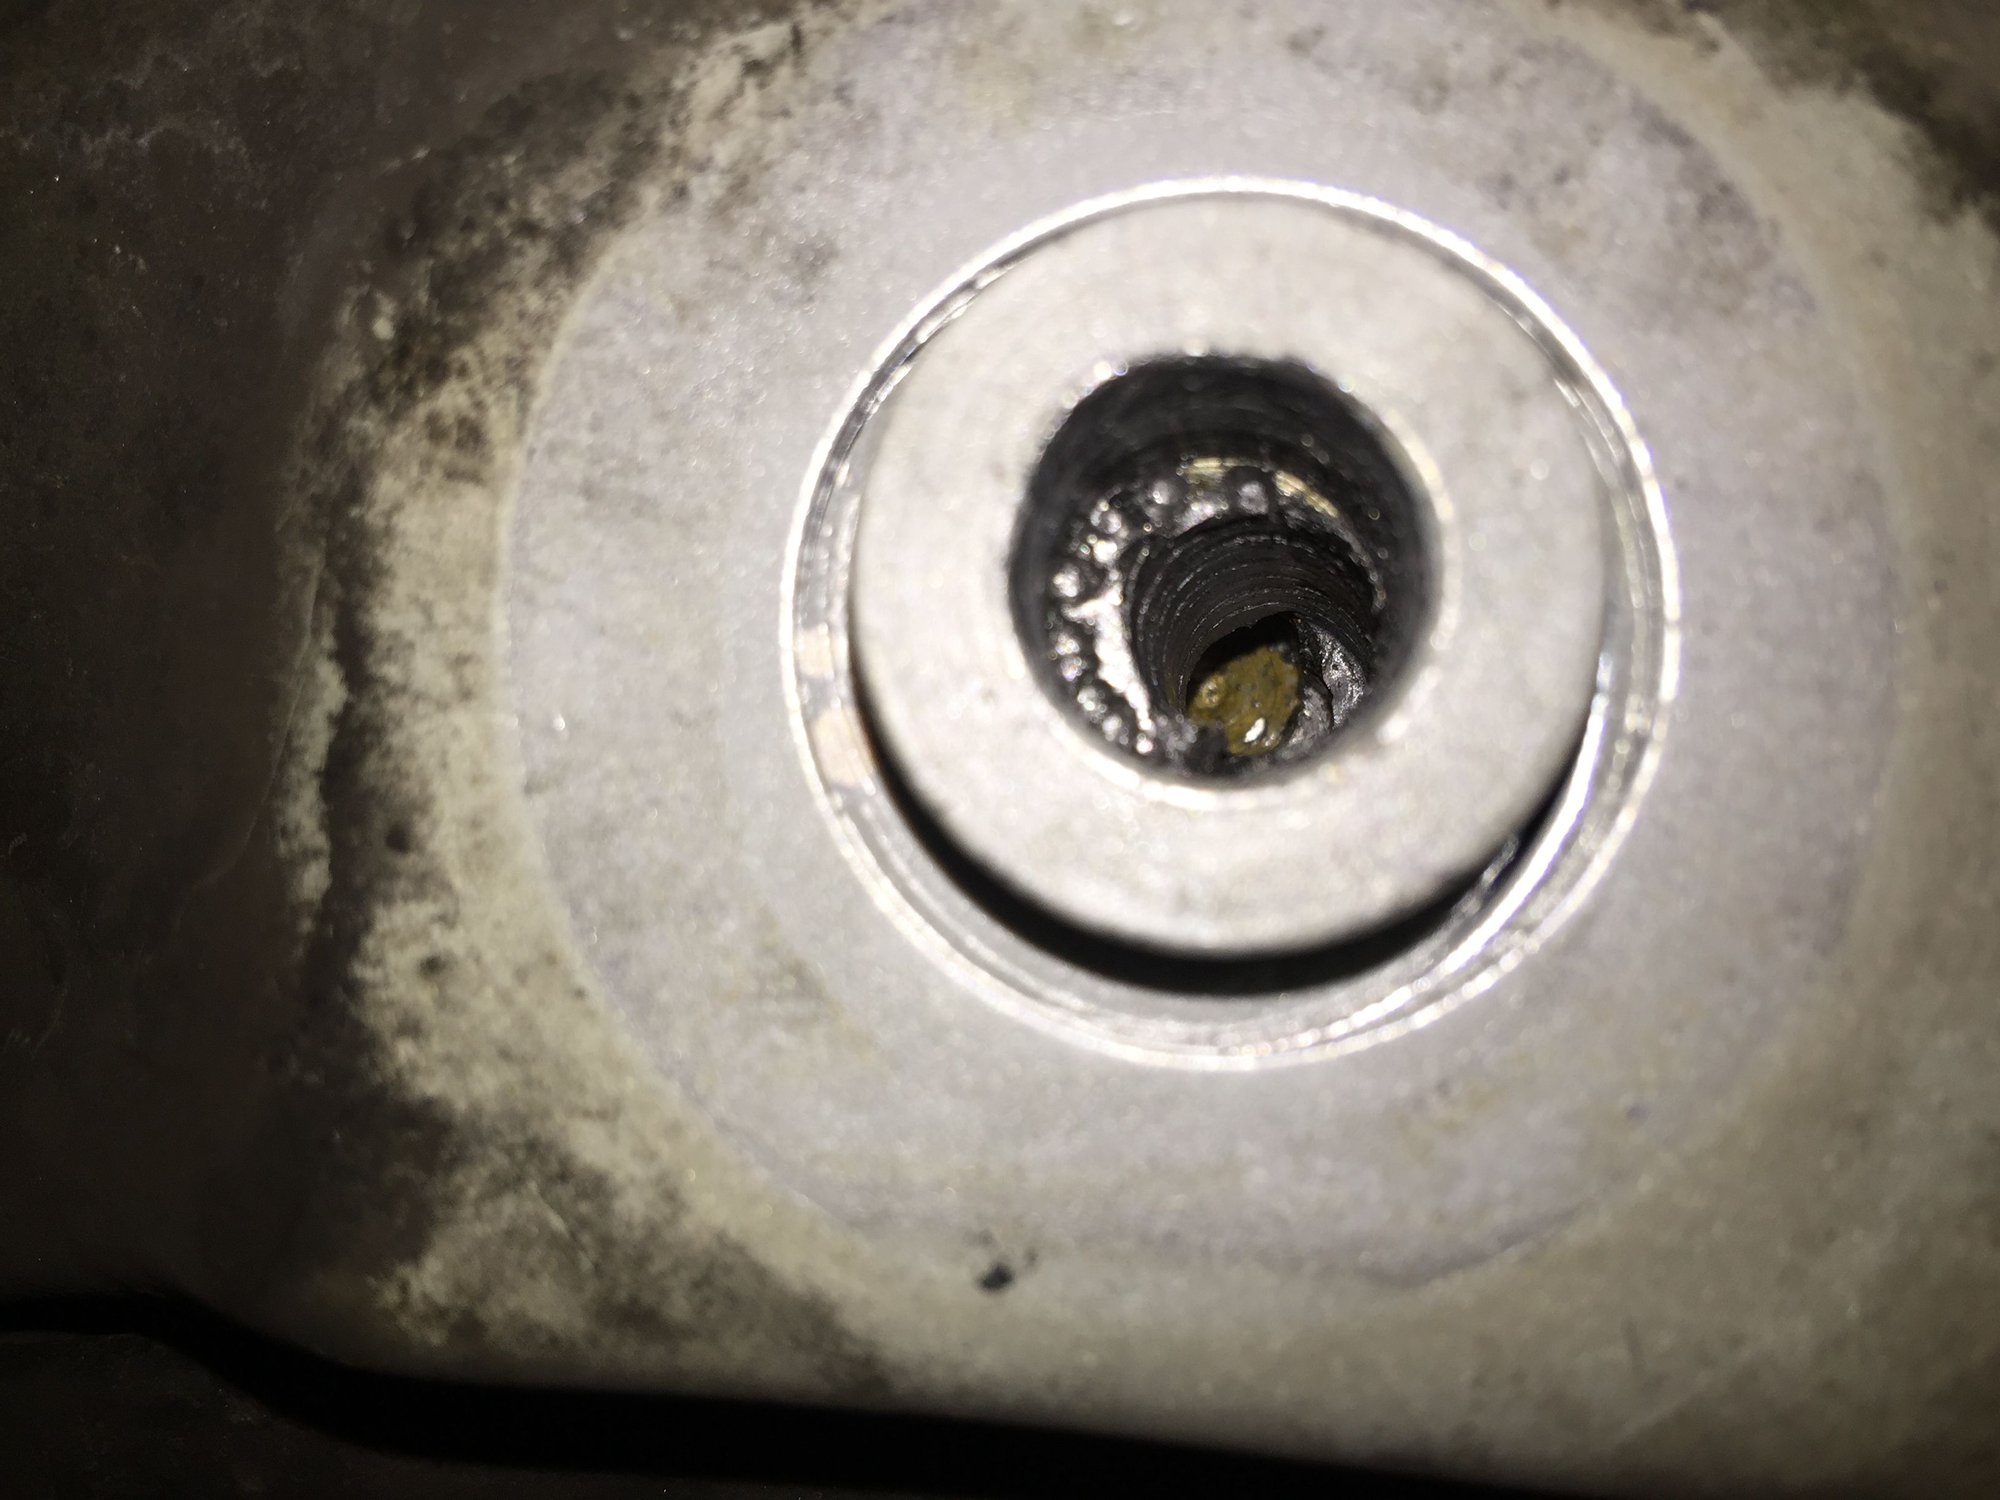
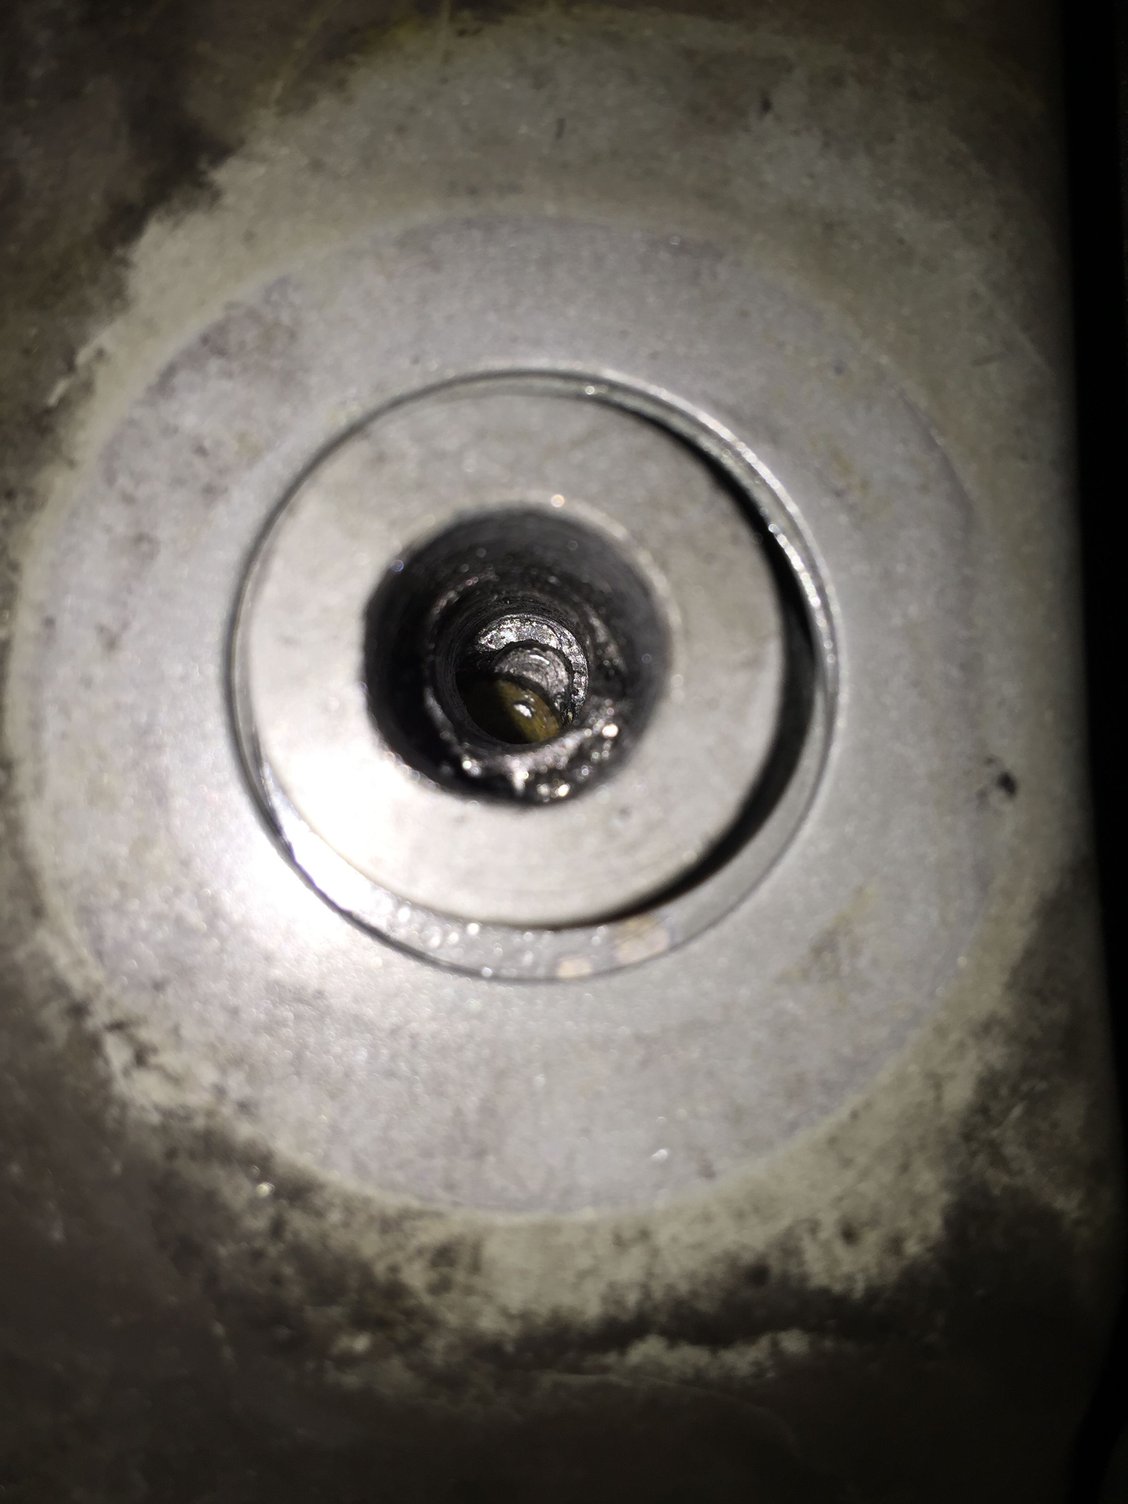
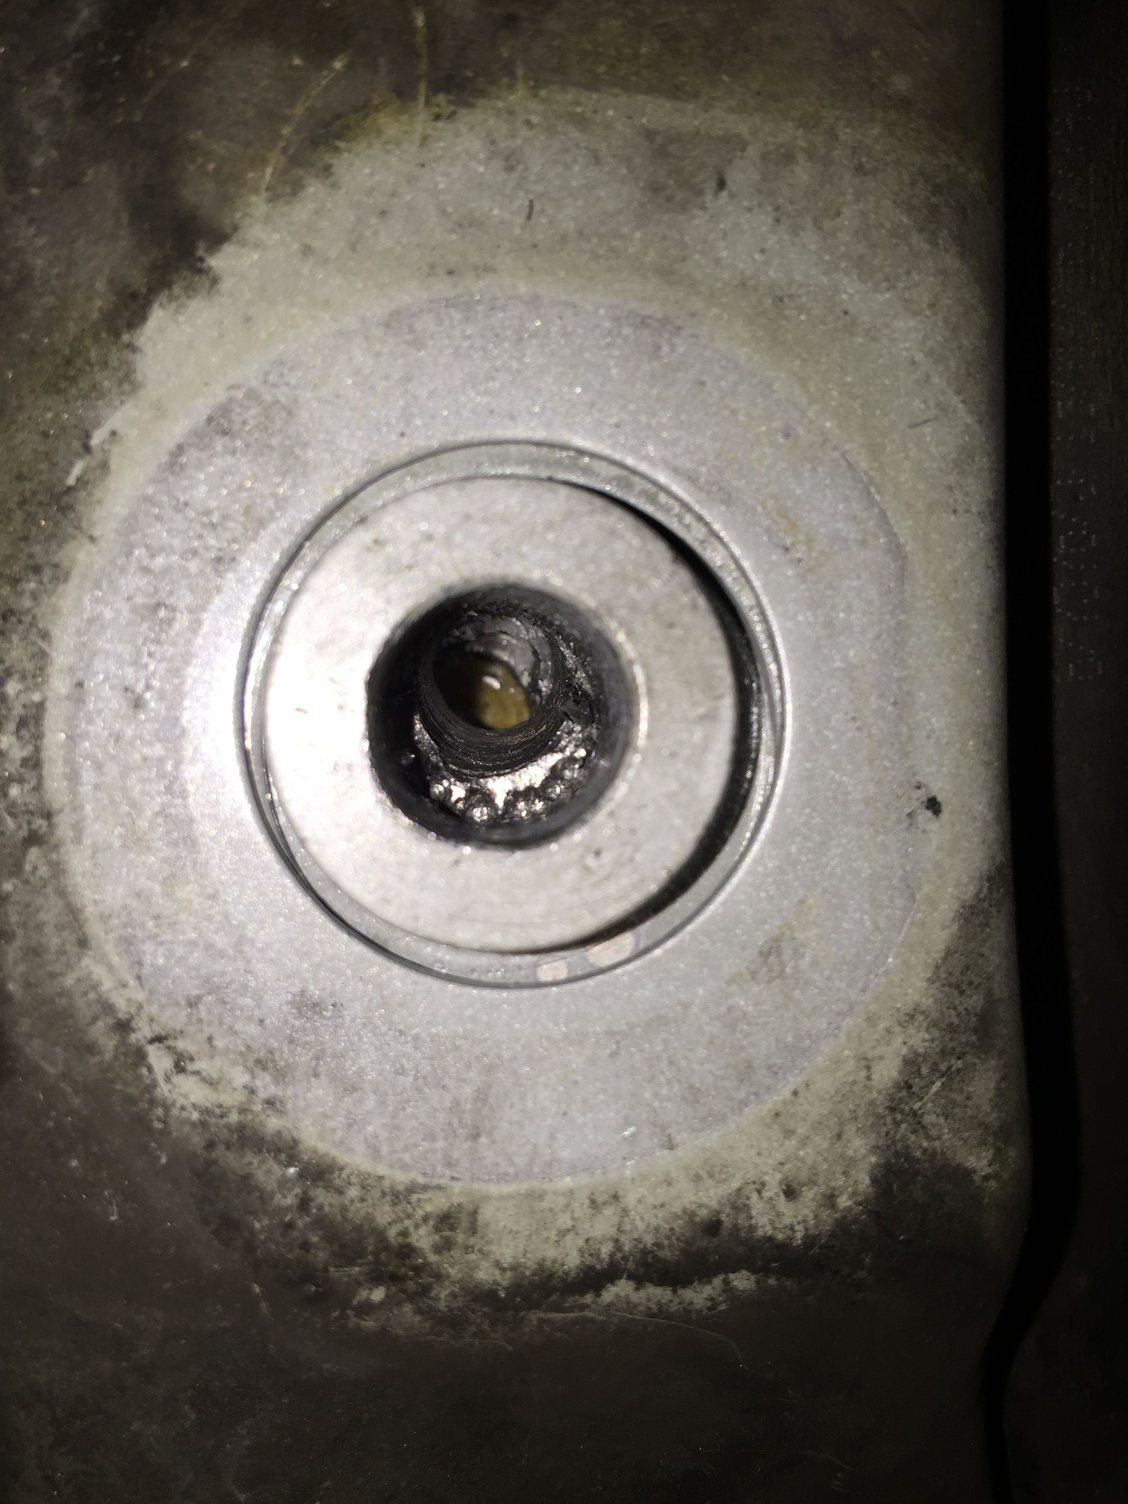
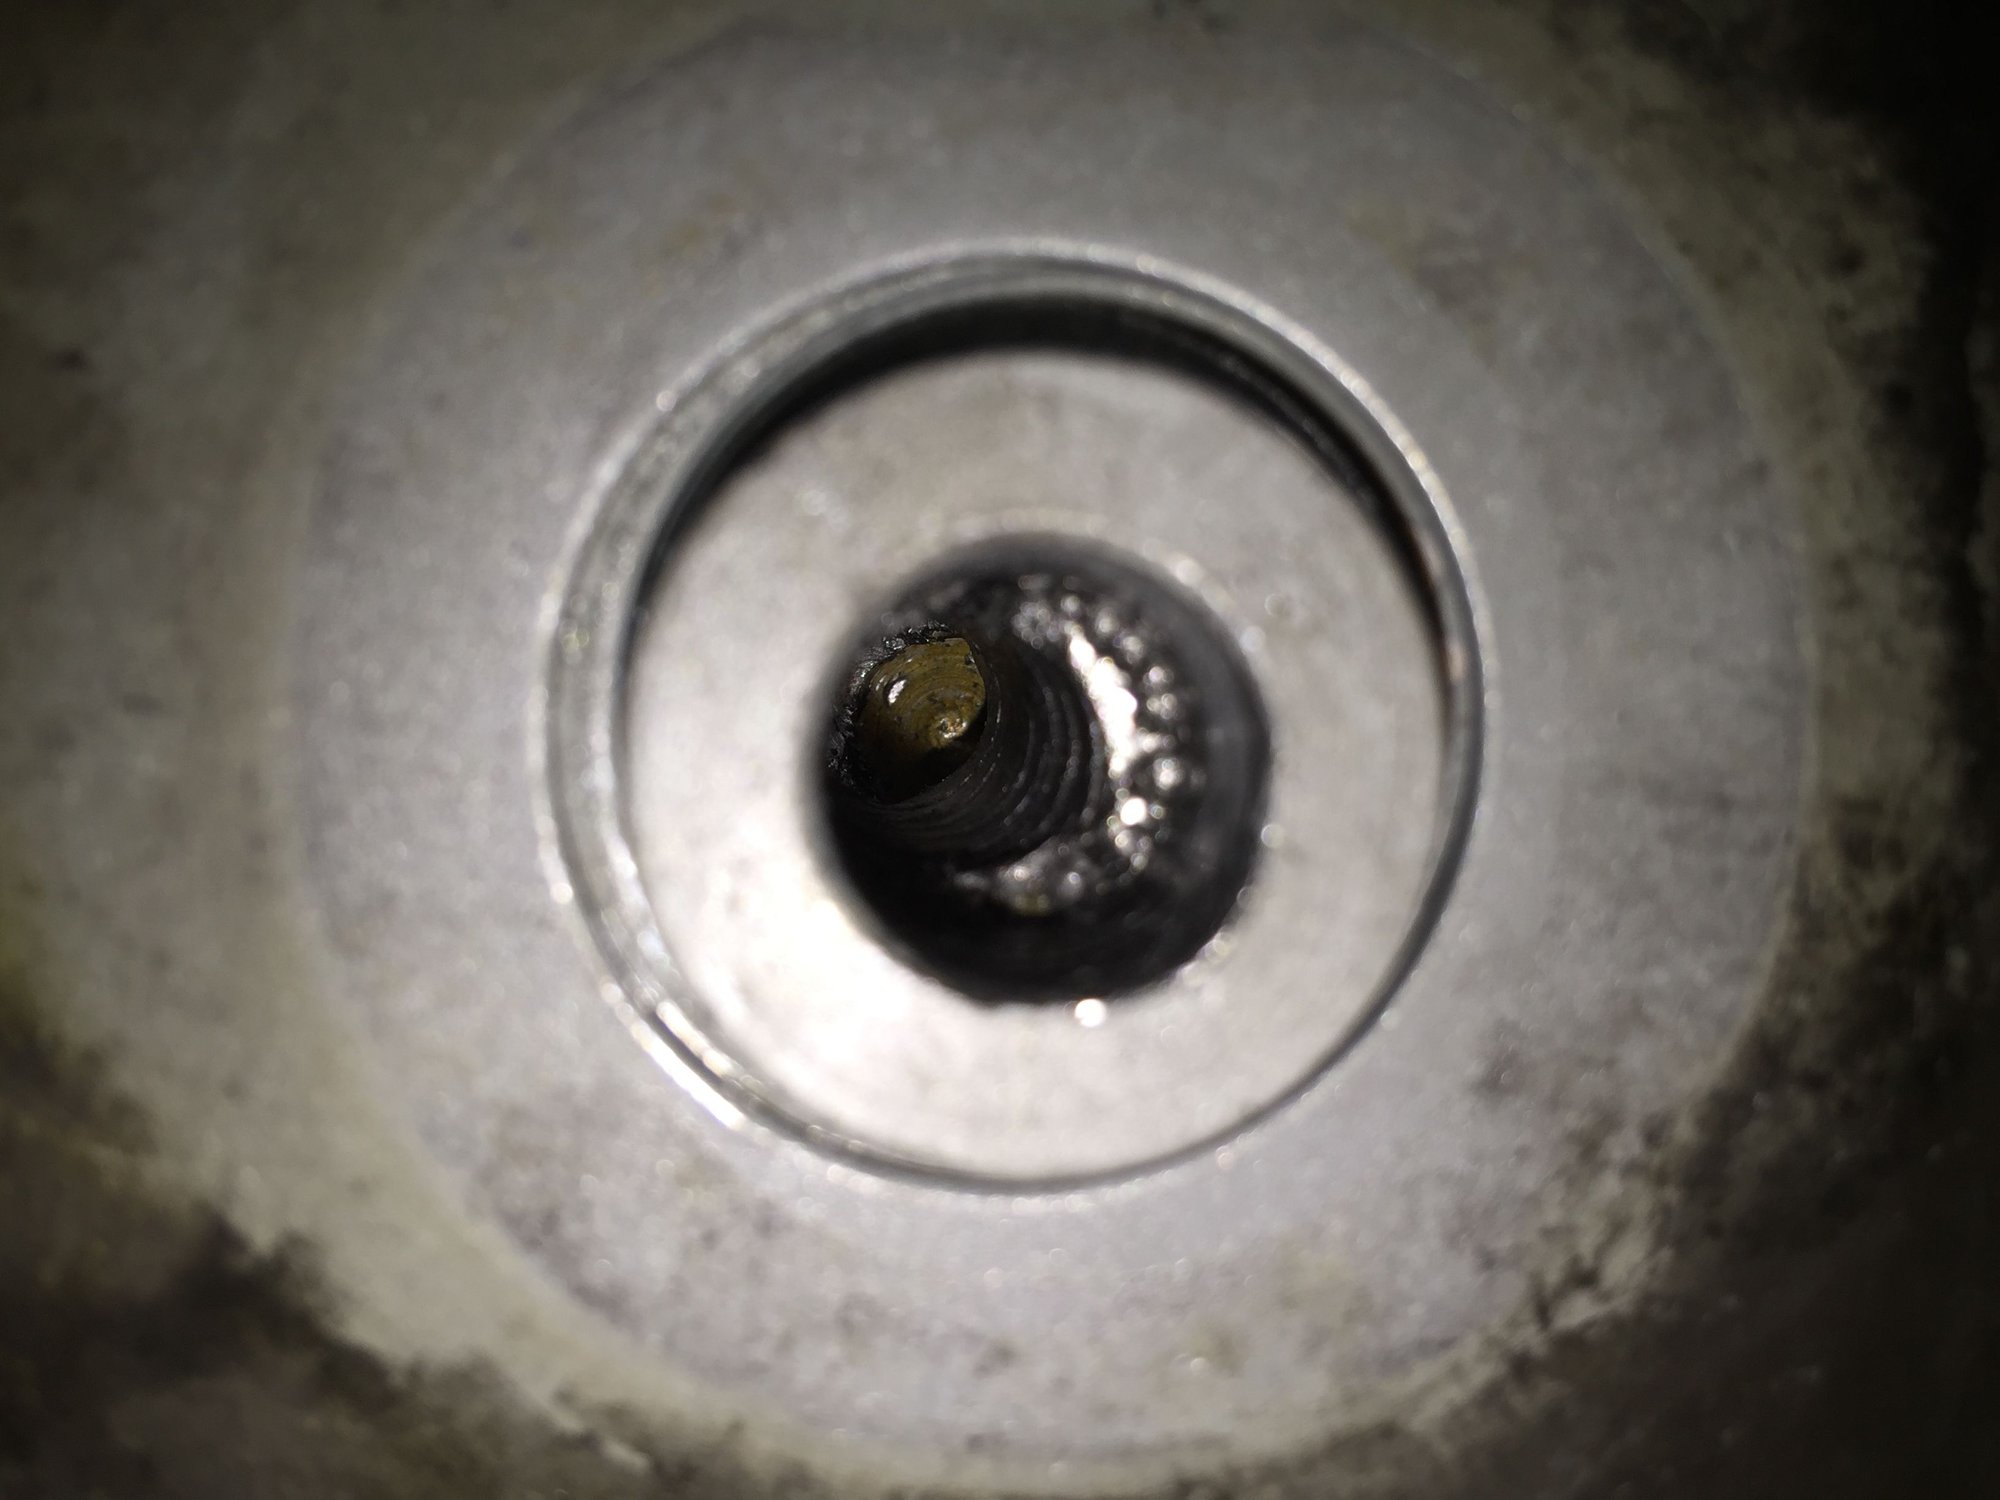
Subframe Remove - Catastrophe!
#76
Rennlist Member
Joined: Jun 2001
Posts: 3,693
Likes: 100
From: California Boardwalk, Skanderborg Denmark
I think the tungsten carbide if you **** it to the side as you drill.
#77
Originally Posted by Tlaloc75
Yes thank you. I have a cobalt bit in 1/4 and 3/8 now and will be drilling the 1/4 all the way through as my next step. I'm about 3/4 of the way through the bolt already so just a bit more and it'll come through.
I was able to eyeball the top of the hole btw. If you look in your engine bay, left side, you can see a small protrusion about 6 inches back from the shock tower. This is the top of the threaded hole as far as I can see. Its closed off, but available if needed and definitely shaped in such a way that the bolt can't completely bottom out.
Figured I'd share in case that information is useful to anyone else.
Another option that some high end machine shops have to remove broken taps is a small EDM (electrical discharge machining) device to very accurately burn through the center with a small electrode.. Might see if someone around you has one.
#79
I have about 13 years experience as a repair/overhaul machinist for the US Navy and can probably help you with this...
First, are you working from under the car, as I suspect?
Do you have a pilot hole all the way through the broken fastener?
Can you take a high res photo of the current status of the area?
Hang in there, we'll get it.
Paul
First, are you working from under the car, as I suspect?
Do you have a pilot hole all the way through the broken fastener?
Can you take a high res photo of the current status of the area?
Hang in there, we'll get it.
Paul
#80
I have about 13 years experience as a repair/overhaul machinist for the US Navy and can probably help you with this...
First, are you working from under the car, as I suspect?
Do you have a pilot hole all the way through the broken fastener?
Can you take a high res photo of the current status of the area?
Hang in there, we'll get it.
Paul
First, are you working from under the car, as I suspect?
Do you have a pilot hole all the way through the broken fastener?
Can you take a high res photo of the current status of the area?
Hang in there, we'll get it.
Paul
Yes, I am working from under the car. Pilot hole is about 3/4 of the way through. I have a 1/4" hole to that depth (in a 12mm bolt) and a 3/8" hole that is about half way through. I've been drilling pilot part way, then going larger, then going back and drilling further with the pilot. I started with 1/8 but have continued with the 1/4 and 3/8.
The photo at start of the thread is still representative of the status of the area. I have not made any changes since then. I've been sitting on it while I think it through further and while I learn more about the process. I don't want to make any mistakes so I stopped to get my head more around the problem.
My plan is to drill further tomorrow with the 1/4" bit and once I'm all the way through, start to spray teflon lube up into the hole so it can soak down into the threads.
#81
Ok, please stop drilling the 1/4" hole all the way through.
What I would do is prepare the left handed 3/8" bit (as long as you're sure it will not be cutting into the internal thd crests) If not sure, go ahead and break through with the 1/4 drill, and flood the area with penetrating fluid for a day or so. But read on before proceeding...
Do you have a method of heating the area hotter than a butane torch, like map or oxy/acly? If so, heat the area around the broken fastener, if access allows.
Using the prepped LH drill bit, drill into your 1/4 hole and keep going until you break through, or the drill bit stops cutting due to dulling. The thought is the LH drilling may be enough heat and pressure, that the broken fastener shank, backs itself out, but if it doesnt, thats ok too. Often times, galled thds do not yield to such a method, but maybe the thds are not galled and just over torqued.
The closer your drill hole gets to the crest of the internal thds, the less tension will be on the broken shank. At this point an easy out may work in removing the shank.
#82
I do not have a method of heating that's hotter than a butane torch. Would that change your approach?
Is there an easy to acquire solution that would allow me to apply that kind of heat?
What do you mean by a prepped drill bit? Prepped how?
What's the purpose of going directly to 3/8 vs. continuing with 1/4 and then going to 3/8?
Is there an easy to acquire solution that would allow me to apply that kind of heat?
What do you mean by a prepped drill bit? Prepped how?
What's the purpose of going directly to 3/8 vs. continuing with 1/4 and then going to 3/8?
#83
I do not have a method of heating that's hotter than a butane torch. Would that change your approach?
Is there an easy to acquire solution that would allow me to apply that kind of heat?
What do you mean by a prepped drill bit? Prepped how?
What's the purpose of going directly to 3/8 vs. continuing with 1/4 and then going to 3/8?
Is there an easy to acquire solution that would allow me to apply that kind of heat?
What do you mean by a prepped drill bit? Prepped how?
What's the purpose of going directly to 3/8 vs. continuing with 1/4 and then going to 3/8?
#86
I've taken it as far as I'm comfortable going. I finished drilling and added teflon, but still no budging. I worked a bit on the shell that's left, trying to get it to collapse and come out but no luck with that either. I'm worried that if do anything more drastic at this point that I may do damage that I'll regret later. So, it'll go into the hands of a professional next.
Plan is to finish the rest of the suspension job and then get it to my mechanic to resolve this corner.
Thank you for all of your help and support, this community is truly amazing! I've climbed out of the pit of despair and feel confident this will be resolved satisfactorily. I'll update this thread once I have a complete resolution - will be 4-6 weeks from now realistically.
#88
#89
The prepped 3/8 LH drill was to be used right after heating the surrounding frame area, for purposes of expansion. When expanded, penetrating fluid will seep into the threads, and while still hot, an easy out should do the trick. Collapsing the shell is a last ditch effort and takes lots of time, patience, and the right tools (pics) to do the job.
p.s. Thread chasers are cheap, so making one is not necessary to clean the thds once the job is done. Dont use a tap unless the chaser wont produce the desired results.
An easy out, per its twist design will back out a broken shank, not push it further in.
This is why I and others recommended PENETRATING fluid like kroil or pb blaster, with a day or two soak.
A couple of map gas heat cycles would not hurt either, with penetrating fluid up in the hole while still hot. Be ready to smother the area with a small blanket of woven fiberglass in case the fluid ignites.
Overboosted stated exactly my intentions, but I liked bcameron's fazer approach as well.
I wish you lived close so I could get a whack at this. I know I could get it out...
BTW, could you please post a current photo for our viewing pleasure?
Last edited by nine9six; 01-22-2017 at 01:47 AM.
#90
The prepped 3/8 LH drill was to be used right after heating the surrounding frame area, for purposes of expansion. When expanded, penetrating fluid will seep into the threads, and while still hot, an easy out should do the trick. Collapsing the shell is a last ditch effort and takes lots of time, patience, and the right tools (pics) to do the job.
p.s. Thread chasers are cheap, so making one is not necessary to clean the thds once the job is done. Dont use a tap unless the chaser wont produce the desired results.
An easy out, per its twist design will back out a broken shank, not push it further in.
This is why I and others recommended PENETRATING fluid like kroil or pb blaster, with a day or two soak.
A couple of map gas heat cycles would not hurt either, with penetrating fluid up in the hole while still hot. Be ready to smother the area with a small blanket of woven fiberglass in case the fluid ignites.
Overboosted stated exactly my intentions, but I liked bcameron's faser approach as well.
I wish you lived close so I could get a whack at this. I know I could get it out...
BTW, could you please post a current photo for our viewing pleasure?
 .
.I put teflon into the hole this afternoon and then squirted some PB Blaster up there this evening.
I don't feel comfortable adding a lot of heat to the frame, I don't feel experienced enough with that to know I wouldn't do damage.
I could go back at it with an easy out tomorrow and the next day as the lubricants get to work. I was able to knock a few of the threads off the bottom, but I could see it wasn't going to go well trying to do that all the way up.
Here are a few pictures of what it looks like right now.


