When you click on links to various merchants on this site and make a purchase, this can result in this site earning a commission. Affiliate programs and affiliations include, but are not limited to, the eBay Partner Network.
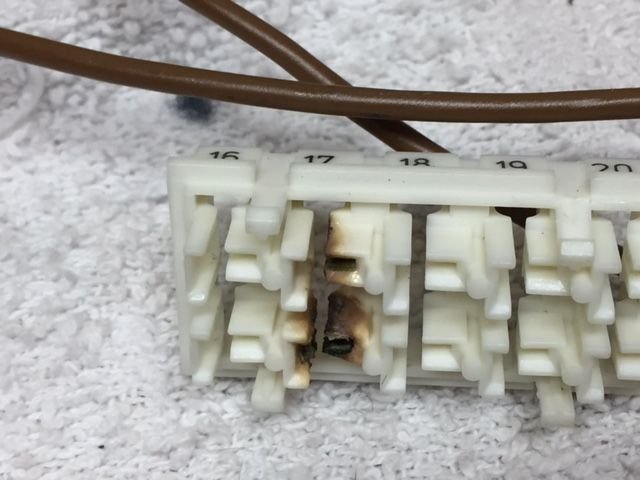
Then checked all other fuses for any signs of heating...and sure enough, found #17 (HVAC blower) looked almost as bad as #28-29. Luckily the damage behind the face plate was much less. Because #17 upper contact is ganged (bridged connected) to it's three neighbors to the right, and the condition of #17 contact and the fuse block shows less evidence of heating, I'll clean, finely sand, apply Deoxit, and pinch the contacts snug and replace only the face plate.
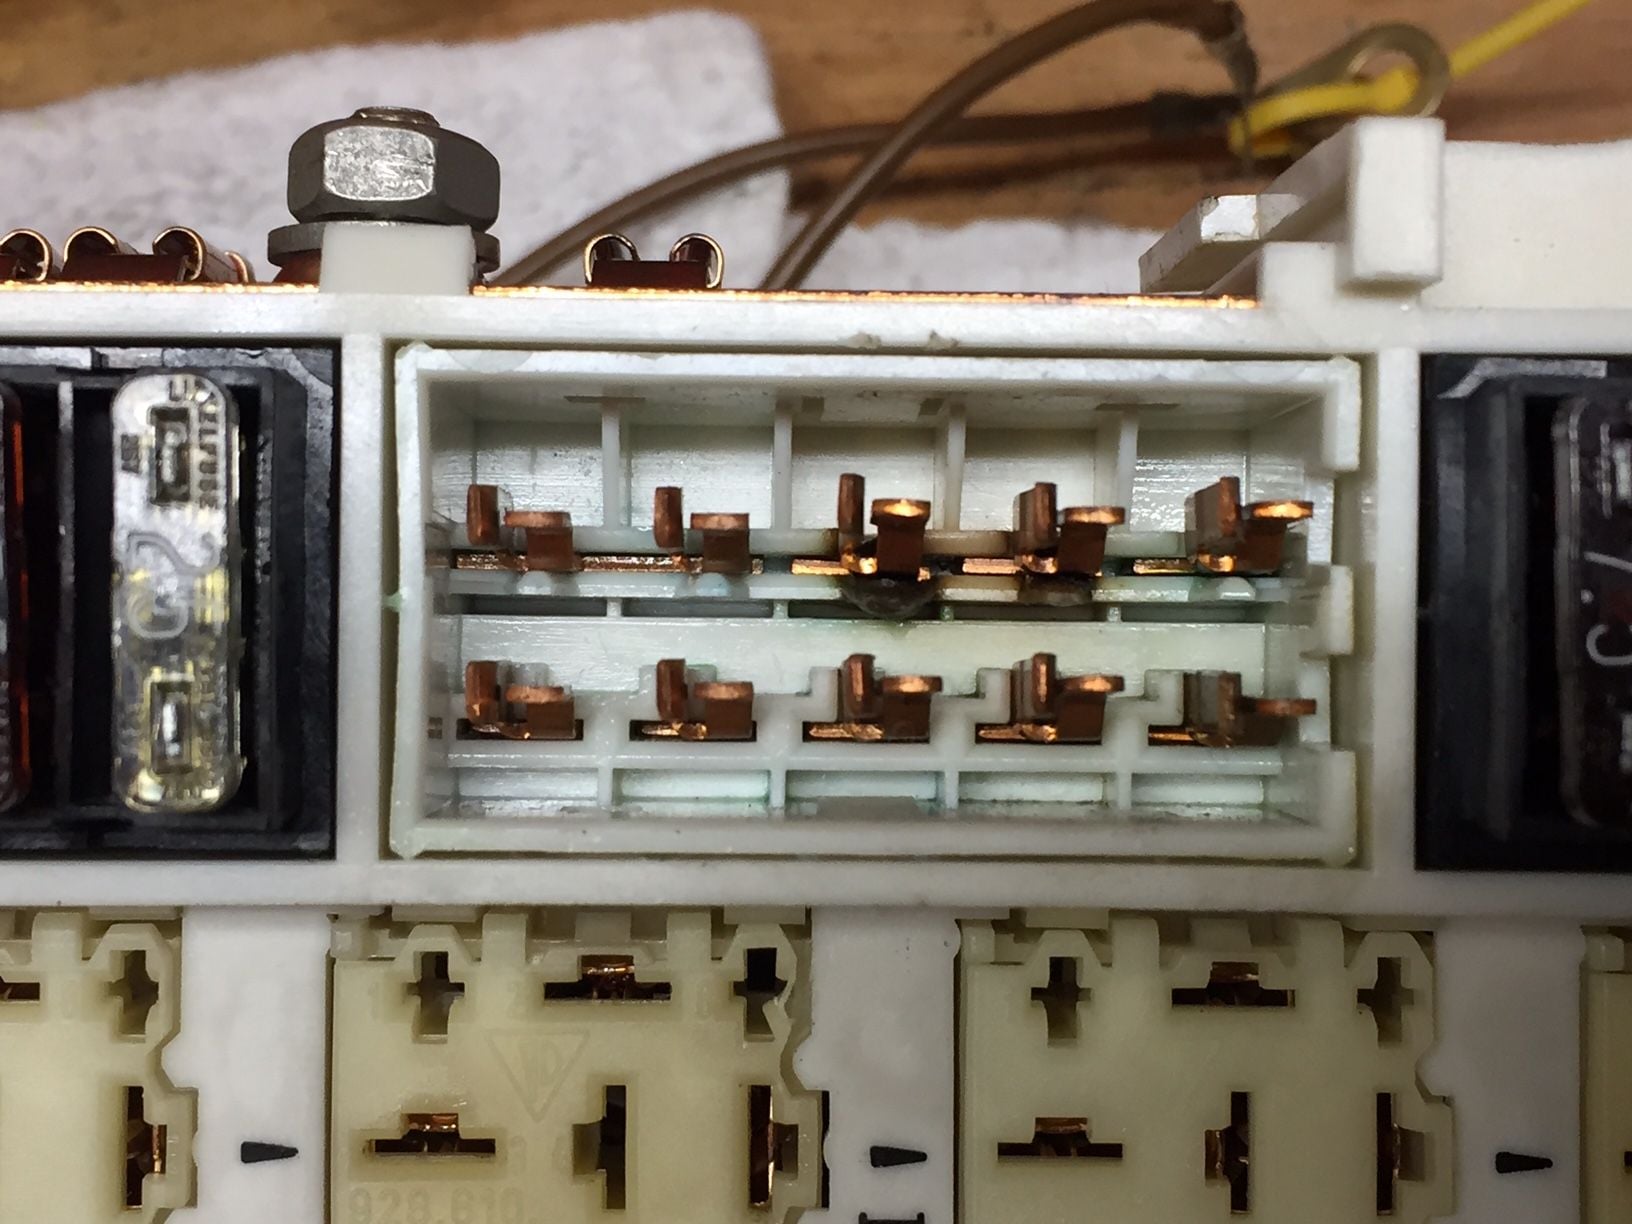
Rear of the burned face plate for #16 through #20. Will replace with clean one from donor panel.
Jon, nice work! And thanks for including Alan's instructions on removal/replacement- it's good to have all this info together. As Randy said, it will be very useful to others.
Thanks Bertrand (aka Randy ) and Martin. Whenever I'm into a project I've had a hard time finding info on in the forum I try to post enough detail and pics for anyone coming along behind me. This fuse contact heating/charring problem is likely the cause of a lot of cooling fans going into failure mode (the one fan cycling on and off behavior), perhaps more so than the more expensive causes, including the Final Stage controller (looks like a small amp, under the hood and left of the hood release in 87+ cars). A tip posted above in the thread suggesting to check the HVAC fuse holder was spot on! Not as bad as the cooling fans, but the plastic fuse body was melted yet filament hadn't blown. I was amazed my HVAC blower was still working.
Waiting for DeOxit 100 to arrive to do the panel cleaning (there is at least one good thread on cleaning the panel...I'll try to find it again and link it to this thread)
Last edited by Captain_Slow; 04-21-2018 at 08:47 AM.
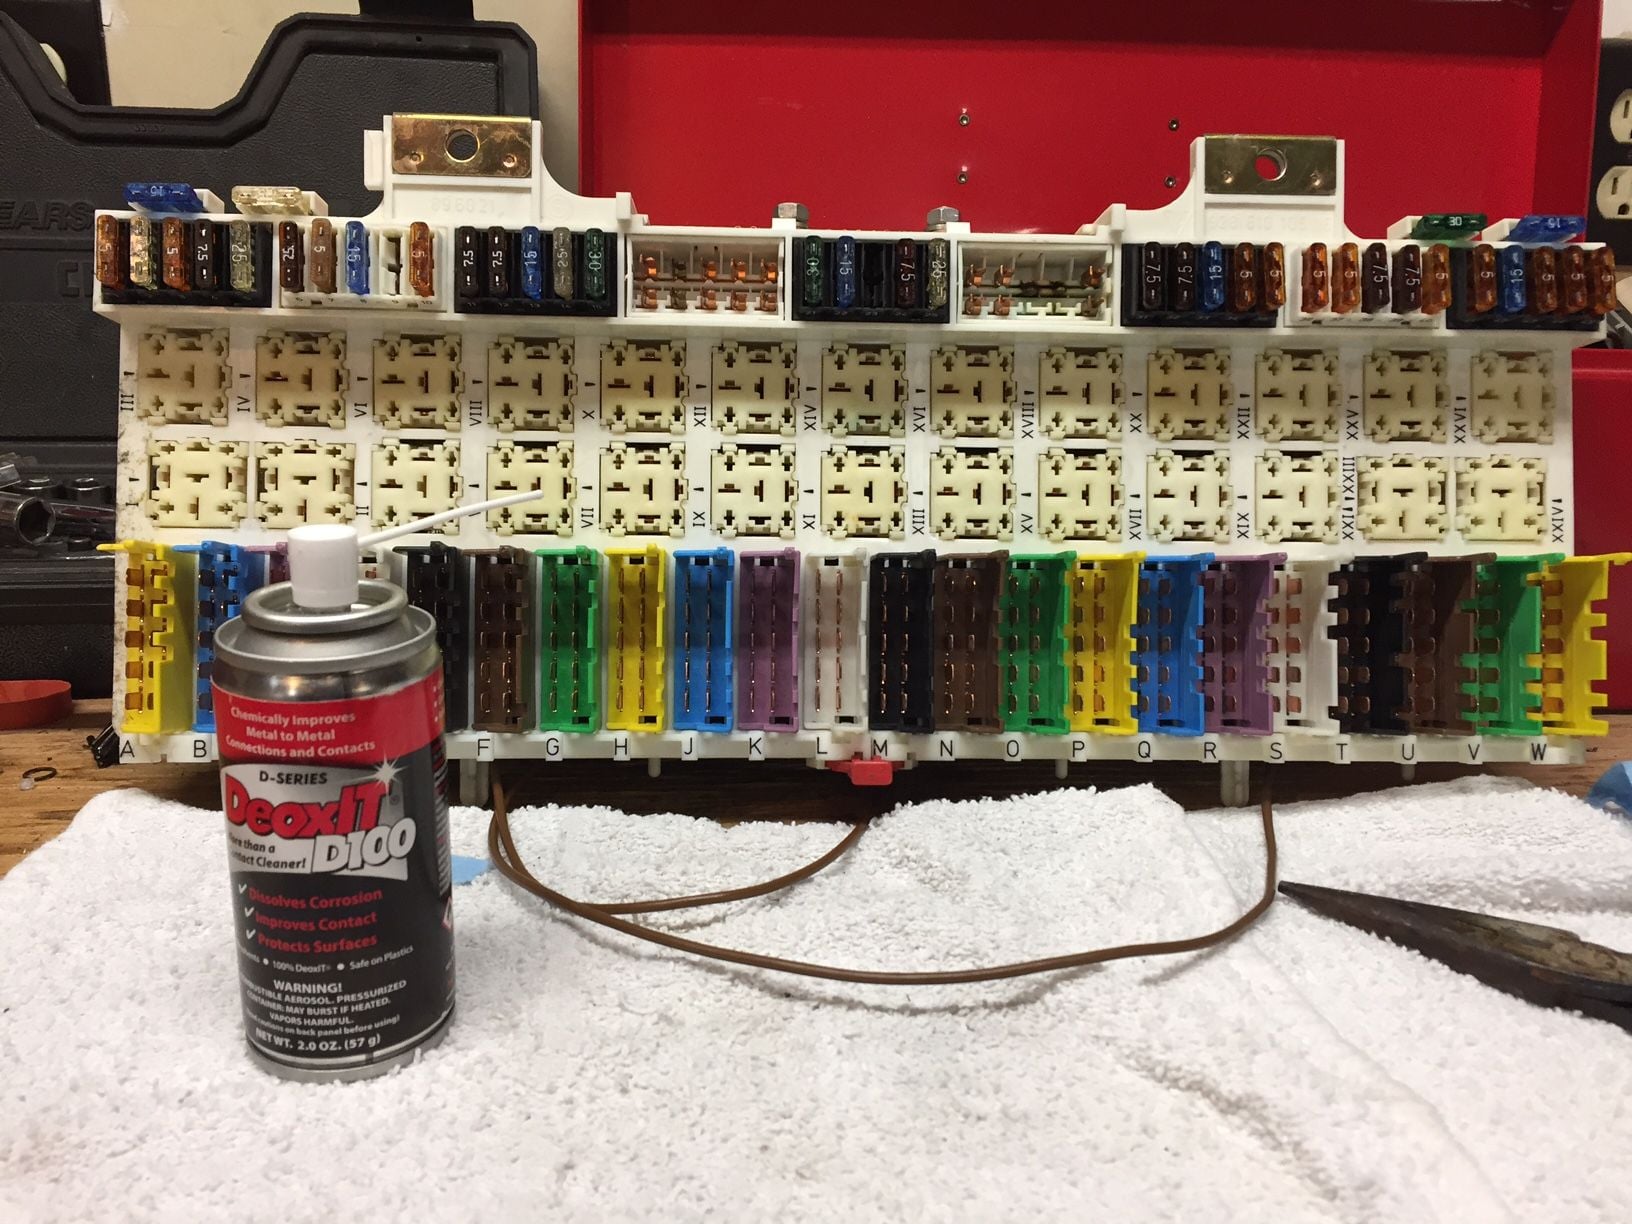
DeoxIT 100 arrived yesterday. The spray nozzle is metered, spraying small single bursts. This morning I spent a little over 2 hours spraying every wire connection on the backside and every fuse holder contact and relay socket contact on the front.
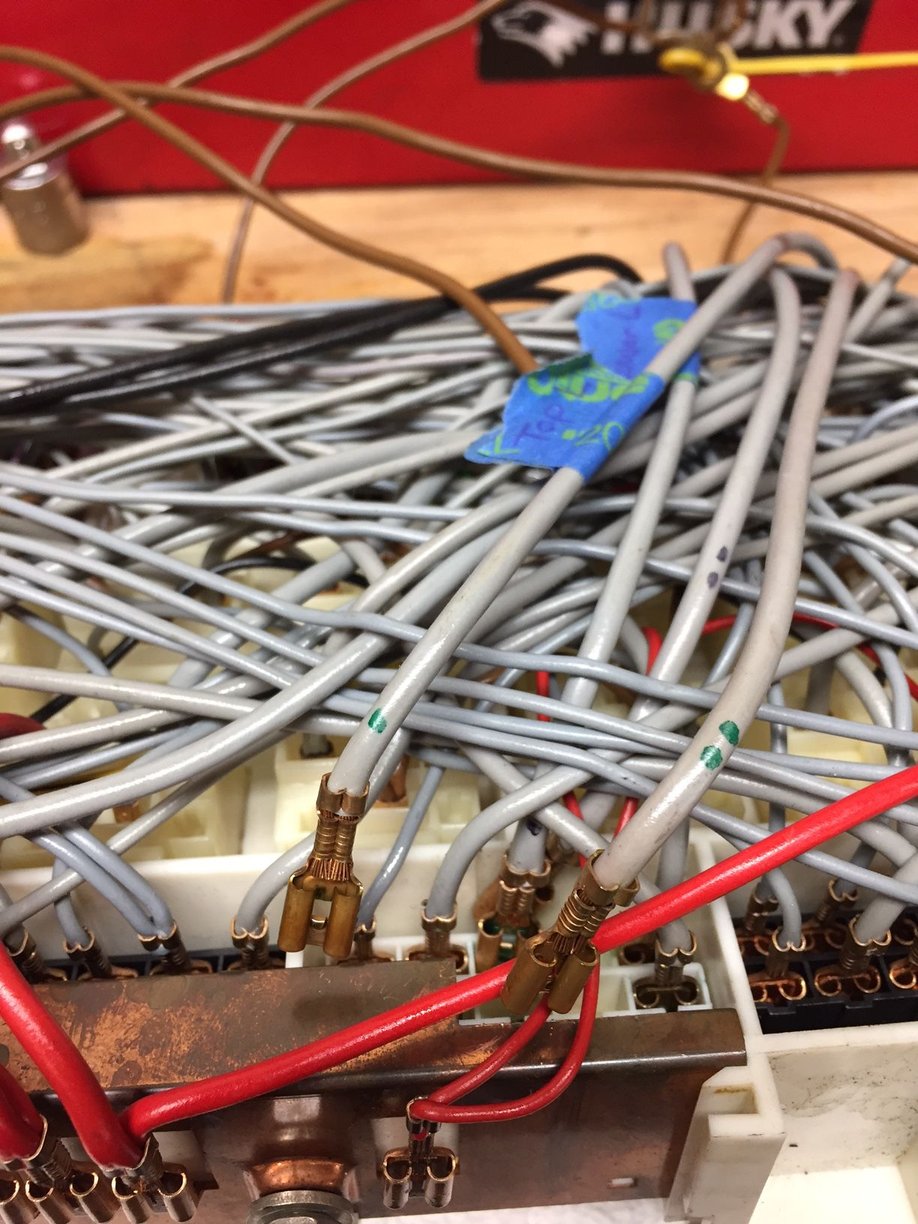
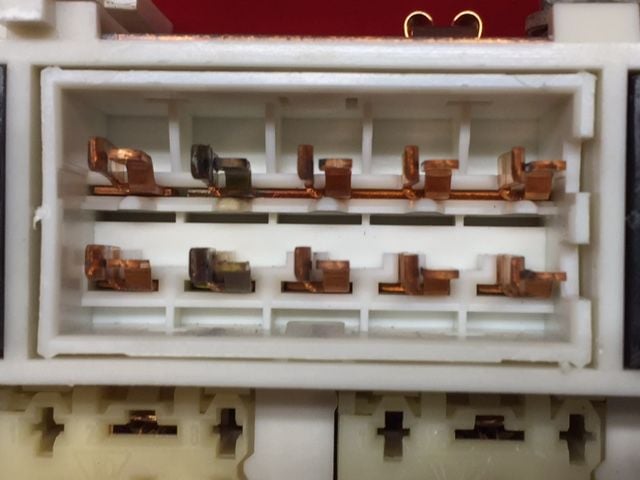
Only four wires were disconnected - those connected to the degraded copper contacts for fuse #28 and 29.
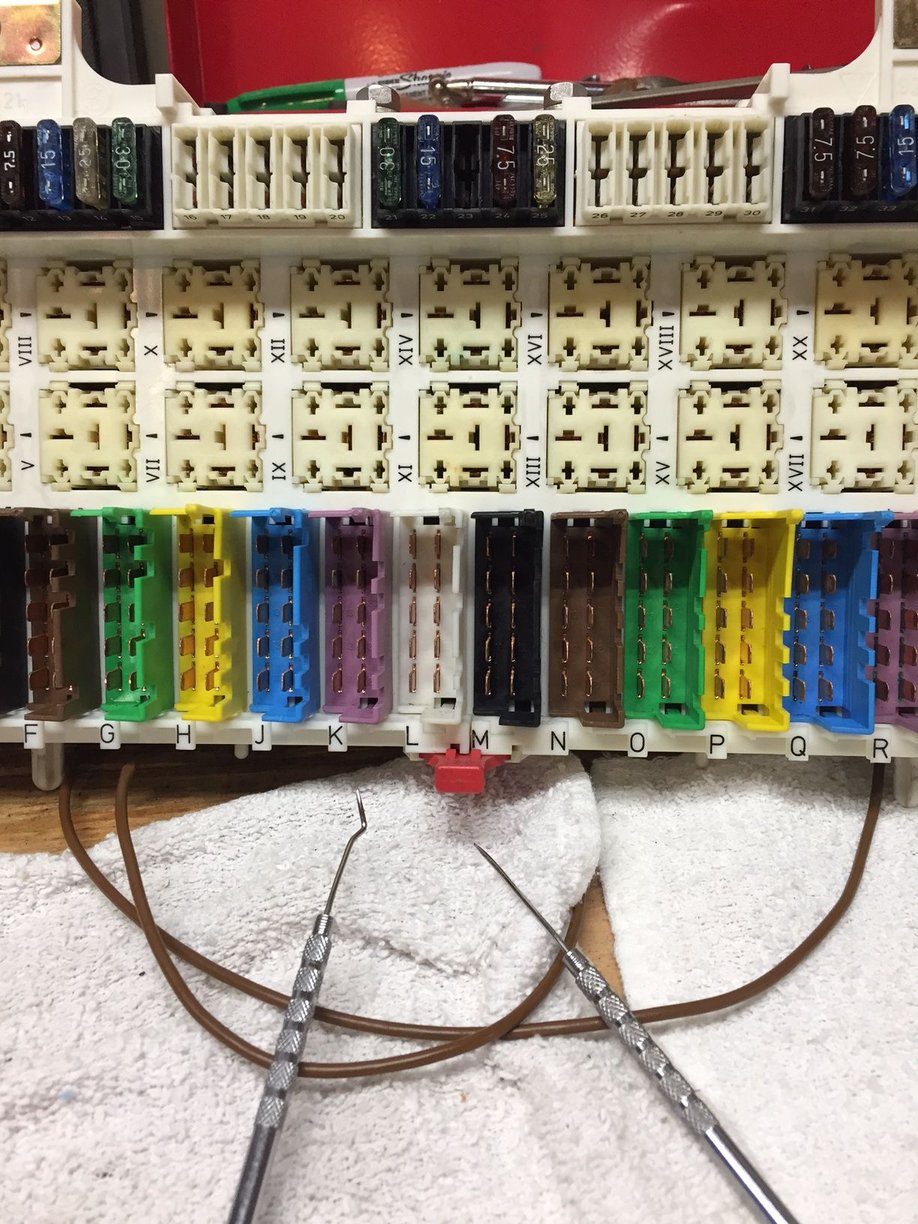
Finished assembling the panel this afternoon. At this point I've refined my techniques and tools of choice for removing the fuse block faces. Cheap Harbor Freight picks work well - working the pieces with one in each hand. Installing the clean donor fuse block faces requires a bit of fiddling to get the copper contacts aligned with slots in the face piece. Labeling all the relays made it easy to orient the relays for installation. All the tape is removed now. Hope to have time to put the panel back in the car tomorrow.
Above: Connecting wires to "new" contacts.
"New" contacts
"New" face
The tools used for removing fuse block faces.
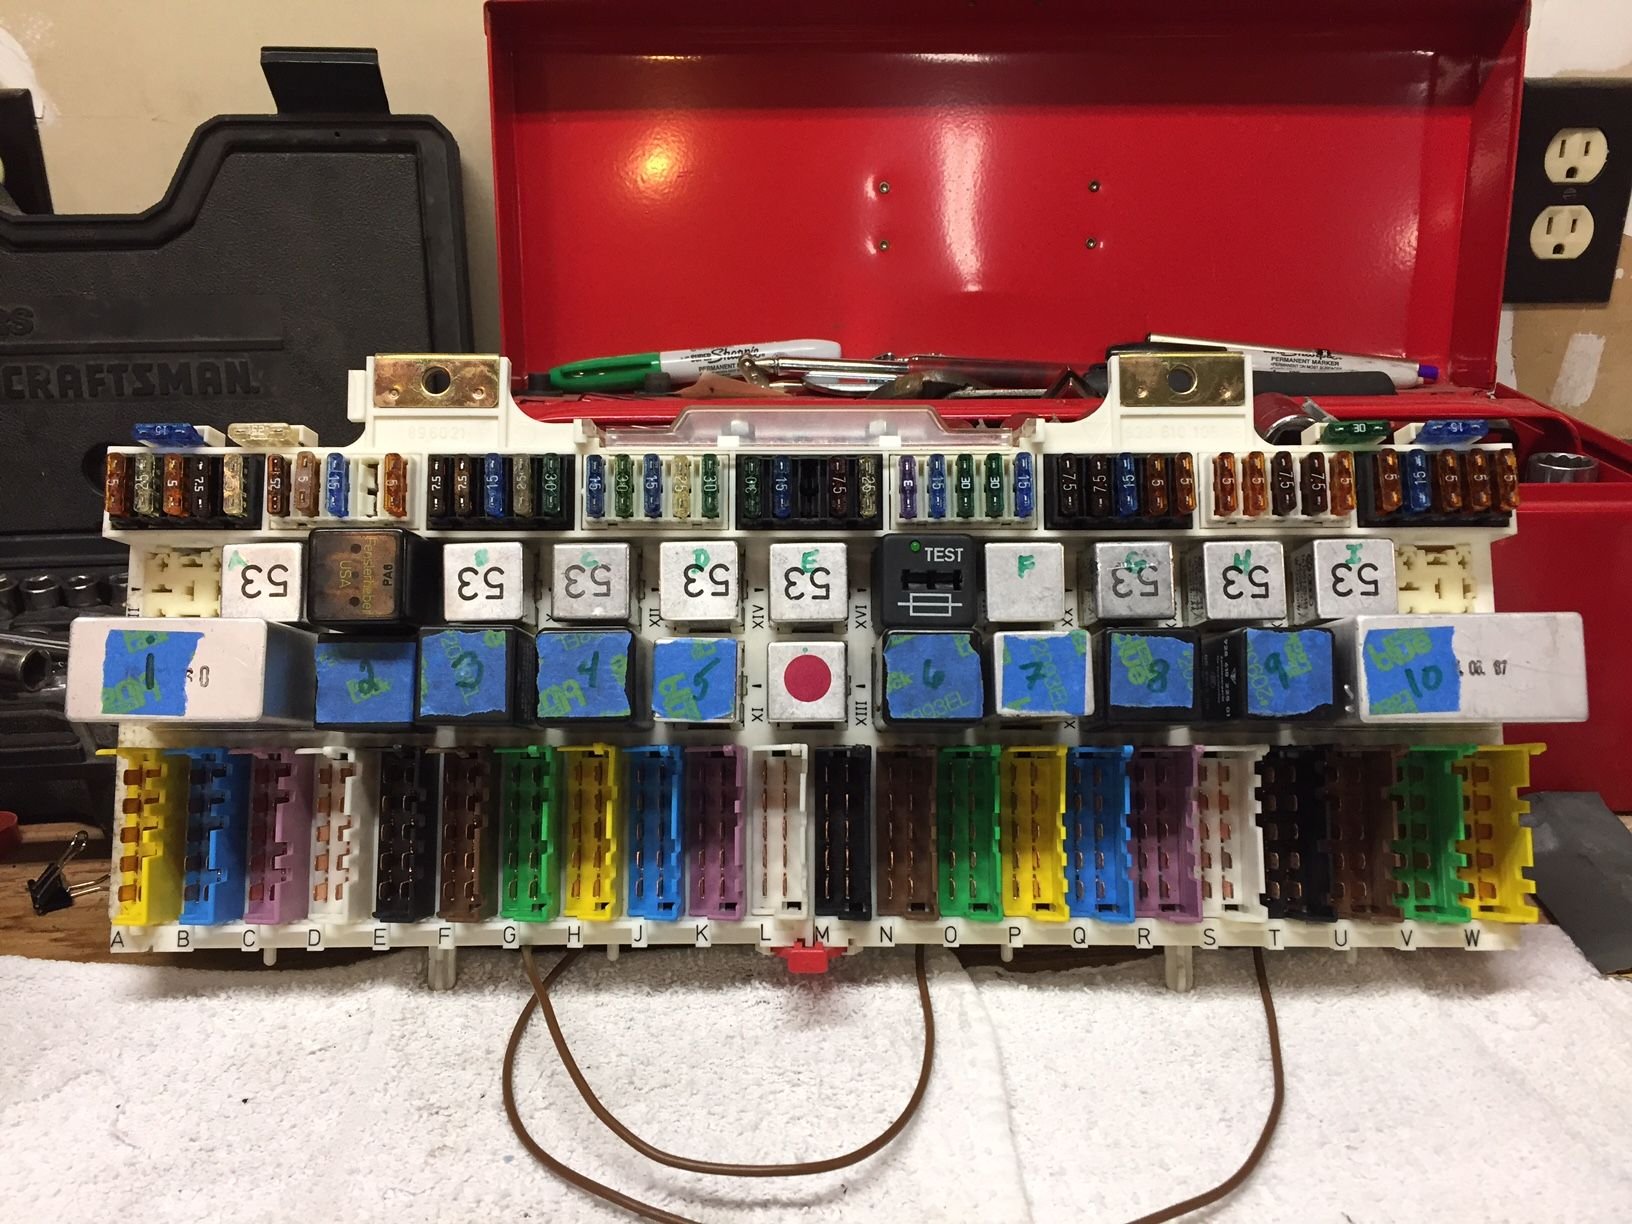
All back together. Labeling made it a snap to reinstall the relays.
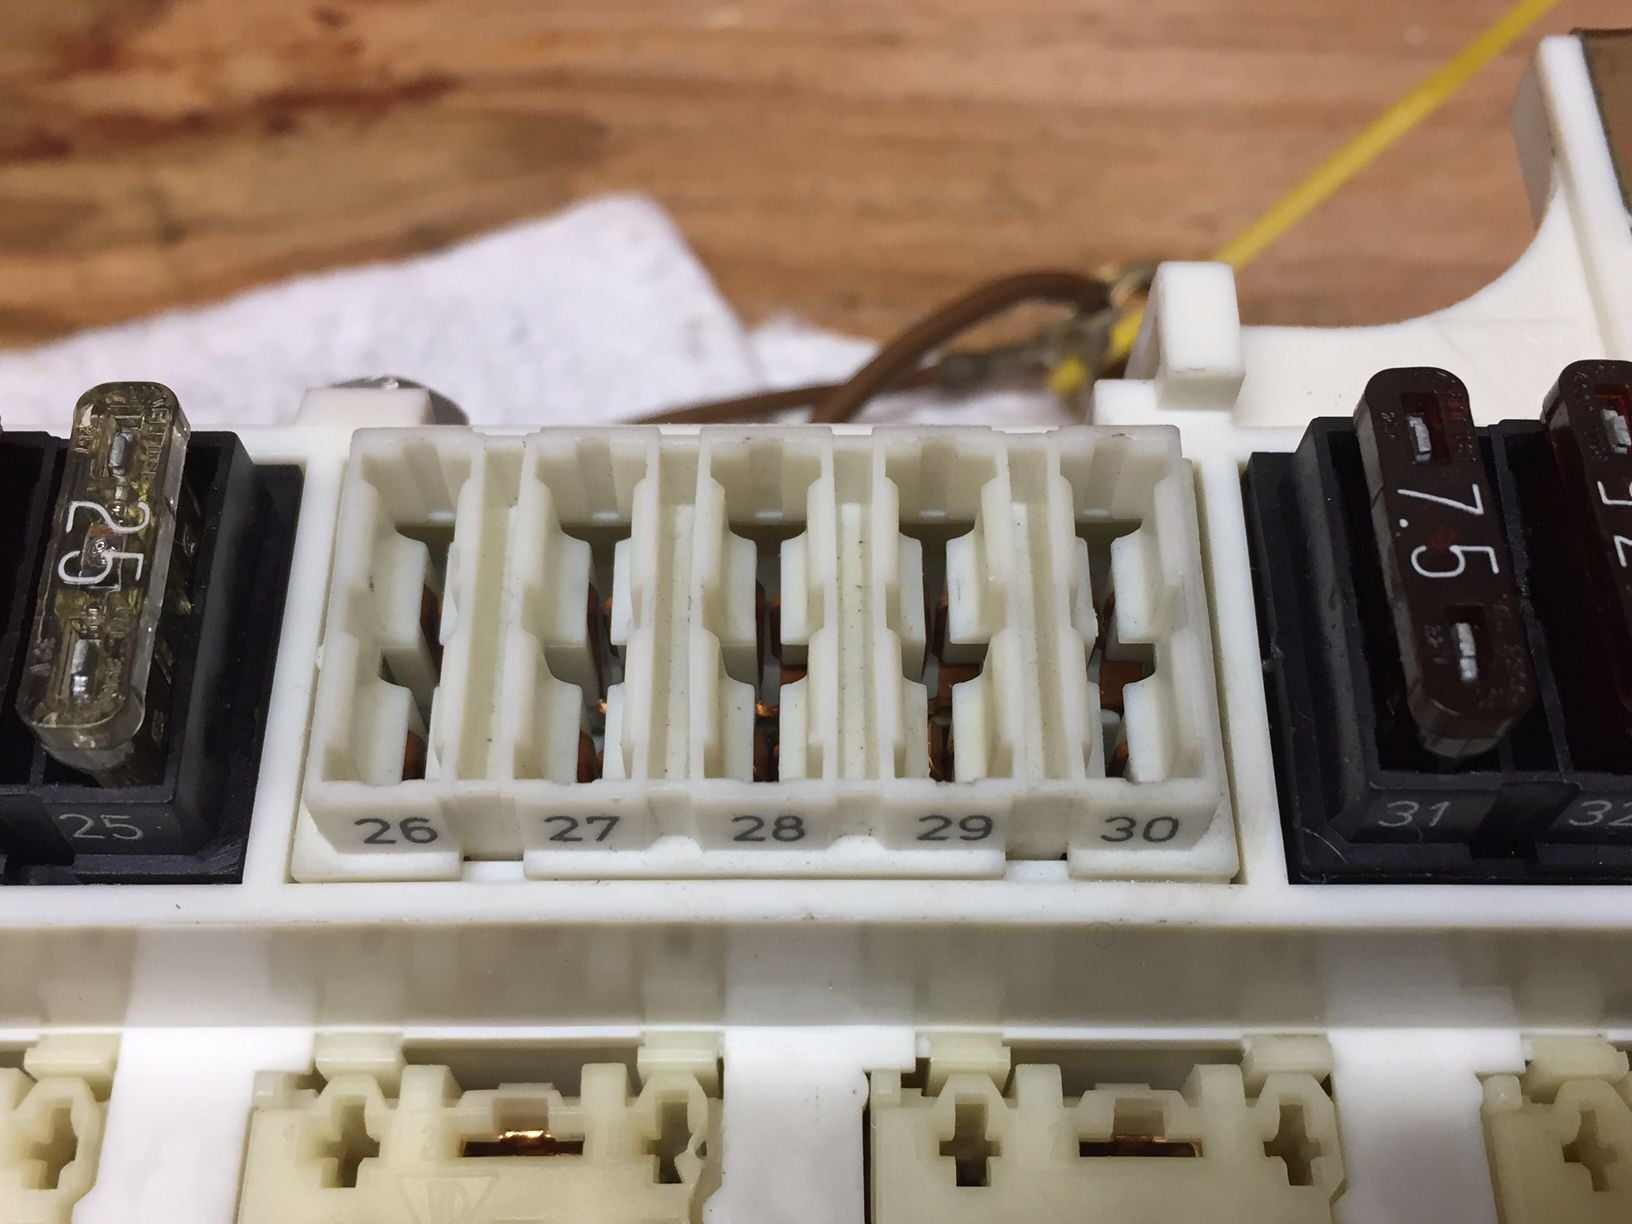
Shouldn't that be a 1 amp fuse in position 26? You appear to have a 3 amp in there.
I'm currently doing a CE panel clean myself and have the same discrepancy. I'd assumed it was just a previous owner putting in whatever he/she could find at the time but having seen yours I'm beginning to wonder if there's a reason for using a 3A fuse in that position.
Regards
Duncan
The donor CE panel does have at least one original 1 amp fuse on it. But to replace with new, as Alan states, required a 3 amp. I've also noticed conflicting fuse specs between the 928 Specialists fuse chart (stating a 25 and a 15 amp fuse combo for the cooling fans) vs. the two 30 amp fuses installed in my car (matching specs on the card on the CE panel lid), and also the two 30 amp fuses observed in the donor CE panel. I have wondered if it would be better to install 25 amp fuses and hope they pop before things get too hot - although the entire purpose of this project was to improve the contacts and prevent heating. So I have two new Bussman 30 amp fuses installed.
Jon,
The new 928 Specialists fuse chart has 2 - 30 amp fuses for the cooling fans in positions 28 and 29.
John,
Thanks for posting this correction. The copy I have was in the glovebox when I bought the car and looked familiar...but I should have thought to check their website.
Jon,
You did a very nice job on the panel refurb (and all the pictures & descriptions). While your labelling obviously worked to get everything back together - it doesn't look too sweet - certainly not compared to the other improvements you've made. I realize it is partly removable (masking tape) and that you can probably clean the rest off - however consider the relay labels from this thread as a possible finishing touch to your work here:
I did this repair on an '88 for a customer. It was an unrelated effort to the work that I was paid to do. But, since I had a donor block, I did a quick replacement of the affected block for an otherwise pristine, fully operational example.
Fate would have it that the fans quit again on the next long travel, as the same block was toasted for the fact that the culprit was actually caused by the defective fan controller.
...Fate would have it that the fans quit again on the next long travel, as the same block was toasted for the fact that the culprit was actually caused by the defective fan controller.
I very much doubt that - there should be no fault on the controller that can cause this. Faults should cause the fuse to blow - but heating like this is due to only a few causes:
1) Water (corrosion/oxidation) damage to the fuse terminals
2) Mechanical damage to the fuse terminals (e.g. from abuse: damaged fuse blades, inserting extra blades (e.g. add in circuit types), mechanical cleaning with a file (don't).
3) Poor fuse blade material/plating choices - Cheap Chinese fuses suffer from this
4) Poor fuse blade sizing (thickness) - Cheap Chinese fuses suffer from this too
5) Some combination of the above and fuses with poor adherence to their rated capacity allow marginal equipment faults to cause more damage - Cheap Chinese fuses suffer from this too.
Moral of the story - don't buy cheap Chinese fuses - in the long run they aren't really cheap, and at no time are high quality fuses really that expensive. For 85+ models with ATC/ATO fuses I recommend you buy only Bussman or Littelfuse brands. If you aren't sure and certainly if any of your fuses look like they are gold plated (they aren't) - replace them with known good fuses.

 11-20-2016, 06:35 PM


 ) and Martin. Whenever I'm into a project I've had a hard time finding info on in the forum I try to post enough detail and pics for anyone coming along behind me. This fuse contact heating/charring problem is likely the cause of a lot of cooling fans going into failure mode (the one fan cycling on and off behavior), perhaps more so than the more expensive causes, including the Final Stage controller (looks like a small amp, under the hood and left of the hood release in 87+ cars). A tip posted above in the thread suggesting to check the HVAC fuse holder was spot on! Not as bad as the cooling fans, but the plastic fuse body was melted yet filament hadn't blown. I was amazed my HVAC blower was still working.