When you click on links to various merchants on this site and make a purchase, this can result in this site earning a commission. Affiliate programs and affiliations include, but are not limited to, the eBay Partner Network.
Replacing charred CE fuse block with a donor block
I've got a problem with the #28 and 29 cooling fan fuses overheating when the AC is on. The problem is entirely with degraded fuse holders/contacts. It's only a problem with the AC on due to the fans running continuously. (EDIT: This was also the cause of previous intermittent fan issues - one not working and one cycling off and revving high, repeat. No problems since doing this repair over two years ago).
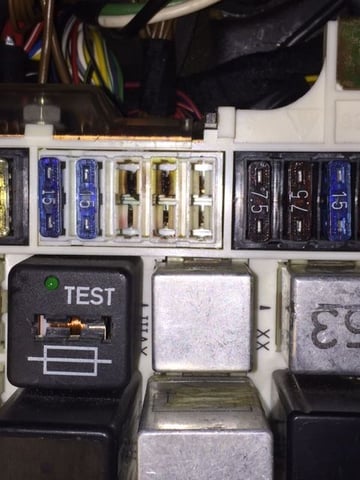
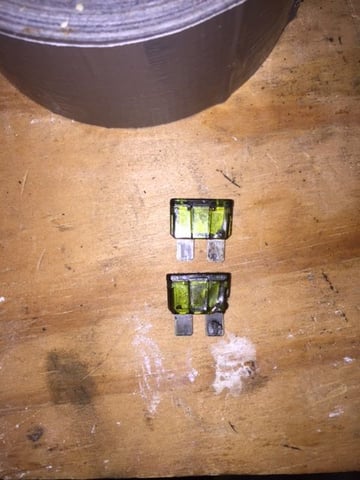
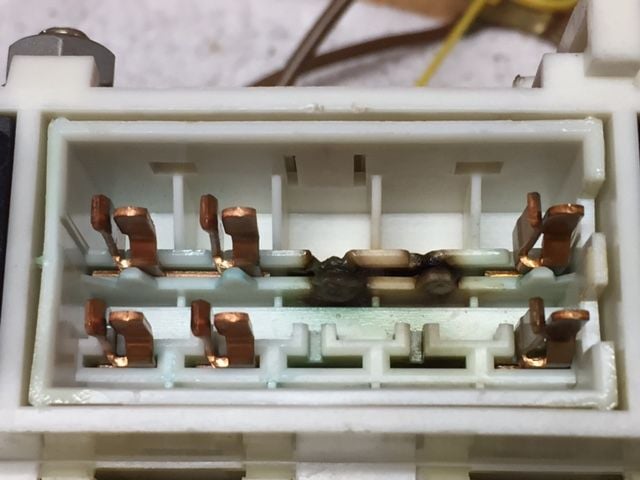
Here's what the fuses look like:
This causes resistance/current changes that the fan controller interprets as a fault with at least one of the fans. Then it starts the notorious single fan cycling to high, then off, repeat.
So I bought a donor panel and today tried to remove one of the fuse blocks for practice...and honing technique and tools used.
I used this small screw driver
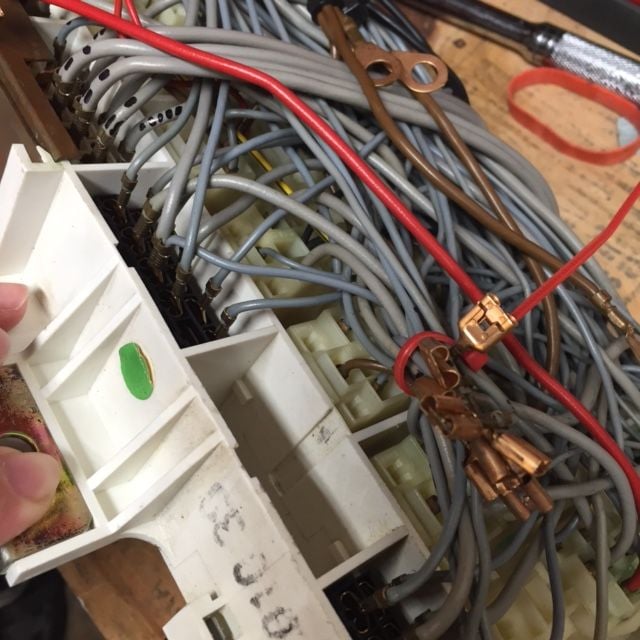
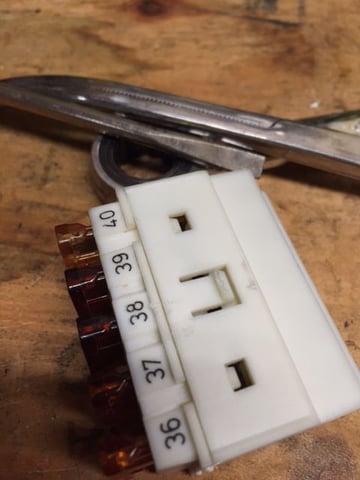
The picture below shows the rear of the panel and one of the slots (one top, one bottom) where I inserted the small screw driver to release the clips so I could push the fuse block out the front of the panel.
But doing so did some minor damage to the donor panel body and the fuse block. I'd like to find something that can do less harm...something flatter than the screw driver is between the tip and handle. Below the tool marks are clear and one of the tabs that secures the block was bent too far.
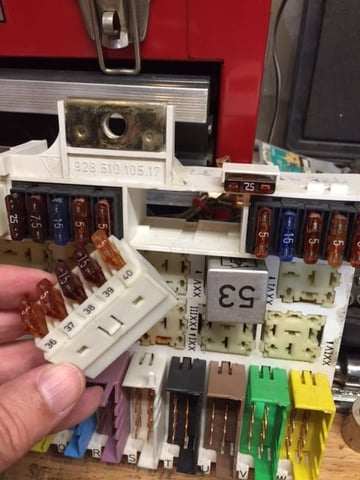
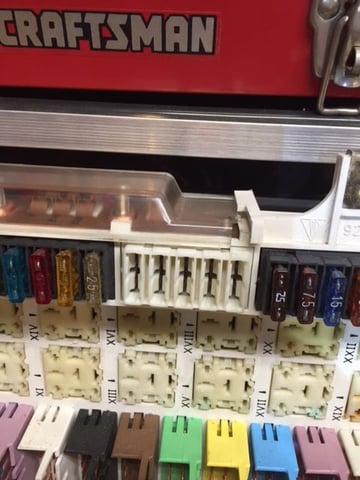
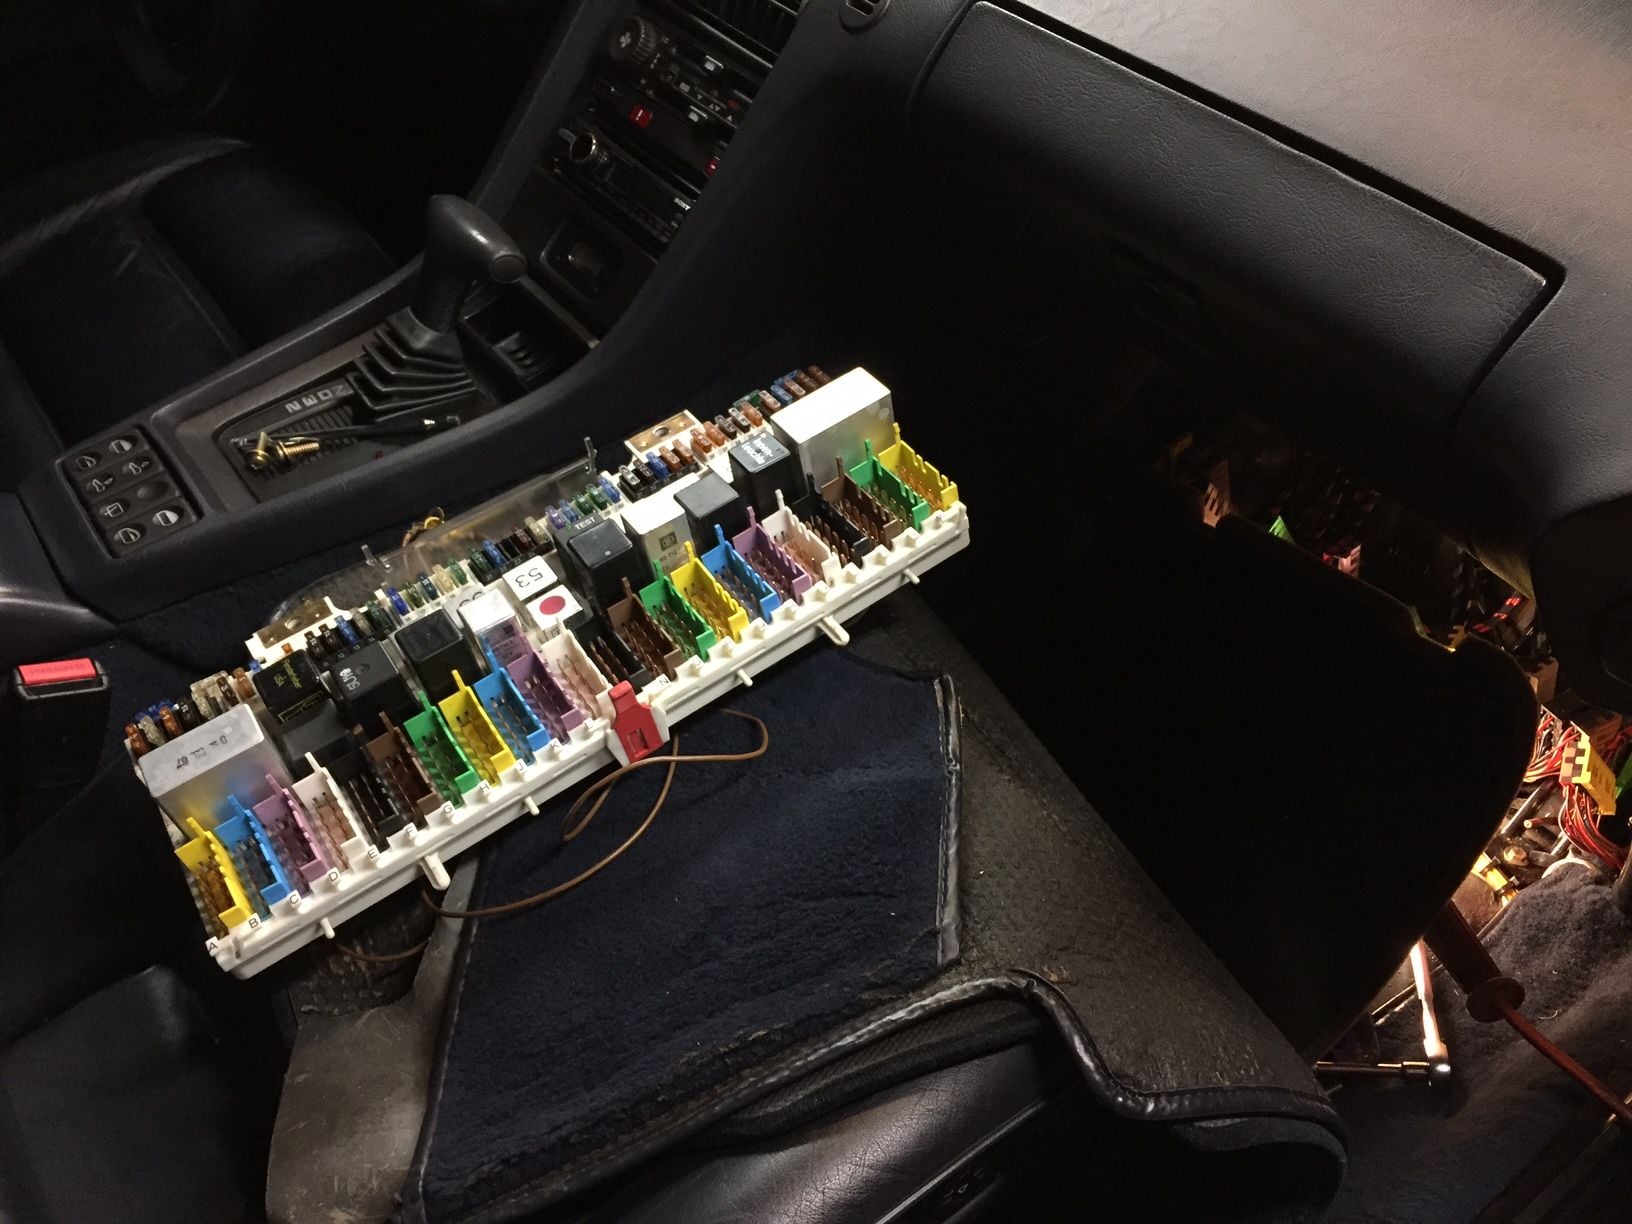
The fuse block I need is #26 to 30 on an "88 (and a few other years that are the same). And here it is... in a slightly tougher location to access due to the copper plate, some nuts and bolts and a clear plastic cover. Once those are all removed the job should be as simple as the "practice" block.
The donor is shown below...I'm harvesting the block with the fuses missing.
Last edited by Captain_Slow; 01-05-2019 at 08:57 PM.
Instead of replacing the entire block just pop the face of the block off the rest of the housing. This will give you access to the fuse contacts. Clean the contact points with sandpaper and apply some corrosion preventer like Deoxit. Finally take a pair of needle nose pliers and crimp the fuse contacts closed so they will make very tight contact with the fuse blades. Replace the face cover with the undamaged one from your donor and go with God.
Mike
p.s. not a bad time to clean and refresh all the other fuse holder sections. The HVAC blower one likely needs attention as well.
Thanks Mike. Great tip on a less invasive repair. I'll give it a try if the internals look like sandpaper and Deoxit will do the job. I plan to pull everything out and apply Deoxit.
Instead of replacing the entire block just pop the face of the block off the rest of the housing. This will give you access to the fuse contacts. Clean the contact points with sandpaper and apply some corrosion preventer like Deoxit. Finally take a pair of needle nose pliers and crimp the fuse contacts closed so they will make very tight contact with the fuse blades. Replace the face cover with the undamaged one from your donor and go with God.
Mike
p.s. not a bad time to clean and refresh all the other fuse holder sections. The HVAC blower one likely needs attention as well.
Yep, a clean and tight connection is paramount here. Also, use quality, name brand fuses...not the cheap Chinese ones.
The wiring connectors are readily available as over-the-counter bits at Volkswagen dealers parts counters. Typically, by the time they heat enough to melt the plastic in the fuse block, they've done some damage to the wiring behind them, and so deserve replacement.
The terminals insert from the rear of the CE panel fuse blocks, each locked into the holder with a tab on the back face (opposite the rolled side) of the connector where the fuse tab enters. I use a jeweler's or sculpter's spatula, a tiny thin blade spatula, to push in from the front deep enough to release the tab and allow the terminal to be extracted to the rear of the block.
The new terminal is crimped to the trimmed-back wire with a crimping tool that forms the tabs the same as the originals. This is different from the tool used for butt splices and other repair fittings. Soldering is a poor option here because the heat from soldering risks compromising the stiffness of the beryllium copper terminal, and its ability to retain proper pressure on the contact faces. OK to solder if you use a good heat-sink clamp to protect the terminal area during soldering. Still, there are other risks to soldering here that make it the second choice after proper crimping.
-----
The high current draw from the fans can often be traced to tired bearings in the motors. In my car in SoCal, the fans ran all the time, as AC is used at every time of the year except for mornings between Christmas and New Years. The rumble in the fan motors was audible on shutdown.
The motors are not designed for easy bearing replacement, but it can be done with some patience and care. The bearings, IIRC, are double-shielded 201-size similar to what's used in rollerblade skate wheels. Brushes can sometimes be found at better local hardware stores, or our trusted vendors may have them and the bearings as a repair package.
A little searching here on Rennlist will find several threads on bearing and brush replacement.
Alternatively, Roger carries aftermarket replacement fan motors that are a drop-in, except the electrical connectors may be different. These may be intended for Opel or Vauxhall (GM Europe) cars, but are the same fitment as what Porsche used except for the electrical terminals
Thanks for the continued responses. Dr. Bob...thanks for the tips on the fan motors as well. Frenzy is over...so I'm going to put the car up on stands and start my winter projects a little earlier this year.
Wandering through the garage looking for something, my eyes caught the donor fuse panel sitting where I'd left it about a week ago....and I couldn't resist digging in to the 26-30 block. I found it easier to remove the fuse holder face in situ. Not only are all the copper fuse holders readily accessible for cleaning - they will easily fall out if not still connected to their wires on the back of the panel. Only the upper copper holders for 26 and 27 are bridged. This panel is from an "89 (928.610.105.17), which has the same fuse holder internals as my "88 (per Alan).
If the fuse block body in my "88 is not damaged I'll leave it in place (as I did here with the donor block). I will replace the copper fuse holders that caused the charring (28 & 29) just because it's just a matter of disconnecting the wires at the back and swapping in the relatively pristine donor copper bits. However, notice the contacts still show some oxidation and will need a physical and Deoxit cleaning.
Last edited by Captain_Slow; 10-09-2016 at 12:08 AM.
Here is what a less concentrated version of Deoxit did to oxidation on the tines of one of the fuse holders. I applied it last evening and wiped it off this evening. I slid a shop towel between the tines a few times. It's the first time I've seen observable evidence of how effectively Deoxit cleans with nothing more abrasive than a paper shop towel. The holder in the center looked like the two beside it.
Had some time to get back into this job today. Managed to remove all the connectors at the bottom of the panel without breaking any of the thin tabs. I am probably the first person to remove this panel since it left the factory. Next is replace the internal copper and plastic bits as needed for block #26-30. Then remove all the relays from the panel and give it a Deoxit bath.
Last edited by Captain_Slow; 11-14-2016 at 06:14 AM.
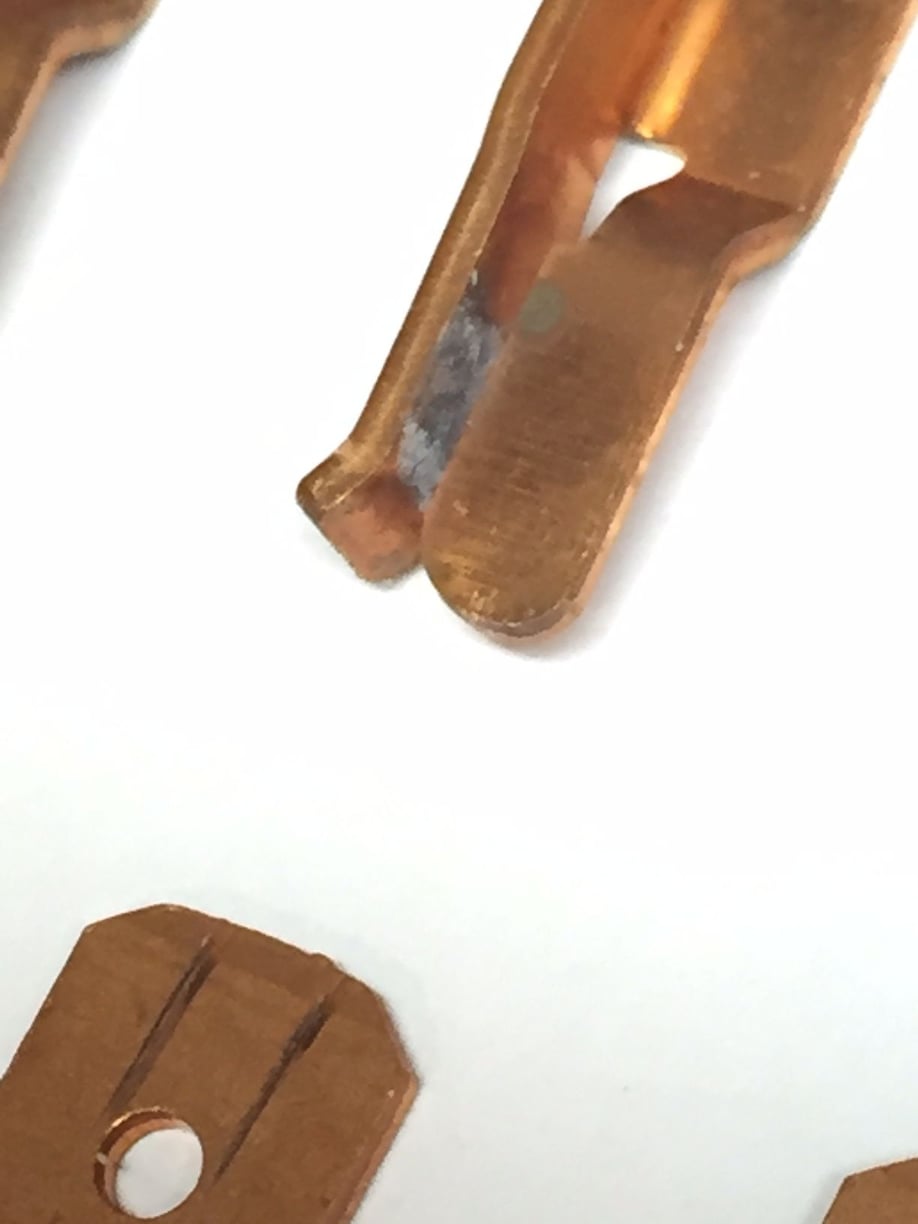
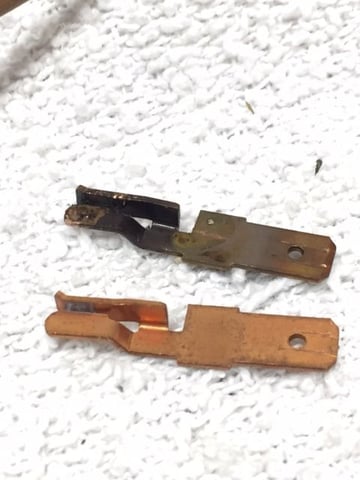
Will replace the contacts with better condition used ones for #28 and #29.
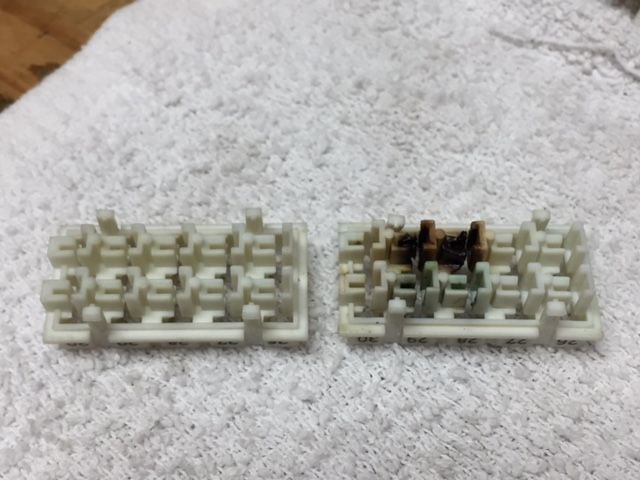
Donor face plate and charred original.
removed gray wires connected to rear of contacts and extracted the loose contacts from the front. Looks bad, but still functional. Lots of work to remove the two upper left contacts - copper plate on top of panel has to come off. I'll just replace the contacts with clean donor pieces and a clean donor fuse block face plate.
Still need to clean up the lower donor contacts with some Deoxit, but the condition is so much better as is.


 09-25-2016 | 10:15 PM