When you click on links to various merchants on this site and make a purchase, this can result in this site earning a commission. Affiliate programs and affiliations include, but are not limited to, the eBay Partner Network.
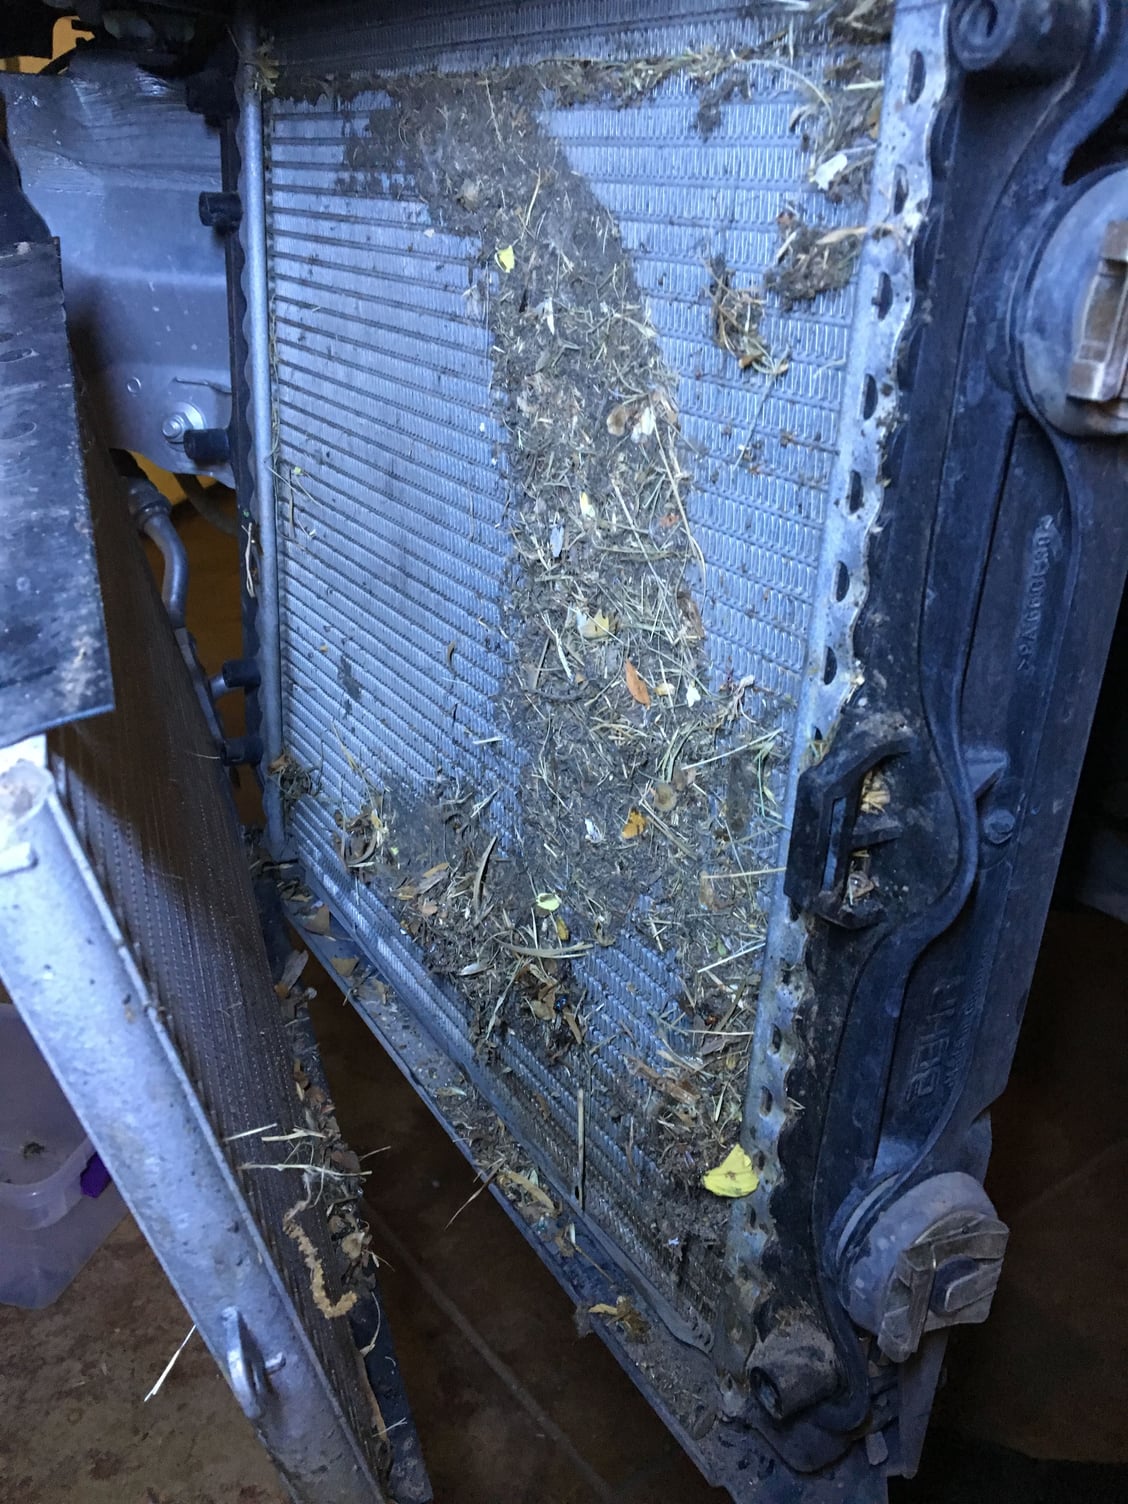
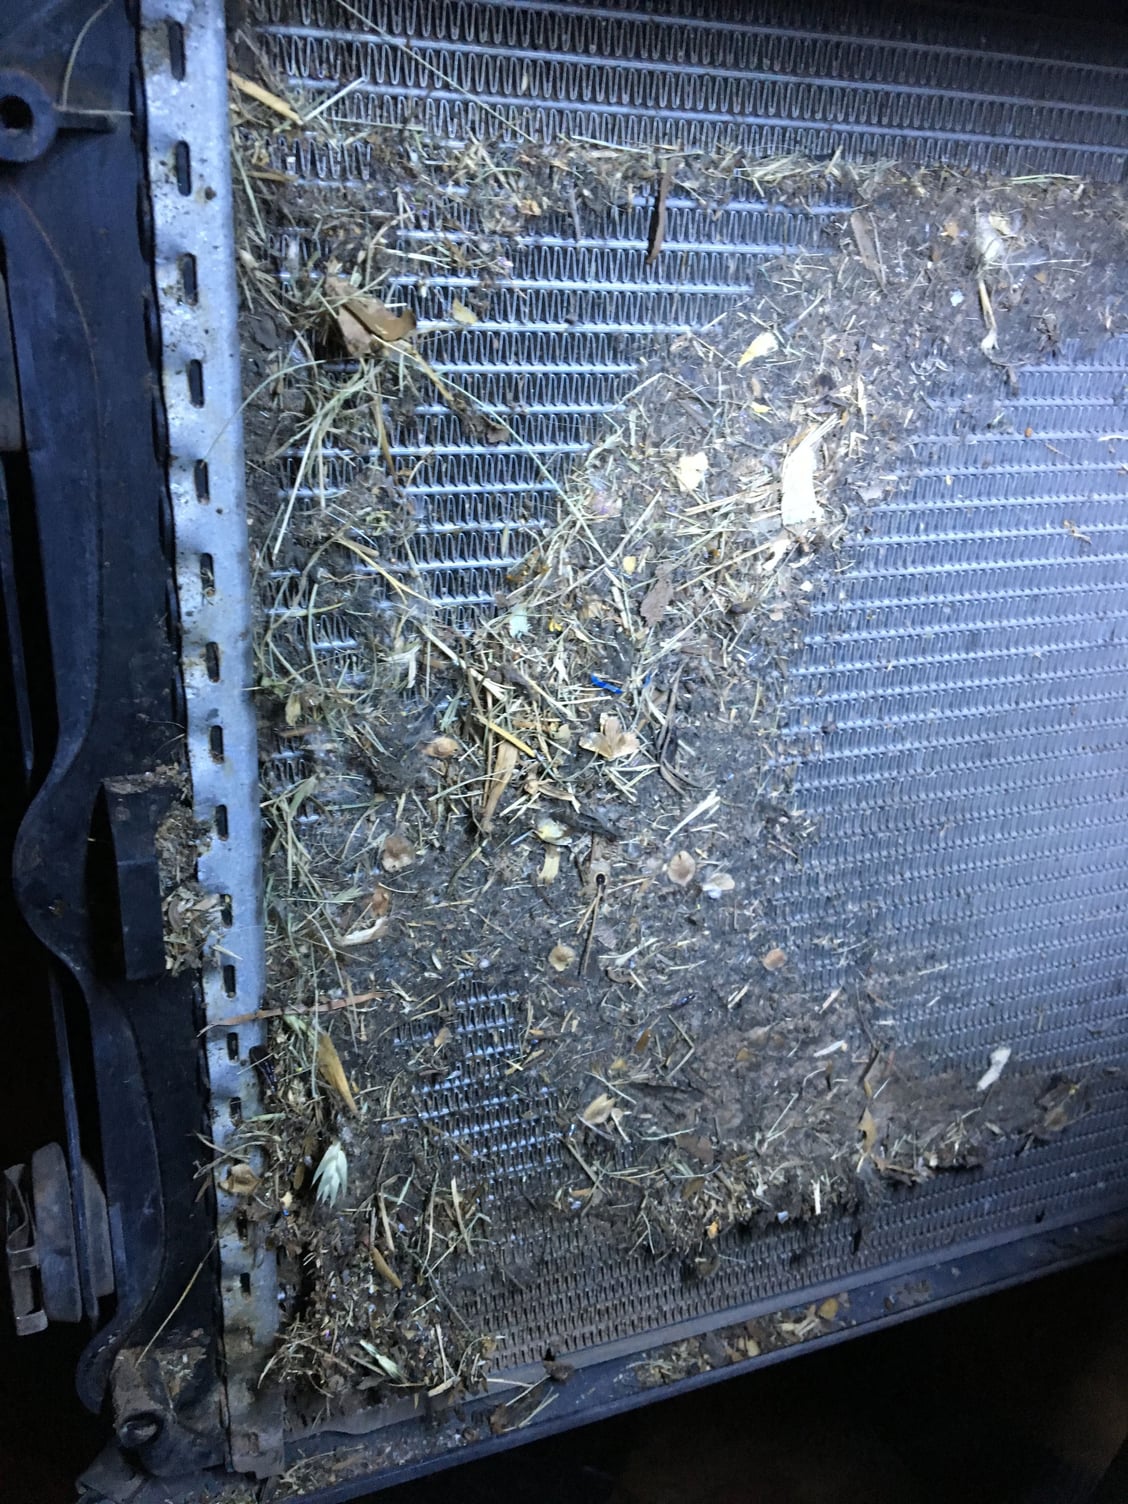
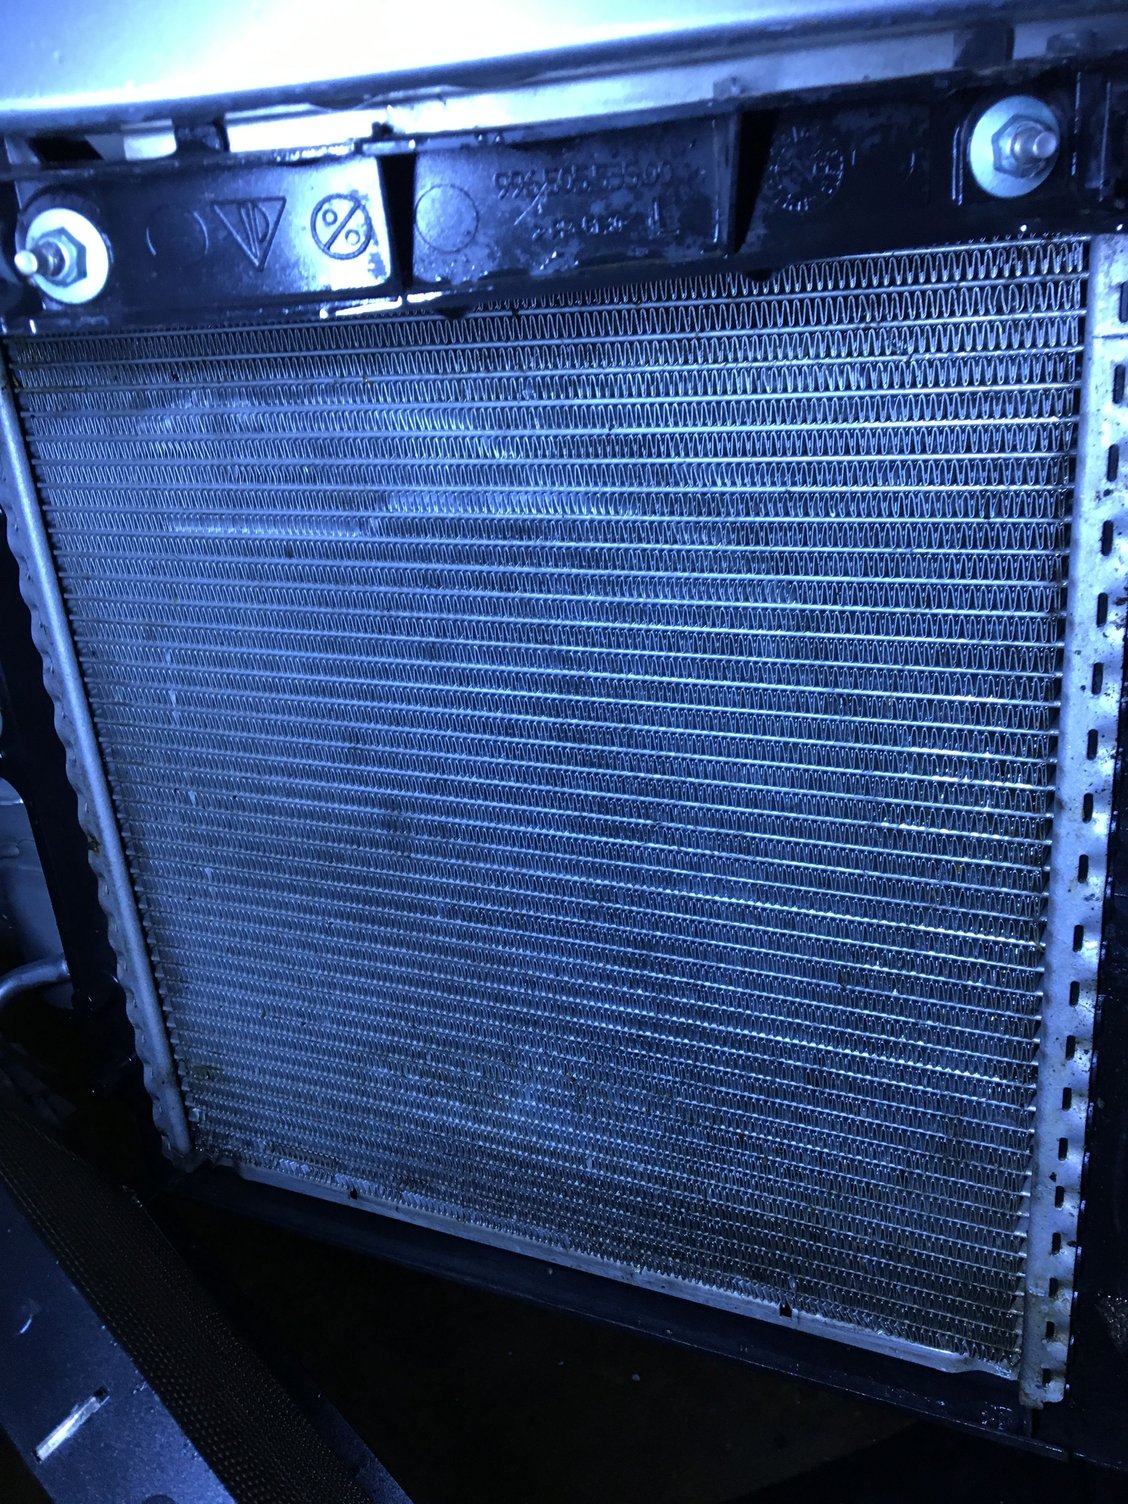
This is why I enjoy this site, was reading some older posts and found one about how many Porsche Owners overlook the cleaning of the radiators. Found a YouTube showing how easy it is to remove the front bumper to access and clean them, so had some free time today, pulled the bumper and found just how dirty the radiators were (looks like I could of been loosing about 10% of cooling capacity). Here are a few pics to show what I mean. Would recommend if you have not done this in awhile, take the time and do it. I had 54K miles on car and was told it was always garaged and pampered by original owner. Who knew!!, Only took about 2 hours.
Spend the bucks if you are that far along, take the rads out of the car, clean them with a pressure washer from the back to the front, and add the 3rd rad in the middle. once you use the pressure washer, use comp air to blow from back to front. You'll get tons more little particles out that you had no idea about. Do it a couple times.
The 3rd rad addition was the best upgrade I've seen for cars in S US. It improved not only my temp, but also the AC operation, better warm oil pressure and it seems to use a little less fuel.
Thanks for the reply docmirror, I was planning on doing a radiator flush on my 60k service. I will definitely be looking into the 3rd radiator kit. I live in Northern CA and the summers get hot, we have had a week of 100+ deg and I do see an increase in my temp (the reason I did the radiator clean-up in the first place).
No prob. It's just so much more than cooler water temps. I was pretty surprised. My fave result is ice cold AC within a few minutes of start up and it stays frigid even in slow traffic. Not really a hard job either. A couple of the fittings are hard to reach but I would rate it about a 3 or 4 on the 1-10 DIY scale. Don't rush, and clean the heck out of the rads once they are out of the car.
I'm about to do this in the morning. I need to flush the coolant because it is discolored and gunky. My radiators look just as dirty as yours did slakker. Does anyone have advice on where I can purchase this third radiator and how should I plumb it?
I just got done researching that one. Pelican has a center radiator kit that lists out all of the part #'s you need. But you can get them individually at warehouse 33 and save a hundred or two with the Rennlist discount. I would buy more from Pelican since they have such awesome information but they are usually higher. I always give them a shot though.
Not sure about the bolts because I usually source them locally from Napa.
I bought the center rad from rockauto.com(Behr). I bought the two hoses from Roger at 928sRUS. Replaced my hose clamps from O'Reilly, and got the coolant there too. I made all the braces and framing from 26Ga sheet metal.
A note for those starting this job. Although not mentioned in the pelican write up here's an important tip. When you open the box for the rad, take a sharp knife and cut two pieces of cardboard that will exactly cover the fins of the new rad. Use some packing tape and cover the fins of the rad as you remove it from the box. Leave this cardboard cover on the fragile fins until you are ready to put the bumper back on, then cut the tape, and pull the cardboard off. Your fins will still look new.
Another tip, once you have the rads and fans out, test the fans by jiggling the fan blade fore and aft from the end. Check for noisy bearings, and run each fan on 12V for a bit. I found one that was starting to get wobbly. Use comp air from the back to front of rads to blow out all the little pebbles you can. Do it several times.
Clean them again in 12 months and be prepared to be amazed at how nasty they get after one year. I've been thinking about the Zunnsport grills for some time now, but I'm not sure about how they might affect the airflow - especially during hot Texas summers.
Clean them again in 12 months and be prepared to be amazed at how nasty they get after one year. I've been thinking about the Zunnsport grills for some time now, but I'm not sure about how they might affect the airflow - especially during hot Texas summers.
... Or do what this guy did with gutter mesh from Home Depot:

 07-30-2016, 07:06 PM