When you click on links to various merchants on this site and make a purchase, this can result in this site earning a commission. Affiliate programs and affiliations include, but are not limited to, the eBay Partner Network.
Competition Motorsport -- Step-By-Step BMC Filter Install DIY on the Cayman GT4
This will guide you step-by-step through installing BMC intake air filters on your Cayman GT4. The BMC filters decrease resistance to intake flow significantly, improving throttle response and adding a distinctly sporty intake tract growl. BMC are the filters that come standard on the new 991 GT3 RS. Read on, and feel free to PM us with any questions you might have!
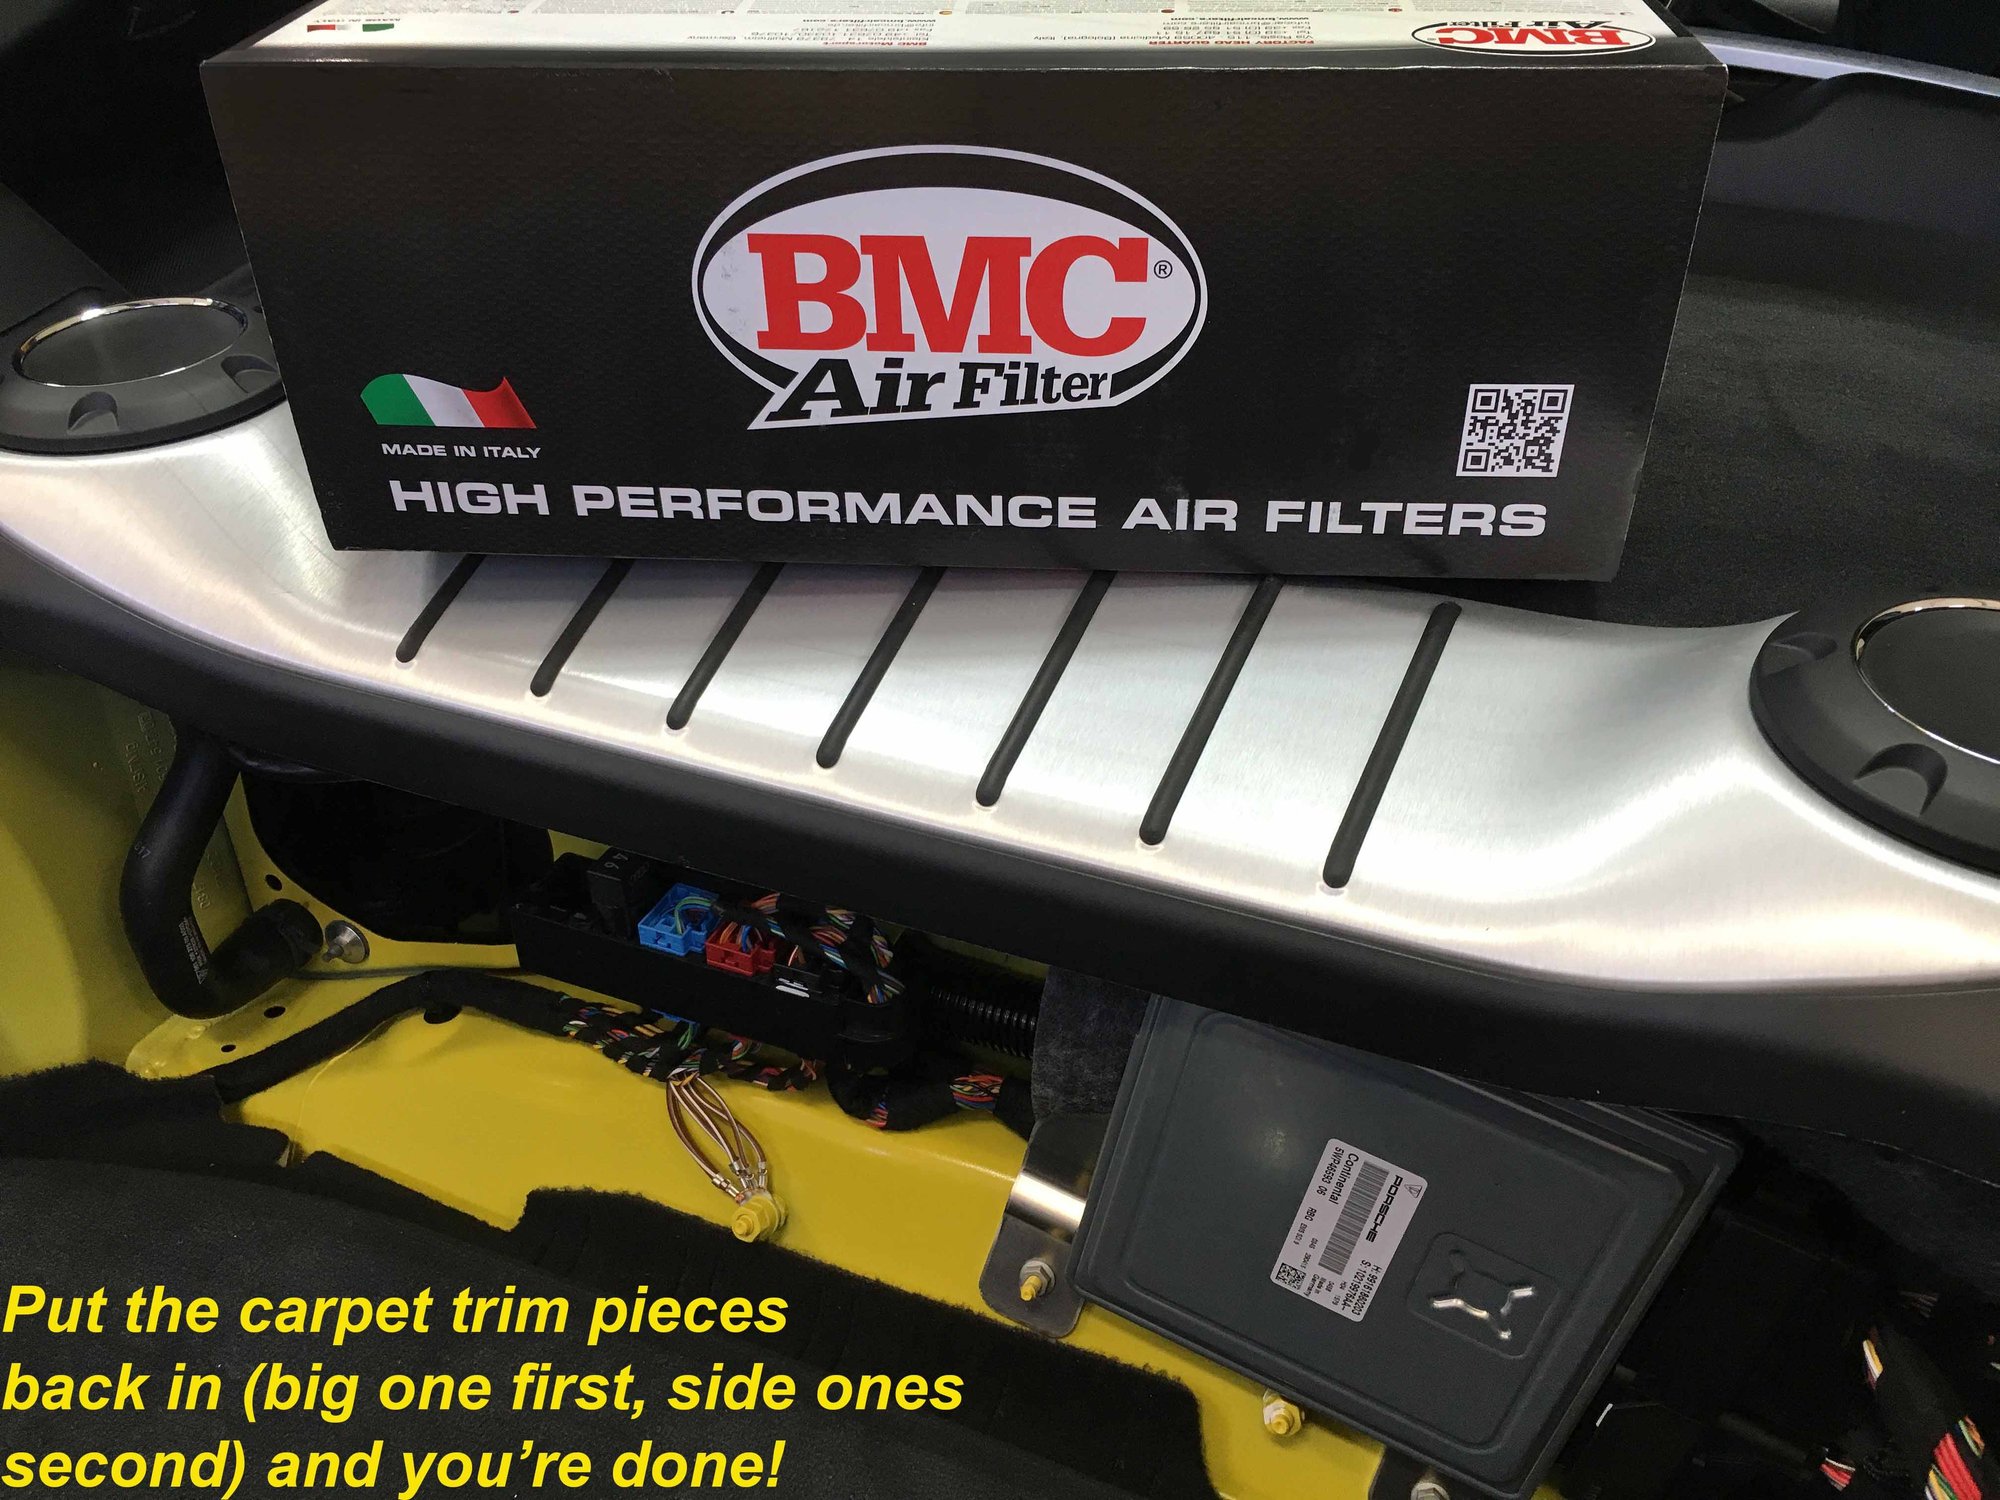
Remove the two carpeted pieces of side trim on either side of the rear cargo area. They will simply pop out with a good tug. Keep track of the small cone-shaped plastic fittings which are loose on their tabs. After removing the side pieces, remove the large carpeted center trim piece. Again it just pulls out with a little persuasion.
Remove the single T25 torx retaining screw (red arrow), but not the other two torx screws (green arrows) yet. Grab the filter housing by putting a finger and thumb in each of the tabs sticking out, squeeze them toward each other, and pull the housing back toward the rear of the car. It's a bit stubborn, but it will come.
Remove the paper backing from one of the two oval foam gaskets that came with the BMC filters. Stick the foam gasket to the large end of the BMC filter and stick the filter to the plastic filter housing. Secure it with the two T25 screws you just removed in Step Three. Then slide the whole apparatus back into the opening in the firewall and secure it with the third T25 torx screw. Voila, you're done with the driver's side filter.
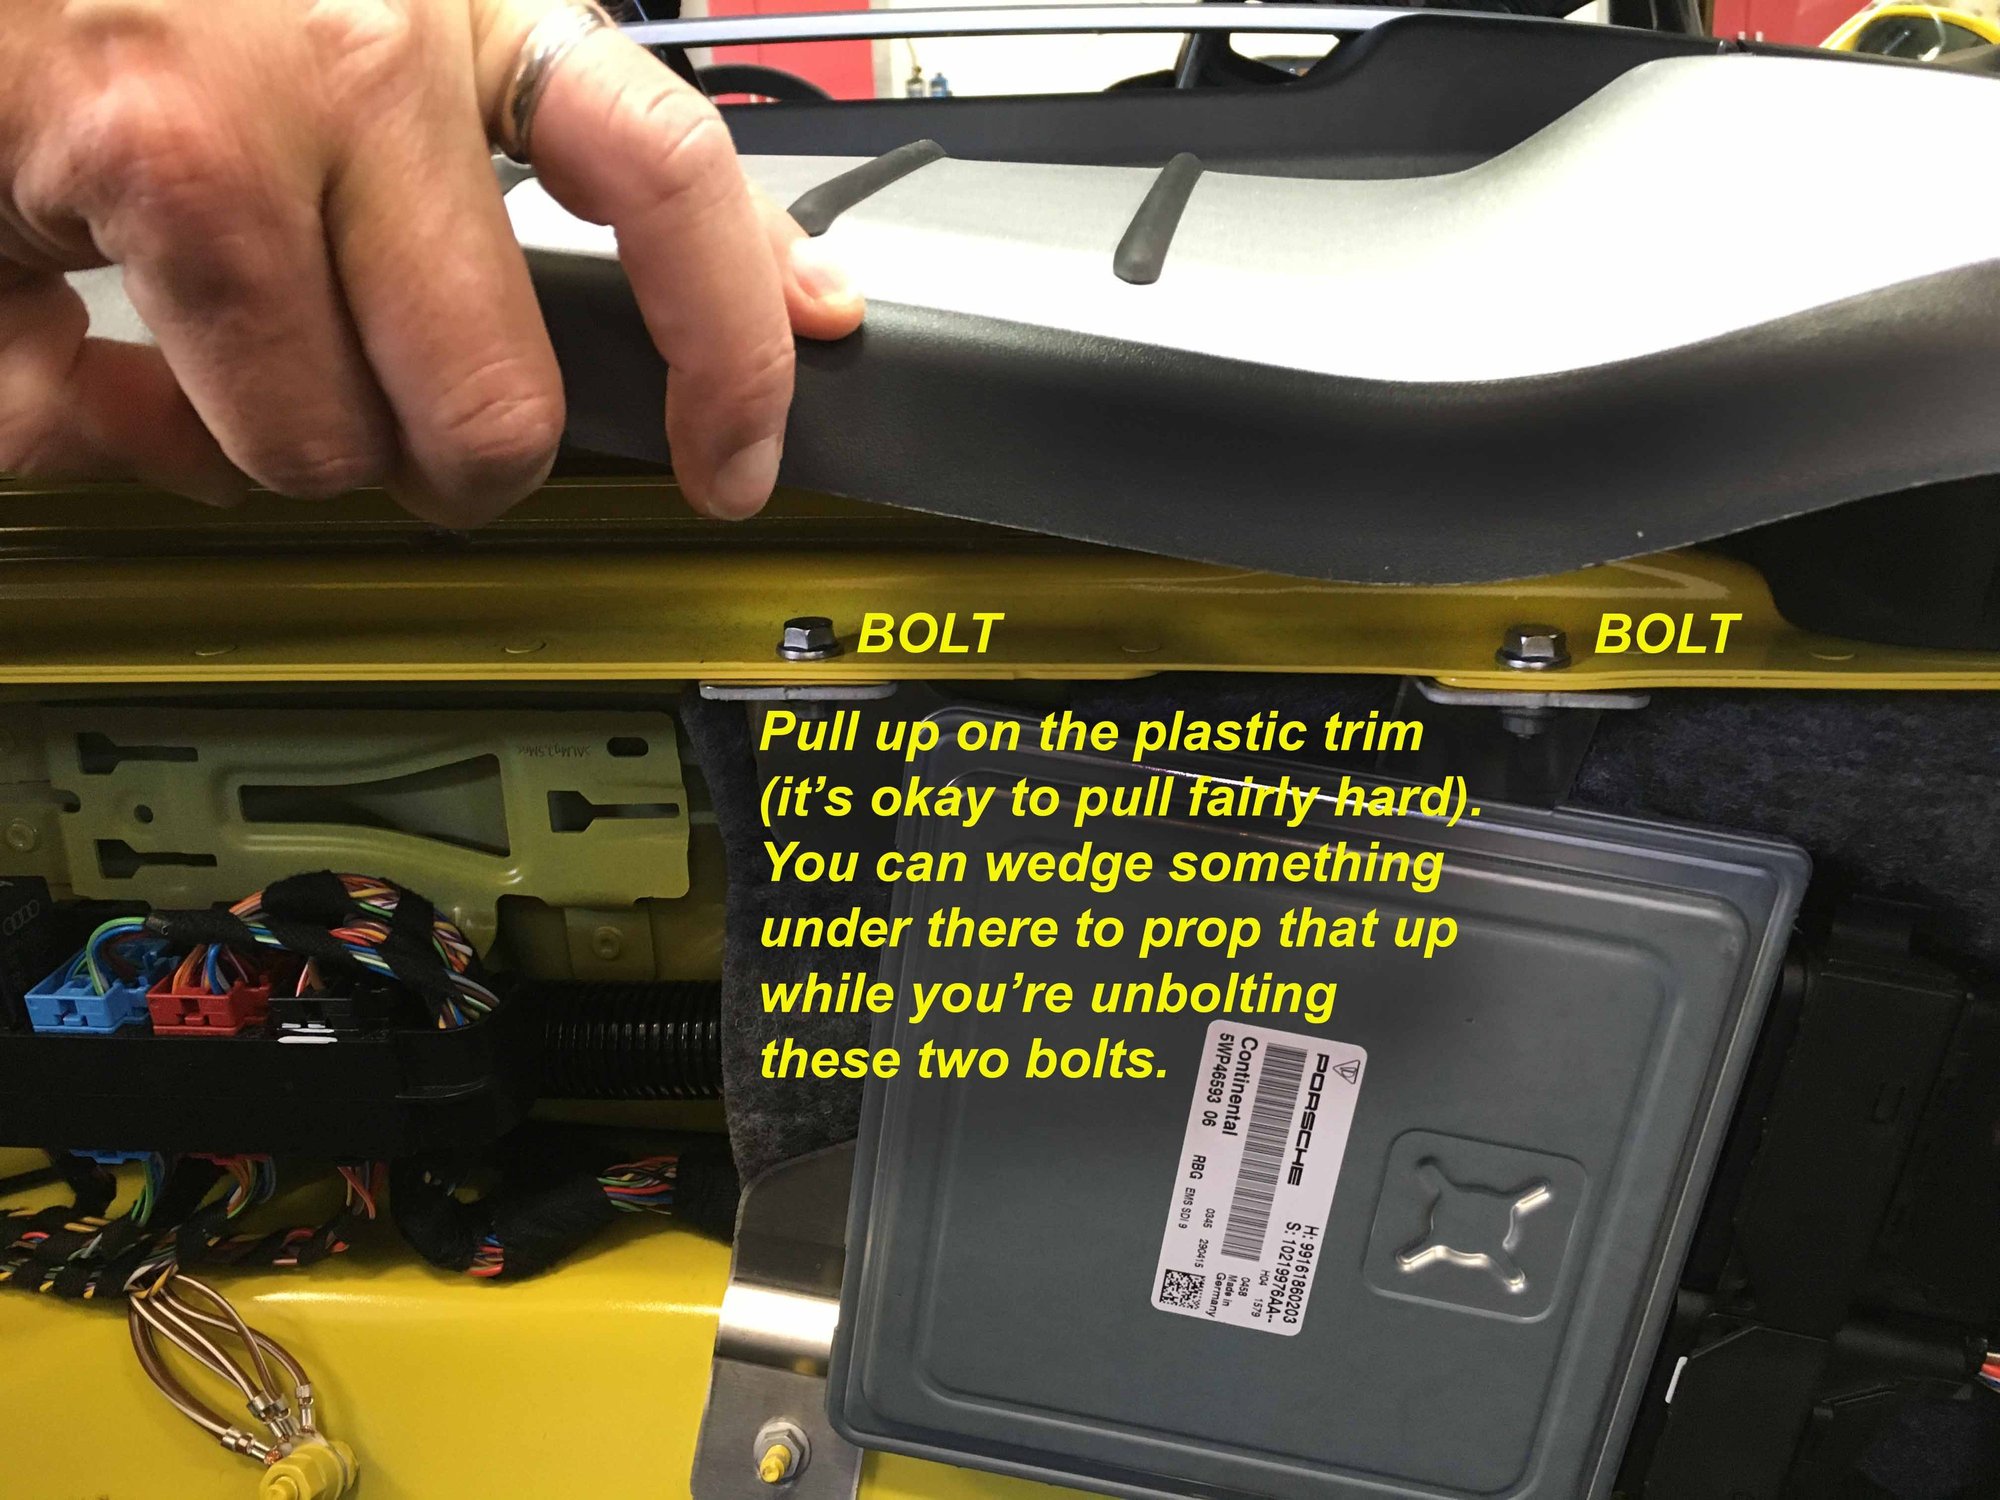
Now move over to the passenger side. To remove the ECU, first pry up on the silver plastic trim to expose two 10mm nuts -- pry up fairly hard with your hand and then wedge something in there to keep it up. Remove the two 10mm nuts that secure the top of the ECU with the 10mm wrench (ratcheting box end or open end work best).
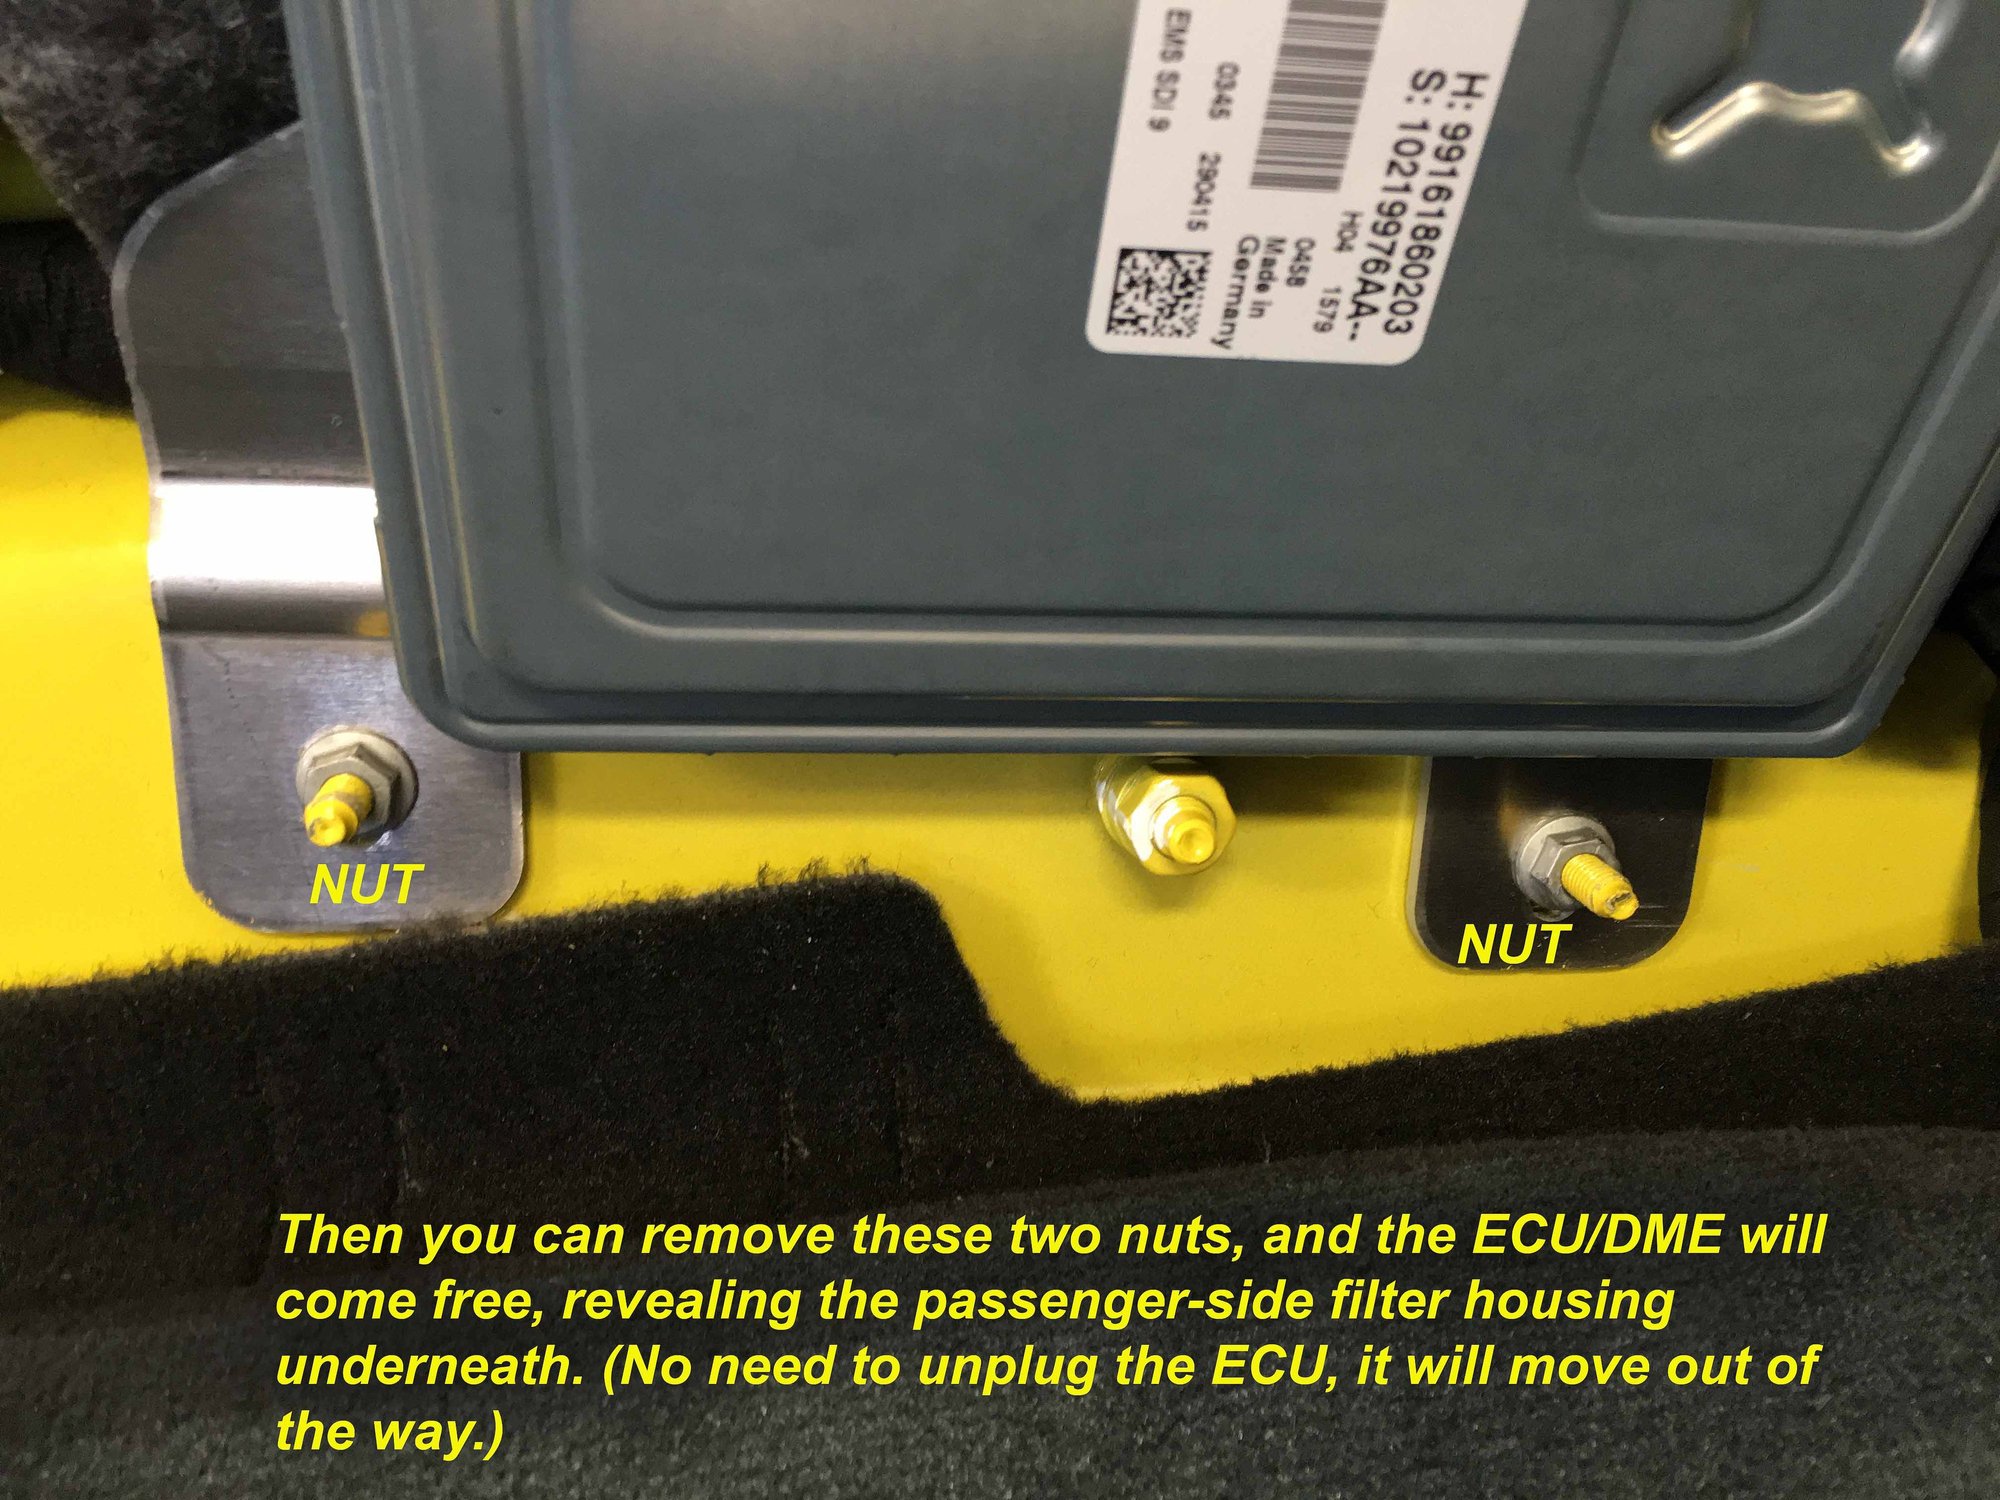
Now remove the remaining two bolts at the bottom of the ECU, and move it out of your way. This exposes the oil filler tube and, directly behind it, the passenger-side filter housing.
STEP SIX: DISCONNECT THE OIL FILLER TUBE
Pinch the end of the oil filler tube where it meets the oil filler neck (as seen in the photo) and pull down to release it from the neck. Move it out of your way, exposing the passenger side filter housing.
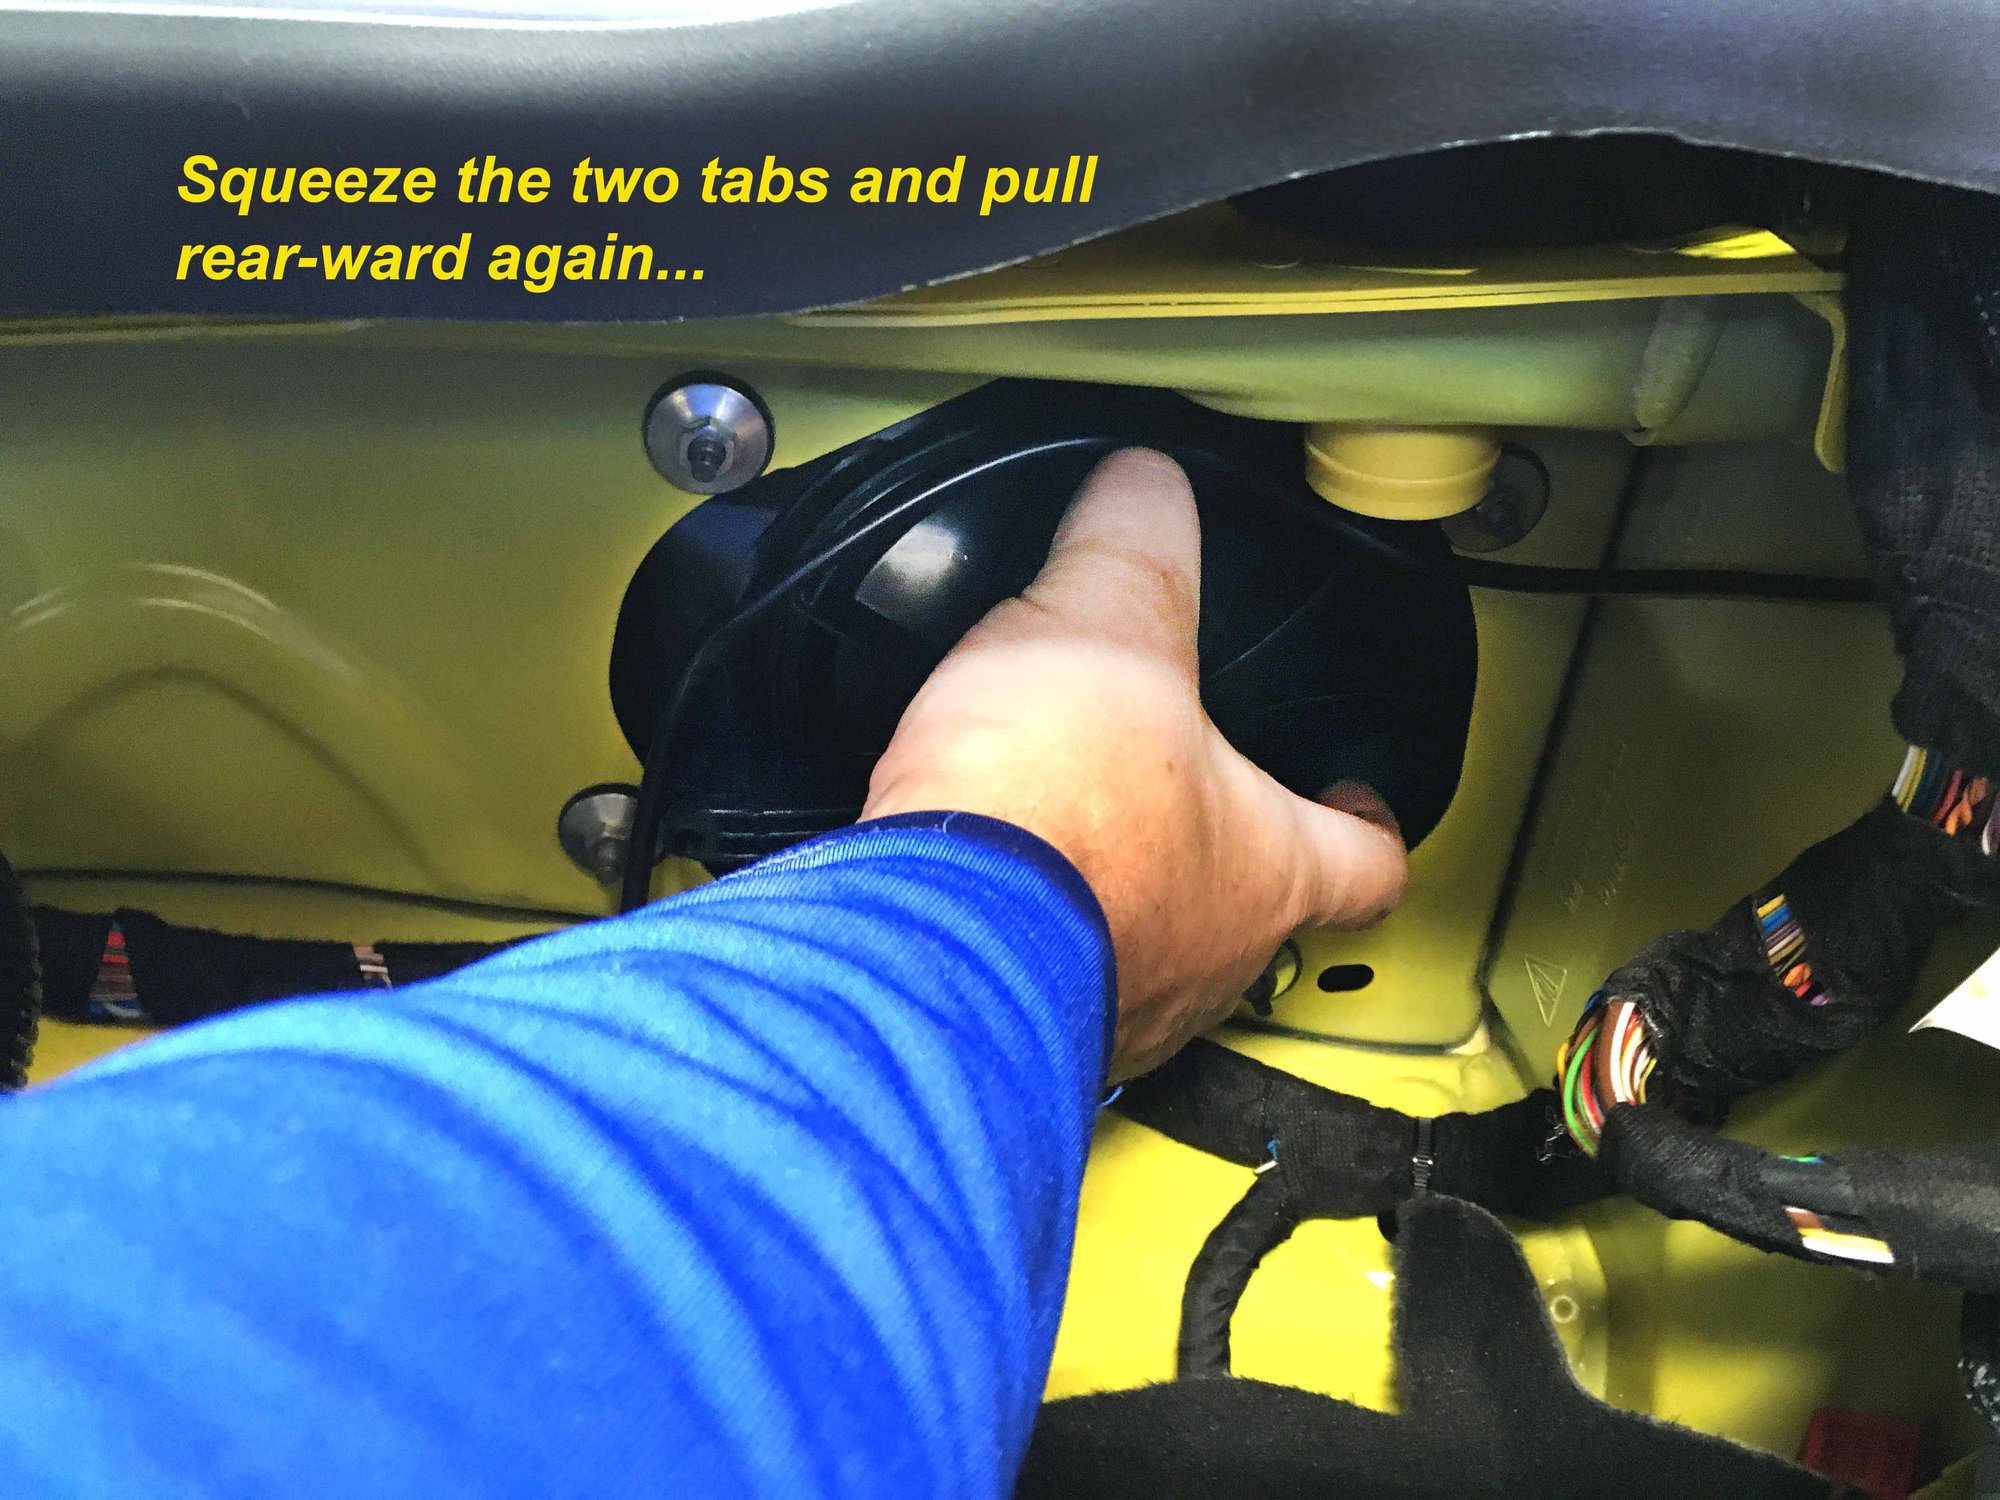
This is the same as the driver's side; first remove the one T25 torx retaining screw, pinch together the two pull-tabs and pull rearward to slide the housing and filter out of the compartment.
Again, same as the driver's side, remove the other two T25 torx screws holding the filter to the housing. Put the foam gasket on the remaining BMC filter and re-attach it to the housing with those T25 screws. Then slide it back into it's compartment and secure it with the last T25 screw.
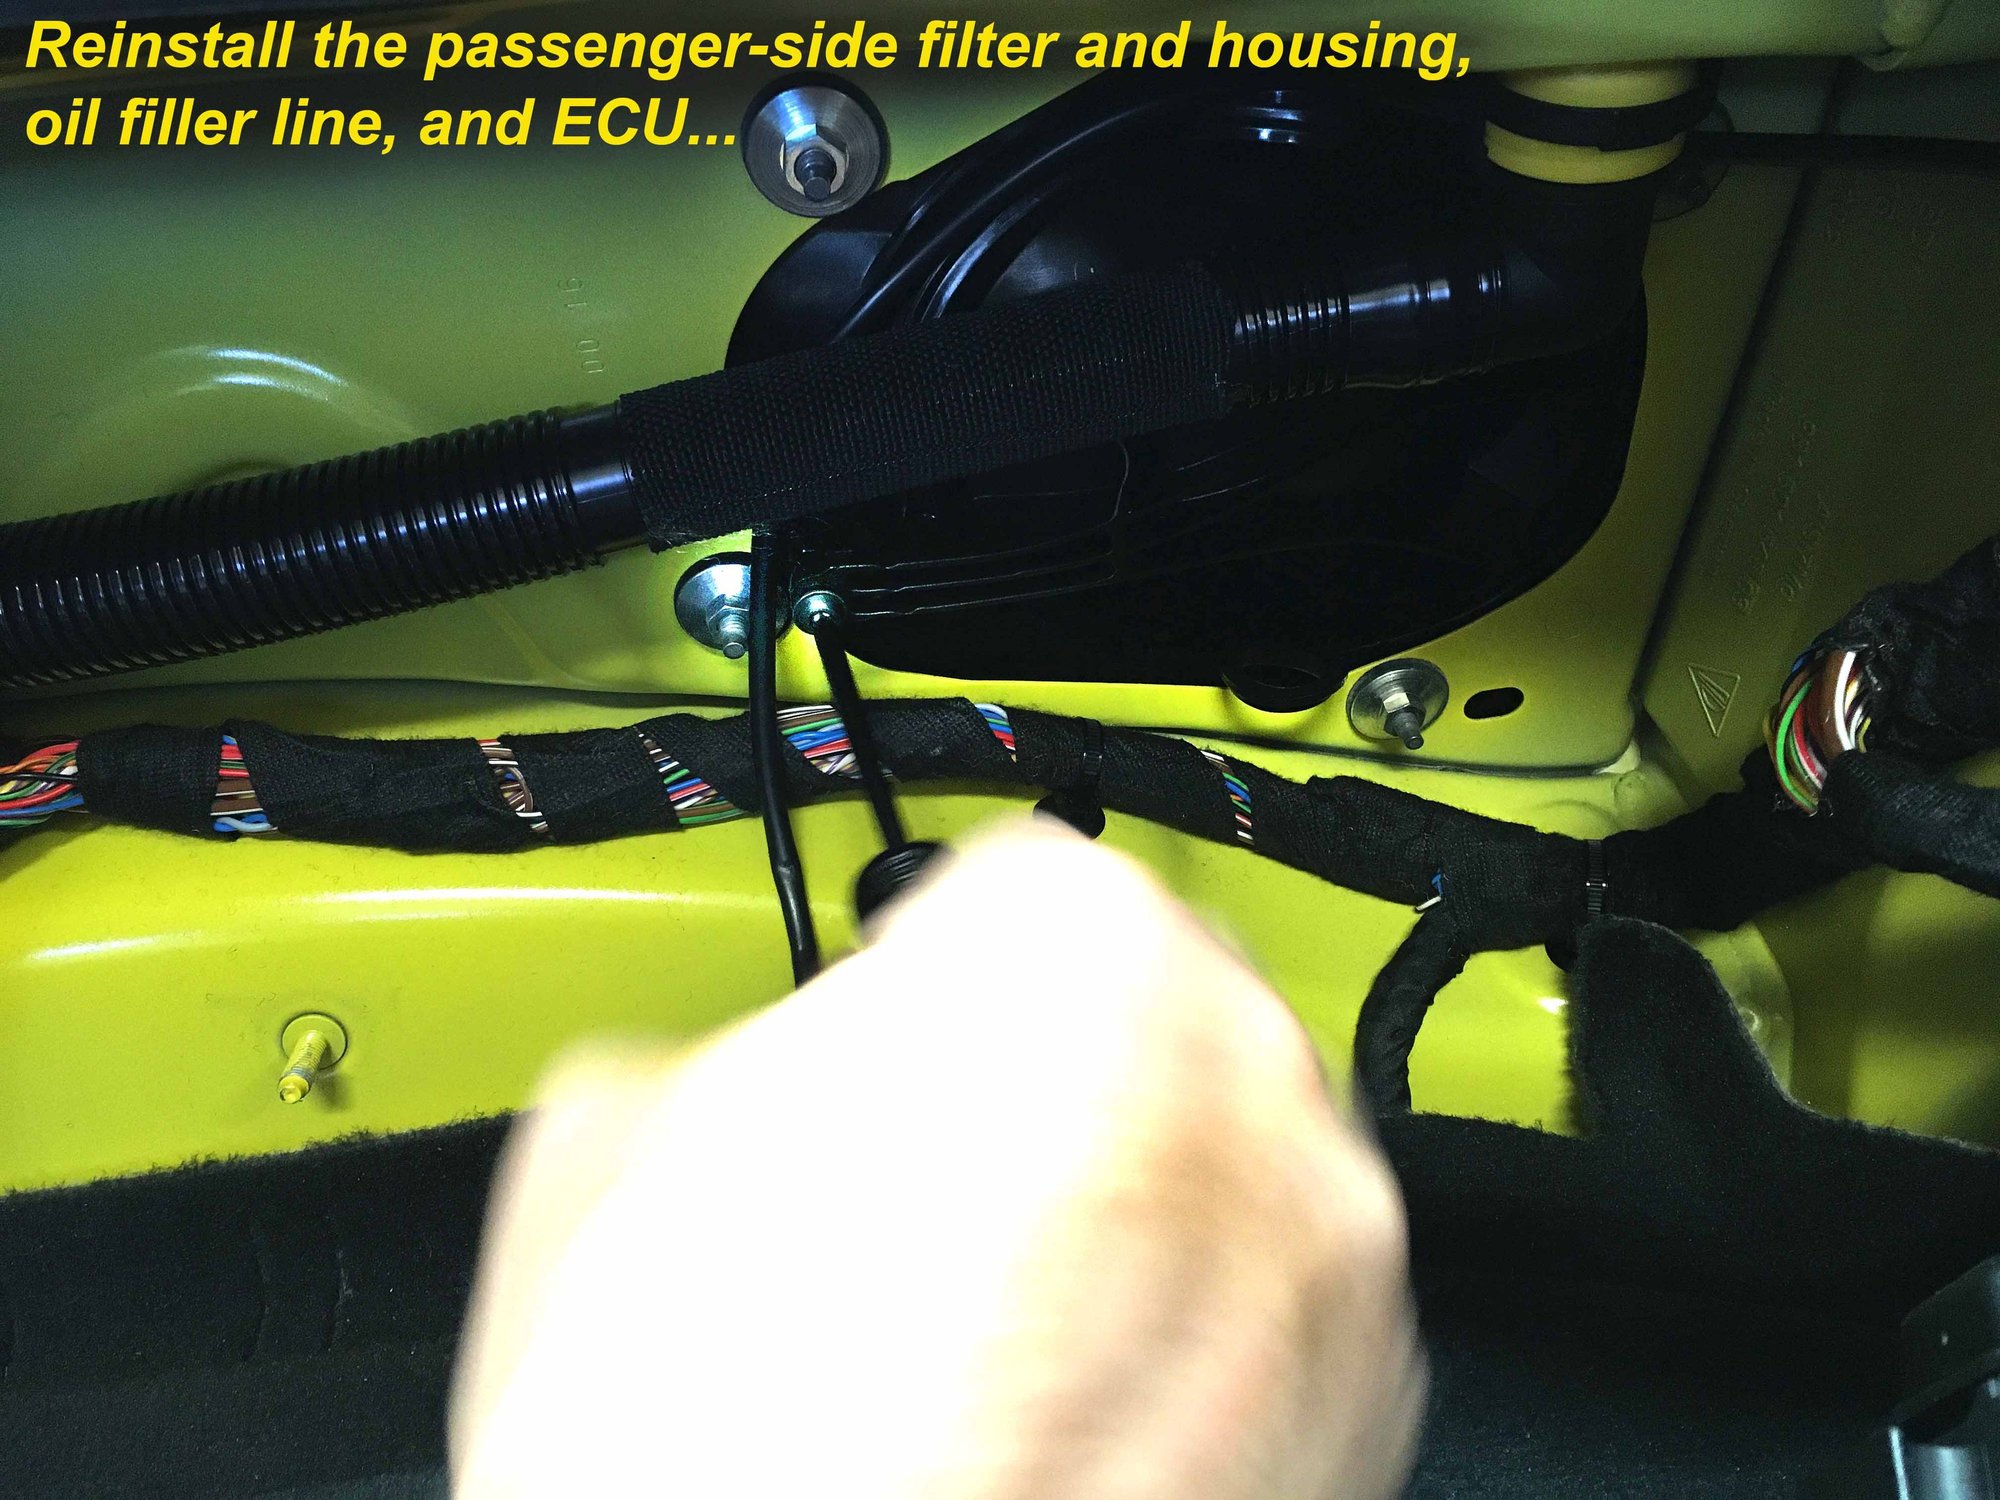
STEP EIGHT: REINSTALL OIL FILLER TUBE, ECU, AND CARPETED TRIM
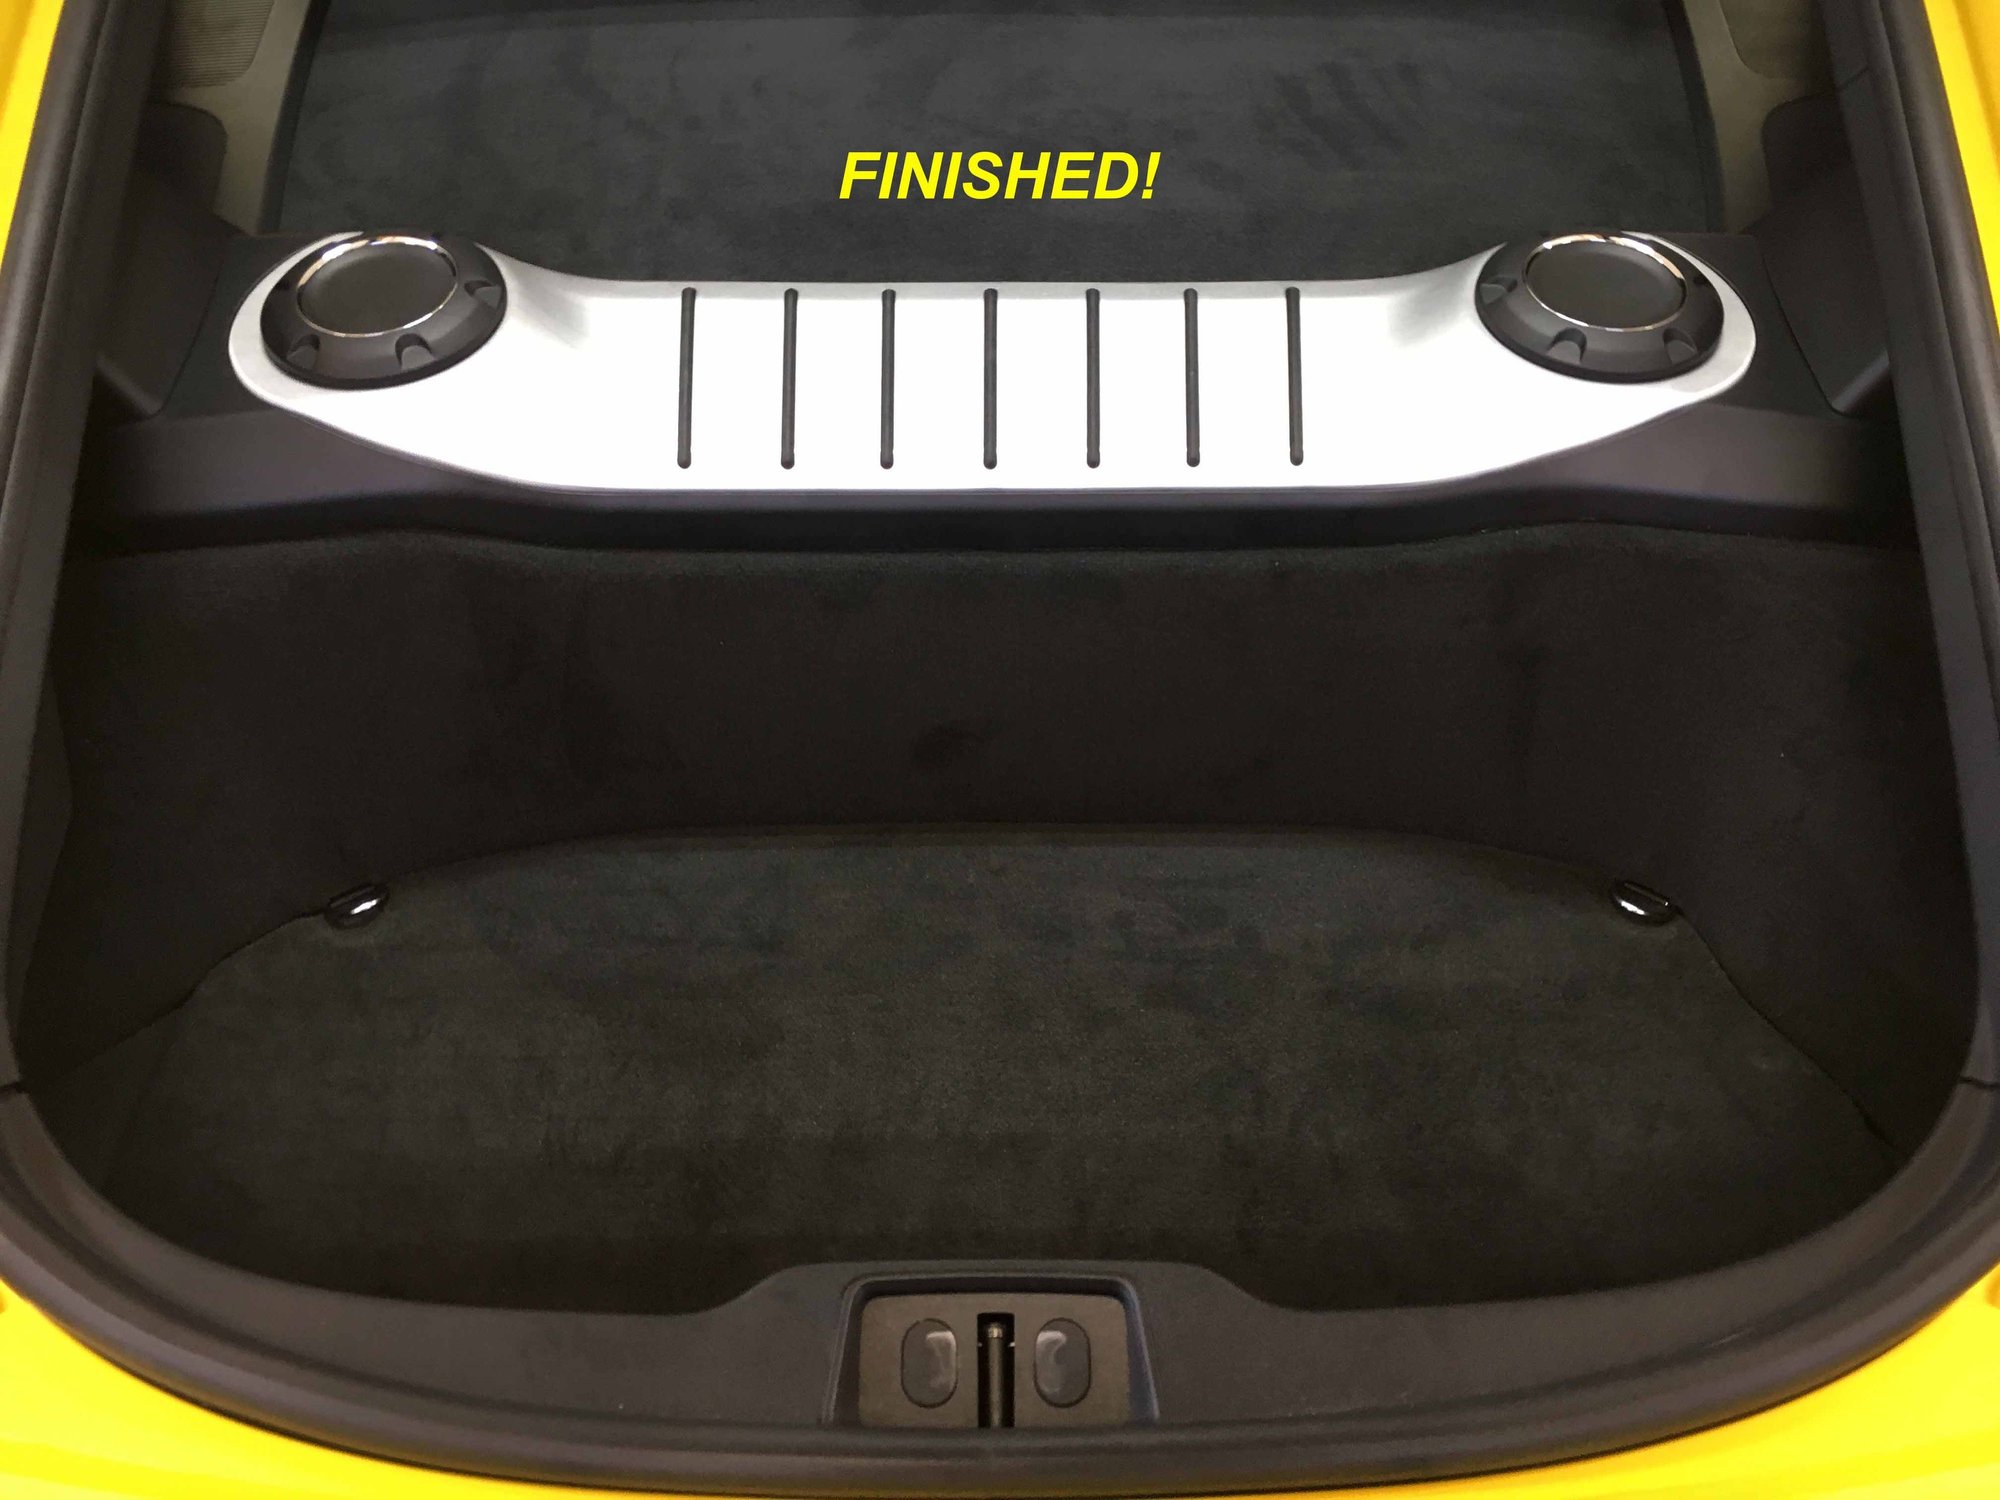
Reinstall the oil filler tube to the filler neck by simply pushing it up onto the neck until it clicks into place. Next, bolt in the ECU (the reverse of removing it). Reinstall the carpeted trim pieces (big center piece first, then the two side pieces), and you're all done! Drive the GT4 around a bit allowing the ECU to adapt to the change in air flow, and enjoy the added throttle response and sound!
IF YOU HAVE QUESTIONS OR WANT TO TALK TO US ABOUT A SET BMC FILTERS, GIVE US A CALL AT 844-438-7244 OR PM US ANYTIME!
Note. Do not pull trim by accident. What a b1tch to put back in. Would have been done in 20 minutes if I didn't accidentally pull the center piece completely out.
Thanks for the DIY. I've been meaning to get to these but thought it was a little more involved.
Happy to do it! It's very straightforward to do. We'll have before/after dynos for the BMC filters in a couple weeks -- same GT4 is being used to prototype some other very cool products that we'll post about soon. We have the "before" (bone stock) dynos but have yet to run the "after" with just the BMCs.
FREE BMC Filters for your GT4 with purchase of IPD Plenum!
Competition Motorsport is running a special on BMC Filters for your GT4. Buy an IPD competition plenum and 82mm throttle body from us and we will throw in the BMC filters for FREE.
 05-25-2016, 08:52 PM