When you click on links to various merchants on this site and make a purchase, this can result in this site earning a commission. Affiliate programs and affiliations include, but are not limited to, the eBay Partner Network.
Trick to getting Return Spring on Parking Brake Reattached
Ever since I got my '82 a year ago, the PB hasn't been working (e.g. wouldn't hold the car on any sort of incline), so figured I'd dive in while it was on lift bars.
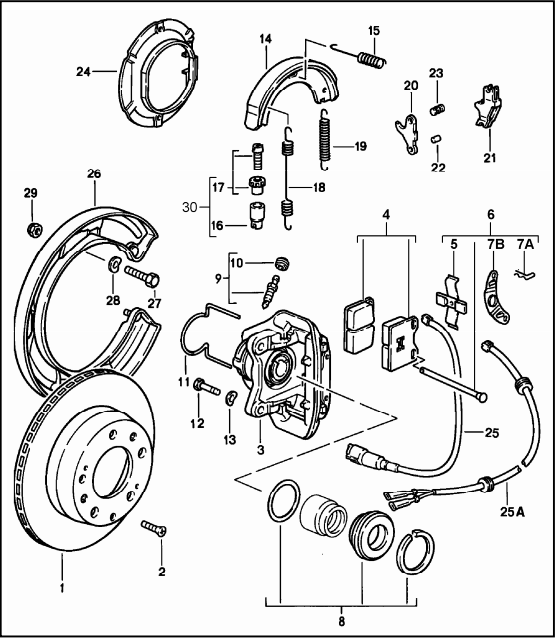
Read up in the WSM and some of Stan's threads on how to adjust the brake, and found that I couldn't turn the tightening screw (part 17 in PET).
Took the caliper off and discovered that the Return Springs were reversed - the one that was supposed to go behind the push-button lock (part 19 in PET) was tensioning into the tightening screw, and that was causing the obstruction.
So....took springs off, switched sides and am starting to put them on, but I'm really struggling to pull the Return Spring behind the push-button lock into the mounting hole on the shoe. I've also looked at Pirtle's write-up, and he interestingly has the springs reversed as well.
Any tips / tricks as to how you've done it?
I've tried needle nosed pliers (I lose grip and the spring releases), a small hook (not enough strength in my hands to pull the hook enough) but no joy.
Piece of wire looped around the end and pull it down into position.
Yep.....did that, too. But the bottom lip of the shoe, which the wire was rubbing up against, was essentially pulling the hook away from the mounting hole. I tried pushing it in with a few different tools and that reduced stress on the spring and pulled it back upward.
I put the spring in first, and then put the adjuster into position. Easier to pry the shoes apart than to stretch the spring.
The hold-down springs deserve a nut-driver, easiest way to push the outer end of the spring in, then turn to get the hook seated in the depression behind the backing.
The adjuster and the cam actuator bits get removed, thoroughly cleaned and lubricated before installation.
A spot of grease on the backing plate where the shoes slide can help. Just takes a tiny bit.
The adjusters sometimes need to be "relaxed" (shortened) to allow the disk to come off, particularly if they've been dragging and have worn the drum to leave a "lip" on the edge.
Adjust the shoes after the disk is installed. Tighten until snug, then relax by about four teeth on the adjuster.
You can also use a screwdriver, place one end of the spring in its hole, then hook the spring on the screwdriver's shaft and place the end o the screwdriver in the hole where you want the spring to end up.
Lever the screwdriver and the spring slides down the shaft into the hole
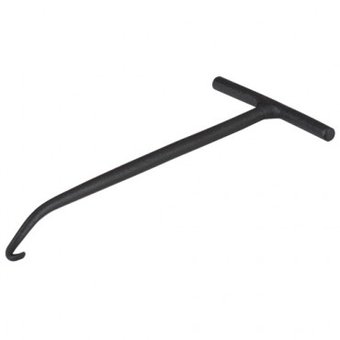
The parking brake access is somewhat limited by that annoying drive hub. To assemble the rear parking brake, the bottom shoe is installed with its hold-down spring. The actuator cam is then assembled to the cable end, and set in place at the front of the bottom shoe. The spring around the cam actuator is connected to the bottom shoe, then the top shoe, then the top shoe is engaged with the cam actuator, trailing end of the top shoe drooping. The adjuster springs gets connected to the bottom shoe, then the top shoe. The rear of the top shoe gets pulled/pried up to allow the adjuster to go in. A roll-head bar is great for this. Once the adjuster is in place, the retaining spring for the top shoe gets installed.
After doing this assembly work as part of multiple rear wheel bearing clinics, a reminder that it's WAY EASIER to put all this stuff together before the drive hub is fitted.
Well after doing this a few times I must say the diagram your looking at is not correct,
the springs are actually reversed.
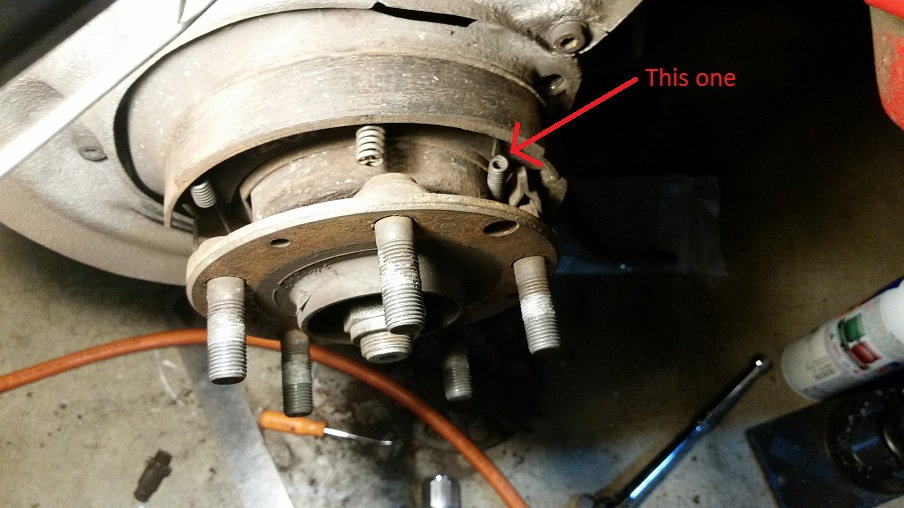
Please NOTE the spring with the single strand must go between the E brake fulcrum.
I suggest to google porsche 928 emergency brake then scroll for pictures.
NOTE the fat spring is used to hold the star in position once its set .
NOTE it is easier to adjust the star one way and then it will jamb the other way,
the solution is to get a thin screw driver and put it between the body of the adjuster this will hold the spring off the star,
then another thin screwdriver is used to spin the star.
TO set E brake adjuster ,
spin the star till the hub locks,
then back off 3 clicks.
do both sides, then set the handle a few times,
then see that both hubs turn free ,
if not then remove another click or two till the hub spins free.
NOTE you dont usually have to adjust the cable by the handle its the shoes that need adjusting
NOTE the brakes should set in 2 to 3 clicks
Well after doing this a few times I must say the diagram you're looking at is not correct,
the springs are actually reversed.
Please NOTE the spring with the single strand must go between the E brake fulcrum.
I suggest to google porsche 928 emergency brake then scroll for pictures.
Thanks, Stan. The orientation of the springs is how it was when I removed everything, but I took the PET as Bible, and the fact that I was having a hard time moving the star due to the spring providing a block.
And, as always - you are right. I googled Porsche 928 emergency brake, and sure enough - the pics all showed the springs reversed from the PET. And what you wrote about the spring holding the star in place to prevent it from loosening makes total sense.
So. Lesson learned. I guess I can rely on the PET for most things, but should validate just to be sure.
Maybe an anti-?
Thanks again. Replacement spring is on the way, so will hopefully have a functioning unit soon.
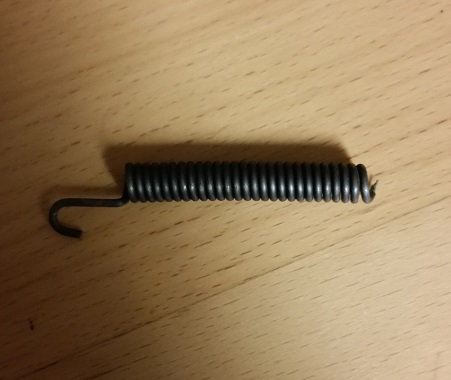
Got my replacement spring in over the weekend. Reversed them back to the orientation Stan suggested, and for the reason he suggested, and it went on a heck of a lot easier. No breakage this time.
Looks like the holes are spaced a bit differently, with the ones on the single strand side being further apart. This is probably what lead to the original breaking, as I was stretching it beyond what it was supposed to.
But alas, no functioning unit yet. Went to adjust the DS side only to find that there was no surface left on the shoe and everything inside was rusted. So new parts on the way for that. At least now I know how it will need to be assembled. Another lesson learned for personal future benefit.
one other thing,
make sure to set the Shoe hold down hook springs so they grab the ridge on the back side of the hub carrier,
you need a light and a mirror to see this happen ,
If not positioned correctly The hook spring can pop back into the E brake and strange noises will follow


 04-07-2016, 01:08 PM


 ?
?