When you click on links to various merchants on this site and make a purchase, this can result in this site earning a commission. Affiliate programs and affiliations include, but are not limited to, the eBay Partner Network.
Built a Track/Street Outlaw 996 just for fun: build thread
A couple years back the shop that runs my racing team down in Florida started a fun project for me, building an "outlaw" 996 track/street car to have some fun with. It wasn't built to a rule book like my other racing cars, it was just done the way I wanted it, which was as bad a*s as possible without breaking the bank. They had a customer with a 2003 Porsche 996 C2 that had started building it into a track car, and then abandoned it. I took it over and we're just about done with everything we planned to do. I registered it for the street before the summer hit down here in Miami and drive it around town on occasion, and I've also taken it to the track a couple times on HPDE days I was instructing rather than the wheel to wheel racing or rallying I usually do.
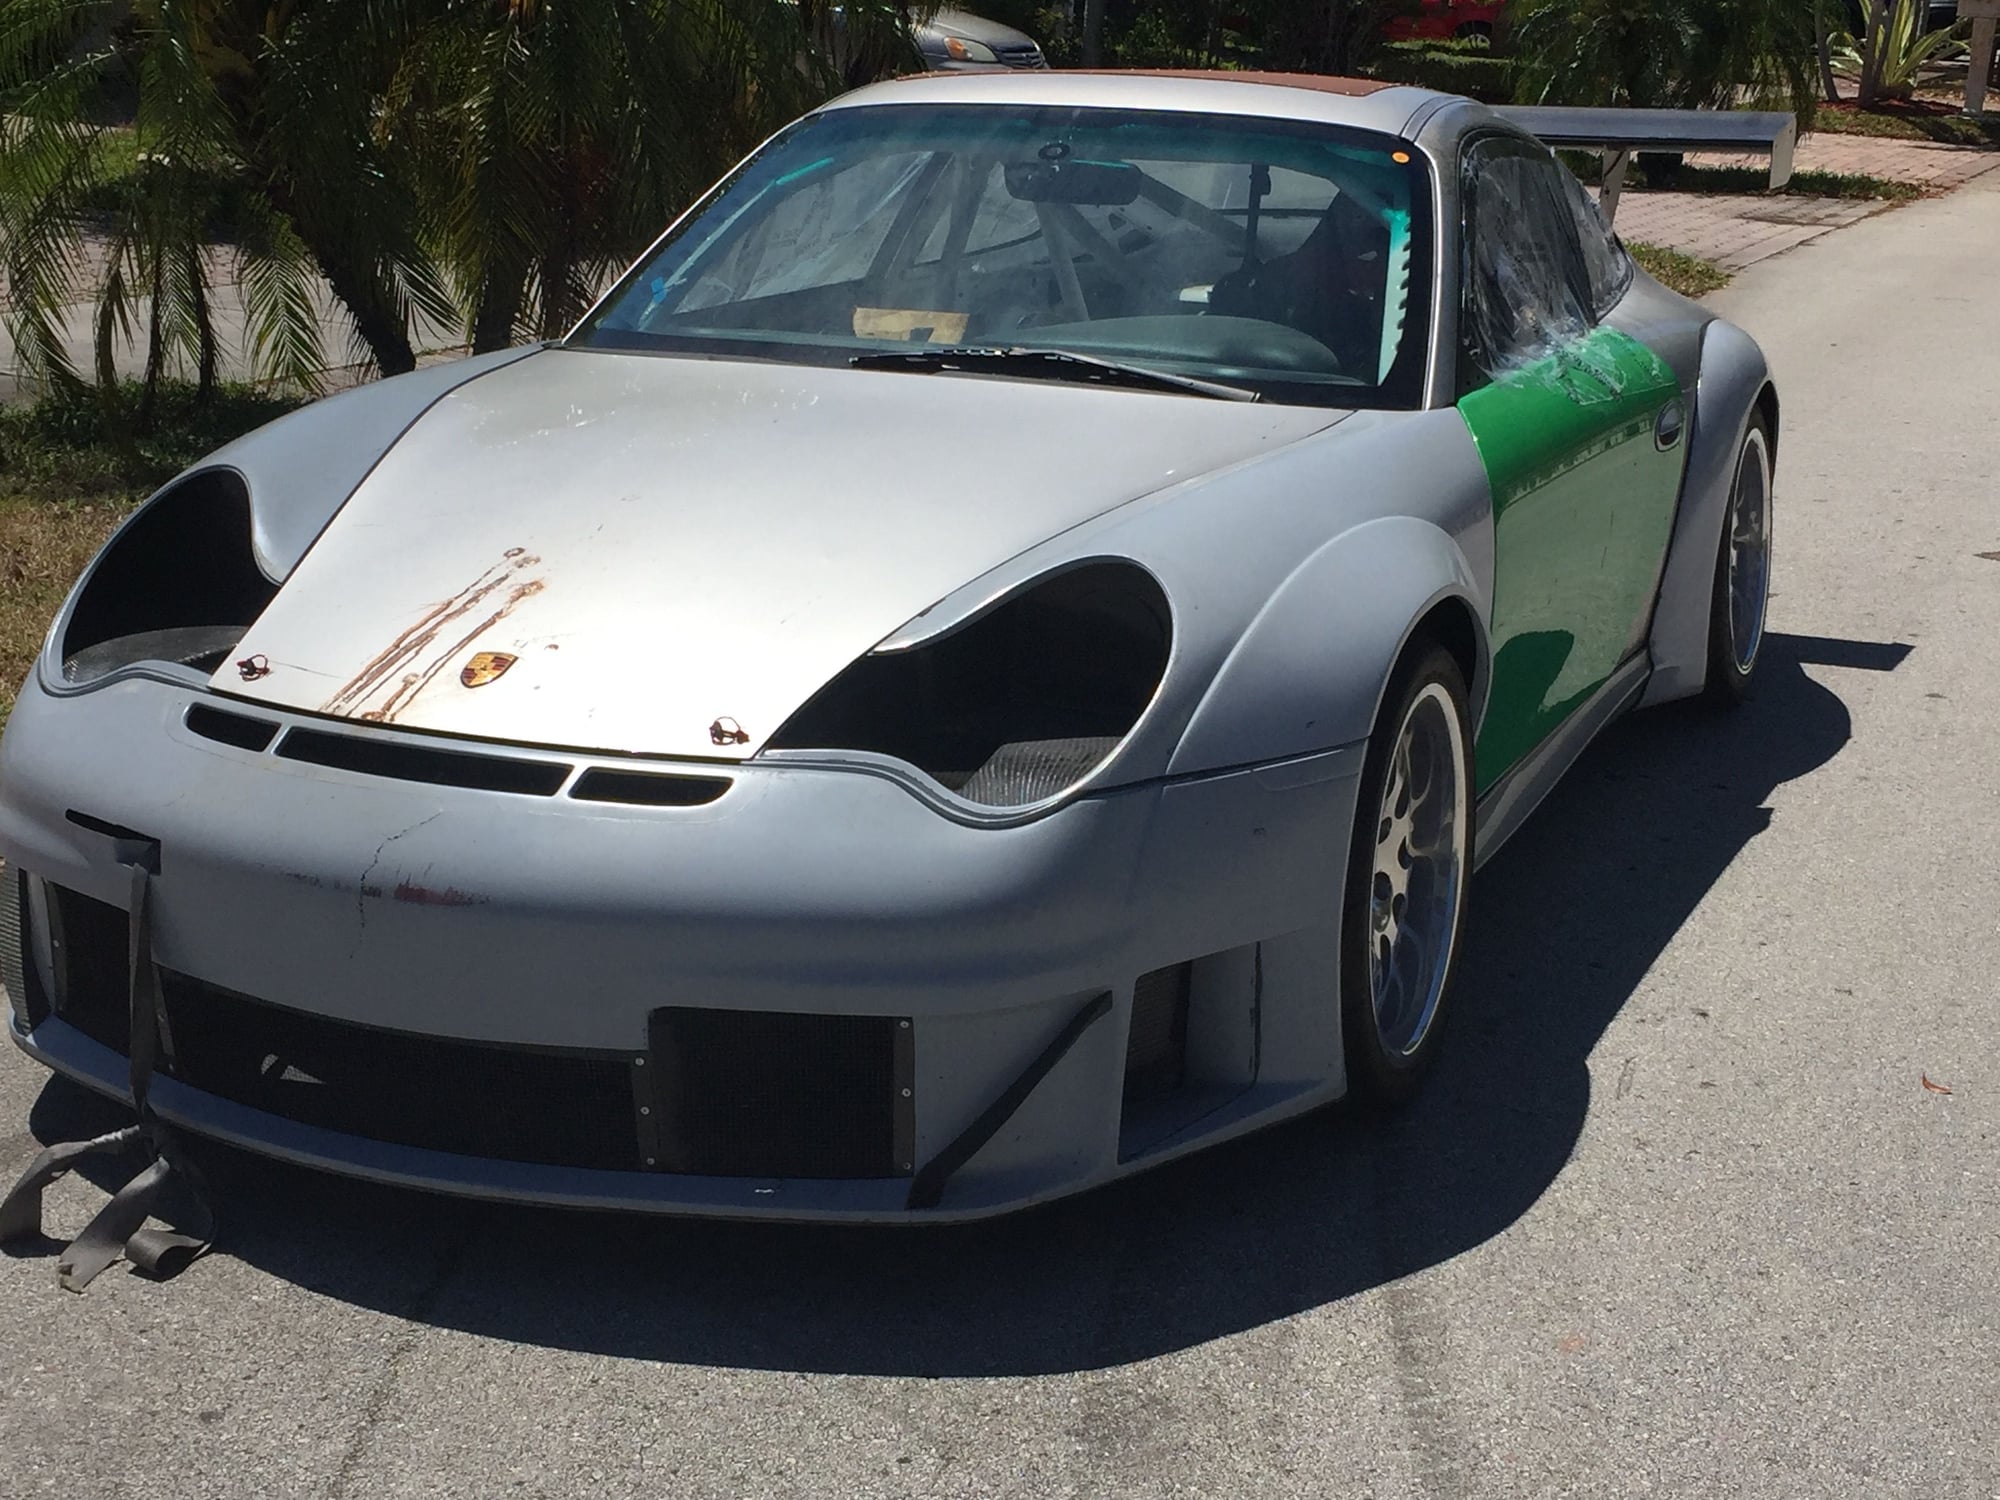
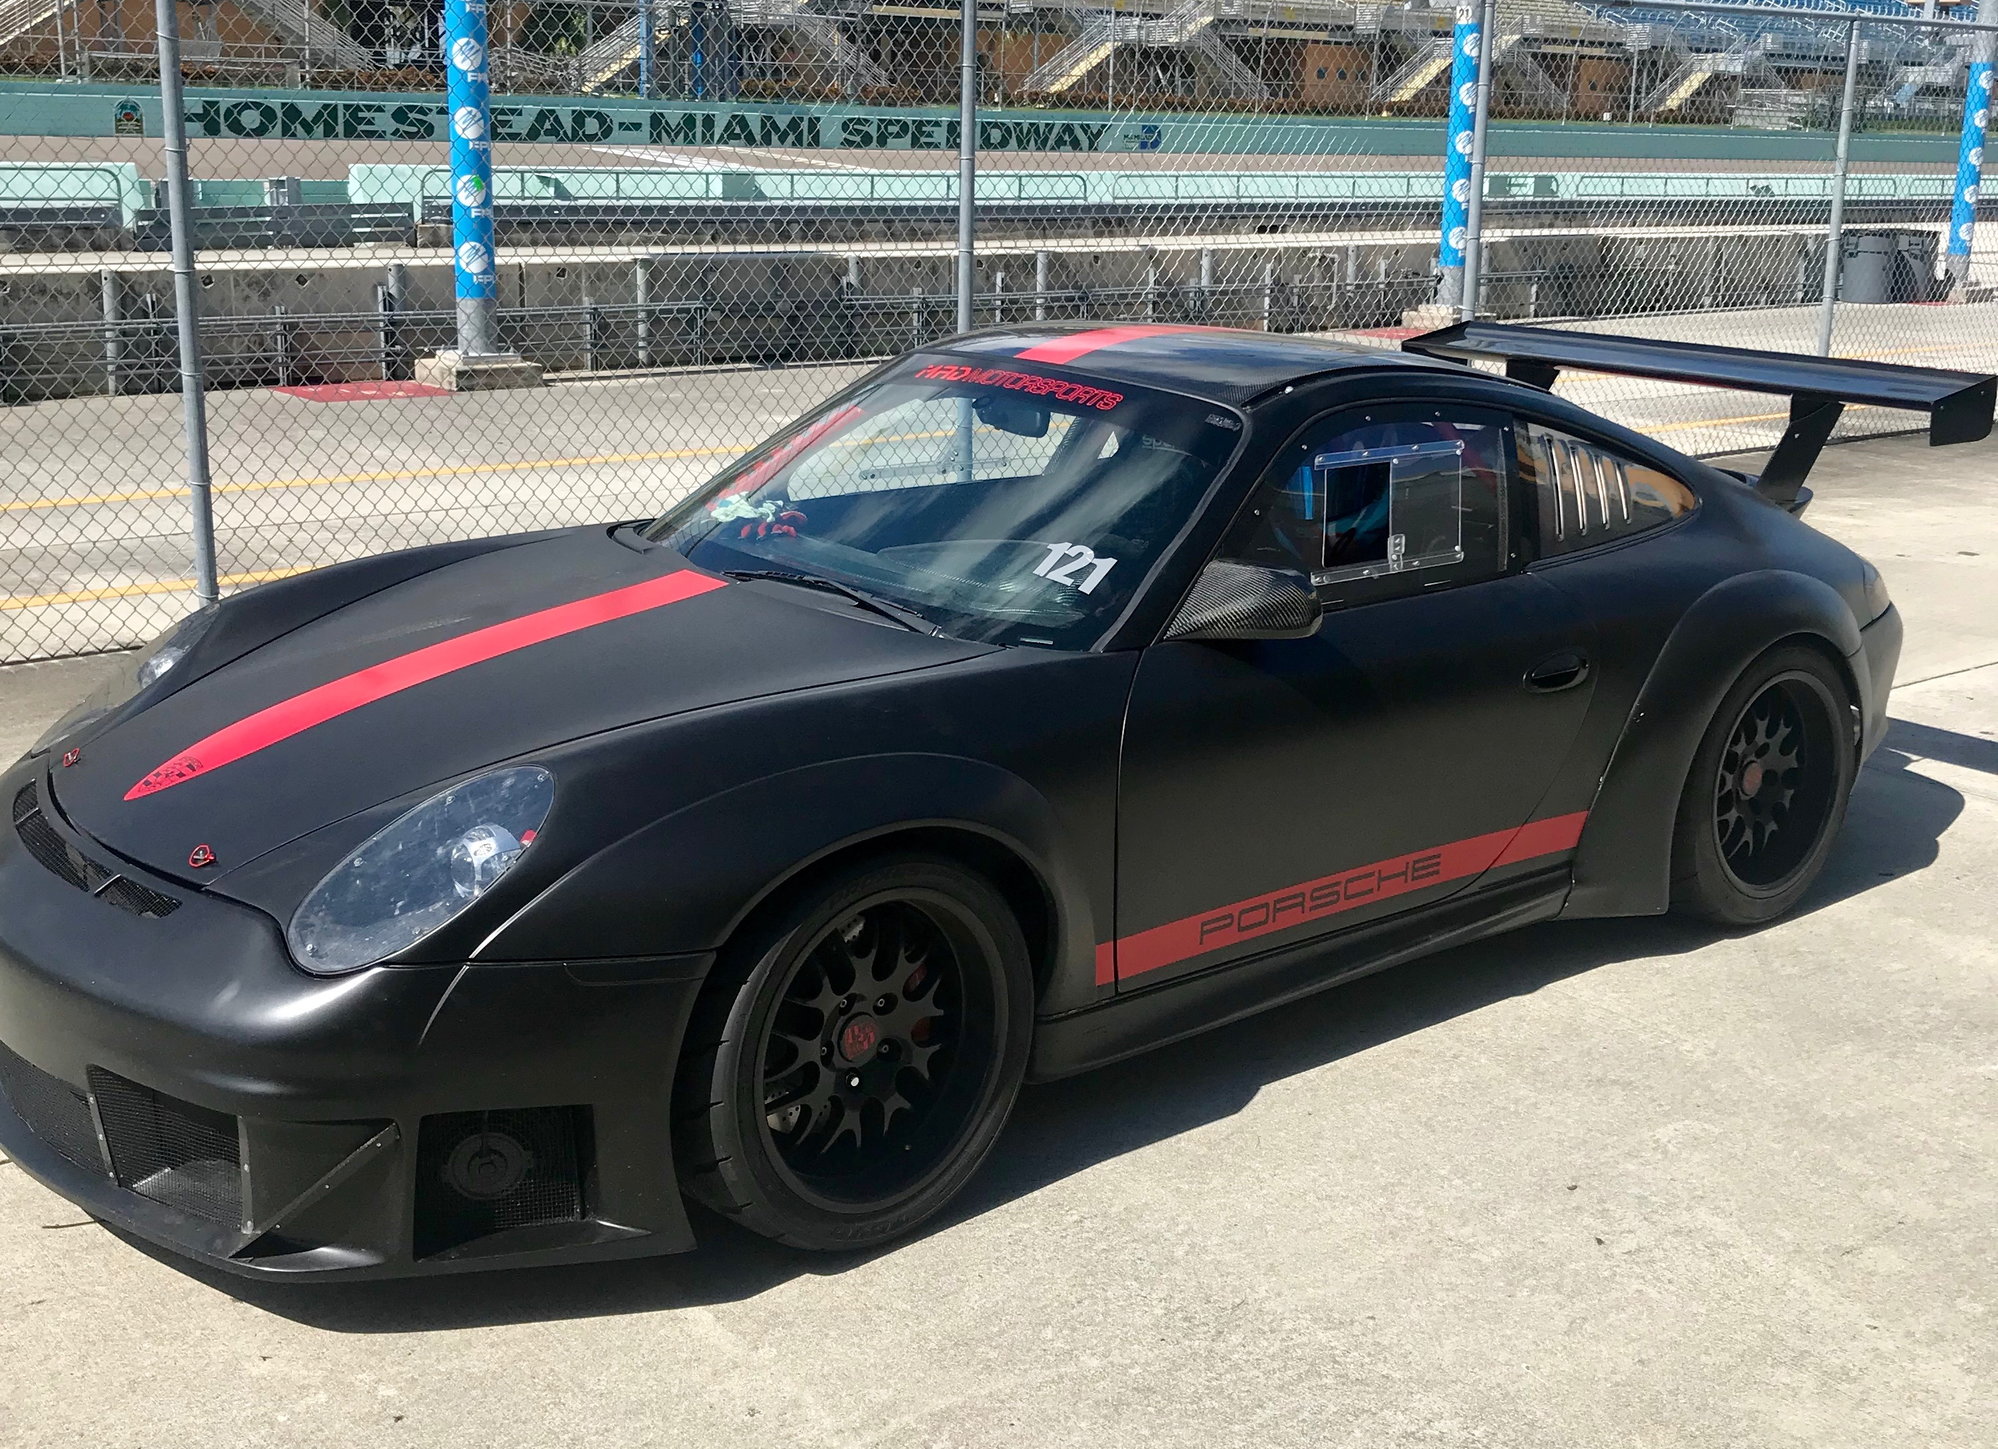
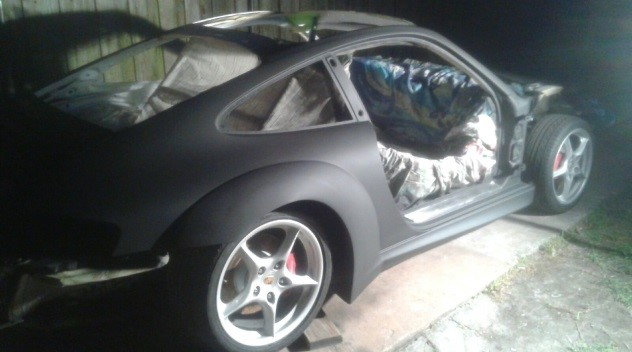
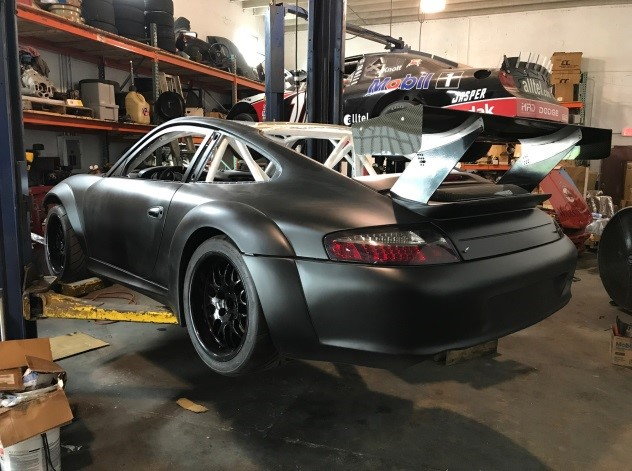
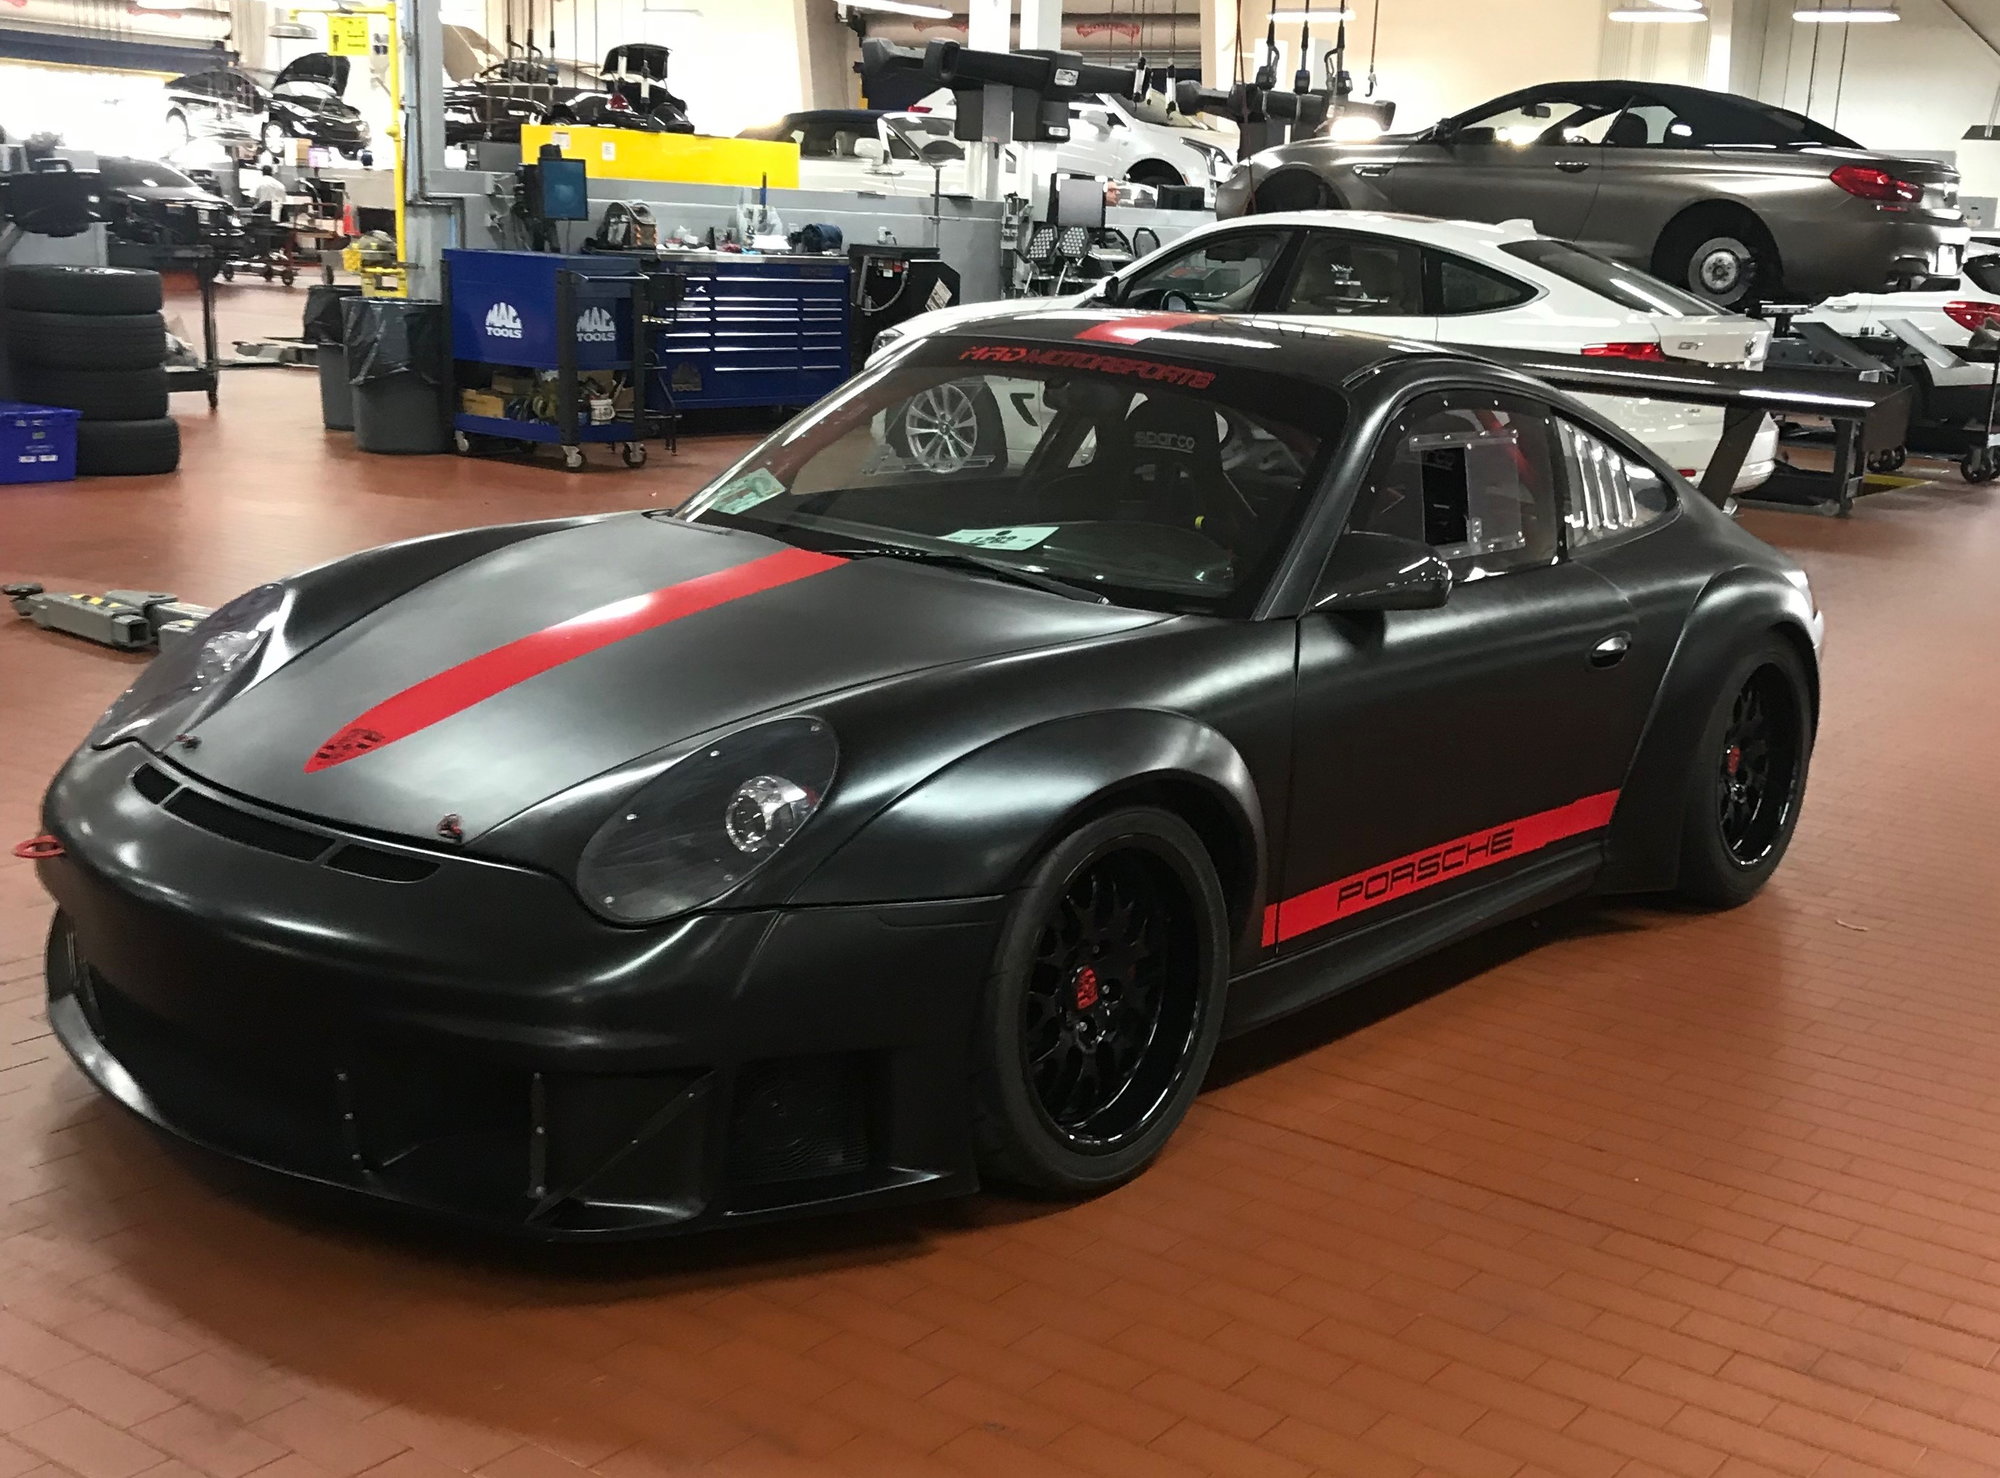
What I'll post below is the build story of the car that my shop was putting in their quarterly newsletter as the build went along. Again this was a fun project with no deadline, budget, or rule book to meet. It was all about the $/smile ratio! More pics are on my IG @scottknottracing but here's a before and after pic: Project Outlaw 996 Before Project Outlaw 996 After
(Copied from the newsletter): Race car builds are a fun part of what we do at MAD Motorsports. Sometimes we start from scratch on a car without any changes from the way it came from the factory, but often we are improving upon an already modified car. Roll cages usually need reinforcement, suspensions have to be dialed in, or simple reliability on track has to be addressed. All of those things are the case with the Porsche 911 we�re currently working on. It was someone�s long neglected track car that needed to be finished, so here we go on the final push. Before we make a car go faster though, we have to make sure it can survive the brutal environment of a racetrack for extended periods of time without breaking something.
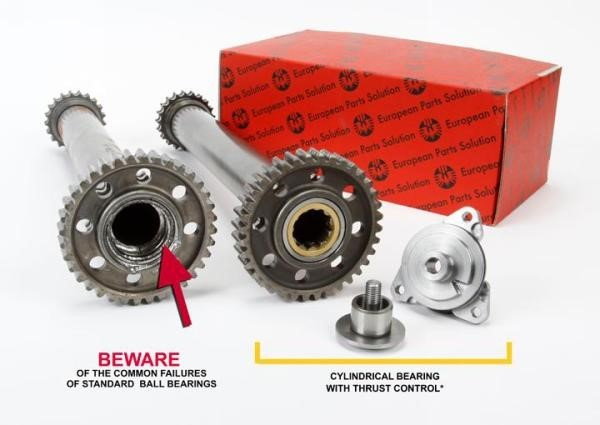
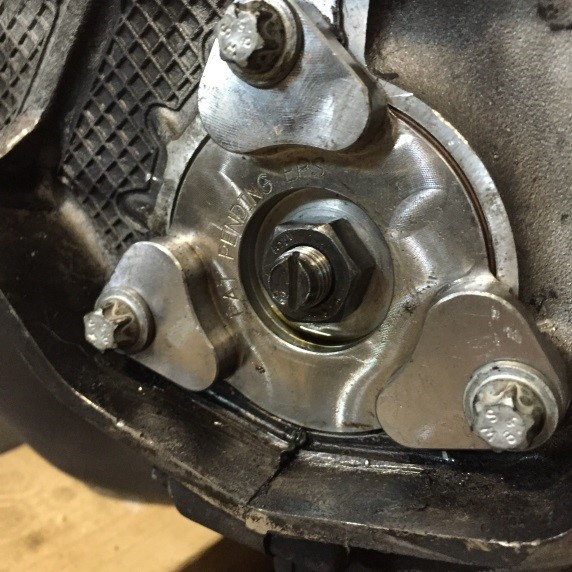
Step 1: Reliability - Ask anyone about the Porsche 911/996 model (built from 1999-2005) what they think of the cars from those years and the first thing they say is how they hate the look of the headlights, but more on our solution for that later in our build. Then they say that these first generation of water-cooled 911�s had great improvements in drivability and dynamics but they also had some weaknesses. Specifically some engine weaknesses exist in the M96 motors that can lead to terminal engine failures (ouch!) and that has hammered the resale values of these cars. The good news is that these weaknesses have been solved by the aftermarket and you can take advantage of the soft retail market by picking up a 911 cheap and then eliminating those weaknesses for less than a thousand bucks in parts. Specifically, the Intermediate Shaft (�IMS�) bearing on these motors can fail without warning, at which point the motor is toast. Our friends at Champion Porsche hooked us up with a Vertex IMS replacement that greatly improves the bearing design.
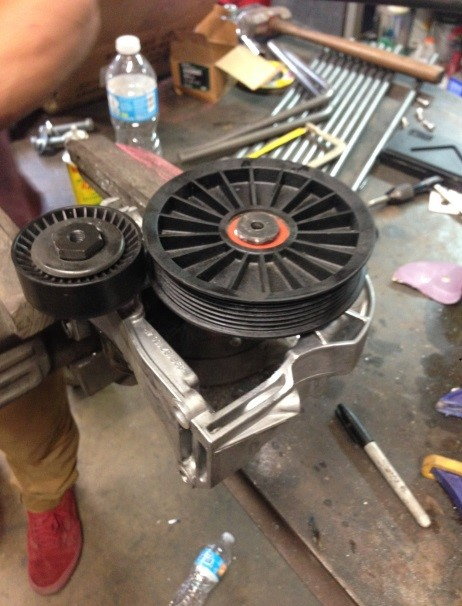
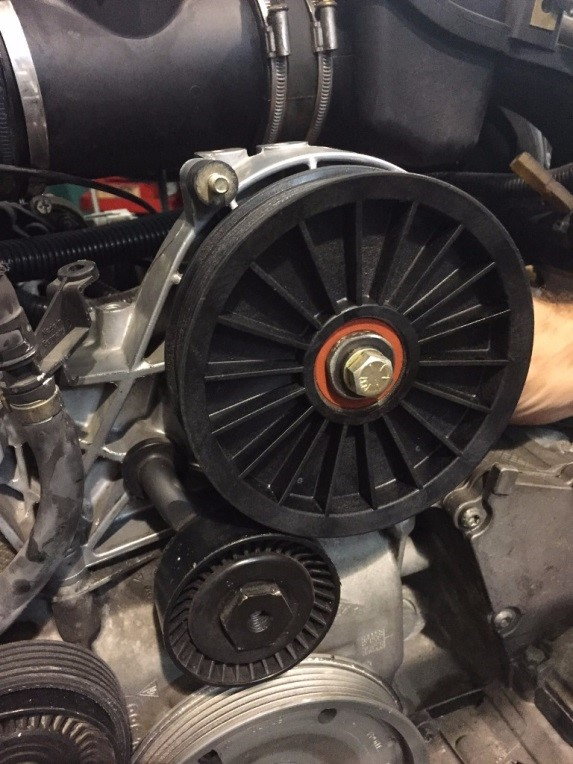
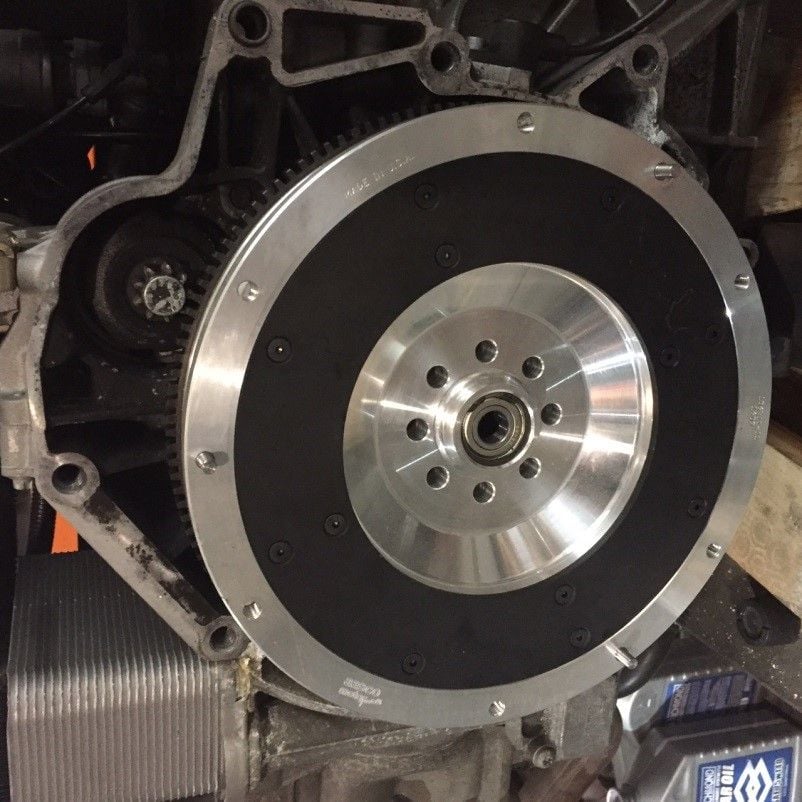
We did this modification with the engine out of the car but it can be done with the motor still in place. While our 3.6 liter engine was out we�re also doing all new solid mounts, a single-mass lightweight flywheel, and deleting the stock power steering to really help the motor rev and to free up some horsepower. We�ve sourced an electric power steering pump from a Porsche Cup racecar but that required building a custom power steering delete kit with an idler pulley. The new electric pump will go up to the front of the car in the �frunk� for better weight distribution.
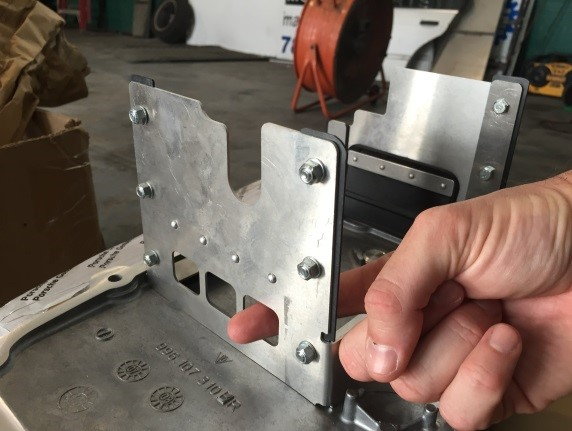
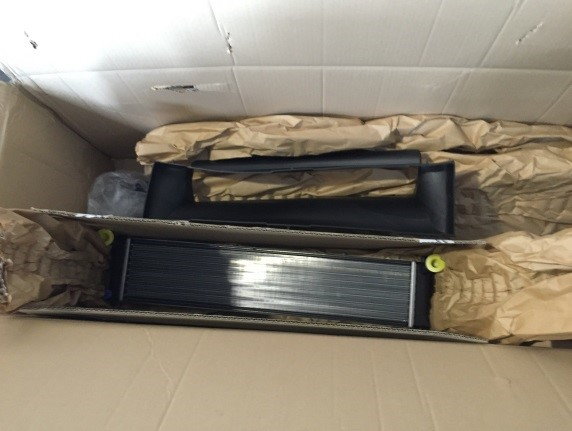
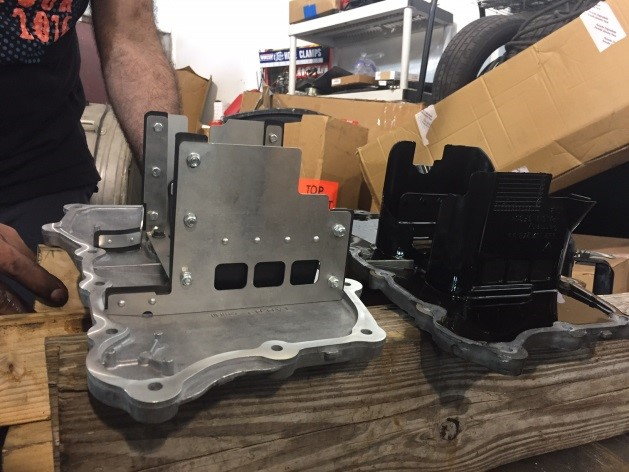
Finally in terms of on track reliability we made sure that other common issues with these Porsche 996�s were addressed: heat and oiling. Porsche has a factory �X51 power kit� for M96 engined models that has parts for those two issues, and we got both from Porsche for this car. First there is a baffled oil pan to help prevent oil starvation in turns. It�s also a good idea to have a fresh or Porsche Motorsports �Air/Oil Separator� (basically a catch can) for a track driven Porsche but our car has a new one so we didn�t touch that. On the water cooling side we are adding the additional X51 center radiator in the nose of the car, further improving the car�s cooling capacity and efficiency.
Next up we�ll show you the trick suspension and braking modifications that are going into this Porsche. This is not an unlimited dollar build, but the car will have everything it needs to go fast.
Part 2 - Suspension & Brakes, Plus More Weight Reduction
(Copied from the newsletter): Part 1 was all about reliability on track, in particular replacing the poorly designed Intermediate Shaft Bearing on the M96 3.6 liter flat 6 motor, with an improved aftermarket part. In addition, we replaced the stock engine belt driven power steering pump with an electric pump from a Porsche GT3 Cup race car. The stock power steering pump has a tendency to burn out at sustained high rpms you see on track, but just as important we also wanted to take that load off the motor (freeing up about 5 horsepower) and remove the weight of the pump from the back of the car. The electric pump is not only lighter but it mounts up front in the "frunk" for better weight distribution. Finally we also added an oil pan baffle from Porsche's X51 power kit as well as its center mounted 3rd radiator for keeping lubrication and cooling in check on track. Now that those reliability items were addressed, it was time to start on the go-fast modifications on Project 996.
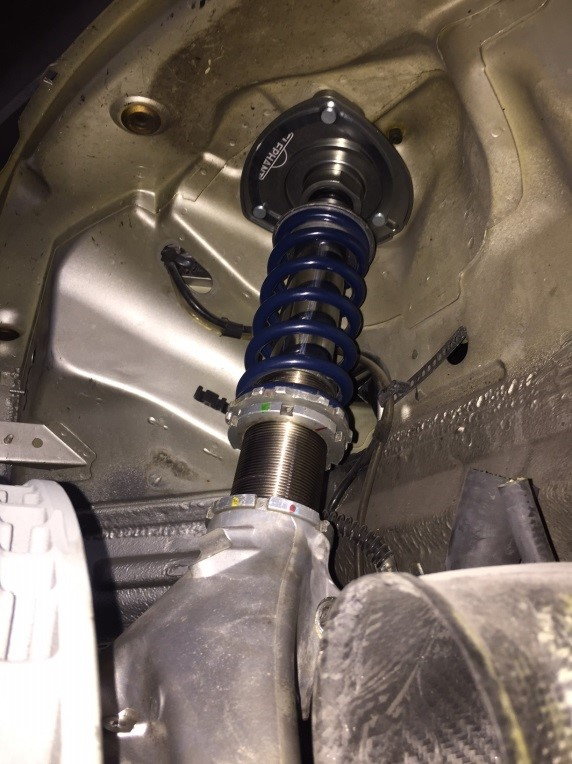
Suspension - Like we said before Project 996 was already partly underway when we took it over, so we had some items to start with but they needed to be tied together with additional parts and then installed. Most importantly, we had a sweet set of Koni race spec coilover shocks from a Grand Am series Porsche 996. These were sent back to Koni for rebuild and the bodies were modified to fit on Porsche 997 spindles. Why 997 spindles? More on that when we talk about the brakes.
The racing shocks were mounted up top to Elephant Racing camber plates, which had to be custom machined to accept the thicker shafts of these heavy duty Koni shocks designed for endurance racing. The shocks sit on a set of trick Elephant Racing fully adjustable control arms the car came with. A combination of all these parts allows for full camber, caster, and toe range of adjustment even when the car is lowered for the track and sitting on ridiculously wide wheels. In addition, the worn rubber bushings were replaced with solid ends taking the play out of the suspension. Between all that, the solid motor mounts, and the stiff Hyperco springs this thing is going to feel like it's on rails.
To keep Project 996 flat in the corners we chose a set of Porsche GT3 front and rear adjustable sway bars. These were mounted to a set of Elephant Racing adjustable drop links. Chuck at Elephant Racing was super helpful in getting our suspension package completely together, and we look forward to getting Project Porsche 996 on track to set it all up and dial it in.
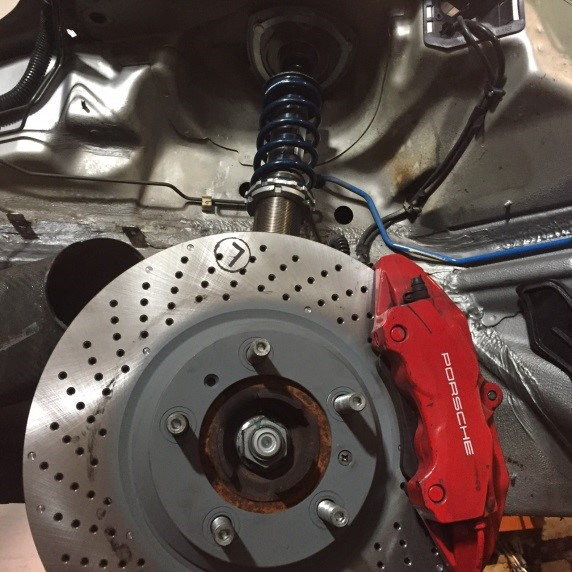
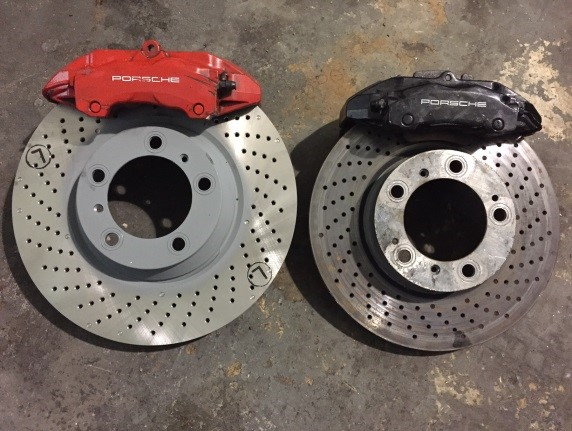
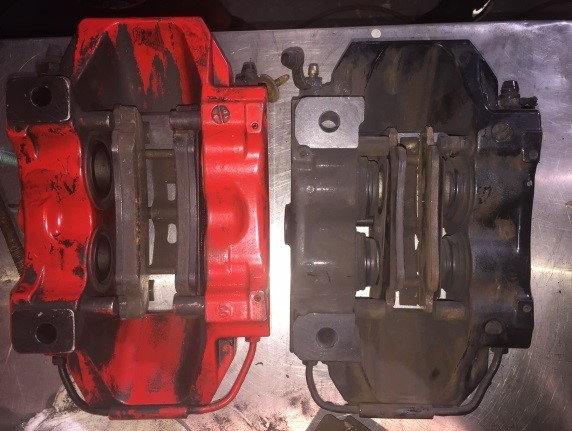
Brakes - Before this massive makeover Project 996 started off life as a C2 model, meaning the brakes were more suited for the street than the track. Even though a lot of weight has been removed from this car it's safe to assume that the stock brakes were not going to cut it. The prior owner realized this and sourced some Porsche 996 Turbo calipers front and rear, but never got all the parts needed to make them actually work. It turned out to be a little tricky to do because the front needed all new Porsche 997S spindles and related hardware to accommodate the bigger calipers, but we think our unique finished product turned out pretty good and it was much less expensive than spending thousands of dollars on an aftermarket big brake kit.
The main difference between the 996 Turbo calipers and the C2 calipers is the size of the pistons and the size of the rotor they accommodate. The pistons are at least double the size of the original ones, providing good clamping force and resistance to heat soak. Our original rotors were 318mm by 28mm front / 299mm by 24mm rear. Now we are using 350mm by 34mm front / 330mm by 28mm rear rotors, representing a huge increase in cooling capacity and mass. These are actually factory Porsche 997 Turbo front and 996 Turbo rear rotors, so they were a really good value at about a hundred bucks a corner. The oversized front 350mm rotors were made possible with the use of Agency Power caliper adapter brackets.
Weight Reduction - Getting power gains out of a M96 Porsche motor is tough and expensive. We're taking steps to free up the power that's already there by removing drag on the motor through the power steering pump and through the lightweight flywheel discussed in part 1, but the main thing we have done to this car to make it faster is to make it lighter. The power to weight ratio of this car from the factory was 9.39 lbs to 1 hp (2,959 lbs/315 hp), compared to the GT3 model for that year which was 8.00 to 1 (3,043 lbs/380 hp). We're shooting for 7.5 lbs per horsepower which we'll get to primarily by dropping 400+ pounds from our car. We'll also be boosting the power a bit, but we'll discuss how we'll accomplish that next time.
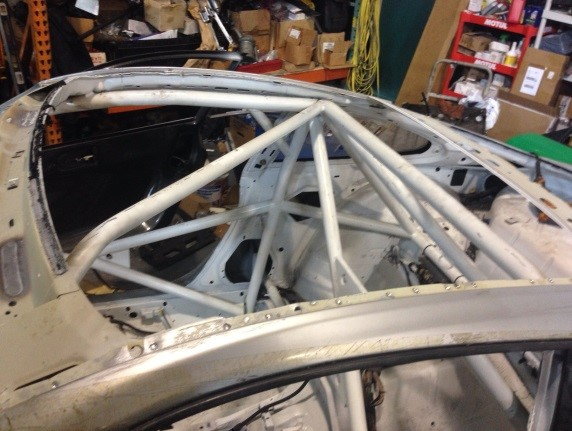
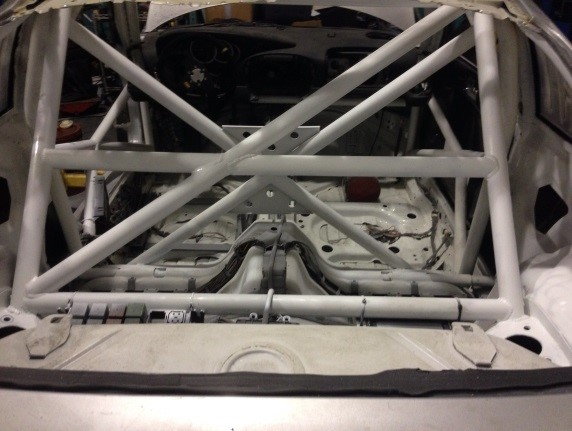
How do you drop 400+ pounds from an already light Porsche 996 C2 model? Porsche themselves do this with the GT3 Cup race car by only adding what they need to go fast. When starting with a street car, the first step is to take off everything you don't need to accomplish that goal. The previous owner had already done most of that: interior, power accessories, radio, etc. all were already removed. A GT3 Cup style roll cage then added a little weight back, but it's necessary for a track car and it even adds a little stiffness to the chassis if it's properly gusseted. Then the body and doors were replaced with carbon fiber pieces that were patterned after the Porsche GT3 RSR. That's where we picked it up and finished shedding off the last few pounds.
Due to simple physics one of the worst place to have weight in a car is up high in the roof, so we are mounting stuff like batteries and our electric power steering down low on the floor of the car, and removing weight from up top. Our Porsche was a coupe model with a sunroof, so we set out to eliminate that to lighten it up. We got a great deal on a carbon fiber roof from Getty Design, which meant it was time to get out the cutting wheels and drill out the spot welds holding the old roof down. The new roof weighs only about five pounds and we had it clear coated along with the side mirrors and rear wing so it will give the car a little bit of "carbon bling look." While we were at it we also bit the bullet and got a carbon fiber hood, completing the all carbon fiber body diet program. GT-Racing hooked us up with that and also Lexan polycarbonate light weight windows to replace all the heavy glass except for the windscreen. We have some trick carbon fiber interior bits on hand too plus the new headlights but we'll be putting those in after the car gets painted, which is happening right now.
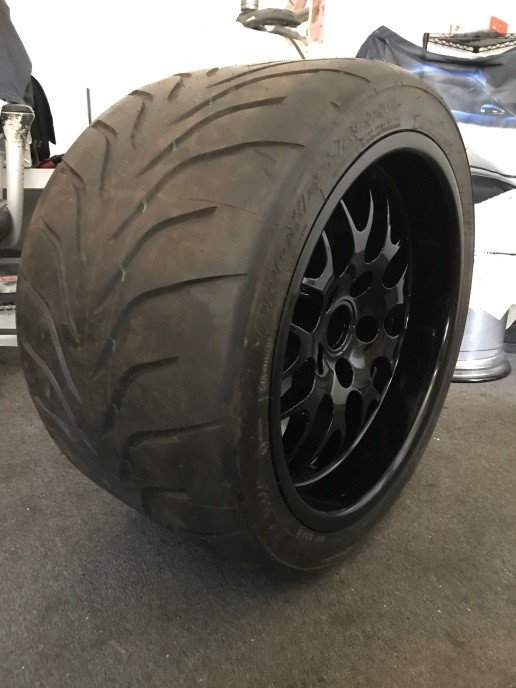
(Copied from the newsletter): Going into the New Year Project 996 was finally a roller again, which meant we could easily move it around, so we started by moving it� to the body shop. Recall that in Part 2 we got the new Elephant Racing & Koni suspension bits put together so that we could hang the wheels on the car. We still have to dial the suspension in, set the ride height, and align the car but the goal for now the goal was just to get it assembled so we could move it off the lift. While at it we got the new (and used but never assembled) upsized brake rotors and calipers together with our new Porsche 997 spindles, but again we�ll have to adjust all that before turning a wheel in anger. Putting the brake lines back on and bleeding them will be necessary as well. Finally, Part 2 saw us finish adding the remaining lightweight carbon fiber body panels to the exterior so that we could get the car painted. The new carbon fiber hood was the last piece of the puzzle.After the holidays we got started on transforming the look of our Project Porsche 996. First we dismounted the tires from our CCW Classic two piece forged aluminum racing wheels. These rims had been custom ordered by the previous owner to fit properly with the widebody kit but they were left in their original polished state � to better match the look we were going for we had them powder coated glossy black by our friends at Bullseye Coating & Blasting. The 18 inch diameter wheels are insanely wide, 11 inches in the front and 14 inches in the rear. When the rear wheels are mounted with the 335 mm wide Toyo R888 tires they look like steamrollers.
Once the car itself was off to the bodyshop the first thing that was tackled was the modifications to the carbon fiber Porsche RSR style front and rear bumpers needed to pass tow hooks through them. That was easier said than done, but we got there and the result is a very clean look. We admit that racing tow hooks look kind of �ricer� on street cars but since this Porsche is meant to also be used on the track we had to have them, so we incorporated them into the plan early on. The rear uses a retractable Brey Krause Porsche GT3 Cup tow hook and the front uses a Rennline universal tow hook that we modified to fit our Porsche RSR style bumper. In addition to motor mounts we ended up getting a bunch of interior bits from the folks at Rennline but we�ll describe those when we install them.
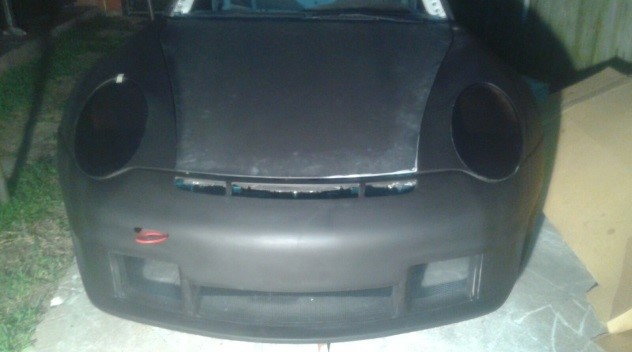
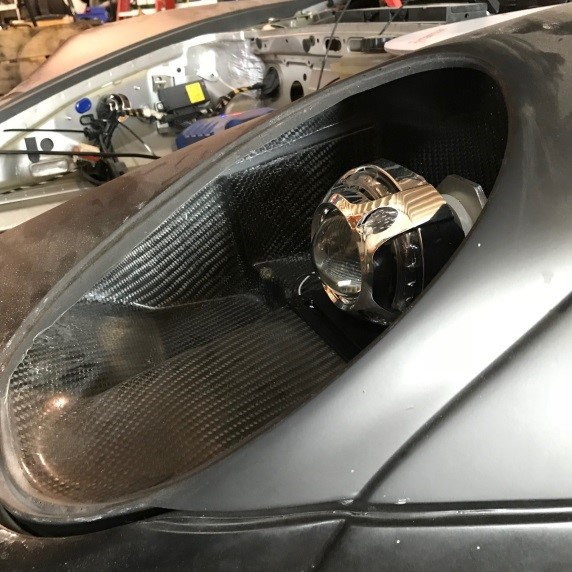
Also on the punch list were the modifications to the carbon fiber rear engine cover to properly fit the huge GT3 wing (made from carbon fiber, except for the aluminum uprights that were powder coated to match the wheels), and most importantly the modifications to the front carbon fiber front fenders. We�ll cover the front fender part of the project in a later part of the newsletter but in a nutshell these will be one of the coolest parts of this project � they have been modified to change from the original �fried egg� looking Porsche 996 headlights to a much more modern oval shaped custom LED setup similar to the current Porsche 991. We think it will transform the look of the car when it�s done. Once the modifications to the body were completed they had to generally clean up the new panels by sanding them and eliminating any imperfections, fitment issues, etc. before the car was hit with a flat black coat of primer. Here�s the work in progress pics, which we hope you will agree is killer:
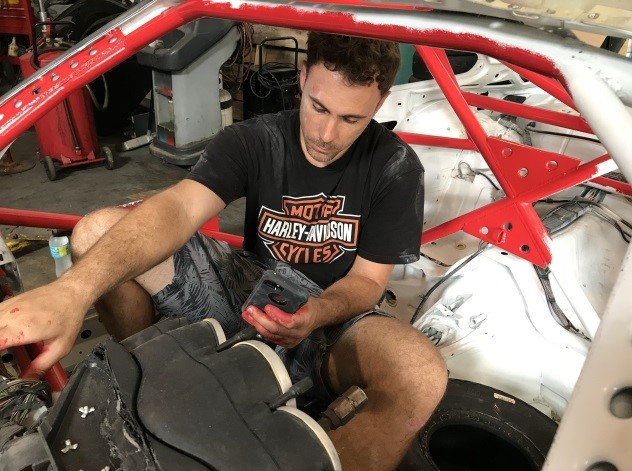
Shortly the satin black paint we chose will be applied. Finally, a special non-gloss clearcoat will finish off the �murdered out� look. Once the car returns from the bodyshop we can turn to getting the improved 3.6 liter Porsche M96 engine running again. We�re giddy thinking about how the full light weight stainless steel M&M race exhaust we got from FVD Brombacher is going to sound on this thing, which should be covered in Part 4. Once any issues related to the restarting of the engine have been identified and solved we can move on to installing the new �interior� we sourced and then attaching the new carbon fiber roof and the glass/Lexan. By �interior� of course we mean the Sparco race seats, attaching the harnesses to the roll cage, installing the new full carbon fiber dash, and attaching the door handles. You know, the luxury stuff.
Part 4 � Bodywork Completed, Close to Firing It Up
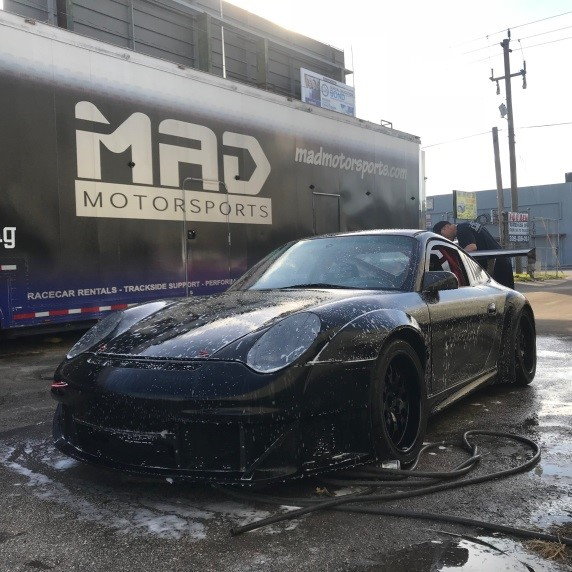
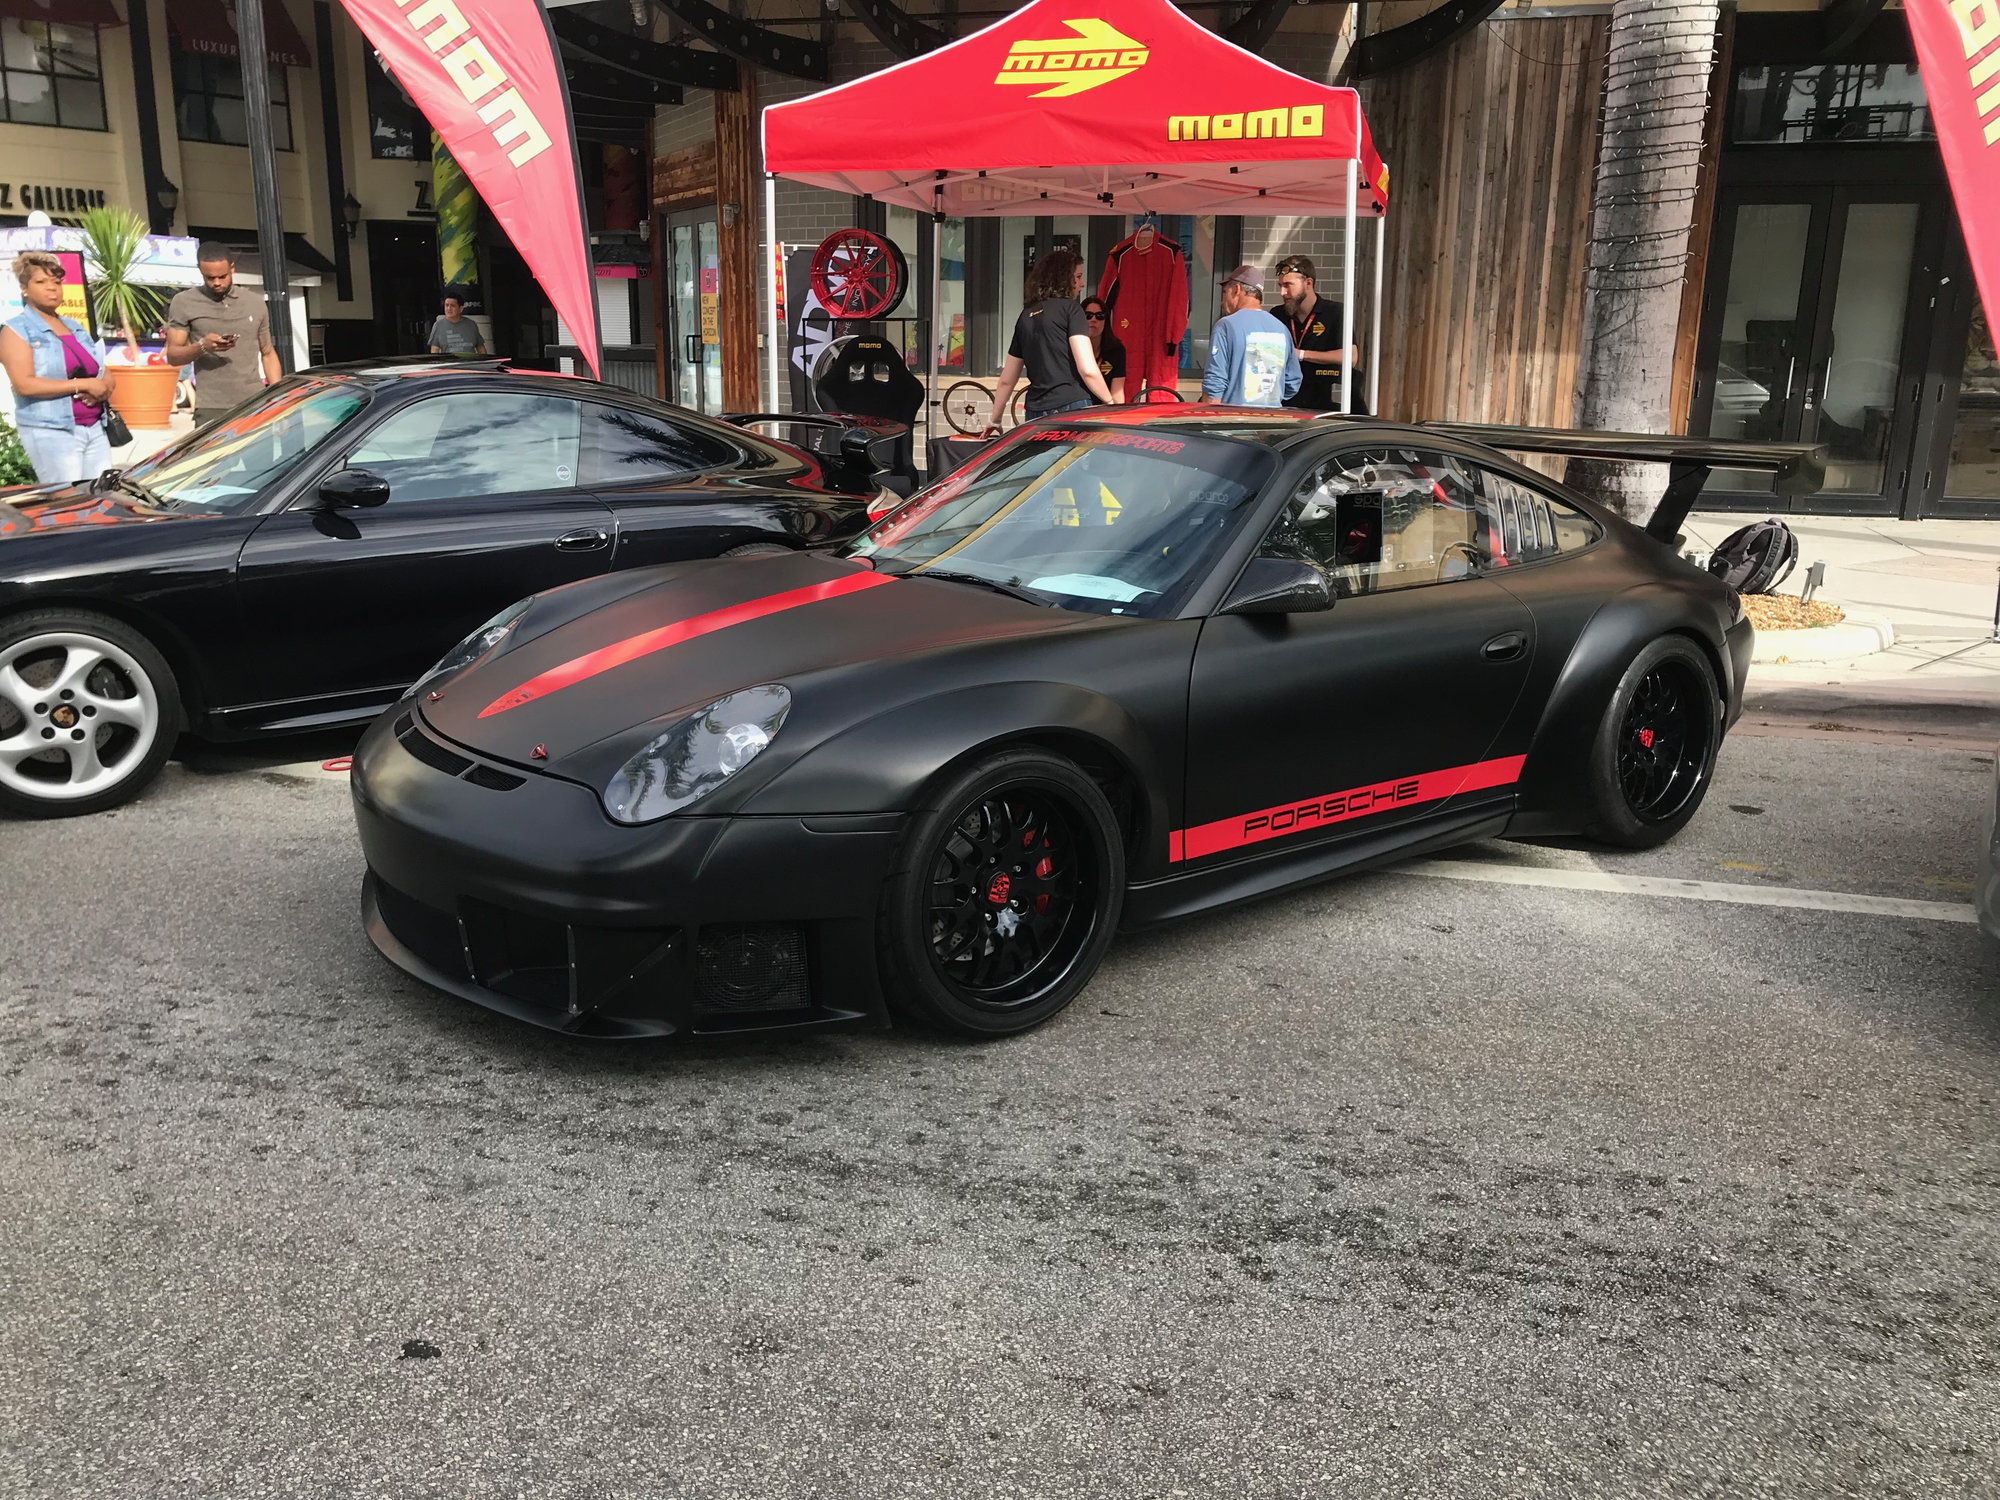
Our Porsche 996 project came back from the bodyshop earlier this spring, sporting satin black paint with a special non-gloss clearcoat to give it the �murdered out� look. It looks insane with the gloss black wheels to say the least.
Once the car was in the shop we started on our list of items to get the car restarted. It was running well before it was disassembled for this project, so it�s just a matter of reconnecting everything instead of trying to diagnose and fix old problems. Of course as discussed in Part 1 we did make some changes to the engine internals such as the new IMS bearing and lightweight flywheel, and the removal of the power steering pump and pulley, but that�s not expected to create any headaches for the restart. However, we still had a lot to reconnect to get the improved 3.6 liter Porsche M96 engine ready to fire up again.
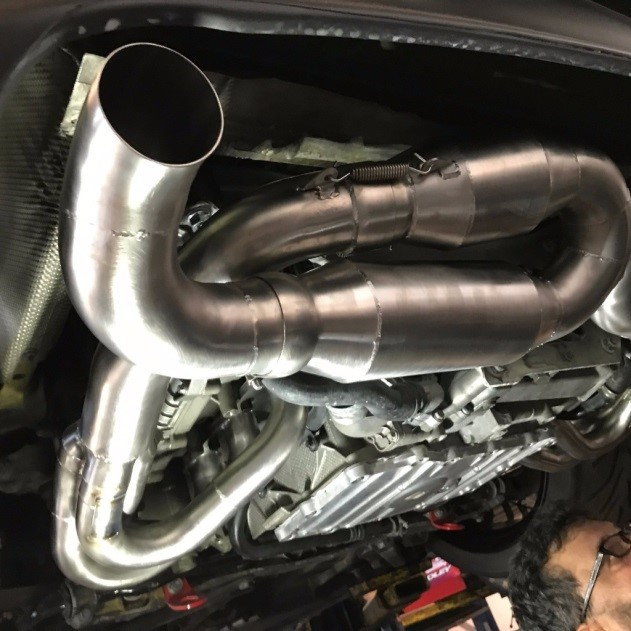
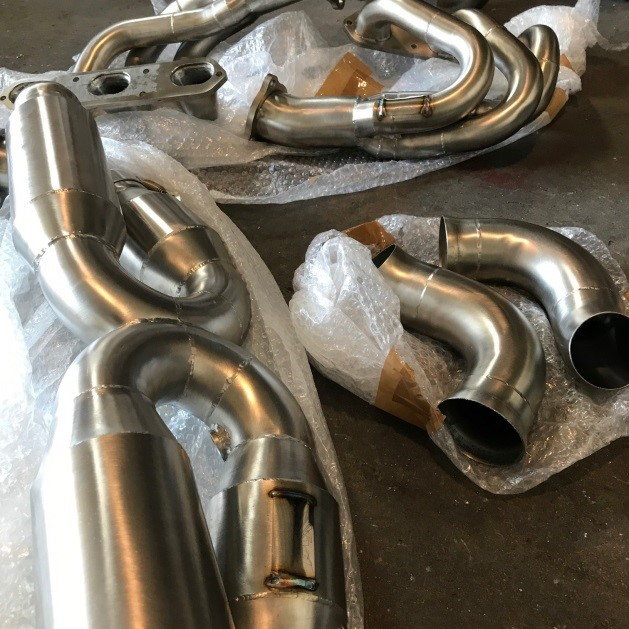
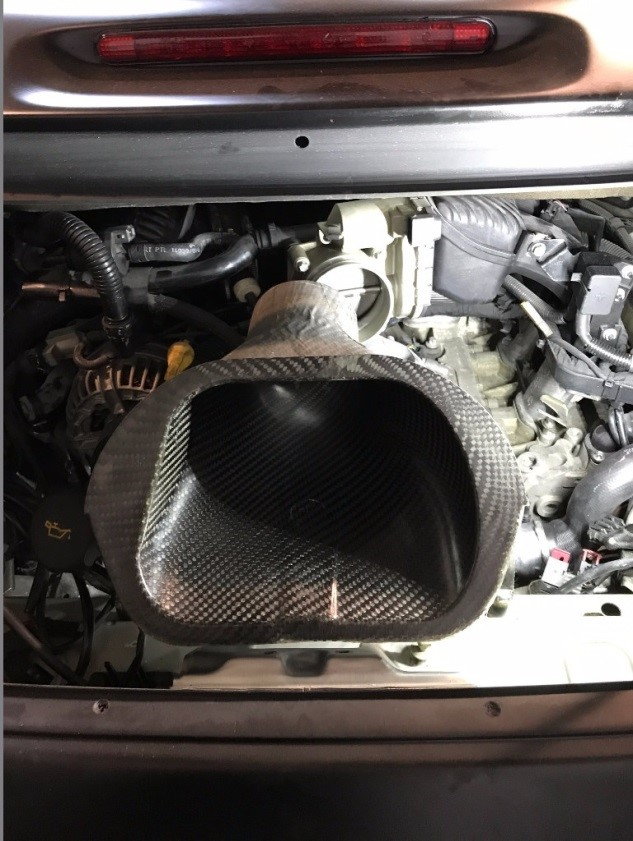
After mounting up all the electrical connectors, water lines, etc. we turned to installing the full light weight stainless steel M&M race exhaust we got from FVD Brombacher. It is a beautiful piece of metalwork to say the least � very high quality welds, collectors, bends, and so on. Then we started lining up the carbon fiber intake which is fed directly from the engine cover and realized we�ll have to do some major alterations to it to get it to line up with the M96�s angled throttle body. But for now we put that on hold and focused on completing the cooling system.
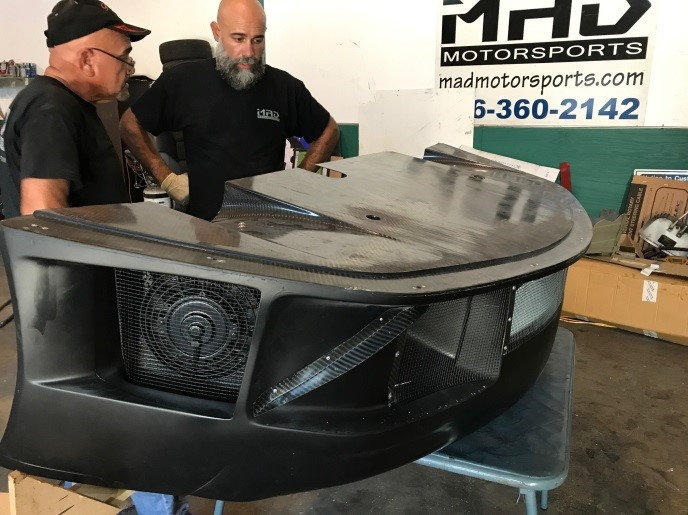
As discussed in Part 1 we added bits from Porsche's X51 power kit to keep lubrication and cooling in check on track. Here in Part 4 we turned to the center 3rd radiator portion of that kit, which looks like it improves the cooling capacity of the system by about 25%. However, the kit was designed to be installed in a stock Porsche 996, not a car with a carbon fiber RSR widebody. So we had to move the location of the radiator up and forward to match the center front airduct of the widebody kit�s front bumper. This also meant that the carbon fiber brake ducts that came with the RSR kit were not going to work, because they were in the way of the new radiator. Our solution was to source two new brake ducts and mount them � with new 3 inch hoses leading to the brake calipers � underneath the 3rd radiator in the direct airflow of the center airduct. It actually turns out very clean with the radiator on top and the brake ducts below, and the exhaust air from the radiator then can escape from the vent along the leading edge of the hood. It�s as if it was intended to be that way from Porsche Motorsports.
With the center radiator solution worked out we turned back to the question of what to do with the 2 side radiators. In a stock Porsche 996 they have fans and are located in the front of the bumper, but in the RSR widebody they are mounted on the sides with giant nose fed carbon fiber ducts leading to them� and there is absolutely no provision for fans. After all, the Porsche RSR was meant to be a track only racecar, and our Project 996 is meant to be a dual purpose street/track weapon. So what we did was source some high flow 9 inch Mishimoto puller fans mounted on the outside of the radiators to help move some air through them when moving slowly. Hopefully those fans and the added volume of the 3rd radiator do the trick and Project 996 will be as cool as a cat� or at least the water temperatures will be anyway.
Once any final issues related to the restarting of the engine have been identified and solved we can move on to installing the new �interior� we sourced and then attaching the new carbon fiber roof and reinstalling all the glass and Lexan. Concurrently we�re working on the new oval headlight fixtures and installing the electric Porsche Motorsports power steering pump. We�re hoping to do a test day this fall with the car at Homestead. It will be so great to see it running again after all this time.
Part 6 � Track testing, and the thrashing required before it.
(Copied from the newsletter): In Part 5 we tackled many issues relating to the cooling system so that we could FINALLY fire up the car, which was perhaps a hint of things to come this quarter. Once we buttoned up the intake and got the car started, we discovered that much remained to be done before our first track test scheduled for December 17th.
The first problem we discovered after we ran the car for a while was that the coolant was overflowing. Pressure was building in the coolant reservoir, which is very bad, and we soon realized why. Apparently 4 years of sitting around is not only not good for fuel tank internals (which we replaced last quarter), but it was also bad for the oil-to-water heat exchanger, which had totally corroded internally, resulting in a mixture of oil and water in the engine. This heat exchanger sits on top of the flat 6 engine in a 911, and was easily accessible with our simplified engine setup, but oh boy did it make a mess. The entire coolant system had to be disassembled and flushed numerous times to get the milky gunk out. All the oil had to be drained and flushed at least half a dozen times with new oil and before all the contaminated oil was out of all the crankcase and heads.
Problem 2: with the intermix problem solved we also noticed that the car would run rough at high RPMs and under load. Apparently the signal from the MAF sensor was not being read properly in the location we chose to install it in our custom Cup intake, which we confirmed by swapping back in the stock intake that worked fine. We ran it in that configuration for our test day but plan to move the MAF sensor further upstream soon to let the engine breathe better with the Cup intake.
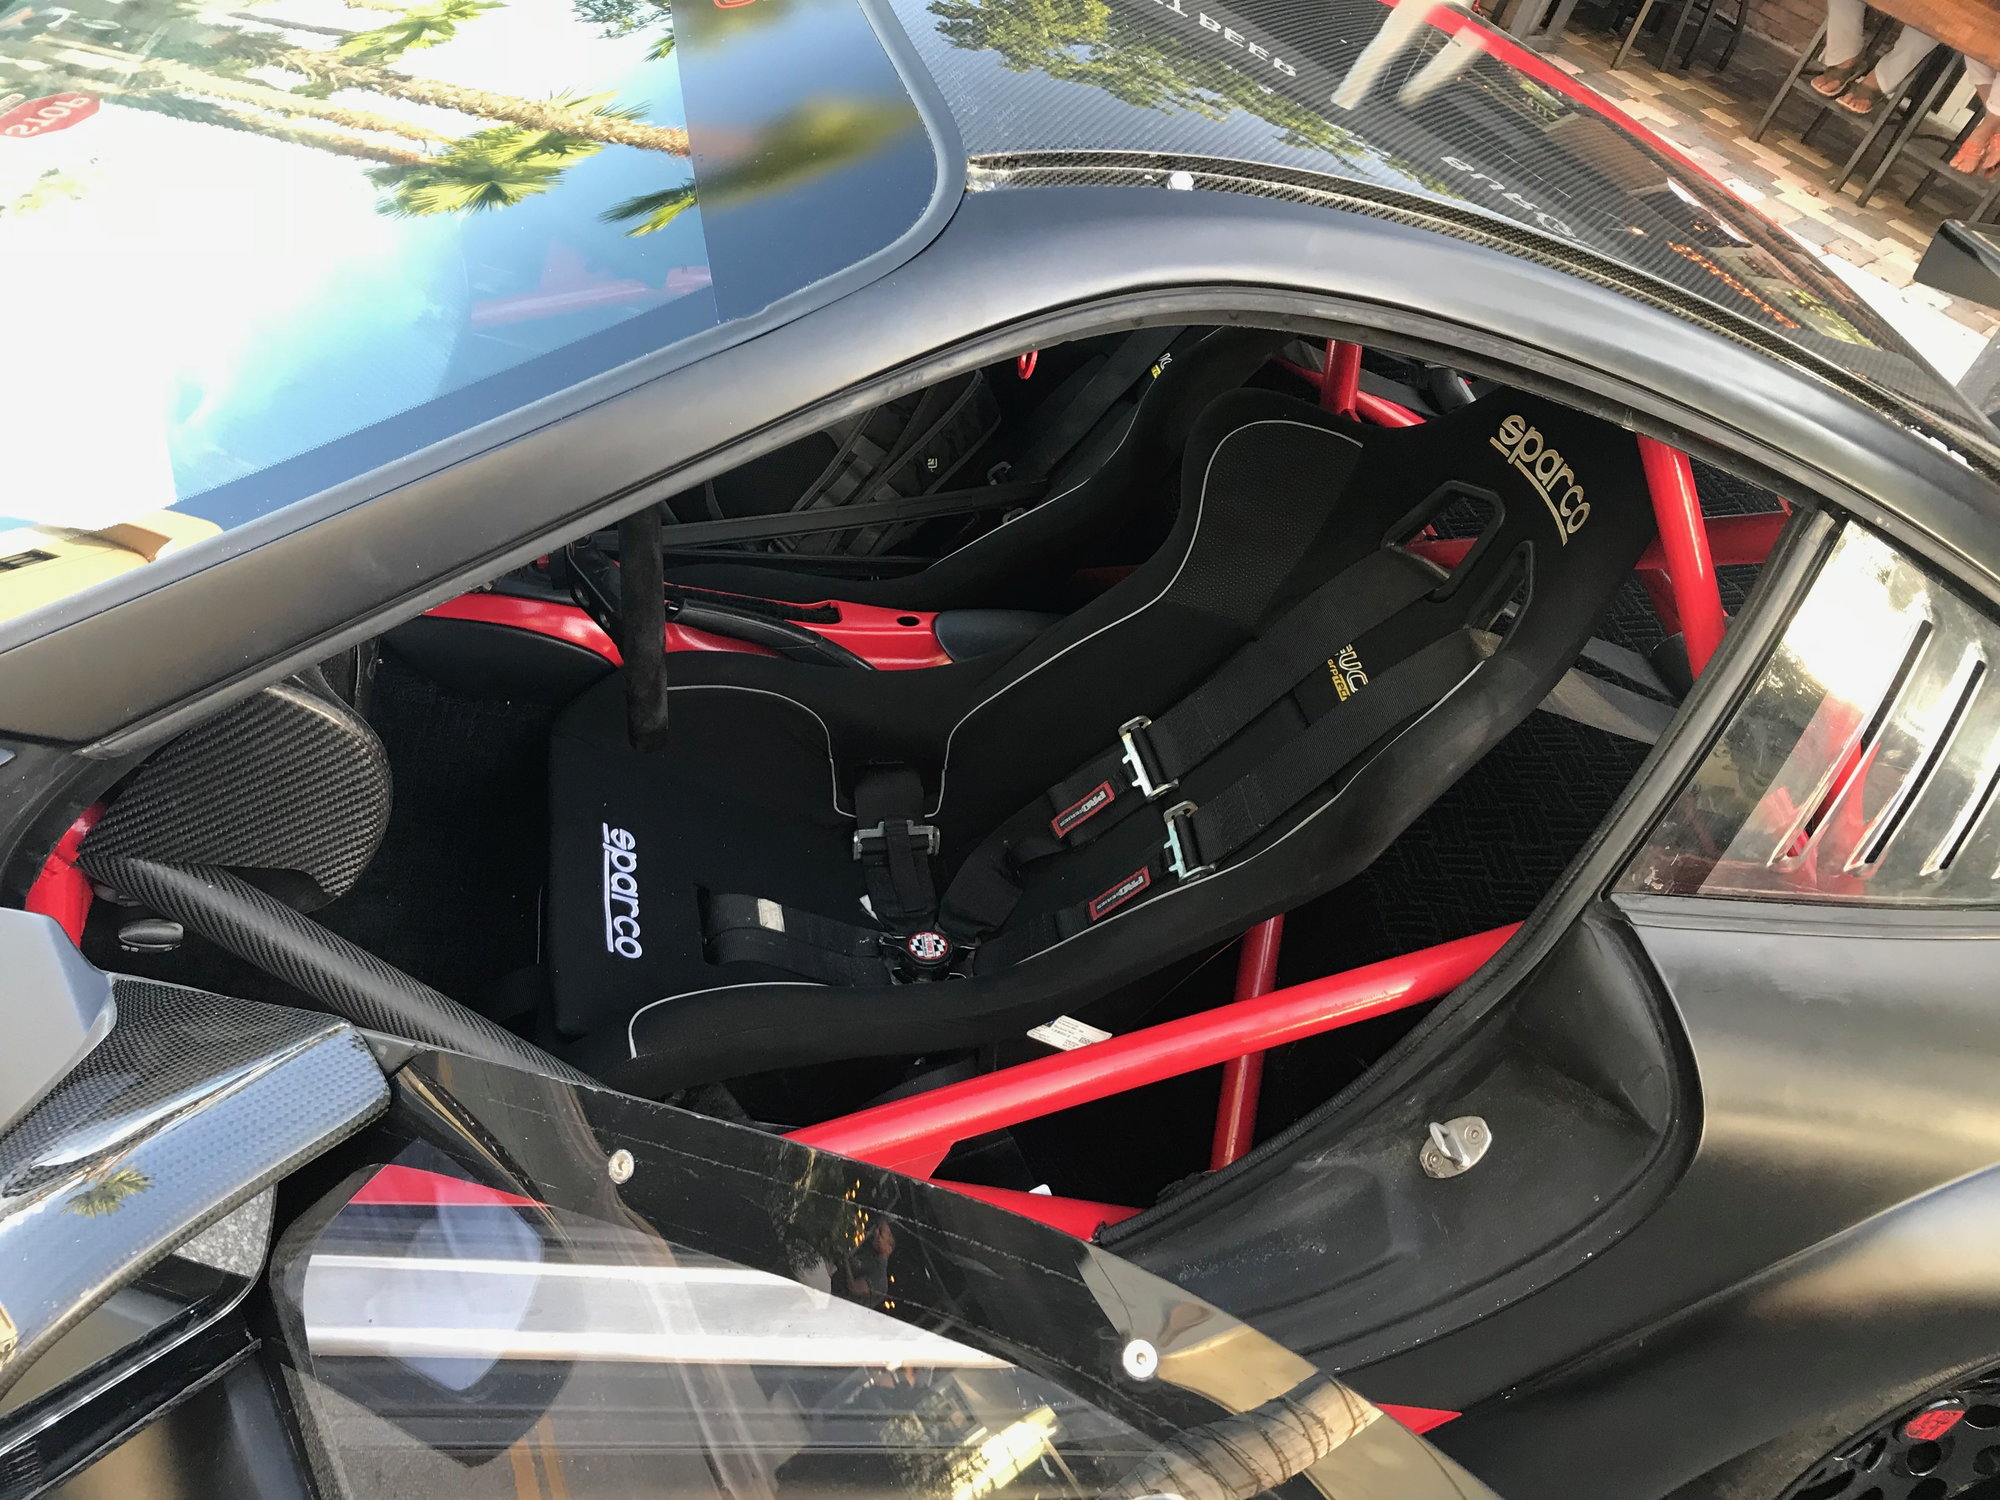
While wrestling with this mess we took the downtime to spruce up the interior. Our good friend Jay Greene of JG Painting and Restoration Inc. hooked us up with a beautiful �Guards Red/Safety Red/Whateveryoucallit Red� paint job on our custom roll cage and center console. The color Jay chose matched the brake calipers and tow hooks perfectly, while balancing out the muted satin black of the exterior. With black seats and minimal black carpeting surrounded by exposed carbon fiber, the red really pops.
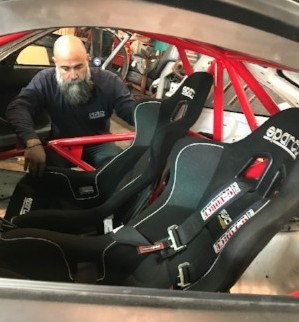
Now that the car was running properly we turned to buttoning up the exterior. The windshield and back Lexan were reinstalled and sealed up. The headlight covers were bolted onto their enclosures with nutserts riveted into custom fabricated brackets. Side mirrors back on, brake lights bolted in and plugged in, etc. For the interior, once the paint on the cage dried we reinstalled the driver�s side Sparco racing seat and harness, the carbon fiber dash, etc. It was ready for testing at Homestead Speedway.
Testing went well after an initial scare of oil smoke while things burned off and cleared out from years of storage. The amount of grip in the corners due to the huge tire footprints was ridiculous, even without dialing in the suspension, challenging the muscles because we had not yet hooked up the Cup electric power steering system. Also, the ABS system was not functioning so we started to get some brake lockup as we picked up speed, but hopefully new front wheel speed sensors will solve this. Everything else was great, gearbox, motor, etc. , and the M&M full race exhaust system sounded great at all RPMs, but particularly up high.
The plan is to enter Project 996 in the Das Renn Treffen car show for Porsches in South Miami on Sunday February 11th. This is one of the two biggest Porsche shows in the US (the other being Luftgekuhlt out in LA), so we�re excited to participate. Lots to do before then though: head lights have to be installed, passenger seat brackets modified, new pedals installed, Cup floors put in then carpeting installed, custom vinyl from KD Vinyl Graphics laid down, power steering pump plumbed, paint and install the cool custom splitter that our friend made, and more little stuff than we even want to think about.
(Copied from the newsletter): In the last installment of Project Porsche 996 we added a 3rd radiator from the factory X51 power kit to our custom cooling system for extra cooling capacity on track, then installed our new M&M stainless steel full race exhaust system. Progress was slow as we finished up final connection details on the cooling system, details which needed to be finalized so we could pressurize the system and start the car. Specifically we had to fit cooling fans (for street use) in the sides of our RSR nose in a way that was not intended in the original race-only design. Once that was buttoned up we finished off the top and sides of the nose with quarter inch mesh, which was epoxy and rivet mounted, to complete the nose.
The cooling system fitment also required us to tweak the inlets to our custom brake ducts with 3 inch hoses feeding directly to the rotors for our trick 997 braking system. We had to ditch the pretty and huge RSR spec carbon fiber brake ducts that our body kit came with because it used the same space as the inlet for the center radiator, and it also only allowed the front wheels to turn halfway. That wasn�t acceptable for a car that is going to be able to be driven on the street. The big carbon fiber nose with integrated splitter now comes off in one piece with all the fans and ducts attached to it for ease of service. Once that was all done we started the car for the first time in almost 2 years. It sounds insane.
One of the major areas of weight in a street car is the glass, so getting rid of that was a high priority for this project. Our GT3 Cup spec carbon fiber doors have no provision for using the factory glass, so we had to figure out what to do with those anyway because we need windows for the street. We sourced some Lexan side windows from GT Racing, which fit perfectly and weigh almost nothing. After blacking out the edges of the Lexan these will be mounted to the carbon fiber doors with quarter turn fasteners so they can be easily removed for the track if we want to do so. Our car already had a Lexan rear and side quarter windows so we just had to clean those up and remount them. Again because this is a dual use street/track car we decided to stick with the glass windshield because Lexan doesn�t really like windshield wipers, despite the small weight penalty.
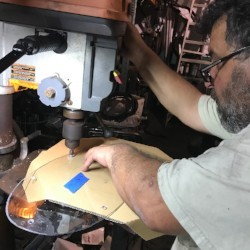
We also just cut the Lexan covers for our new custom oval shaped headlights. In the future we�ll wire these lights up and write more about their 991-spec design then, but suffice to say this part of the project will probably transform the looks of the car more than even the carbon fiber widebody. There are no oval headlight options for the Porsche 996 so we had to make these covers from scratch out of Lexan blanks to match our customized 996 carbon fiber fenders.
As we wrote about in our last quarterly update the throttle body of the 3.6 liter Porsche M96 engine was not lining up with the GT3 spec carbon fiber intake that is integrated into the engine cover. They were a bit off and at the wrong angle, so again we had to custom trim the intake we had and add a 45 degree silicone coupler/reducer to get these to match up. The intake will be covered with gold foil to keep the heat out and will need some more tweaks to seal it up properly but it is mostly there. Finally we�ll have to mount the MAF sensor in the intake airflow to keep the ECU happy.
Unless OP enjoys building for its own sake, why not just get the real thing, a 996 Cup for much less $, and be done with it? Both will be equally useless for the street, anyway.
Unless OP enjoys building for its own sake, why not just get the real thing, a 996 Cup for much less $, and be done with it? Both will be equally useless for the street, anyway.
Seems the OP covered that :" Again this was a fun project with no deadline, budget, or rule book to meet. It was all about the $/smile ratio!"
Unless OP enjoys building for its own sake, why not just get the real thing, a 996 Cup for much less $, and be done with it? Both will be equally useless for the street, anyway.
hf1: We really did build this for building's sake... plus I wanted to have some fun with it on the street AND on the track. Imagine taking your kid to school in this or your neighbor who "doesn't get it" for a ride around the block - something you can't do in a Cup car. One of the things I really missed was having a car that I could drive to the track and run all day then drive home. That's what this is - it's radical looking but not high strung or fragile. In terms of cost we have less $ into this than any (running) 996 Cup car I have seen for sale, and again I love and appreciate full out racing cars as much as anyone... which is why I have a bunch of them!
Project Porsche 996: Part 7 � Showing the car and street use
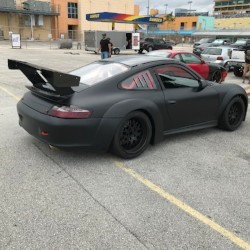
(Copied from the newsletter): In part 6 we were thrashing to get the car ready for the Das Renn Treffen car show for Porsches in Miami. After all that time working on this car we still had to wire up the head lights, finish the passenger seat brackets, and put in the Cup floors from Rennline then install the custom carpeting. The minimal black carpeting is a nice touch that makes it look a lot cleaner inside and lends some streetability to the car without adding much weight. The interior is now a blend of carbon fiber, red on the roll cage and center console, and black seats, roll bar padding, and carpeting. It ties together well. Once that was done we had custom vinyl from KD Vinyl Graphics laid down. The car looked quite sharp at the show.
After the car show the effort was to get the car registered for the street. It was kind of a hassle given that this was a California car that had not been previously registered in Florida, and it had some previous cosmetic damage from an accident that left it with a �rebuildable� branded title. A series of inspections by state and private agencies assured Florida that the car was fixed, and more importantly that we hadn�t used stolen parts (?!) to do so. There is a little wrinkle in the front right corner of the frunk that looks like it may have been pushed in a little in an accident and then pushed back out by a bodyshop, but that�s as far as the damage went (i.e. not anywhere near the suspension pickup points). Once the new rebuilt title was secured we got it insured and registered, taped the new tags to the rear window, and started driving it on the road. This thing sounds and looks amazing. To say it turns heads around town is an understatement.
Even though it is on the street there was still a punch list of things to get done. First thing was to get it aligned before its next track day. Getting such a low car with so many adjustable suspension components requires a patient tech and a low rack, so we had our friends at Braman Miami do the initial setup to the specs we provided. Later on we can mess with adjustments based on tire temperatures but for now we wanted things pointed in the right direction and corner balanced. The final weight of the car with a � full tank of gas was 2715 (call it 2640 dry). One thing we left in for now was a heavy full size battery for street use, so figure on knocking another 20 lbs off that with a lightweight battery for the track. That puts us almost exactly at our ~7.5 lbs/hp goal at the beginning of the project, although we haven�t run it on the dyno yet to verify the power number which we estimate to be ~350 hp at the crank. Back out on track for its next test day at Homestead it performed flawlessly, and we even drove it to and from the track with no issues.

 10-23-2018, 02:40 PM