Notices
987 Forum Discussion about the Cayman/Boxster variants (2004-2012)
Sponsored by:
Sponsored by:

Spec Cayman Build

Thread Tools
 
Search this Thread
 
Old 01-18-2018, 10:33 PM
  #1  
jscott82
Rennlist Member
Thread Starter
 
jscott82's Avatar
 
Join Date: Aug 2006
Location: Charlotte, NC
Posts: 3,076
Received 363 Likes on 238 Posts
Default Spec Cayman Build

Though I would start a thread documenting what I'm learning about Cayman's while I do its build-out.

Day 1


Timeline:

12/2/2017 Install cage
Install air jacks
Install Seat

12/9/2017 Prune wireing harness

1/6/2018 remove engine/trans

1/13/2018 inspect engine
rebuild trans / install diff
rebuild calipers

1/20/2018 inspect existing suspension components
fab brake ducts

1/27/2018 install PS cooler
plumb airjacks
plumb firesystem
install fire system
install cutoff switch

2/3/2018 install upgraded suspension
upgrade brakes to studs / 2 piece rotors
update wheel studs
update wheel bearings
update axles

2/10/2018 reinstall motor / trans
replace motor/trans mounts
replace clutch / flywheel
install underdrive pully
replace PS pump
replace alternator
replace water pump

2/17/2018 fab trans cooler
Paint wing/splitter
fab mount for rear decklid
Dye interior pieces

2/24/2018 fab new exhaust
revise wire harness for data / camera / cooler
fab center console

3/3/2018 reinstall interior
Install wing / splitter

3/10/2018

3/17/2018 Shakedown Weekend !

Last edited by jscott82; 01-18-2018 at 10:58 PM.
Old 01-18-2018, 10:57 PM
  #2  
jscott82
Rennlist Member
Thread Starter
 
jscott82's Avatar
 
Join Date: Aug 2006
Location: Charlotte, NC
Posts: 3,076
Received 363 Likes on 238 Posts
Default

First valuable thing I learned...

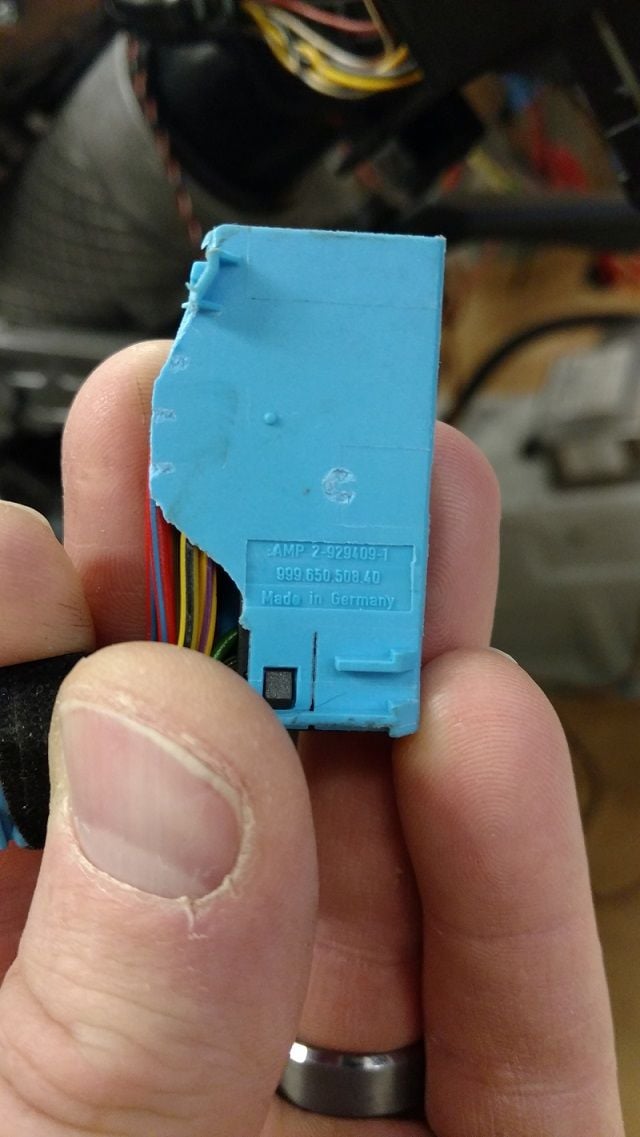
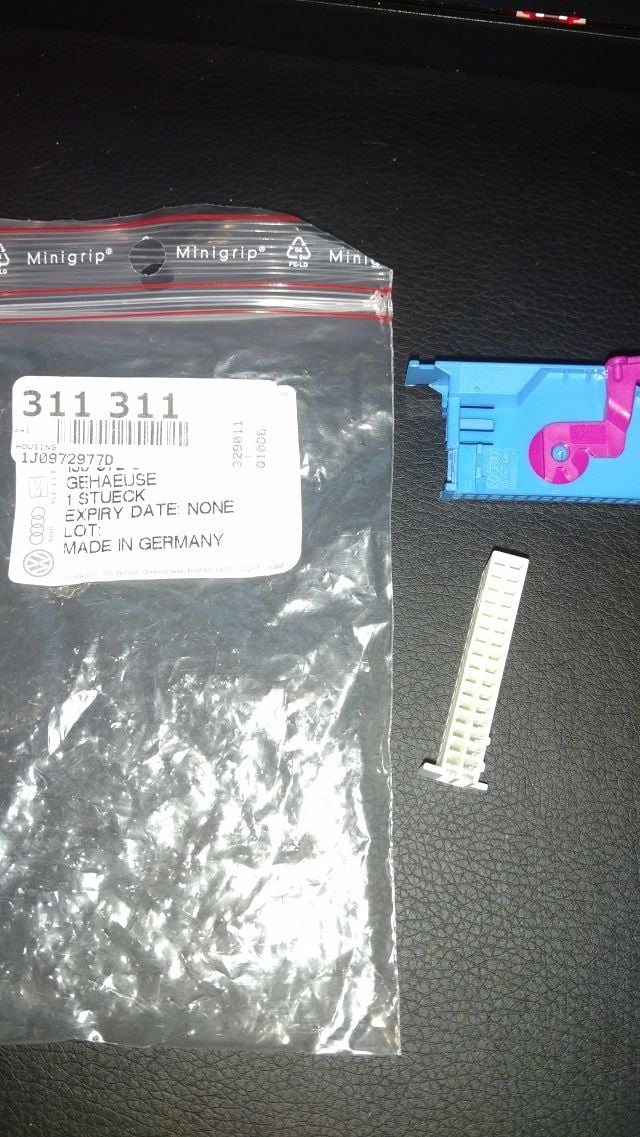
The connector to the back of the instrument cluster (pn 999.650.508.40) gets fragile with age.... It breaks easily.. very easily.... And Porsche does not carry it anymore, fortunately VW/Audi does its part number is 1J09729770.

Old 01-18-2018, 11:18 PM
  #3  
jscott82
Rennlist Member
Thread Starter
 
jscott82's Avatar
 
Join Date: Aug 2006
Location: Charlotte, NC
Posts: 3,076
Received 363 Likes on 238 Posts
Default

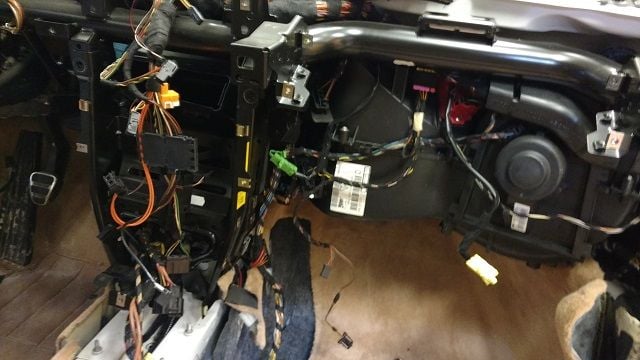
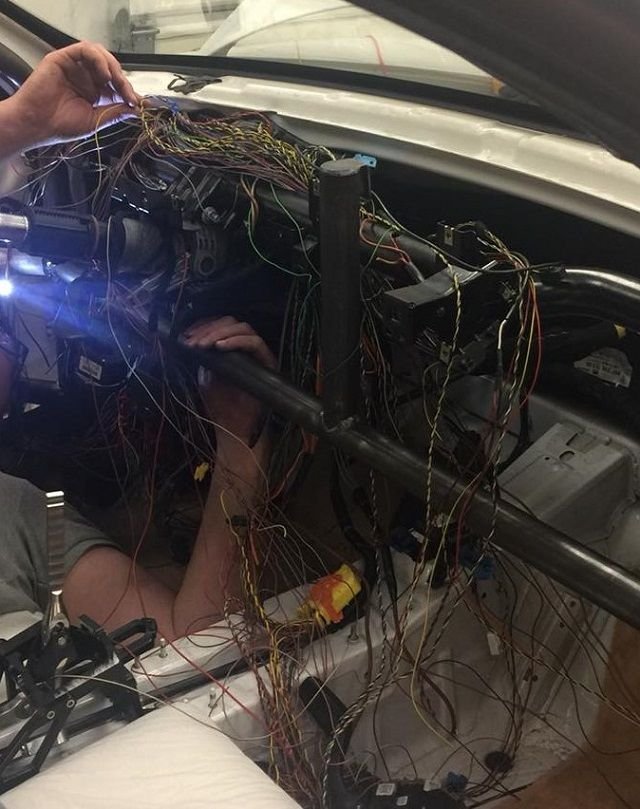
I was able to successfully disable the HVAC and Infotainment systems as well as airbags, seats (and the AWS scales built into each seat), and windows with Durametric pro.

With the systems disabled, I was able to remove over 15 lbs of wire and 5 circuits from the fuse panel, not to mention greatly simplifying the wiring harness. There is probably 5 or 10 more pounds of wire that could be pulled, but I took the conservative route.


Old 01-19-2018, 12:32 PM
  #4  
mjdavis
Instructor
 
mjdavis's Avatar
 
Join Date: Oct 2009
Location: Connecticut
Posts: 241
Received 17 Likes on 15 Posts
Default

Thanks!
Old 01-27-2018, 04:42 PM
  #5  
MK95
7th Gear
 
MK95's Avatar
 
Join Date: Dec 2017
Posts: 7
Received 0 Likes on 0 Posts
Default

Looking forward to the next update as I am planning on doing a similar thing later this spring..
Old 01-27-2018, 04:46 PM
  #6  
Benjamin Cherry
Advanced
 
Benjamin Cherry's Avatar
 
Join Date: Oct 2017
Location: New Haven, CT
Posts: 99
Received 0 Likes on 0 Posts
Default

Very cool, thanks for sharing
Old 01-28-2018, 11:55 AM
  #7  
mann277
5th Gear
 
mann277's Avatar
 
Join Date: Jan 2018
Posts: 5
Likes: 0
Received 0 Likes on 0 Posts
Default

Im digging this thread.
Old 01-28-2018, 09:05 PM
  #8  
jscott82
Rennlist Member
Thread Starter
 
jscott82's Avatar
 
Join Date: Aug 2006
Location: Charlotte, NC
Posts: 3,076
Received 363 Likes on 238 Posts
Default

No new lessons learned...
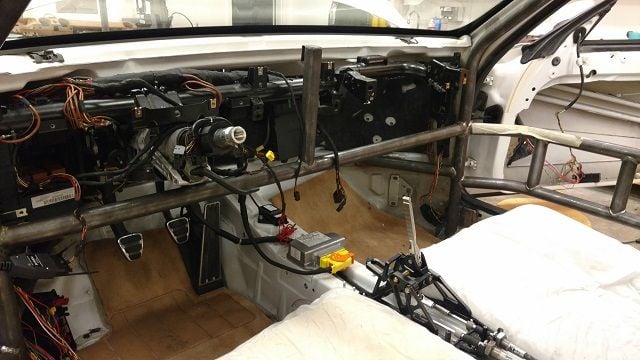
At this point have the car stripped to the chassis.
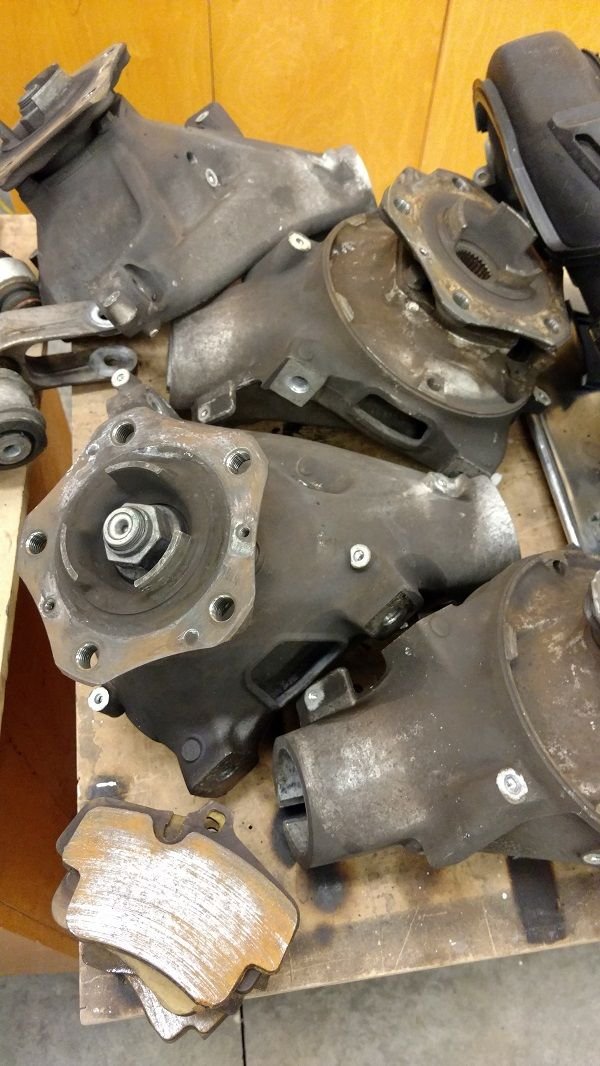
Transmission is off to be rebuilt
All suspension parts that will be reused have been bead blasted and dye checked for cracks..
Order placed with Tarett for the performance parts and Suncoast for replacement OE pieces (axles, bearings, new bolts etc)


Next week is on to final assembly.

Last edited by jscott82; 01-28-2018 at 10:34 PM.
Old 01-28-2018, 10:52 PM
  #9  
jscott82
Rennlist Member
Thread Starter
 
jscott82's Avatar
 
Join Date: Aug 2006
Location: Charlotte, NC
Posts: 3,076
Received 363 Likes on 238 Posts
Default

And lots and lots of cleaning.

Old 02-01-2018, 07:11 AM
  #10  
Paseb
Race Car
 
Paseb's Avatar
 
Join Date: Sep 2008
Location: Montreal, Quebec
Posts: 4,642
Likes: 0
Received 63 Likes on 45 Posts
Default

I have a **** load of oem parts for you

Trans, axles, engine, calipers,

Let me know

Good luck in your build!
Old 02-11-2018, 10:29 PM
  #11  
jscott82
Rennlist Member
Thread Starter
 
jscott82's Avatar
 
Join Date: Aug 2006
Location: Charlotte, NC
Posts: 3,076
Received 363 Likes on 238 Posts
Default

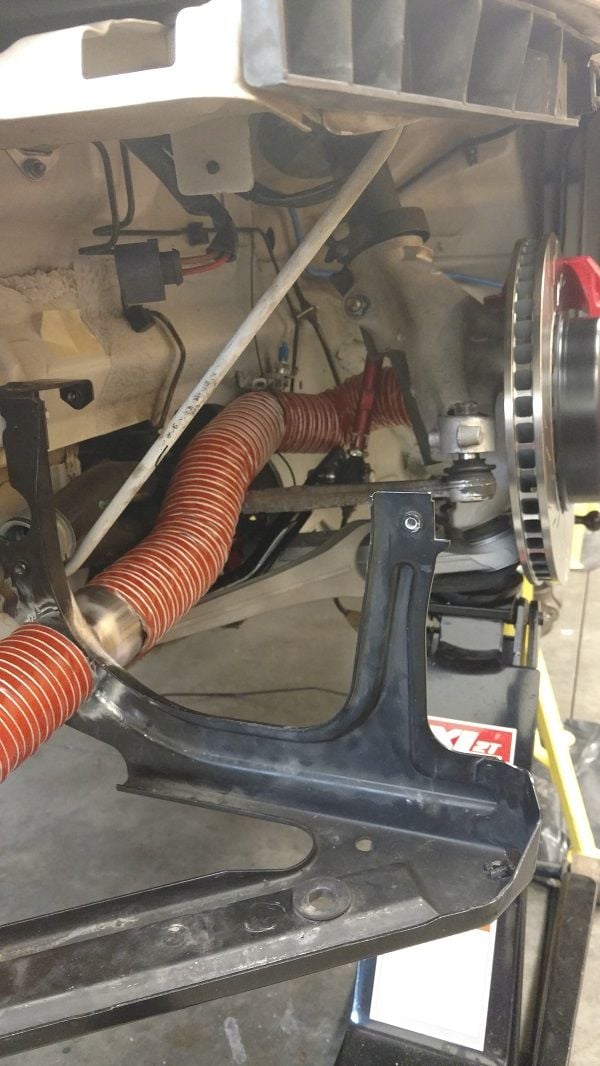
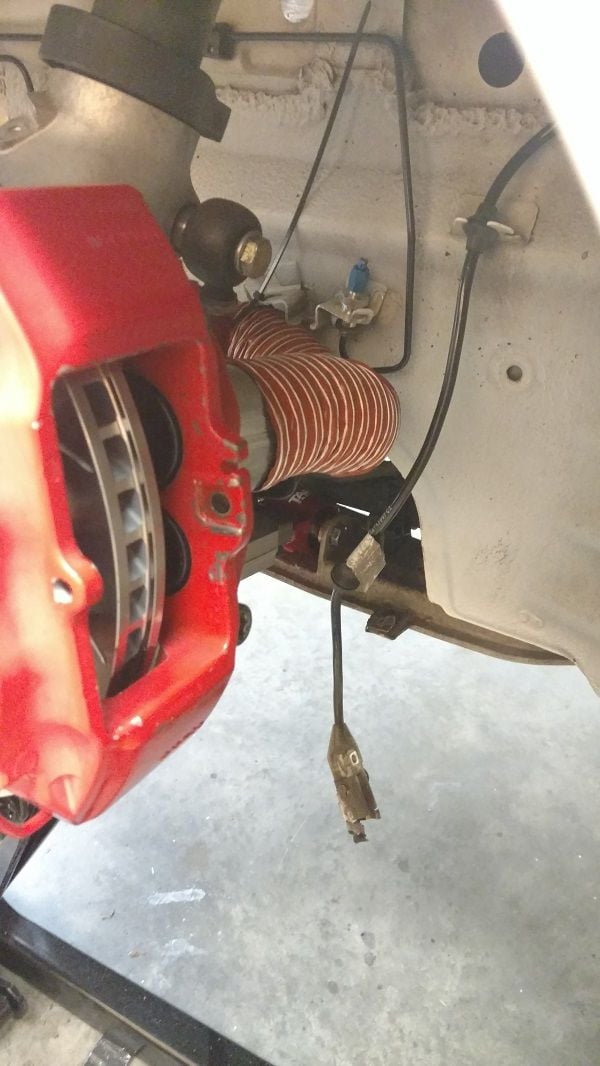
Brake duct mock-up is done. After days of trial fitting and agonizing over this, this is what I came up with. There are still some tweaks to be done, need to replace the steel duct, with a little 45 bend to clear the tie rod better....

Ultimate requirement was to feed clean air to caliper and to the rotor eye. I've seen a bunch of options (like the GT3 scoops) that get turbulent air into the wheel well, but none that actually get clean air to the rotor eye.

Before I finalize this, feedback would be appreciated..


Old 02-12-2018, 07:19 PM
  #12  
Paseb
Race Car
 
Paseb's Avatar
 
Join Date: Sep 2008
Location: Montreal, Quebec
Posts: 4,642
Likes: 0
Received 63 Likes on 45 Posts
Default

Im not sure you will see a difference, but it does look good.

The best thing to do is to install a big air blower in front trunk and get tim olsen brake duct.
Old 02-12-2018, 09:45 PM
  #13  
jscott82
Rennlist Member
Thread Starter
 
jscott82's Avatar
 
Join Date: Aug 2006
Location: Charlotte, NC
Posts: 3,076
Received 363 Likes on 238 Posts
Default

Originally Posted by Paseb
Im not sure you will see a difference, but it does look good.

The best thing to do is to install a big air blower in front trunk and get tim olsen brake duct.
Why are the Olen duct are better? Seems to me they aren't capturing any high pressure air at all, so noting to force air down the duct.

I don't like the 90 deg bend, but there is no escaping that... What is missing from the pic is the naca duct in the radiator shroud that will feed them so I get a little bit of pressure down the line.

Last edited by jscott82; 02-12-2018 at 11:01 PM.
Old 02-18-2018, 01:41 PM
  #14  
Frank 993 C4S
Addict
Rennlist Member

 
Frank 993 C4S's Avatar
 
Join Date: Mar 2003
Location: NY Tri-State
Posts: 8,571
Received 808 Likes on 494 Posts
Default

This looks really neat but I’d be cautious about fixing a problem that does not exist. I have yet to hear anybody complain about brake cooling issues on an SPC. I’ve never had an issue on my old car, even with stock brakes. You are adding a lot of cool stuff to the car but be mindful of your weight. I am sure you’ve figured it all out but you want to be within 10-20 lbs of minimum weight with driver at min fuel to be competitive.
Old 02-18-2018, 02:47 PM
  #15  
Gear Rower
Racer
 
Gear Rower's Avatar
 
Join Date: May 2015
Posts: 336
Received 78 Likes on 32 Posts
Default

Originally Posted by Frank 993 C4S
This looks really neat but I’d be cautious about fixing a problem that does not exist. I have yet to hear anybody complain about brake cooling issues on an SPC. I’ve never had an issue on my old car, even with stock brakes. You are adding a lot of cool stuff to the car but be mindful of your weight. I am sure you’ve figured it all out but you want to be within 10-20 lbs of minimum weight with driver at min fuel to be competitive.

I have spoken with a couple SPC drivers who had brake cooling issues at Road Atlanta despite running aftermarket discs, GT3 ducts, endurance pads and SRF.
Now that the series is likely to go with grippier Hoosier R7 tires, the brake issues might be even more of a concern.
With the min weight at 2950lbs, there is plenty of room for brake ducting without worrying about a weight penalty.


Quick Reply: Spec Cayman Build


All times are GMT -3. The time now is 02:32 AM.