When you click on links to various merchants on this site and make a purchase, this can result in this site earning a commission. Affiliate programs and affiliations include, but are not limited to, the eBay Partner Network.
I have spoken with a couple SPC drivers who had brake cooling issues at Road Atlanta despite running aftermarket discs, GT3 ducts, endurance pads and SRF.
Now that the series is likely to go with grippier Hoosier R7 tires, the brake issues might be even more of a concern.
With the min weight at 2950lbs, there is plenty of room for brake ducting without worrying about a weight penalty.
H Class Caymans have been running 3104 lbs with Hoosiers for years without issues. I'm all for optimizing brake cooling but overall weight of the car is important too. The later was my intended point.
Haven't posted in a while... Lots in-flight, but not wrapping projects up as fast I need to, March 15th shakedown is most likely not going to happen...
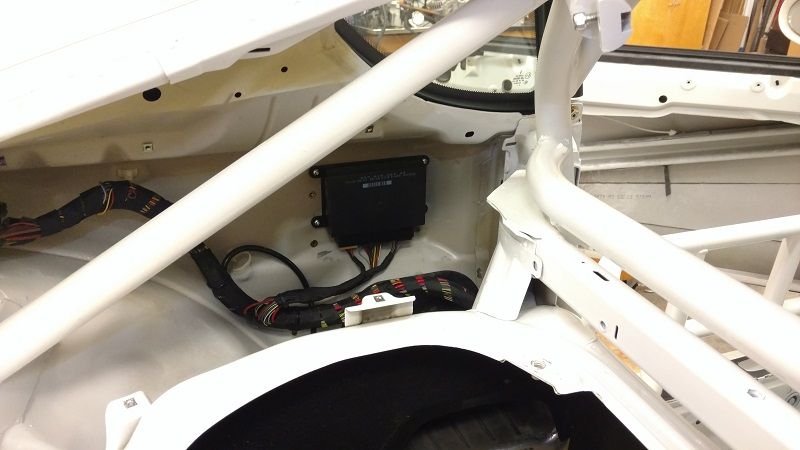
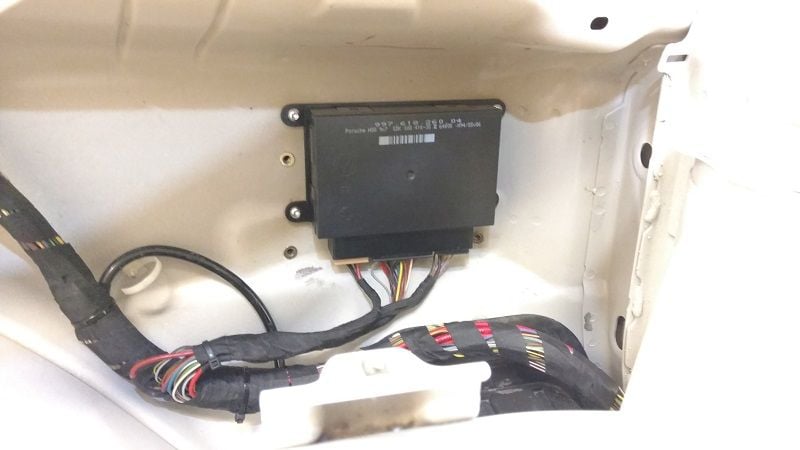
Relocating the rear electronics module is done. Moved from under drivers seat, to inside of the rear quarter panel. I can post the .stl for the bracket if anyone is interested. Pic is of the prototype printed in PLA, final will be professionally printed in Nylon.
Wiring is temporarily wrapped, need to add trans temp sensor and trans cooler pump power to it before I finalize it with silicone over-wrap, but I need to get the trans back from rebuild to see where he put the fittings.
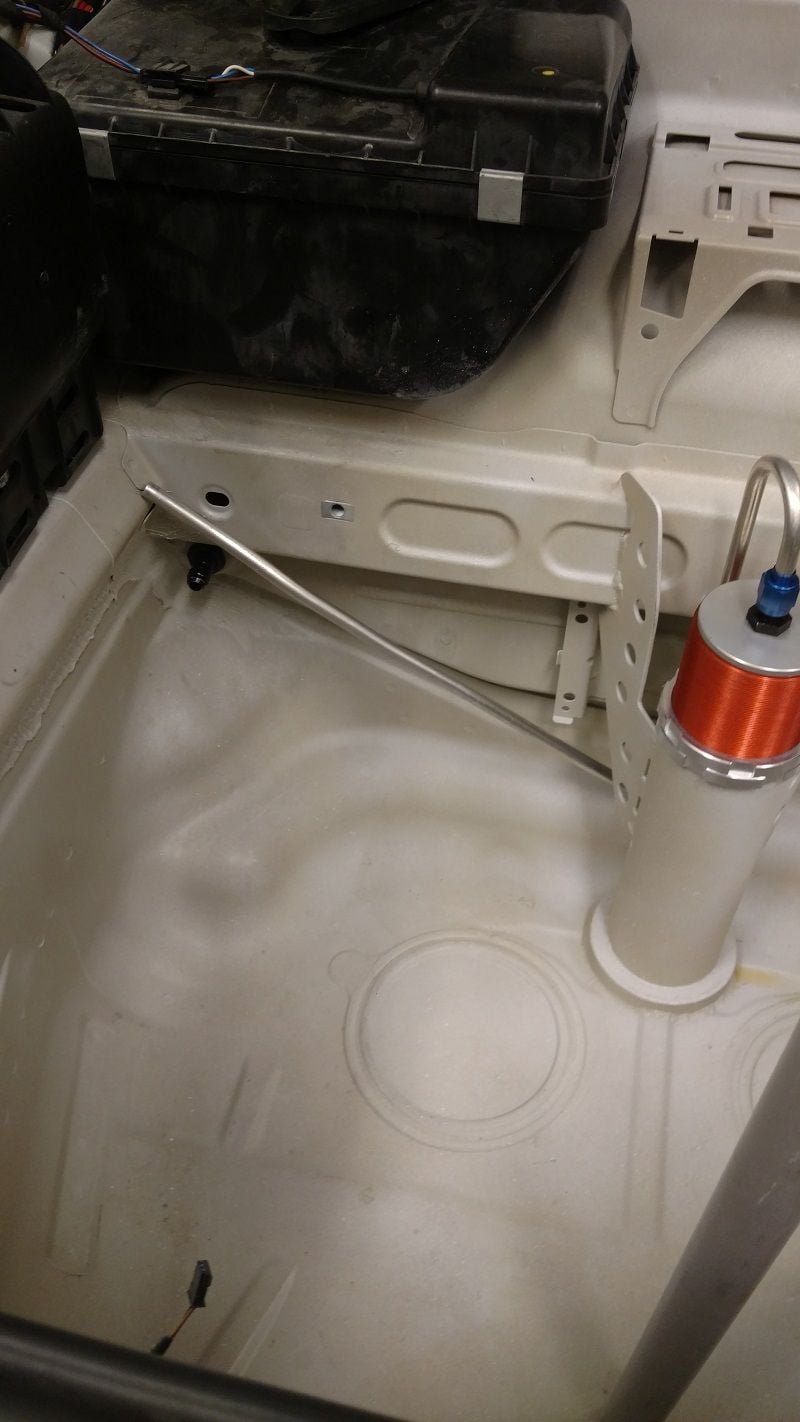
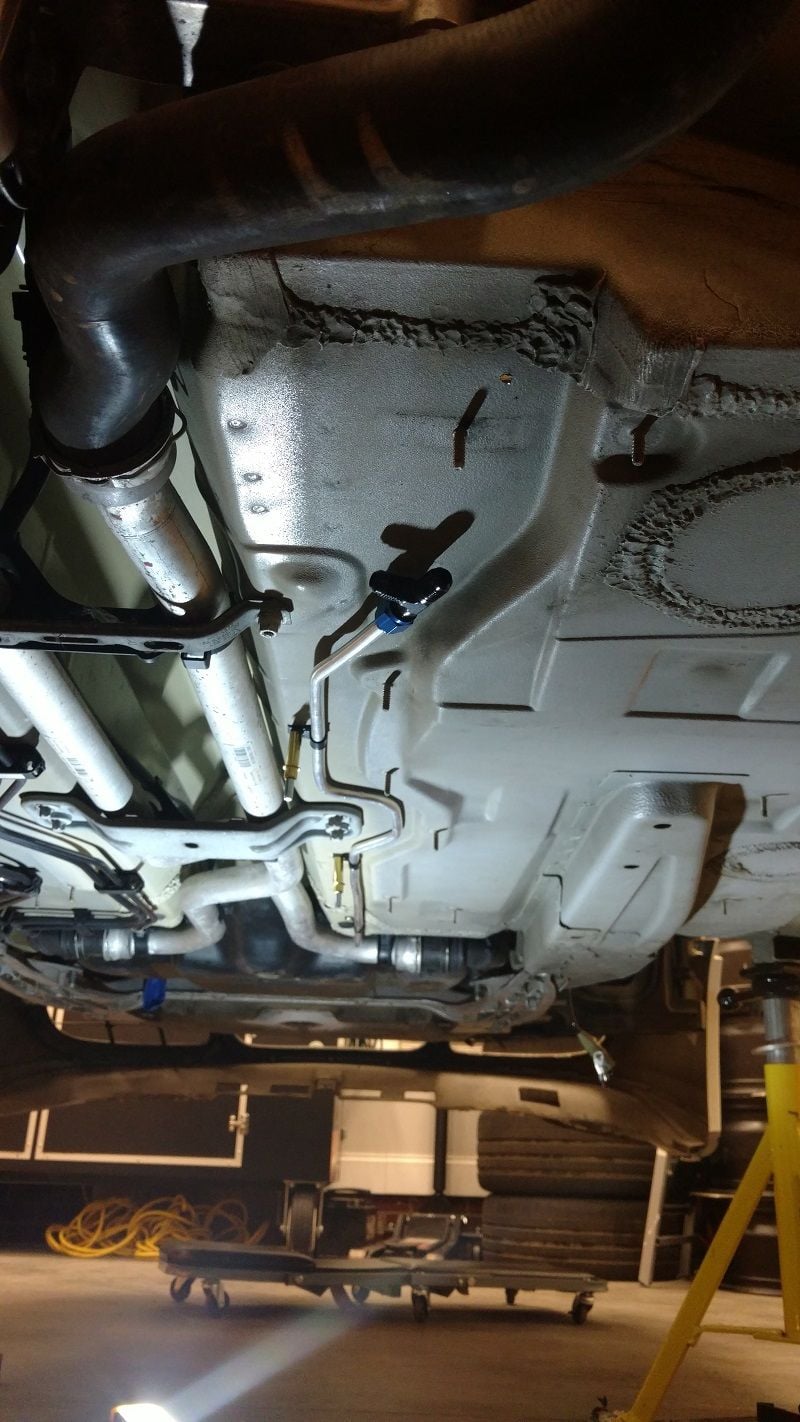
Air Jack plumbing is coming along. Porsche was nice enough to put a perfect little recess in the chassis right where I needed to bring the line into the frunk, just like the factory intended it to be there... Routing under the car follows what used to be the coolant lines to the HVAC. Rear is still in flight, having to have the rear jacks modified to relocated the inlet port.
I just went with simple jacks, no blowoff valves, came out right at 2k with wand and safety stands.
It's Leighton Reese's company. He has been great to work with, explaining what I needed, and even offering to modify the rear jacks for me. I can't say enough good things about the company.
The jacks themselves look like they are very well made, but I have not used them yet.
This looks really neat but I’d be cautious about fixing a problem that does not exist. I have yet to hear anybody complain about brake cooling issues on an SPC. I’ve never had an issue on my old car, even with stock brakes. You are adding a lot of cool stuff to the car but be mindful of your weight. I am sure you’ve figured it all out but you want to be within 10-20 lbs of minimum weight with driver at min fuel to be competitive.
I really don't have a baseline in a Cayman, my only frame of reference is my old 993 (I know, completely different car). Cooling was essential to getting any longevity out of the brakes on that car. The ducts only add about 2lb per side. and only about 1/2lb of unsprung weight (the bracket on the caliper is thinwall aluminum).
My biggest weight problem is not going to be the car.. The driver needs a lot of work :-)
Vents the cylinder at the cylinder as soon as you remove air pressure.. for instant dramatic drop. Since I wont be doing timed stops, slow drop is fine. He sells the valves if that what you need.
Originally Posted by Paseb
2k seems cheap!
I think these are targeted at the club level. He even uses a little bigger cylinder so I expect to be able to lift the car with 250psi vs 400 for the smaller cylinders so can use standard 300psi hose and fittings.
I ran "forced" air through the frame to the wheel well which allows a relatively straight duct out to the rotor. Unfortunately, I am out of town for the next two weeks and do not have pictures on me or I would send them to you.
I ran "forced" air through the frame to the wheel well which allows a relatively straight duct out to the rotor. Unfortunately, I am out of town for the next two weeks and do not have pictures on me or I would send them to you.
I've seen that done in the 993, but the framerail in the cayman is very small... Id love to see how you enter and exit the rail when you have a chance.
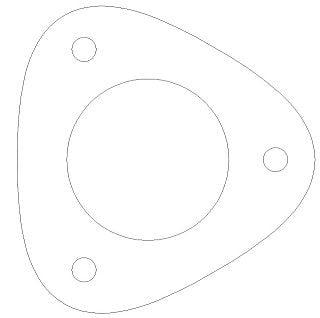
Template for exhaust manifold flange... Could not find one on the internet, so drew it up, here is it for posterity. (its a .dxf file, but Rennlist would not accept it, so renamed to .txt)
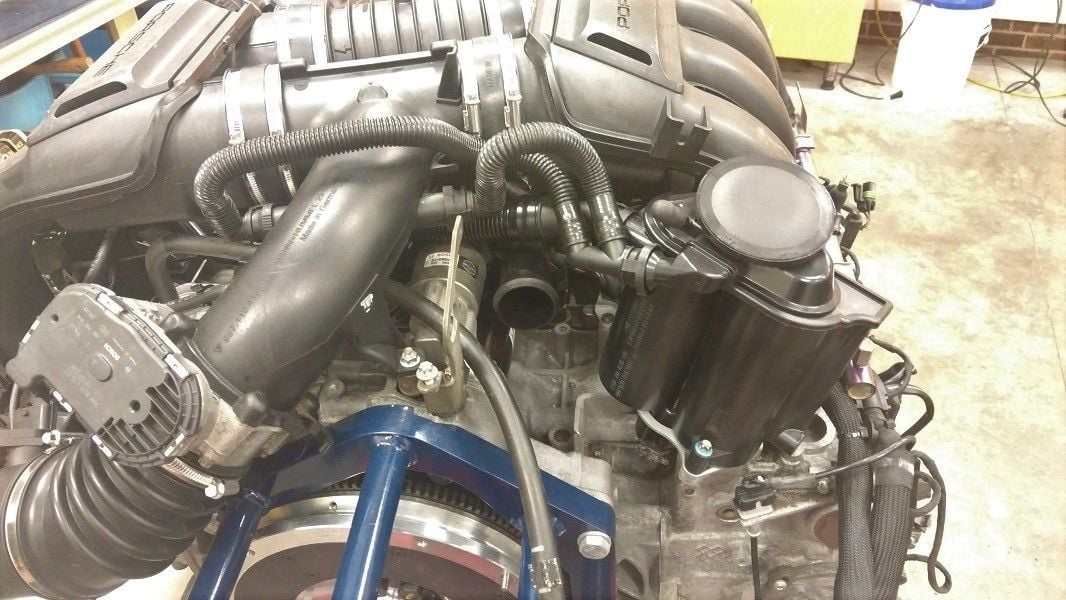
Anyone have designs for hoses for a Motorsports AOS? just getting started on that.
Also toying with the idea of gold foil on the intake to reduce intake temp. After doing one runner, Im guessing it's more trouble than its worth.
I love your attention to detail! Not sure its worth doing gold foil on the intake runners but you might want to consider doing it on the snorkel where the MAF is located.
Couple of noteworthy things on the Air-Oil separator and SAI pump removal that I have not seen discussed.
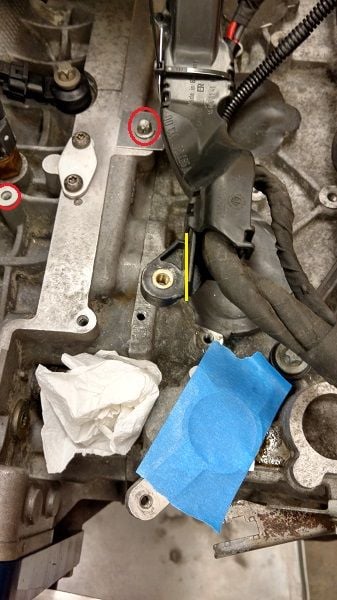
The right side SAI port is under the pump itself, and the mounting holes are spaced pretty far apart (second pic, red circles). To make a blockoff plate that would span them would need some kind of reinforcing rib to keep it from bowing (so says my intuition anyway). I opted to drill and tap new holes to mirror the port on the left side. That way I can still use the OE gaskets.
The SAI pump bracket also serves as the support for the wiring harness. Once you remove the pump the harness is unsupported, a simple "L" bracket and wire tie solves the problem (second pic using the now unused SAI bolt hole).
Since the new AOS sits much farther forward it either forces the harness into the back of the alternator or forces the harness to obscure one of the intake runner bolts. Removing the now unused mounting flange (second pic, yellow line) from the harness allows the harness to sit in the OE position with plenty of clearance on both ends.
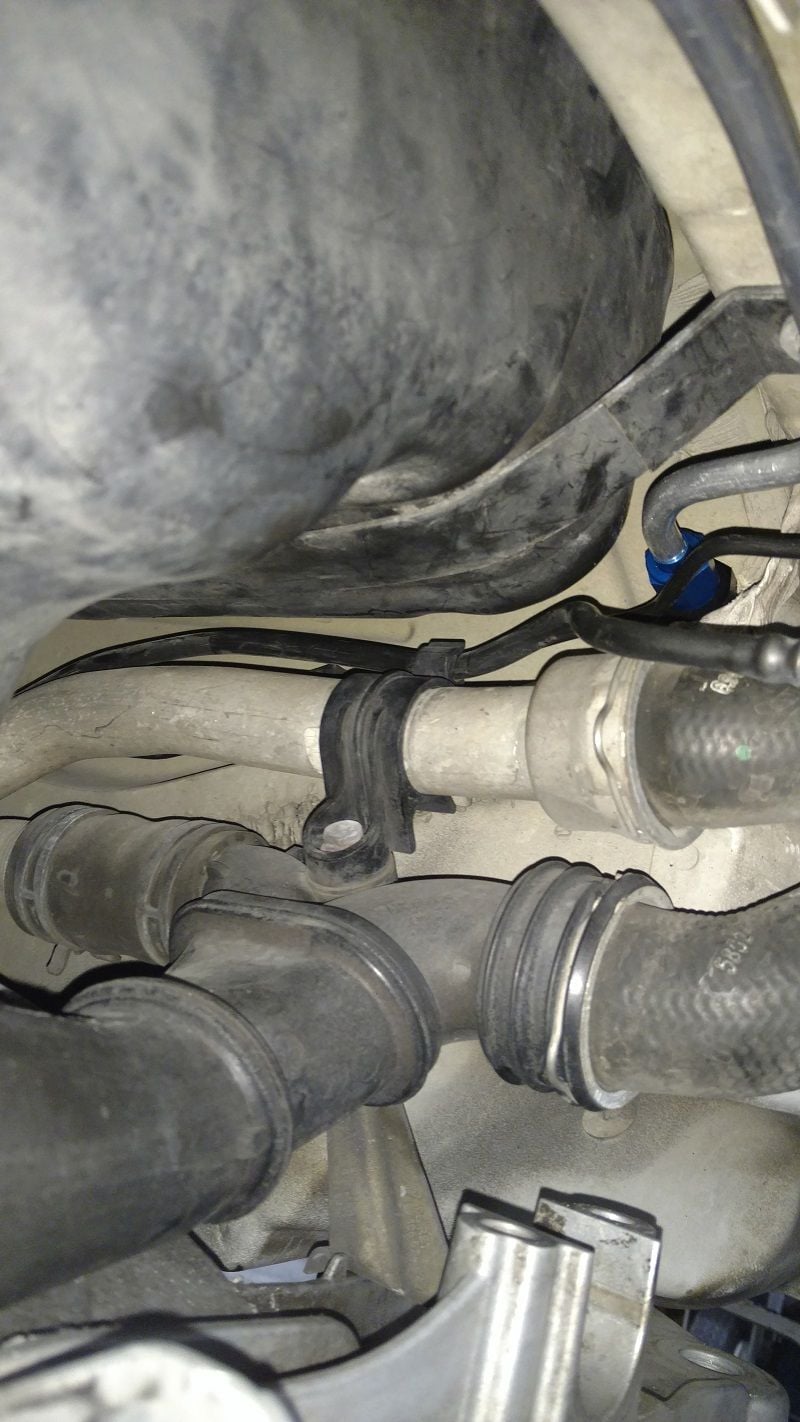
The updated AOS hose for the 1-3 bank is $100... My original plan was to section the OE hose by cutting at the green tape and using a heatshink hose clamp to splice it back together... I still think that plan would have worked just fine, but in the end opted to bite the bullet and buy the updated hose. Its not a perfect fit either... Here is the TSB I found about the install . http://www.planet-9.com/downloads.php?do=file&id=223
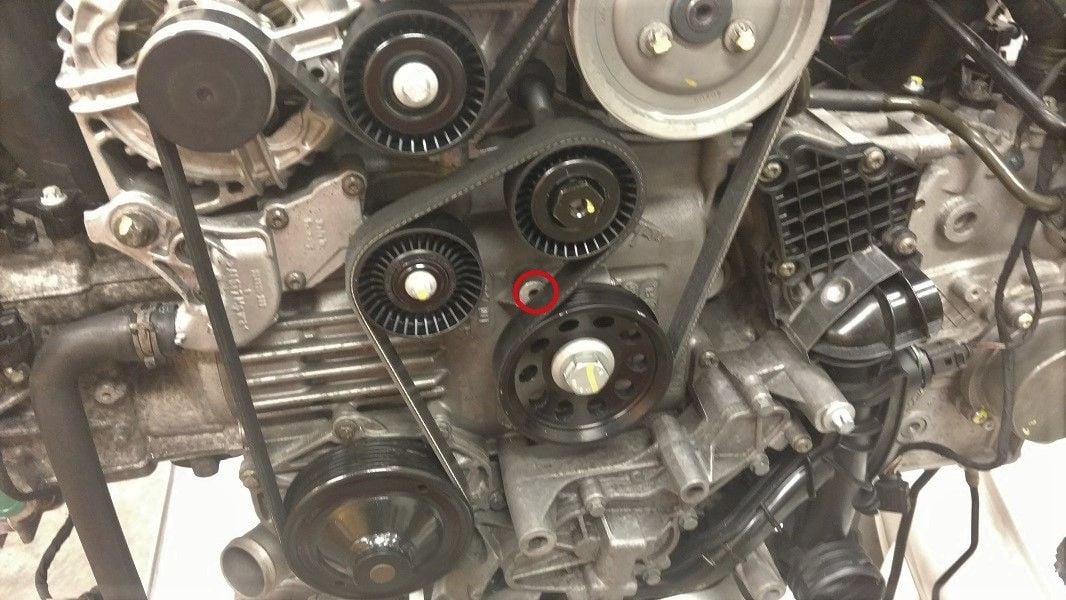
Under-drive pulley install.. Having to shorten the bung for the TDC alignment pin came as a surprise to me, I guess I didn't do enough research first... Not a big deal to cut it down with the motor out though.

 02-18-2018, 05:50 PM