When you click on links to various merchants on this site and make a purchase, this can result in this site earning a commission. Affiliate programs and affiliations include, but are not limited to, the eBay Partner Network.
My search of the form for a similar issue didn't turn up anything useful. If this has been covered elsewhere I would appreciate a link to that thread.
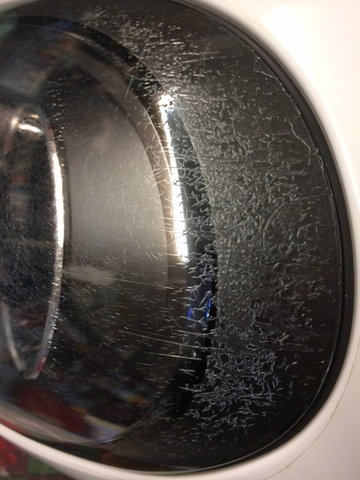
Both of the headlights on my '14 981 S have this damage. These are HID lamps. What causes this? How is it fixed and is this a warranty issue? There is no clear bra on the lights, although there might have been before I purchased this Porsche
That's not scratching: that looks like the plastic or its UV protective coat has actually crazed. I can only think it's either a defective part or chemical damage of some sort. Did you use anything besides soap and water to clean them? Stuff like Windex will damage polycarbonate.
Assuming you didn't personally mess them up, I'd take it in to the dealer and see what they say about warranty replacement.
Worst case, you'll need to sand off the old coating, repolish, and re-seal. Sylvania makes a good kit for this that's only $17, but it requires a bit of elbow grease (see link below).
Fortunately the headlights are easy to remove from the car. If you go the Sylvania kit route make sure to take them out since it makes the job much easier.
Not sure what dealer will do about this - I saw a CPO'd 991 on a local reputable dealer's lot for sale with this issue and it was "as-is" (though maybe they would be more flexible to resolve if they knew I was writing a check?). I would have to imagine if it were that easy they would have resolved it. I never had much luck with those kits but YMMV - I would take it some place like an auto body or detailing place to have it done. Good luck!
Thank you MrMoose and Dom991.1, I figured this was UV or other damage. This car came like this CPO, so that probably answers the warranty question. The car had a clear bra on it when the dealer acquired it, but it was taken off. I don't know if it covered the lights. The new bra I had applied doesn't cover the lights.
I have tried the headlight cleaning kits, but to address haze damage, not this type of damage. We have some really good local detail shops so I'll likely check with them. Unless I have another reason to visit my local dealer (hope not) I'll not bother since the answer is pretty evident.
If anyone else has fixed this issue, I would like to know how.
If anyone else has fixed this issue, I would like to know how.
It's basically the same as you'd do for a yellowed headlight. You need to remove the old coating and get down to clear plastic, then reseal:
1) Wet sand off the old coating down to clean plastic
2) Polish with compound to get it smooth
3) Seal with new UV protectant so it doesn't yellow/haze
The Sylvania kit should have everything you need and works well, but a good detailer should be able to do the same thing. Just make sure they apply a high-quality UV coat at the end or it'll haze up quickly.
MrMoose I'll give the Sylvania kit a try as it is really inexpensive and you say it works on this type of damage in addition to the yellow haze. You hit my concern on the nose about it working on both types of damage. I have used 303 for years as a UV protector given it's reputation. It will not repair any fading, but is reputed to be the best UV protection around.
303 is good stuff for vinyl, but it won't work on the headlights because it won't last. You basically need a clear coat UV protective paint, which is what the Sylvania kit comes with.
Bear in mind that I'm looking at a photo of the problem here, but if it's really just that the outer layer of the headlight has failed then the Sylvania kit should do what you need. If there's any question. start with Step 1 on a small, damaged section of the headlight and see what happens.
Well I tried the Sylvania kit from Amazon on the passenger side and it now looks worse than before. The cracking/scratches on the top were taken off by the sanding, but not the fine cracks/scratches on the rest of the lens. I spent 20 minutes sanding this lens with the three grades of wet sand paper provided. The UV block coating creates a blurred effect that may not be noticeable if your were trying to address a yellowing issue, but really looks bad now.
I found a local detail shop that quoted me $250 to $500 to address the issue. He has seen this before on HID lights and thinks it is heat damage from the lights. For this reason I am going to get an opinion from the dealer and hopefully get the lights replace under warranty. New light are $1500 a side from Suncoast!
You have two options, one is to simply get an orbital sander, sand down the upper layer starting from 1500 grt working your way up to 3000 grt. Then use a rubbing compound, get the scratches out, and finally you need 2k clear coat. Second option is ebay, you can source a used set of headlights around 500. If I had to choose between having a shop do it and sourcing used once on ebay, I would go the ebay route, no telling on the level of craftsmanship from the shop.
The ebay versions don't have the ballast or bulbs, but that is OK because I have those that work. If this is not covered under the CPO, and I expect it will not be, I am going to ask if the dealer can get the housings and at what cost. Otherwise I'll try the e-bay route. The Suncoast versions are complete with bulbs and ballast.
Sorry it didn't work for you. Personally I've had good luck with those kits, but I guess it depends on what's wrong with your lights.
If the plastic is actually *cracked* (i.e., if there's any damage below the top fraction of a millimeter of plastic) then there's really no way to repair that besides replacement. You'd need to sand deep enough to remove all the cracks which is pretty much impossible.
If you're just not happy with the finish from the kit you (or a pro) can wet sand it off, repolish smooth, and then clear coat with some other UV protectant. But if the plastic is actually crazed from heat or chemical damage then you're kind of screwed.
Went to the dealer today and they indicated they would contact Porsche about coverage under warranty, but didn't think they could cover the lamp I worked on myself. I think we all know what the result of this conversation will be. Dealer = good guy did what he could, Factory = bad guy: no way dude.
Visited a detail shop who sponsors my Arizona PCA and they indicated it would be $500, mostly for the labor. What am I but labor? More internet search resulted in this plan:
1) more sanding with a power orbital 800, 1200, 2000 and 3000
2) coat with Dupli-Color adhesive prep
3) coat with Dupli-Color acrylic clear coat.
I believe the key is how the acrylic fills in the remaining sanding scratches to create a clear lens. Saw many "magical" applications from several manufacturers. 4DIYers video is what I am basing this on:
Well the 800 is not aggressive enough, but an hour with wet 400 made progress on about 1/4 of the light. Getting some dry 400 for my orbital and going at it again tomorrow.
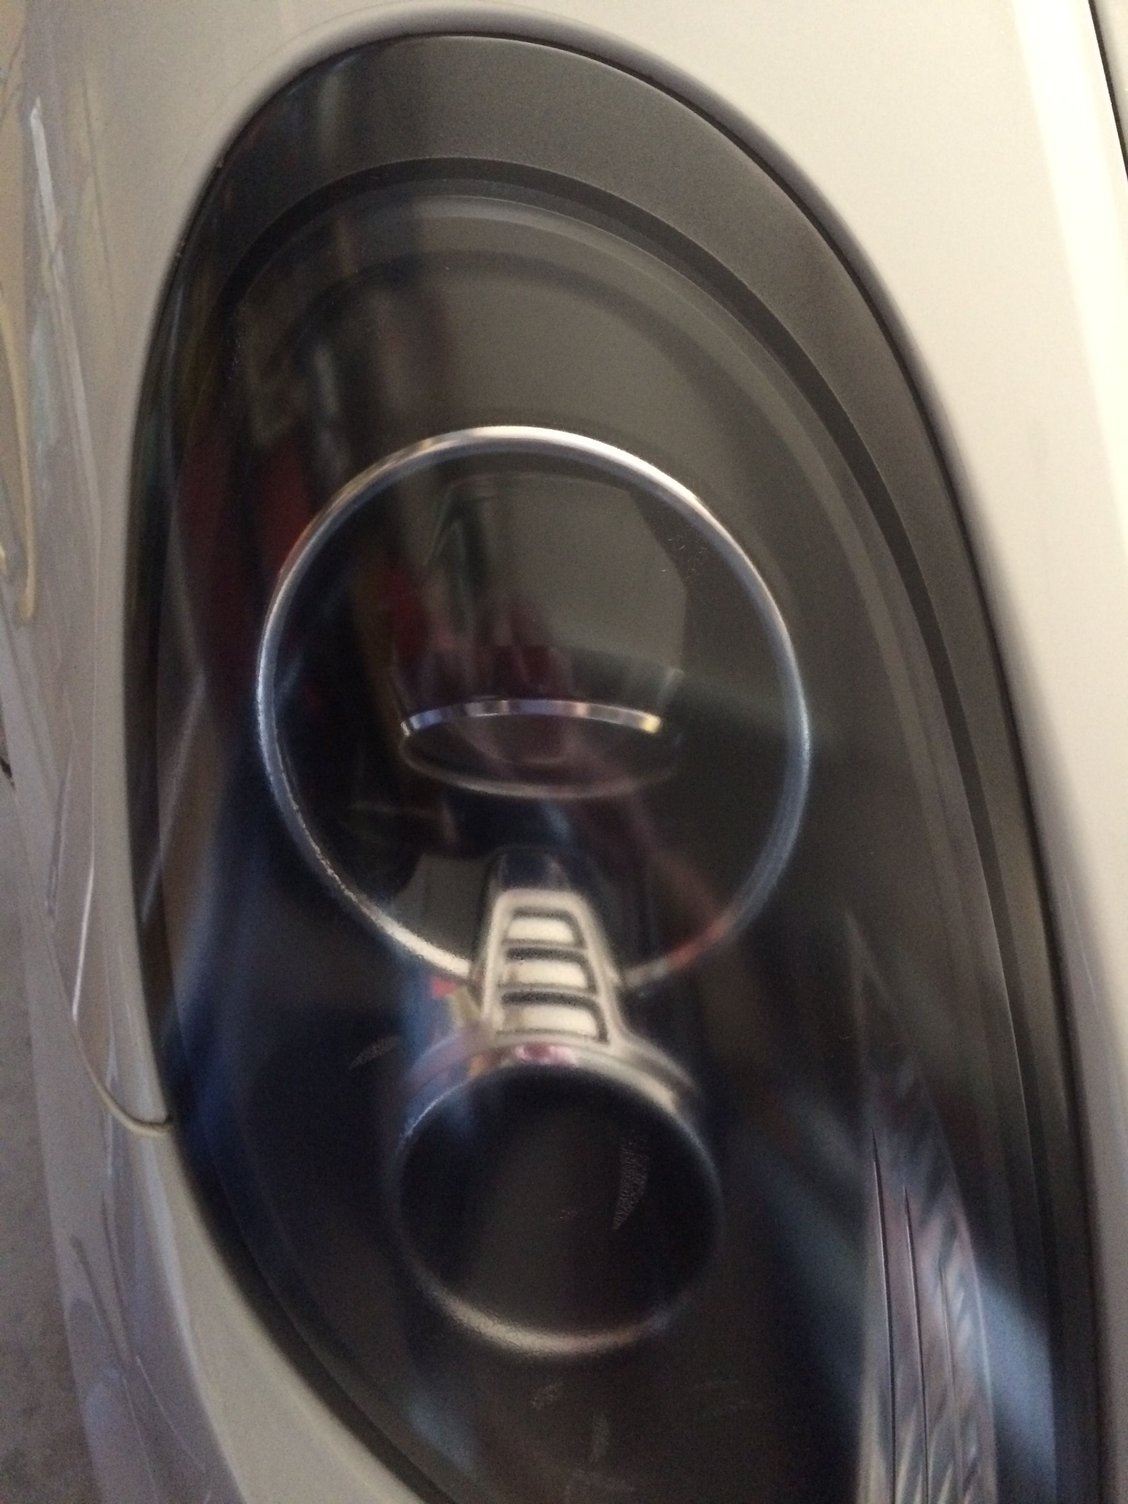
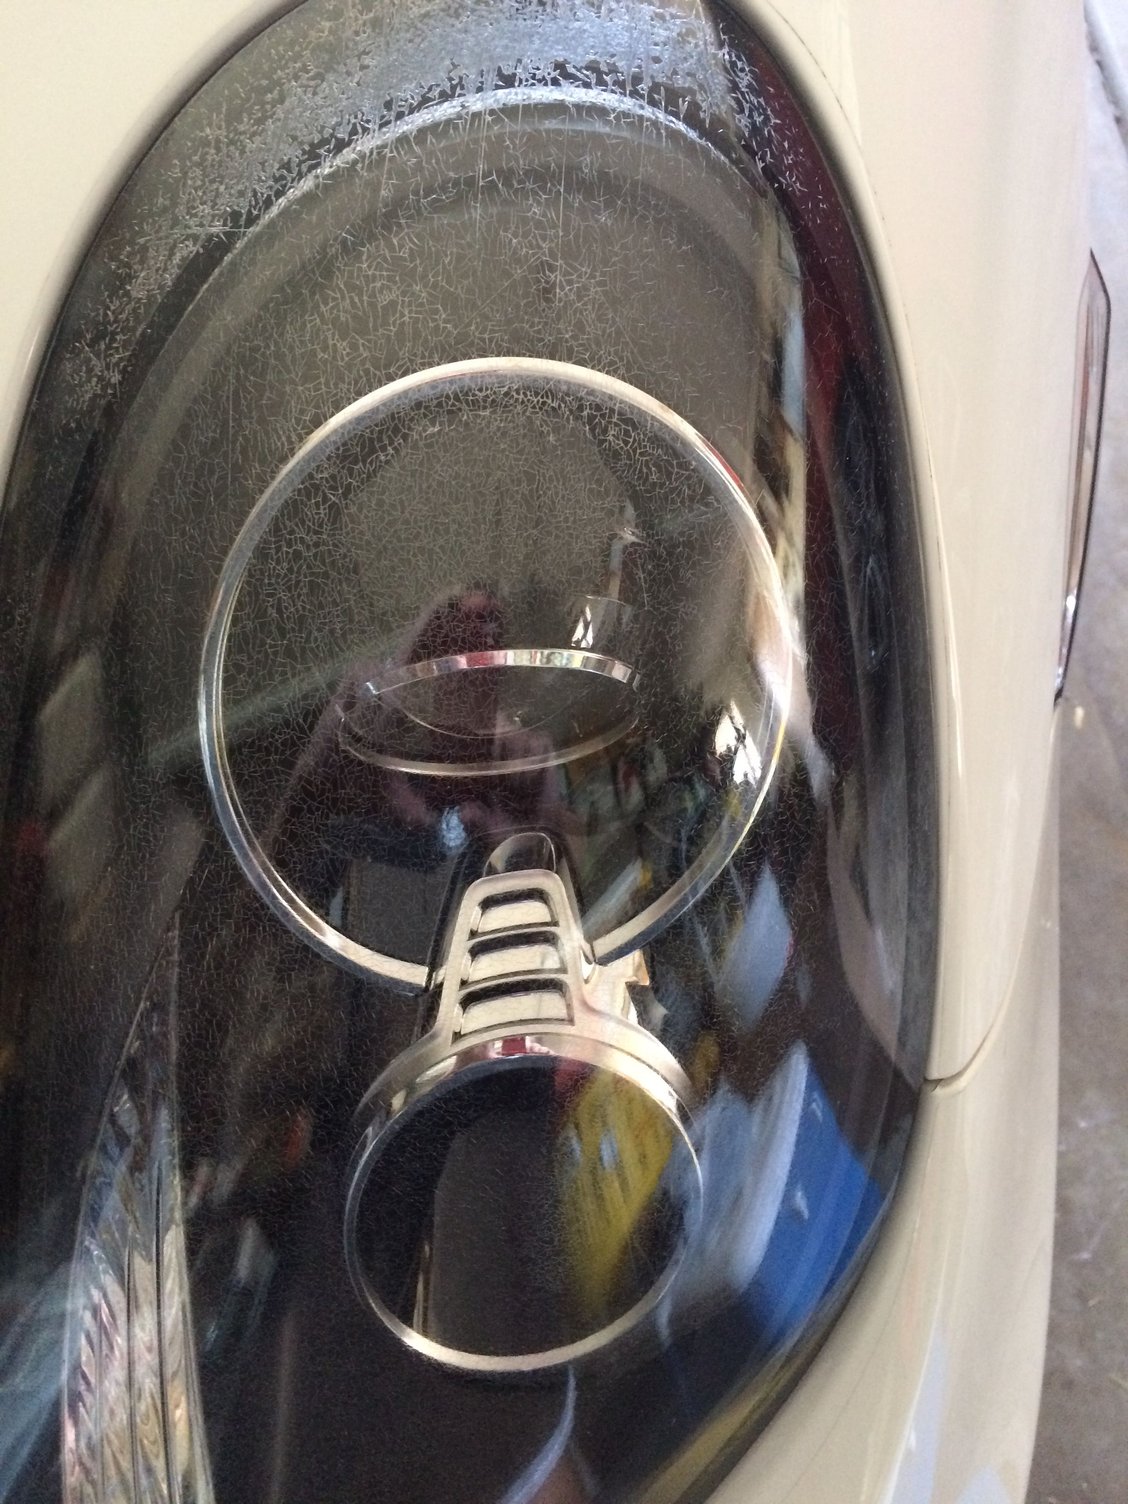
220 grit on the orbital started to get some traction. The fine cracks were really deep so after about 2.5 hours of sanding with the orbital I started back up the grit chain with 400 dry, 400 wet, 800 dry, 1200 dry, 1500 dry, 2000 wet and finally 3000 wet. Adhesion promoter then acrylic clear coat per the video. The first photo is of the "restored" light and the second the pretty much untouched state of the driver's side.
Observations: Mr. Moose was right about taking the lights off the car. This so easy on a Porsche there really is no good reason not to. My work didn't return the light to as new, but removed the worst scratches and reduced the small cracks. I did miss about four small 1/2 inch moon shaped areas that didn't get as much of the cracking removed. These areas didn't show up until I applied the clear coat and were not visible when I cleaned the lens with rubbing alcohol or Windex. The lens is not as clear as the drivers side as the chrome surrounds are not as clearly visible. I am going to live with this quality and try to do better on the drivers side.
Total cost of materials (had the sander already) ~ $120. Time on job about 4 hours over three days. For a driver Porsche this is OK and beats the $500 quote form a detailer for me in my situation.
In the end if you need a perfect light buy new, pay someone to do the work who has experience or be willing to do it more than once. For me the result is acceptable, but it wouldn't be for everyone.
My suggestion is go to Harbor, buy an orbital polisher, purchase some 3m rubbing compound, take the 3000grt remove the top clear coat and buff out the plastic, i've restored some really scratched plastic to perfect clarity like this. As of now the plastic looks hazy, although still miles away from before.
 09-04-2017, 10:03 PM