
DIY Oil Change Guide 2005 Cayenne Turbo w/ Pictures
 11-14-2012, 03:12 PM
#1

I found a nice guide for a DIY Oil Change but it was for a Cayenne S which is a little different then the Turbo. So I decided to post a guide for the Turbo as well. Feel free to provide me any feedback and I will update the guide accordingly. This is for a 2005 Turbo, which I am assuming it would hold true for any first generation Turbo. Total cost of the oil and filter was only $65 but that is because Advance Auto Parts currently has a sale on their oil. Regular price would be $105, which is still $60 less then the cheapest quote I could find on getting this done for me.
Parts/Tools List (What I used):
9 Quarts of 5W-40 Full Synthetic Oil - Castrol Edge w/ SPT - $8.99 at Advance Auto Parts
Oil Filter w/ O-Ring - PN: HP-7011 - $14.99 at Advance Auto Parts
Oil Drip Pan 5 Gallon - Rhino Gear - $8.99 at Advance Auto Parts
Oil Recycling Can 12qt - Rhino Gear - $5.99 at Advance Auto Parts
8mm Socket Drive
#2 Phillips Head Screwdriver
#10 Socket
Car Jack
Now, what I did was I set the suspension to the highest level (Special Terrain Mode) and put the car jack in place for safety. Next time, I am going to spend the extra money to get a real car jack and raise the vehicle higher so I have more room to work. I will be looking for a good deal on a 3 ton service jack over the next 5 months before my next oil change, but most likely will have to shell out $100-$150 for a decent one.
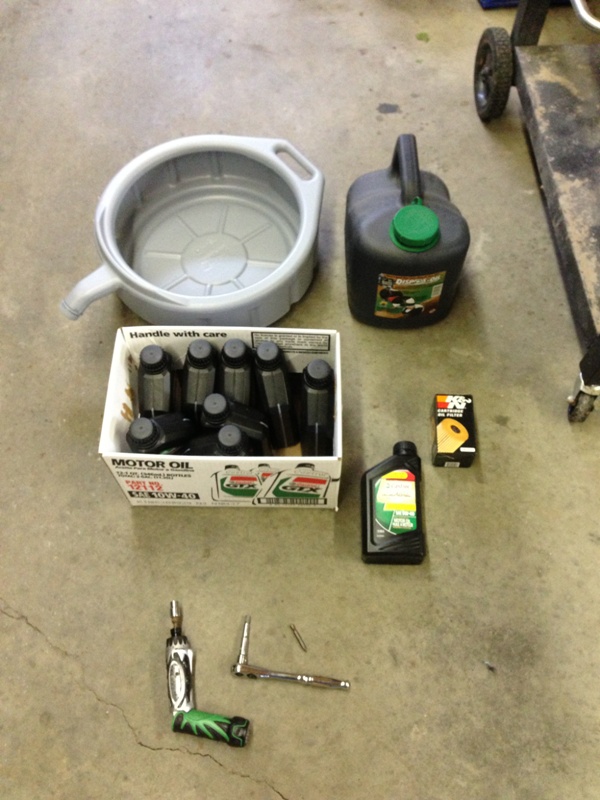
Parts Photo

Tools
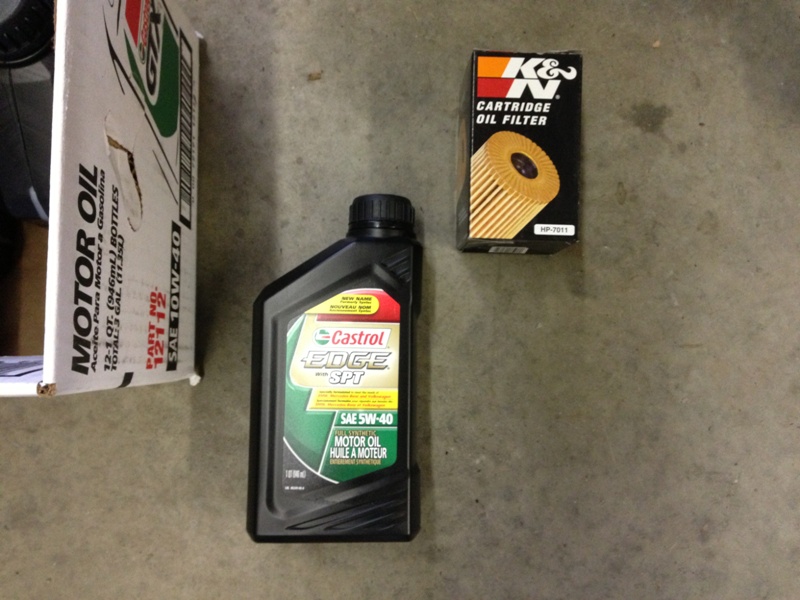
Oil and Filter
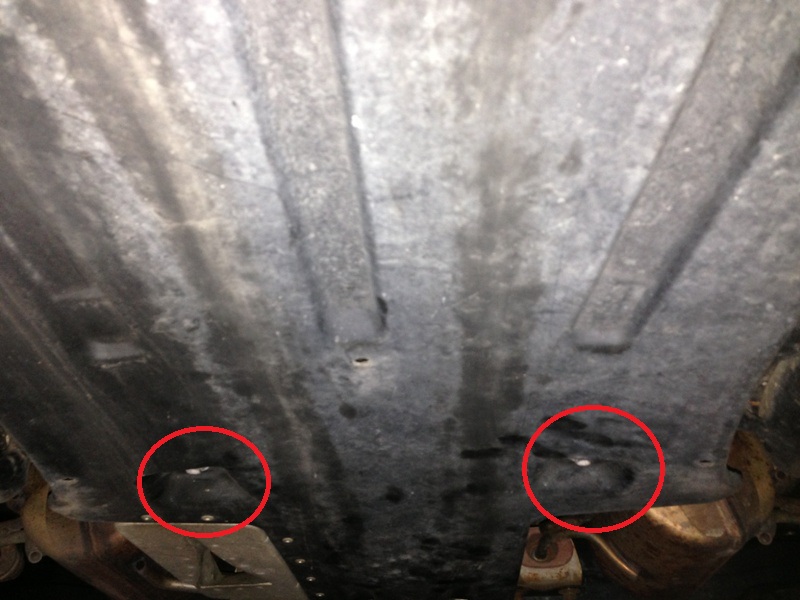
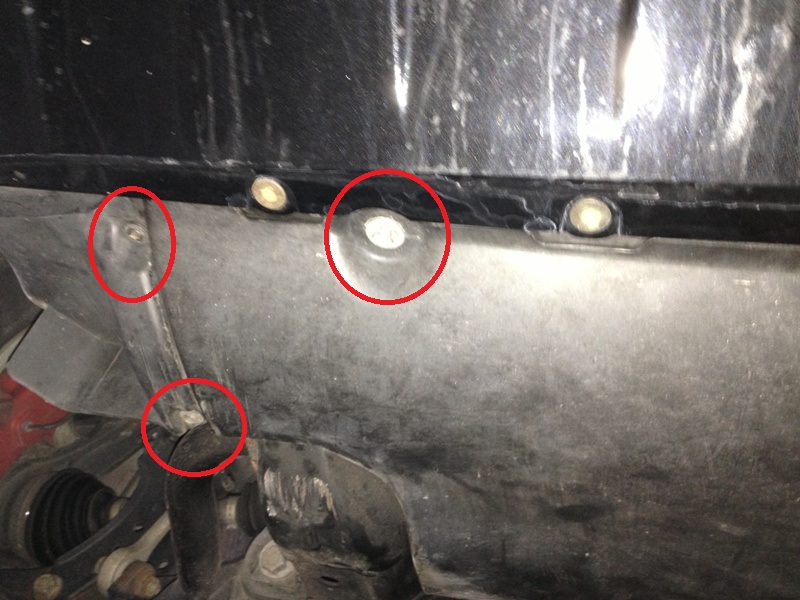
Underneath, there are two panels you will have to remove. The red circles are the locations of the screws you need to remove.
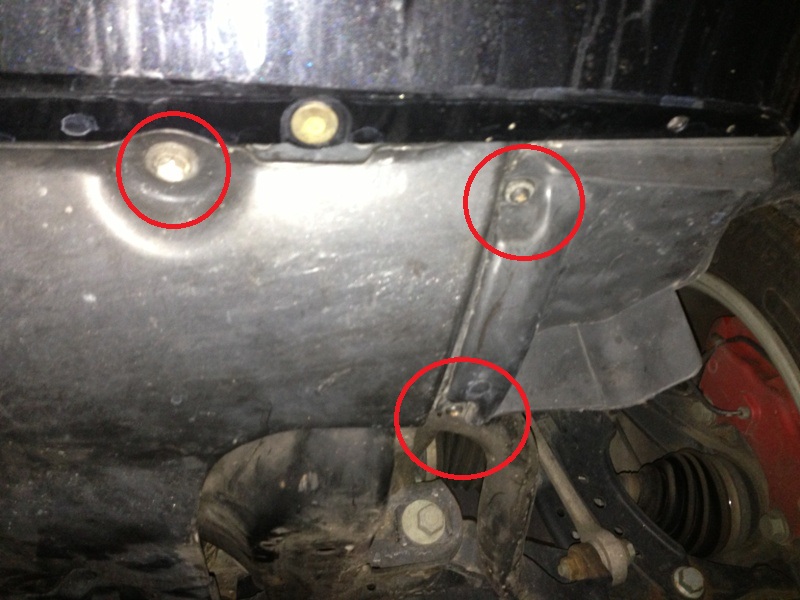
Here is one of the side to the front panel. There are two additional Phillips screws you will need to remove that attach the front panel to the wheel deflector panel.
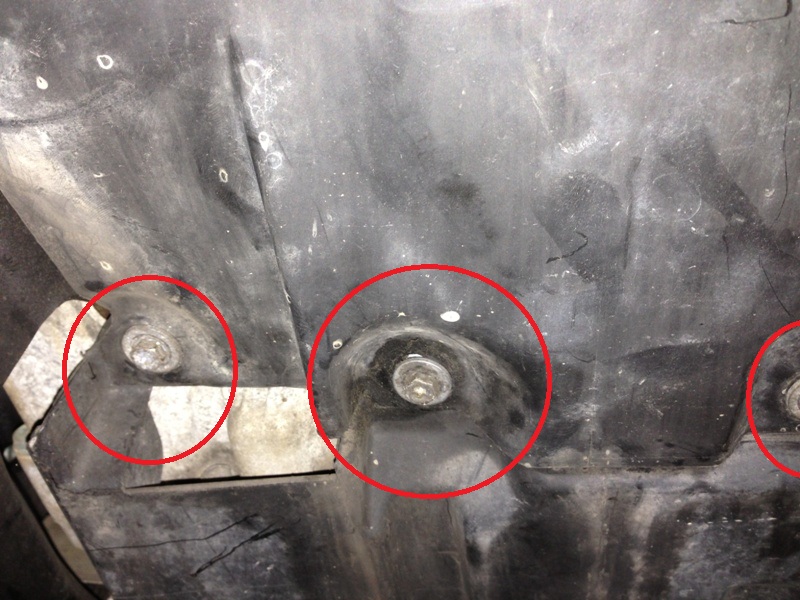
Here is the other side to the front panel. Once you remove all the screws on the front panel, you will have to carefully pull it down. This was the most challenging part of the oil change as this front panel is not easy to remove. With some minor bending and adjusting, it will come out. The alternative is to completely remove the wheel well deflector shields as well, but I didn't want to go to this extent.
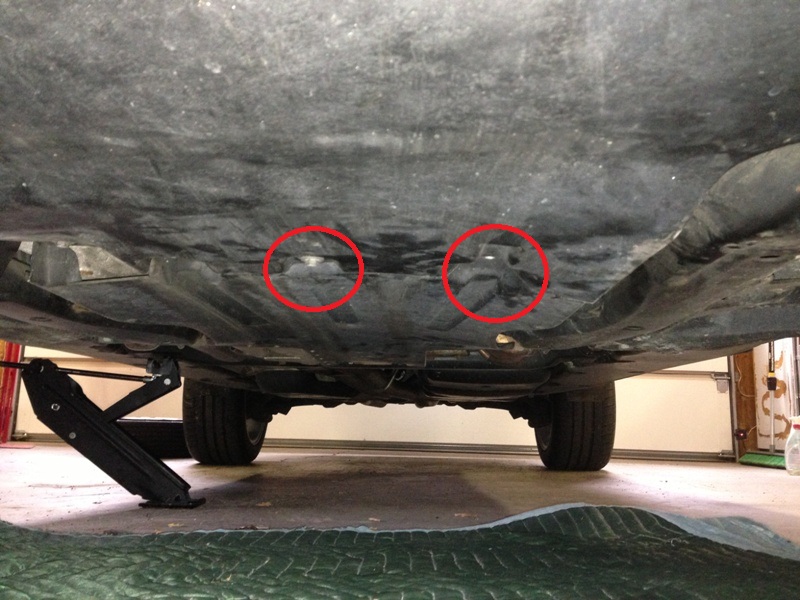
Screws on the back side of the front panel
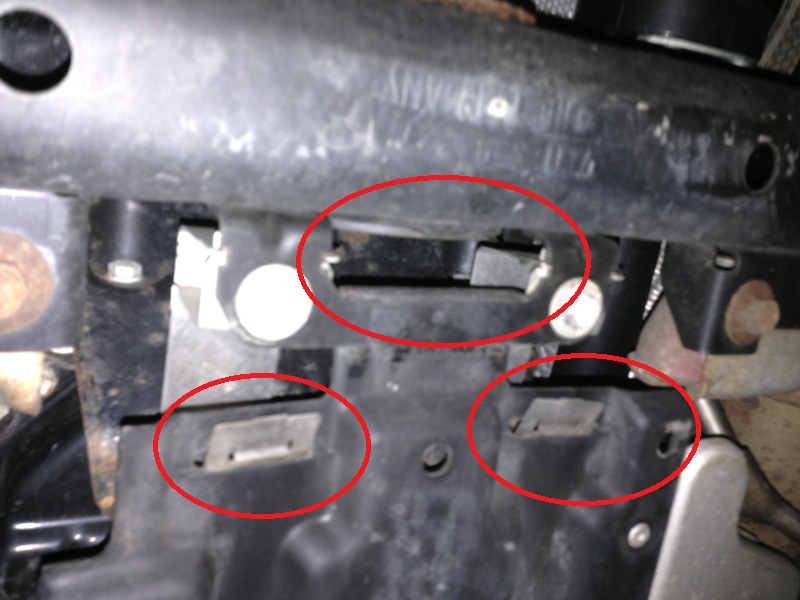
More screws that connect the front and back panels. I raised the vehicle with the air suspension only, this jack was just put in place in case the suspension gave way and was not used to actually raise the vehicle. I would not recommend using this car jack to raise the vehicle. Next time I am going to use a drive-up ramp, walmart sells a set for relatively cheap.
Two screws on the back panel
This is the back end of the back panel. Pay attention to how this is attached to your vehicle before you remove it so that you know how to properly install it when you are finished
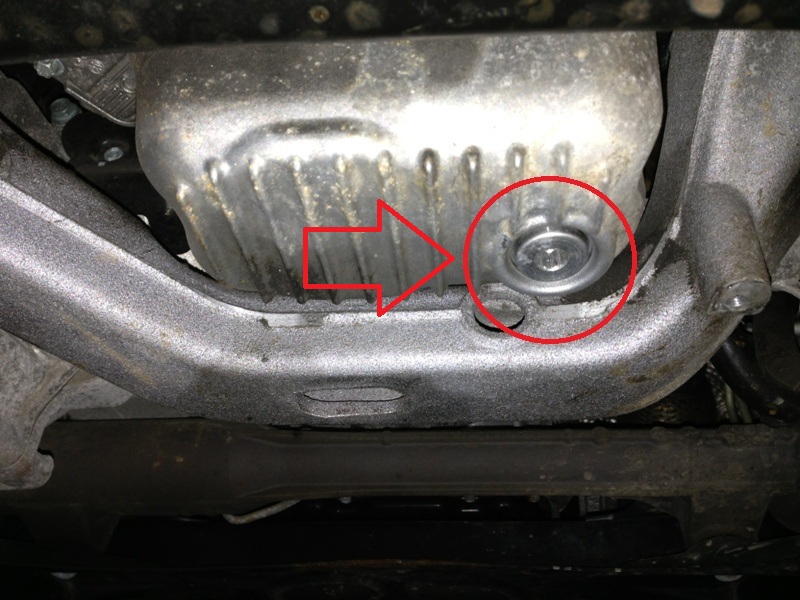
Now that you have the panels removed, here is the exposed oil drain plug. I only removed this drain plug during this oil change. I have read about another drain plug located adjacent to the oil filter housing, however I didn't remove that one and from the looks of the plug on my vehicle, neither has anybody else in it's lifetime so I left it alone. You will need an 8mm socket drive in order to remove this drain plug. You can also use a Torx drive however I didn't have one available and I am not sure what size you would need.
After removing the drain plug, pull out the dipstick so that the oil will drain freely and completely.
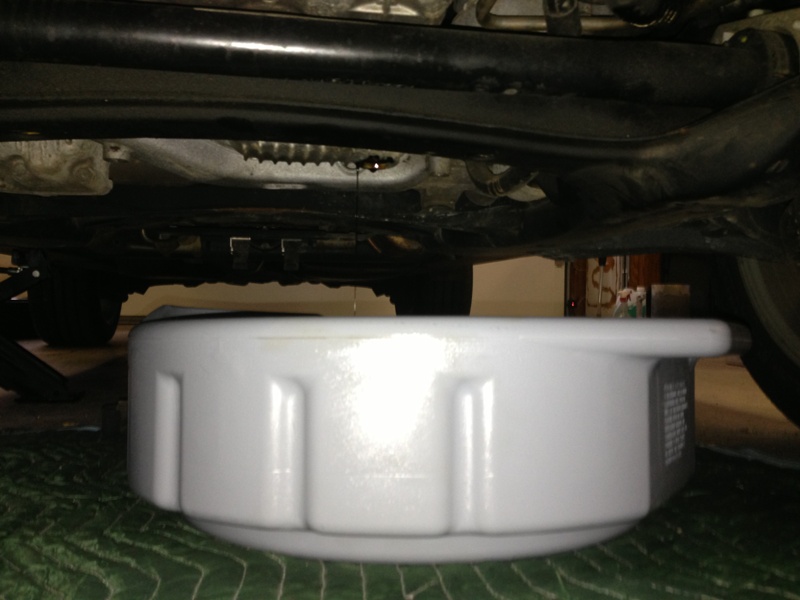
Photo of the oil draining into the 5 gal drip pan
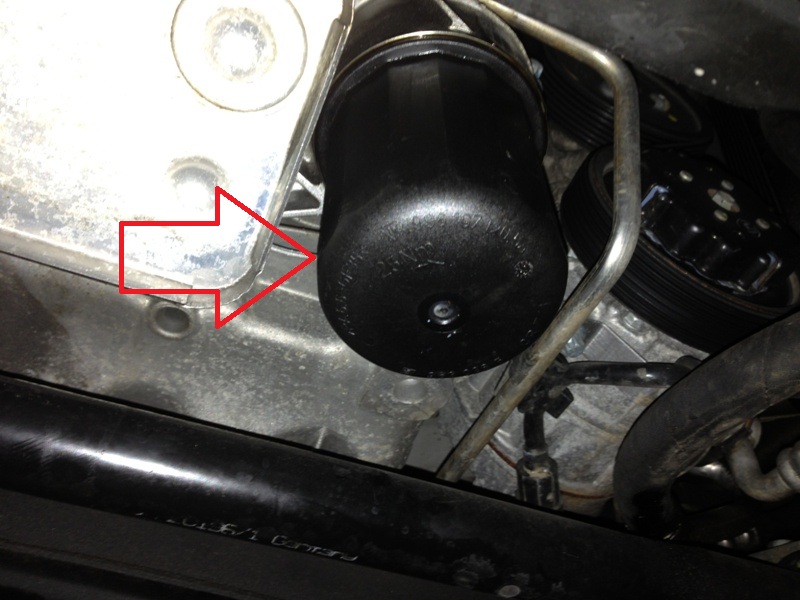
After the oil is drained most of the way, you can remove the oil filter housing. You shouldn't need a tool in order to do this as this housing should only be hand tight. If you are unable to remove the housing because someone before you used a tool to tighten it, then you will have to get some kind of wrench to carefully remove the housing. If you get the same drip pan as I did then you can slide it under this filter housing and it will catch the additional oil that comes out once you remove it as well as the oil that is still coming out of the drain plug at the same time
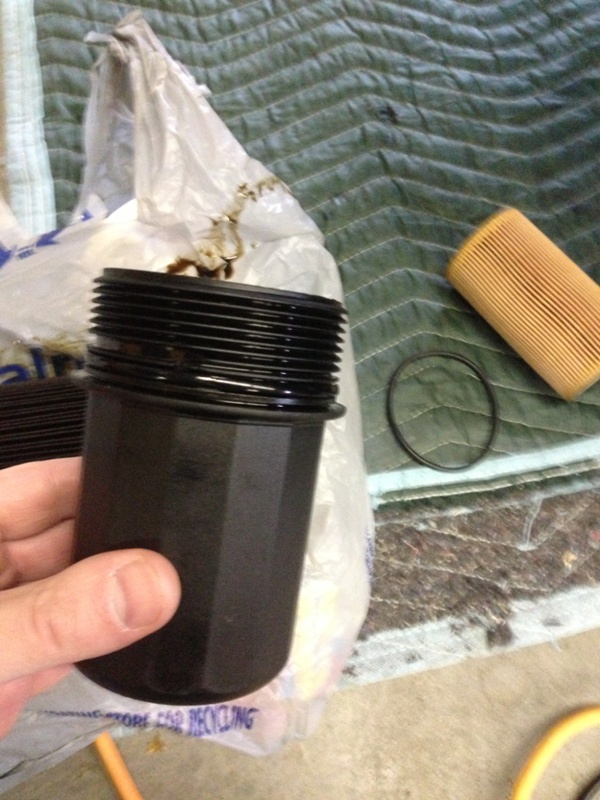
Here is a photo of the oil filter housing removed as well as my new filter and O-Ring set aside ready to be installed. Take the time to clean off the filter housing threads as best as you can and replace the O-Ring. Be careful not to get any dirt or debris in the oil filter housing as this would be counterproductive
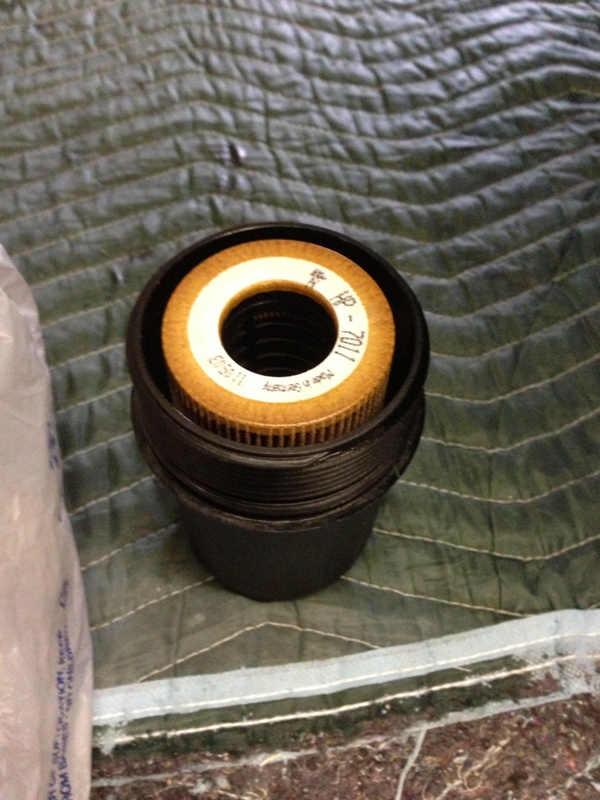
Here is the new filter installed into the housing. You will have to push the new filter down so that it seats fully into the housing compartment. The top of the filter will almost fit flush with the top of the housing. After you do this, go ahead and screw the housing back into the vehicle all the way and only hand tight. The last 1/4" or so will be tougher to screw on as the top of the filter is being seated into the top end of the vehicle filter compartment. Be sure the top part of the filter housing is all the way seated to the vehicle receptacle
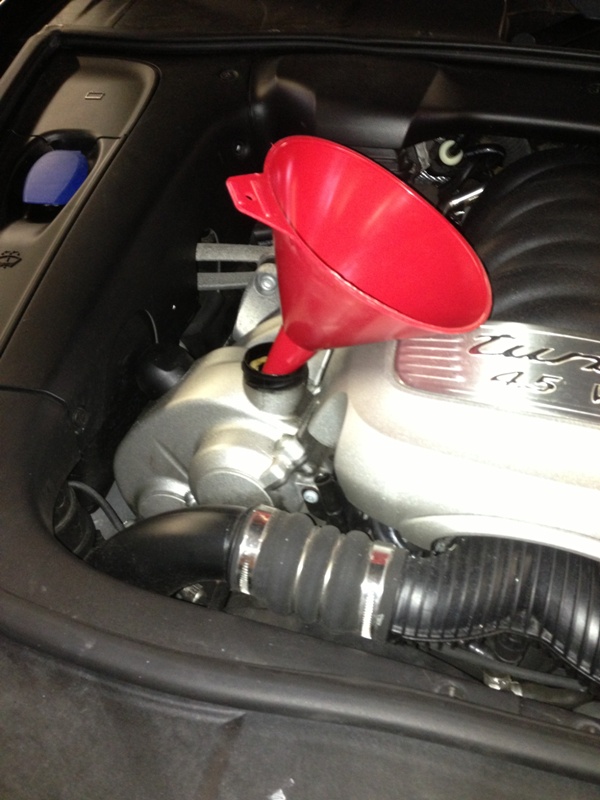
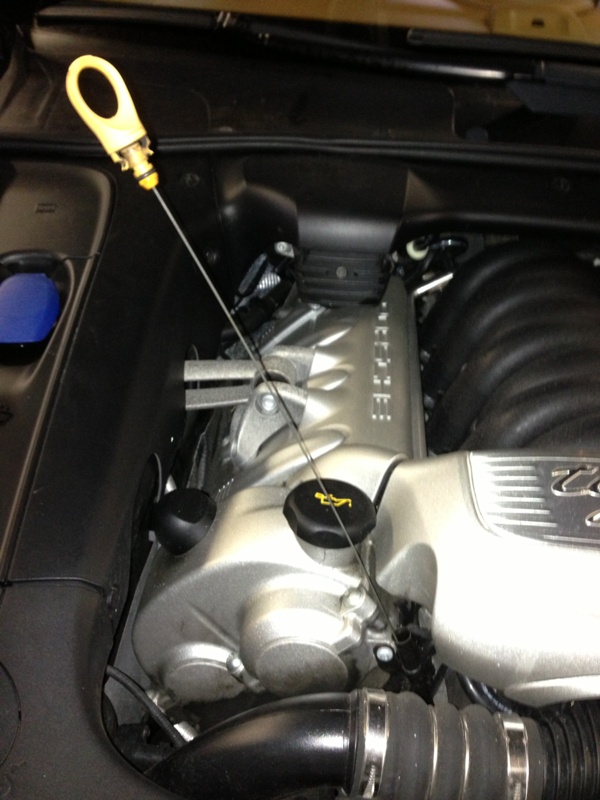
Next you can replace the drain plug. Make sure it has a tight fit with your wrench but don't over-tighten it. Sorry, I am not sure what the spec torque is on this plug at this time but will update this thread when I find out. After that, go ahead and pour the 9qts of the new oil into the oil filler hole. I used a funnel as shown in order to keep from making a mess.
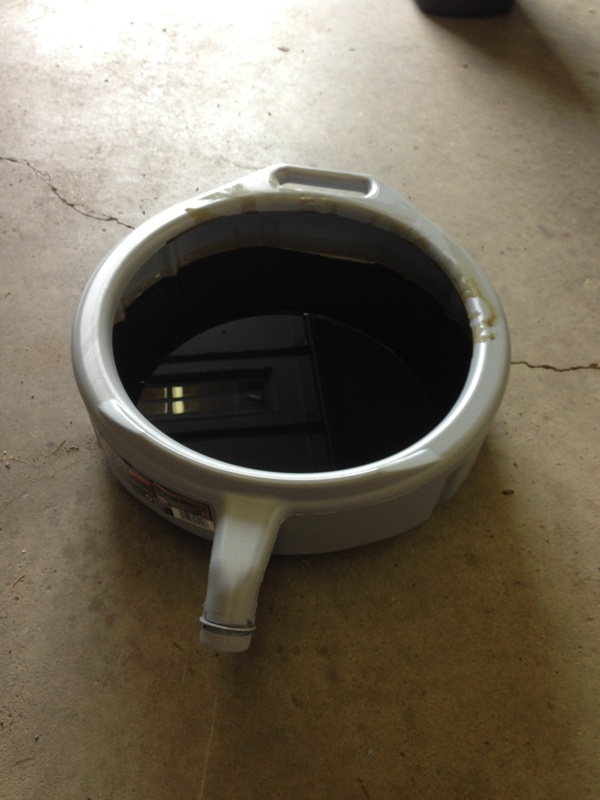
Here is what your old oil will look like. You can pour the residual oil into the oil can and take it to Advance auto parts or your local garage for disposal. Be sure you replace your cap and dipstick and start your engine. Let it run for a good 3 minutes, then turn it off and check your oil level. I used the entire 9qts when I did this even though the book capacity says like 8.5qts.
Check for leaks from the drain plug and the oil filter housing. If there are no leaks then go ahead and re-install the two panels and you are done!
Parts/Tools List (What I used):
9 Quarts of 5W-40 Full Synthetic Oil - Castrol Edge w/ SPT - $8.99 at Advance Auto Parts
Oil Filter w/ O-Ring - PN: HP-7011 - $14.99 at Advance Auto Parts
Oil Drip Pan 5 Gallon - Rhino Gear - $8.99 at Advance Auto Parts
Oil Recycling Can 12qt - Rhino Gear - $5.99 at Advance Auto Parts
8mm Socket Drive
#2 Phillips Head Screwdriver
#10 Socket
Car Jack
Now, what I did was I set the suspension to the highest level (Special Terrain Mode) and put the car jack in place for safety. Next time, I am going to spend the extra money to get a real car jack and raise the vehicle higher so I have more room to work. I will be looking for a good deal on a 3 ton service jack over the next 5 months before my next oil change, but most likely will have to shell out $100-$150 for a decent one.
Parts Photo
Tools
Oil and Filter
Underneath, there are two panels you will have to remove. The red circles are the locations of the screws you need to remove.
Here is one of the side to the front panel. There are two additional Phillips screws you will need to remove that attach the front panel to the wheel deflector panel.
Here is the other side to the front panel. Once you remove all the screws on the front panel, you will have to carefully pull it down. This was the most challenging part of the oil change as this front panel is not easy to remove. With some minor bending and adjusting, it will come out. The alternative is to completely remove the wheel well deflector shields as well, but I didn't want to go to this extent.
Screws on the back side of the front panel
More screws that connect the front and back panels. I raised the vehicle with the air suspension only, this jack was just put in place in case the suspension gave way and was not used to actually raise the vehicle. I would not recommend using this car jack to raise the vehicle. Next time I am going to use a drive-up ramp, walmart sells a set for relatively cheap.
Two screws on the back panel
This is the back end of the back panel. Pay attention to how this is attached to your vehicle before you remove it so that you know how to properly install it when you are finished
Now that you have the panels removed, here is the exposed oil drain plug. I only removed this drain plug during this oil change. I have read about another drain plug located adjacent to the oil filter housing, however I didn't remove that one and from the looks of the plug on my vehicle, neither has anybody else in it's lifetime so I left it alone. You will need an 8mm socket drive in order to remove this drain plug. You can also use a Torx drive however I didn't have one available and I am not sure what size you would need.
After removing the drain plug, pull out the dipstick so that the oil will drain freely and completely.
Photo of the oil draining into the 5 gal drip pan
After the oil is drained most of the way, you can remove the oil filter housing. You shouldn't need a tool in order to do this as this housing should only be hand tight. If you are unable to remove the housing because someone before you used a tool to tighten it, then you will have to get some kind of wrench to carefully remove the housing. If you get the same drip pan as I did then you can slide it under this filter housing and it will catch the additional oil that comes out once you remove it as well as the oil that is still coming out of the drain plug at the same time
Here is a photo of the oil filter housing removed as well as my new filter and O-Ring set aside ready to be installed. Take the time to clean off the filter housing threads as best as you can and replace the O-Ring. Be careful not to get any dirt or debris in the oil filter housing as this would be counterproductive
Here is the new filter installed into the housing. You will have to push the new filter down so that it seats fully into the housing compartment. The top of the filter will almost fit flush with the top of the housing. After you do this, go ahead and screw the housing back into the vehicle all the way and only hand tight. The last 1/4" or so will be tougher to screw on as the top of the filter is being seated into the top end of the vehicle filter compartment. Be sure the top part of the filter housing is all the way seated to the vehicle receptacle
Next you can replace the drain plug. Make sure it has a tight fit with your wrench but don't over-tighten it. Sorry, I am not sure what the spec torque is on this plug at this time but will update this thread when I find out. After that, go ahead and pour the 9qts of the new oil into the oil filler hole. I used a funnel as shown in order to keep from making a mess.
Here is what your old oil will look like. You can pour the residual oil into the oil can and take it to Advance auto parts or your local garage for disposal. Be sure you replace your cap and dipstick and start your engine. Let it run for a good 3 minutes, then turn it off and check your oil level. I used the entire 9qts when I did this even though the book capacity says like 8.5qts.
Check for leaks from the drain plug and the oil filter housing. If there are no leaks then go ahead and re-install the two panels and you are done!
Last edited by uh60pin; 11-30-2012 at 10:22 AM.

The following users liked this post:
f266 (12-26-2020)
11-14-2012, 04:18 PM
#2
Drifting
Good write up. I am lucky that my local indy uses a high efficiency oil burner to heat his shop. He is always looking for oil to fill up his tank. He take engine oil, ATF, gear oil etc. He can burn damn near anything. Basically heats the 6 bay shop for free.
11-14-2012, 05:13 PM
#3
Race Director
Only change I would suggest is don't crawl under the car relying on the stock jack, they're not designed for that.
I use a pair of 2x8 boards that are stacked (nailed) to each other and cut so I can drive right up on them. Only about 2' long. Much easier (and far safer) than using any jack and I don't have to worry about using jackstands.
They come in handy for many uses.
I'll try to remember to take a photo.
I use a pair of 2x8 boards that are stacked (nailed) to each other and cut so I can drive right up on them. Only about 2' long. Much easier (and far safer) than using any jack and I don't have to worry about using jackstands.
They come in handy for many uses.
I'll try to remember to take a photo.
11-14-2012, 05:51 PM
#4
Former Vendor

That's a great DIY and thank you for sharing  As 993BillW stated I wouldn't suggest using the stock jack for an Oil Change and only use it for removal of a tire.
As 993BillW stated I wouldn't suggest using the stock jack for an Oil Change and only use it for removal of a tire.
11-14-2012, 07:12 PM
#5
Race Director
This is what I use for oil changes and anything not requiring the tire to be removed.
Bottom board is not even 20" long so it's not hard to store. I have 2 of these and a bunch of single board ones. Work for the 993 too.
Bottom board is not even 20" long so it's not hard to store. I have 2 of these and a bunch of single board ones. Work for the 993 too.
Last edited by Slow Guy; 12-24-2014 at 01:40 PM.
Trending Topics
11-16-2012, 08:19 PM
#8
Race Director
Until someone with a Turbo answers your question I will answer it from the NA V8 side.
The rear-most upper drain bolt gets about 1/2 qt. when you remove it, from the shape of the pan there's no way to get that oil out w/out removing the drain plug.
Some have said they can reset the service reminder light using a procedure with the key and the info stalk, I tried but never got it to work. I bought a Durametric system and do it with that.
HTH
11-30-2012, 10:17 AM
#9
Thanks for your responses. I actually had the vehicle suspension raised fully, the car jack I had in place was only there for an emergency, it wasn't actually raising the vehicle. But as I stated, next time I am going to use a real jack or ramps. Walmart sells a set of drive-up ramps for relatively cheap.
As far as the service light goes, mine has not come on yet. When it does, I plan on taking it to a local shop who happens to have a reader that can reset it.
As far as the service light goes, mine has not come on yet. When it does, I plan on taking it to a local shop who happens to have a reader that can reset it.
11-30-2012, 10:19 AM
#10
12-06-2012, 12:59 PM
#14
12-06-2012, 09:02 PM
#15
Burning Brakes
Nice write up. I'm shopping an 05 Turbo and trying to get some education before the purchase. A note on the oil drain pan. I purchased a plastic cement mixing pan at Home Depot some years back to catch the 12 quarts of oil from my 911. It works great and is so big I never worry about missing the initial surge of oil or the splash. I think it was about $5