When you click on links to various merchants on this site and make a purchase, this can result in this site earning a commission. Affiliate programs and affiliations include, but are not limited to, the eBay Partner Network.
Lots of threads and articles of where to jack up the car. I'm fine with *where* to do it and where to put the jack stand, but I'd like something that actually "fits" into the cutouts where porsche recommends jacking the car up.
For the front lift points, I've seen them at Pelican Parts front lifting location,
I've also seen a link from this forum to ebay auction of what looks like would fit into that hole, but they're not available.
If they're the normal oval openings used by Porsche, Rennline has a metal lift puck with a rubber pad on top and an oval metal top piece that inserts into the slot and locks in by turning 90 degrees.
Your referenced point is a roadside tire change lift point
See photos for
Lift point
Stand placement
Non-lethal Stands
Get a puck and bore a 1 inch diameter hole partially through
Or maybe some Delrin and take it to the machine shop https://www.ebay.com/itm/282558963261
If they're the normal oval openings used by Porsche, Rennline has a metal lift puck with a rubber pad on top and an oval metal top piece that inserts into the slot and locks in by turning 90 degrees.
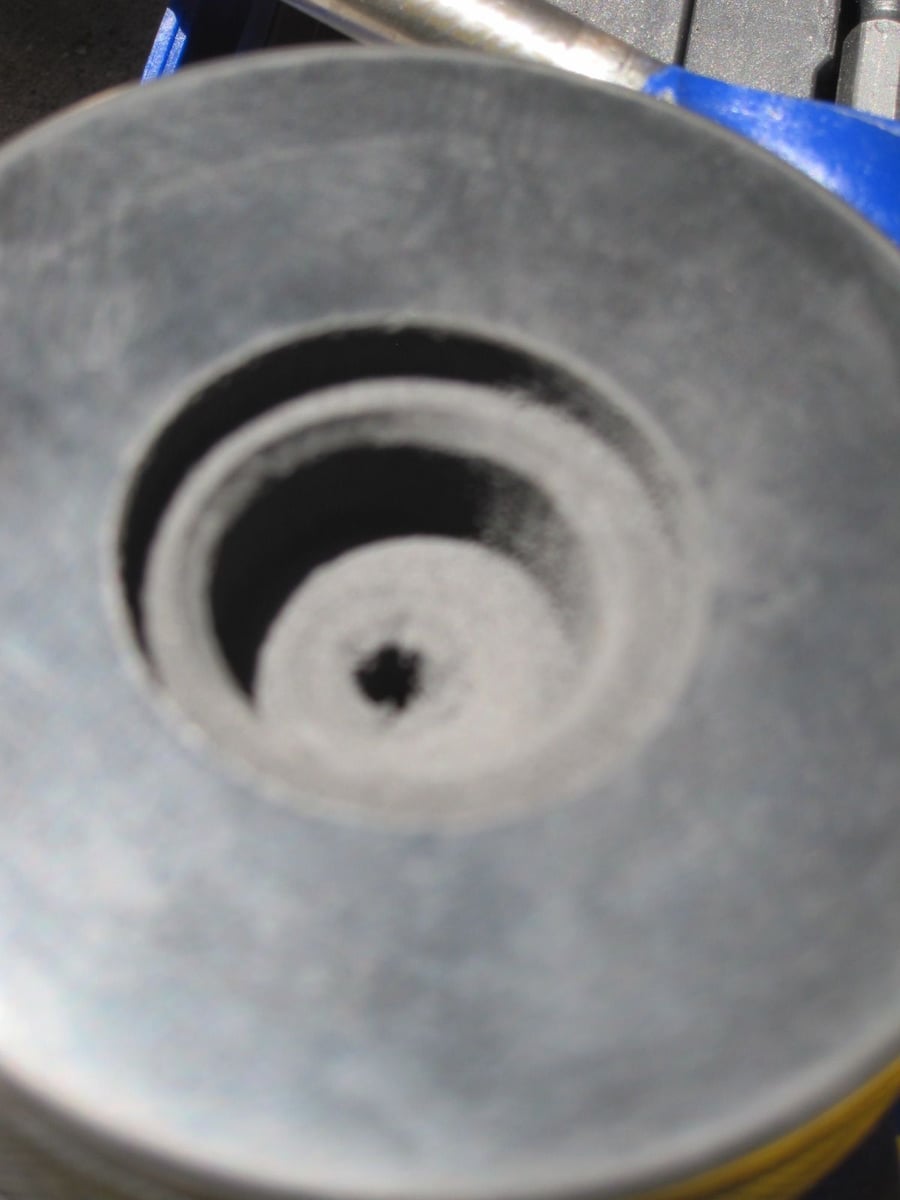
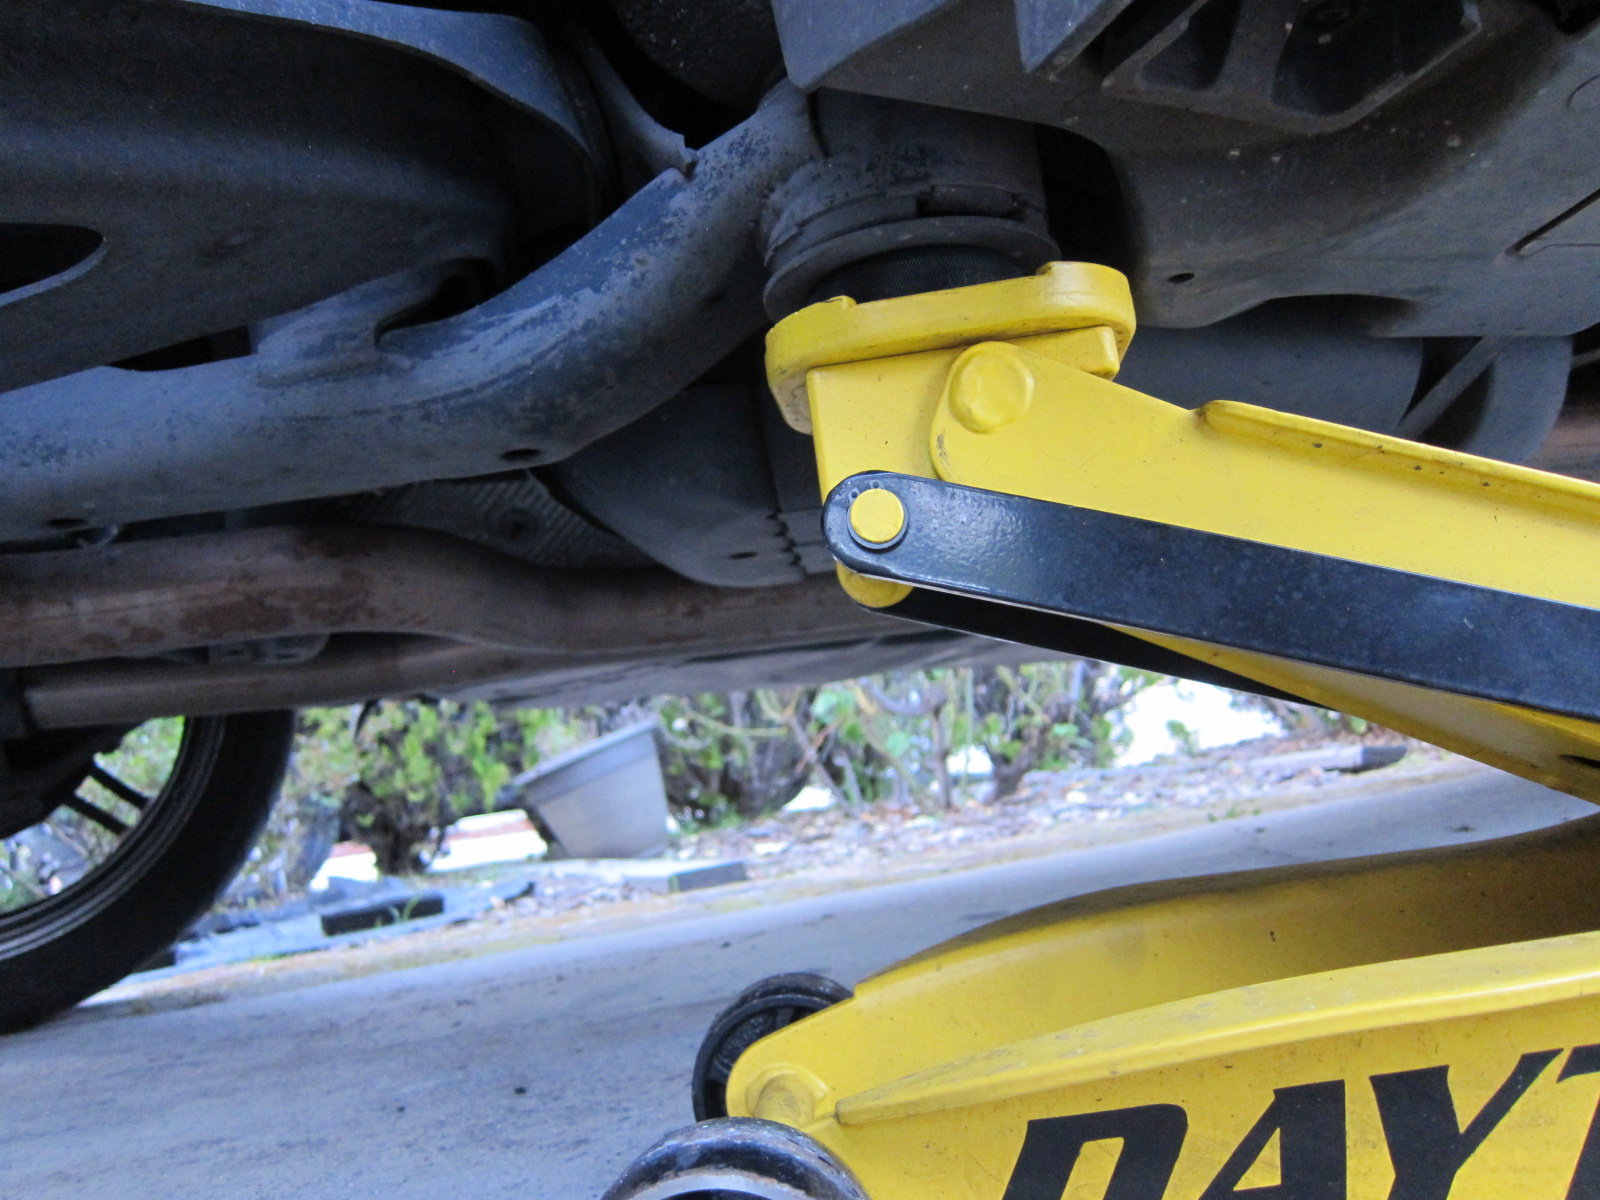
I made my own custom fit hockey puck adapters for the rear points on my 2004 S. The drill bits shown in the pics turned out to be ideal. I purposely drilled the small hole small enough so it fits over the hex bolt, but grips it and stays in place. The slightly bigger hole is to clear the washer. Fits perfectly, evenly distributing the load between the center bolt and outer flange.
The drill bits I used are 7/8" and 1-1/4". The 3-fluted design of these Irwin bits is far better for this application than a flat spade bit would be.
It's very simple, but here's the procedure I used: drill a small pilot hole in the center of the puck, fine to drill all the way through. Use the 1-1/4" bit to drill in a little to clear the washer on the bolt on the car. The threads on the end of the bit will pull it in, so go slowly. These bits are sharp and cut the hockey puck like butter. I set the puck on the ground and held it from moving with my feet, while drilling from above. At least as accurate as a milling machine would be. Then swapped to the 7/8" bit, and I ended up drilling until the threaded portion just barely reached the back side of the puck. You'll want to tune the depths of both holes to fit the exact mounting point you've got, to ensure even load distribution, etc. Then I used a utility knife to manually bevel the edges as seen in the finished product.
I'll see what I end up making next time I need to jack the front end and have some extra time to make a custom interface like this.
I made my own custom fit hockey puck adapters for the rear points on my 2004 S. The drill bits shown in the pics turned out to be ideal. I purposely drilled the small hole small enough so it fits over the hex bolt, but grips it and stays in place. The slightly bigger hole is to clear the washer. Fits perfectly, evenly distributing the load between the center bolt and outer flange.
The drill bits I used are 7/8" and 1-1/4". The 3-fluted design of these Irwin bits is far better for this application than a flat spade bit would be.
That's perfect and I just did a similar thing, but used a jack pad that has the groove in for cars with seams and drilled the holes in the opposite side. Now I can use it one way to straddle a seam and flip it over to use on the rear of the Cayenne. I just went with a straight 1.25" hole, but like your idea better so it stays in place - that was clever.
That's perfect and I just did a similar thing, but used a jack pad that has the groove in for cars with seams and drilled the holes in the opposite side. Now I can use it one way to straddle a seam and flip it over to use on the rear of the Cayenne. I just went with a straight 1.25" hole, but like your idea better so it stays in place - that was clever.
A few years ago I bought a 12-pack of hockey pucks (and I don't even play hockey any more) just to make these things. Yes, I've used a router to make slots in for the seams, etc. No shortage of hockey pucks for that. I did not take photos of that since they're more general purpose things, but yes, different pucks for the seam weld points, and I also cut little notches out of them so they sit a little more securely in the jack stand cradle.
In general I consider the jacking and supporting of my whole fleet pretty important and am willing to put in a little effort to do it safely and not likely to damage anything or anybody.
And just to be clear on the hockey pucks staying stuck on the bolt - it's plenty tight to stick on there and not worry about it falling off, but I don't drive around with them stuck on there, although I probably could. When I need to jack, I stick those on, then either jack from there or jack stand to that point. Then pull them off when I'm all done.
7/8" is just the right diameter. Greater than the distance from hex face to hex face, but less than the distance from hex corner to hex corner on the bolt.
I made my own custom fit hockey puck adapters for the rear points on my 2004 S. The drill bits shown in the pics turned out to be ideal. I purposely drilled the small hole small enough so it fits over the hex bolt, but grips it and stays in place. The slightly bigger hole is to clear the washer. Fits perfectly, evenly distributing the load between the center bolt and outer flange.
The drill bits I used are 7/8" and 1-1/4".
I apologise if this is a stupid question, but was there a reason why you did not drill the 7/8" hole right the way through?
I apologise if this is a stupid question, but was there a reason why you did not drill the 7/8" hole right the way through?
peppapig
I tried to drill that 7/8" hole just deep enough that the center bolt is taking some load as well as the outer flange. So I drilled just enough so that the center bolt touches at the same time the outer flange touches. The clearance hole for the washer was not careful like this - it is deep enough, and maybe deeper, to avoid contact with the washer at the base of the bolt. Distributing the load evenly across a big area seems best.
And even if you did (only) drill a 7/8" all the way through, it would hit on the washer at the bottom of the bolt, so there would be a gap between the outer flange and the puck. And BTW, that's why you drill the 1-1/4" clearance hole before the 7/8 - so you'll have the concentric pilot hole keeping the two holes centered. Those Irwin tri-fluted bits are awesome (I'll admit, I've even used them for reaming Aluminum holes), but they will wander if they don't have a pilot hole, or just bare material for that screw thing on the end to screw into and pull it in.
Also, philosophically, I tend to either not do something at all or do it as well as I can. I just like things like that more. I just used a plain hockey puck the first few times I had to jack it up, until I finally had a little extra time and then tried to do a clean job. I even beveled the edges with a utility knife - LOL.
I tried to drill that 7/8" hole just deep enough that the center bolt is taking some load as well as the outer flange. So I drilled just enough so that the center bolt touches at the same time the outer flange touches. The clearance hole for the washer was not careful like this - it is deep enough, and maybe deeper, to avoid contact with the washer at the base of the bolt. Distributing the load evenly across a big area seems best.
Sorry!! I had not realised that you were using the bolt to take some of the load. I liked the idea of the flange only taking the load, using the clearance hole for the washer as well.
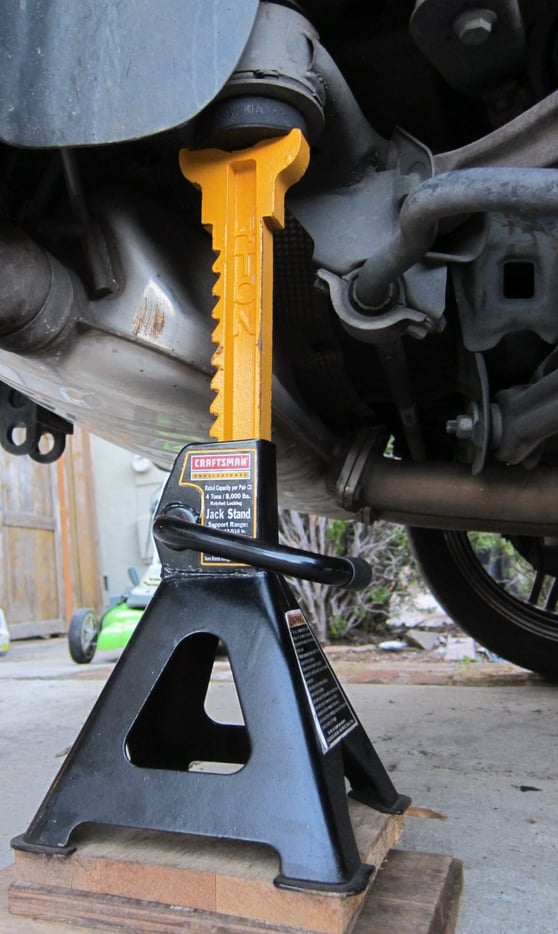
I don't know if this is obvious, but I have not seen it discussed yet, so here's what I figured out recently when I had to remove a rear wheel ...
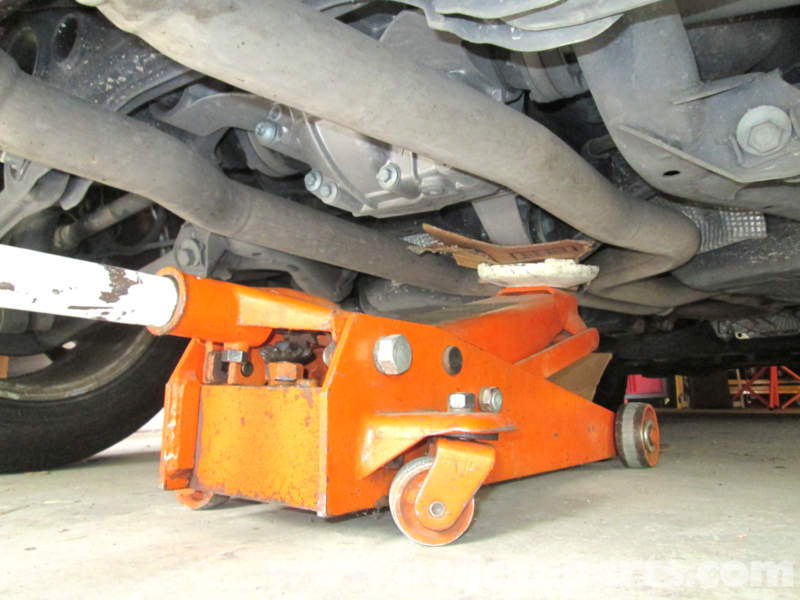
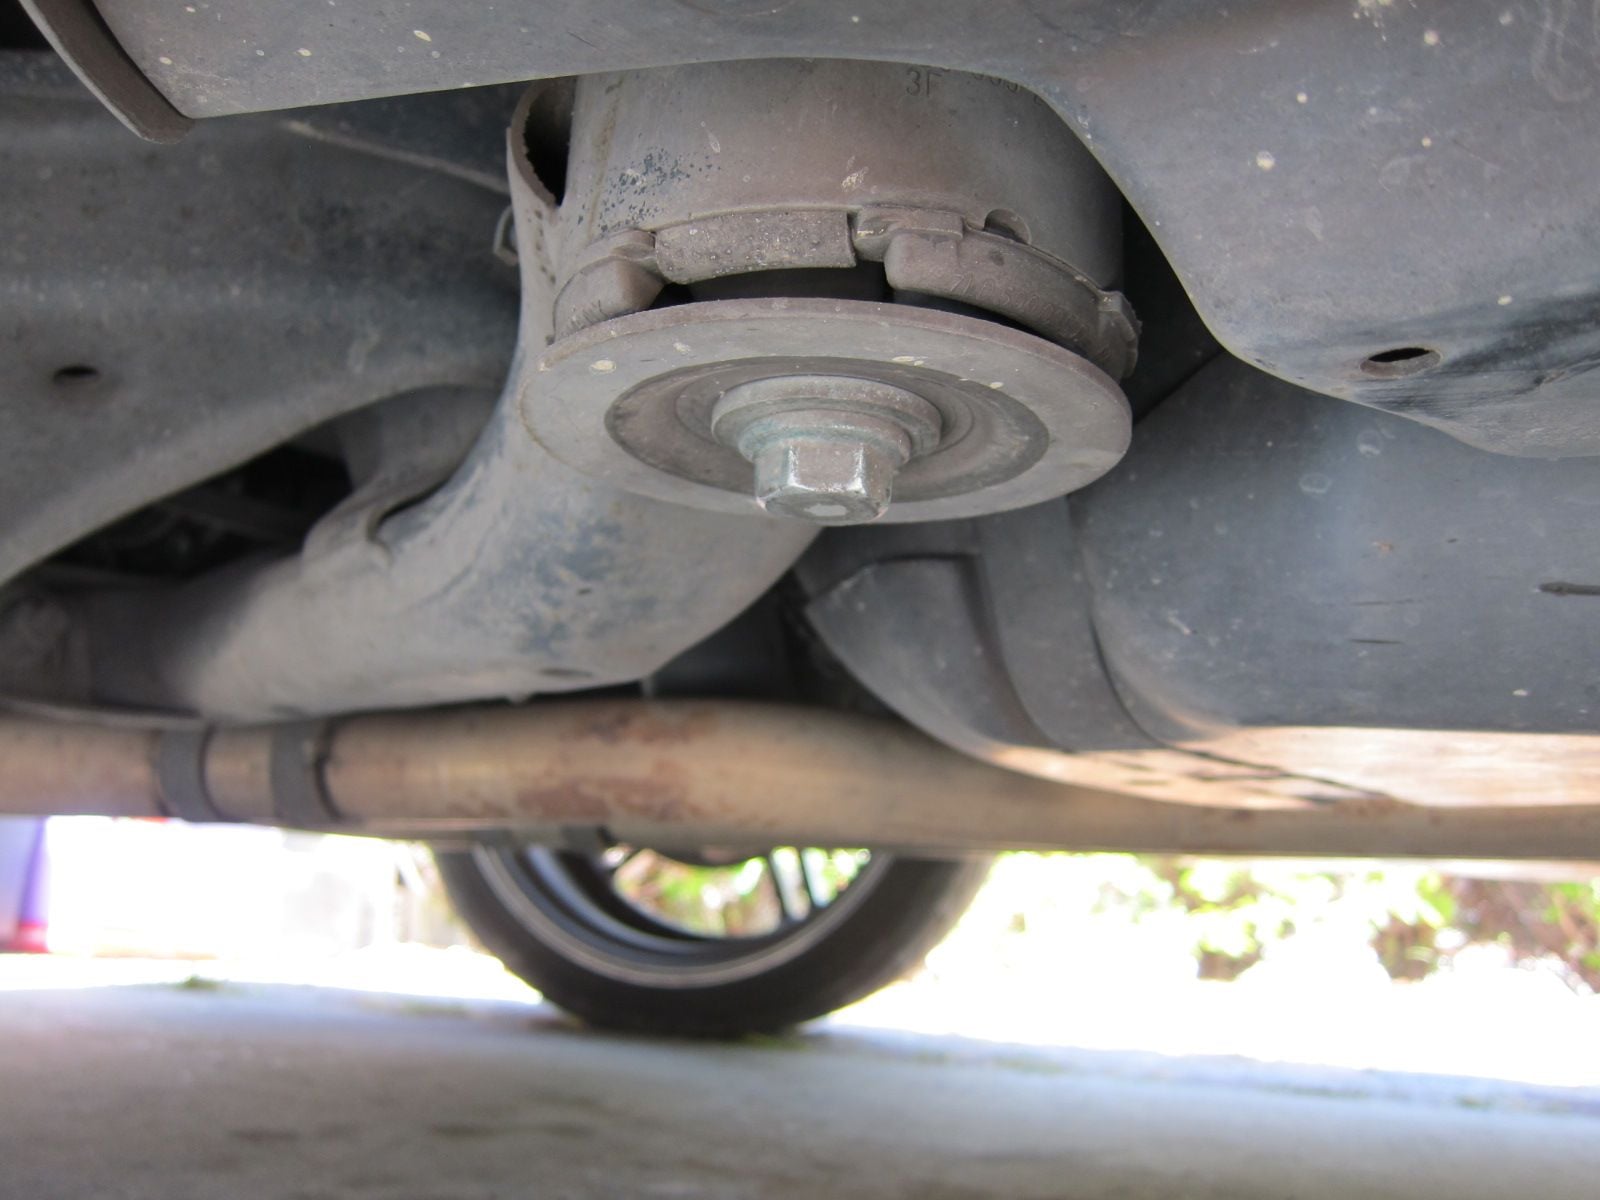
At least on my 2004 S, there is an excellent support point for a jack stand aft of the rear wheels.
So I use two of those custom hockey puck things I showed how to make above. One of them for the floor jack, as is widely known.
And then I use a second one, to the rear of the rear wheel for the jack stand. Same type of circular flange with a bolt head in the center, so the hockey pucks work just as well. Appears to be a very solid structural point on the car. Further out from the front wheels means the support load is less. I use the Craftsman 4-ton jack stands as shown in the pics. Longer ones or better blocks of wood (I did not have access to my "good" scrap wood at the time of the photos) would be good to have.
If I need to jack both rear wheels, I might still go with the central jacking point by the rear differential, but I expect this method would work well too, jacking and jack-standing one side at a time. And this method is probably better when you just need one side jacked. If doing the central jack-point method, you can then choose to put the jack stands on either the front or the rear points, depending on how best to get them out of your way.

 02-25-2018, 04:59 PM