When you click on links to various merchants on this site and make a purchase, this can result in this site earning a commission. Affiliate programs and affiliations include, but are not limited to, the eBay Partner Network.
I was surprised how many research papers have been written on the topic of mufflers, and in `Shape optimization of Extended Tube Muffler using Threshold Acceptance, Simulated Annealing and FEM Methods’ found what may work in an extended outlet tube design (essentially what the PSE is with valves open), and was able to change the drone to just loudness on the second try.
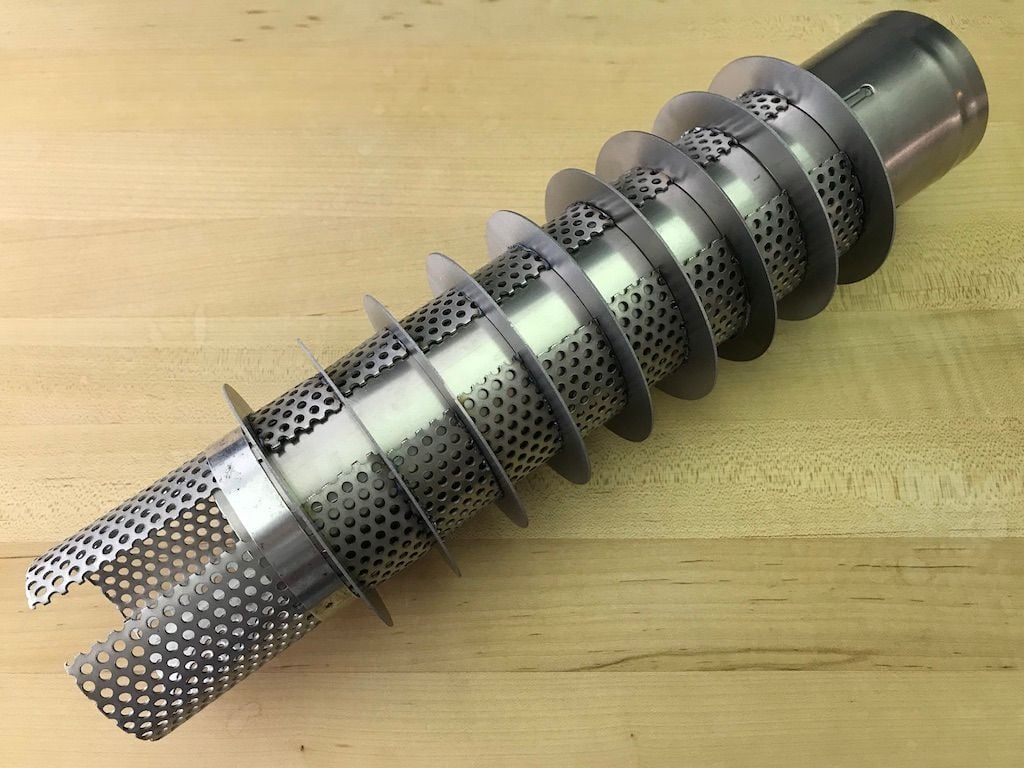
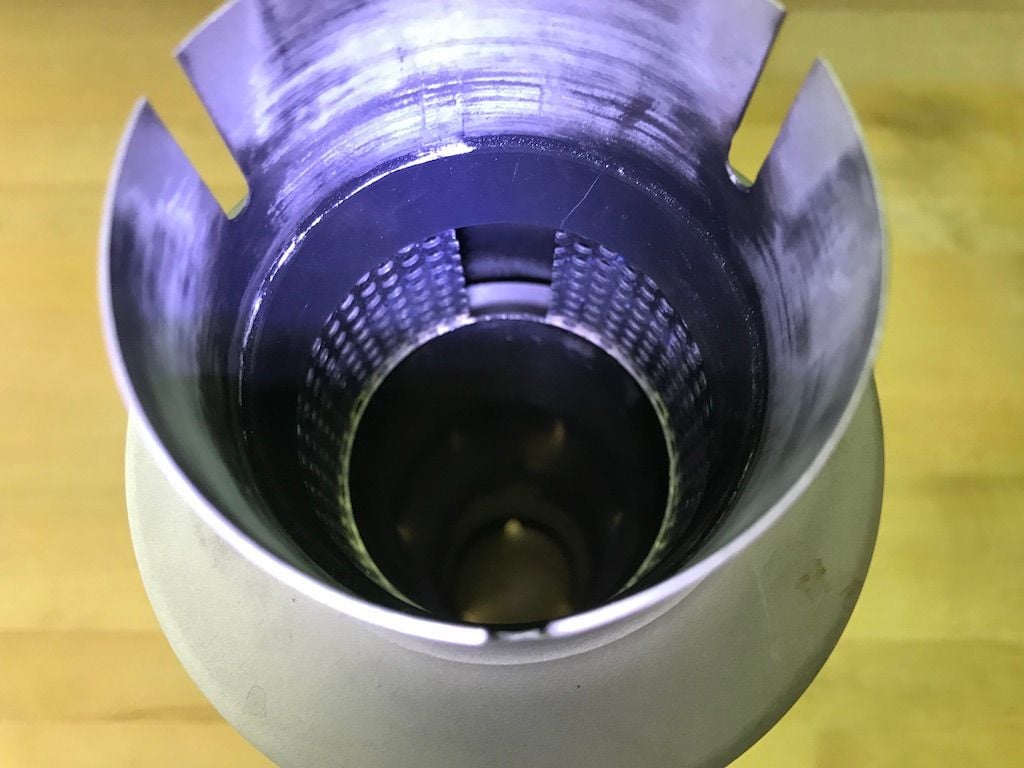
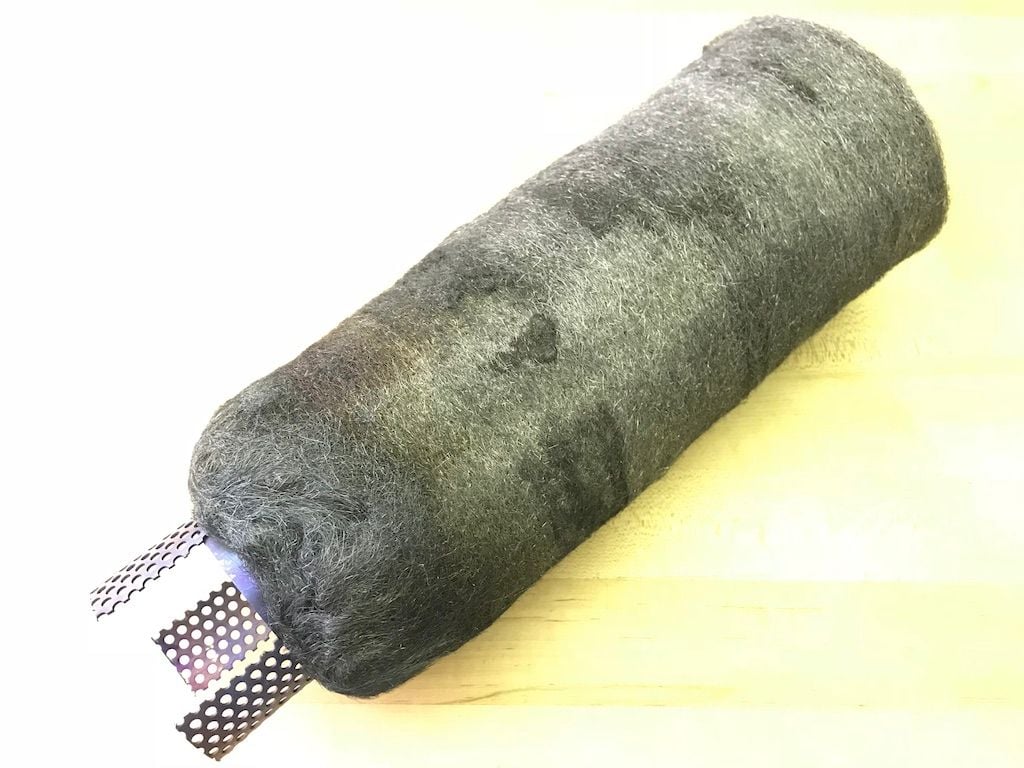
The solution I came up with is a resonator chamber consisting of a tube with two staggered rows of four 7/8”D holes oriented towards the muffler inlet, which is the same area as the 2.5"D pipe, surrounded with one inch stainless steel wool packing.
Tests;
1. Standard perforated tube with half inch stainless steel wool packing - intense drone across the RPM range, no overrun burbles
2. Standard perforated tube with one inch stainless steel wool packing - didn’t test
3. Custom Dundon spiral louvered tube with one inch stainless steel wool packing - 2-3K RPM drone (104.6 Hz -10.1 dBFS peak), no overrun burbles
4. Custom extended outlet tube - 2-3K RPM drone, somewhat less intense than in test 3, has overrun burbles
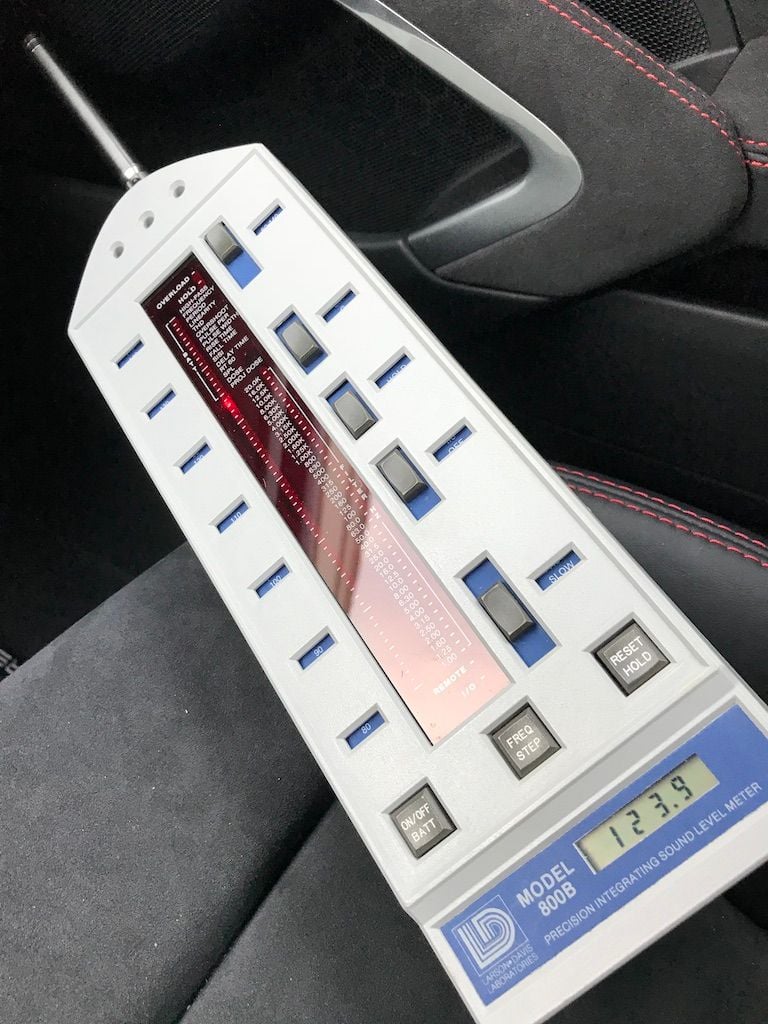
5. Custom extended outlet tube with one inch stainless steel wool packing - 2-3K RPM loudness (117.6-124 Hz -10.8 dBFS peak), has overrun burbles
Notes:
All tests with Dundon race headers, a sport header with catalyst will act as a muffler, so results may be different.
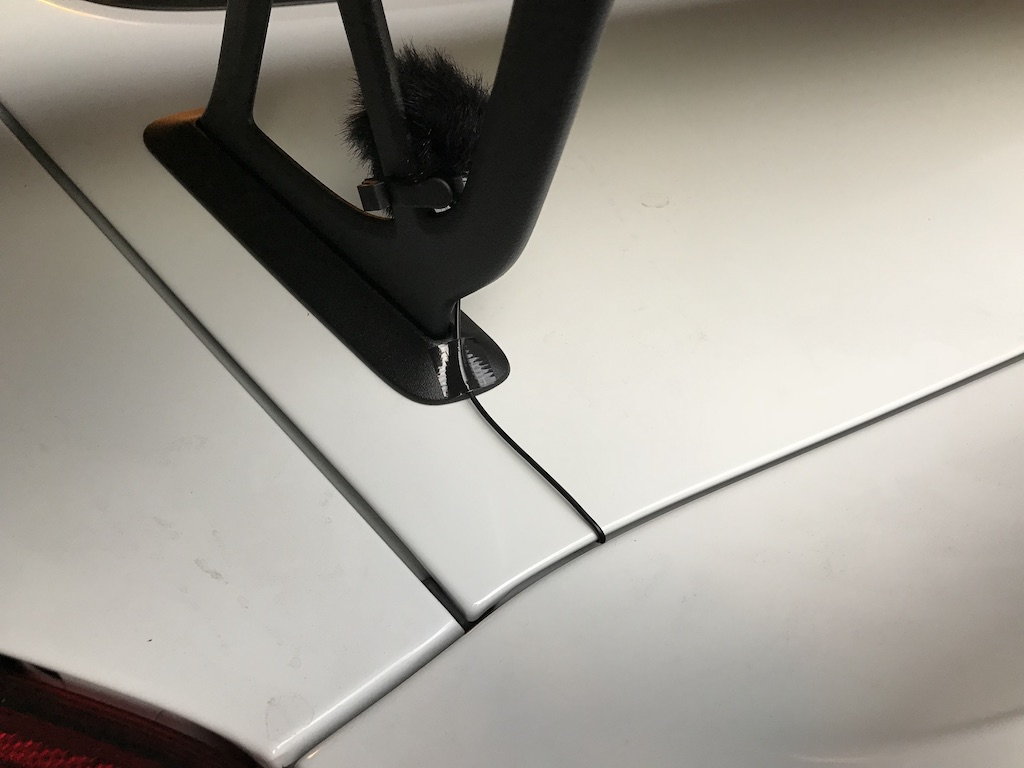
Audio to come after I set up the R�DE microphone in the hatch.
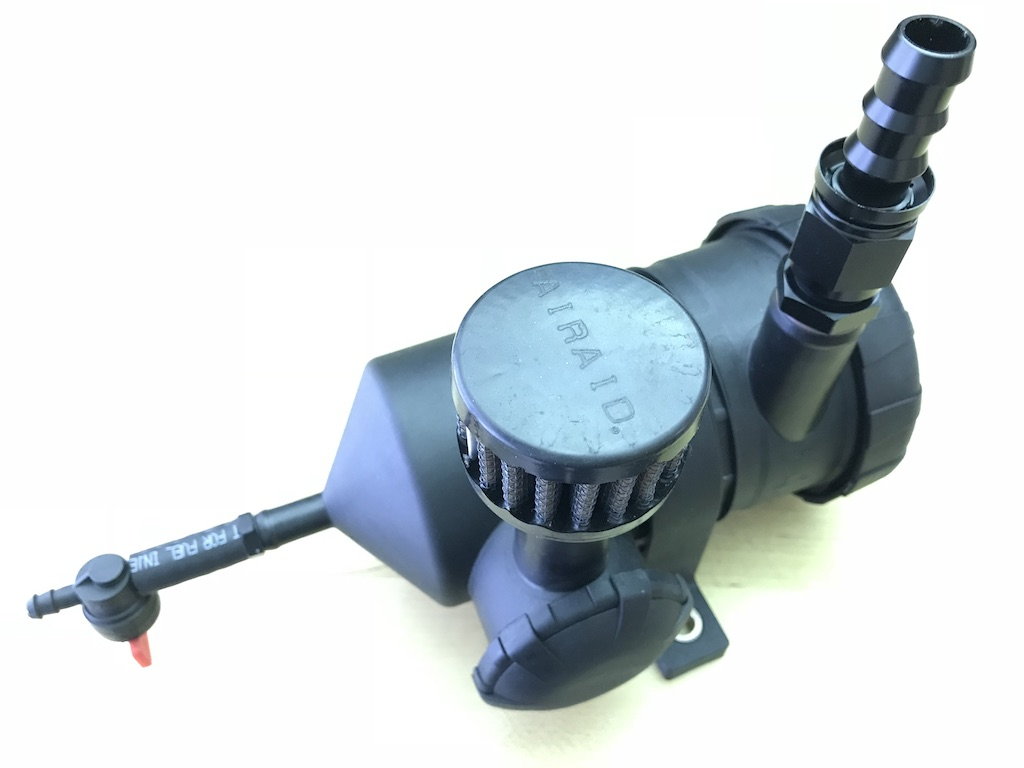
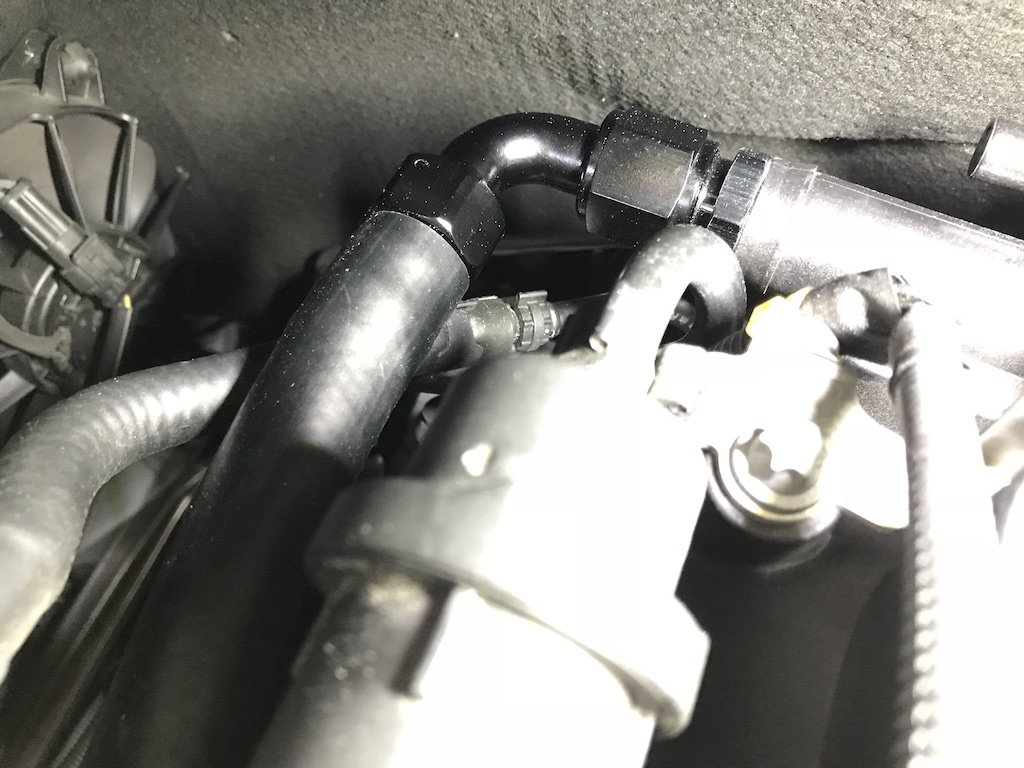
The heater hose that I originally used wasn’t correct, so replaced it with proper fuel line hose and related fittings.
Didn’t need to file down the threads of the new fittings, used epoxy to secure them to fine oil separator and catch can.
Parts (revised);
MANN+HUMMEL ProVent 200 Catch Can 39-310-70-550
10AN ORB Fittings 14-0194 10AN ORB to 0.750" OD Barb, Black
10AN ORB Fittings 14-0133 10AN ORB to PushLok Hose End, Straight, 5/8in
10AN ORB Fittings 14-0136 10AN ORB to PushLok Hose End, 90deg, 5/8in
PCV Rubber SAE 30R7 Hose 5/8" PCV Hose, 10AN (4’)
20-0024 Catch Can Petcock Drain Kit
Vent Cap 036131510
Airaid Filter 770-136
J-B Weld Twin Tube epoxy
The heavy SS resonator wasn't in keeping with the lightness theme, so remade it in Ti.
Goal is to move the low frequency peak higher in pitch, while reducing intensity, which the latest resonator design with packing does better than the others tested so far.
Had thought a chambered design without packing may match or exceed one with packing, but not so, although a different design may work better.
Thanks to emachineshop.com for the rings, ticonindustries.com for the tubing, no thanks to gmfco.com.
6. Custom Ti chambered extended outlet tube - 2-3K RPM drone, has overrun burbles;
7. Custom Ti extended outlet tube with one inch SS wool packing - 2-3K RPM loudness (111.1 Hz -11 dBFS, 117.6-124 Hz -11.6 dBFS peaks), has overrun burbles;
There was a relatively low chance of stone chips with back road driving and early morning highway runs, but I didn’t want to risk it with an upcoming trip to another state.
I had Xpel front, rocker panel, side scoop, and rear wheel area done by Unique Car Care and Automotive Elegance (uccboston.com/clearbraboston.com), thanks to Nizer for the recommendation.
Good thing I did this, as something pierced the film on the hood but didn’t scar the paint, will have the piece replaced this week when I go back for ceramic paint coating.
There was a relatively low chance of stone chips with back road driving and early morning highway runs, but I didn�t want to risk it with an upcoming trip to another state.
I had Xpel front, rocker panel, side scoop, and rear wheel area done by Unique Car Care and Automotive Elegance (uccboston.com/clearbraboston.com), thanks to Nizer for the recommendation.
Good thing I did this, as something pierced the film on the hood but didn�t scar the paint, will have the piece replaced this week when I go back for ceramic paint coating.
Don't even bother unless they are replacing the hood film for free, as any driving, especially in the Northeast will guarantee that this will happen again. Trust me as i have been through this with about a dozen cars with Xpel.
Any car, ESPECIALLY truck, can pick up any tiny stone and weaponize it into a chip in your windshield or paint.
They're going to replace it for free for some reason, but it makes sense to replace it anyways for the full body CPC.
I think a paint chip looks better than a PPF rupture, but I'm considering them as disposable car condoms.
How long do you wait to replace yours?
There was a relatively low chance of stone chips with back road driving and early morning highway runs, but I didn�t want to risk it with an upcoming trip to another state.
I had Xpel front, rocker panel, side scoop, and rear wheel area done by Unique Car Care and Automotive Elegance (uccboston.com/clearbraboston.com), thanks to Nizer for the recommendation.
Good thing I did this, as something pierced the film on the hood but didn�t scar the paint, will have the piece replaced this week when I go back for ceramic paint coating.
Curious, is that ~100 lb cross weight from L to R front and reversed from L to R rear what you intended? OEM specs are for a lot less L/R weight mis-match that what you show here. May be what you want but is out-of-spec per OEM docs. With X73 suspension on my BS, I'm no more than 20 lbs L to R both front and rear.
They're going to replace it for free for some reason, but it makes sense to replace it anyways for the full body CPC.
I think a paint chip looks better than a PPF rupture, but I'm considering them as disposable car condoms.
How long do you wait to replace yours?
FREE?!?!?! Sweet, I wouldn't pass that up either.
Regarding ruptures/replacement... I do it on a case by case basis. But generally, unless an auto body situation occurs, I just leave it there for as long as possible.
Xpel Ultimate is relatively new, so I haven't tested it for a life cycle (10 yrs iirc), but ruptures are not a big deal for me. Replacing something that still works is just $ down the tubes in my opinion.
Drive the car and let the PPF take the beating. Even if you replace it, same thing will happen to the next one. Save your $ for mods, tires, oil changes, etc.
The best attenuation is from using a 1 9/16” long perforated section, which is 40% open, with SS wool packing.
Ceramic wool packing didn't even last 100 miles.
8. Custom Ti extended outlet tube with one inch ceramic wool packing - 2-3K RPM loudness (111.0Hz -13.3dbFS, 117.6Hz -10.6dbFS, 124Hz -10.6dbFS peaks), has overrun burbles
9. Custom Ti extended outlet tube with one inch ceramic wool packing going - 2-3K RPM loudness (98.2Hz -10.6dbFS peak), has overrun burbles
10. Custom Ti extended outlet tube with one inch ceramic wool packing gone - 2-3K RPM loudness (91.7Hz -12.9dbFS, 98.2Hz -9.4dbFS peaks), has overrun burbles
11. Custom Ti extended outlet tube with one inch SS wool packing - 2-3K RPM loudness (98.2Hz -14.8dbFS, 104.6Hz -10.1dbFS, 111.1Hz -14.2dbFS peaks), has overrun burbles
This is a must have!
Not only is the shift throw reduced, but the feel is significantly improved.
The original shifter is a flimsy plastic toy, maybe this is similar to what those with old RSs are going on about.
The written documentation could be improved;
1. There are two other bolts holding down the console below the rubber mat under the lid.
2. The console is removed by lifting up on the rear end so that the front unhooks.
3. Twist the shift boot to the left, not the right.
4. Shift **** takes effort to pull up and off, make sure to position your nose away from the direction the **** will follow.
5. Console parts are sharp, clean up blood before reassembly.
Three brackets need to have the raised area ground off so the new cable hardware can attach firmly (one under console, one on each side of the transmission);
...after;
They were currently out of the wrench that's pictured in the documentation, and sent me one that's supposedly used in their shop, there was enough room on the right side but had to be cut for the left;
...after;
Sweet! Any additional NVH from the numeric cables and shifter combo?
 04-28-2018, 08:49 PM