Transaxle Oil Change (gear box & differential)
 04-18-2009, 12:38 PM
#1
Rennlist Member
Thread Starter
Porsche Models: instructions based on 2004-2005 996 GT3 & RS
should be applicable for 1999-2002 996 GT3; 2001-2005 996 Turbo & GT2; 2007-2008 997 GT3, RS, & Turbo. Some models may not have the oil cooler which means better access to the filler screw plug.
Capacity: 3.3 liters for 2004-2005 996 GT3 & RS
Part Numbers:
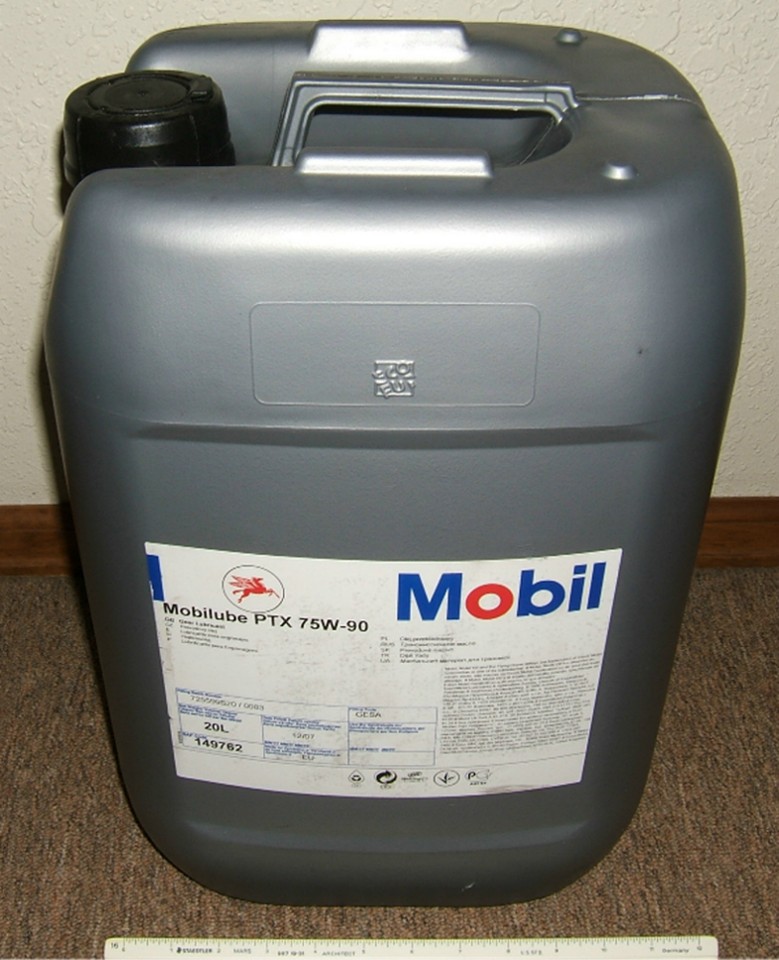
000.043.204.20 ----- Mobilube PTX 75 W 90, comes in a 20 liter container only and only available from Porsche. It may be possible to buy just the quantity needed from a Porsche dealership or do a group buy and divide among local owners.
900.123.118.30 ----- sealing ring, aluminum (need two)
Tools:
- car lift or garage work pit or floor jacks & jack stands
- oil catch pan, about a 5 liter size
- 10 mm hex (allen) bit tool that has a 3/8 or � drive socket. For the filler screw plug the 10 mm hex tool must be very short, about � to 1 1/4 inches long. I used a Craftsman 10 mm hex bit 3/8 inch drive socket for both plugs, but removed the bit from the socket for the filler plug job.
- 10 mm box end 12 point wrench 8 inch or longer (may require ‘cheater pipe’ for more leverage)
- 10 mm open end wrench, short
- torque wrench
- work light
- oil refill equipment. I recommend either manual pressure or gravity feed using clear flexible vinyl tubing with a � inch inside diameter. See Step #9.
- shop towels or rags
- flashlight
- small mechanic’s mirror on extension rod tool
Procedure:
1. Drive the car to warm the transaxle (manual gear box & differential) and engine to normal operating temperature.
2. To gain sufficient access to the filler plug the car will have to be raised above the floor or placed over a mechanics pit. The car must be level for proper oil refill.
3. Follow the manufacturer’s instructions for proper lift points, safe jacking, and support of the car.
4. Begin with the filler screw plug just in case you cannot loosen and remove it, that way the transaxle oil is untouched and the car is operational (can be driven to dealer or independent shop for help).
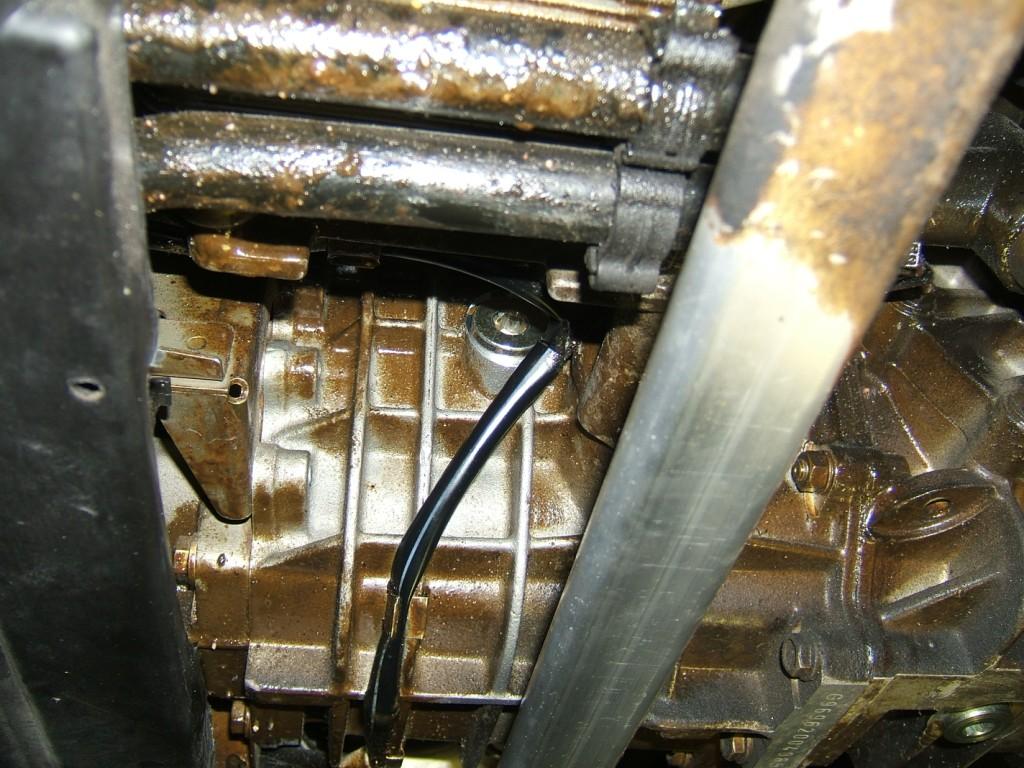
Photo. View of the left side of transaxle showing filler plug (center of photo) and drain plug (lower right corner of photo).
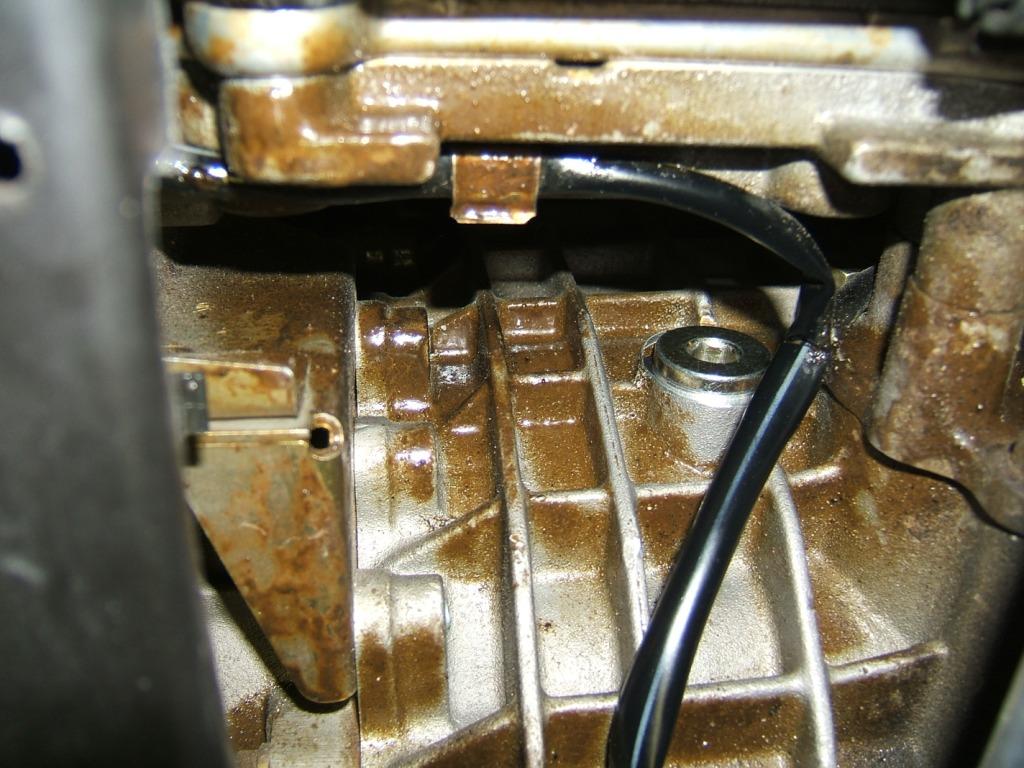
Photo. View of left side of transaxle, the filler plug.
5. On the 2004-2005 996 GT3 the oil cooler is located across from the filler plug with about a 2 inch gap between them. While there is very little room for tools between the cooler and the plug there is enough for the tools I recommend. CAUTION – the transaxle and oil will be hot.
Locate the filler plug (see photo) and clean the area around it. Place a 10 mm hex bit (about one inch long) into the recessed hex portion of the plug. Place a 10 mm box end (12 point) wrench over the end of the hex bit and slide it along the bit next to the filler plug. The wrench should be located so that it is free to rotate in a small arc, enough travel to loosen the plug. If the plug won’t loosen with that relatively short box end wrench then slide a ‘cheater’ pipe over the wrench extending the length to get more leverage. Due to obstructions you will have to reposition the box end wrench again before unscrewing the plug further. Next you can replace the box end wrench with a small 10 mm open end wrench and unscrew the filler plug faster. Eventually the plug should be loose enough to undo with your fingers. Be careful not to drop the plug. A little oil may drain out of the filler hole so have a small catch can handy. Clean the filler plug.
6. Locate the drain screw plug and loosen it with a 10 mm hex bit socket tool and appropriate drive tool. Remove the drain plug and sealing ring and allow the oil to drain into the catch pan for about 30 minutes.
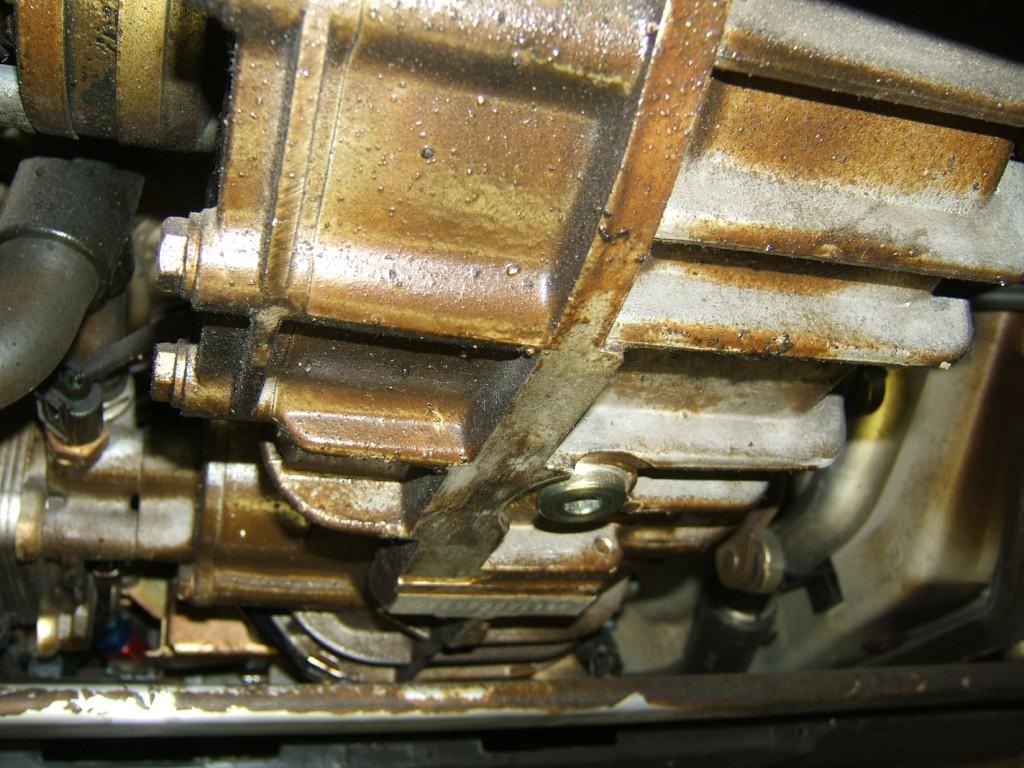
Photo. View of transaxle drain plug from rear of car.
7. Clean the drain plug. A small amount of metal particles on the magnet can be expected from normal wear.
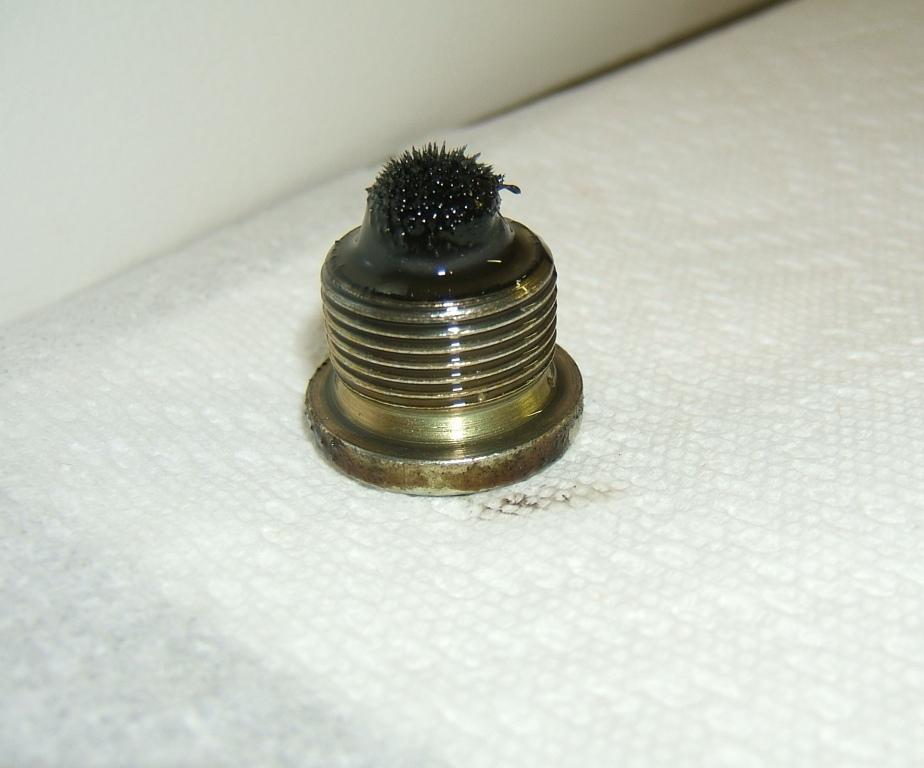
Photo. Drain plug with metal particles and oil on the magnet.
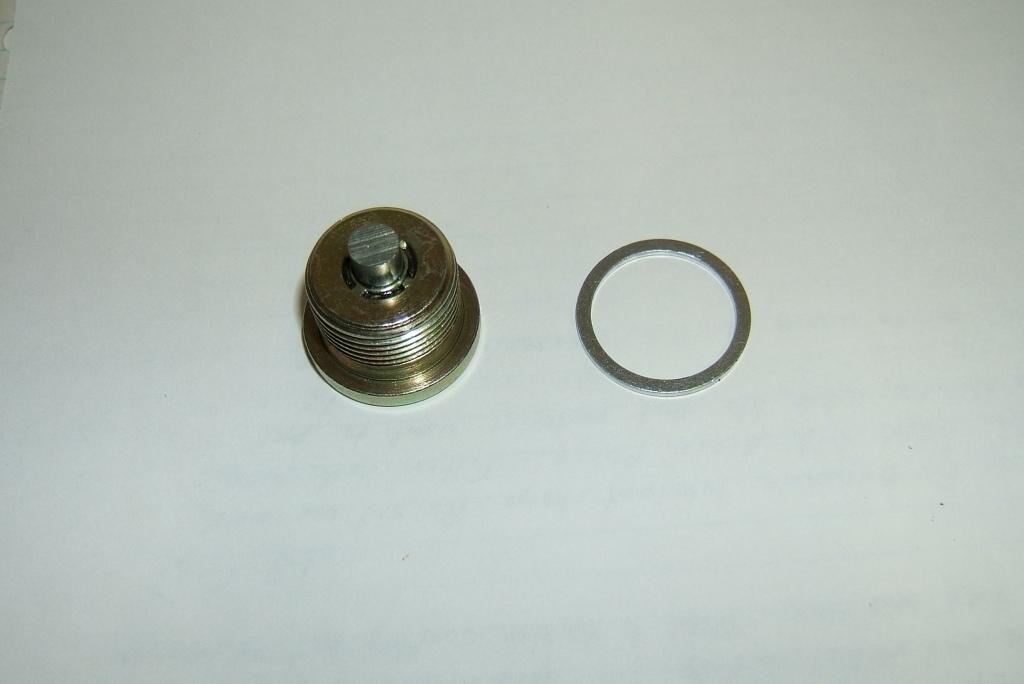
Photo. Clean drain plug and sealing ring.
8. Clean the area around the drain hole and reinstall the drain plug with a new sealing ring (aluminum washer). Tighten to torque of 22 lb-ft (30 Nm).
9. Access to refill the transaxle is from underneath so I recommend the following methods.
- Manual pressure feed. Use a manual device to push the new oil through clear flexible vinyl tubing (about three feet long and � inch inside diameter) with the tubing routed into the filler opening. (i.e., oil suction gun ‘syringe’ used in reverse)
or
- Gravity feed. Locate the new oil beside the car and high enough for it to drain through the tubing routed into the filler opening.
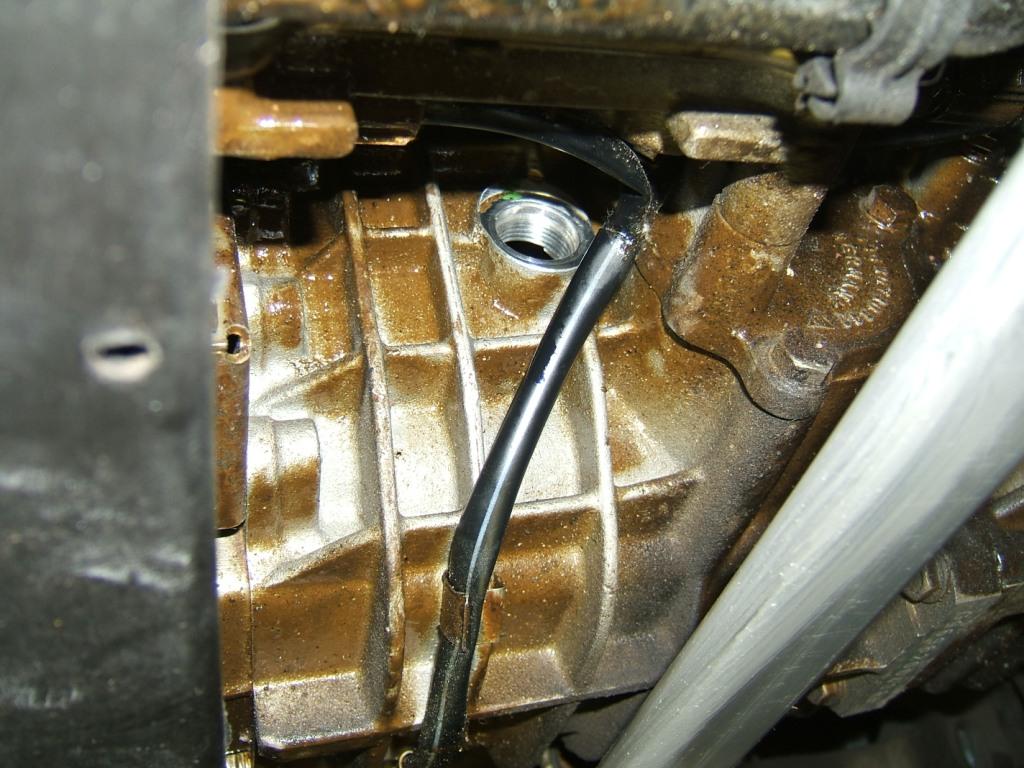
Photo. View of left side of transaxle with filler plug removed.
10. As the transaxle nears the full level some oil may run back out of the filler hole. Allow a little time for the oil to settle and top off slowly. The car must be level to check the proper oil level which is at the bottom edge of filler hole.
11. Install the filler plug with a new sealing ring. It helps to insert the 10 mm hex bit into the plug and then screw the plug in using your fingers. Use the open end wrench and finally the box end wrench to get the plug screwed in. I don’t have a torque wrench that will fit in that very small space so I tightened the filler plug with the hex bit & box end wrench combination only.
12. After cleaning up and placing the car on the ground take a short test drive. Upon return do a visual check of transaxle plugs for leaks using a flashlight and mirror (car on the ground).
.
.
.
should be applicable for 1999-2002 996 GT3; 2001-2005 996 Turbo & GT2; 2007-2008 997 GT3, RS, & Turbo. Some models may not have the oil cooler which means better access to the filler screw plug.
Capacity: 3.3 liters for 2004-2005 996 GT3 & RS
Part Numbers:
000.043.204.20 ----- Mobilube PTX 75 W 90, comes in a 20 liter container only and only available from Porsche. It may be possible to buy just the quantity needed from a Porsche dealership or do a group buy and divide among local owners.
900.123.118.30 ----- sealing ring, aluminum (need two)
Tools:
- car lift or garage work pit or floor jacks & jack stands
- oil catch pan, about a 5 liter size
- 10 mm hex (allen) bit tool that has a 3/8 or � drive socket. For the filler screw plug the 10 mm hex tool must be very short, about � to 1 1/4 inches long. I used a Craftsman 10 mm hex bit 3/8 inch drive socket for both plugs, but removed the bit from the socket for the filler plug job.
- 10 mm box end 12 point wrench 8 inch or longer (may require ‘cheater pipe’ for more leverage)
- 10 mm open end wrench, short
- torque wrench
- work light
- oil refill equipment. I recommend either manual pressure or gravity feed using clear flexible vinyl tubing with a � inch inside diameter. See Step #9.
- shop towels or rags
- flashlight
- small mechanic’s mirror on extension rod tool
Procedure:
1. Drive the car to warm the transaxle (manual gear box & differential) and engine to normal operating temperature.
2. To gain sufficient access to the filler plug the car will have to be raised above the floor or placed over a mechanics pit. The car must be level for proper oil refill.
3. Follow the manufacturer’s instructions for proper lift points, safe jacking, and support of the car.
4. Begin with the filler screw plug just in case you cannot loosen and remove it, that way the transaxle oil is untouched and the car is operational (can be driven to dealer or independent shop for help).
Photo. View of the left side of transaxle showing filler plug (center of photo) and drain plug (lower right corner of photo).
Photo. View of left side of transaxle, the filler plug.
5. On the 2004-2005 996 GT3 the oil cooler is located across from the filler plug with about a 2 inch gap between them. While there is very little room for tools between the cooler and the plug there is enough for the tools I recommend. CAUTION – the transaxle and oil will be hot.
Locate the filler plug (see photo) and clean the area around it. Place a 10 mm hex bit (about one inch long) into the recessed hex portion of the plug. Place a 10 mm box end (12 point) wrench over the end of the hex bit and slide it along the bit next to the filler plug. The wrench should be located so that it is free to rotate in a small arc, enough travel to loosen the plug. If the plug won’t loosen with that relatively short box end wrench then slide a ‘cheater’ pipe over the wrench extending the length to get more leverage. Due to obstructions you will have to reposition the box end wrench again before unscrewing the plug further. Next you can replace the box end wrench with a small 10 mm open end wrench and unscrew the filler plug faster. Eventually the plug should be loose enough to undo with your fingers. Be careful not to drop the plug. A little oil may drain out of the filler hole so have a small catch can handy. Clean the filler plug.
6. Locate the drain screw plug and loosen it with a 10 mm hex bit socket tool and appropriate drive tool. Remove the drain plug and sealing ring and allow the oil to drain into the catch pan for about 30 minutes.
Photo. View of transaxle drain plug from rear of car.
7. Clean the drain plug. A small amount of metal particles on the magnet can be expected from normal wear.
Photo. Drain plug with metal particles and oil on the magnet.
Photo. Clean drain plug and sealing ring.
8. Clean the area around the drain hole and reinstall the drain plug with a new sealing ring (aluminum washer). Tighten to torque of 22 lb-ft (30 Nm).
9. Access to refill the transaxle is from underneath so I recommend the following methods.
- Manual pressure feed. Use a manual device to push the new oil through clear flexible vinyl tubing (about three feet long and � inch inside diameter) with the tubing routed into the filler opening. (i.e., oil suction gun ‘syringe’ used in reverse)
or
- Gravity feed. Locate the new oil beside the car and high enough for it to drain through the tubing routed into the filler opening.
Photo. View of left side of transaxle with filler plug removed.
10. As the transaxle nears the full level some oil may run back out of the filler hole. Allow a little time for the oil to settle and top off slowly. The car must be level to check the proper oil level which is at the bottom edge of filler hole.
11. Install the filler plug with a new sealing ring. It helps to insert the 10 mm hex bit into the plug and then screw the plug in using your fingers. Use the open end wrench and finally the box end wrench to get the plug screwed in. I don’t have a torque wrench that will fit in that very small space so I tightened the filler plug with the hex bit & box end wrench combination only.
12. After cleaning up and placing the car on the ground take a short test drive. Upon return do a visual check of transaxle plugs for leaks using a flashlight and mirror (car on the ground).
.
.
.
Last edited by enthusiast; 04-18-2009 at 02:16 PM.


