When you click on links to various merchants on this site and make a purchase, this can result in this site earning a commission. Affiliate programs and affiliations include, but are not limited to, the eBay Partner Network.
955/957 Cayenne DIY: Panoramic Sunroof Panel 2 or 3 replacement
This is a very easy job, despite the thought of working on the pano roof sounding daunting. It’s six easy-to-get-to screws and you’re done, and it took me less than an hour. This write-up isn’t really saying much more than what’s in the workshop manual, but I discovered a few details that helped.
When to do this: A rock on the highway cracked the front-most sliding glass panel on my 2009 CTT. Only the glass was damaged. This procedure is for replacing the panel (Panel 2 in the first picture) that contains the glass. The same basic procedure would apply to the rear-most sliding glass panel (Panel 3), although I didn’t need to replace that one. If some part of the sunroof besides the sliding glass panels is damaged then this procedure is unlikely to be very helpful.
Step 1: Get a replacement glass panel. For Panel 2, the part number is either 7L0 877 055 or the updated part number 925 716 601. I found mine used on ebay for about ˝ to ⅓ the OEM price. Still pretty pricey though.
Step 2: Put the sunroof in a position where you can access, from inside the car, the three screws on each side holding Panel 2 in.
A) Turn the sunroof **** left one click until Panel 2 slides back. Notice that the panel raises up before it moves back.
B) Then turn the **** back to the closed position, but when the panel is just above its closed location (but still raised) push back on it with your hand. You’ll trip the safety switch, and it should just stay in that raised position right above its closed position.
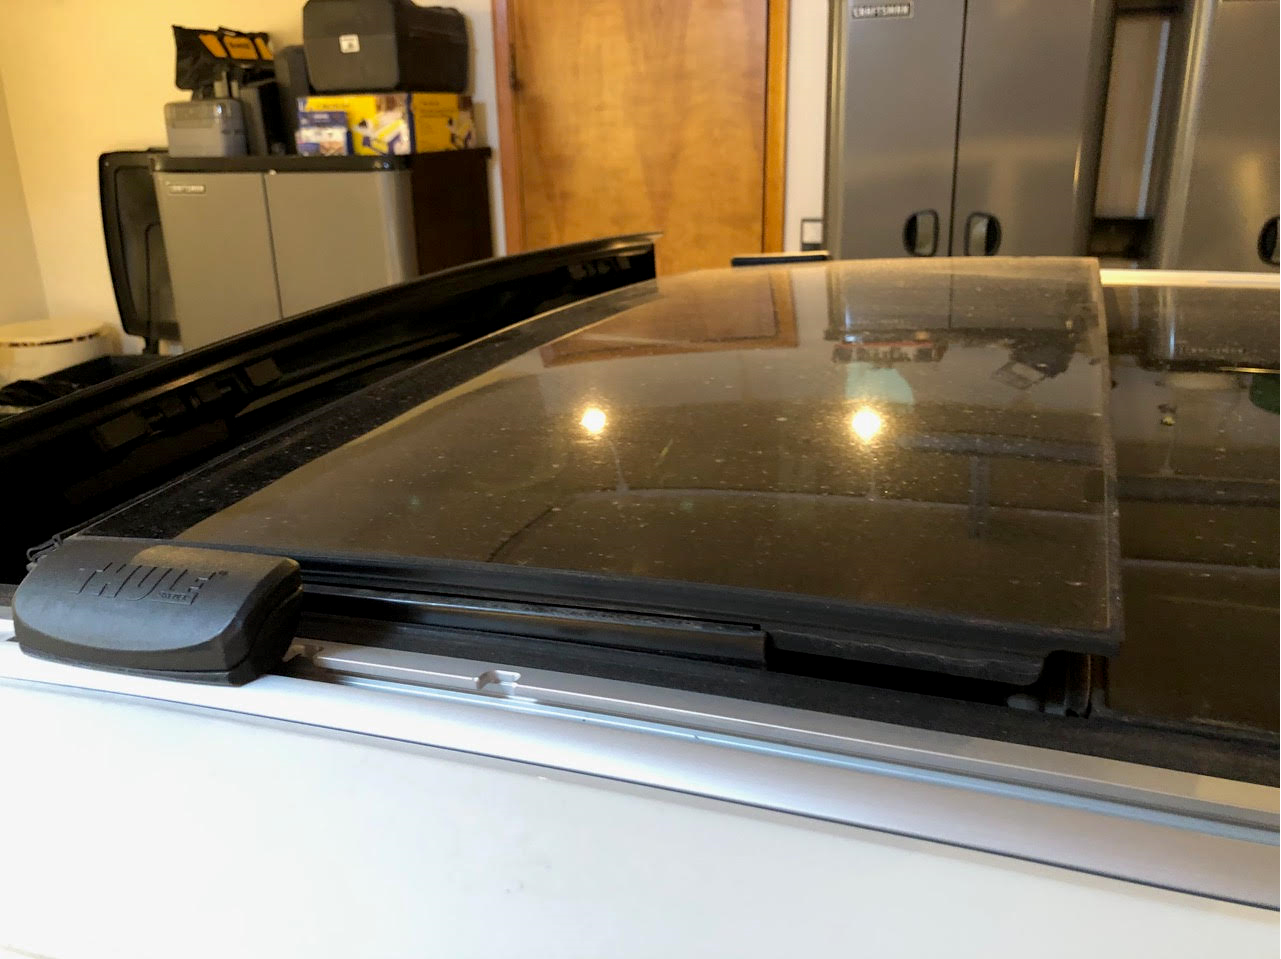
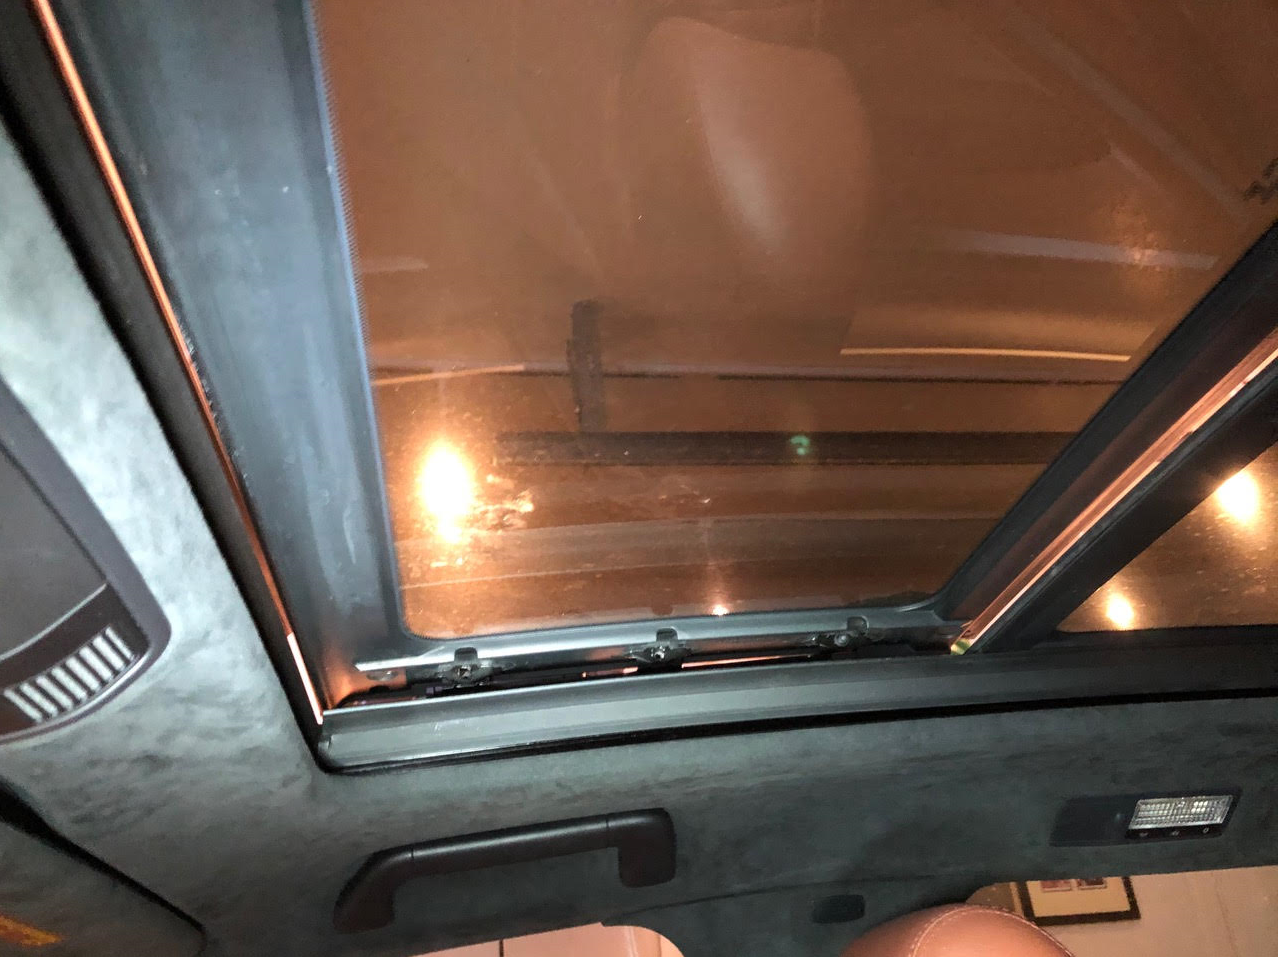
In this position you should see the three screws on each side (looking toward the right and left sides of the roof). From the outside it should look like the second picture, and from the inside, the third picture. The screws are shown more clearly in the 4th picture.
Step 3: Use a Torx 25 driver to remove the 6 screws, 3 on each side. I attached a magnet to my Torx driver to make sure I didn’t drop the screws, but they are actually pretty easy to recover since you’re about to take the panel off. Notice that the screws are not threaded into the roof panel but into the rails (one rail on each side) that do all the complicated sliding stuff. The rails will not be removed in this job.
Step 4: Lift the panel straight up and off the car. Probably nice to have someone help you to prevent accidentally dropping it and damaging the car, although I did it by myself, and I’m not The Hulk.
Step 5: Put the new panel in. Important: don’t forget the screws go through the panel first and then into the rails. This means the flanges on the panel need to go 'inside' the rails. There might need to be a bit of wrestling to make this happen.Step 5: Screw the screws back in (I used a magnet on my Torx driver again because this time I really didn't want to drop any screws) but don’t tighten them. Make sure the panel can move around a bit with all screws in.
Step 6: Raise and lower the roof panel a few times to make sure it seats nicely when closed. Go outside the car to make sure it’s seating properly. The shop manual shows some dimensional specs for how things should like up, but I couldn't make sense of them. I think you can just see if it looks right (we'll see the next time we get a good rain!)Step 7: repeat Step 2 again to gain access to the screws, and tighten them.
Done.
(Rant about my local dealer: The dealer wanted to charge me $2500 for this, including $1500 for the part. And they couldn’t tell me how long it would take - they wanted me to leave the car with them for a week while they took it apart to figure out what else might need replacing. Considering they should have access to the same shop manual I do and can therefore see how easy the job is, I was very disappointed. I live 1.5 hours from the dealer, and it’s a real pain to leave the car there if I don’t need to.)
This is how the shop manual numbers the panels. I replaced Panel 2.
This is what it should look like from the outside at the end of Step 2.
This is what it should look like from the inside at the end of Step 2.
Here's 2 of the screws with Panel 2 in the first 'normal' position (you can't get to the 3rd screw from here, so follow Step 2.)
Last edited by deilenberger; 05-31-2021 at 01:33 PM.
 05-08-2021, 04:35 PM