993 cab Rear Seat Delete installation
 01-13-2010, 11:14 PM
#1
Addict
Lifetime Rennlist
Member
Lifetime Rennlist
Member
Thread Starter
TODAY'S UPDATE: Just discovered RLer Howdy993's "The 993 Cabriolet Rear Seat Delete DIY" thread in the 993 How To archive. He's obviously the below-mentioned Howard 
So I was going to delete as much of the below thread, which now seemed repetitive & a total waste of time to create.
However, all of Howdy993's photos in his thread are non non-active.
Hopefully the moderators can decide the best way to include both threads in a complimentary manner
________________________________________________________________________ __
YESTERDAY'S SUBMISSION:
FWIW, Porsche's factory name for the Rear Seat Delete (RSD) is "rear luggage dump."
This material was graciousliy e-mailed to me by RLer PorscheRalph, who, IIRC, is not the author. From checking the document's Properties tab, "Howard" is listed as the writer & photographer.
I've already received requests from other RLers who'd like to receive an e-mail copy. To share more efficiently with all of RL, I converted it to the below from the 500 kb PDF (Adobe Acrobat document) it started as, which is ~350 kb too large to post on RL
Here's to Howard for a DIY that's worthy of being posted on Mike J's pcarWorkshop.com or Robin Sun's p-car.com, where I don't see a similar topic currently shared
P.S. If anyone knows of a reason not to post it here, just let me know & I'll remove it.
Last edited by curve lover; 01-14-2010 at 10:02 PM.
 01-13-2010, 11:18 PM
#2
Addict
Lifetime Rennlist
Member
Lifetime Rennlist
Member
Thread Starter
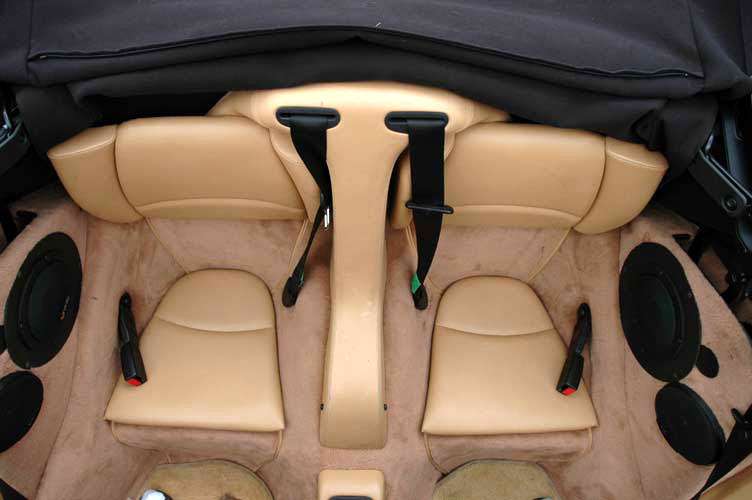
Start by leaving the Cabriolet top UP - this will allow easier access to bolts you will be removing
Begin the Rear Seat removal by moving the front seats all the way forward.
Begin the Rear Seat removal by moving the front seats all the way forward.
 01-13-2010, 11:21 PM
#5
Addict
Lifetime Rennlist
Member
Lifetime Rennlist
Member
Thread Starter
This panel is glued at the bottom so removal will meet with resistance
Remove the back rest bolts (3 per side) and take off back rests.
This picture is taken with the RSD already removed for clarity.
Remove the back rest bolts (3 per side) and take off back rests.
This picture is taken with the RSD already removed for clarity.
Trending Topics
01-13-2010, 11:26 PM
#8
Addict
Lifetime Rennlist
Member
Lifetime Rennlist
Member
Thread Starter
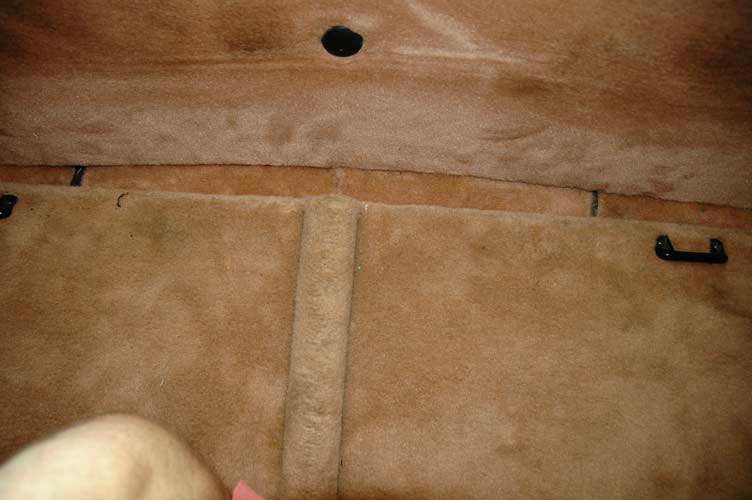
Remove the remaining Phillips screws that hold the frame cover to the frame, and then remove the frame cover.
Remove the rear carpet panel � the one attached with the big plastic screw
Remove the rear carpet panel � the one attached with the big plastic screw
01-13-2010, 11:26 PM
#9
Addict
Lifetime Rennlist
Member
Lifetime Rennlist
Member
Thread Starter
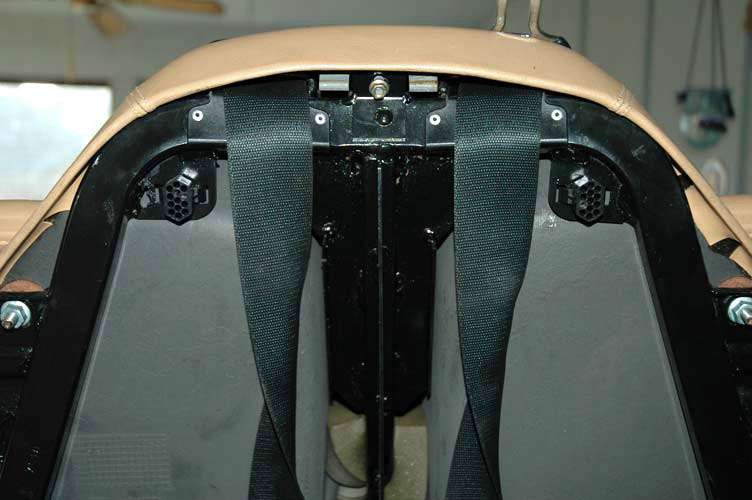
You will also have to unbolt the seat belt retractors and remove them to set the frame cover aside.
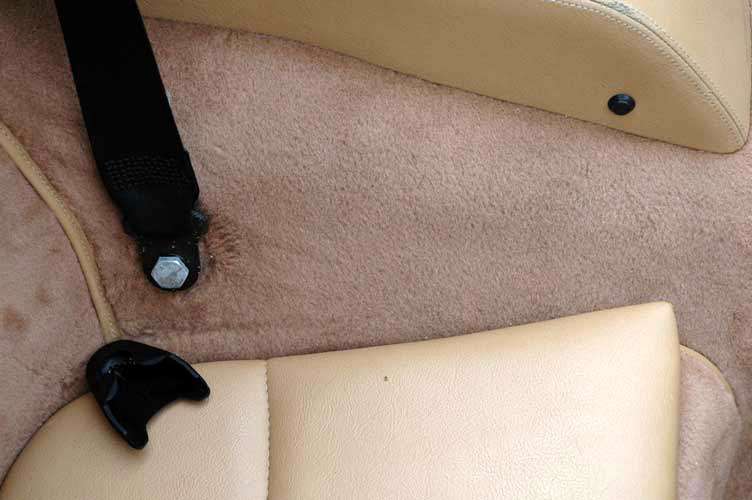
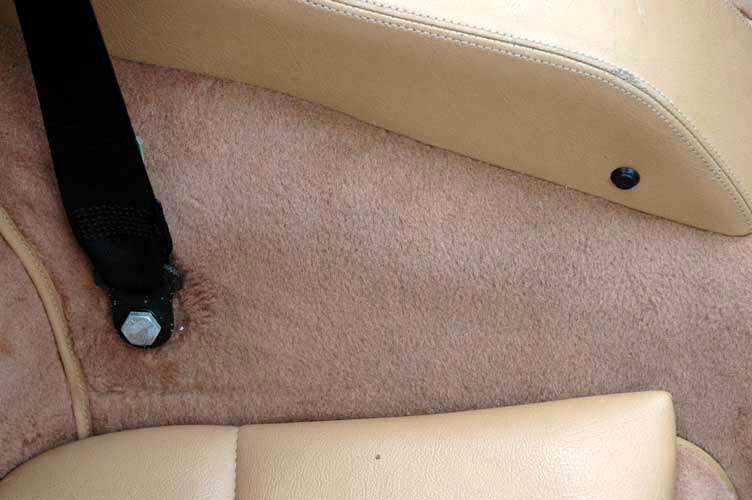
The heavy sturdy frame is bolted into place in 6 places. � 4 in back 2 in front.
Feel for the bolt heads under the carpet and make �X� cuts across the tops of the bolts.
The 6 frame attachment bolts are highly torqued & the same bolts will be surrounded by gooey carpet cement, so be forewarned.
The heavy sturdy frame is bolted into place in 6 places. � 4 in back 2 in front.
Feel for the bolt heads under the carpet and make �X� cuts across the tops of the bolts.
The 6 frame attachment bolts are highly torqued & the same bolts will be surrounded by gooey carpet cement, so be forewarned.
01-13-2010, 11:27 PM
#10
Addict
Lifetime Rennlist
Member
Lifetime Rennlist
Member
Thread Starter
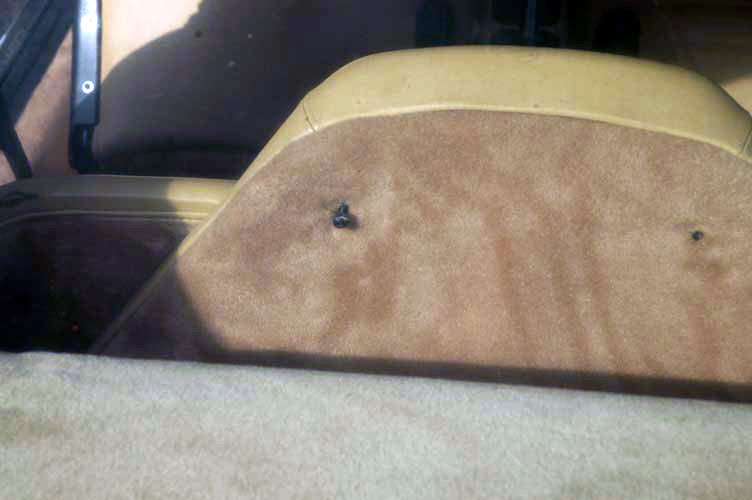
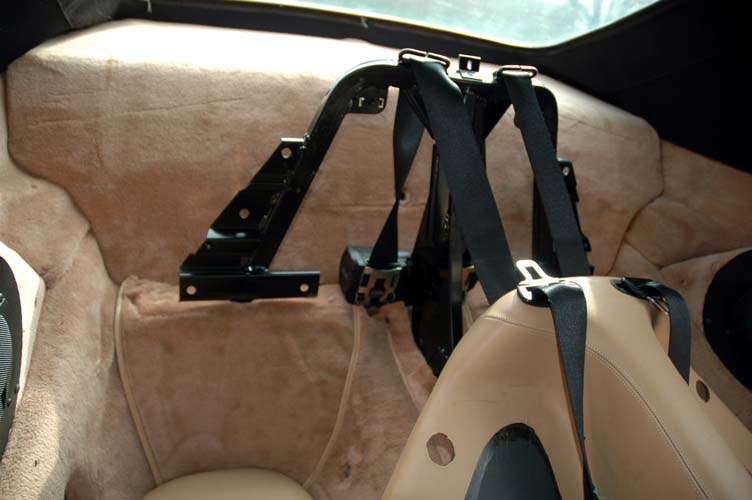
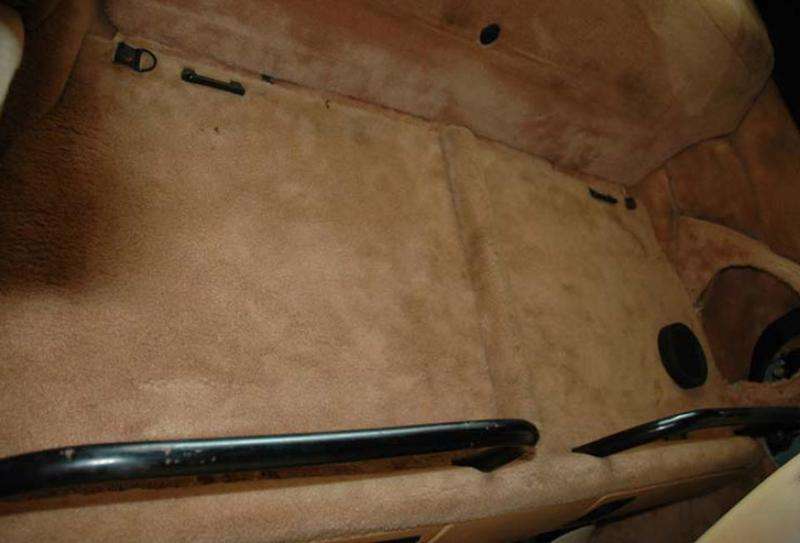
Once all the bolts have been removed, you will need to carefully cut the carpeting and fill padding to remove the Rear Seat frame.
In the front section there is a large amount of foam that is attached to the metal frame yoke.
Separate this foam from the frame carefully, then remove the frame.

In the front section there is a large amount of foam that is attached to the metal frame yoke.
Separate this foam from the frame carefully, then remove the frame.
01-13-2010, 11:29 PM
#11
Addict
Lifetime Rennlist
Member
Lifetime Rennlist
Member
Thread Starter
Try to preplan your carpet cuts in advance.
I had not made X cuts on the front bolts, so this may have resulted in more carpet cutting than was necessary.

I had not made X cuts on the front bolts, so this may have resulted in more carpet cutting than was necessary.
01-13-2010, 11:30 PM
#12
Addict
Lifetime Rennlist
Member
Lifetime Rennlist
Member
Thread Starter
All of this area will be / is covered by the RSD deck, so I have not replaced the carpet – yet. You can buy replacement OEM carpeting by the yard from World Upholstery, etc. (no affiliation).
The seat bottoms are simply glued in. I did not remove mine and the cubby space is not drastically reduced – plus your stuff gets a bit of padding during transport.
Also, some RSD kits come w/ microswitches that tie into the alarm system. If the alarm is armed and the cubby doors are opened the alarm sounds. Mine did not have the switches so I don’t know how the alarm connection is made.
As stated before the RSD deck covers up most all of the cut carpeting and if you have a windstop the three small carpet cuts at the very rear will not be seen. That being said I will likely get carpet to recover the cuts underneath the deck.
At this point, put the top down, and lower your windows, it will make getting the deck in easier.
Carefully remove the LH and RH Cab. arm covers and disconnect the rear speakers. Set aside the cover / speakers.
Before attempting to install the deck, make sure the LH - RH attaching brackets are loosely bolted to the bottom of the deck.
Grab the deck and place it in the rear of the car. Push it as far back as possible.
Align the RSD brackets with the seat belt attachment point and reinstall the seat belt bolts
01-13-2010, 11:33 PM
#13
Addict
Lifetime Rennlist
Member
Lifetime Rennlist
Member
Thread Starter
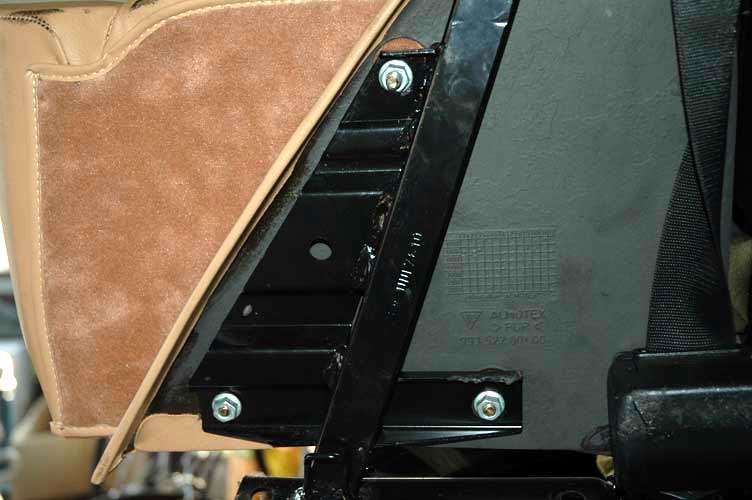
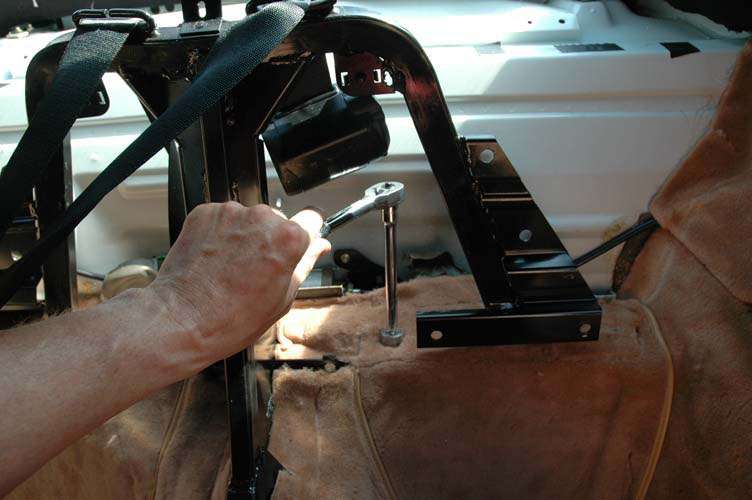
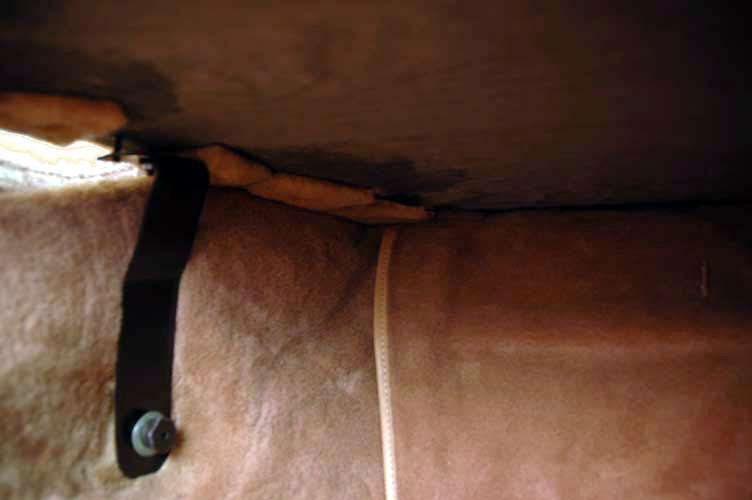
This part of the install was the most difficult for me. The problem was getting the bracket to align at the bottom so the seat belt attaching bolt could be threaded in.
As you can see in the following picture, the bracket is secured by a single nut at the top. In order to properly attach the top with two nuts, I will need to make a sub arm at the bottom to easily attach the seat belt bolt.
 01-13-2010, 11:35 PM
#14
Addict
Lifetime Rennlist
Member
Lifetime Rennlist
Member
Thread Starter
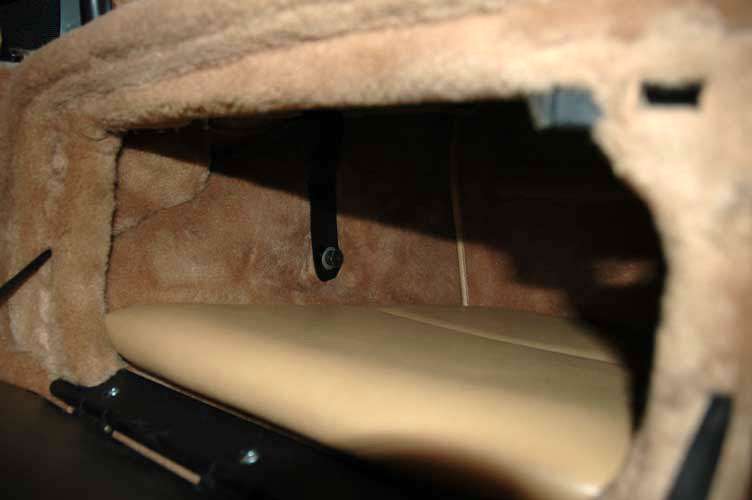
Once installed, you can easily place a couple of roller type carry on bags and take off for the weekend.
After fixing the huge speaker voids, my next purchase will be some nice leather straps and brass buckles for tie downs.
The whole DIY can be done in a few hours, hope this helps
After fixing the huge speaker voids, my next purchase will be some nice leather straps and brass buckles for tie downs.
The whole DIY can be done in a few hours, hope this helps
The following users liked this post:
PeterK_NL (01-28-2023)
01-23-2010, 06:39 AM
#15
Addict
Rennlist Member
Rennlist Member

Hello All
When I first did this, it had to be posted to the DIY Submission Forum. Then a moderator(?) moved it to the DIY Forum. This is when the photos disappeared. It was easier to email folks the document than spend an afternoon uploading the pictures again.
Glad to see curvelover has done the legwork to put it all back together.
Best wishes, Howard
The following users liked this post:
XAVMECH (05-30-2021)

