When you click on links to various merchants on this site and make a purchase, this can result in this site earning a commission. Affiliate programs and affiliations include, but are not limited to, the eBay Partner Network.
In part 1 i described how i ran the power cord from under the passenger footwell up the dash along side the door post and up the windscreen pillar and across the headliner to the dash cam. Now I'll talk about how i got switched power from the fuse box to the passenger foot well.
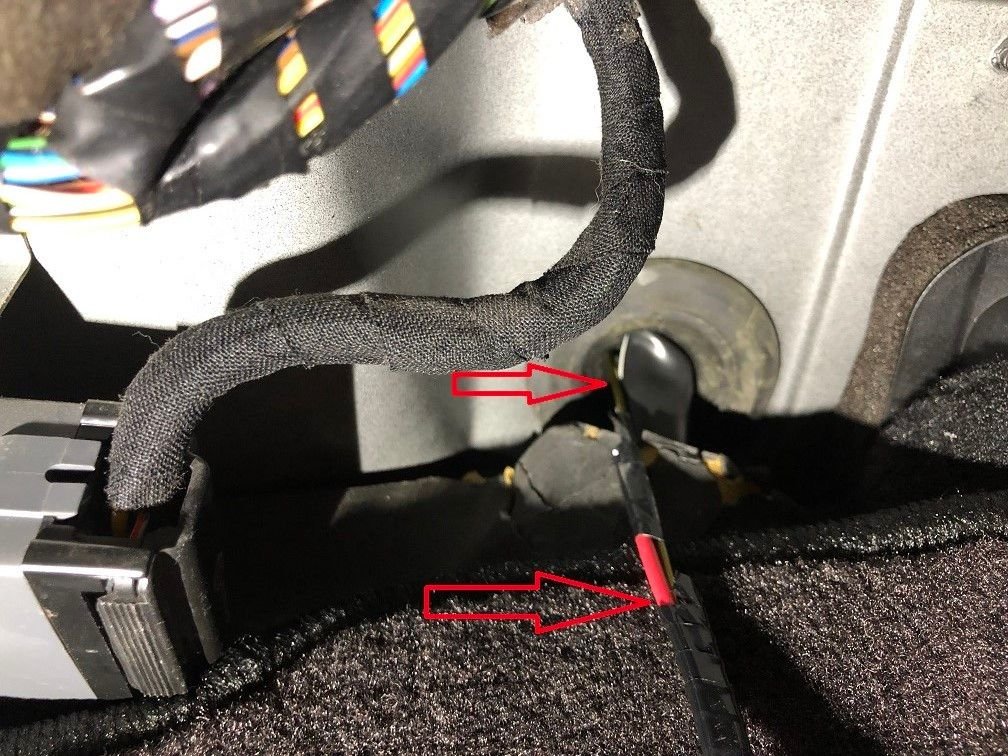
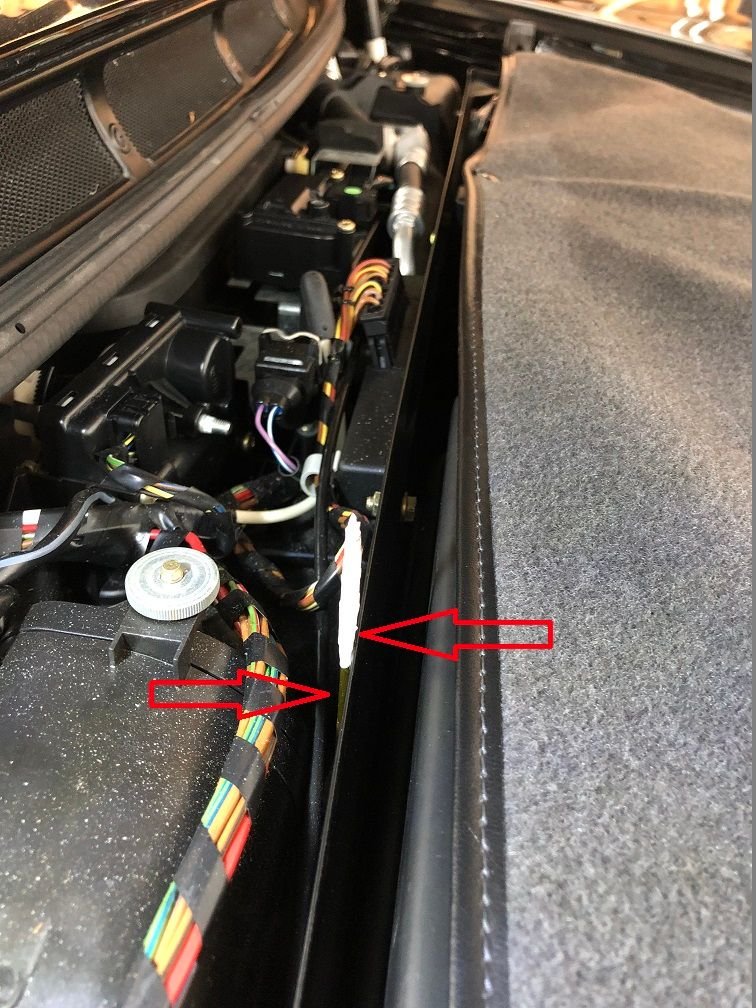
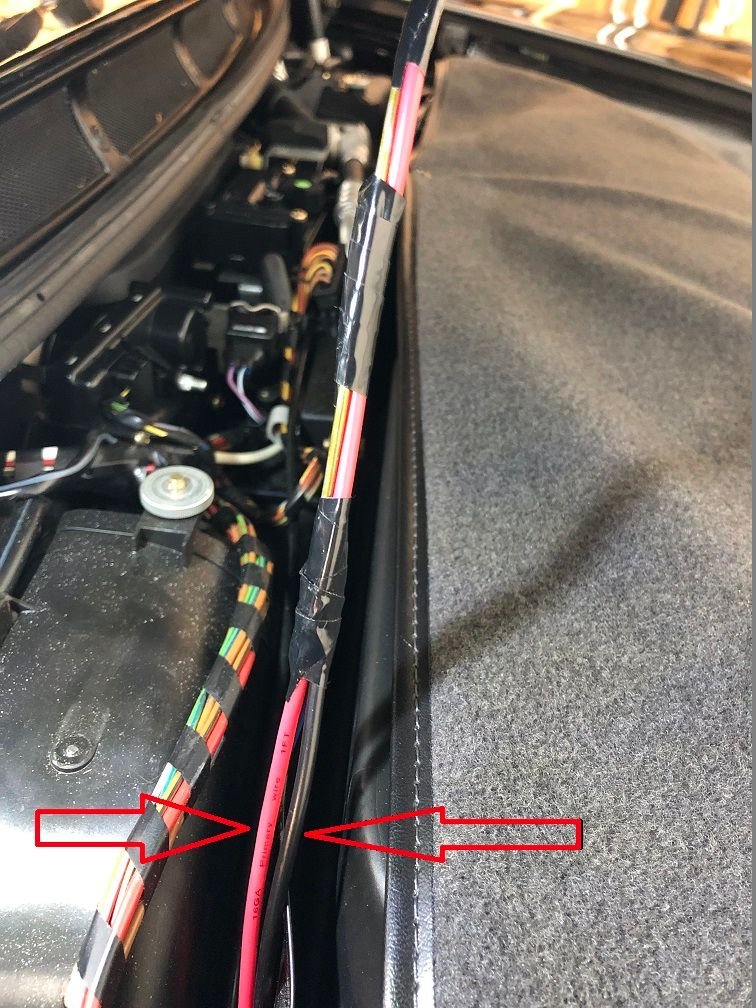
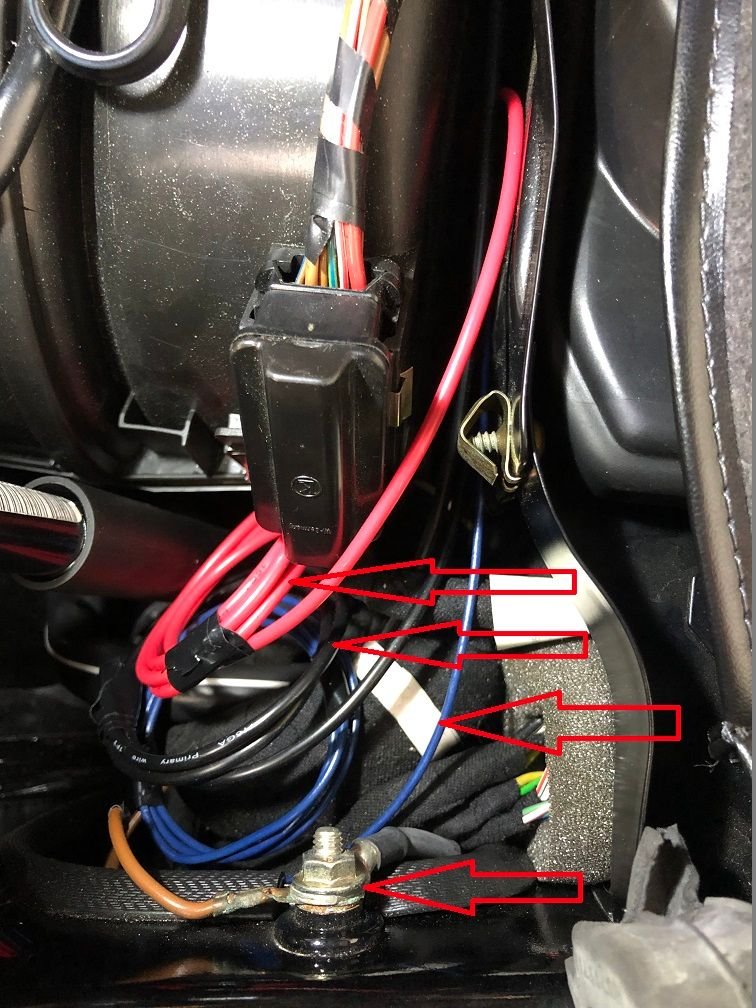
With the passenger seat pushed all the way back, look forward and upwards into the footwell and you will see the large grommet with a wrapped(black with a white stripe) bundle of wires going through it. Using a metal coat hanger, with the tip wrapped in electrical tape to prevent tearing any wire insulation) push the wire upwards, and it will enter into to frunk. You may need to push the bundle wires around to make a pathway for the coat hanger to slide past. Just move it around with your finger, there is lots of room to wiggle it. I have taped a red(pos) and black(neg) wire to the coat hanger Before you push the coat hanger through, remove the plastic trim that covers over this area. Its easy to remove by just pulling the rubber part off the metal edge at the front of the gap. It's not glued. Then you will have a clear view of the coat hanger with the white electrical taped end. Gently pull the coat hanger through, with the red wire, black wire, and a blue wire which i will leave as a "pull" for the next time a want a wire added. Neatly coil the wires and store until you are ready to connect them. I'll put a ring terminal on the black wire and connect to the grounding stud that is handily right there. I'll pass the red wire through into the fuse box and connect to an ignition "switched" circuit using the handy "add a circuit' fuse adaptor. I'll probably use the heated seats fuse slot. And I'll leave the blue spare coiled up and out of site
After I connect the footwell wires to my USB/lighter plug receptacle I'll go back and hook up the red and black leads and replace the trim cover in the frunk. I'll show details of the receptacle and the 'add a circuit" fuse adaptor in part 3 of this 993 dashcam install. Again, everything is reversible to bone stock. I welcome your comments.
Porsche's Top 5 Most Questionable Naming Decisions
Slideshow: For a company obsessed with engineering precision, Porsche has occasionally named its cars in ways that left even loyal enthusiasts scratching their heads.
Pogea Racing's 964 Porsche 911 Reimagination Stands Out in a Crowded Field
Slideshow: Pogea Racing's latest Porsche 964 project blends carbon-fiber construction, modern chassis upgrades, and up to 500 horsepower while keeping the air-cooled 911 experience firmly analog.
Talos Takes Your 991 Porsche 911 GT3 to the Next Level for a Cool $1.13 Million
Slideshow: Talos Vehicles has transformed the Porsche 911 GT3 RS into a carbon-bodied, race-inspired machine that costs well over $1 million before the donor car is even included.
9 Vehicles Porsche Helped Engineer that Aren't Porsches
Slideshow: Long before engineering consulting became trendy, Porsche was quietly helping other automakers build everything from supercars to economy hatchbacks.
9 Features and Characteristics That Only Porsche People Understand
Slideshow: Some brands build cars. Porsche builds traditions, obsessions, and a few habits that stopped making sense decades ago but somehow became part of the charm.