When you click on links to various merchants on this site and make a purchase, this can result in this site earning a commission. Affiliate programs and affiliations include, but are not limited to, the eBay Partner Network.
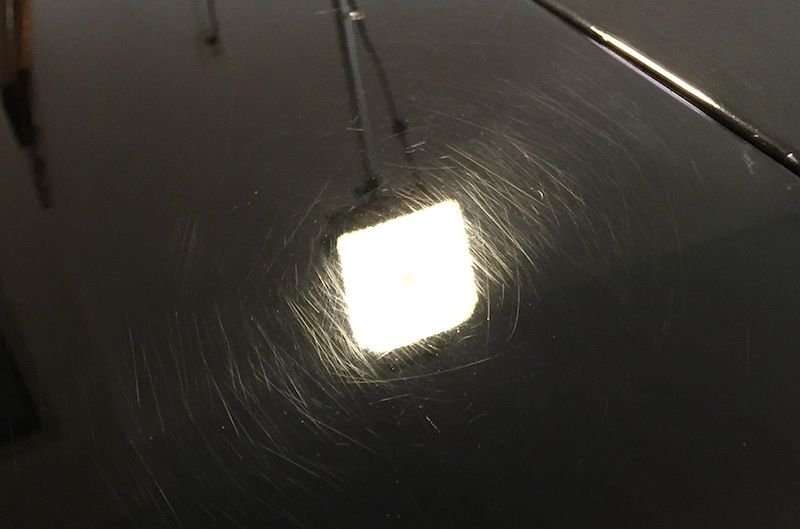
Pictured is my front fender, after some cautious polishing with "medium" rubbing compound. That removed fine scratches, too small to be seen in this photo - an improvement, but the big scratches remain. The appearance is exaggerated by the lighting - it's a "two-footer" sort of problem. I guess some previous owner used the same dirty sponge every time he washed it.
I've been trying ignore the swirls, but they're getting bigger and bigger to my eyes instead. Suggestions?
I have been learning as well, and was scared at first, but slowly gaining confidence to get the paint right.
What are you using for polisher?(machine?) i bought a random orbital 6" at Harbor Freight. I ended up changing the head to a 5" adn still using 6" foam pads though. Works well.
I bought Meguairs 105(ultra cut) and 205(ultra finish), and will be trying these this fall.
Those scratches didn't come from the medium rubbing compound. That stuff makes it look foggy with the very tiny scratches. Guessing those scratches were the reason you went after the finish to start with?
Paint is one of the features on the car where mistakes can be a forever problem. If you. An, find a local pro detailer and ask his opinion. I know that Griot's has a network of experts scattered around the country, worth looking on their website or inquiring for one near you. Meguiars has a similar network but they tend to be in the business rather than enthusiasts helping each other.
A few days ago l went over my black car with these products...and was very pleased. I was close to the point of insanity beforehand, since l had similar swirl marks like yours...and after an hour of wheeling with the 3M ultra fine polish compound, combined with a 3M blue rubbing compound pad, and hand polishing the hard to reach spots...and after a coat of wax...it turned out pretty nice.
I do not have any close up before or after pictures like yours, but trust me...it removed them and made the paint seem much deeper.
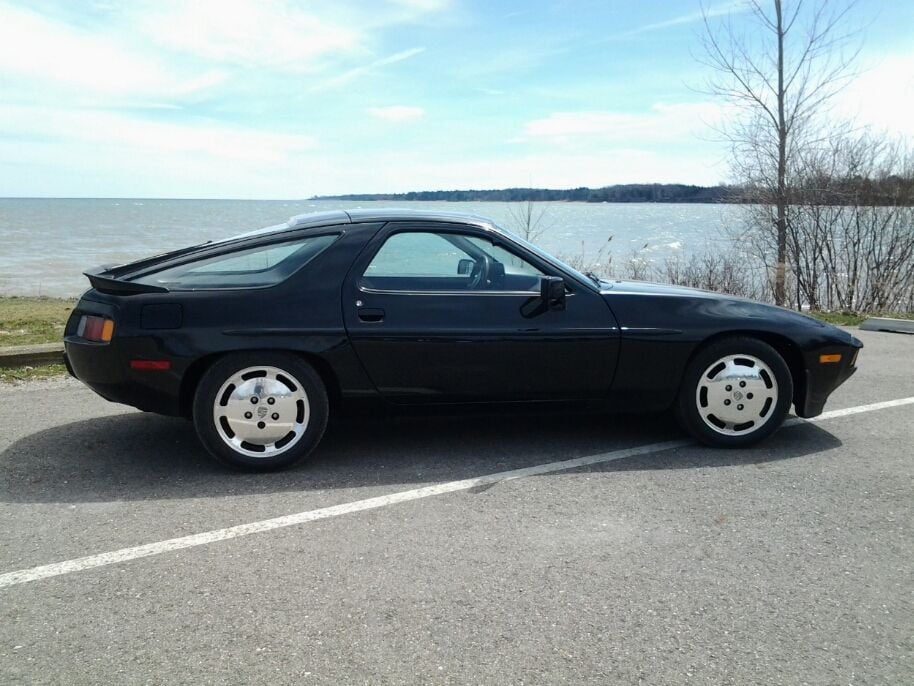
I tried my best to find two photos with similar lighting, too. I believe, I did a great job getting the rear wheel in exactly the same position in each picture though.
... I tried my best to find two photos with similar lighting, too. I believe I did a great job getting the rear wheel in exactly the same position in each picture though.
Very good. I can't tell, but I assume the crests are correctly pointed at the valve stems.
I took a very cautious and cowardly approach, just putting the polishing agent on a small towel and hand-rubbing, checking frequently. Clearly, more nerve is required, and a motorized device. Or a trustworthy source of paint magic.
In theory, I am a highly qualified polisher, as a metallurgist. We all spend hours and hours at sandpaper blocks and polishing wheels, preparing samples for metallography. We can check our work as we go, under a microscope. If we screw it up anyway, we can go back to the coarse paper. Polishing a car makes me anxious!
I think I am hearing that it is possible to get these damned swirls out. Thanks for the links.
I have 2 black Porsches and don't like to use any type of machine on either of them. When you do and the sun hits them just right, you can always see the circles from the polishers - it's the same reason none of my Porsches go to the detail shops and are all hand done by me. Any cleaning, claying, or polishing products I only apply in linear strokes going with the lines of the car. The final wax seems like it doesn't matter so that gets applied in small overlapping circles - always indoors and always when the paint is cool.
This past weekend I needed a break from the inside work (see photo) and decided to focus on the outside. I spent about 14 hours doing a 4 step process on my 928 Spyder. It was the first paint protection process since the PO had the car painted a couple years ago. I started with a Clay bar to pull the surface impurities out and make it smooth. Then moved on to Meguiar's Polish, then tried a new product for the first time. It's Turtle Wax's Jet Black paint kit, available pretty much everywhere. Everything in the kit is tinted black (2 bottles of spray detailer, the bottle of paint cleaning compound, and the bottle of carnuba wax). The instructions say to use the spray detailer when removing the dried cleaner and wax products, which I've never done before - just dry cheesecloth or microfiber towels.
Man did it turn out great. With the products being black in color, you don't get any white residue remaining and it seemed to fill and disguise any of the tiny scratches or scuffs much better than any of the non black products I'd used in the past. We'll see how long it lasts, but from the initial results, I may have found my new black car paint care system.
You need a buffer and some high quality pads. Don't be afraid to use a machine... buffer trails or "buffer circles" come from a lack of knowledge and experience using a buffer. Watch some of the previously posted AMMO NYC videos, as they will provide you with some cursory training. I'd say that the problem mostly lies with the use of compound. Compound will make things look worse before they look better (if that makes sense). Compound will remove the deepest scratches, but will leave smaller and finer ones behind. You need to use a polish to finish off the process (possibly a combination of two polishes/pads). Also, make sure that you clay bar before you touch the paint with a buffer.
From what i have learned, and still learning, the trick is to start with the lightest abrasion, then go with more abrasion if needed. It will take some trial and error.
When i first did my hood it took all the light swirls out, but still had some deeper swirls. So I went to a harsher compound. When i wiped it off it scared the crap out of me. It looked so dull and scratched. I thought i had ruined it. I immediatly went to the polish, and it came out great.
You will have to make it worse before it gets better, but make the marks uniform, and then go to a more polishing compound.
You have black, which looks worse with scratches, but when polished out black is IMO the best looking color on a car.
Im not entirely sure if a good detail will bring out those deep scratches - you may have to either wet sand it or respray BUT in the meanwhile ...I have had good results with this black pilishing kit from Turtel Wx ... http://www.streetsideauto.com/p/turt...3RbhoCTmfw_wcB -
I 2nd the 105/205 recommendation. It did wonders on my red 87 with a Harbor Freight 90 degree buffer with digital speed read out, and medium and fine foam pads. I haven't tried this combo on my black car yet, but plan to. Both have single stage paint so should work well.
If you want to try hand-applied products first, I can recommend Meguiar's Scratch-X first, then Swirl-X. the Scratch-X will remove larger scratches but can leave swirls of its own, as others have mentioned. You may like to finish off with Swirl-X, which leaves my Venetian Blue looking very smooth.
Hope you don't mind, I copied your thread to the car care forum.
You might be able to hand buff those out, it will be a lot of work. Once you use a machine, you'll never go back. They are just too simple to use.
I have two buffers and Meguiars random orbital polisher. Since I don't detail cars professionally, I tend to use the random orbital 75% of the time. I just have a better comfort level with it.
The key to swirl marks is to prevent them. The quality of products that touches your paint is the start. I only buy high quality micro fiber towels, no seams and no labels (that is important).
Washing with a hose, I use two buckets to keep the dirt in one bucket so the soap water doesn't get contaminated. I also have one of these at the bottom and scrape the wash mit across it: http://www.autogeek.net/grit-guard.html
For the non-daily drivers I've actually gotten away from the traditional hose / bucket. They are never "that dirty" and just need to be refreshed. If too dusty / dirty for quick detailer, I use this now: http://www.autogeek.net/optimum-no-rinse.html
Next step is the clay bar, once you use one you'll wonder how you ever owned a car without it. Meguiars has three grades, white, blue, and red. I stick with the blue: http://www.autogeek.net/megovclay.html
The white stuff is what you find at the auto parts store, less aggressive than the blue. I keep some of the white on hand to do the windshield.
Now things get interesting. Not only do you have thousands of chemicals to choose from, you also have to pick the abrasiveness of the pads. Sticking with Meguiars for simplicity (and it's what I use), here is a kit that includes their basic three: http://www.autogeek.net/meguiars-g11...isher-kit.html
I always start with the yellow pad for paint correction, if that's not working I then move to the red pad. There are more abrasive pads on the market, but this combo gets me through the majority of jobs and I feel it's very safe. Yes a stronger pad will be quicker, again I'm not a pro so time is not a huge factor for me. I'm very cautious when doing paint correction.
As for chemicals, not even sure where to start. I've purchased so much product I haven't had to buy anything for a couple of years and a lot of new stuff has come out.
I've used both of them, they work well but once I got comfortable with M105, there was no going back. The only issue with M105 is you must follow it with something less abrasive (like M205). If one of the above two is enough to knock out those swirls, it will save you a step.
The microfiber system is interesting. Instead of a foam bad the disc has a microfiber material on it. I don't think either of these systems are targeted for beginners though.
Finish the job with any wax / sealant of your choice.
If you are really nervous (like I was) go to a junk yard and buy a hood and go nuts.
How do you keep it looking good? I've tried dozens of "quick detailing" products and they all work about the same for me so I stick with Meguiars Last Touch, buy it in bulk and mix it 50/50 with distilled water: http://www.autogeek.net/meguiars-d155-combo.html
There are tons of videos on YouTube, study a lot and figure out what will work best for you.
This can easily turn into an obsession, I started to buy in bulk. This is a sample of my detailing arsenal:
 05-27-2015, 10:28 AM