When you click on links to various merchants on this site and make a purchase, this can result in this site earning a commission. Affiliate programs and affiliations include, but are not limited to, the eBay Partner Network.
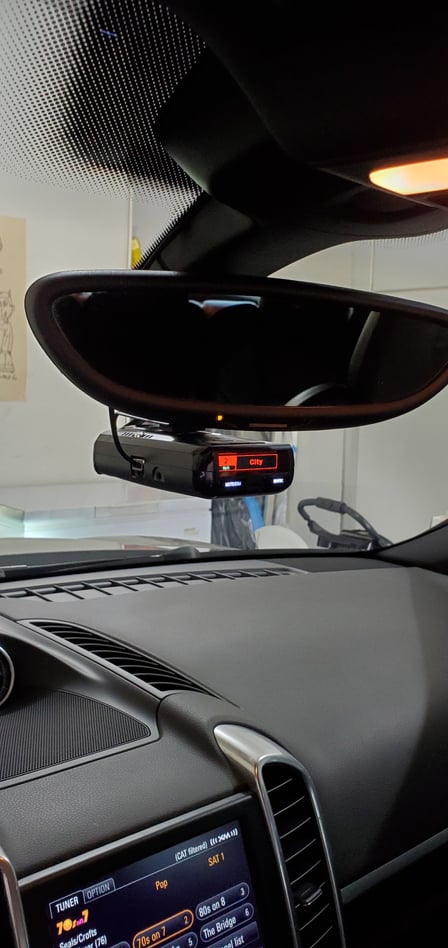
Radar Detector Wire Harness Install at Upper Console
When tapping switched power from your upper console’s auto dimming mirror lines for your favorite radar detector , you have two choices:
1. Follow these instructions for a splice free connection
2. Cut and splice into the lines (not my choice and I won’t present it as a solution)
Disclaimer. If you are not comfortable with electrical and auto trim work, you have two choices:
1. Next time it is in for service at your preferred shop and ask them to do it for you.
2. Leave the Mirrortap, $20 and a short note for you tech on the front seat because they have done a few of these and they can do this in about 15 minutes.
You will need:
- Patience removing the upper console
- 958 2011 Porsche Cayenne S with auto-dimming rear view mirror. This may certainly be applicable to other Cayennes.
- Valentine 1 radar detector
- A warm day or heated garage (plastic can break easier when cold)
- Voltmeter with thin probes
- Non-marring panel removers
- Electrical tape
- MirrorTap MT-2012. 12” long lead with built in fuse. www.mirrortap.com
- 2 small zip ties
- Protective covers for the interior
- Clean hands when handling interior parts around the fabric headliner
Cover everything that you do not want damaged: dash, center console, steering wheel, passenger seat, driver seat.
Remove key from ignition. Do not leave it in…remove it!
I did not disconnect the battery. Why? Because I removed the key from the ignition.
1. Remove the cover between the upper console and the cover to the mirror base. It is help in place by friction fittings.
2. Remove the console. Very good video on this. No affiliation.
a. The metal spring clip ends can get hooked behind the headliner.
b. Start with releasing the rear first and then move forward.
3. Find the yellow auto-dimming mirror wire connections.
4. Test the brown and blue leads if desired with your voltmeter.
5. Slip the black lead into the brown wire’s connector back (ground) and the red leas into the blue wire’s connector back (switch positive power).
6. Wrap the slightly exposed lead ends and yellow connector end with electrical tape.
7. Zip tie the MirrorTap leads to the auto-dimming harness to keep in place.
8. Route your MirrorTap leads out to your desired locations.
9. Mount the radar detector.
10. Reconnect all upper console electrical connections.
11. Insert ignition key and power up the electrical. Test your radar detector.
12. Put everything back together in reverse order.
I tried to follow this and had some other things show up.
1) I couldn't get the clips to spring clips to go into their slots and had to really deform them to drop the console.
2) My 2014 Diesel (not platinum) did not have the yellow molex connector like yours. I was able to hook into the black connector, which is also 12v, and switched my the key so it works for power my radar detector.
Unfortunately having deformed the clips I couldn't get them back into their original shape so that panel it's as secure as it was originally, I'd like to get new clips for next time as they are easy to swap in and out once you open the panel up.
Thanks for the write up. I did this and the mirror tap works perfectly.
Only problem - I did experience the same issue regarding the metal springs clips - my overhead unit was quite snug and unfortunately now, not so much. I should have paid more attention the this write up and less to that ****** in the youtube video. After looking around, it seems the macan folks have similar experience. The part number I am ordering to replace my spring clips 95B-868-771 . This does not show under the cayenne but the console looks identical. Will let you know if they fit for any future reference.
FYI - I finally got around to replacing my damage clips. The ones I ordered above are an exact match and worked perfectly. Note: the parts diagram for these springs clips look nothing like the actual ones.
FYI - I finally got around to replacing my damage clips. The ones I ordered above are an exact match and worked perfectly. Note: the parts diagram for these springs clips look nothing like the actual ones.
Wish I would have read through the entire thread. I totally mangled those clips buy not due to my doing. I think someone was actually in here before I went. So taking out the panel was a nightmare.
Going to pickup some new clips. Thanks for the part number.
Just used your great post to hardwire a V1 in my 2017 Macan S. All the steps are essentially the same, the only difference was the color of the wire plug, which is black instead yellow in my car. Thanks!!
Great post! Thank you. Worked perfectly for a MirrorTap and BlendMount install my Uniden R3 in my 2014 Platinum Edition. Getting the console down was certainly challenging ... and frustrating ... and scary I'll be replacing the clips as they were indeed caught on the body panel and totally distorted when I finally got them out. And like others, I found the rear view mirror power connector to be blue, not yellow as shown in the photos. Same connector, just a different color.
 10-20-2017, 05:37 PM


 I'll be replacing the clips as they were indeed caught on the body panel and totally distorted when I finally got them out. And like others, I found the rear view mirror power connector to be blue, not yellow as shown in the photos. Same connector, just a different color.