When you click on links to various merchants on this site and make a purchase, this can result in this site earning a commission. Affiliate programs and affiliations include, but are not limited to, the eBay Partner Network.
While replacing the headlight gaskets I looked for the usual suspects causing a Direction Indicator fault message and inoperative right front turn signal.
The rail seemed tight (not sure what would come loose here anyway), the connection looked clean and everything looked good.
I cleaned the prongs (sand paper wrapped around a putty knife) and pushed them outward a bit as mentioned on numerous posts.
Turn signal now works. Anxious to see how long it lasts as these sort of non-fix fixes don't give me much confidence. Noticed PO paid Indy to replace the same turn signal bulb numerous times. Ironic if all it needed was a better connection.
I haven't dug into this yet. I tried to get a look at it/clean it up today while replacing the pressure hose o-ring but couldn't get a good look at it.
I think you need to pull the airbox to get a decent look at it.
I was hoping the forums would point me in the right direction but shockingly I haven't found much about power steering leaks. Finding the most likely o-ring part numbers hasn't been simple either.
Yep I'm gonna put ctt on a lift. Access seems possible from underneath. From On top the service manual says to pull air box
While replacing the headlight gaskets I looked for the usual suspects causing a Direction Indicator fault message and inoperative right front turn signal.
The rail seemed tight (not sure what would come loose here anyway), the connection looked clean and everything looked good.
I cleaned the prongs (sand paper wrapped around a putty knife) and pushed them outward a bit as mentioned on numerous posts.
Turn signal now works. Anxious to see how long it lasts as these sort of non-fix fixes don't give me much confidence. Noticed PO paid Indy to replace the same turn signal bulb numerous times. Ironic if all it needed was a better connection.
Nifty mechanism to get the light unit out btw.
Try removing the harness from the holder, pulling it forward, and plugging it directly into the back of the headlight while it sits partially pulled out. Most of the headlight issues stem from the fact that when you push the headlight back, the harness holder deflects to the rear and you don't get a good connection. Second turn signal issue that is common is the prong that touches the bottom of the turn signal bulb needs to be bent up more. Grabbing it with some pliers is often enough. Third - the harness needs to be replaced (white section). They're not that expensive.
If it is a connection issue, do a search for "dipped beam" as many people will take an exacto knife and cut off the front tabs that hold the harness in place. That way, you an plug it straight into the headlight, then slide back into place. Fixed all sorts of headlight issues I was having.
Thanks @wrinkledpants. I've read about dipped beam fixes but the specifics in your explanation are very helpful. I made it half way to work today and the Direction Indicator fault message came back.
For the turn signal fix you mention, is the prong accessed by pulling out the turn signal from the headlight unit?
I fixed my turn signal issue by making sure the contacts were lined up. If I installed the bulb and turned it as far as it would go, the contacts would not line up properly. By just backing off a little the contacts lined up and no more problem.
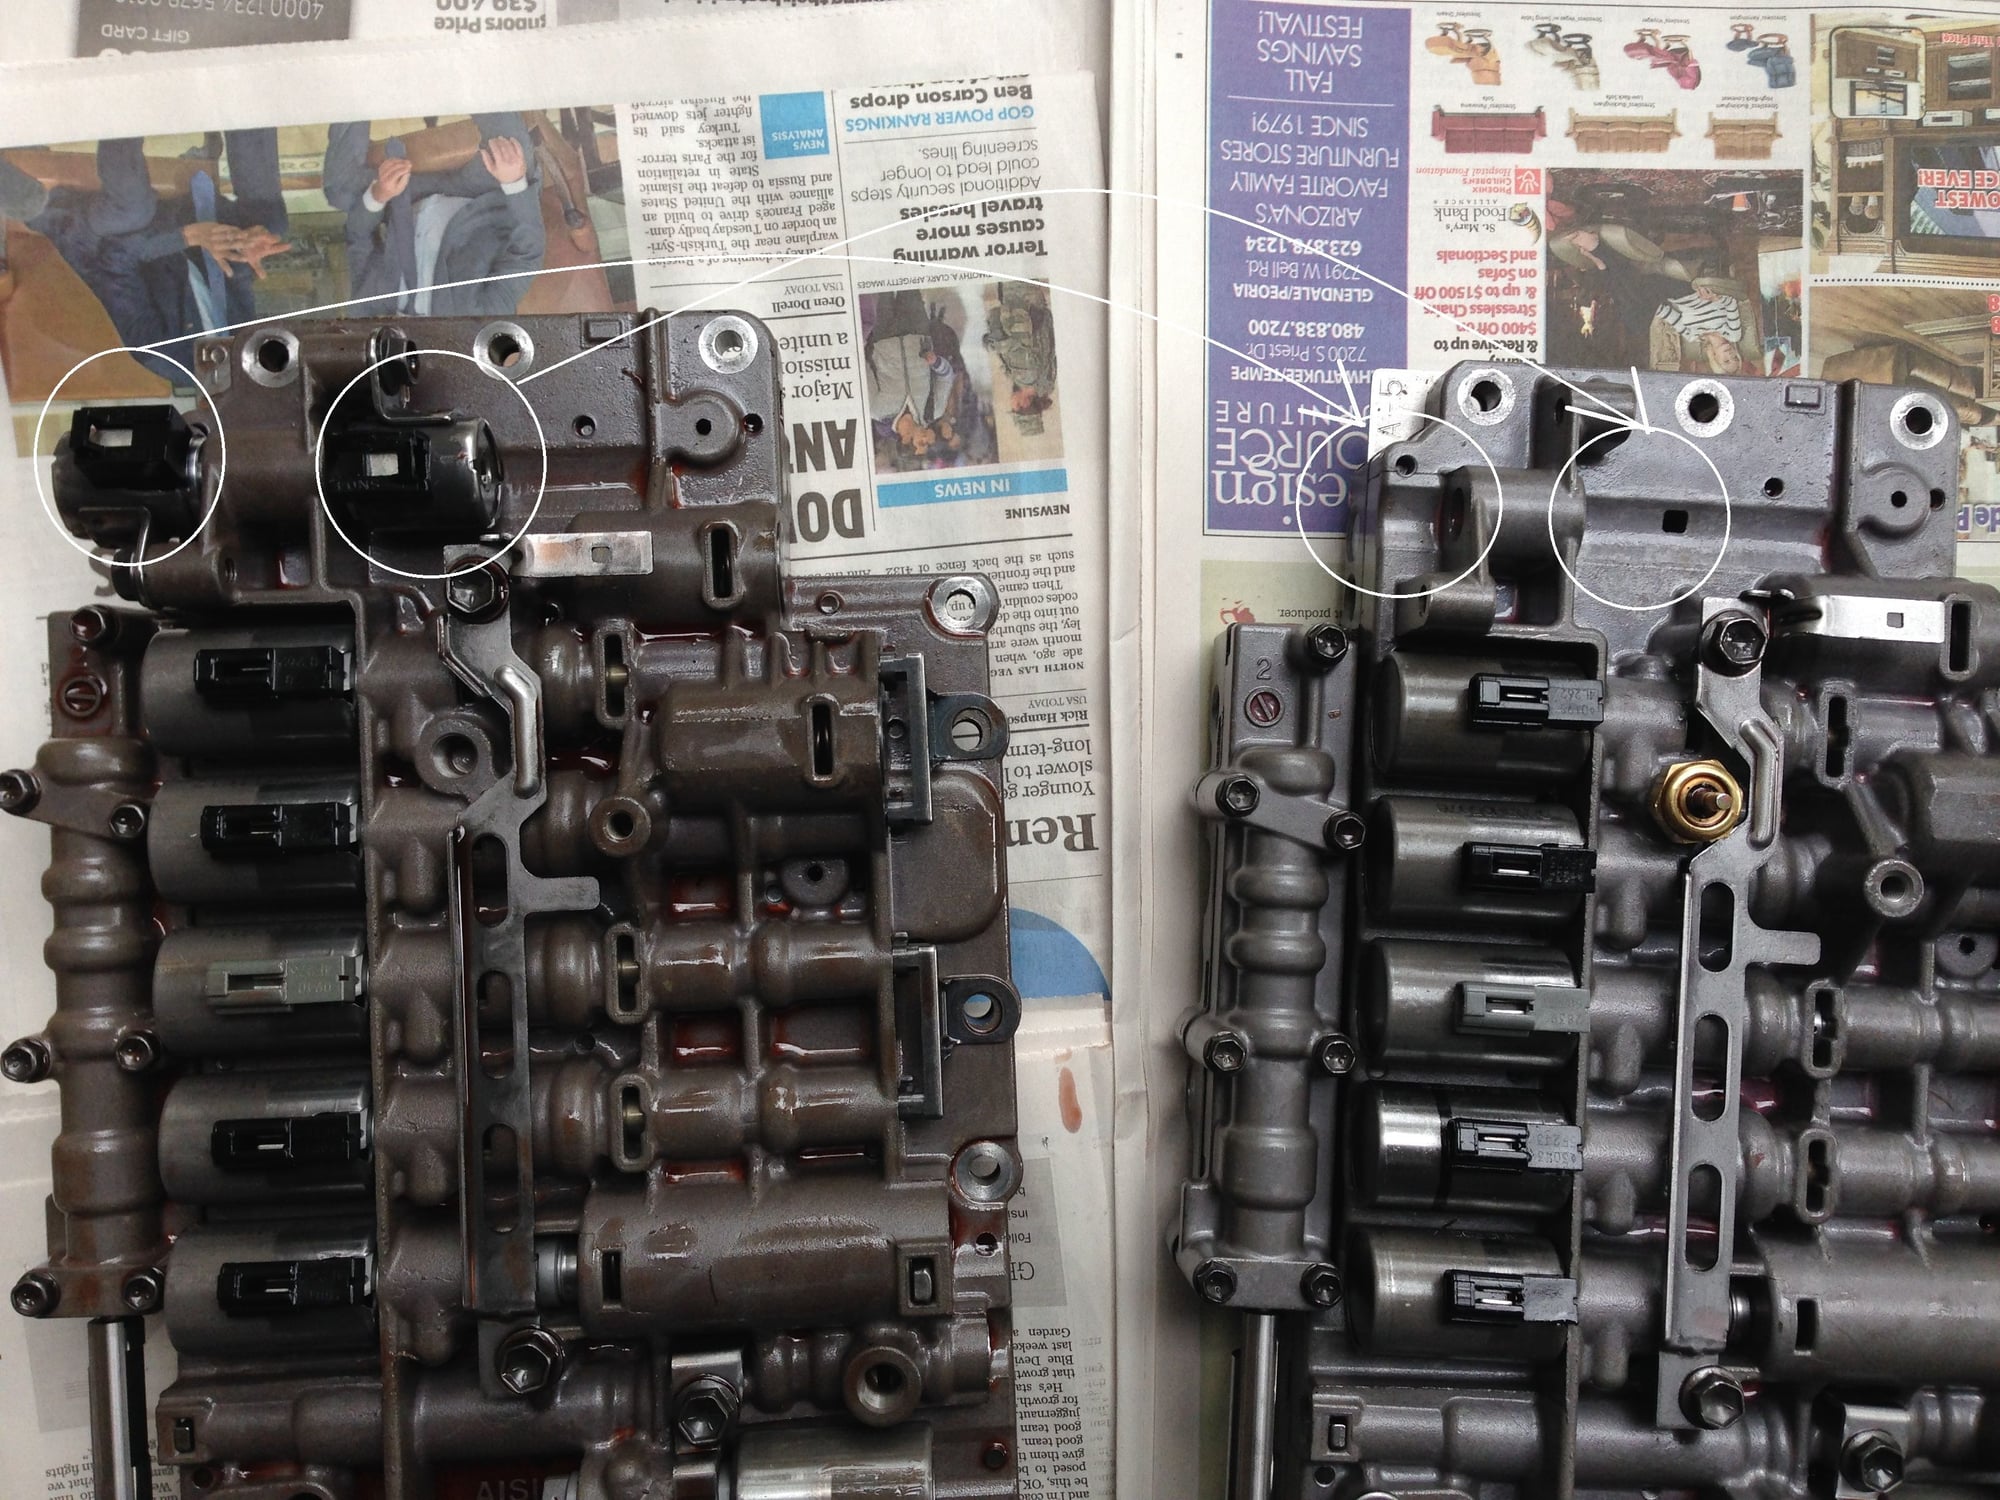
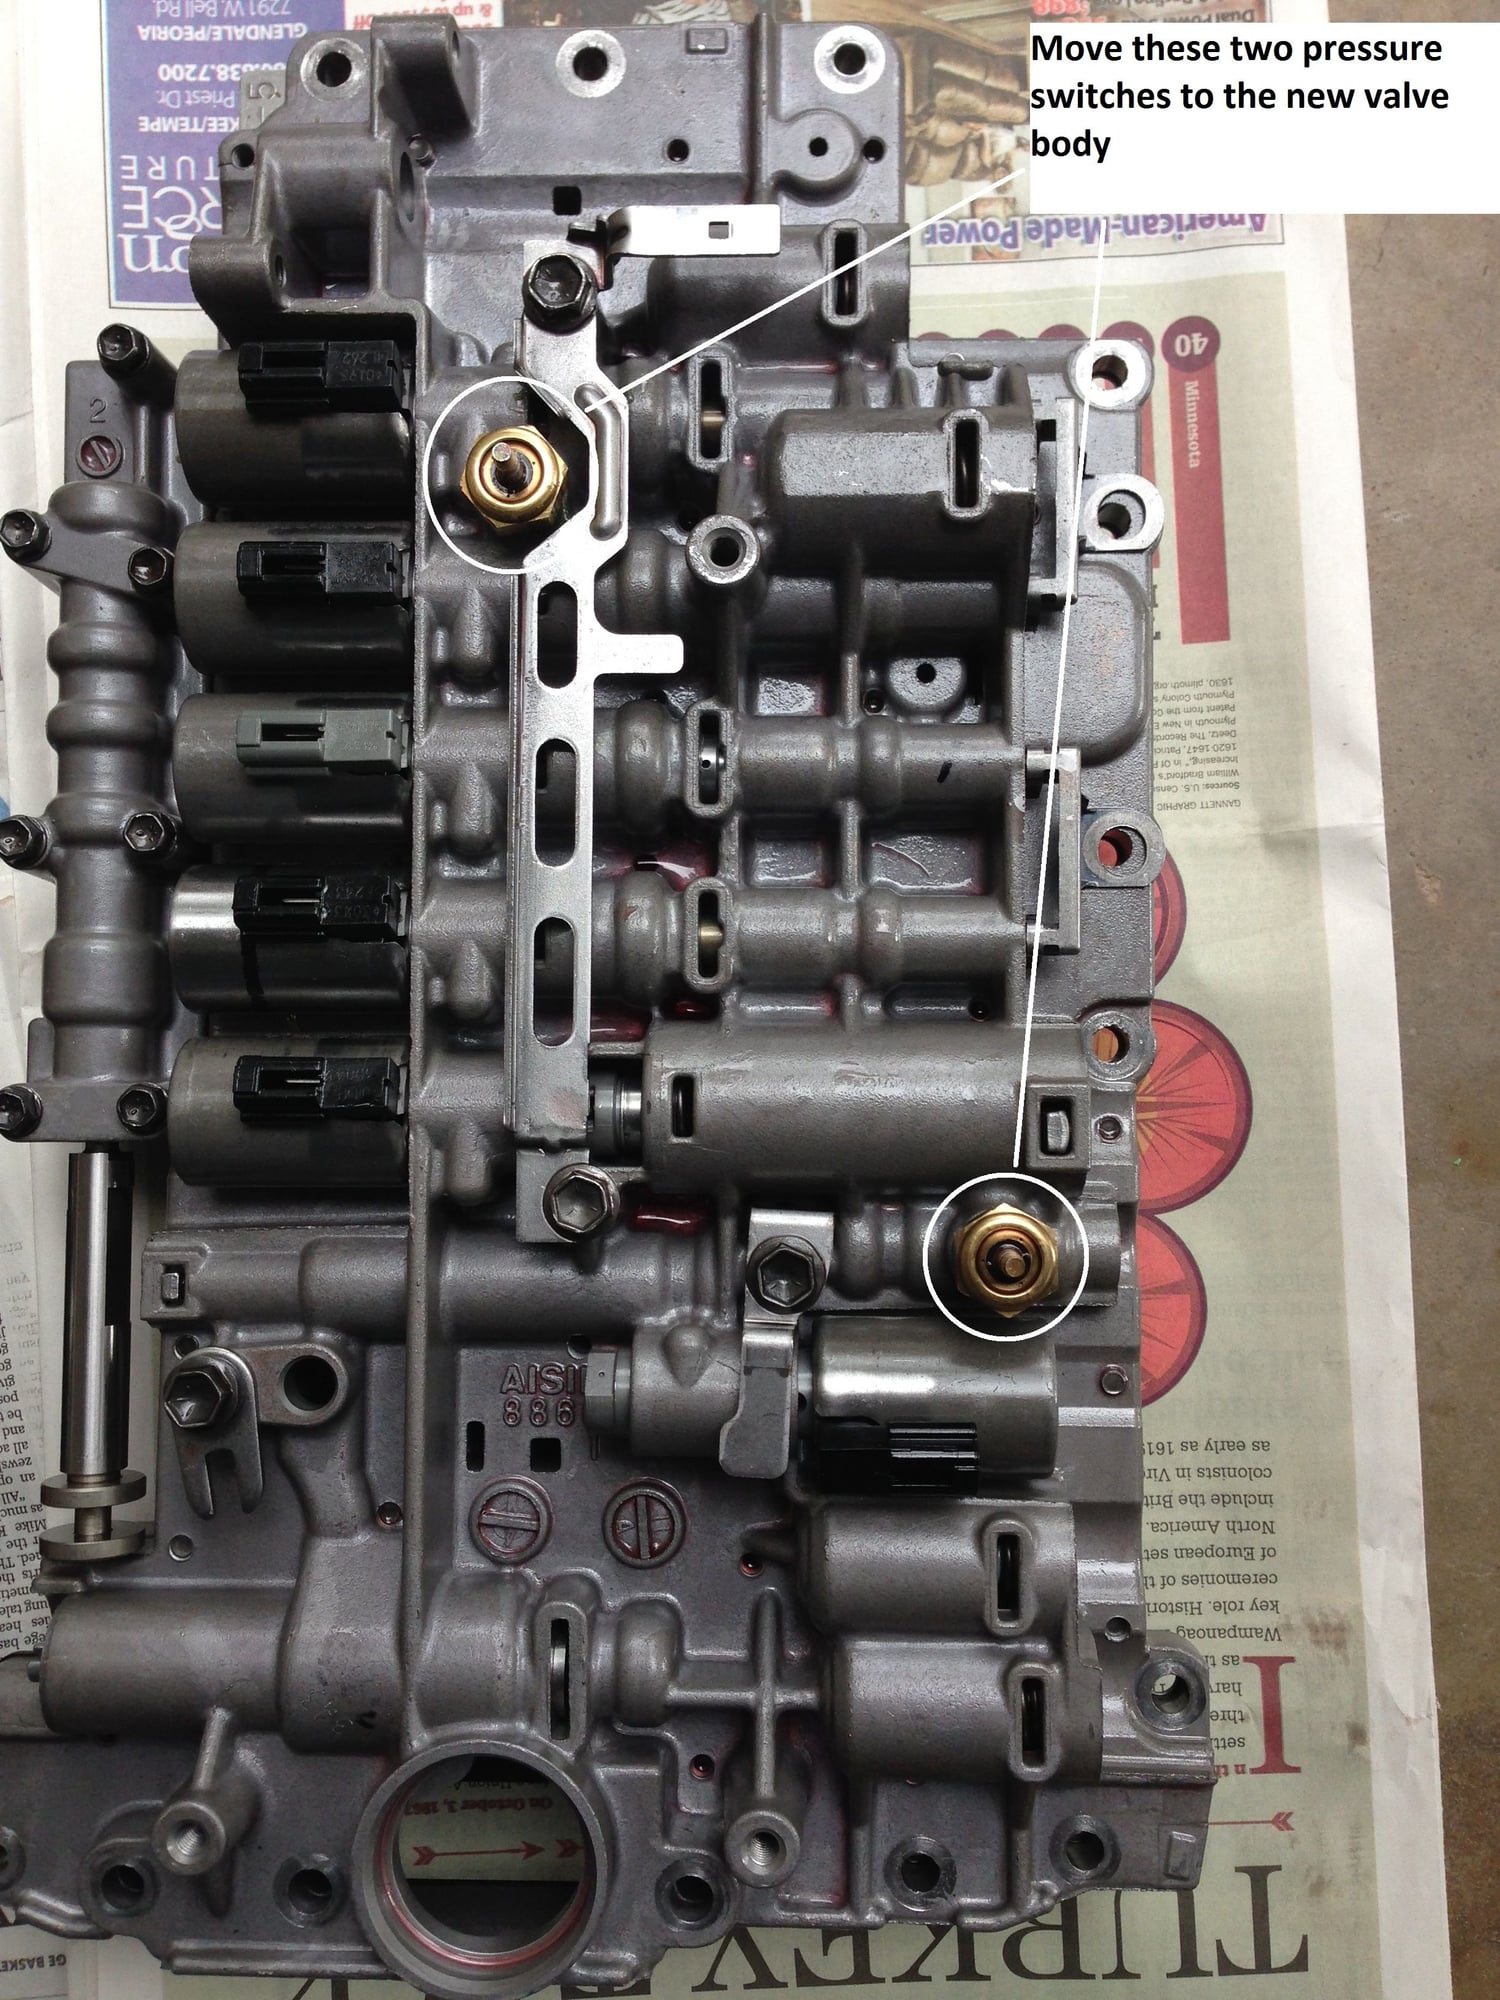
I replaced the valve body last week with a remanufactured unit from RevMax. Very doable DIY, just takes patience. This DIY guide was very helpful.
The result is probably as close to perfect shifts as can be expected from a 116K mile 450hp AWD truck. Its now a pleasure to drive gently or hard.
Using a Durametric and homemade filler, cobbled together from Home Depot parts for $15, the fill process went smoothly too.
Parts and costs
Valve body from RevMax - $719
Porsche ATF filter - $41
Porsche pan gasket - $63
Porsche ATF (10 quarts) - $240
ATF filter gasket - $6
Drain plug washer - $3
Fill plug washer - $3
I bought everything except the valve body from Sonnen.
I read you are supposed to replace the 14 valve body bolts but I re-used them.
Note that I used almost 10 quarts of ATF - not the 9 quarts included the ATF fluid change kits. You loose almost an extra quart from the valve body.
I certainly could have saved a lot of money not using Porsche ATF but decided the extra $ was worth it since it wasn't a complete flush and I was pretty sure the old ATF was Porsche so using Porsche fluid would eliminate any issues of non-compatibility since I don't plan another drain and fill to more completely change the fluid.
A couple items that might help others On/off solenoids
I replaced the spark plugs and coils. The old plugs and coils were both Beru. Pretty easy DIY - just a lot of stuff to remove to get to everything.
Reason for replacement
Plugs are part of the 120,000 maintenance but I did them a few thousand miles early since I had no record of when they were replaced last.
I had pulled a coil to find the model number (948.602.104.05) but didn't pull them all to check for cracks. Based on the model number my guess is the coils were about 8 years old and with 5 versions since '05' version I figured it was wise to replace them.
Parts used
Beru spark plugs #999-170-221-90
Beru ignition coils #948-602-104-21
Results/Observations
None of the coils were cracked and the plugs all looked good.
Not a dramatic difference in performance. Maybe a little smoother power delivery and idle decreased from 600rpm to 560rpm.
I'm a little uncertain if I got the correct coils. The packing slip and box show #948-602-104-21 but the sticker on the coil doesn't show the model #. The old ones have the model number stamped on the coil (however the number on the sticker is the same format as the second stamped number on the old ones). I bought them from Pelican and it seems to run OK so perhaps this is how Beru does their coils now?
Below is the difference in labeling of the old and new coils (new is on the right). Anyone know whether these are the right coils?
I fixed my turn signal issue by making sure the contacts were lined up. If I installed the bulb and turned it as far as it would go, the contacts would not line up properly. By just backing off a little the contacts lined up and no more problem.
take an exacto knife and cut off the front tabs that hold the harness in place. That way, you an plug it straight into the headlight, then slide back into place. Fixed all sorts of headlight issues I was having.
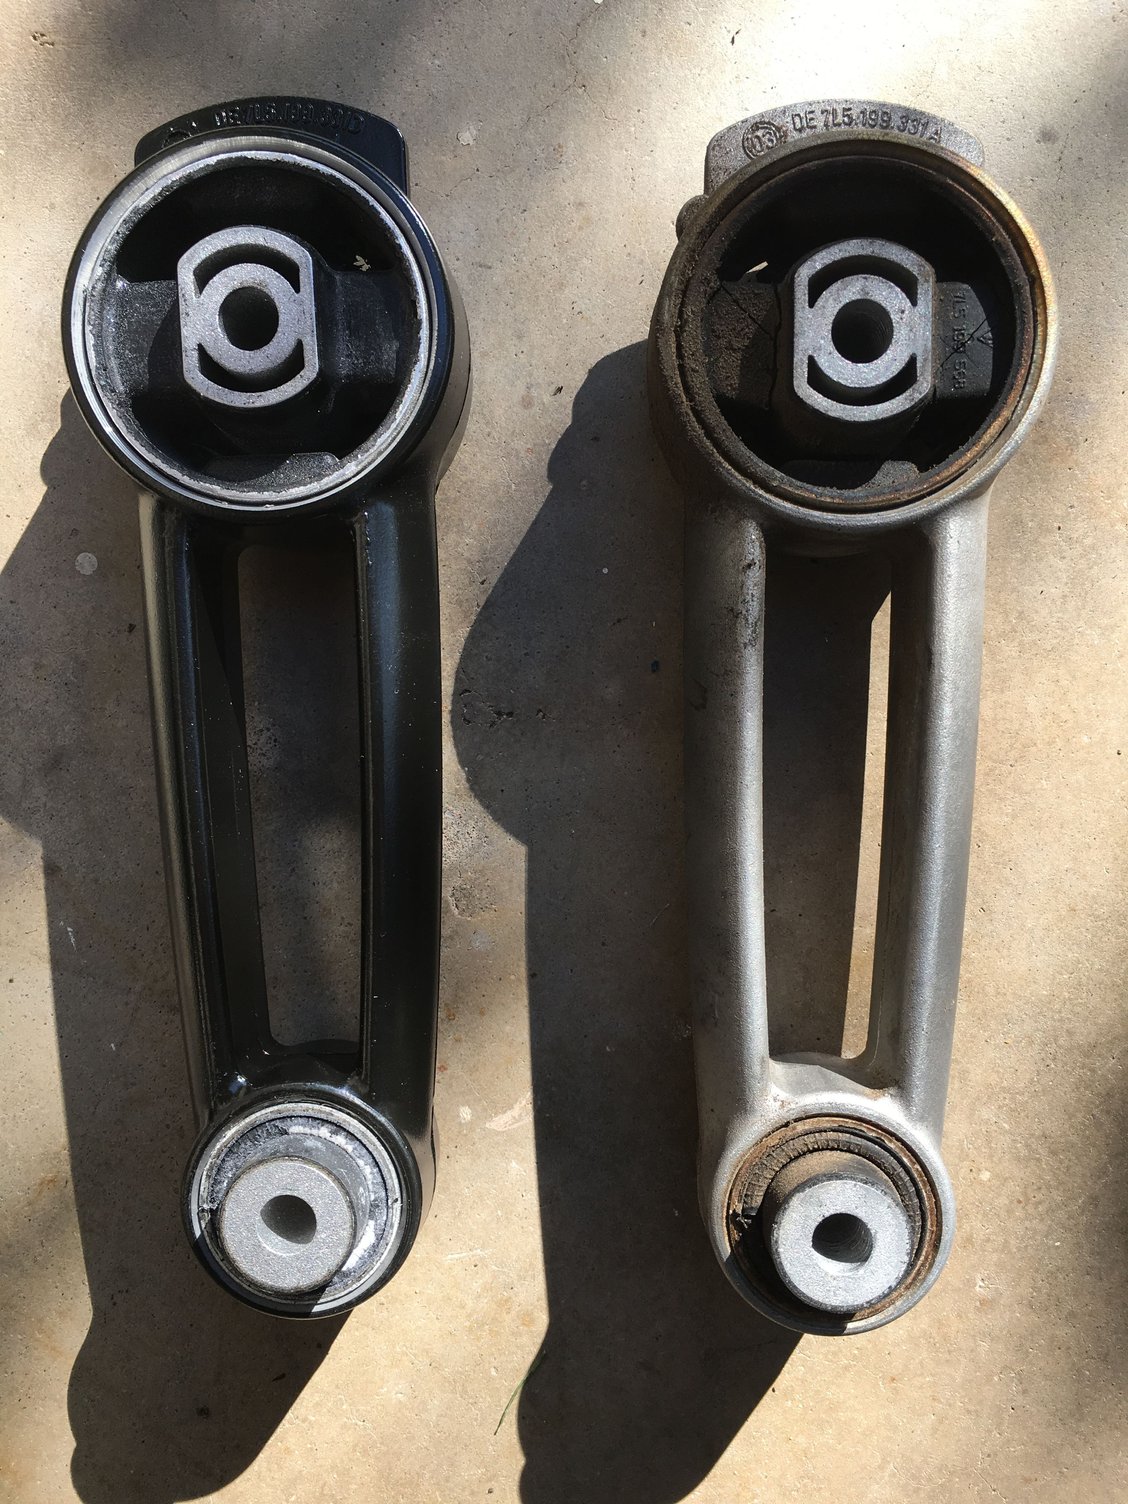
I replaced engine torque strut. No extra work to do it while replacing the spark plugs and coils.
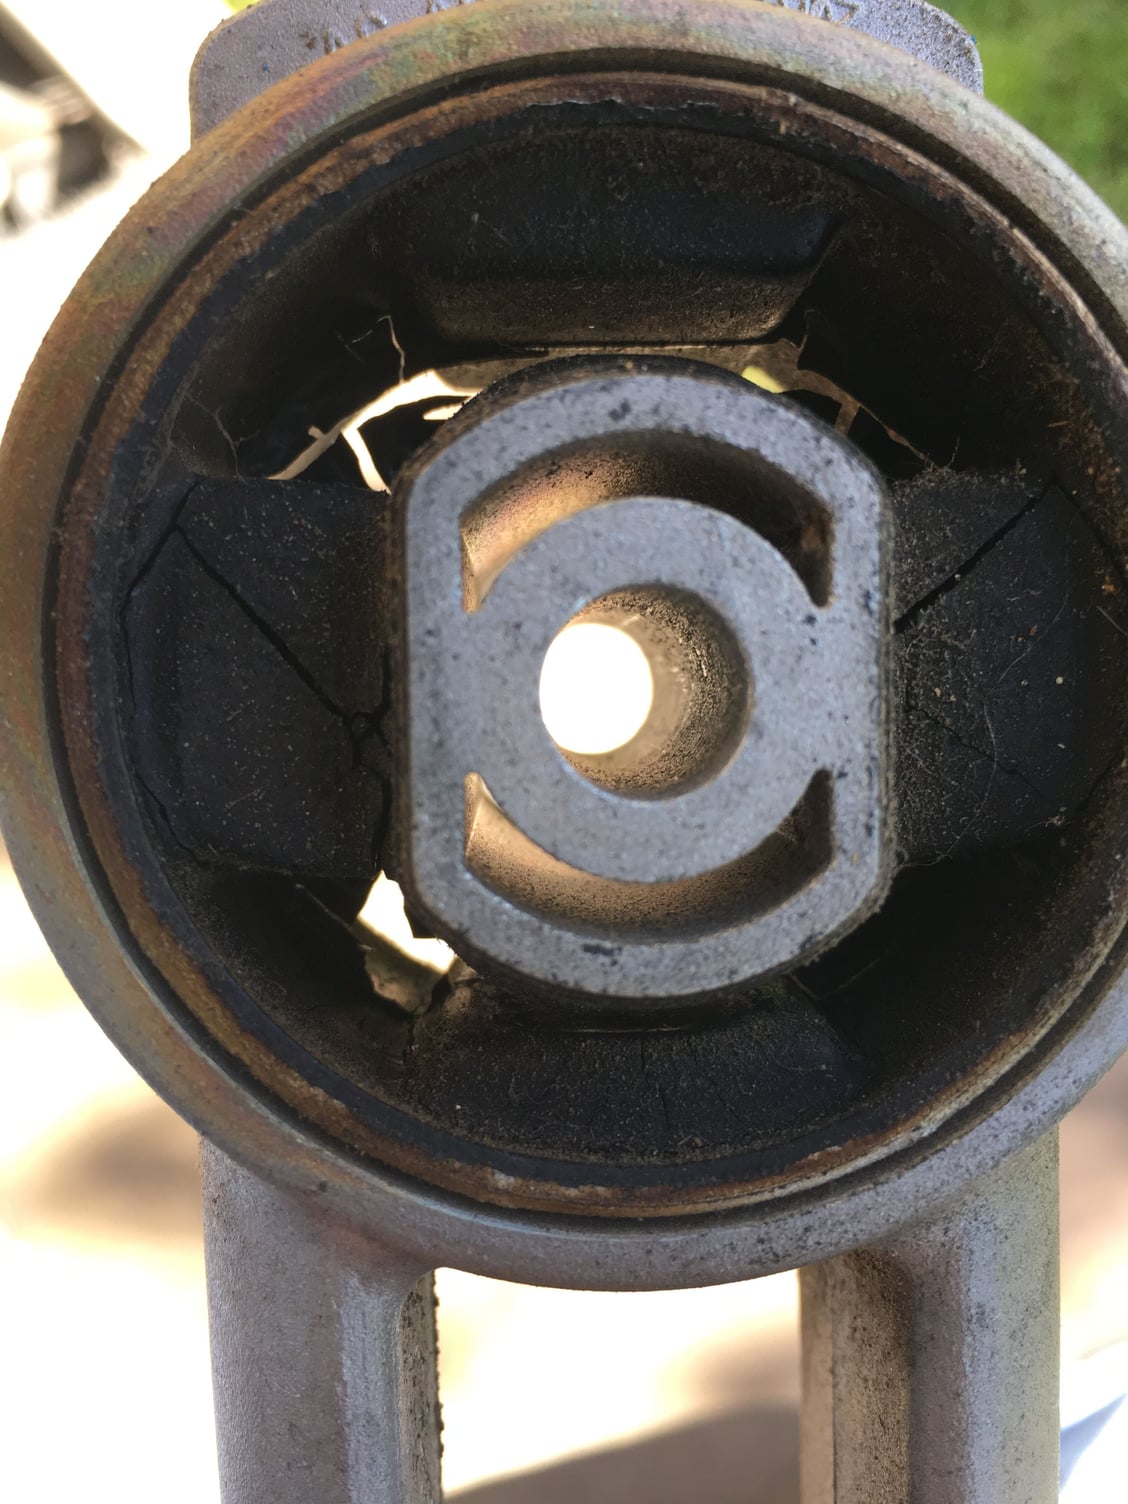
The body side bushing was shot.
Looks like Porsche changed the strut to black (I got mine from Sonnen). I don't know when they made the change but if your looking at Cayenne's and see a black strut it probably indicates the strut is not original.
PPI noted broken bushings in upper control arm and excessive play in lower left ball joint (LCA had 30,000 miles on them). I also had clunking over bumps.
Decided to do a complete front-end refresh while I was at it.
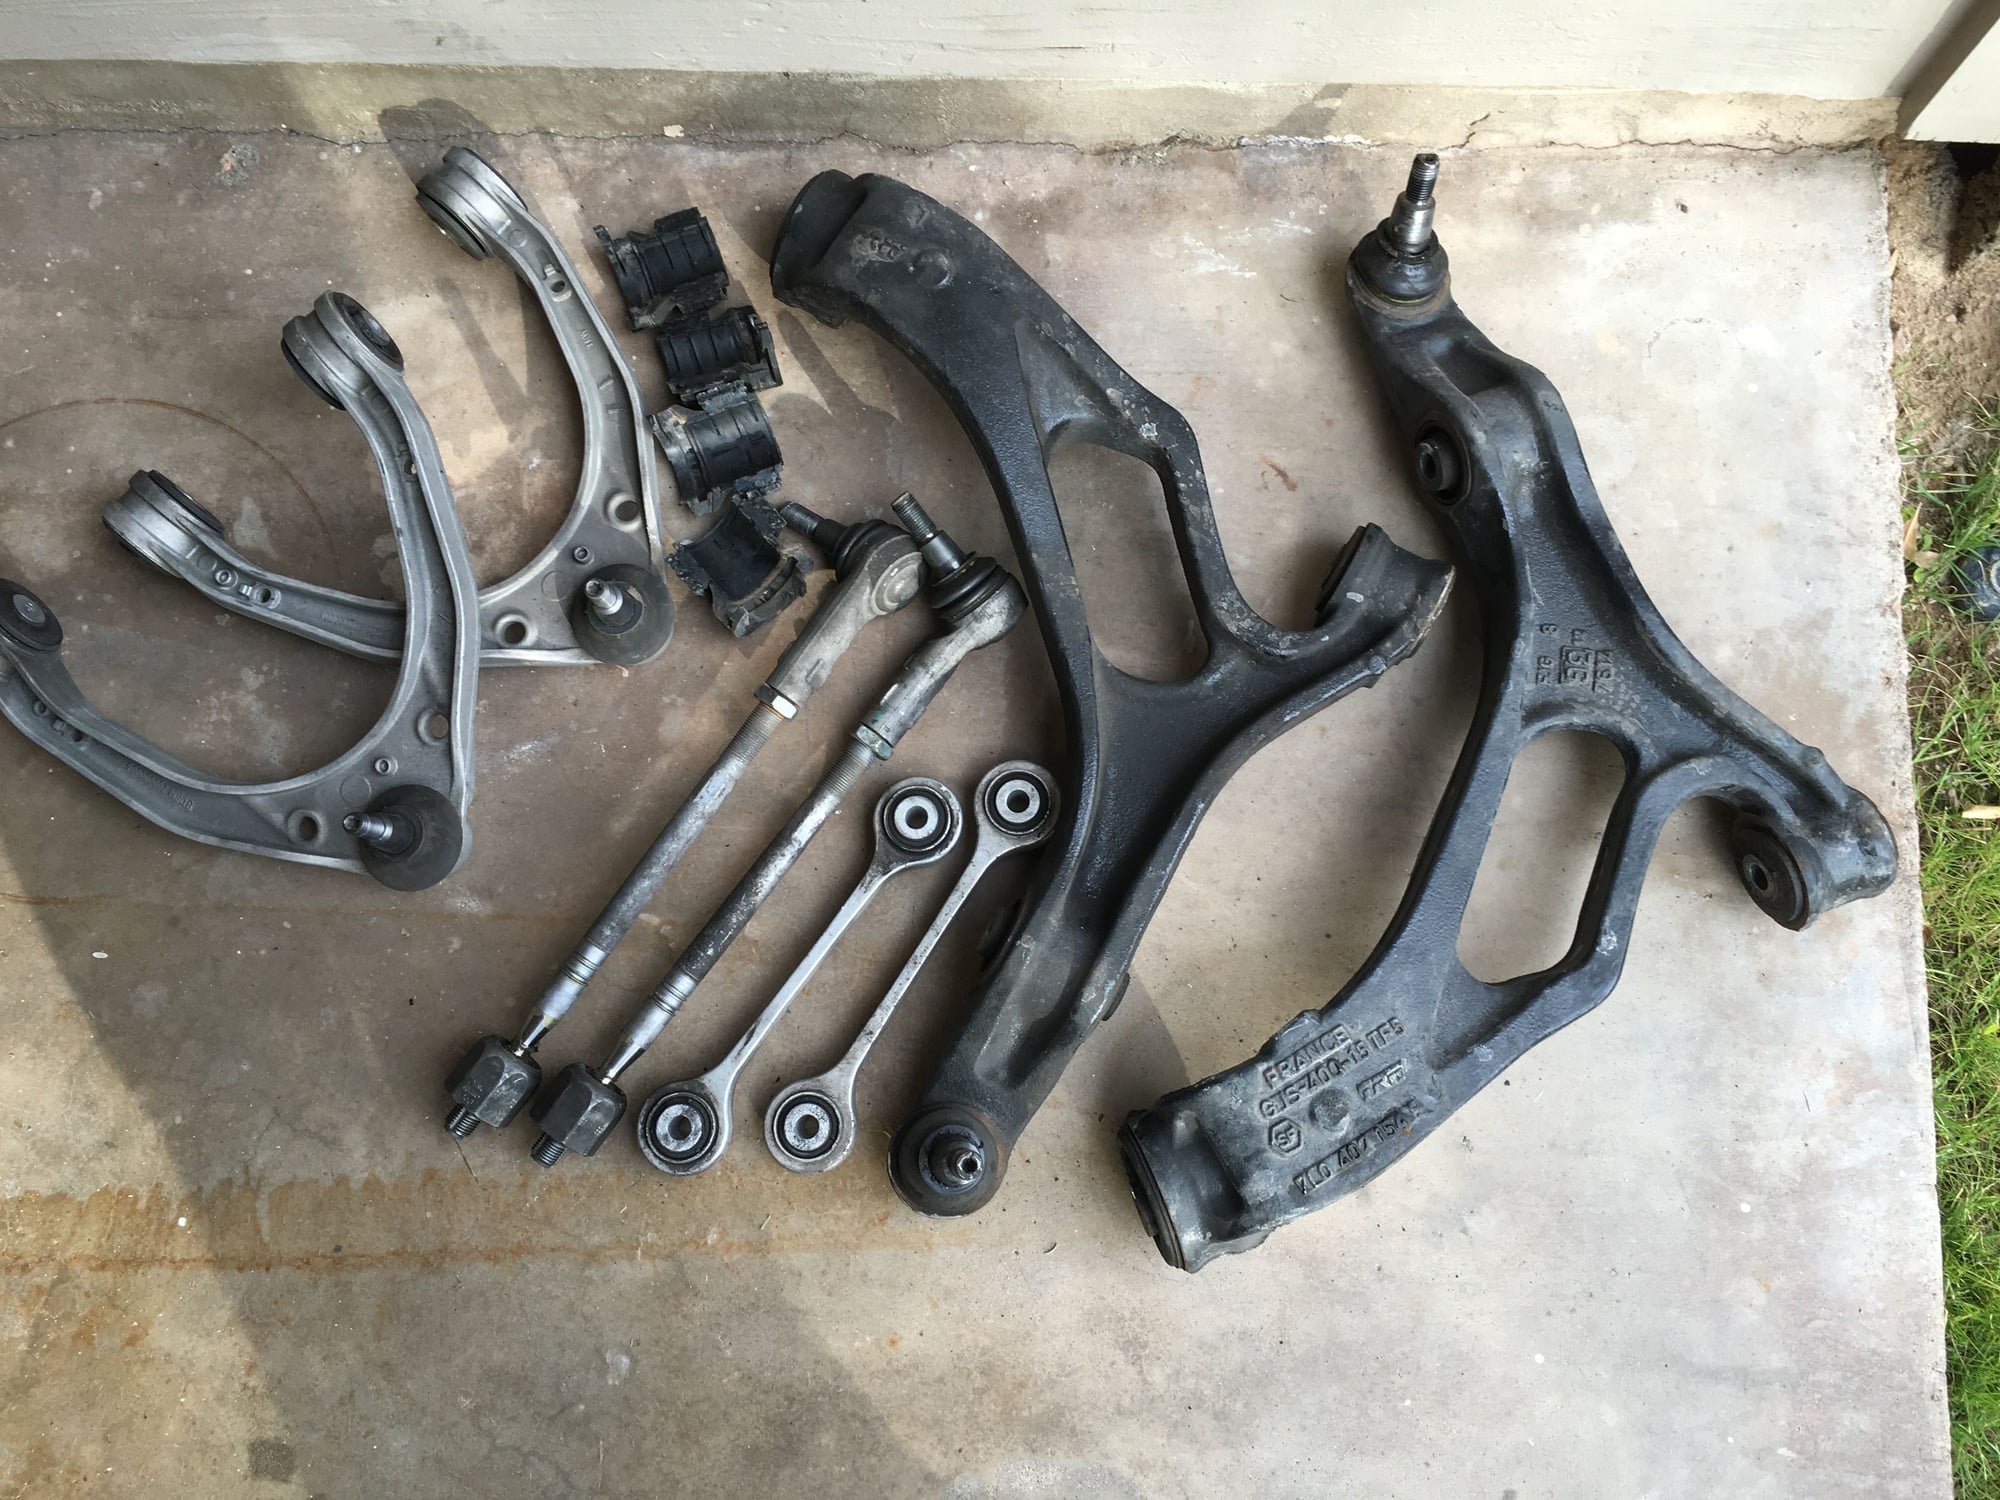
Parts used
Turbo S LCA (Porsche) - $496
UCA (TRW) - $399
Tie-rods (Lemforder) - $160
End links (TRW) - $78
Sway bar bushings (Porsche) - $41
Upper shock mounts (Porsche) - $65
O-rings for shock bracket - $16
Hardware - $63
Total cost = $1,318
Observations
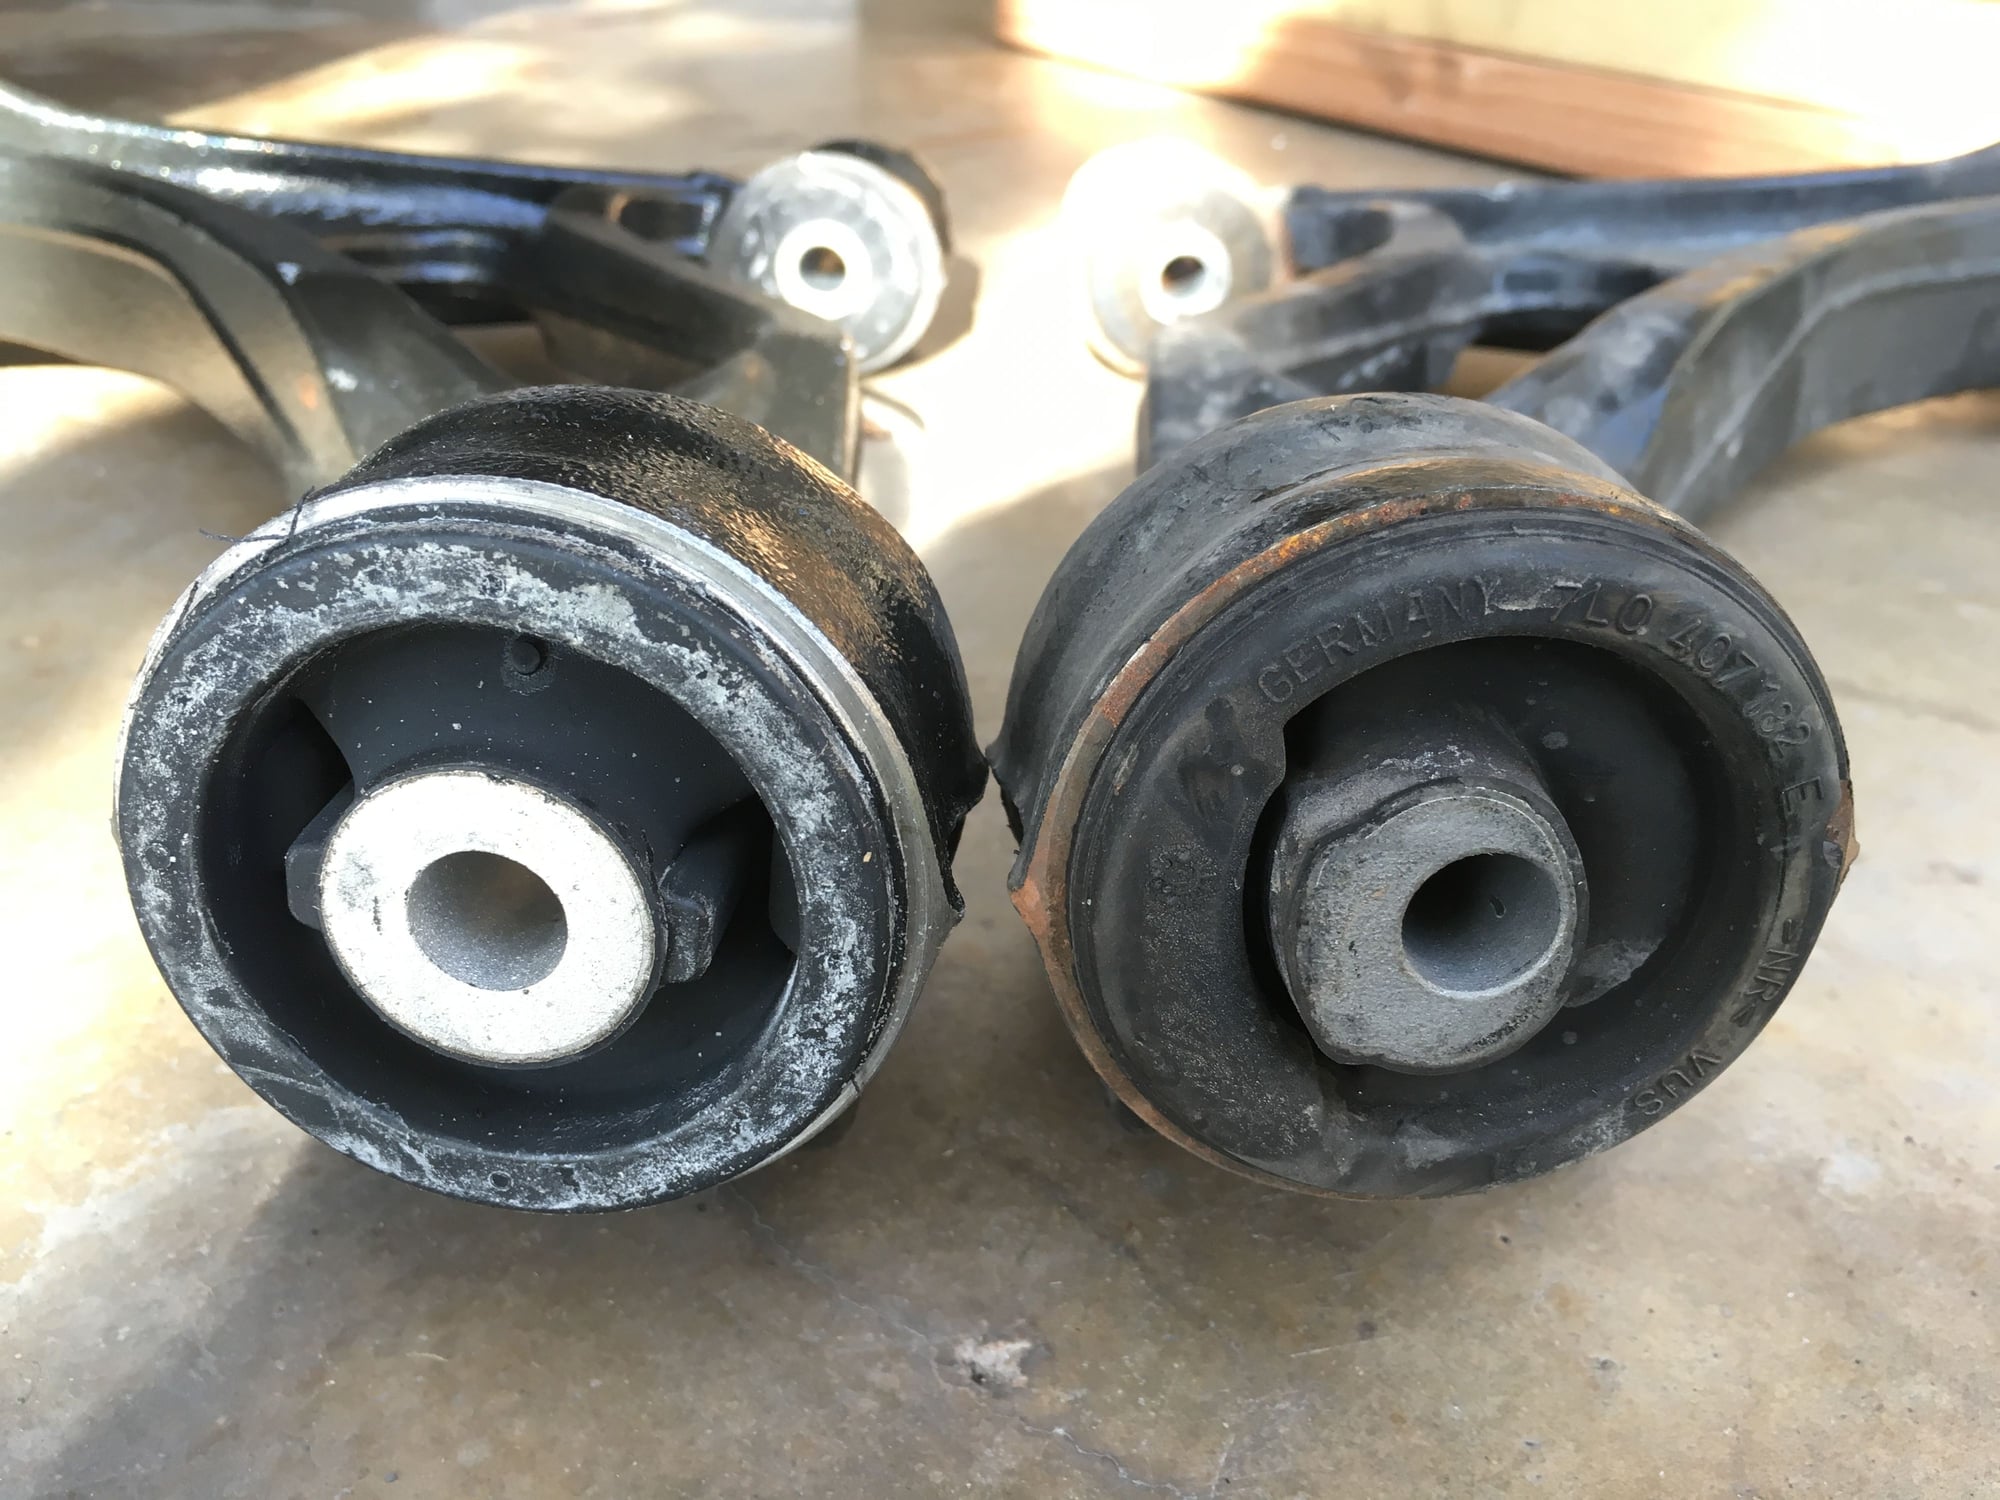
The UCA bushings hadn’t failed but they had lots of horizontal play
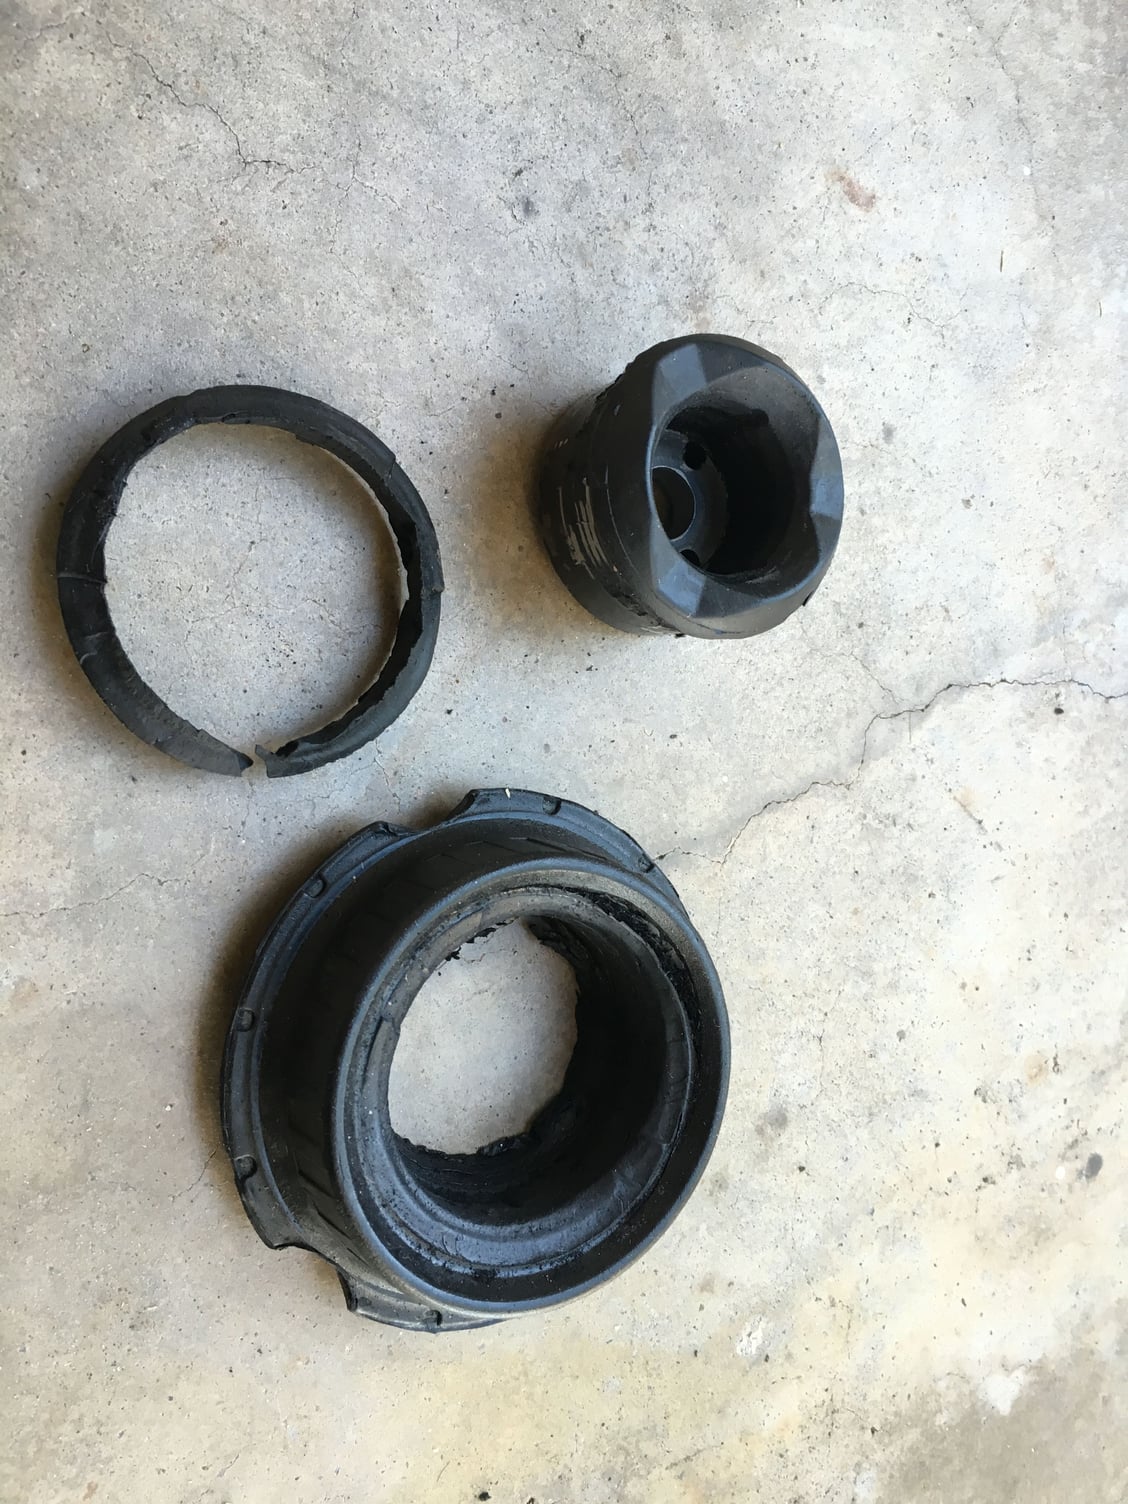
The passenger side shock mount was completely shot (see picture below) and likely the source of the clunking
The original UCA I removed were also TRW
You need a special tool or an air wrench to remove the shock rod nut
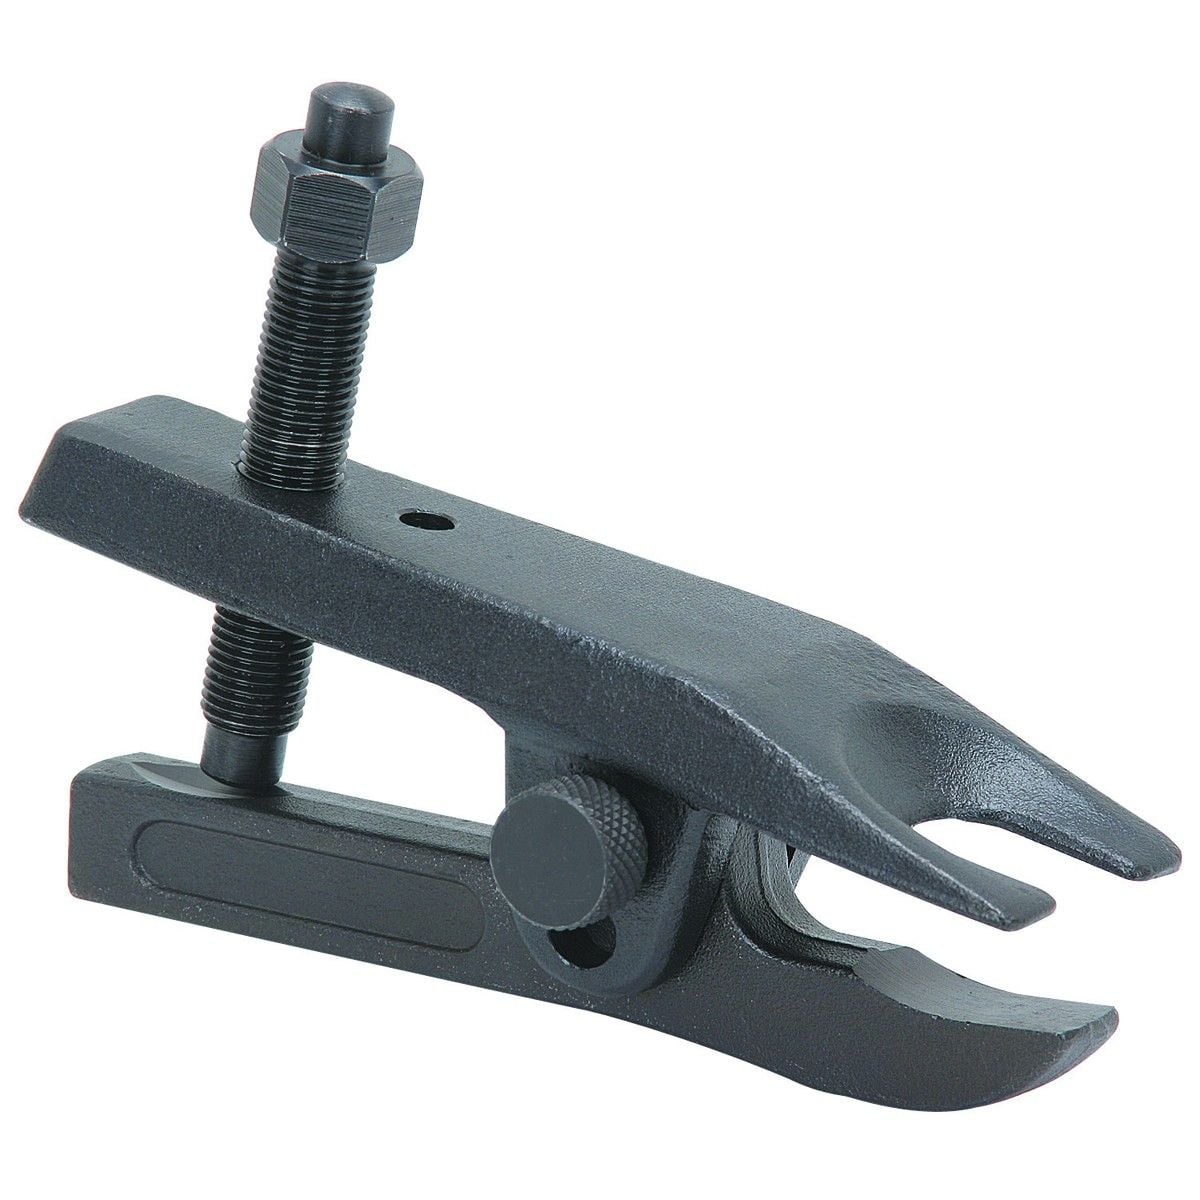
A pitman puller will work on the UCA and tie-rod ball joints but not the LCA ball joint. The ball joint separator below from Harbor Freight worked great.
Nothing individually was too difficult and the whole is job is doable in a weekend
The results
The clunking is completely gone and the vehicle is more solid at all speeds – even backing out of parking spaces, etc. I am very happy with the results. If/when I have the engine mounts done it will drive like new.
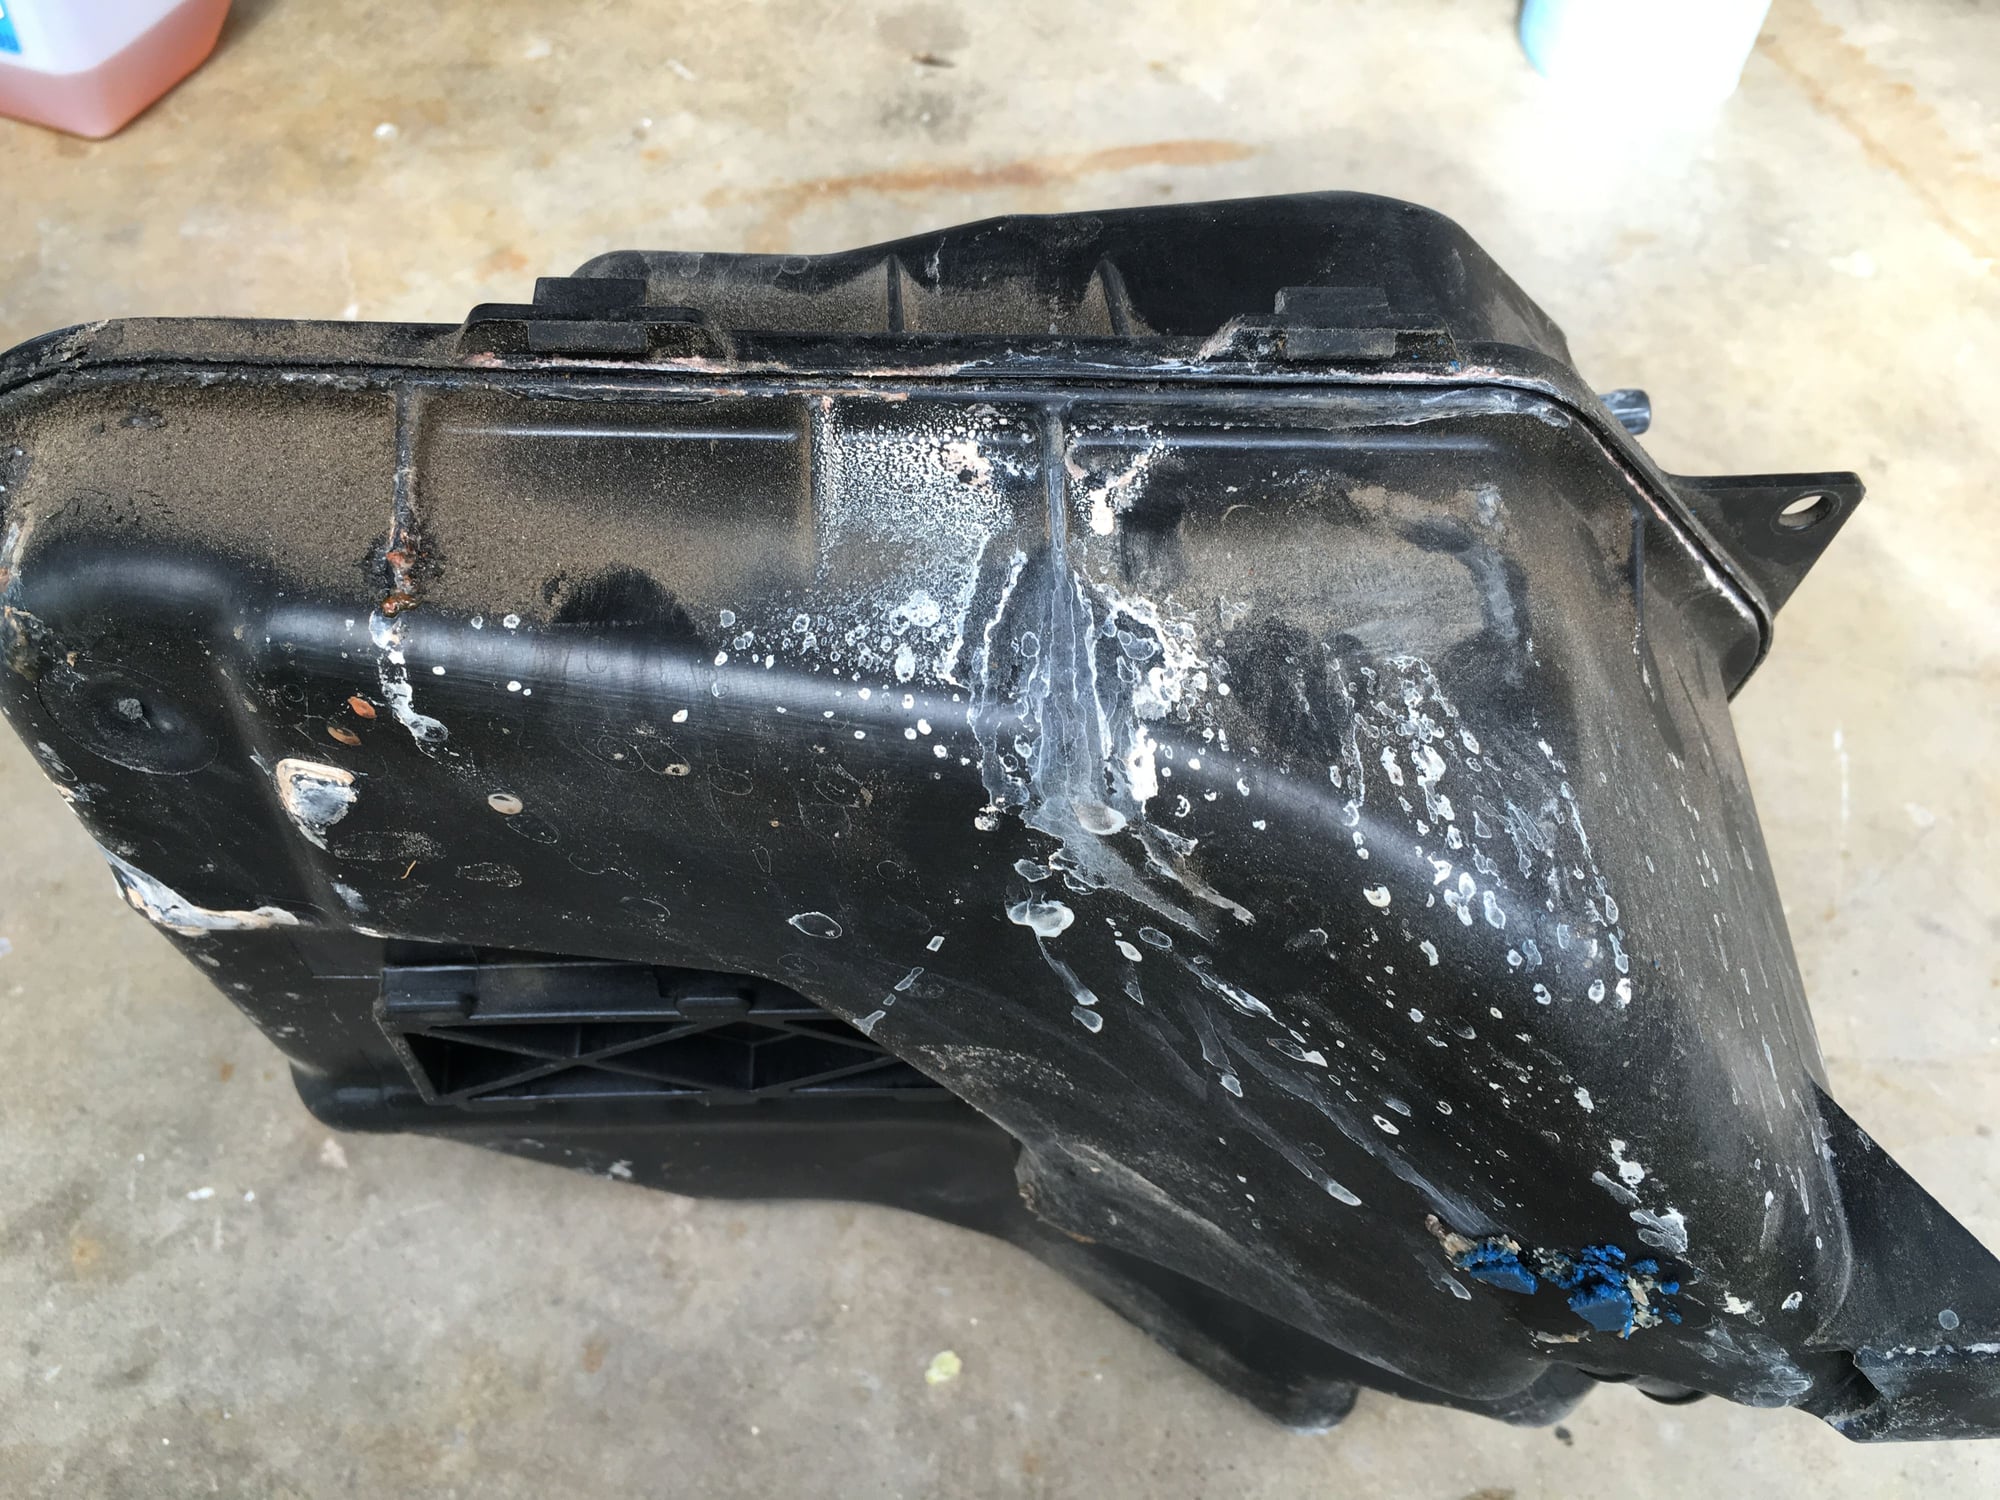
While i had the wheel well liners out to replace the control arms I noticed dried coolant and the coolant level was at the "min" mark so replacing the expansion tank was moved to "soon".
The next week the low coolant light came on so replacing the expansion tank was moved to "now".
Pretty easy job, just lots of things to remove as usual. I bought the ECS kit for $82 plus a gallon of Porsche coolant for $38. I salvaged a little coolant from the old tank and probably added a little less than a gallon of coolant/distilled water.

 11-08-2015, 11:17 PM