When you click on links to various merchants on this site and make a purchase, this can result in this site earning a commission. Affiliate programs and affiliations include, but are not limited to, the eBay Partner Network.
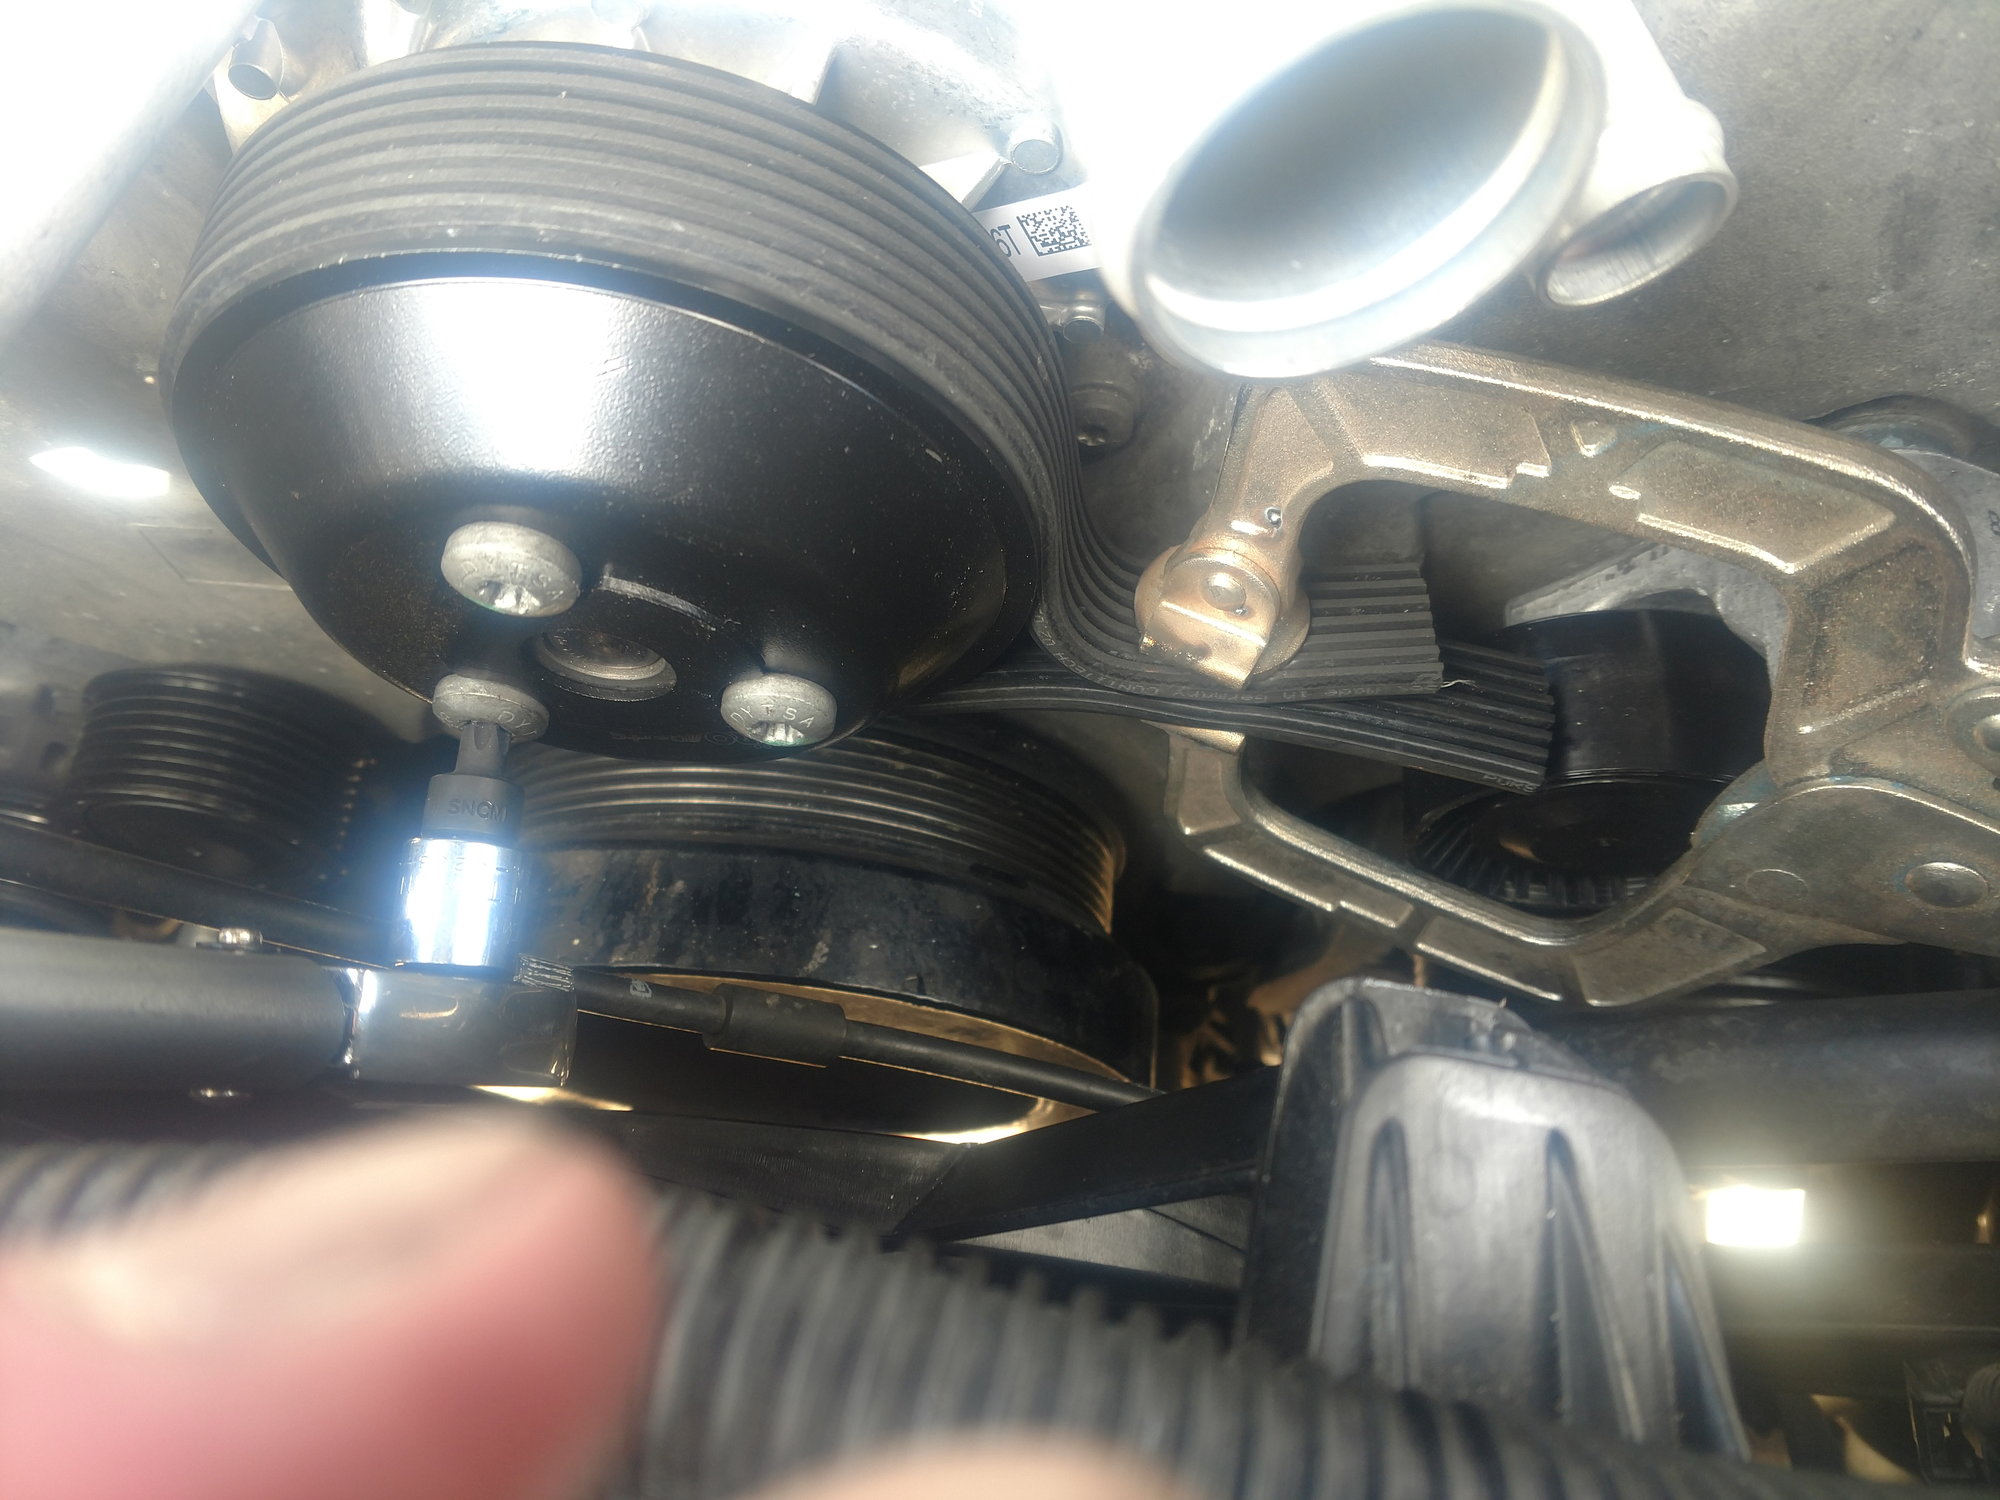
It's time to remove the water pump, thermostat and thermostat housing. First thing we need to do is loosen the bolts holding the water pump pulley on. It should be fairly easy with the serpentine belt still under tension. Once they are loose, grab you 30mm wrench and lever the tensioner over and remove the serpentine belt. Now remove the WP pulley. I checked the water pump torque sequence on alldata so I would know how to loosen the bolts. To my surprise it's not a star sequence. It is a clock wise or anti-clockwise sequence. I don't remember. So again, I loosened the bolts a little at a time going around the horn until they were all loose enough to remove by hand.
Put your catch basin under the front of the engine because the next step is going to create a pink waterfall of coolant. Make sure you didn't miss any of the water pump bolts, grab your soft mallet and give the pump a tap. Mine came right off. After the pink splash you should see the black t-stat. My t-stat was stuck in there pretty good. I had to lever it out with a angled pry bar. I used the plastic protrusion that the electrical connected plug into as a pry point. That's really the only exposed pry point on it. And be careful what you use as a fulcrum. Seems like I remember only one or two choices for the fulcrum. I didn't want to bend or cave in the T-stat tubes because I am fixing my T-stat housing not replacing it. I planned to replace my t-stat from day one so I had a brand new one on hand. It's a good thing because I broke the electrical connector while I was levering. Be careful while levering. That little plastic electrical nub is the only thing between you keeping your work flow going. If you break it without removing the t-stat you are in for a really long day. So, if you start to pry and it wont budge, try a different angle. Once you get it moving the resistance will be less and less until you get the second pink wave.
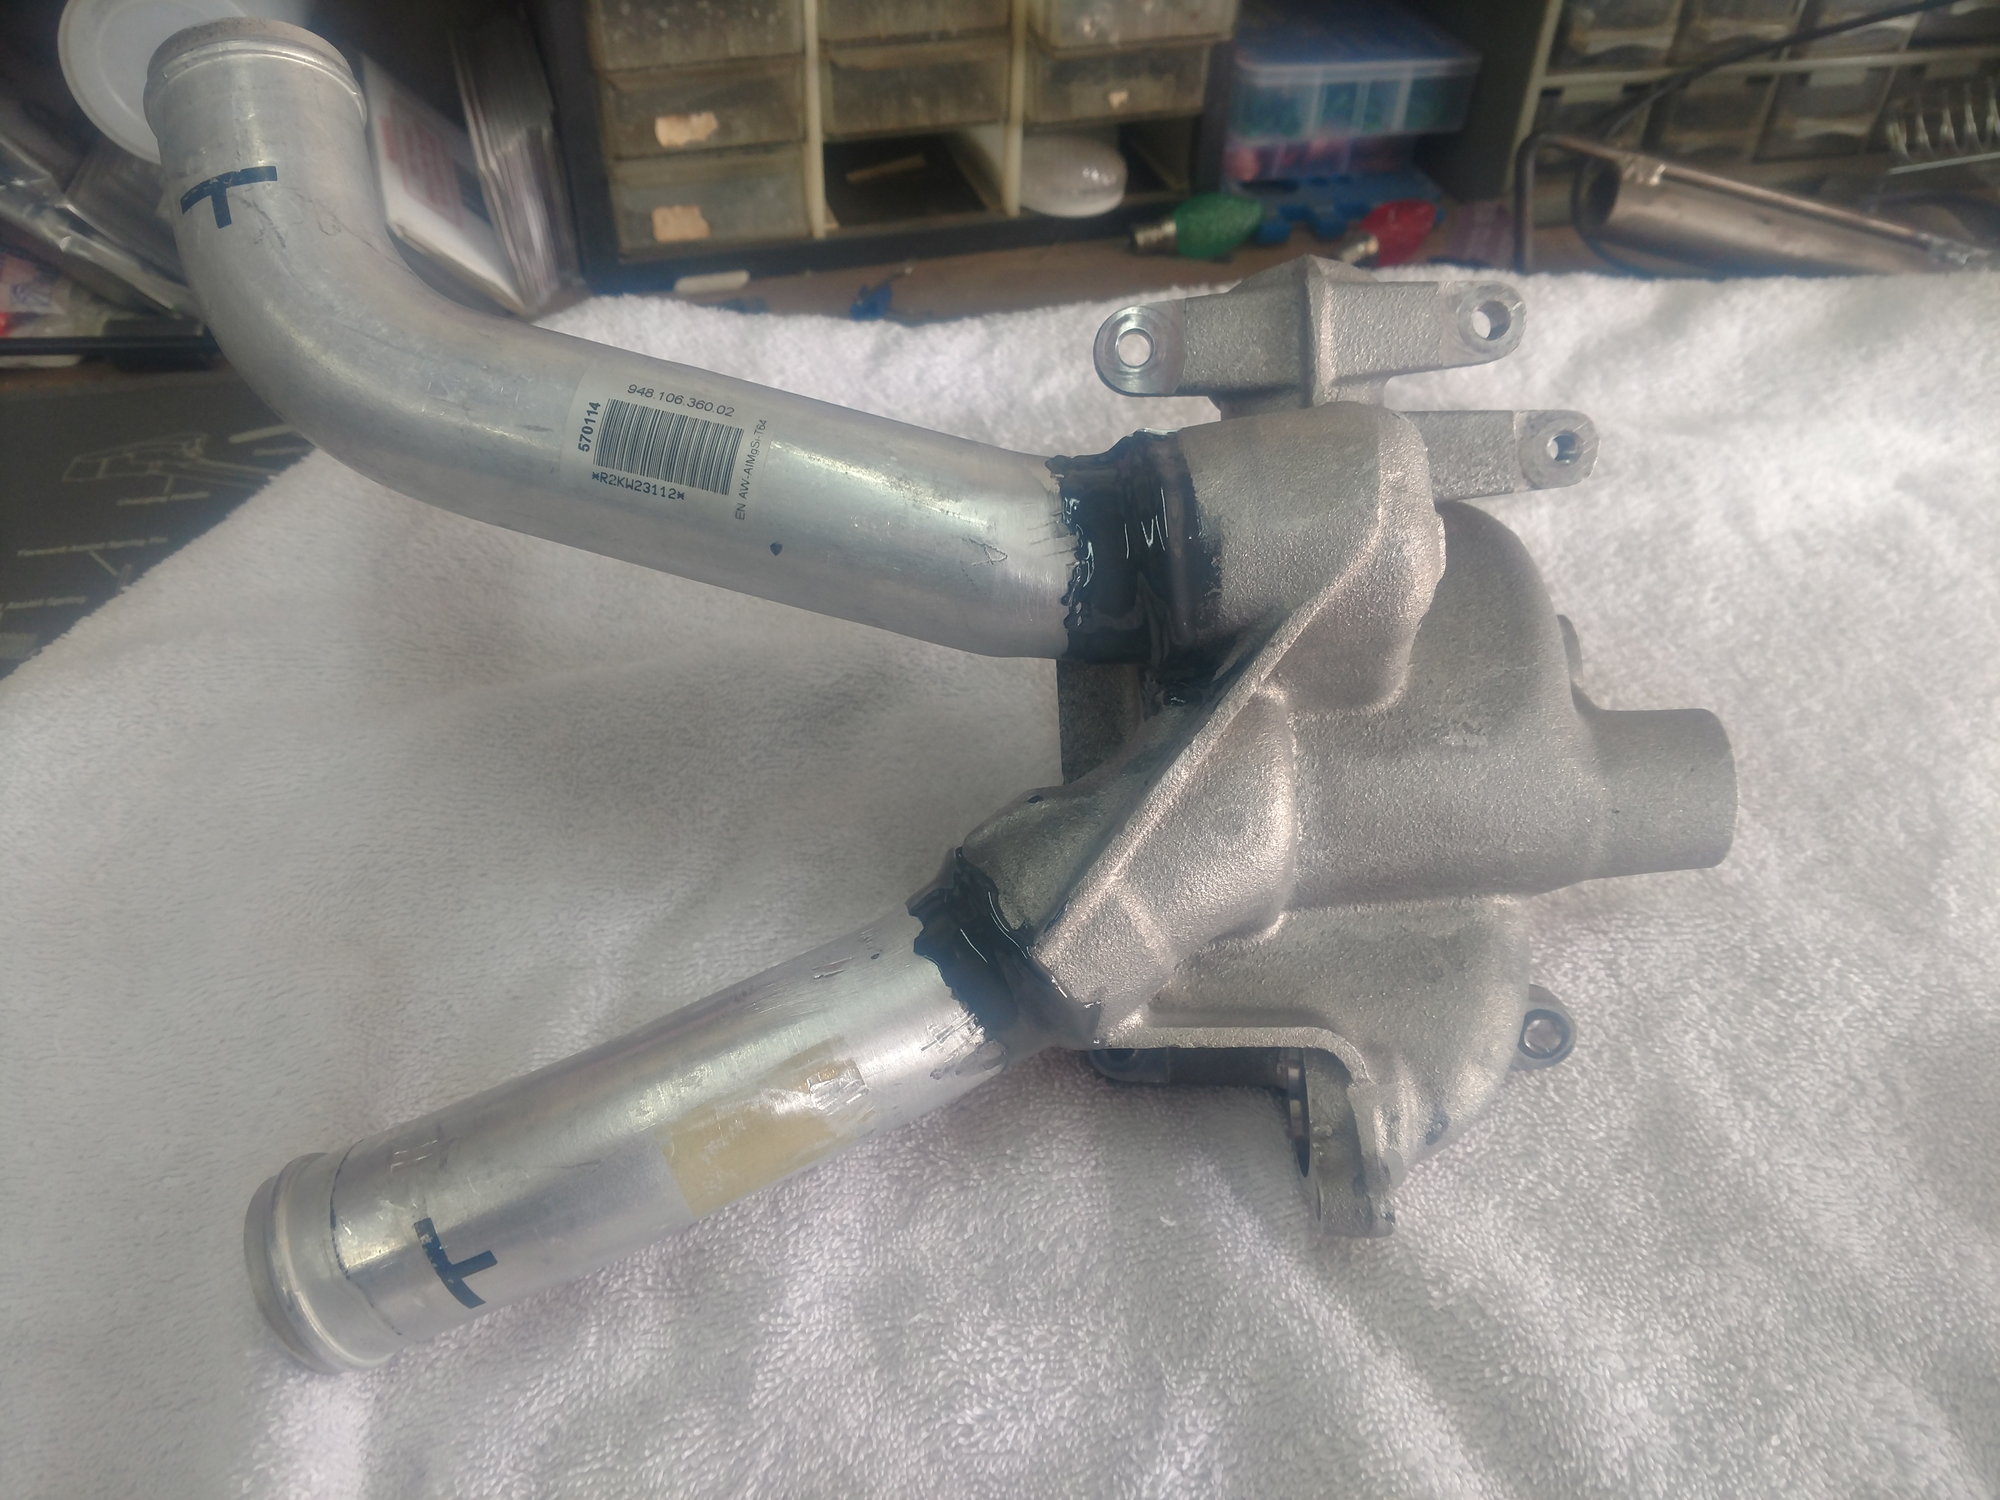
Success. You can remove the t-stat housing now. It is held down by four bolts. One of which you have already removed when you removed the fuel rail. So that one is a freebee. The passenger side bolts were covered by a wiring harness. At this point I wish I had a female torx wrench set. So I had to remove a few brackets in order to move the harness in order to get at the bolts. I now have a female torx wrench set (after the fact of course). I tried to remove the housing without disturbing the pipe that runs into the back of it but it wasn't going to happen. If you follow the pipe to the back of the engine you will see it is held in place by two bolts. one comes right out. the other I just had to loosen. Good thing all I had to do was loosen the second bolt because it would have been a booger to remove. Anyways, now that you have created a little wiggle room the t-stat house ill come right out. The pipe in the back of the housing has two o-rings on the end that plugs into the back of the housing. They are included in the parts list. As well as the o-rings that are under the housing that feed coolant to the block. Unfortunately the parts diagram only showed one of each so that all I had. So I had to reuse mine. They were still in good shape otherwise I would have ordered new ones.
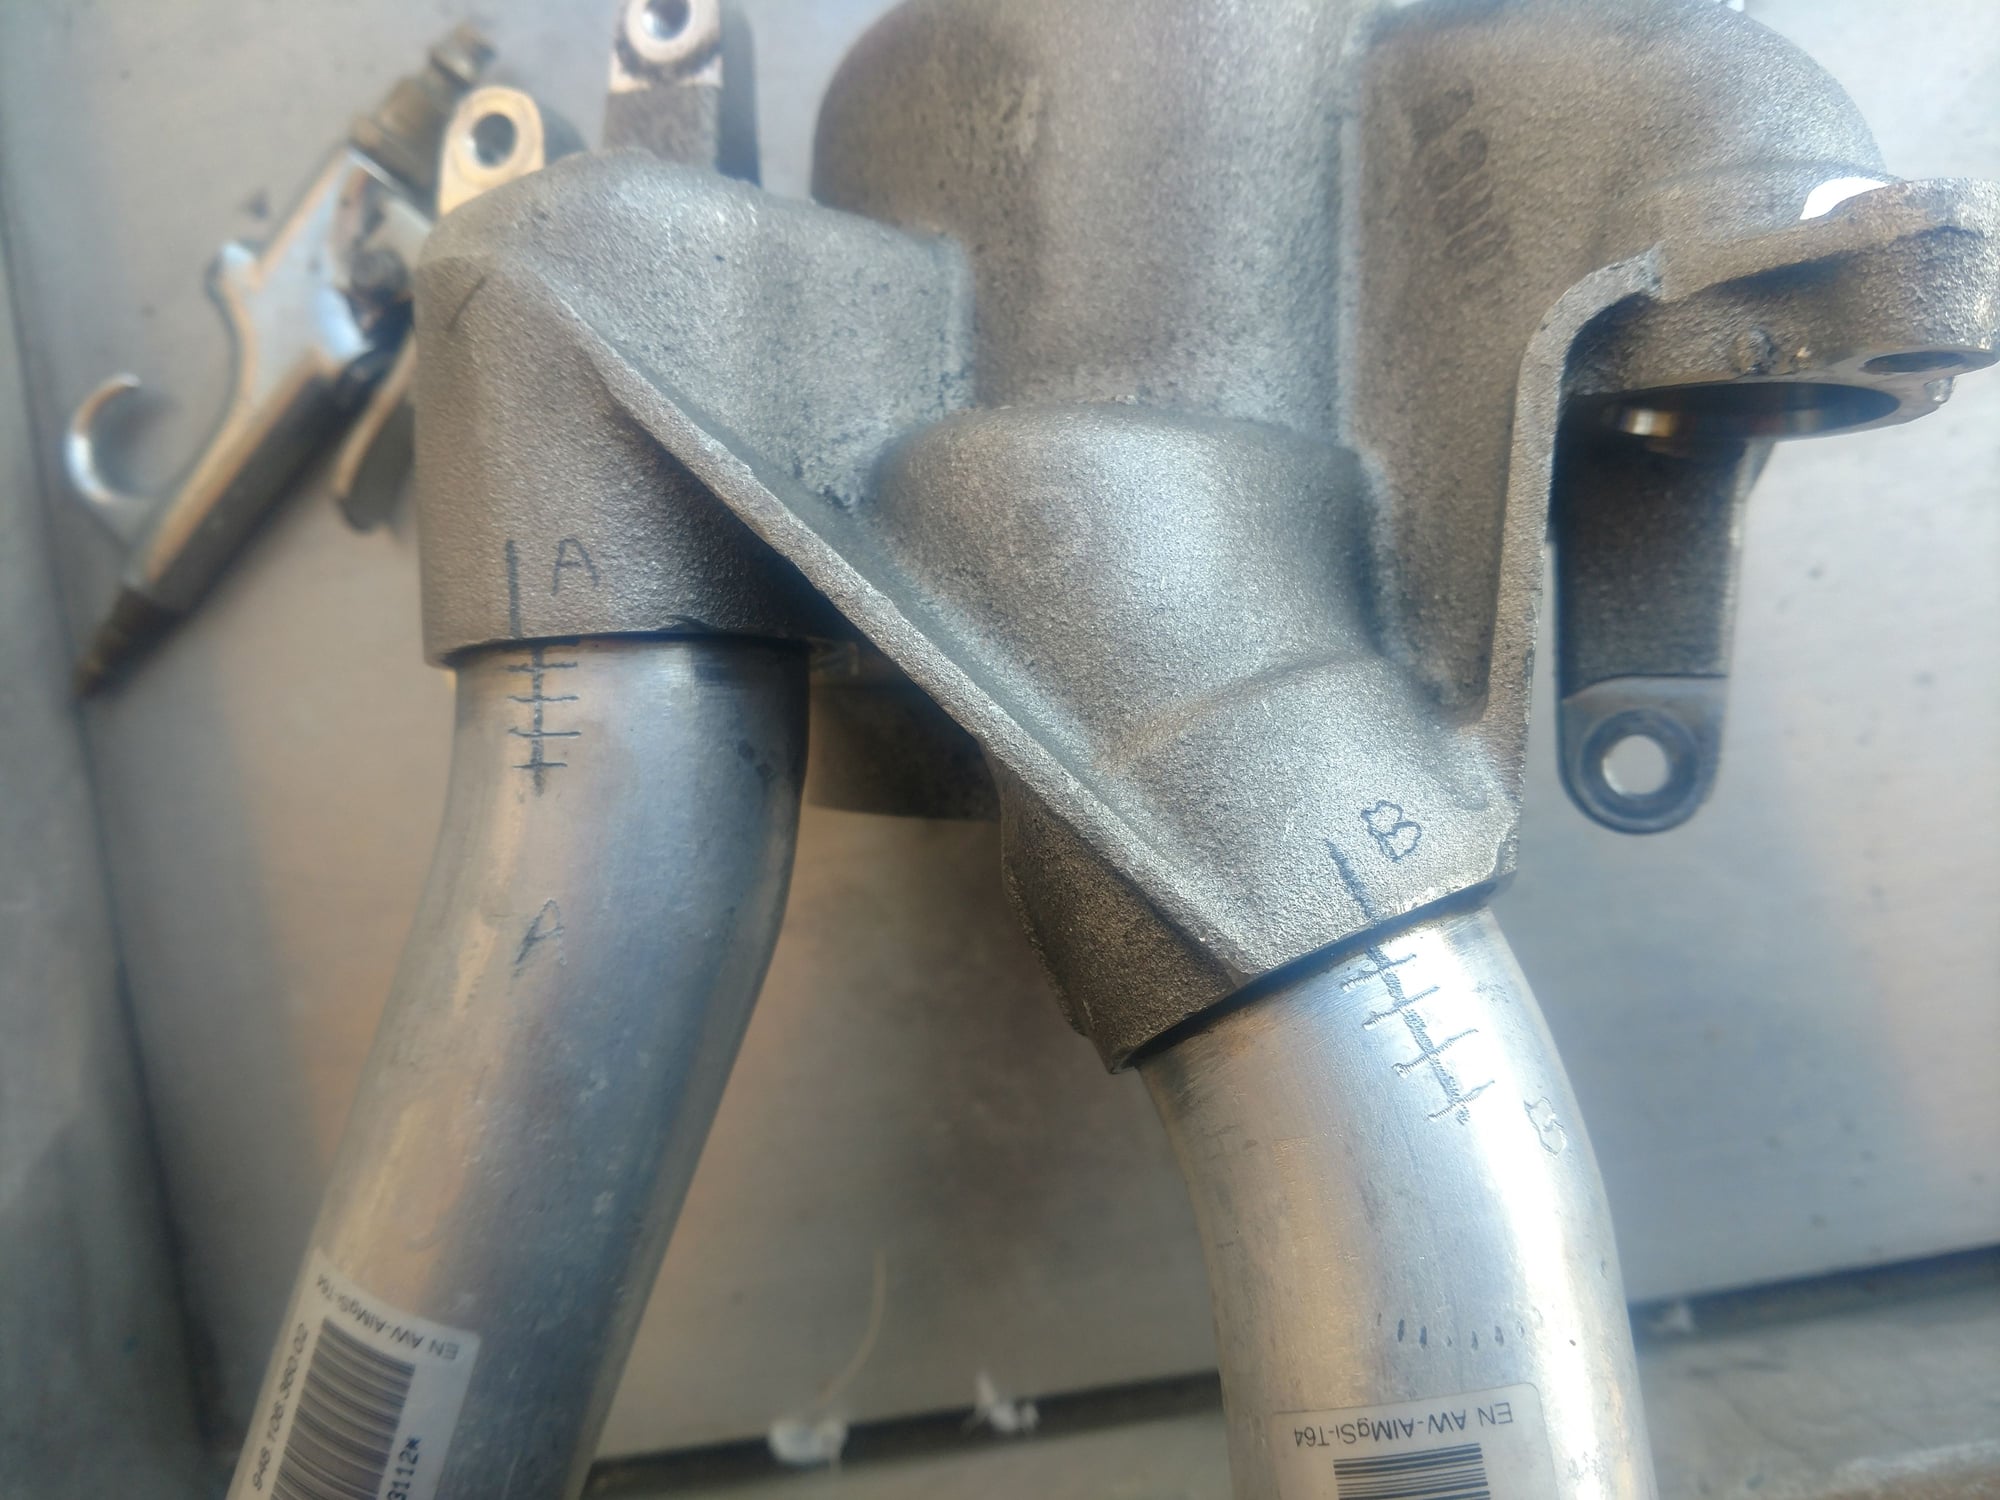
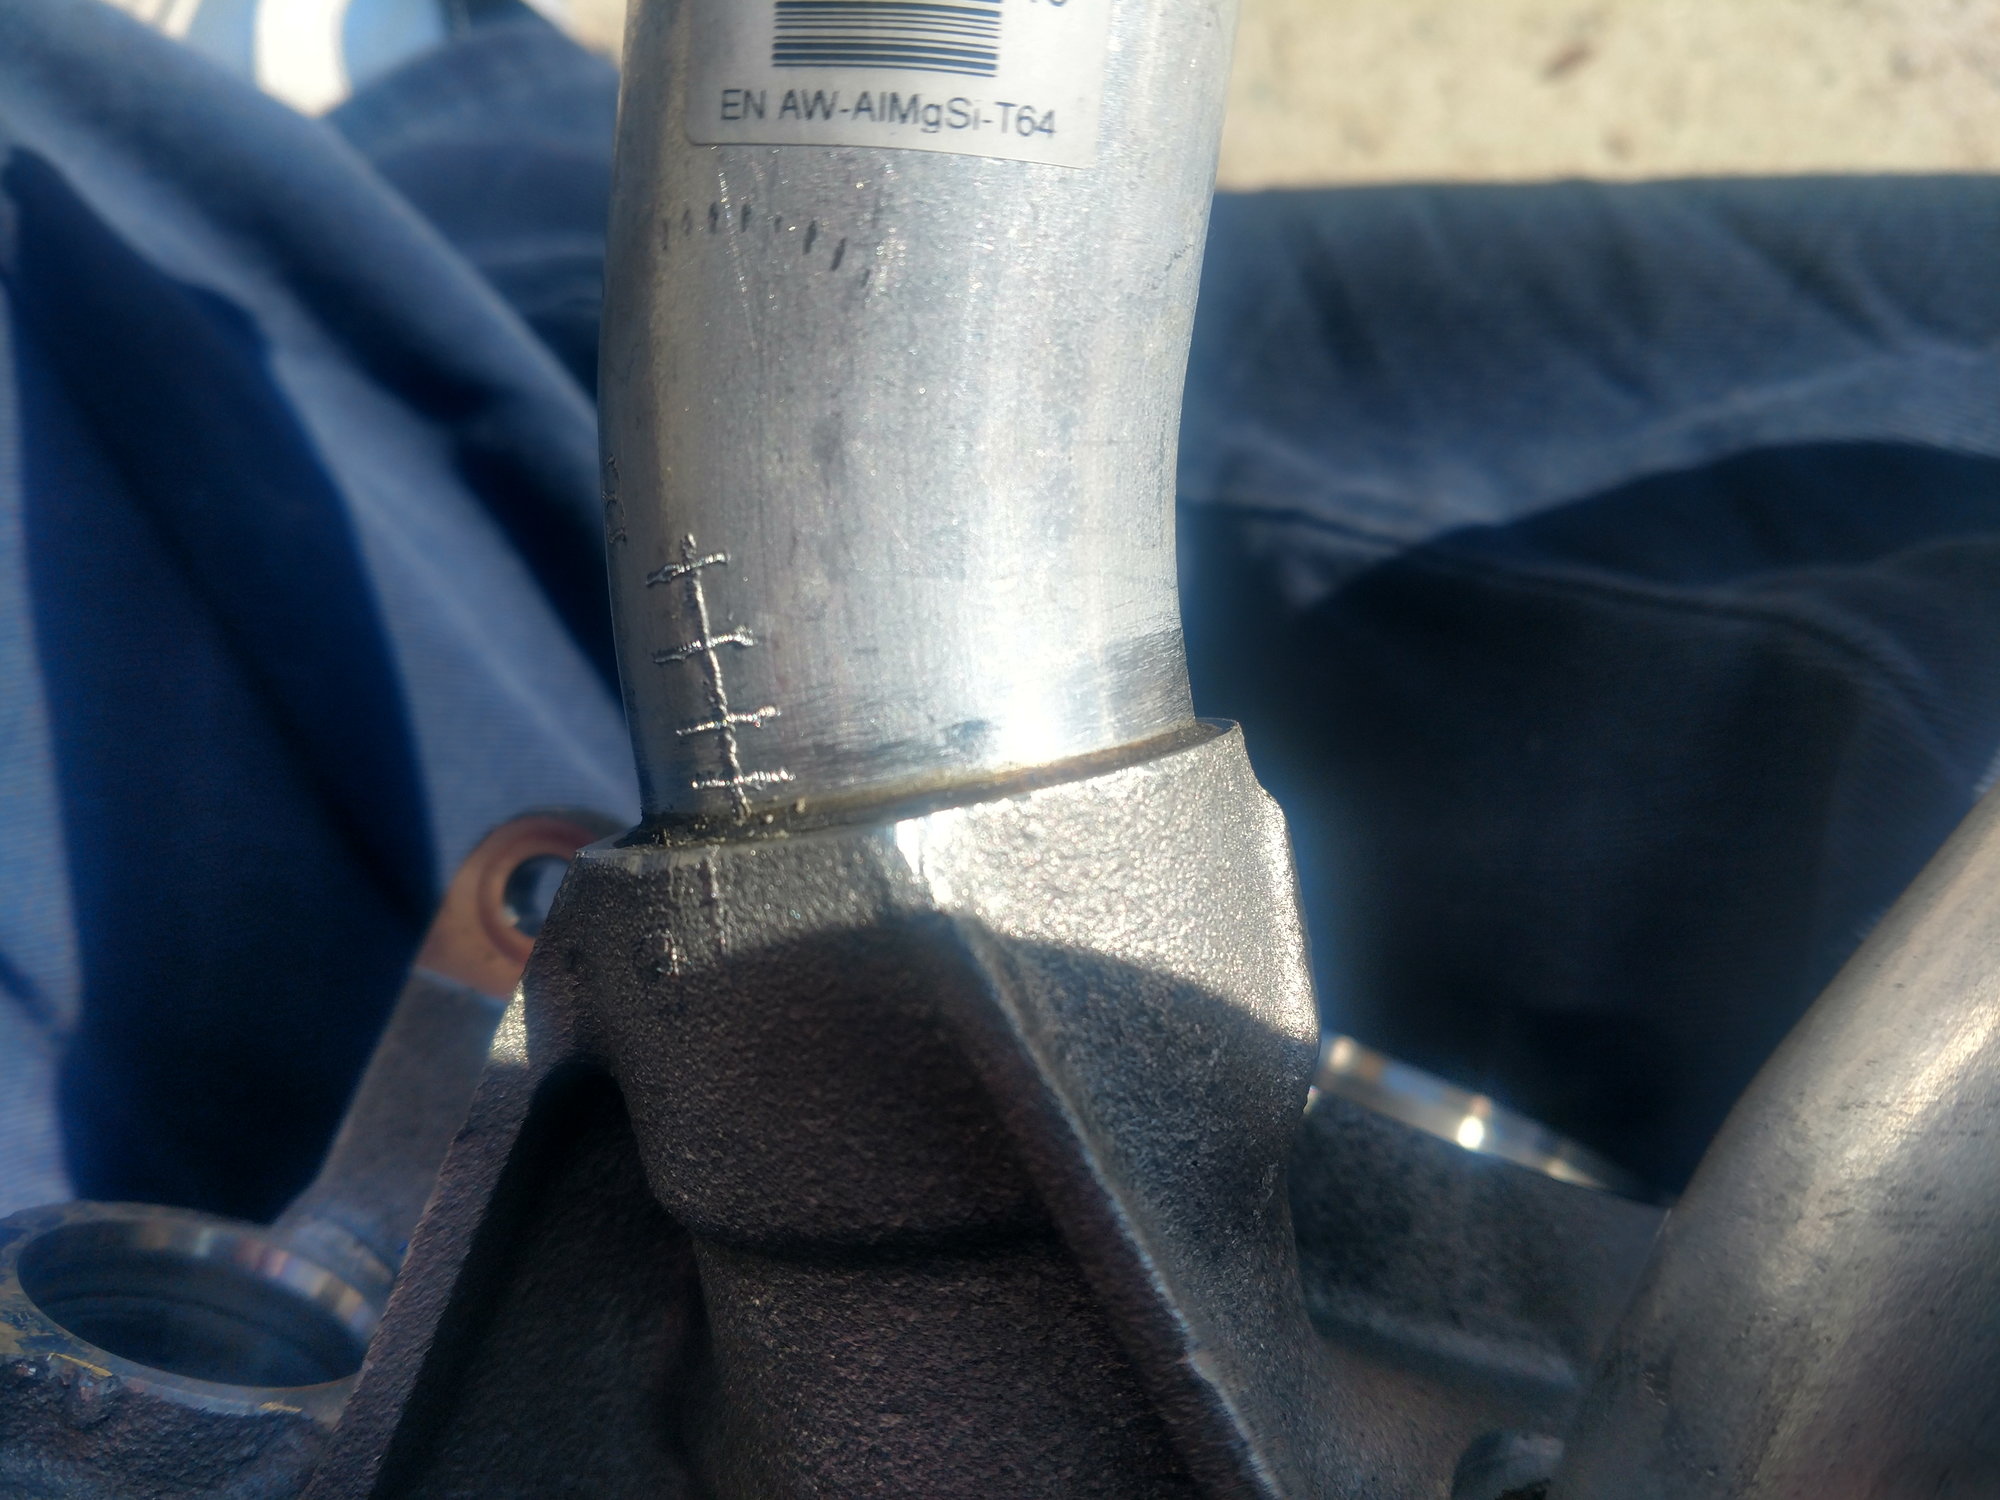
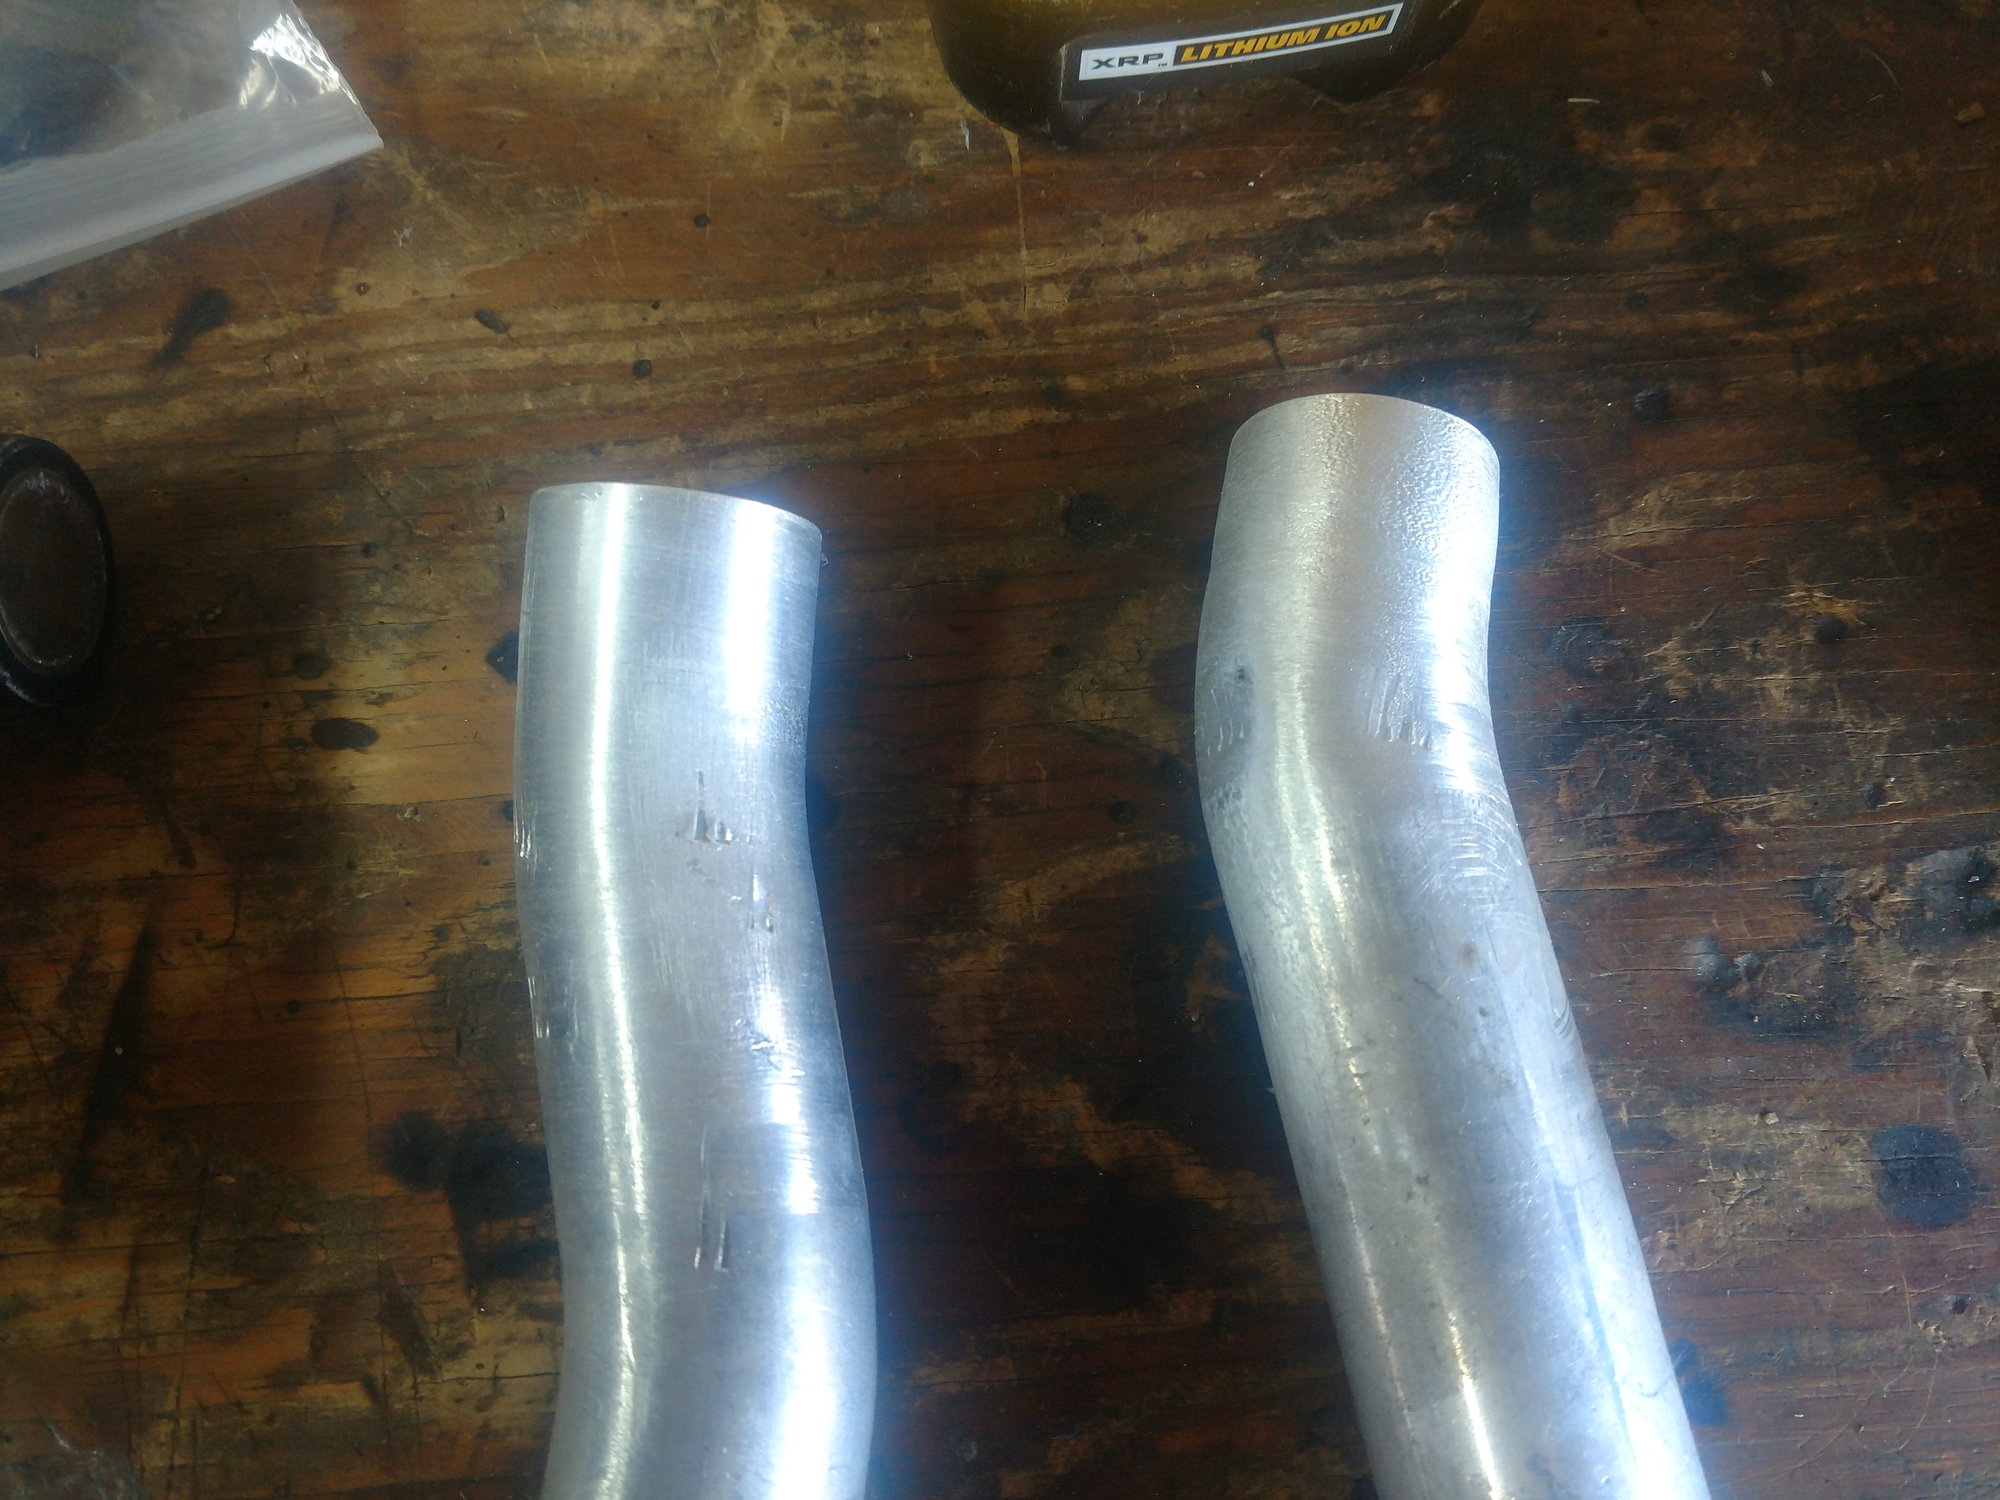
Lets tackle the t-stat housing repair. Not knowing what I was up against I took my electric pencil and drew alignment marks to make sure I got the clocking correct and witness marks to make sure I pushed the tubes in deep enough. I also marked them A and B because the are different.
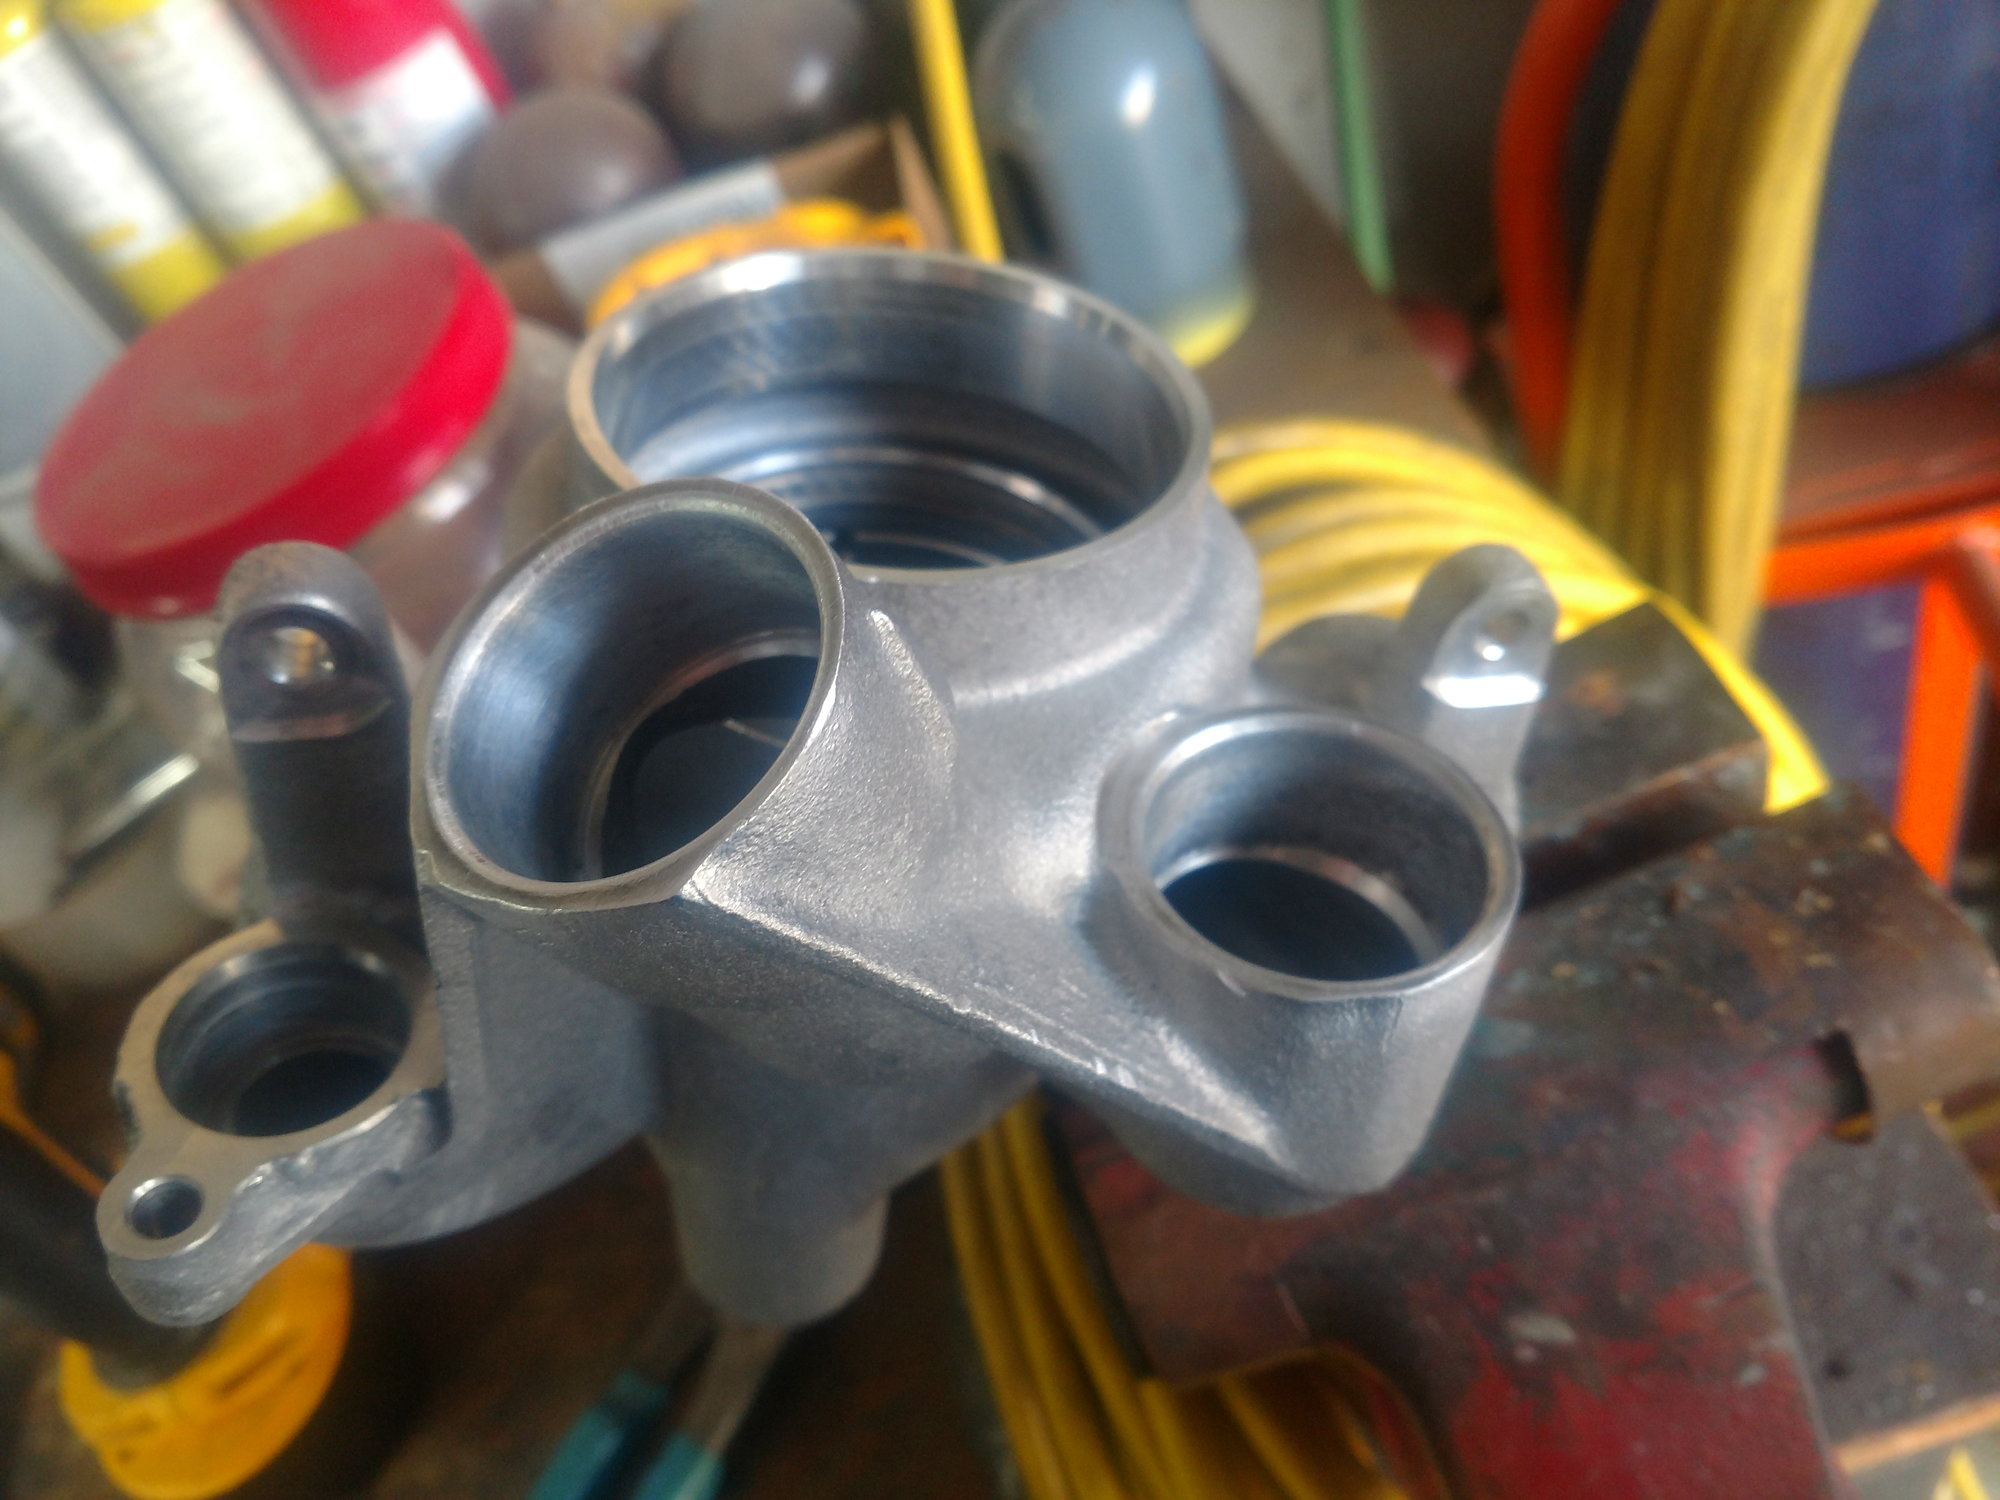
At his point I clamped the housing into my bench vice and put the fire to it. I used a mapp gas torch. It took way more heat than I thought it would. I removed mine one at a time. It wasn't until the glue actually started smoking would the pipes start to move. I twisted and pulled at the same time with a pair of channel locks and removed them. I had glue on the inside of the ports and the outside of the pipes. I was able to use my razor knife on the outside of the pipe to remove a big part of the glue and used 100 grit cloth sanding strips to remove the rest. same with the ports. I just used the sanding strips on the ports. no razor knife.
For this to work I knew it was important to remove every trace of the old glue and to have everything perfectly clean for the JBweld. Satisfied that everything was clean I mixed up a batch of JBweld and glued the pipes into the housing. I used a tongue depressor to mix up the JBweld and used it to spread the JBweld around the inside of the socket as well as the outside of the pipe. I didn't want to take any chances of getting an air pocket or a place where coolant could sneak passed. My method paid off. My pipes bottomed out and the were clocked perfectly. After the bonding it was a perfect stopping point for day one. I brought the t=stat housing in the house to dry over night. I propped it up on the kitchen table and did not disturb it.
Looking good. One trick I read somewhere for the thermostat - might have been the factory manual - apparently you can get a wire around a bit of it and then use the wire with a lever to wiggle it out.. at least that's what it said and showed. If I stumble across that I'll put up a link to it or some pics here.
Looking good. One trick I read somewhere for the thermostat - might have been the factory manual - apparently you can get a wire around a bit of it and then use the wire with a lever to wiggle it out.. at least that's what it said and showed. If I stumble across that I'll put up a link to it or some pics here.
The wire trick is how I removed mine when I did it. It still takes quite a bit of pull to break it loose so I used a pry bar in the wire loop to add some oomph to it. The trick is to get the loop the right length to work with the limited locations that can by used to rest the pry bar.
Thanks for the wire trick you guys. I didn't know anything about it. And I probably wouldn't have thought about it if my way failed. I appreciate all the tips and tricks that you guys have. So if you see an easier, faster, better way please post your ideas. If this makes it to the diy section I have given our moderator full permission to slice, dice, cut, and paste. What ever it takes to make it so us gear heads can tackle these tasks on our own.
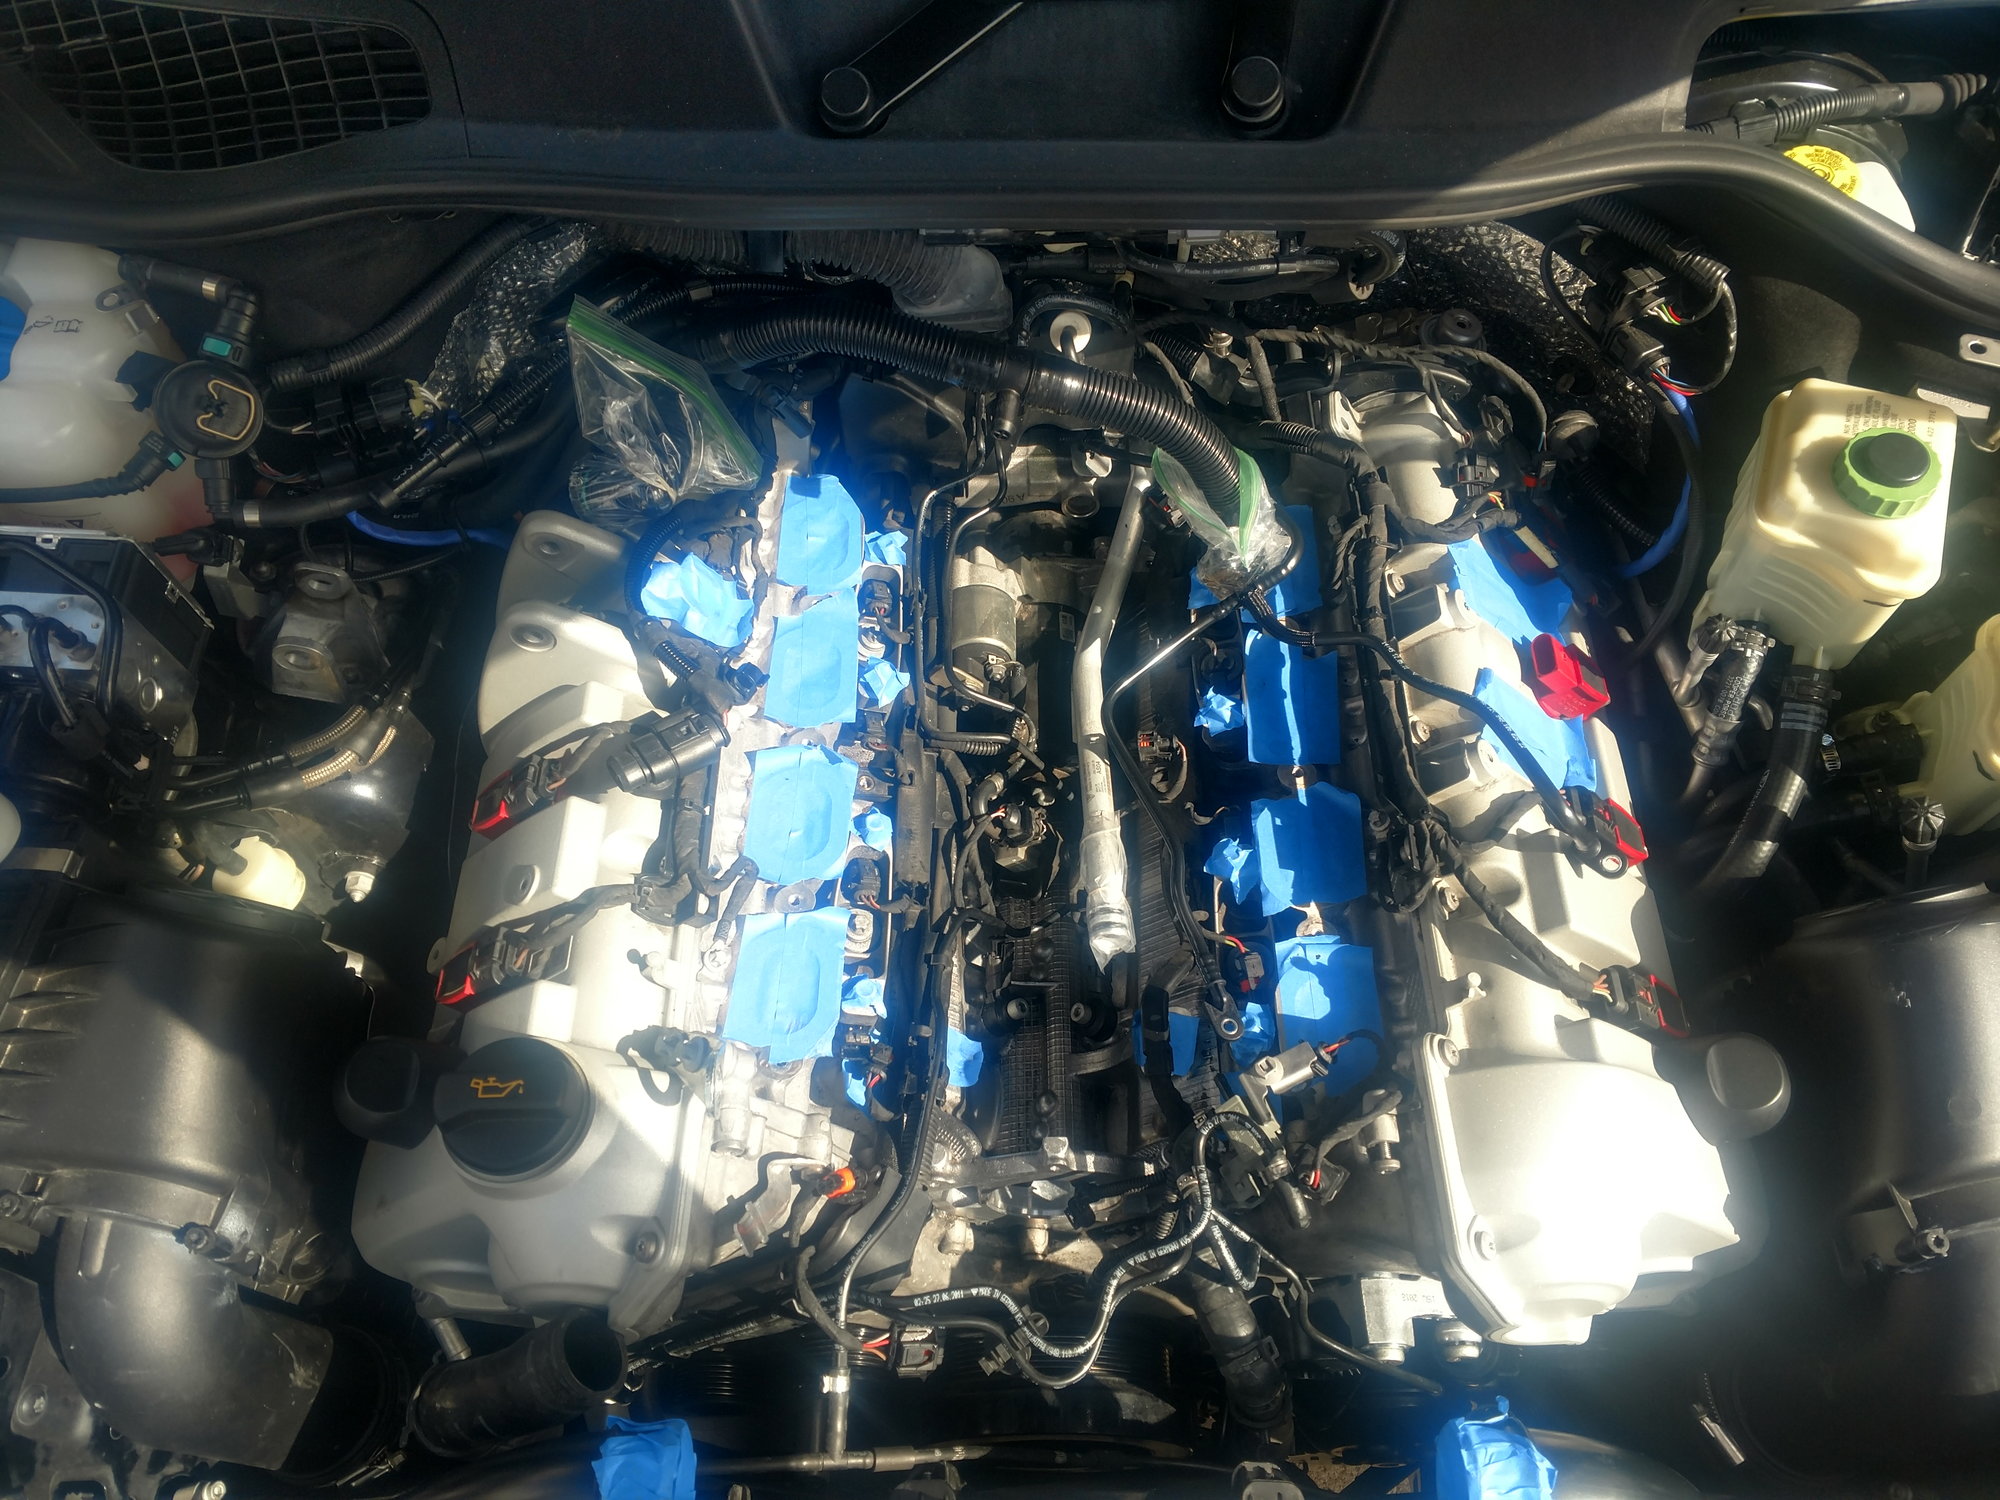
Day two. At this point when I opened the hood and saw this, I thought "I need to have my head examined...."
First thing I did was put the high pressure fuel pump back on the same way it came off. ALLDATA mentions the fuel lines need to have a certain amount of clearance between them. Which I did.
Next, was to replace the vent hose. No need to go into details on that one. One thing I did do.... I lubed all of my o-rings with Dow Molykote 55 while reassembling. I think it helps them slide easier and minimizes the chances of them getting pinched.
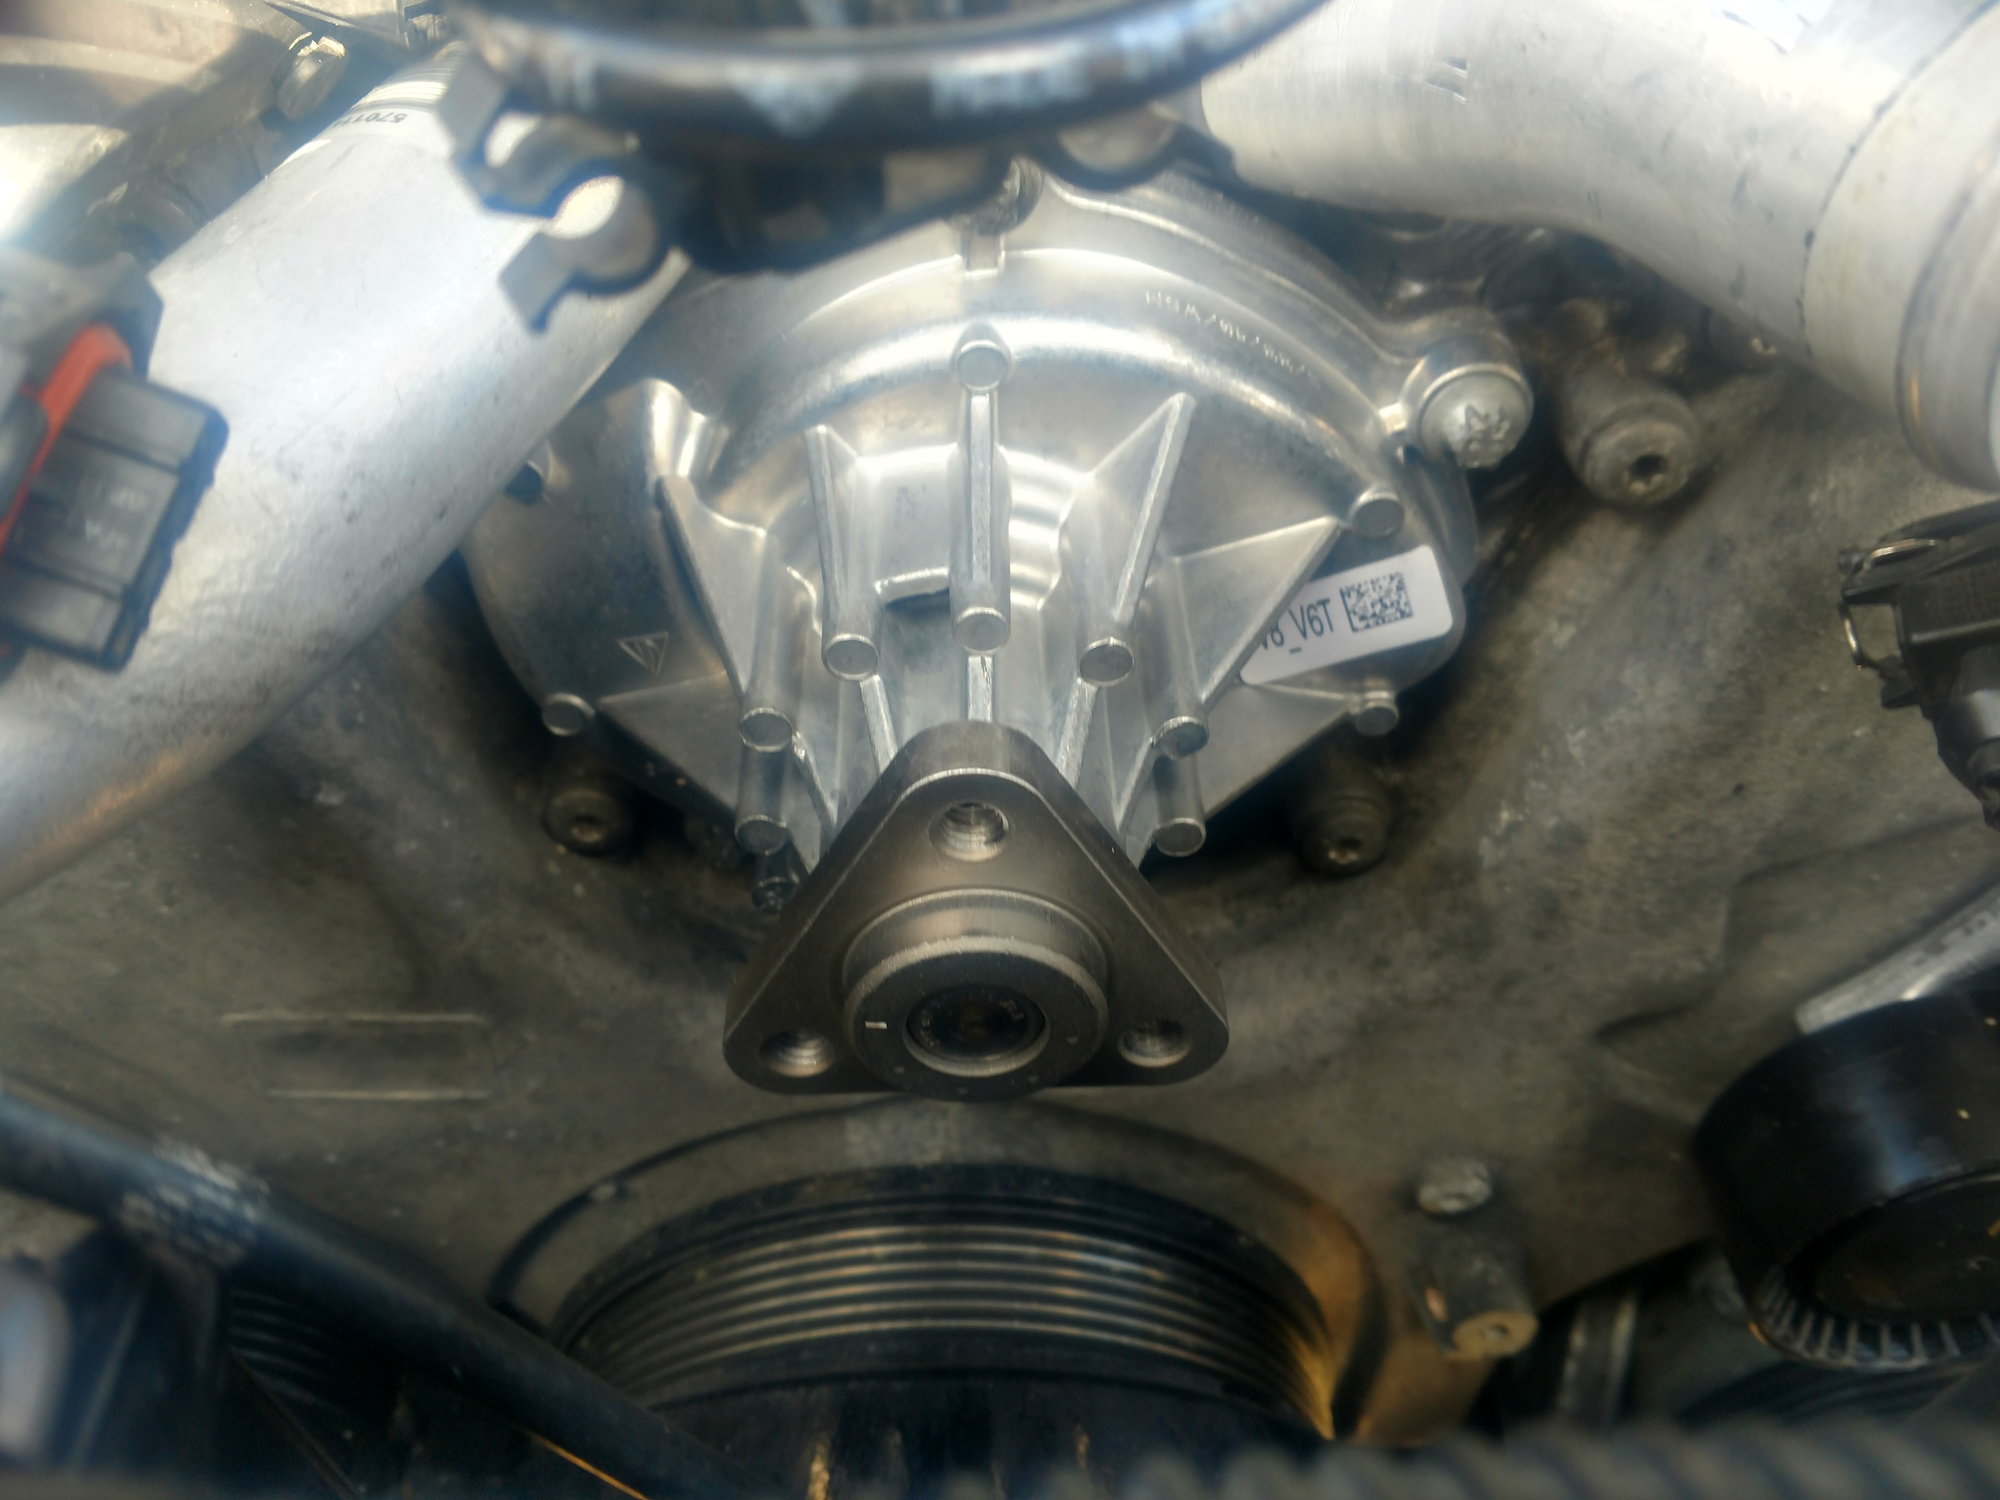
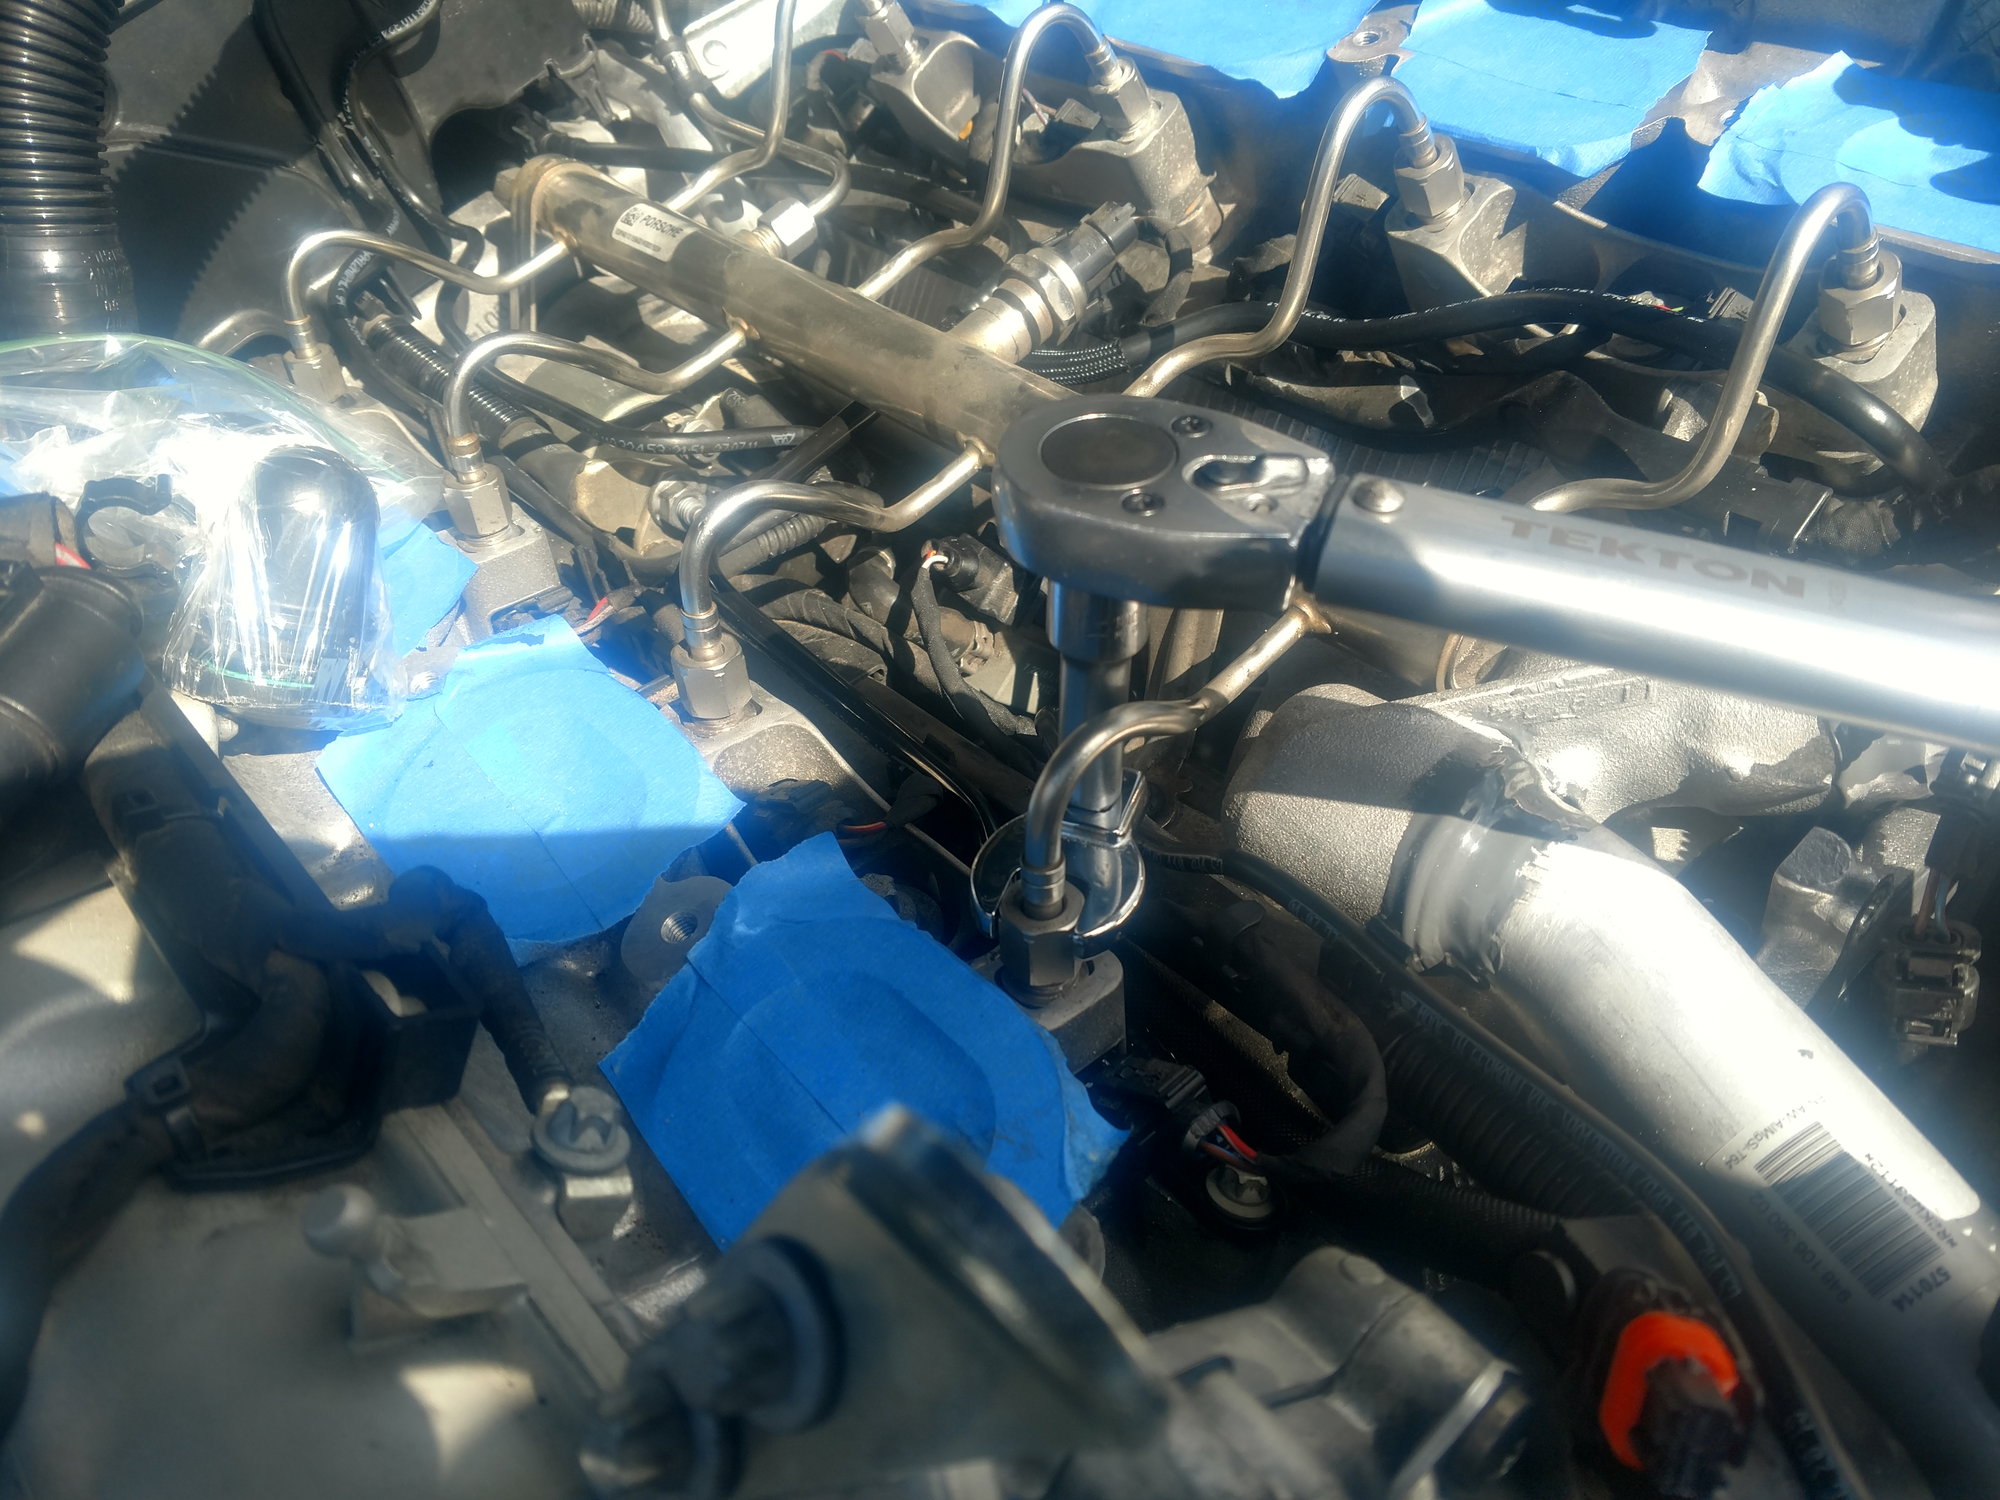
With the vent tube in place, the t-stat housings next. Again with the o-ring grease on seals I stabbed the back of the housing with the pipe that runs across the V. Then bolted the housing to the block. Next is the t-stat itself. I think some kind of lube is necessary for this. Even clean engine oil on the o-rings is better than nothing because its pretty tight. Also....there is no groove or anything to line the t-stat as it goes in, so it's up to you to make sure the electrical connector is pointing up. 12:00. And I had to lever my t-stat back into its hole. The same way I took it out. With the t-stat in place the last piece is the water pump. Like I said, the torque sequence goes around the horn. NOT in a crisscross pattern.
The fuel rail is next. This step took the longest for me. Once it was in place I made sure that all the injector nuts screwed in easily, by hand. I didn't want any binding of any of the fittings all the way tho the fuel pump. Once I was confident nothing was in a bind is when I bolted the hold down brackets in place. Then double checked that the fittings were still not in bind and still loose. The next step was to tighten all the fittings. This is when I had to use the crows foot. ALLDATA says to tighten them in two steps. TORQUE - LOOSEN - TORQUE again. This was a crucial step for me because I didn't have any way to test for fuel leaks so I had to take a leap of faith that I was leak free. This is a shot of me torquing the injectors with the crows foot.
Everything else goes back together in the order it was removed. It's just nuts and bolts so I won't spend any time on it. And I stopped taking pictures from here on. Except for some of the tricks I used.
In order to torque the water pump pulley I cut a section of the old serpentine belt and used a set of hog jaws to hold it to keep it from spinning while torquing the bolts. Vice grips would work the same.
Next I replaced all the pulleys and tensioner. The little caps in the center of the pulleys covering the bolts were a real pain in the *** to get off. I had to wedge a little jewelers screw driver in there to pop the caps off. once the cap came off the actual bolt was easy. I reused all my bolts. Then is just a matter of lacing the new belt through all the pulleys. I think the trick is to lace the belt through all the pulleys and leaving the loop at the tensioner. Then lever the tensioner over and slip the final loop over the tensioner.
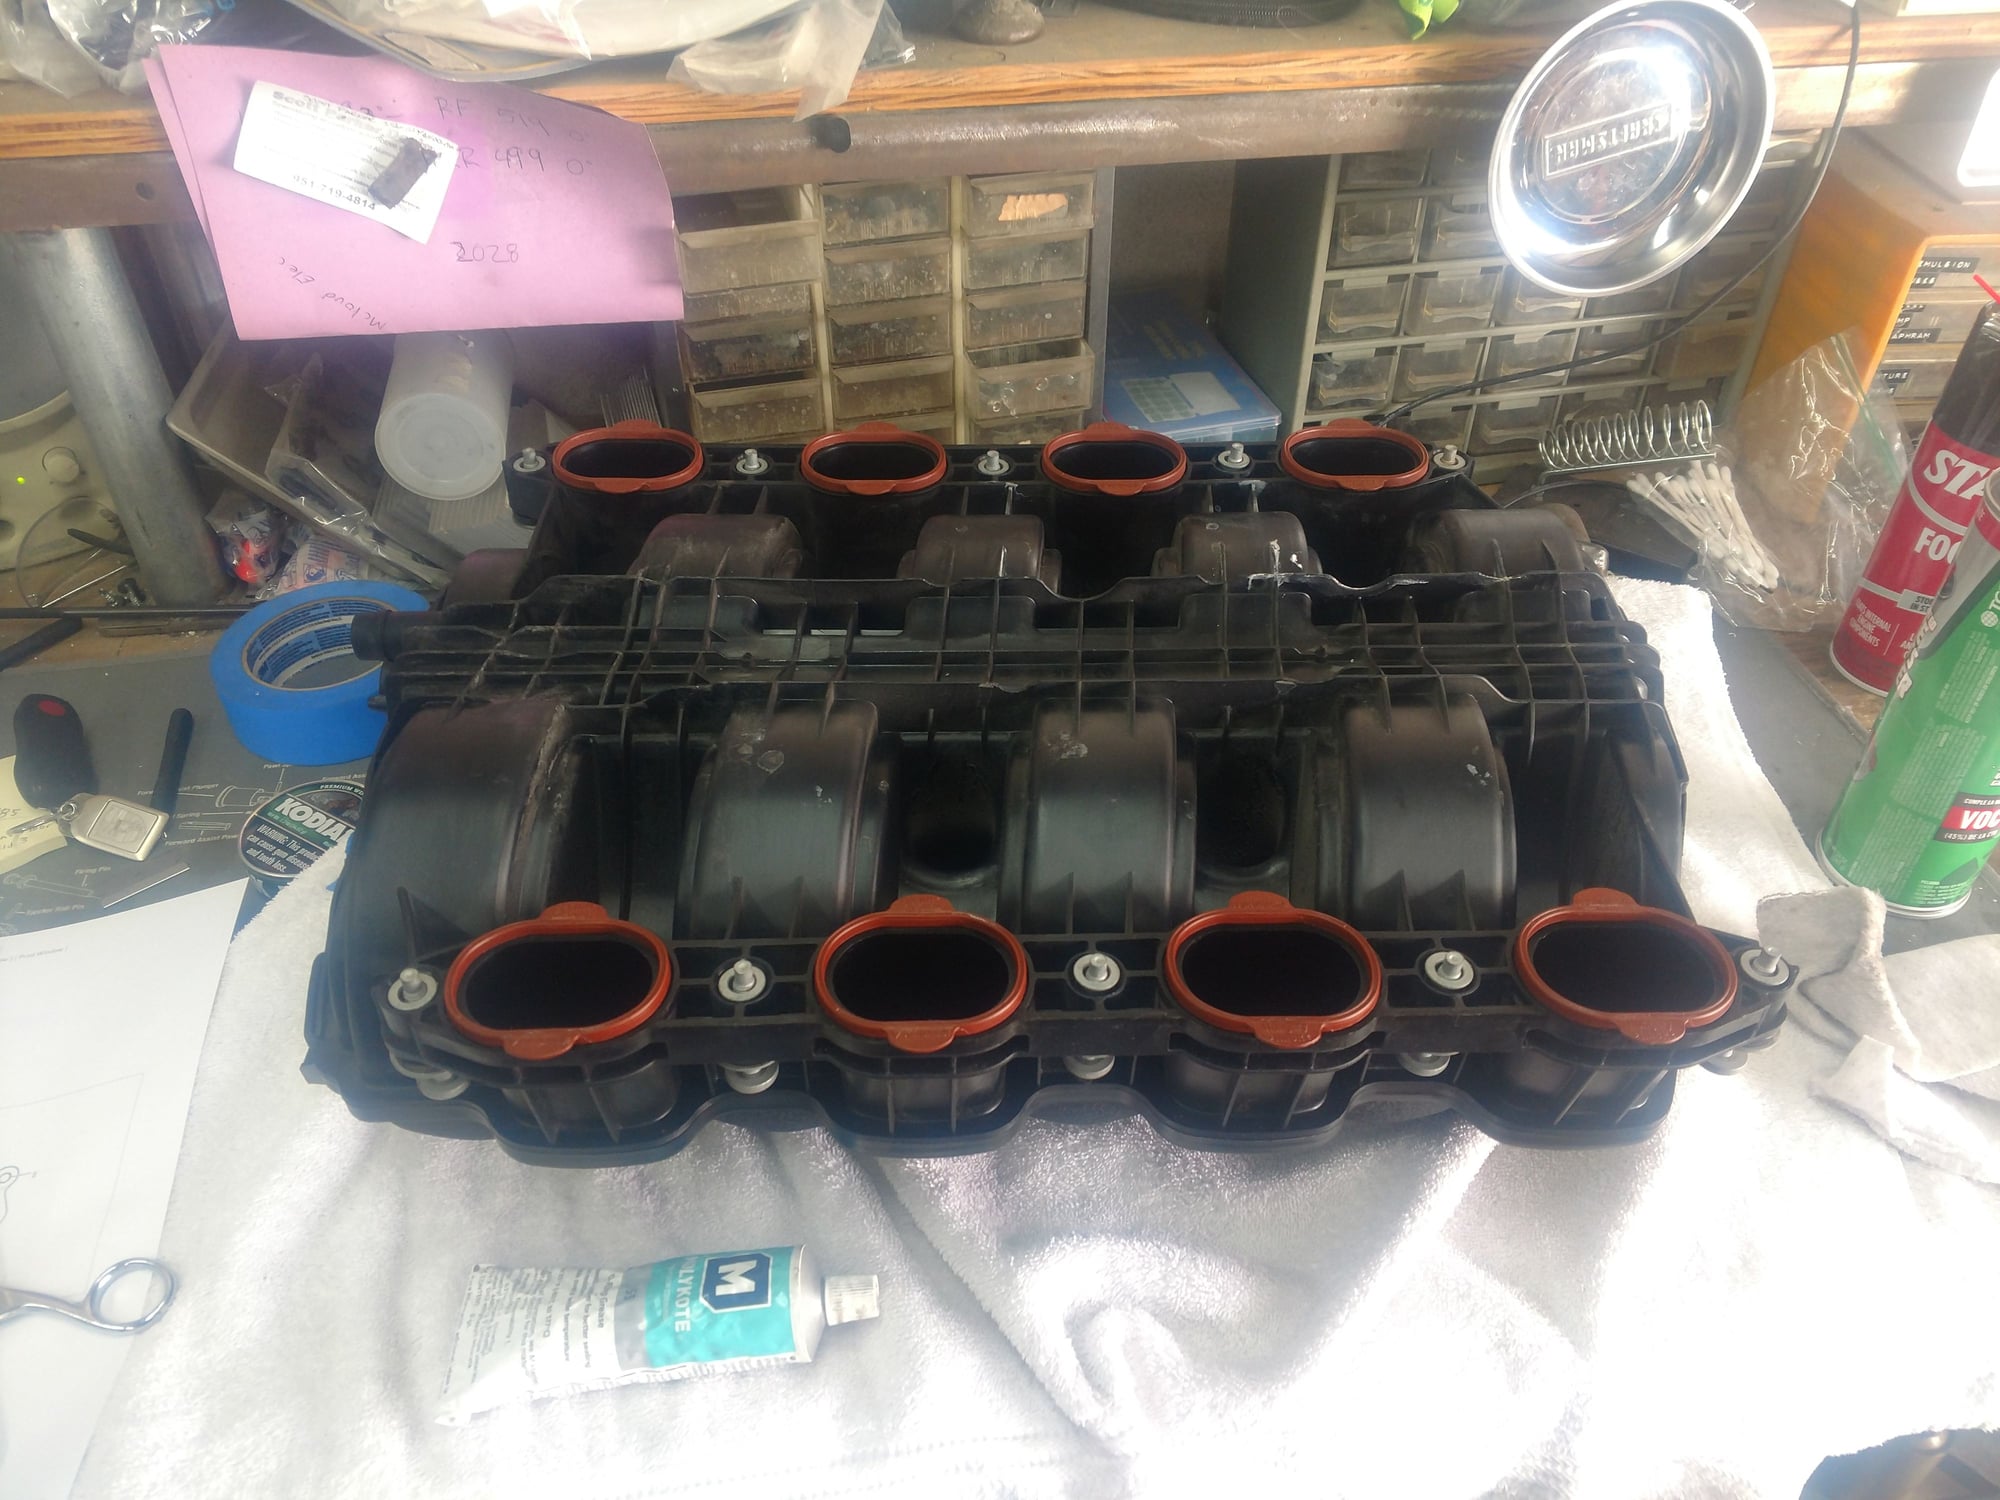
This is a shot of the manifold all cleaned up with new gaskets ready for install. I put the manifold gaskets on dry. I didn't want to take a chance of one of the gaskets falling off. I was very careful installing the manifold. after it came to rest on the heads I double checked that all eight gaskets were still in place and hadn't dislodged. I followed the torque sequence on ALLDATA. The only thing I changed was how I torqued the bolts. First I ran all the bolts down finger tight. Then I set my torque wrench to half the final torque and followed the sequence. Then went to full torque and followed the sequence. Then I hit them one more time at full torque. This might seem like overkill, but the manifold is made of plastic and I was worried about distorting it.
The rest is a cake walk.
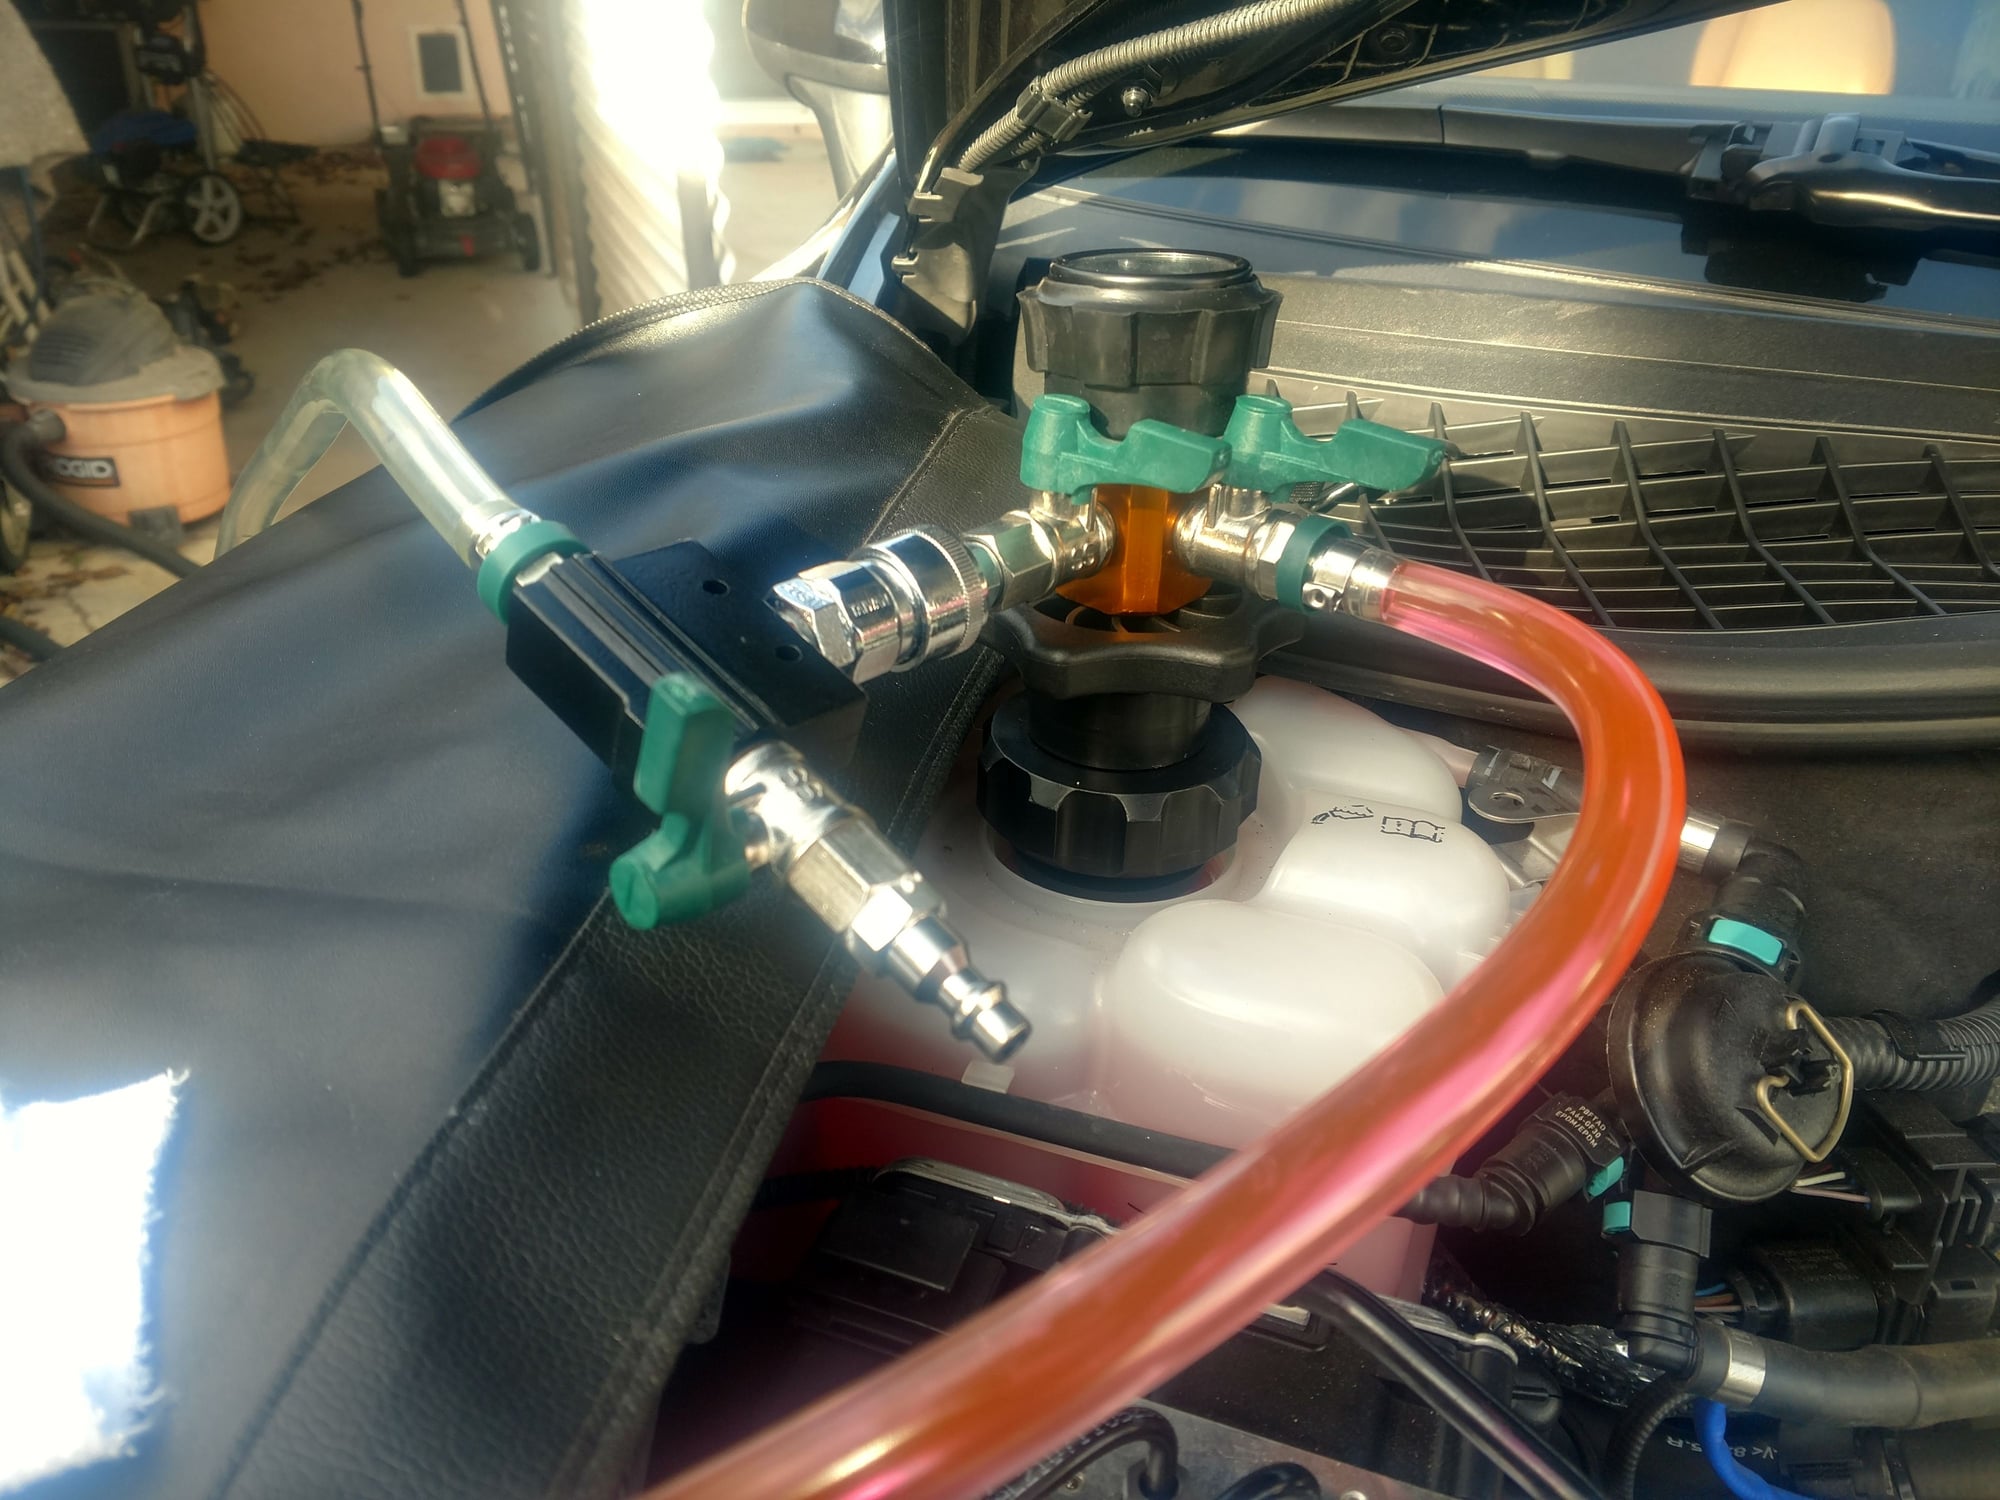
The final step was to refill the cooling system. That is where the Schwaben coolant refill kit worked beautifully. After following the directions that came with the kit, I didn't have to add an additional drop of fluid. No burping the heads, no driving like a bat out of hell down a bumpy road to work out any air bubbles. It just plain worked.
Job done.
Doing water pump and thermostat tomorrow. This job will be a lot easier than what you went through as I don't have to remove much to get to both of those parts.
I read that you used clean engine oil on the thermostat rings. All Data states to use only a water soluble lube like Kluber S06. I'm going to use Ideal water soluble wire pull. You can also use astroglide to lube them as it's water soluble.


 04-12-2019, 10:21 AM