When you click on links to various merchants on this site and make a purchase, this can result in this site earning a commission. Affiliate programs and affiliations include, but are not limited to, the eBay Partner Network.
Recently my 2011 Cayenne Turbo with 75k miles started to exhibit the following intermittent symptoms:
1) Rough idle after startup followed with the red reduced engine power warning
2) Prolonged cranking time
3) More exhaust smoke/smell than usual with a very white coloration
4) Eventually a permanent check engine light
I used my durametric and discovered a low fuel pressure at startup code. This led me to believe that the high pressure fuel pump that resides in the engine bay (two low pressure pumps sit below rear seats) was most likely faulty. This seems to be a much more common failure in the earlier Cayennes and other Porsche models (there were recalls) but not as frequent in the 958s. After talking with my local Porsche parts counter there appear to have been several upgrades/changes to our pumps since 2011.
The part number is 948-110-316-KX. This is a rebuilt pump and can be found for 1400-1600 dollars from the common vendors. All are asking a roughly 300 dollar core charge on top of the price. The V8 pump is pricier than the others so don't be in sticker shock when you get a quote. If you take your car to a shop I read to expect about 3-4 hours for labor.
Not a bad DIY, only difficult as the high pressure fuel pump sits in a very tight location at the back of the engine on the driver's side. The pump mechanism is turned by one of the camshafts and produces very high pressures ranging from 580 to 1740psi. You will be doing much of this job by feel. Other than typical tools you will need some crowfoot wrenches in order to tighten the fuel lines to specified torque. I am an average home mechanic and was able to get the job done in about 5 hours of steady work. I did sit in the engine bay while I worked to give me more leverage and a better view of things. I ended up spending roughly 1800 for the project once I had paid for the pump/shipping/taxes. Please use this DIY as an overview only. I would strongly recommend purchasing an online maintenance manual such as AllData for reference and more in depth information. I would like to reference them for the diagrams shown below.
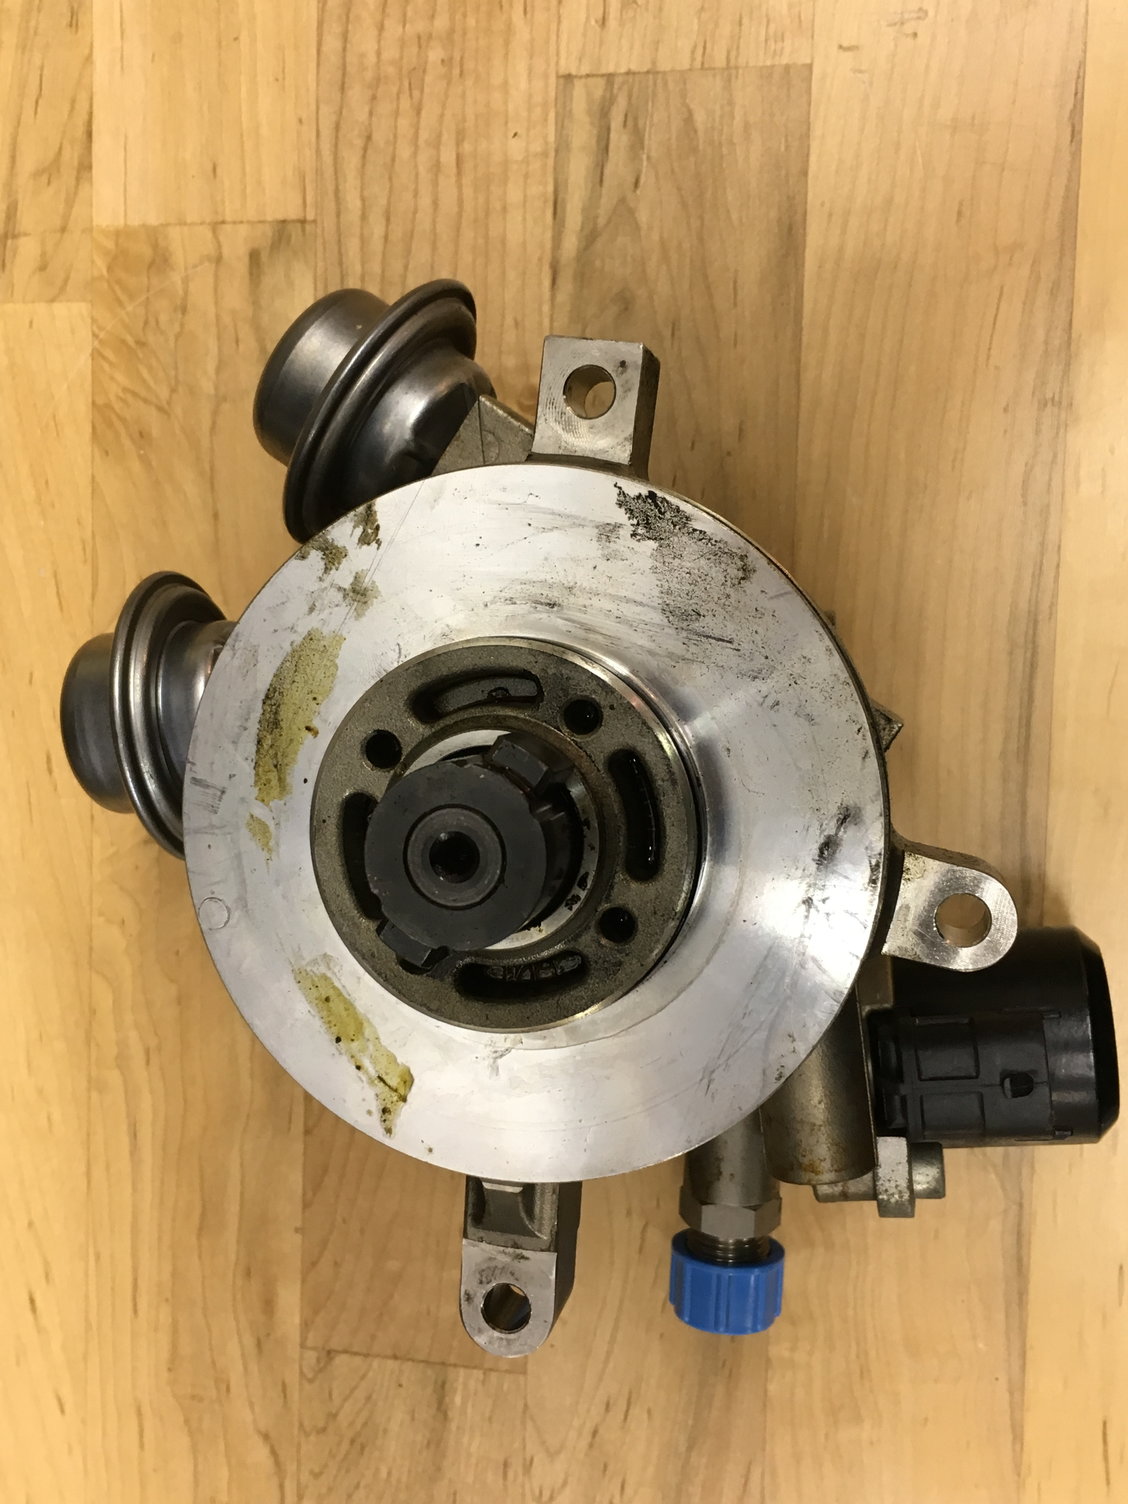
Here are some photos of what the pump looks like when removed:
Optional steps before you begin:
1) Remove the belly pans/plastic under trays so when you drop tools they hit the floor instead of being trapped in the pan. This also allows you to visualize the pump from under the car to inspect for fuel leaks and look at things from another angle.
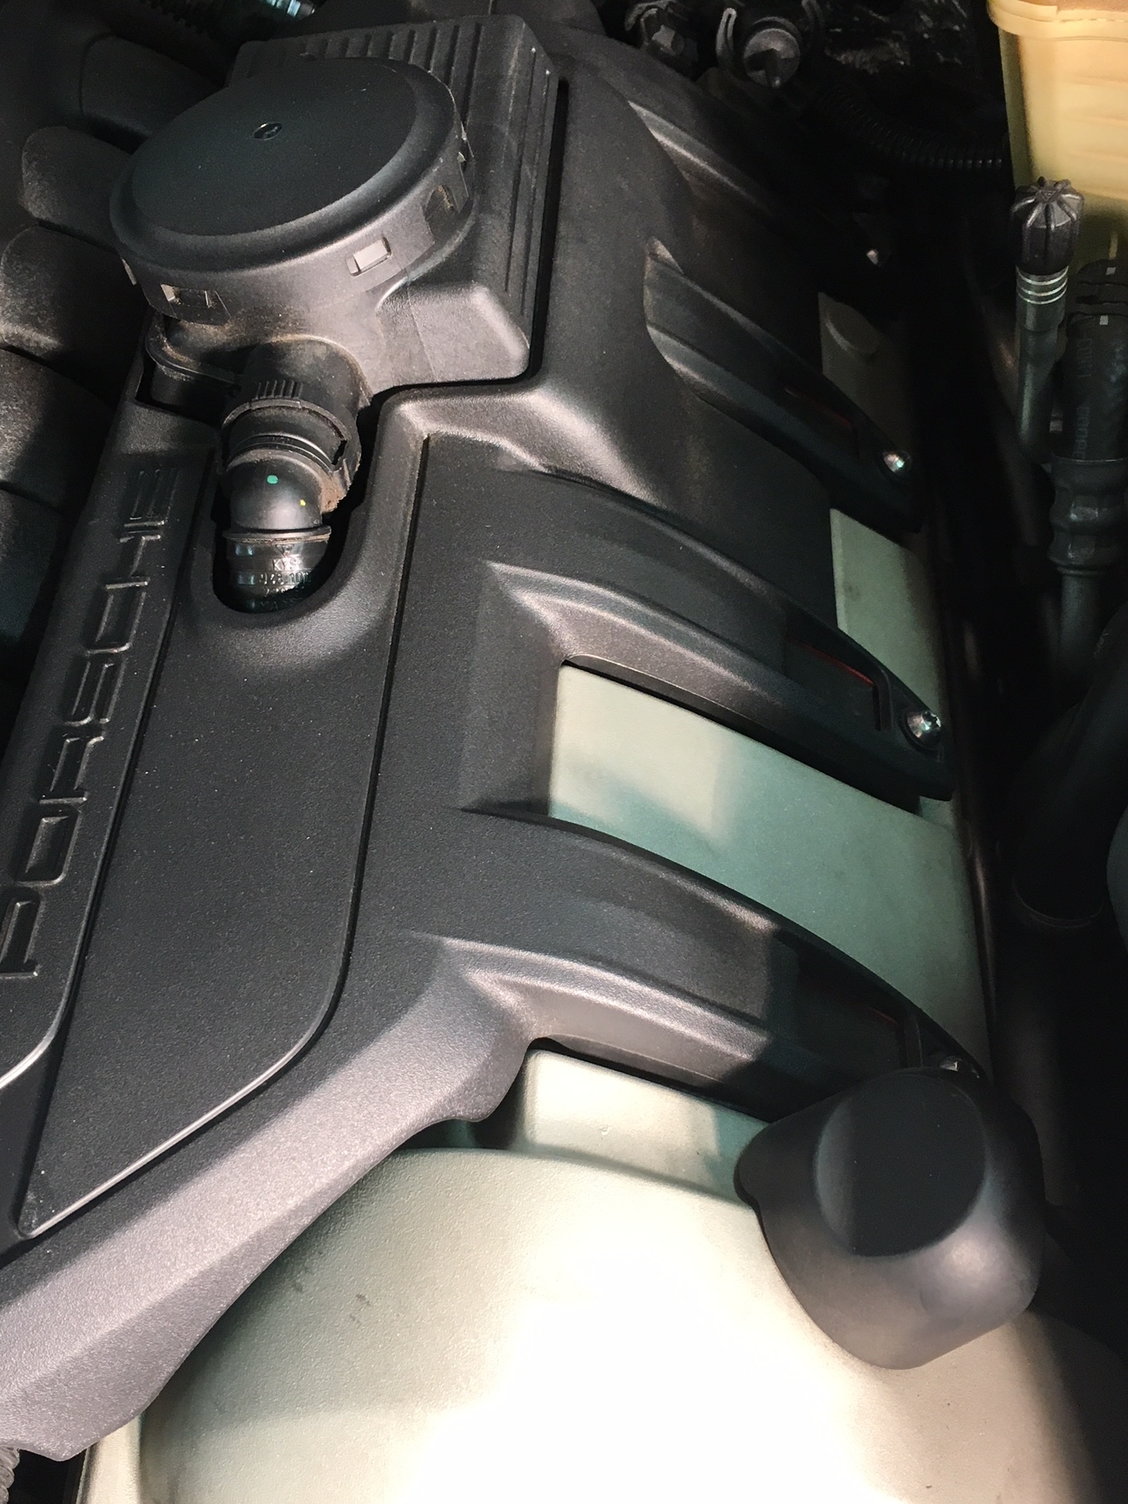
2) Remove the plastic coil pack cover (4 torx bolts).
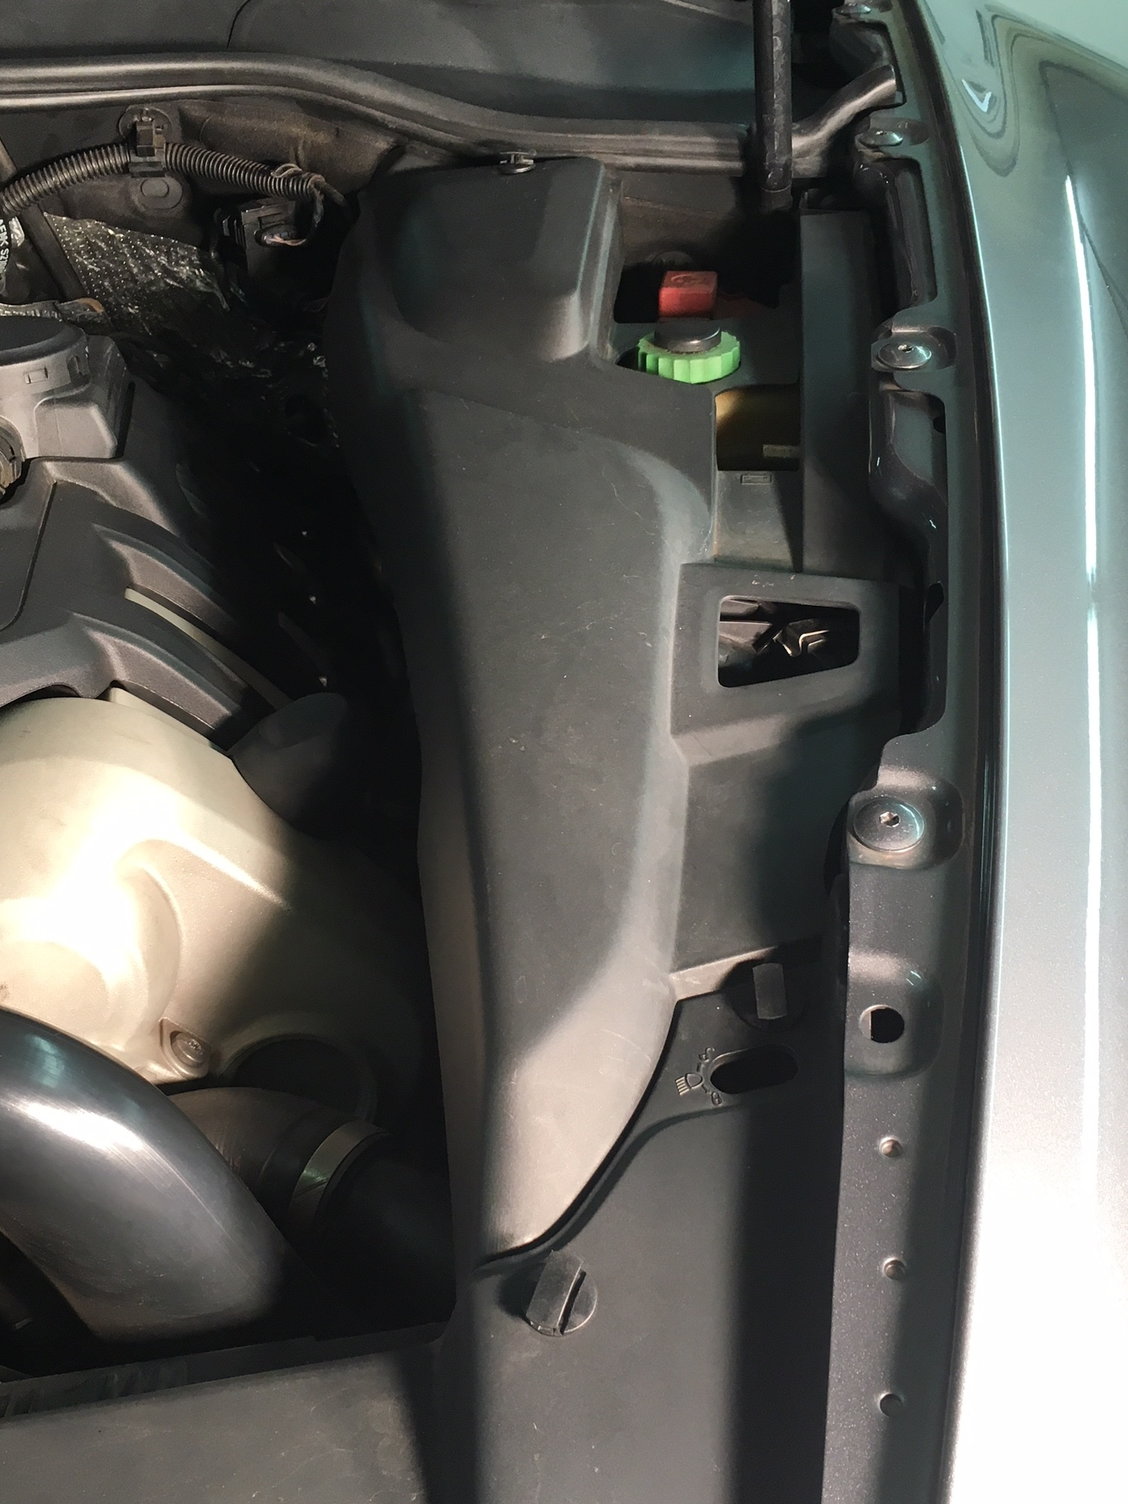
3) Remove the plastic piece that runs along the driver's side of the engine bay. Its held in place with three pop fasteners.
Before you get to the next steps I would be sure to let the engine cool down completely. As you begin to unhook the fuel lines you WILL be leaking petrol into the engine bay. Make sure you have a shop towel handy (or some other means) to keep it from spilling all over your engine bay and/or garage floor. In addition make sure you are in a well ventilated space as you will create fumes as the petrol leaks from the fuel system. Obviously petrol is flammable to it would be wise to have a fire extinguisher available. There are more than likely other ways to do the things I am going to describe, I am just showing how I completed this project. Perform at your own risk....
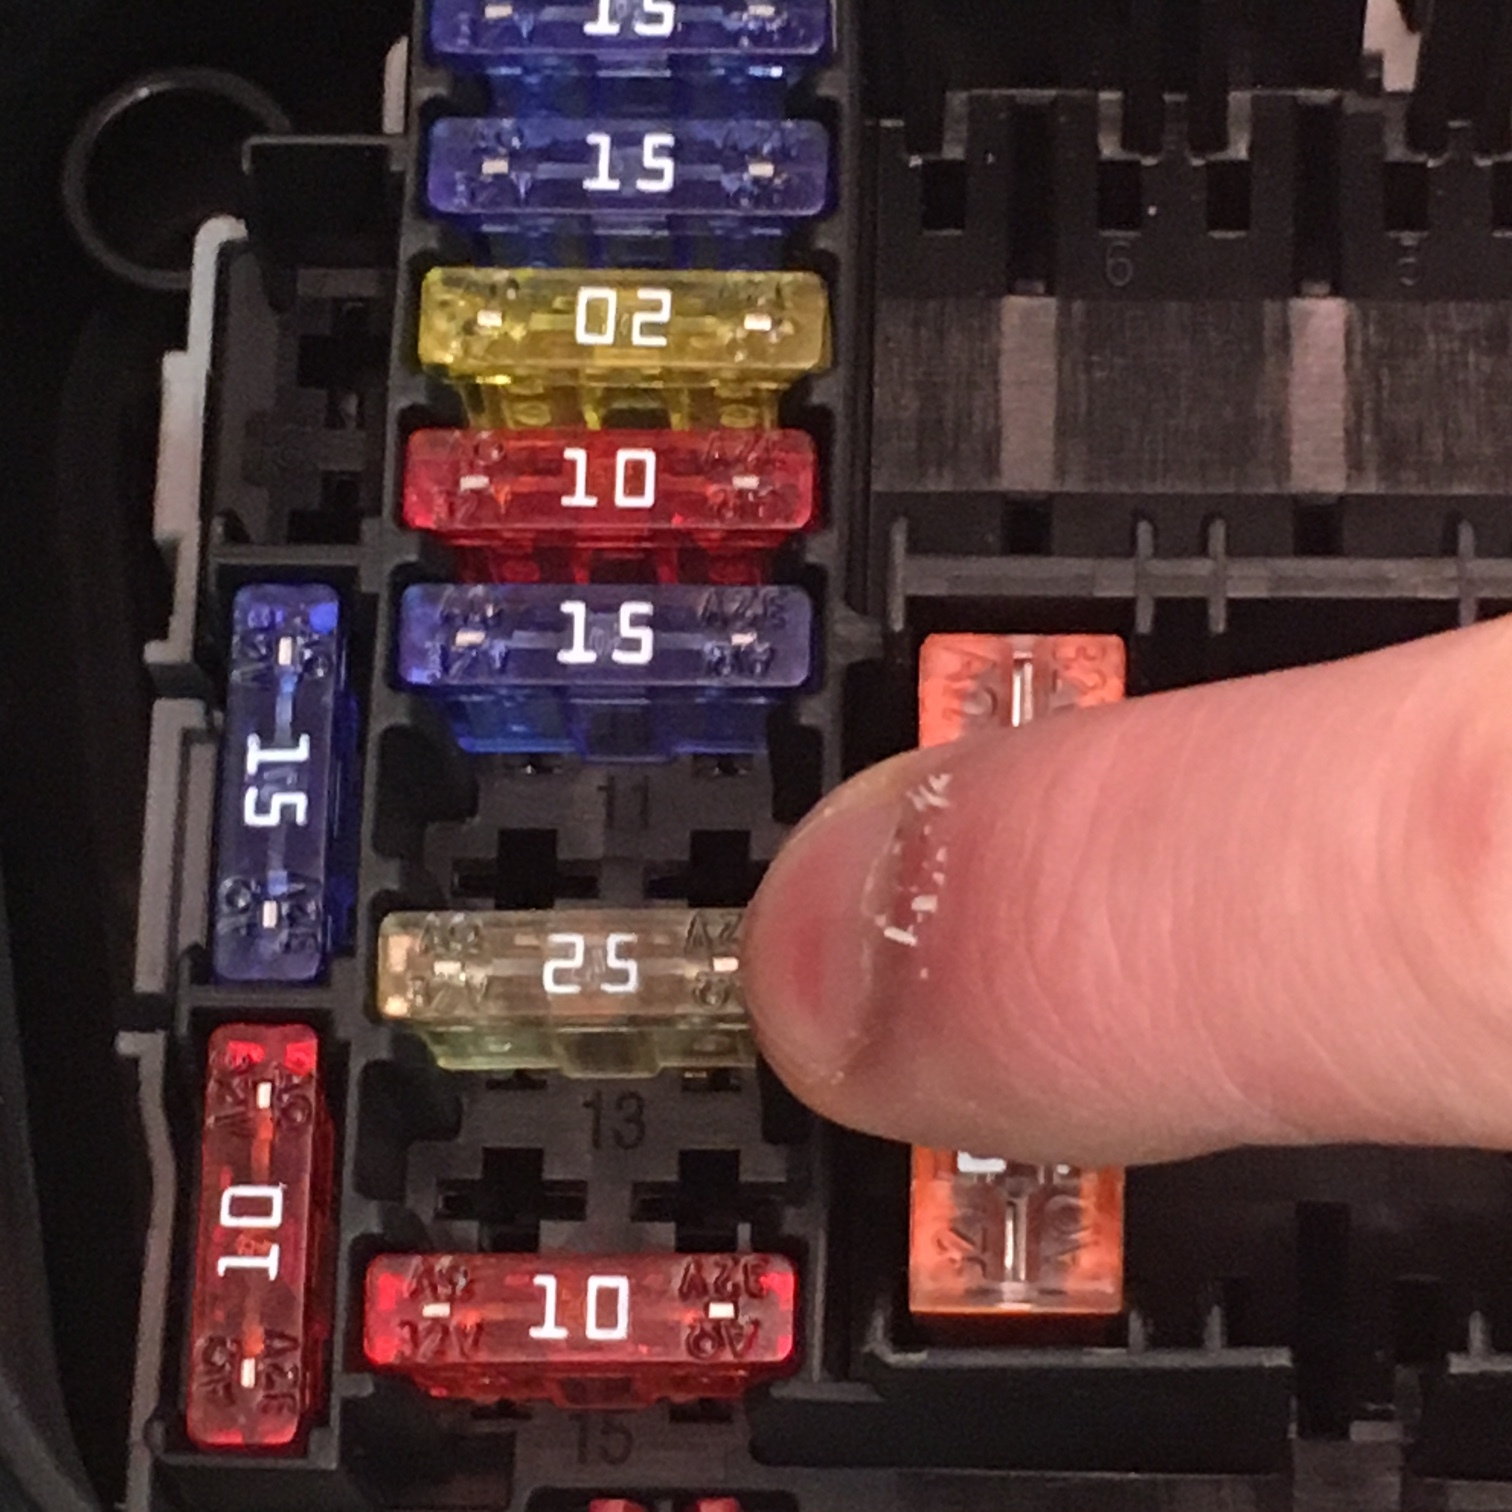
1) It is important to cut power to your fuel pumps as you don't want them accidentally coming on once you have opened up your fuel system. I simply removed the fuel pump control unit fuse in the engine bay fuse box. It is the number 13 fuse and is the only 25A fuse in that box. You may wish to disconnect the battery, some people remove a relay. Up to you.
2) Depressurizing your fuel system-After some research it may be wise to remove some of the pressure and fuel from the system before you open it up. If the car has been sitting for several hours the pressure should bleed off over time. If you would like to bleed off residual pressure/remove fuel, after pulling the fuse as shown above simply start the car. My cayenne started, ran for a few seconds, and then died. If yours doesn't start simply crank the car a couple of times for a few seconds and it should accomplish the goal.
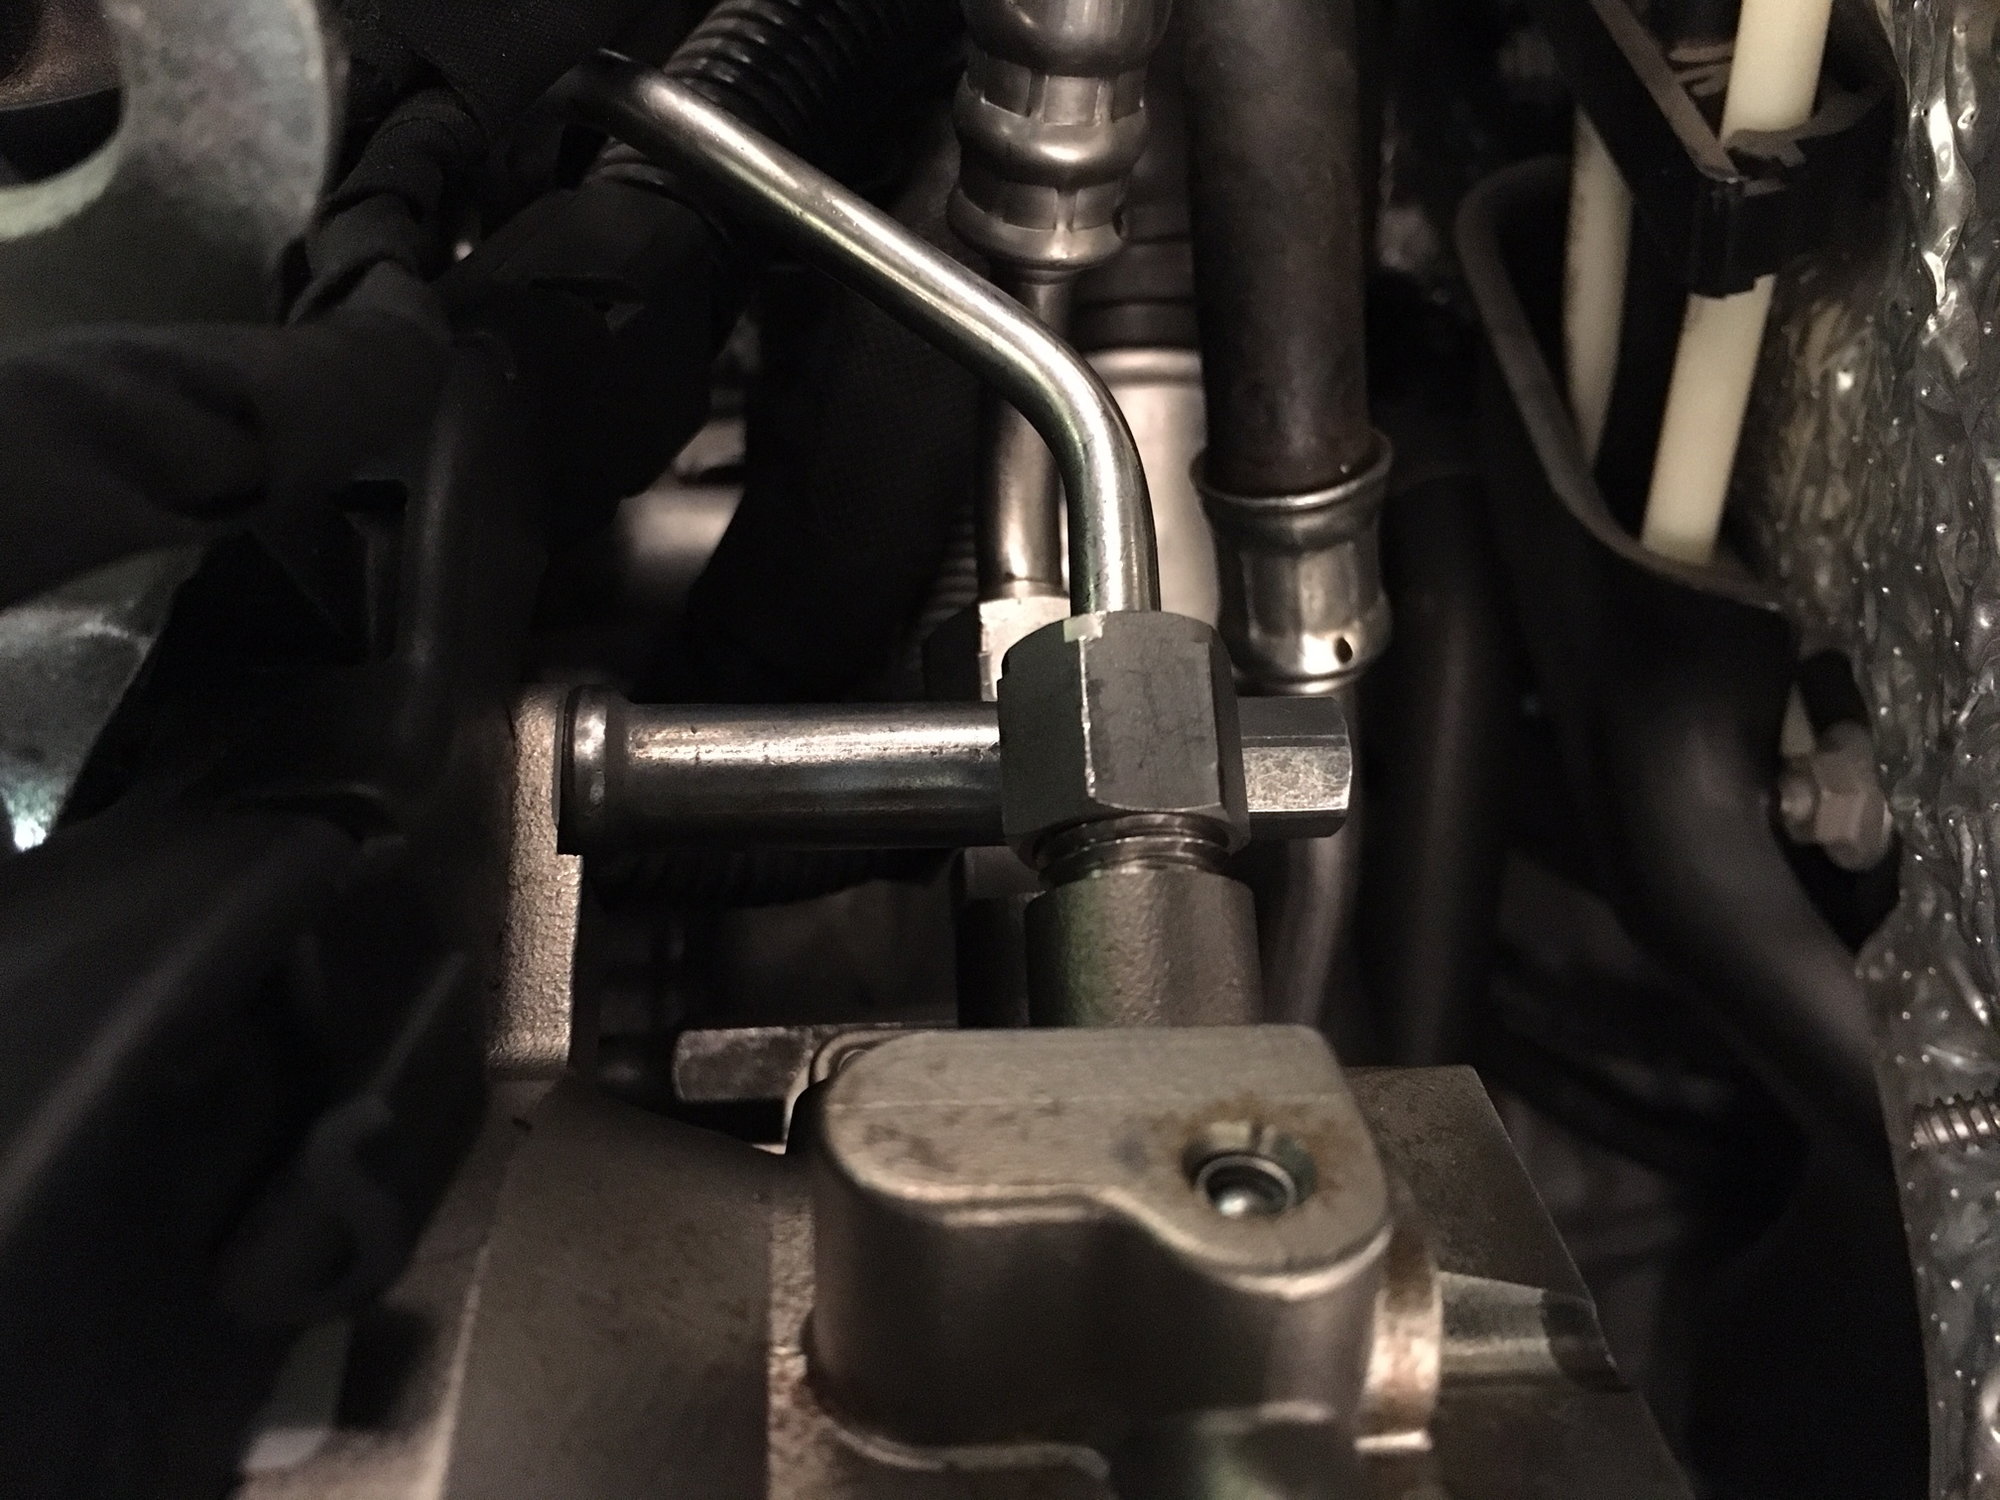
3) Now that the system is depressurized you can loosen the low pressure fuel line from the pump. Remember to have some way to catch the fuel that will spill. The low pressure hose from the pump joins the fuel line from the low pressure pumps on the firewall as seen in the photo. If I remember correctly it required an 18 and 19mm wrench to loosen. There were markings (white lines) on both sides of mine that I used as a reference when I reassembled things. Reassembly torque is 26 foot pounds.
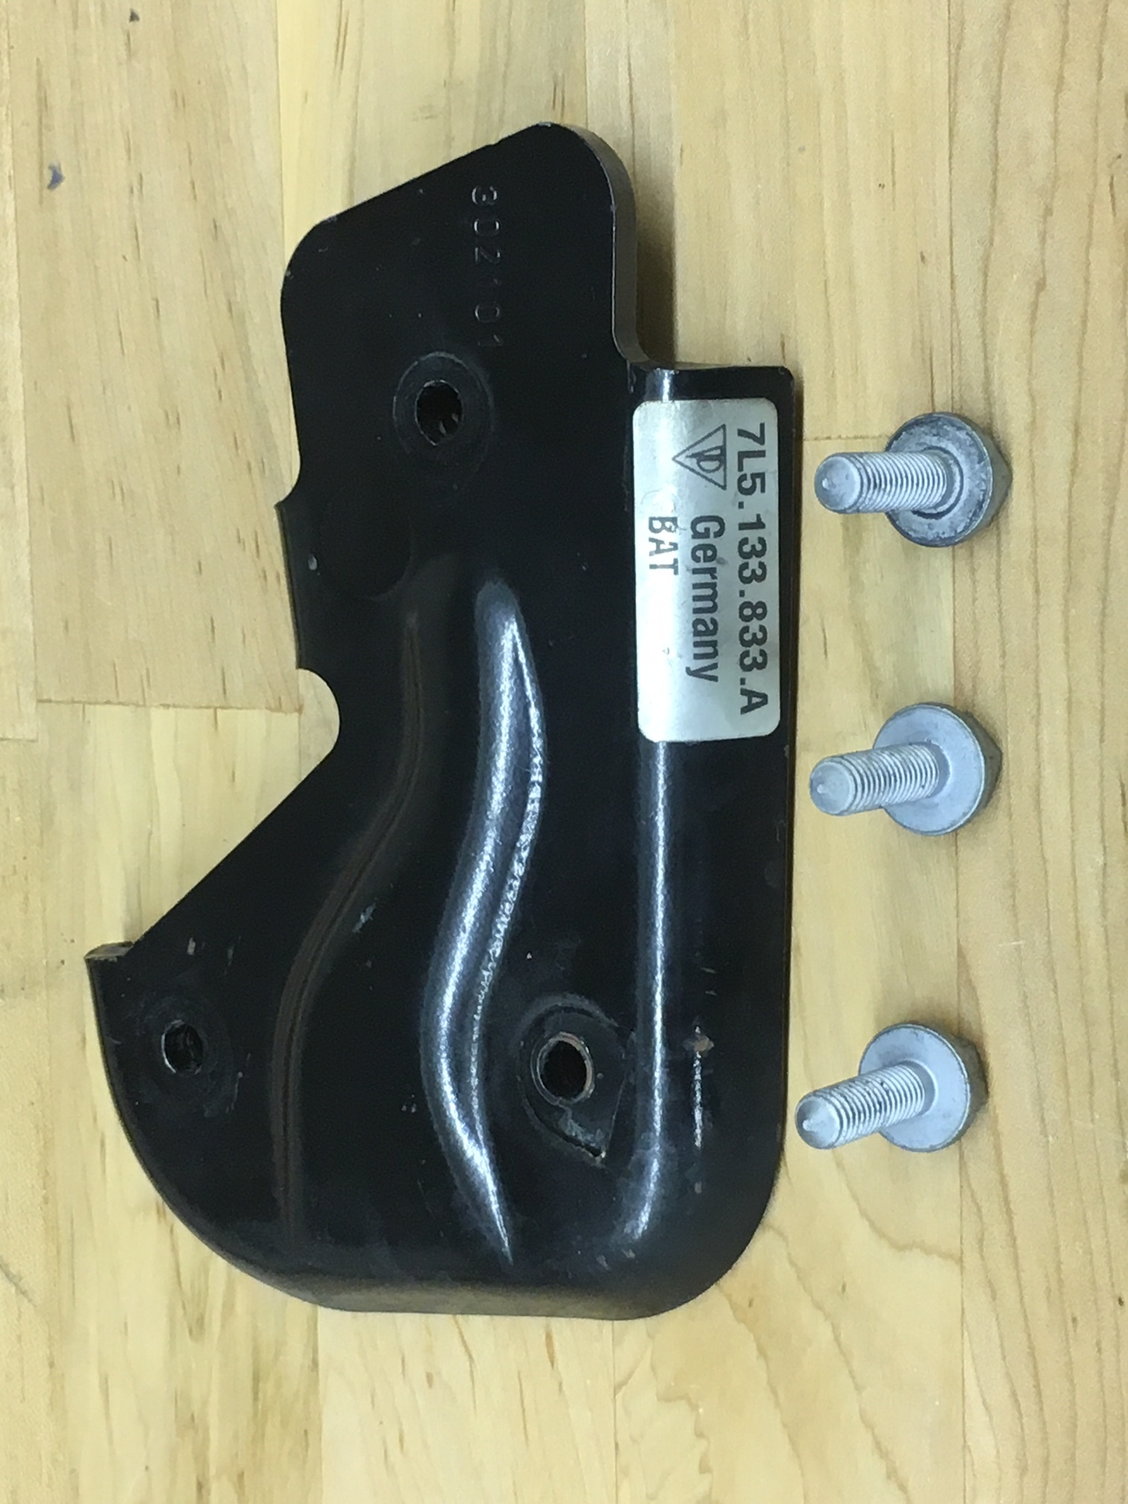
4) Remove the crash panel. On the back of the pump there is a black metal panel that will need to be removed. It is attached with three bolts, I used a 10mm wrench to loosen them and removed by hand. The space here is very limited. The picture below is what the panel looks like once removed.
5) Remove the high pressure line that goes from the pump to the fuel rail. Once again you will need to have a cloth underneath the fitting in order to catch spilling petrol. This line is the all metal line from the pump and sits above the low pressure line. You can see it in the picture below. Take care to not bend this line. Reassembly tightening calls for three turns. Make sure to leave the low pressure hose attached to the pump.
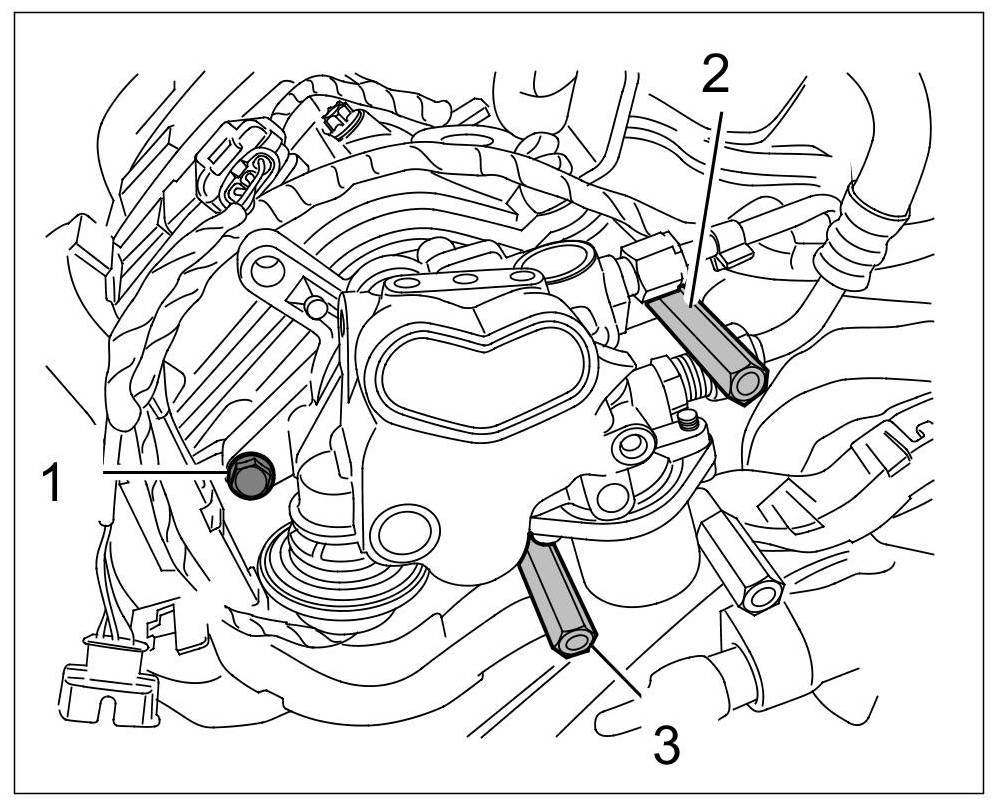
6) Now that the crash plate and high pressure line has been removed it is time to remove the bolts that hold the pump to the engine. It is attached with two hexagon head union nuts and one typical mounting bolt. All three require a 10mm socket. Notice that there are three hexagon bolts in the area that mount the crash panel. Only two of these (marked in the photo below) are removed in order to remove the pump.
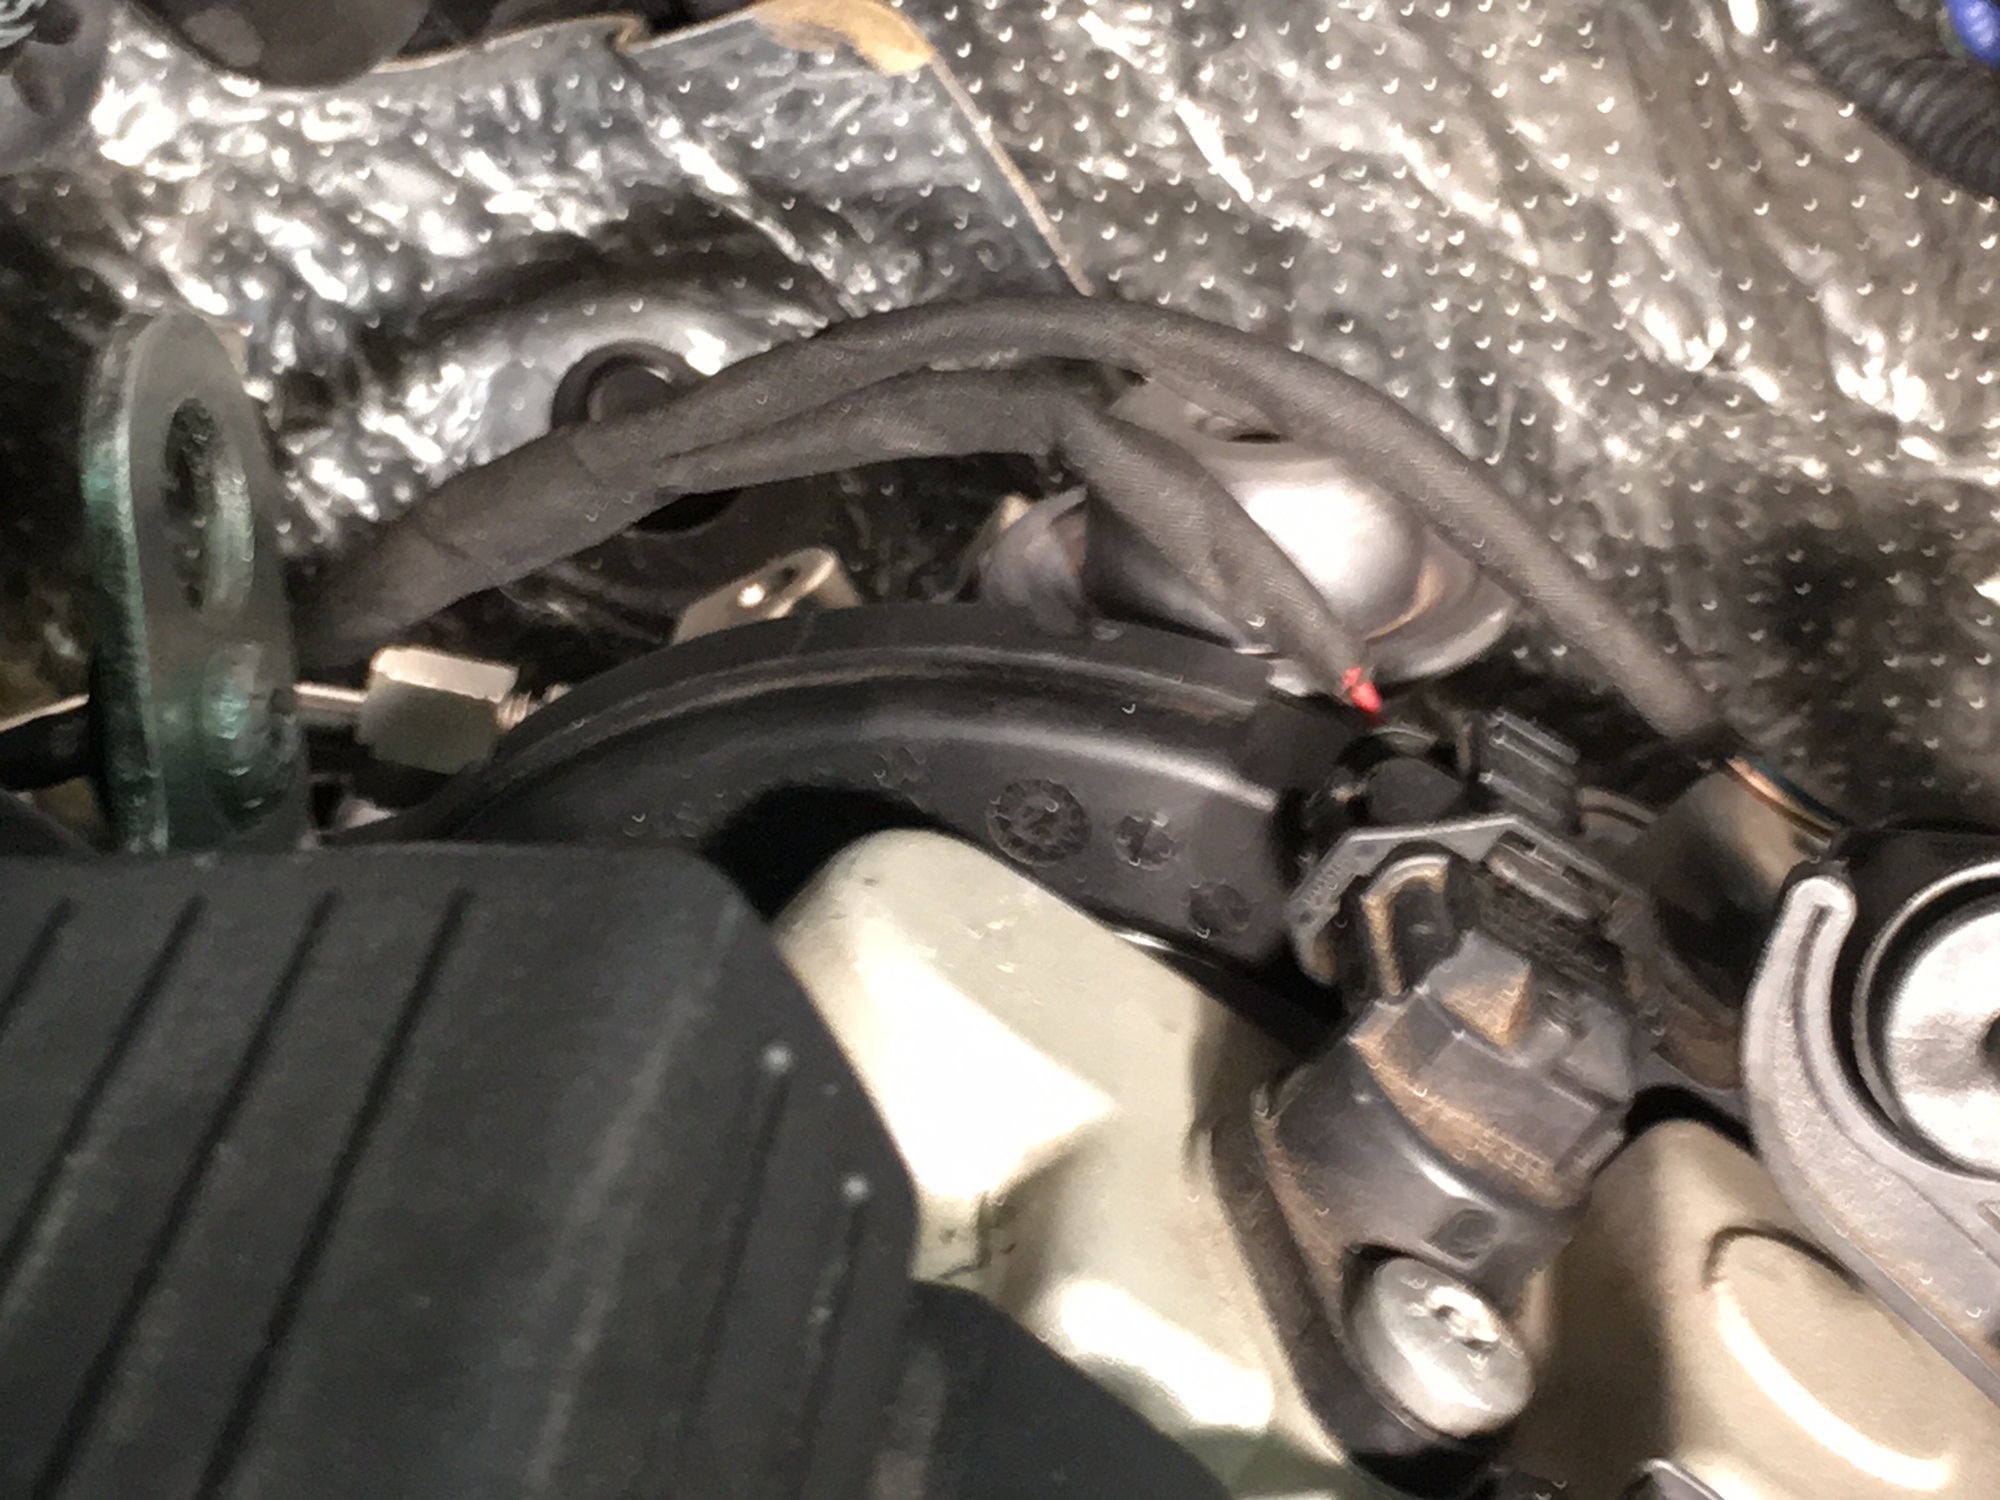
7) In order to make more space for pump removal i loosened the wiring harness that runs over top the back of the valve cover. This is accomplished by unclipping the sensor wiring from the sensor, removing the two bolts that hold the engine hoist hook along with a single bolt further down the valve cover. Harness is pictured in the photo below.
8) Remove the pump - I used a flat head screwdriver to gently pry the pump away from the engine block. It took a little force and several curse words but it slowly wiggled out. Once separated you need to rotate the pump and remove the wiring plug from the pump solenoid. The pump should now be totally loose and able to be removed from the engine bay completely. Its a tight squeeze to get this pump out, be patient and try not to get too frustrated.
9) WARNING: There is a metal coupling that sits between the fuel pump and the camshaft that is referred to as an Oldham coupling (sorry no photo). It was bronze colored and it fell out during my pump removal. Luckily I found it sitting on my garage floor before I reinstalled the pump. Make sure you can account for this part.
Now that the pump has been removed, its time to get the new pump ready to go in. Be sure to save the blue plastic caps that screw onto the fuel inlet/outlet and place them on your core for mailing.
1) Remove the low pressure fuel hose from your old pump and attach to your new pump. Before removing the hose make sure to note the orientation of the hose on the old pump and match it on your new pump. It will need to be tightened to 26 foot pounds. The reason to note this orientation is to make sure there is an 18-22mm gap between the high and low pressure hoses-see image.
2) The pump is now ready to go back in. Make sure to note the orientation of the Oldham coupling in the end of the camshaft and the driver of the pump as they will need to be lined up in order to slide the pump back into place.
3) Follow the instructions in reverse order for reassembly.
4) Before starting the car I cleared the codes using the durametric. The car started and died once with a check engine light. I cleared the codes and the car restarted the second time without issue.
5) Make absolute certain to inspect for petrol leaks! I drove my car for a few days with the crash cover and belly pans off in order to look for any leaks. I also had my fire extinguisher with me just in case. An under seat fire extinguisher mount will be my next project!
One tiny comment - for those doing the job - make sure you learn how to torque correctly when using a crow-foot wrench with a torque wrench. If you use it at 90 degrees to the torque wrench head - no compensation is needed. If you use it at 0 or 180 degrees - there is a formula involved.
BTW - I should comment - you ARE working on a critical part of your vehicle when doing this job. If you have ANY doubt about your ability to complete the job safely - don't do it. Take it to the dealer. You don't want to be that car on the side of the road that's burning up due to a high-pressure fuel pump leak. There have been entire service departments burned up when a tech did it wrong and a car sprayed gasoline - so this is a AT YOUR OWN RISK sort of job. We didn't tell you to do it, or how to do it. ktr6 told you how HE did it.
Thank you for the great DIY article. Yesterday I replaced the HPFP in my 2011 Cayenne S after it developed long cranking times before starting. I decided to purchase a new pump vs a rebuild so that I could be sure to get the most updated model. It was only a $100 upgrade from Suncoast Porsche and was worth the piece of mind. The job took just over three hours thanks to your detailed instructions. The car started after a couple seconds of cranking and immediately seemed to run better. It now starts immediately as it used to do.
Thank you for the great DIY article. Yesterday I replaced the HPFP in my 2011 Cayenne S after it developed long cranking times before starting. I decided to purchase a new pump vs a rebuild so that I could be sure to get the most updated model. It was only a $100 upgrade from Suncoast Porsche and was worth the piece of mind. The job took just over three hours thanks to your detailed instructions. The car started after a couple seconds of cranking and immediately seemed to run better. It now starts immediately as it used to do.
I'm reading two different torque values for the fuel line to the high pressure fuel pump. Everyone says 26ft lbs and AllData shows a 19 ft lbs for the hoses.
What gives?
Last edited by RAudi Driver; 02-13-2020 at 12:21 AM.
From AllData : Tightening torque: 35 Nm (26 ftlb.)
But then their spec sheet states 19 ftlb. I can tell you that 26ftlb is way too much. Even at 19 ftlb, my setting at 18 ftlb, due to offset box end head on the torque wrench, it was at it's upper end as far as how tight it felt.
Alldata states to remove driver's side cowl cross panel. I did this and it made the job a heck of a lot easier. Also removed the passenger side and did a new vacuum pump. I'll try to put together a simple DIY. Mostly just followed AllData, but there are a few tricks that I can list to help future wrenchers out.

 02-19-2018, 10:37 PM