When you click on links to various merchants on this site and make a purchase, this can result in this site earning a commission. Affiliate programs and affiliations include, but are not limited to, the eBay Partner Network.
First thing I want to do is thank everyone for your help through pm's and answering my questions in other threads. What I want to do is to show the easiest way to upgrade your hard drive that is in the pcm to a solid state drive. We are going to get rid of the spinning platters hard disk drive (hdd) and replace it with a solid state drive (sdd). I know the devastating effects of having a hdd fail. Well... my wife more than me with years worth of pictures and her address book lost due to a failed hdd. Lesson learned.
So let's get the old hdd out of there, clone it to a new sdd and replace it. My car is a 2012 CTT.
My cars PCM works perfectly. No reboots every 2 minutes so this diy should be easy. A straight clone. I don't have "jukebox" or any of the fancy stuff so I didn't need to make the partitions bigger. Just a preventative maintenance job.
Before buying any of the parts I will be recommending you should open up the pcm to see what type of hdd you have and the size of it. My cars hdd had an IDE interface. I think the newer models have a SATA interface. But these instructions should be the same.
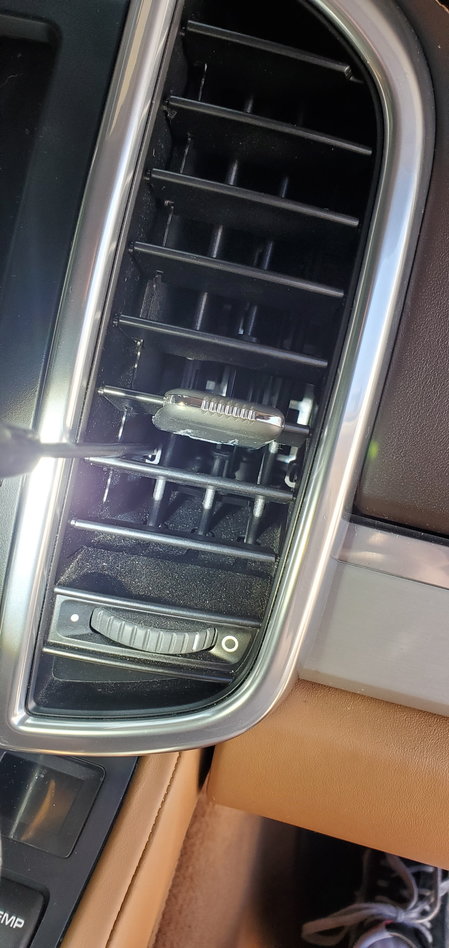
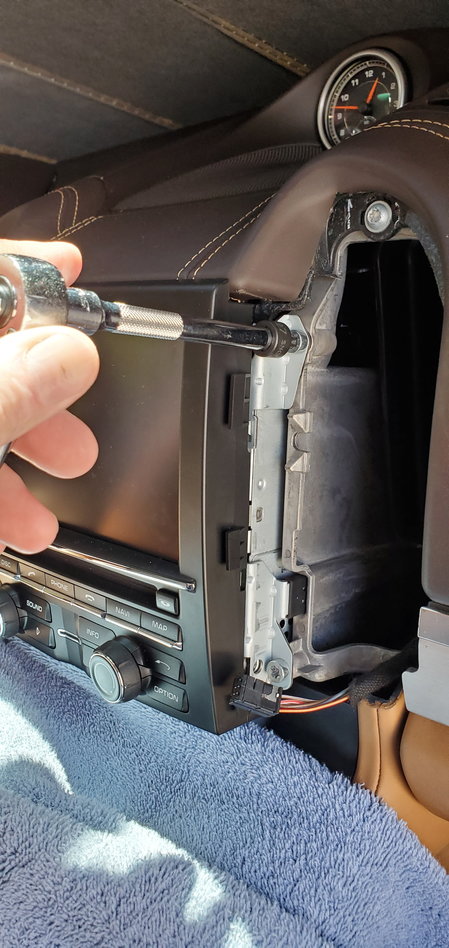
First thing to do is pull the pcm. It's not difficult and I got it down to about 5 minutes. The vents on both sides of the pcm need to come out. You will need four small screwdrivers or chopsticks or anything long and skinny. I've done it with one screwdriver but four is way easier and not so hard on the vents. If you take a look inside the vents with a flashlight you will see four little loops that you need to push your screwdrivers or chopsticks through. Check out the picture.
When you have all four skewered through the hooks it should look like this.
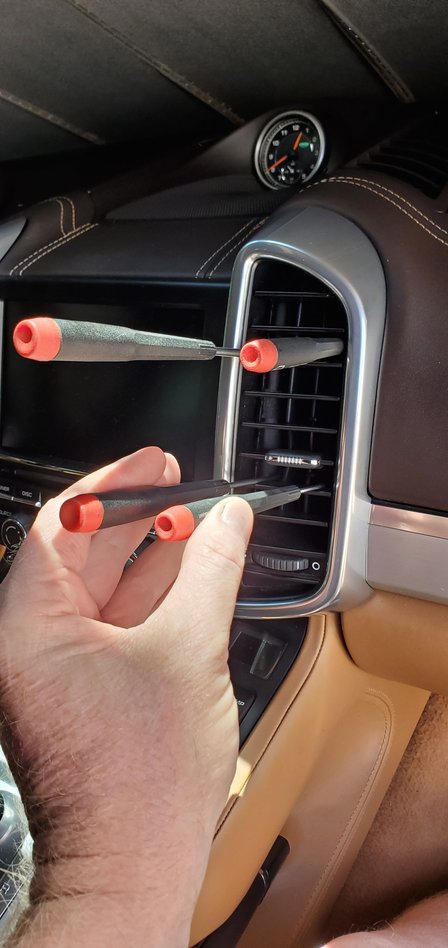
Now gently squeeze the two bottom screwdrivers together and pull the bottom of the vent away from the dash and it should pop out. If it doesn't want to pop out, pull harder LOL. Once it is free from the dash gently wiggle it from dash but be careful because there is a wire attached to it that you will need to disconnect at the connector. Be gentle because the connector is clipped onto the vent and you don't want to break it. Ask me how I know.
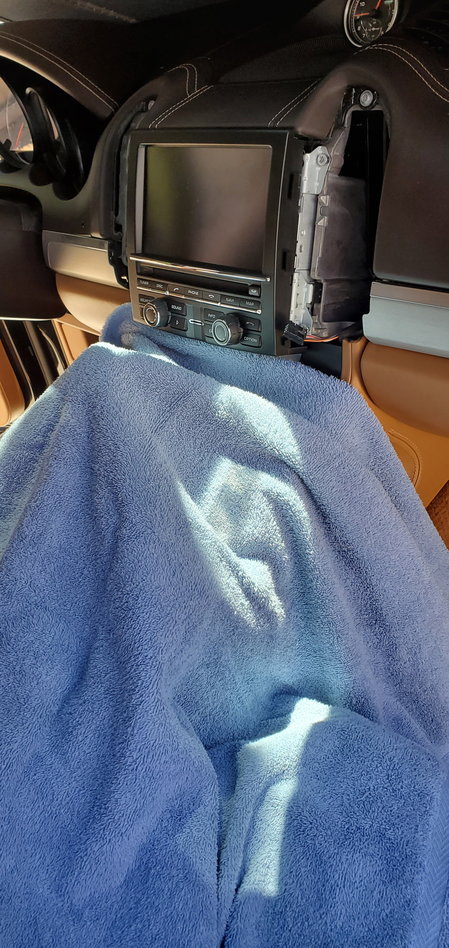
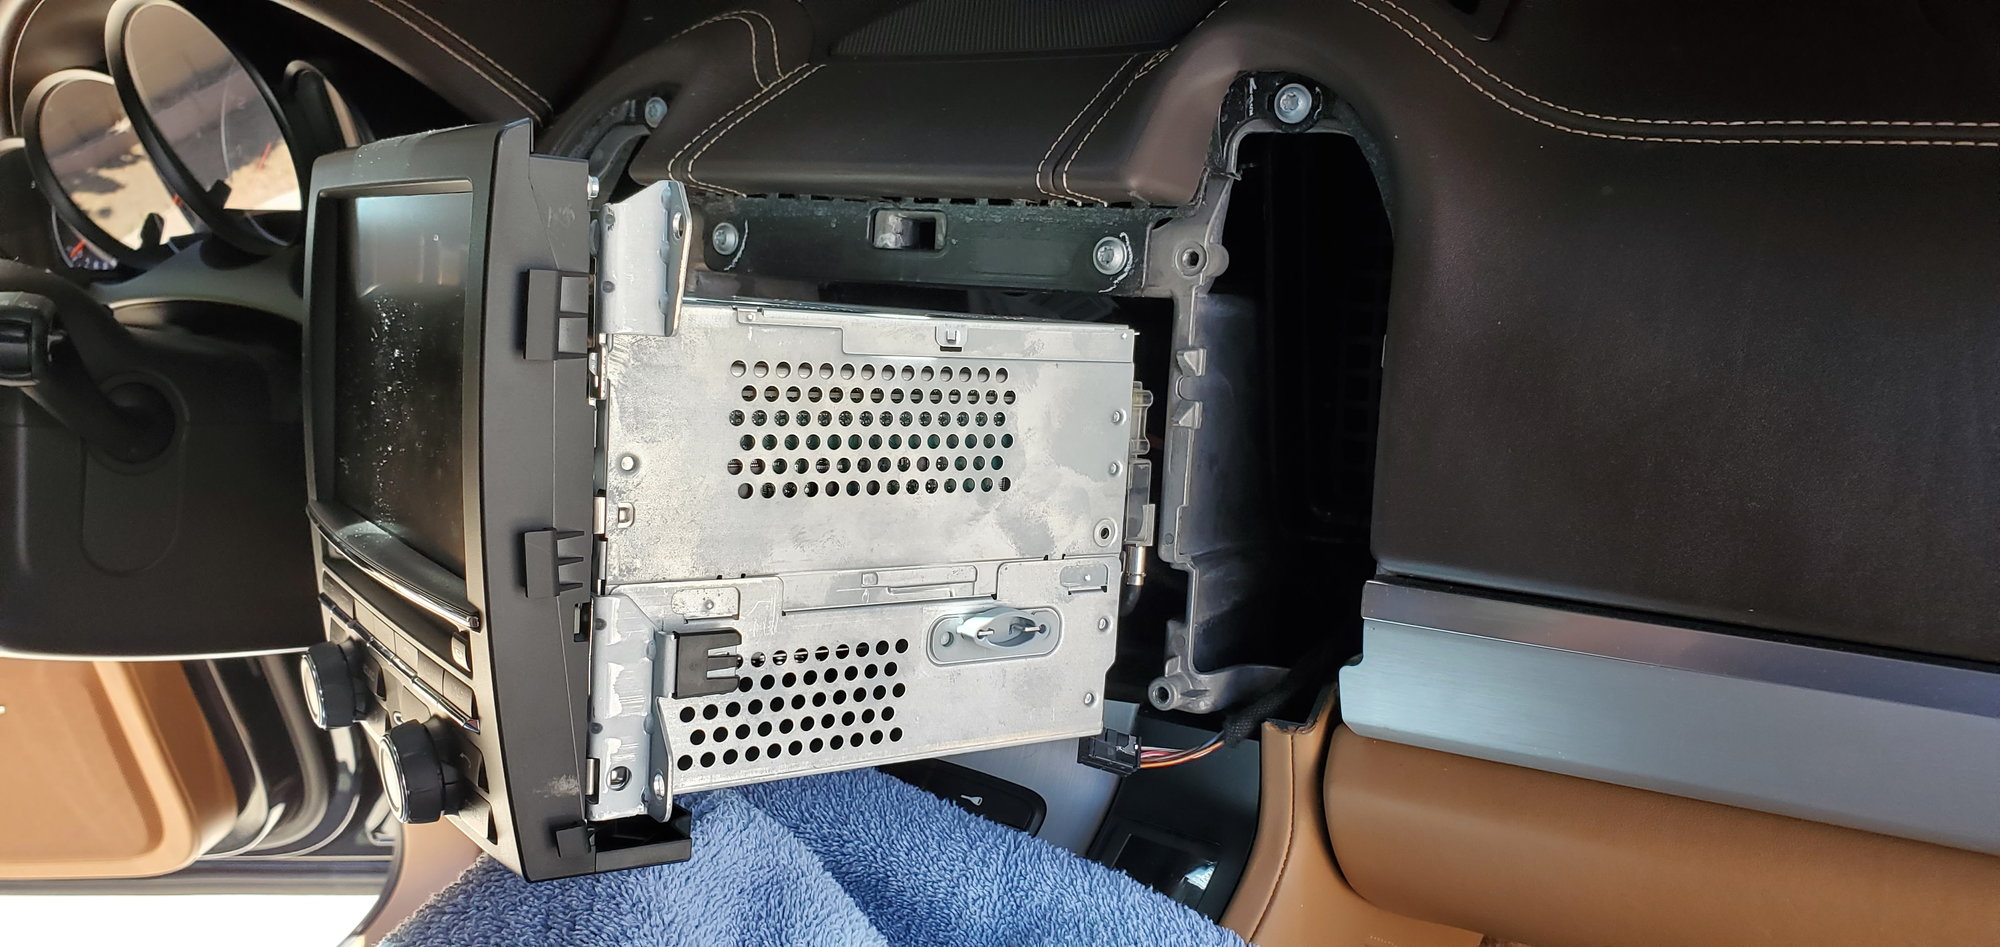
After you get both vents out of the way it time to pull the pcm. I covered the center console with a towel to keep from scratching anything.
There are four torx bolts that hold the pcm to the dash.
Now just grab the pcm and pull it out. I did not unplug any of the connectors on the back of the pcm. There is enough wire to pull it off far enough and **** it to the side so you can work on it.
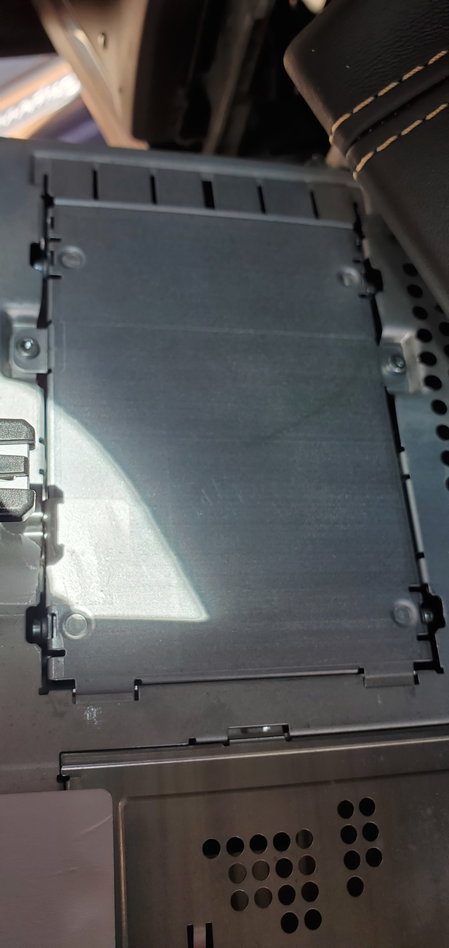
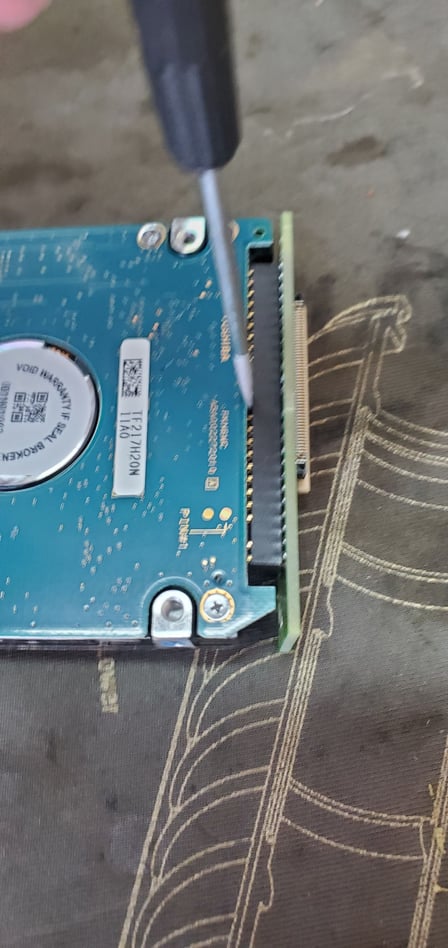
Once you have it propped up stable you can remove the hard drive from the little cubby it sits in on top of the pcm. It is held in with two very small screws.
Be careful. Those screws are really small and as you can see the holes on the back of the unit are... Well you know. With the screws removed you can pry up the hard drive slowly. There is a ribbon cable attached to the drive so lift it straight. It has tabs that act as a hinge but don't unhinge it yet. We need to disconnect the ribbon cable.
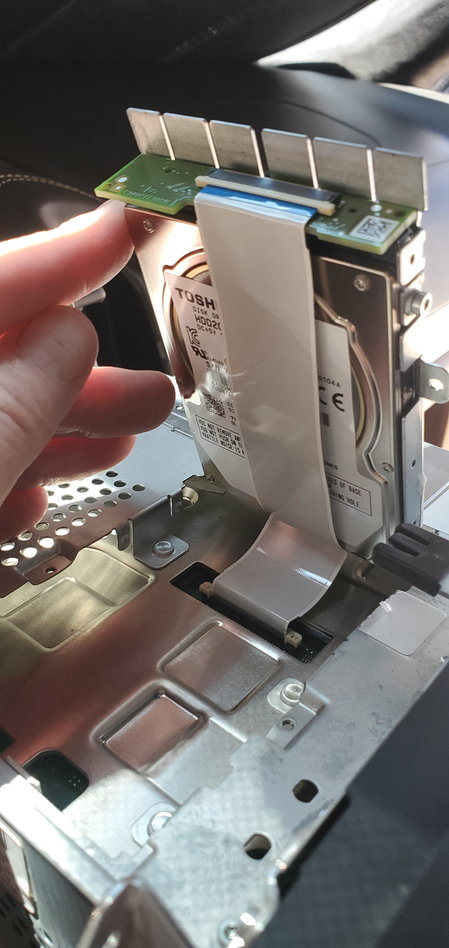
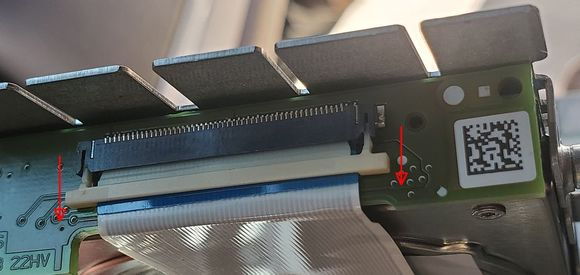
The ribbon cable just slides into the connector and is held tight with a pressure type thing. The white thing in the picture. This is the part that would be nice to be an octopus because you have to hold the hard drive up and pull back on the white thing at the same time. You have to kinda make a "C" shape with your thumb and index finger and grab the white thing and pull back on both sides at the same time. Pull back NOT UP. pull back towards the ribbon cable. And don't pull it off. It only pulls back 1/16 to 1/8 of an inch. The picture is in the open position. Once the white thing is in the open position the ribbon cable is free and you can gently pull it out of the connector. It has a kind of snap in snap out feel to it.
Ok, your done with the car for now... Close it up and take the hdd to your work bench.
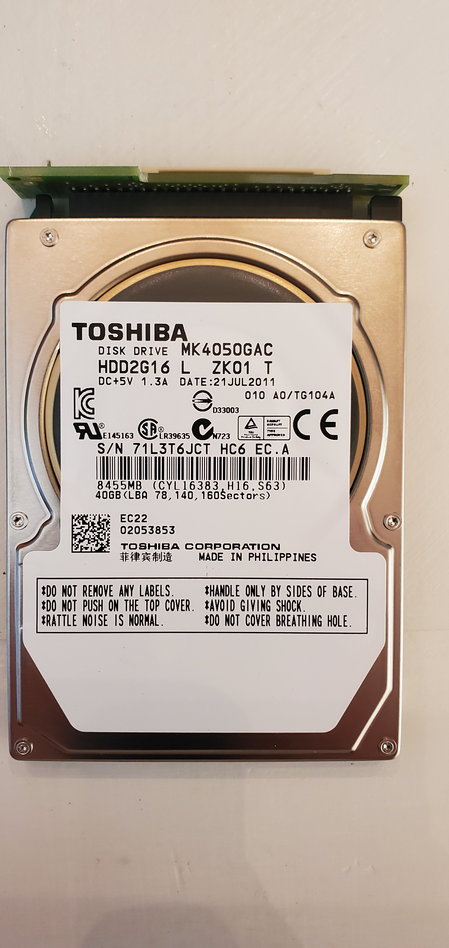
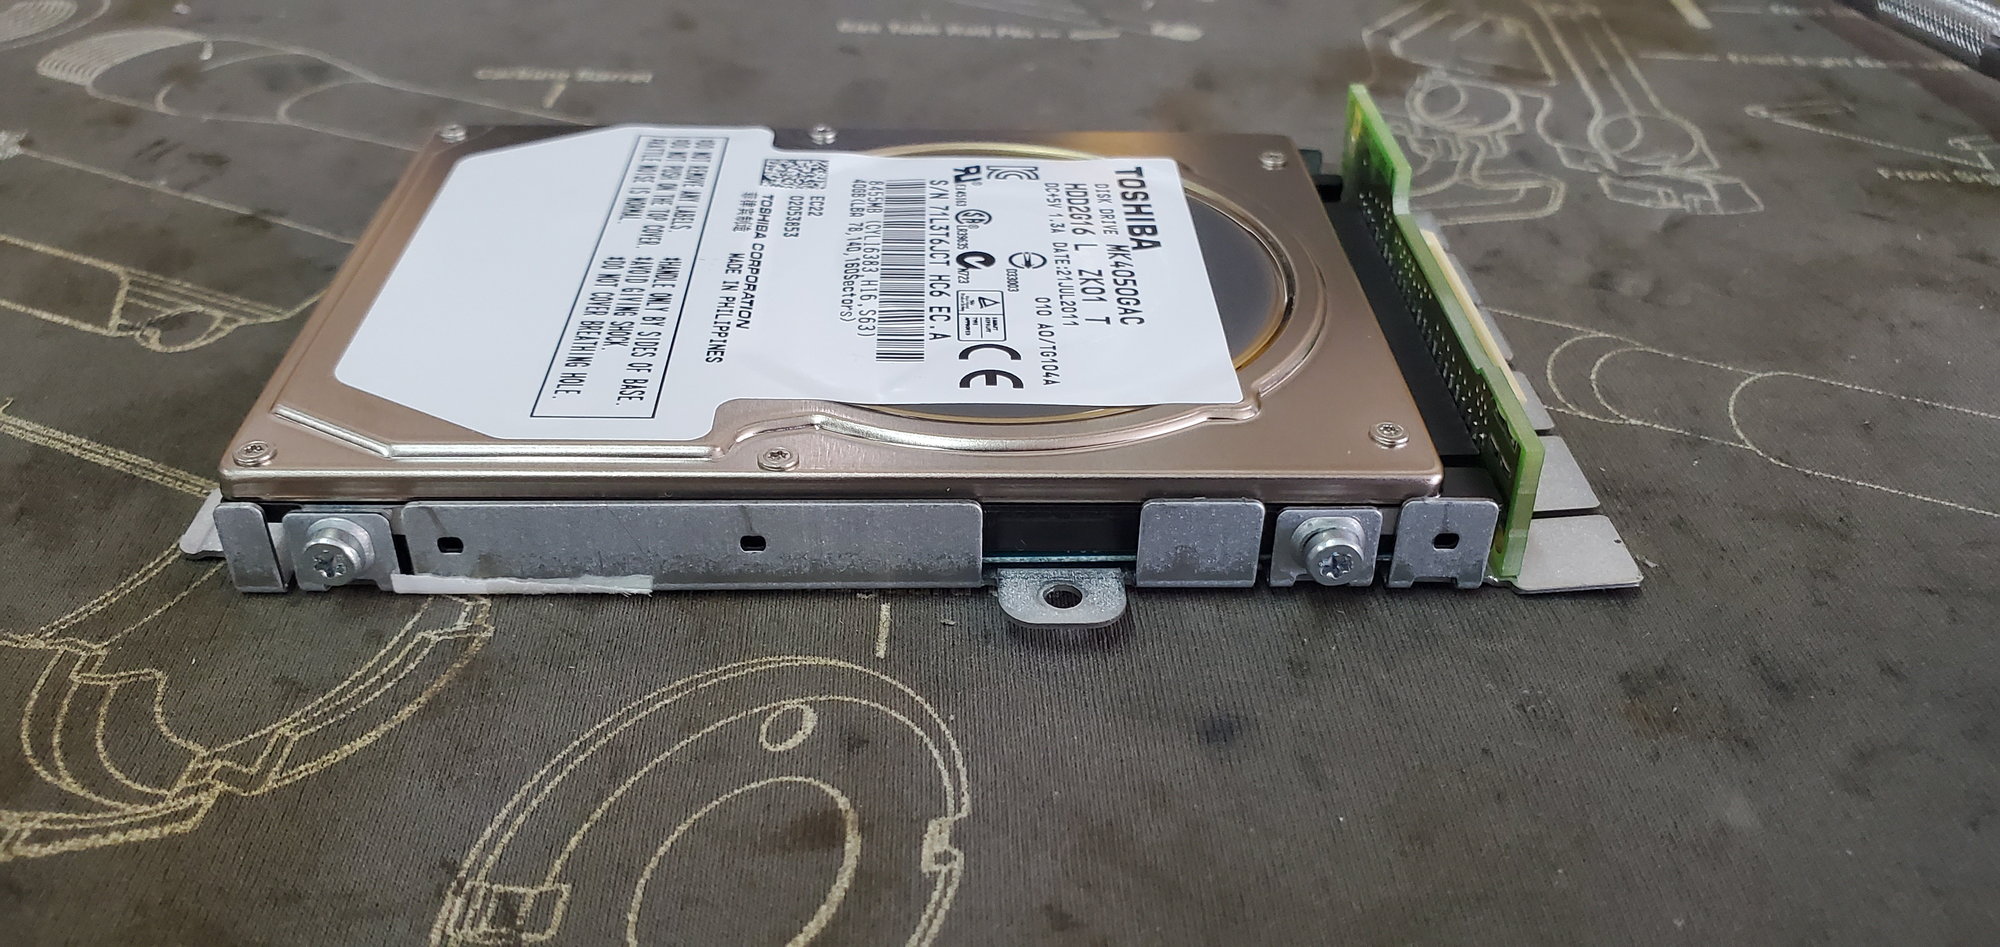
This is a good place to stop and see what kind of hdd you have. I have not seen how a SATA hdd is connected to the pcm. But if it is anything like a normal pc it should have a regular SATA connection so a 2.5 SATA ssd "should" work. Which one to buy? I don't know. There are a couple of other threads on rennlist.com that cover that. Also a BMW thread on a different forum that I read. Apparently BMW's use a similar system.
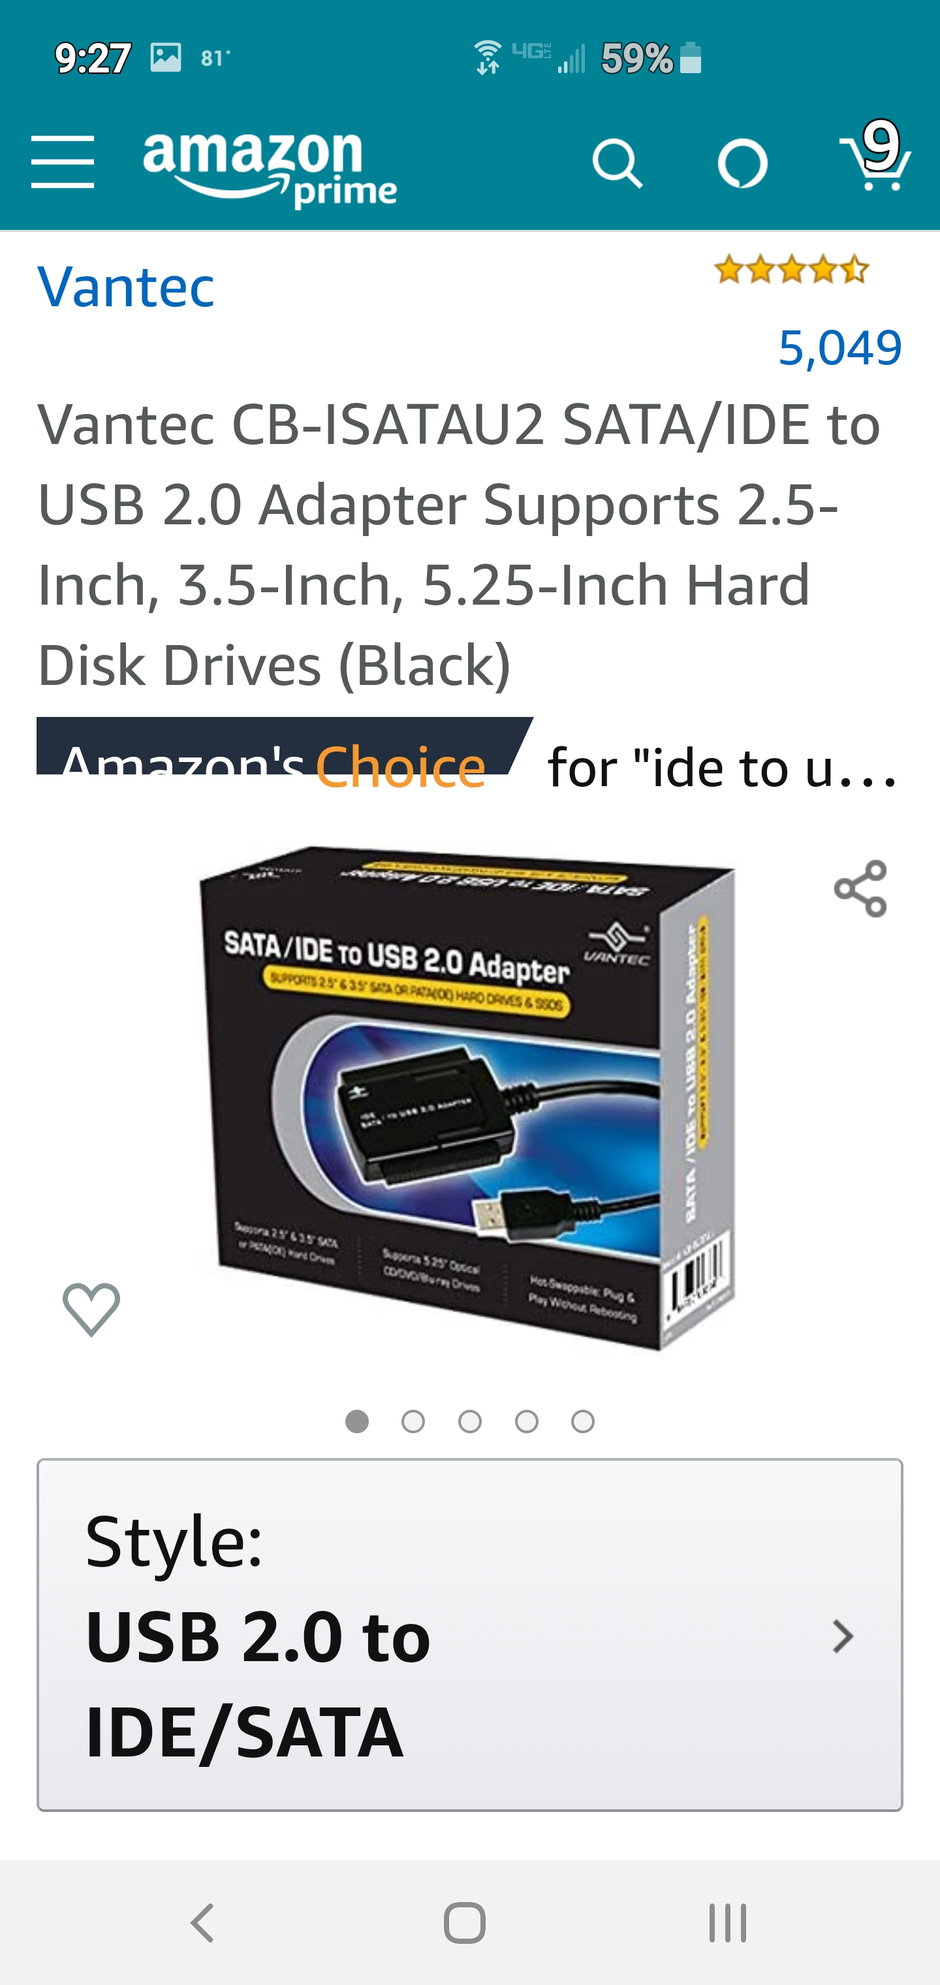
My hdd has an IDE interface. The thread I read was an older thread, and they recommended a Zheino brand ssd that is IDE but it was impossible to find. I even emailed the manufacturer and they don't make them anymore. There is a work around. And it worked for me and as of now these parts are readily available. I used two USB to IDE adapters. These connect your old IDE hdd to your pc and your new IDE ssd to your pc for the cloning process.
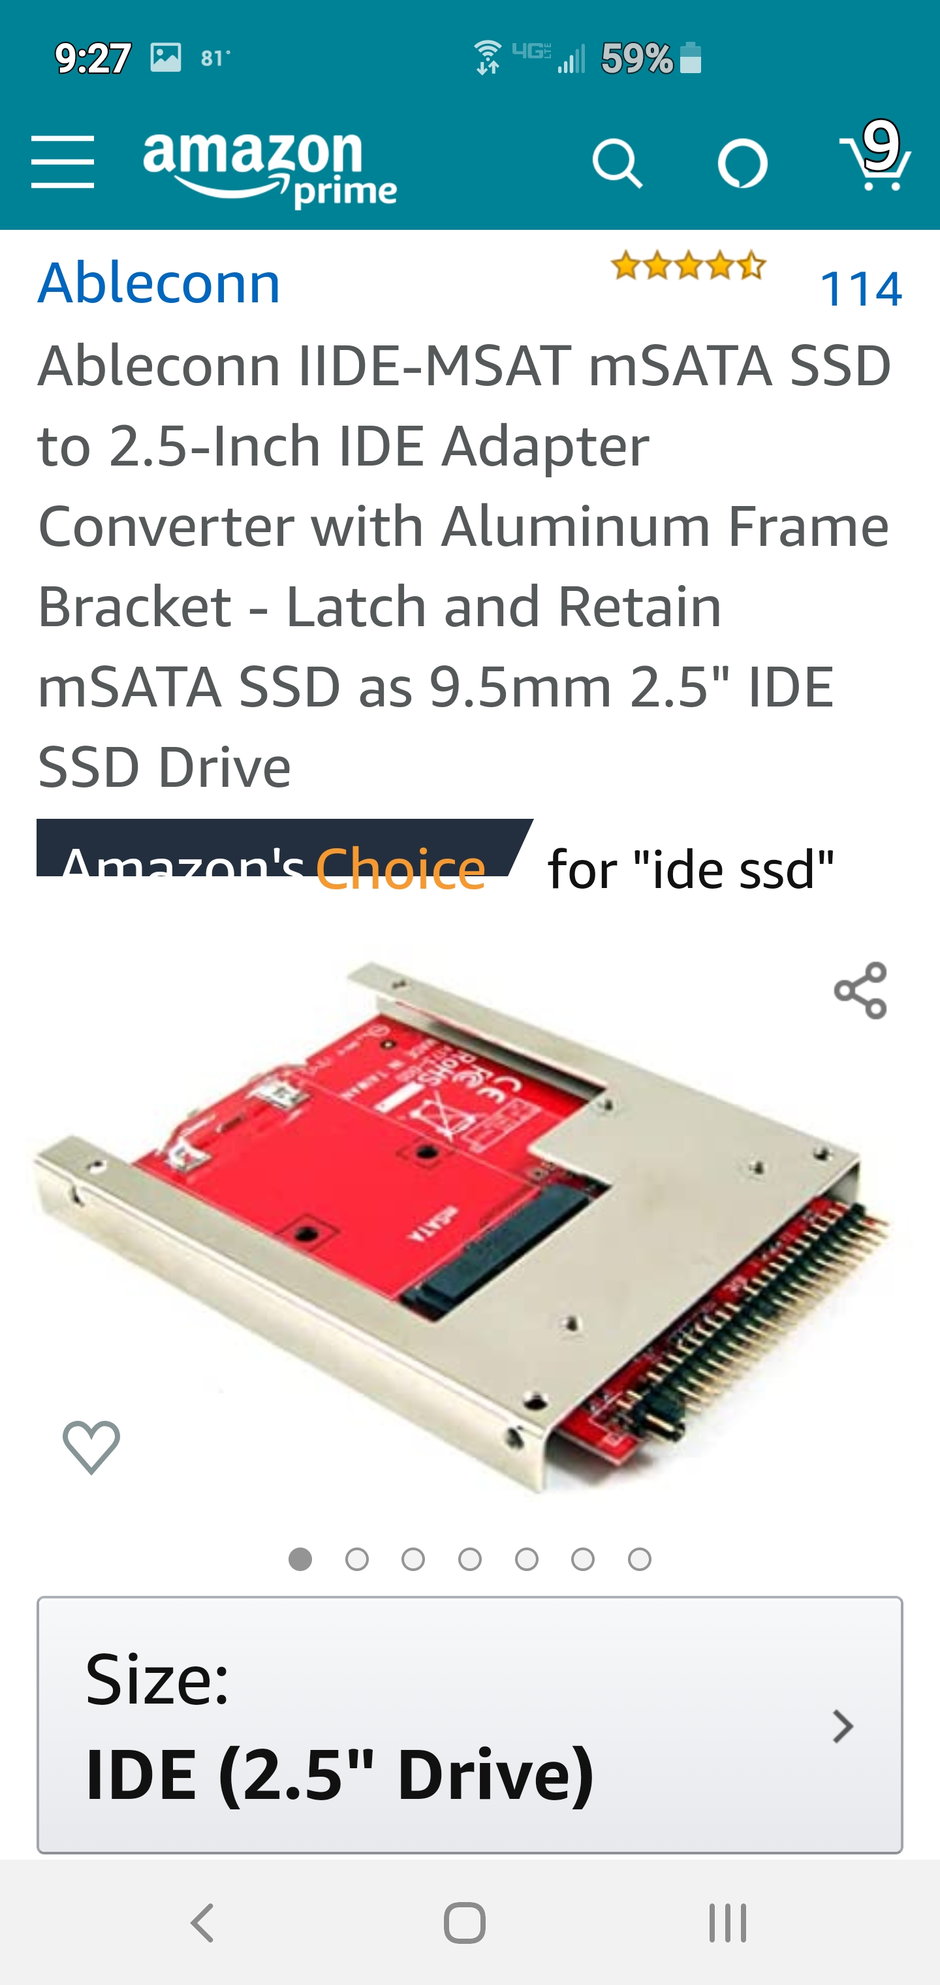
You will also need the IDE to mSATA adapter. This is a special adapter that uses the marvel chipset that our pcm will recognize.
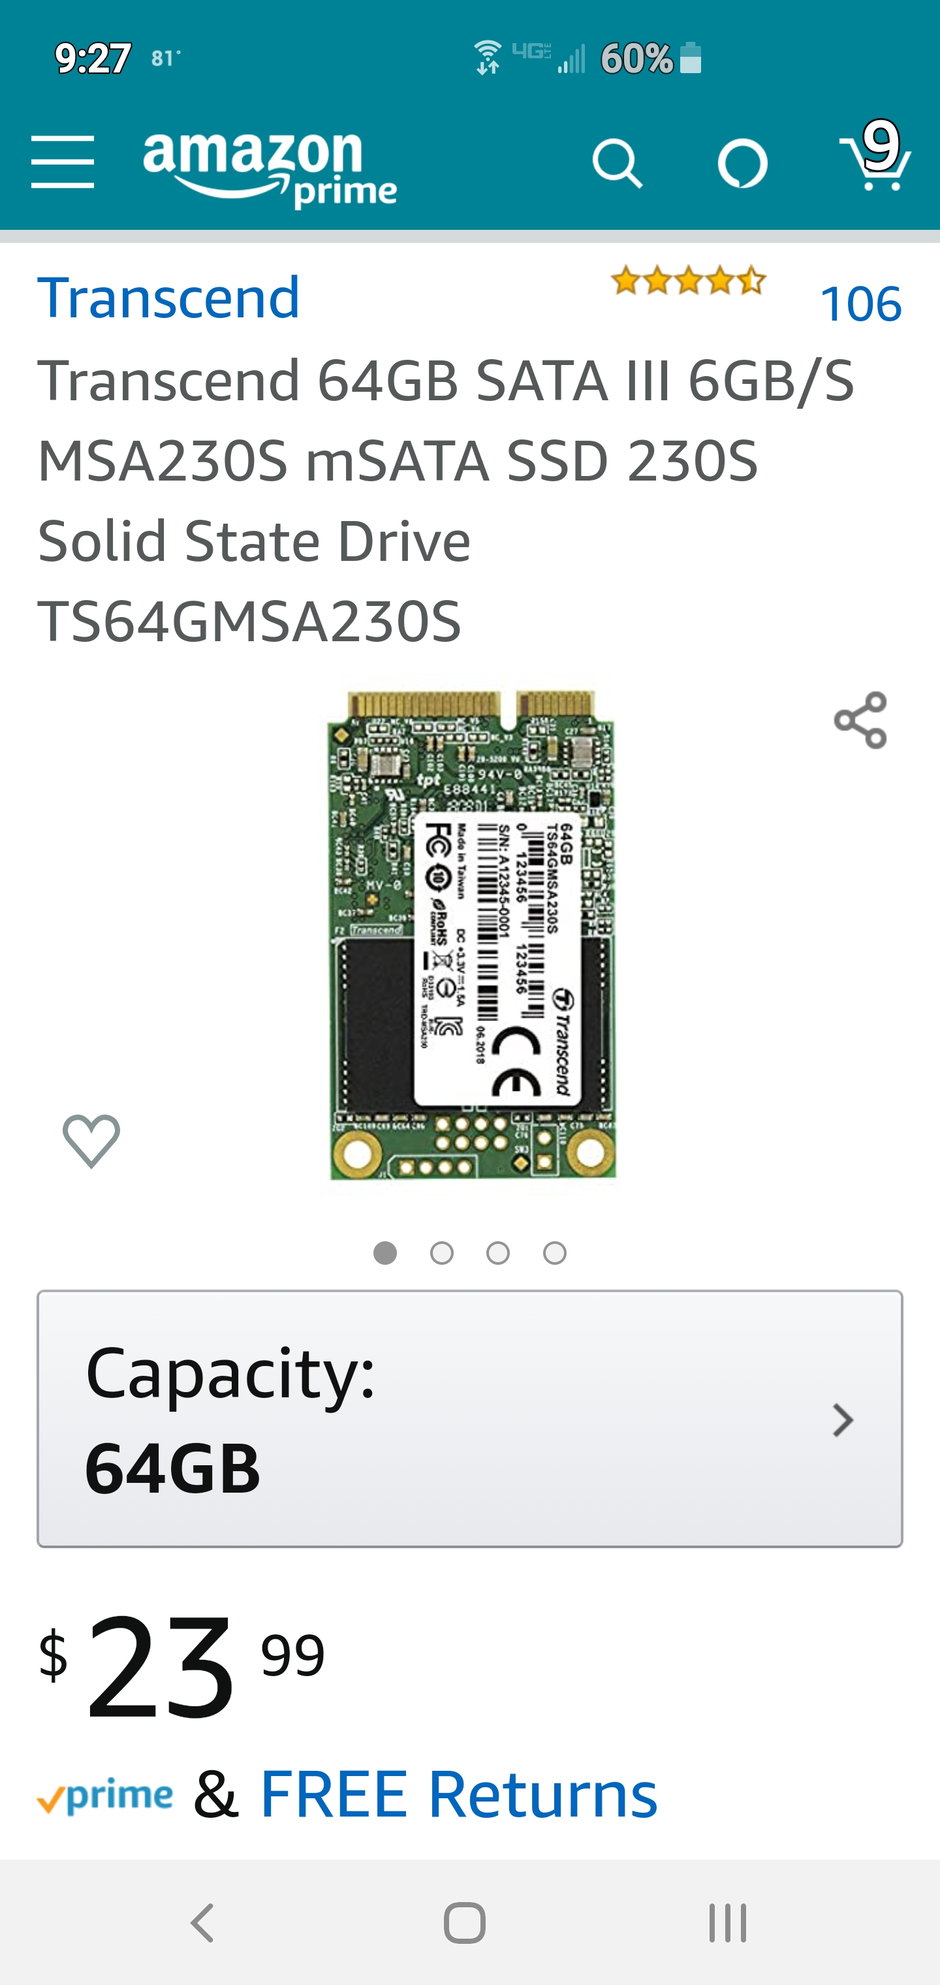
And finally, the mSATA card. My original toshiba hdd was only 40 gig. So I went with the size closest to the original. You can't go smaller but you can go larger. I chose the 64 gig because any more would be a waste. This is the mSATA I chose and it works.
So we have all of our parts and our original hdd on the bench.
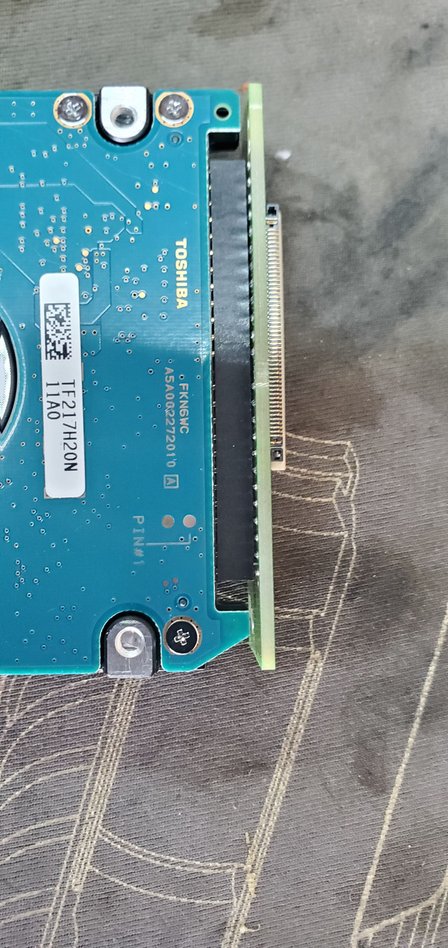
We need to do a little prep work. We have to remove the tin chassis from the old hdd. There are four screws that hold it on.
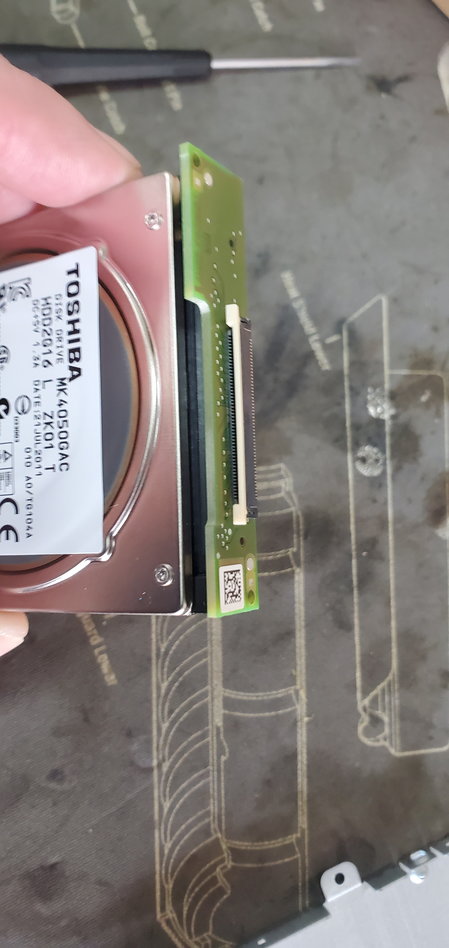
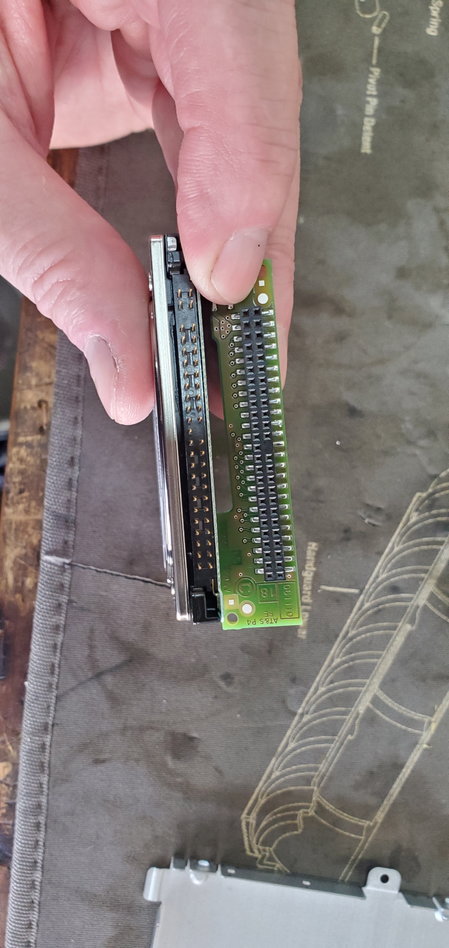
We also need to remove the green adapter that is on the top of the hdd.
This pulls straight off. I was very careful when I removed mine because I would have no idea where to find one if I broke it. I wouldn't know who to call, or how to even describe the damn thing.
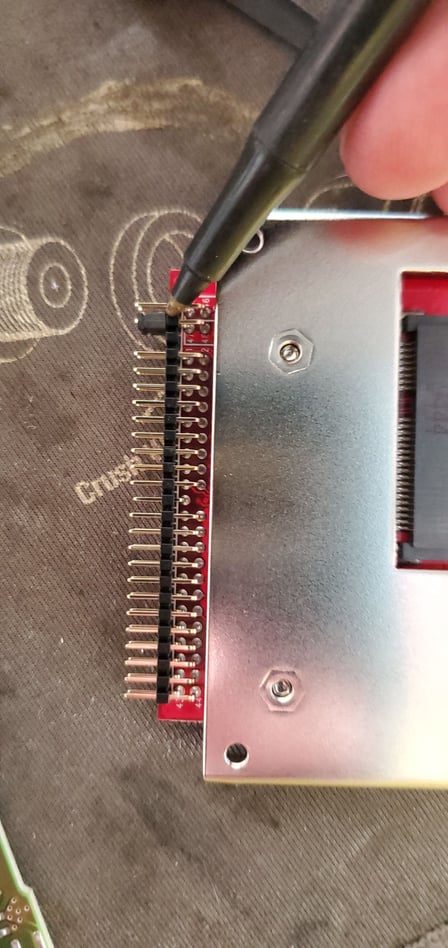
Time to build your new ssd drive. Take your ableconn adapter and snap your transcend mSATA card into the slot. If you notice on the row of pins on your new drive there is a little black plastic (master / slave) jumper across two of the pins. Pull the jumper off and throw it away. It is not used.
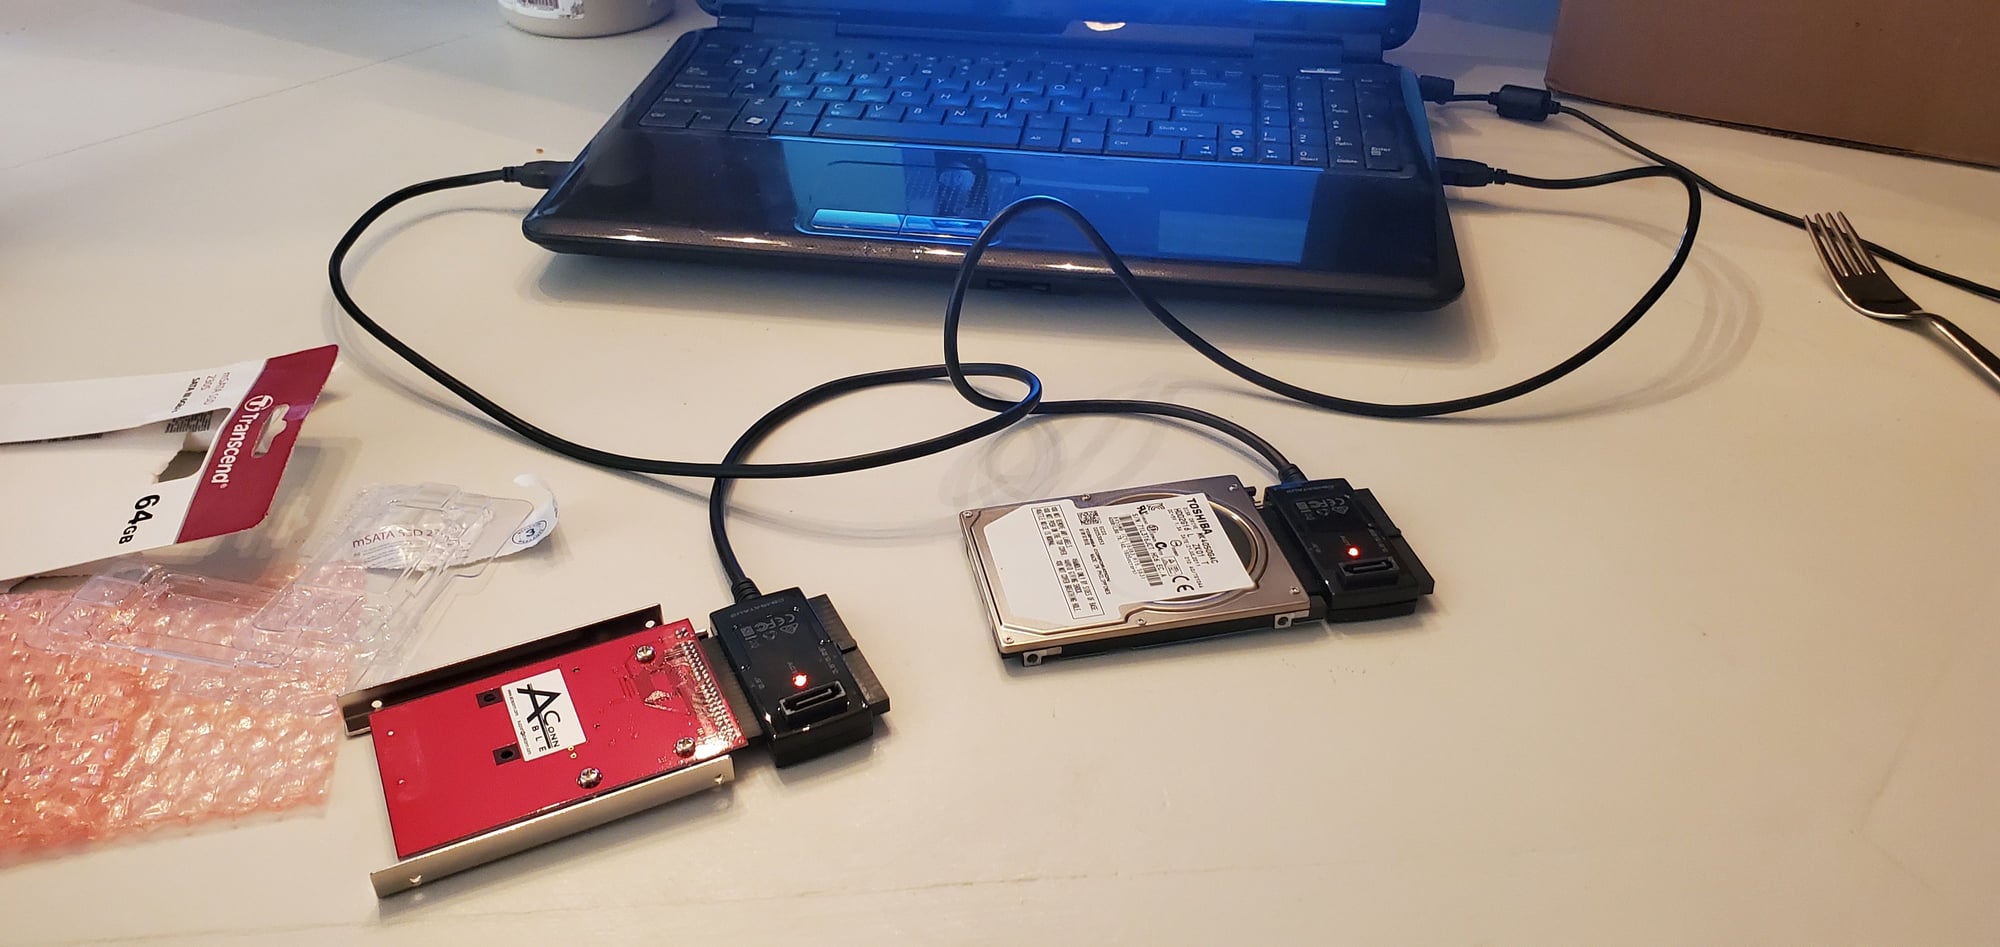
Let's do some cloning. We are gonna make a perfect one to one clone of our old hdd. We need a software program to do this. I used clone genius. It's a free software tool that is easy to use. After you install clone genius on your pc open it up. BE CAREFUL! You can really jack things up at this point. You should see your pc/laptop drive in clone genius. Take note of it and leave it alone. Now plug in your original Toshiba ide hdd into one of the USB adapters then plug it into your laptop /pc. It should show up in clone genius as toshiba QNX and have three partitions. Don't get nervous. This is as difficult as it gets. Now take the new ableconn/mSATA drive we just built and plug it into the other adapter and plug it into your pc/laptop. I forget what the new drive it is named in disk genius. But you can't mistake it. This is what your set up should look like.
In disk genius go to TOOLS / CLONE DISK / source disk will be the old toshiba drive / ok. The target drive will be the new drive we built (I forgot the name) click on it then press ok. You will get some precautionary warnings that all the data on the new drive will be erased. Double check that your source is the toshiba and the target is the new ssd and start the cloning process. And it should start cloning. Mine took about an hour. When it is finished you should see your old toshiba drive with three partitions and your new drive should have changed and now has three partitions under it. SUCCESS! You have a new cloned ssd and your old toshiba as a backup.
Now take your new drive back out to the shop to prep it to go back into the car. Remember that little green adapter? Now it is time to reinstall it on the new drive. If you notice one of the pin holes on the little green adapter is plugged. And on your new drive, one of the pins is missing, so get the orientation right. It only goes on one way. Carefully press it on. Be sure the little green adapter is seated. Install the old tin chassis to your new drive. I reused the old screws. The chassis only goes on one way. It won't go on upside down.
Go back to the car with your new drive and install the the drive into the hinge slots. Here is where it would be nice to have three arms and hands again. Push the ribbon into the green adapter. You will feel a faint click. Now while putting a little pressure on the ribbon cable push the little white chingus into place. You need to push both ends of the white chingus at the same time while putting pressure on the ribbon cable. Please make sure that the white chingus is fully seated home. It presses down on the ribbon cable to make contact with the adapter as well as locking the ribbon cable into place. If both ends of the white chingus isn't fully seated, it won't make a good connection. There is a reason I can pull the pcm out in five minutes now. Because I was not paying attention to the details.
Gently lower the drive into the top of the pcm. I had to press on the chassis a little while putting in the two screws. Remember, be careful, those holes are pretty big on the back of the pcm and I don't know what it would take to fish out one of the screws. Fortunately I didn't have to find out.
When you get the drive installed, slide the pcm back home and put everything back together.
Now that your dash is back together it's time for the smoke test. Turn on the key and hit nav or map. I got a loading maps message for about 10 seconds. Then the map popped up. That was the last time I got the message. Now every time I turn on the key my map pops up immediately. Job done.
Last edited by twodollardoug; 08-01-2020 at 04:29 PM.
I hope you guys find this useful. If you see any tweaks to the DIY I need to make let me know.
Also, if we have enough people do this upgrade maybe we can pinpoint the year our cars went from IDE to SATA. So post up what kind of drive your car has and what year it is.
It would be nice to have the hard drive image posted somewhere on the internet in case the drives start dying. Anonymously, of course.
I'm not sure that would work. Seems like I read somewhere that it is tied to the vin. That is one reason why I wanted to get it cloned BEFORE I started having problems. Now I have the original as a backup. Since the sdd has no moving parts my hope is that it will last the life of the car. Should it fail before its time, I can just pop out the mSATA card and reclone a new one. The risk being the old drive will spin up one more time. I have no reason to believe it won't. Another option is to save an ISO image and store it somewhere.
I don't know how to save an ISO image. If someone wants to post up how to do it with disk genius I will add it to the DIY. This is our DIY not mine. All I have to do is hit the edit button.
Great write up, thanks! Curious how the PCM acted when you booted it up without the SSD ribbon seated correctly. Did everything work except the map? Curious what the fix would be if the HD dies on you before you could make a copy...
Great write up, thanks! Curious how the PCM acted when you booted it up without the SSD ribbon seated correctly. Did everything work except the map? Curious what the fix would be if the HD dies on you before you could make a copy...
To make a long story short. I pulled my original hdd and sent it to a guy back east to clone it for me. While my hdd was in transit across the country country I drove around without the hdd for about 3 weeks. I lost my map's, my Blu tooth function and my arm rest aux port. Maybe more, but those were the functions I noticed. Anyway, for some reason he didn't have the equipment to clone it and sent it back to me. I almost gave up on the project but with more research, persistence, and help from other members around the globe I was able to do it myself. From the other threads and the BMW forum, when the hdd starts to fail and or the files get corrupted, that is when you get the reboot every two minutes. And from what I understand, that is a frustrating mess... I the it renders the pcm useless. Fortunately I haven't experienced that. And for $100 worth of parts I think it is cheap insurance. A new pcm is like $3600.
... when the hdd starts to fail and or the files get corrupted, that is when you get the reboot every two minutes. And from what I understand, that is a frustrating mess... I the it renders the pcm useless. Fortunately I haven't experienced that. And for $100 worth of parts I think it is cheap insurance. A new pcm is like $3600.
I don't know how common they are in our car's but in computers it's not uncommon. And our computers at home aren't subjected to such harsh environments. I just look at it like cheap insurance. We love our car and plan on keeping it for a while. AND it's 8 years old. I have no idea what the lifespan of the hdd is.
Thanks for the writeup and pics. I've replaced HDDs in laptops so your guidance gives me the confidence to tackle this myself given that my PCM will be coming up on 10yrs soon.
Thanks for the writeup and pics. I've replaced HDDs in laptops so your guidance gives me the confidence to tackle this myself given that my PCM will be coming up on 10yrs soon.
Good, I hope it will give you the nudge. It's really just nuts and bolts but on a different scale. I have built all of our home pc's and our home server. And I was a little appreciative about doing it. So much so that I shipped my hdd 3000 miles and pay someone to clone it for me. And when he couldn't do it I was super bummed. Then I was gonna ship it to another rennlister in Australia to clone it but we couldn't find the zheino drive so I was back to square one...
There is a huge thread in the audio video section (I think) about this very subject but it was way over my head. I think all porsche cars with PCMs have hdd in them. That thread was more about repairing corrupted files and resurrecting dead PCMs and hdds and cloning. So I figured now is the right time to make the change. Before I have problems. Because if you have problems with your pcm it's to late. You will just clone your problems to the new drive. This won't fix anything. I wanted to be proactive.
Doug,
Sounds like you could have a little cottage business if you clone your drive again and sell a cloning service to the rest of us so that its just plug and play (hint hint)
Sounds like you could have a little cottage business if you clone your drive again and sell a cloning service to the rest of us so that its just plug and play (hint hint)

 07-31-2020, 11:04 PM