When you click on links to various merchants on this site and make a purchase, this can result in this site earning a commission. Affiliate programs and affiliations include, but are not limited to, the eBay Partner Network.
I was starting to feel very uneasy for you whilst reading through this thread, just from the incredible length of time it has taken and the apparent disregard for the previously pristine interior....... I am feeling much better for you now! It's starting to look the business, can't wait to see the final product. The new rims will really set it off.
I hope they are reasonable with regard to the invoice.....that is still a worry.
Good luck and keep the faith!
Thank you for the well wishes. Invoice is actually coming in right on budget - phew !
This looks amazing, love seeing build threads for the Cayenne. I can't wait to see the finished product. That paint is going to look amazing in the sun!
I was sort of aghast at how the shop was treating the interior and other parts of your Cayenne. I could see layers of body-dust on the engine and interior. That stuff doesn't come out easily, and it so easily could have been avoided with some correct masking off of openings. Don't let them clean it by blowing it with an air-gun. Bring in a good high power vacuum with a tool for crevices and use that before an air-gun gets anywhere near the car. The air-gun is going to blow stuff into cracks and openings that you'll never get it out of.
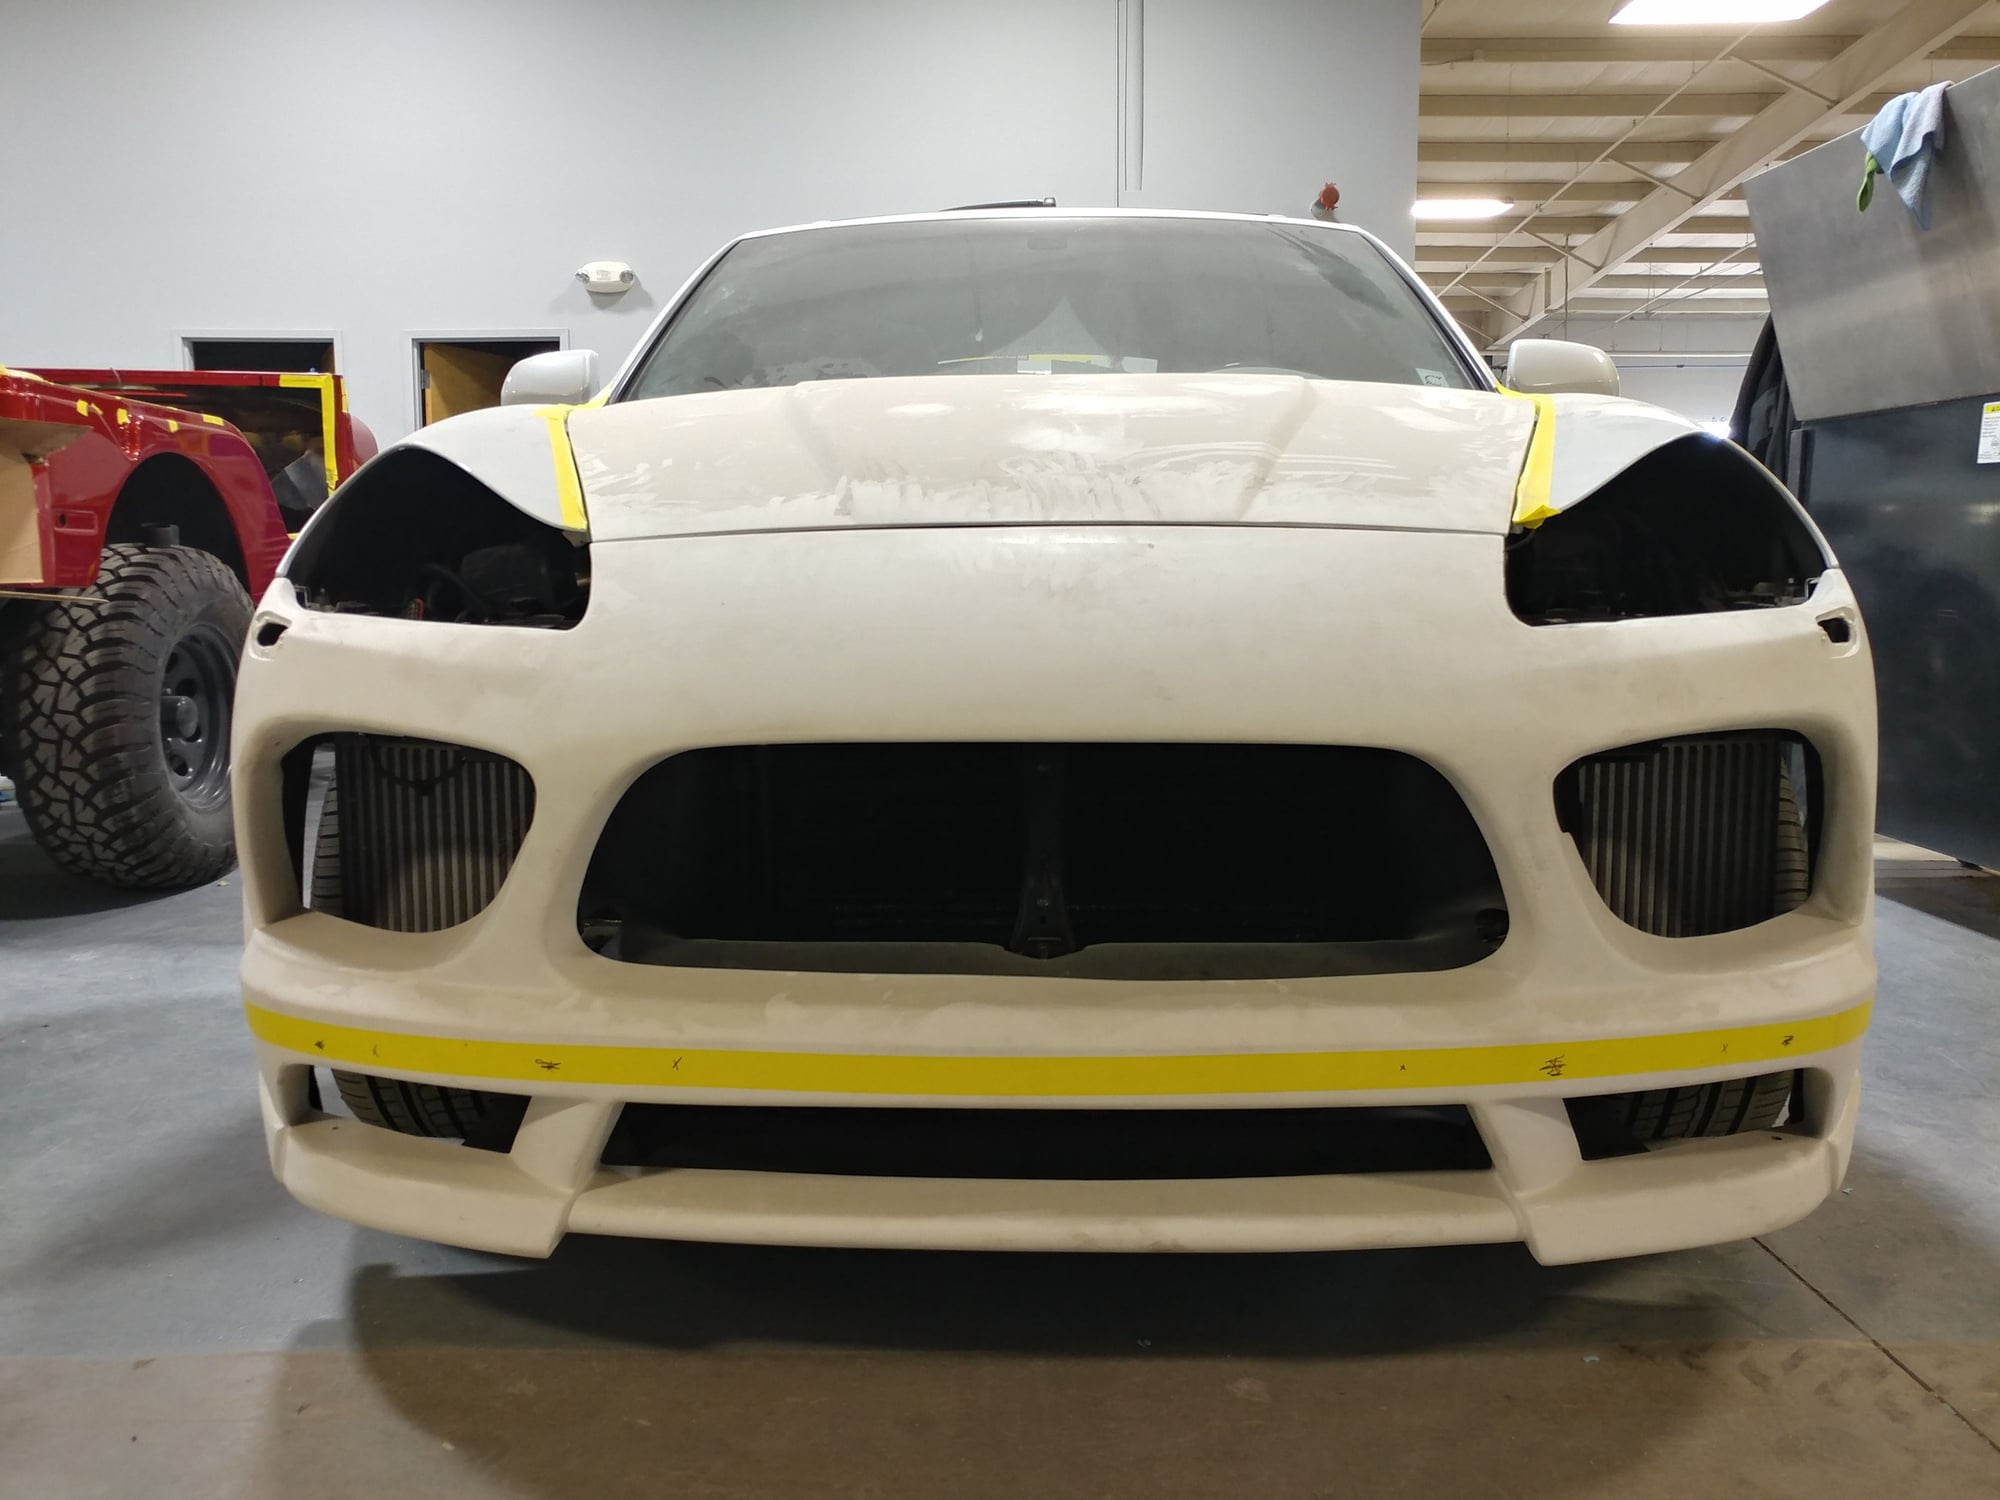
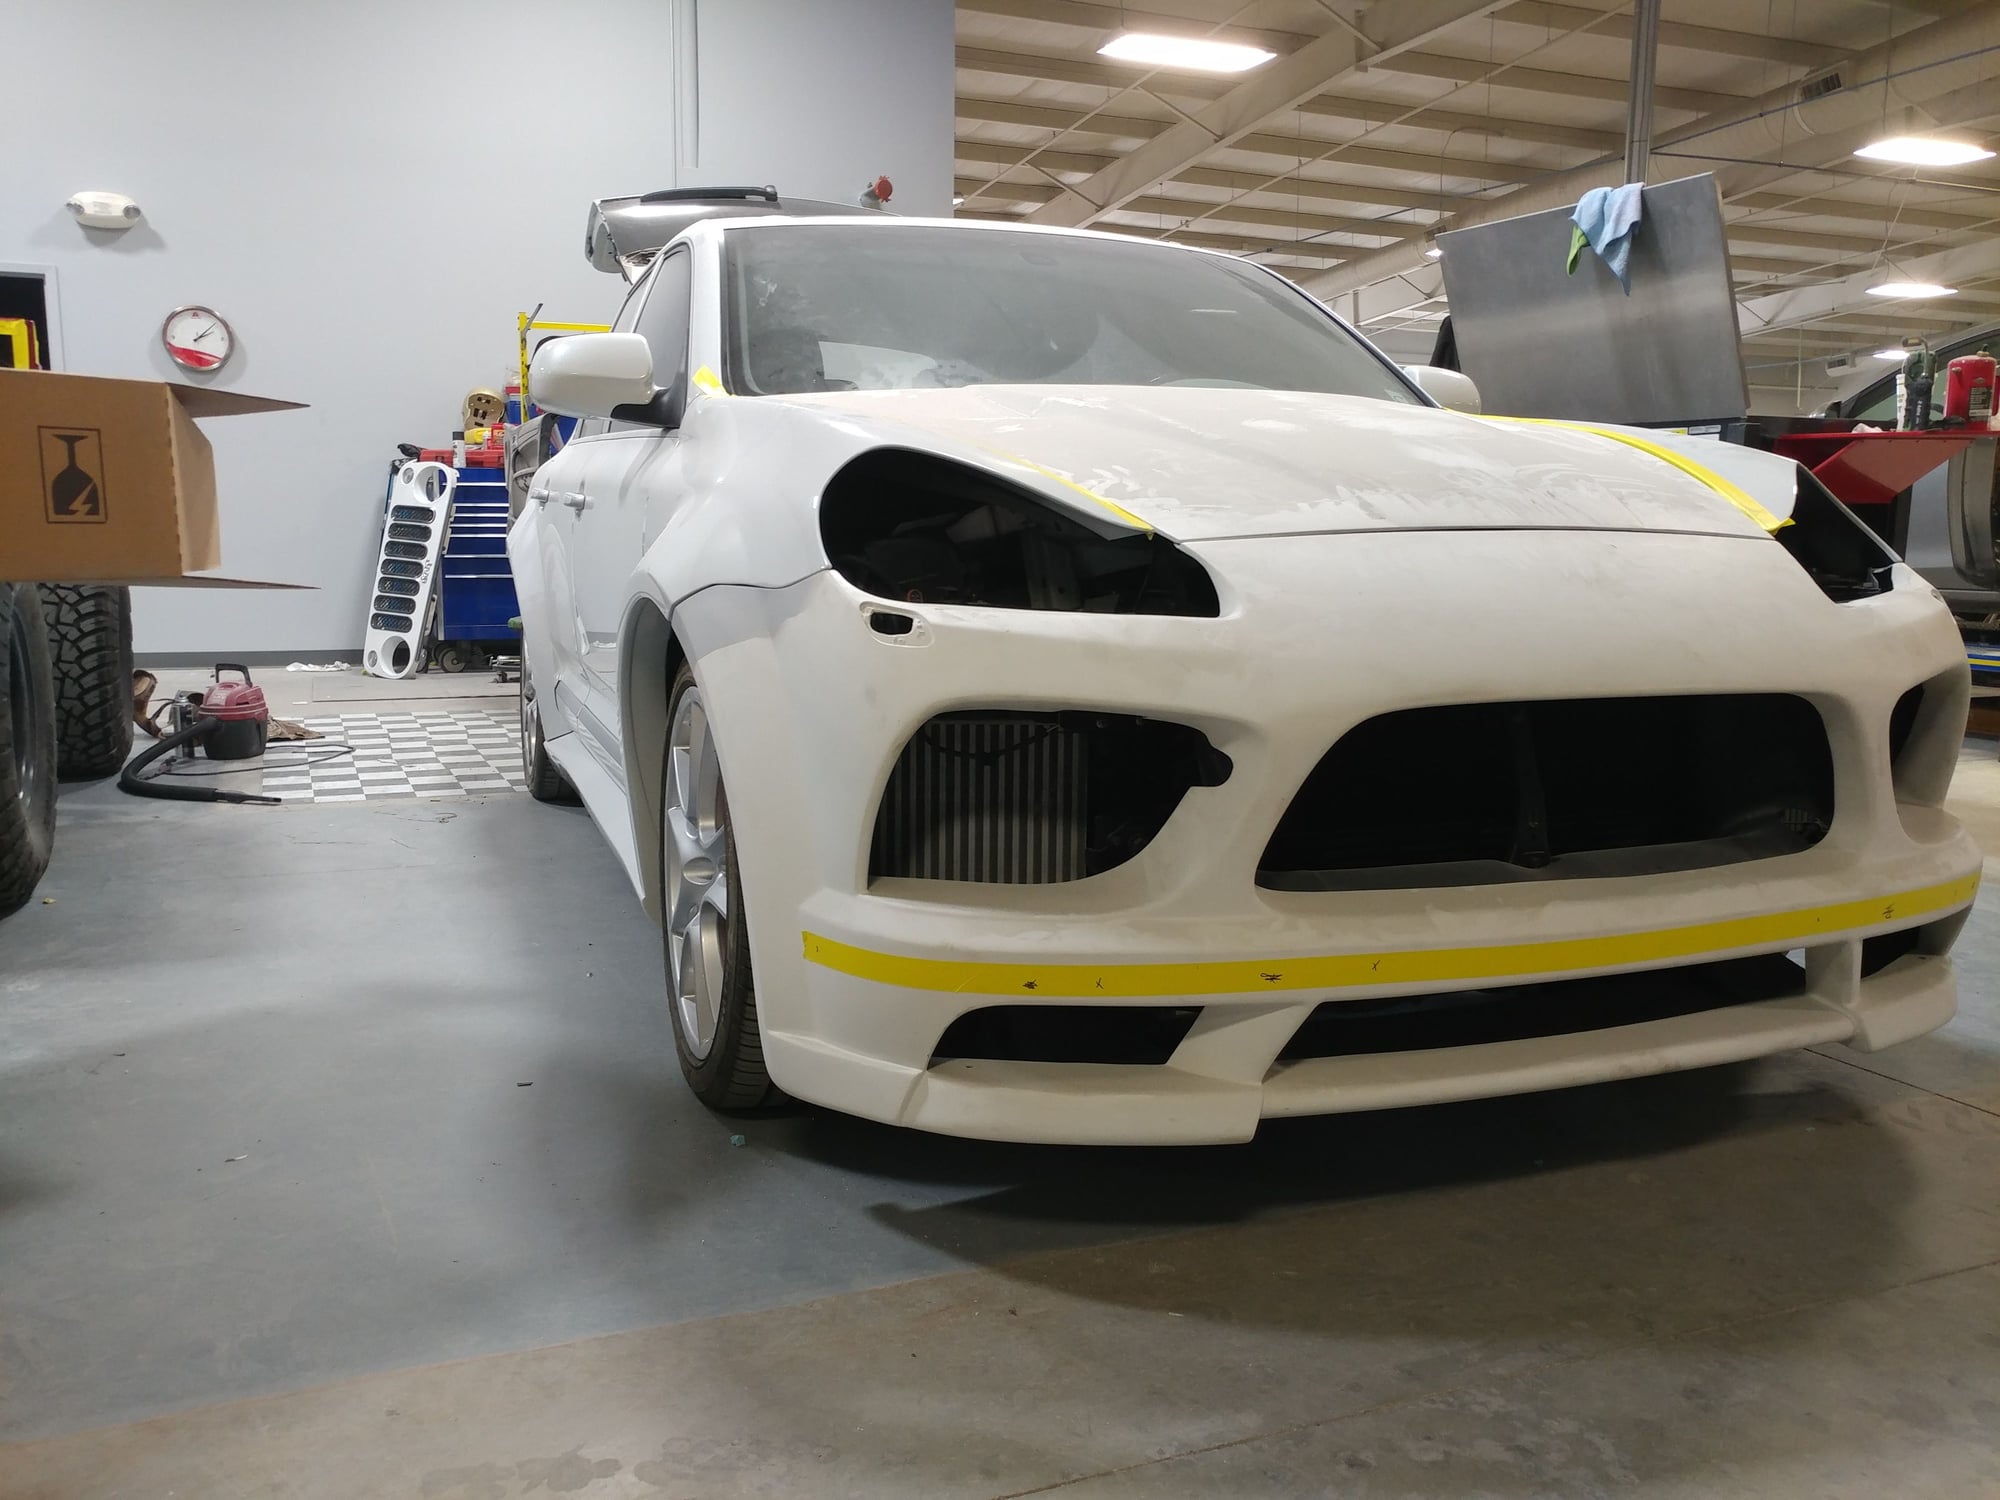
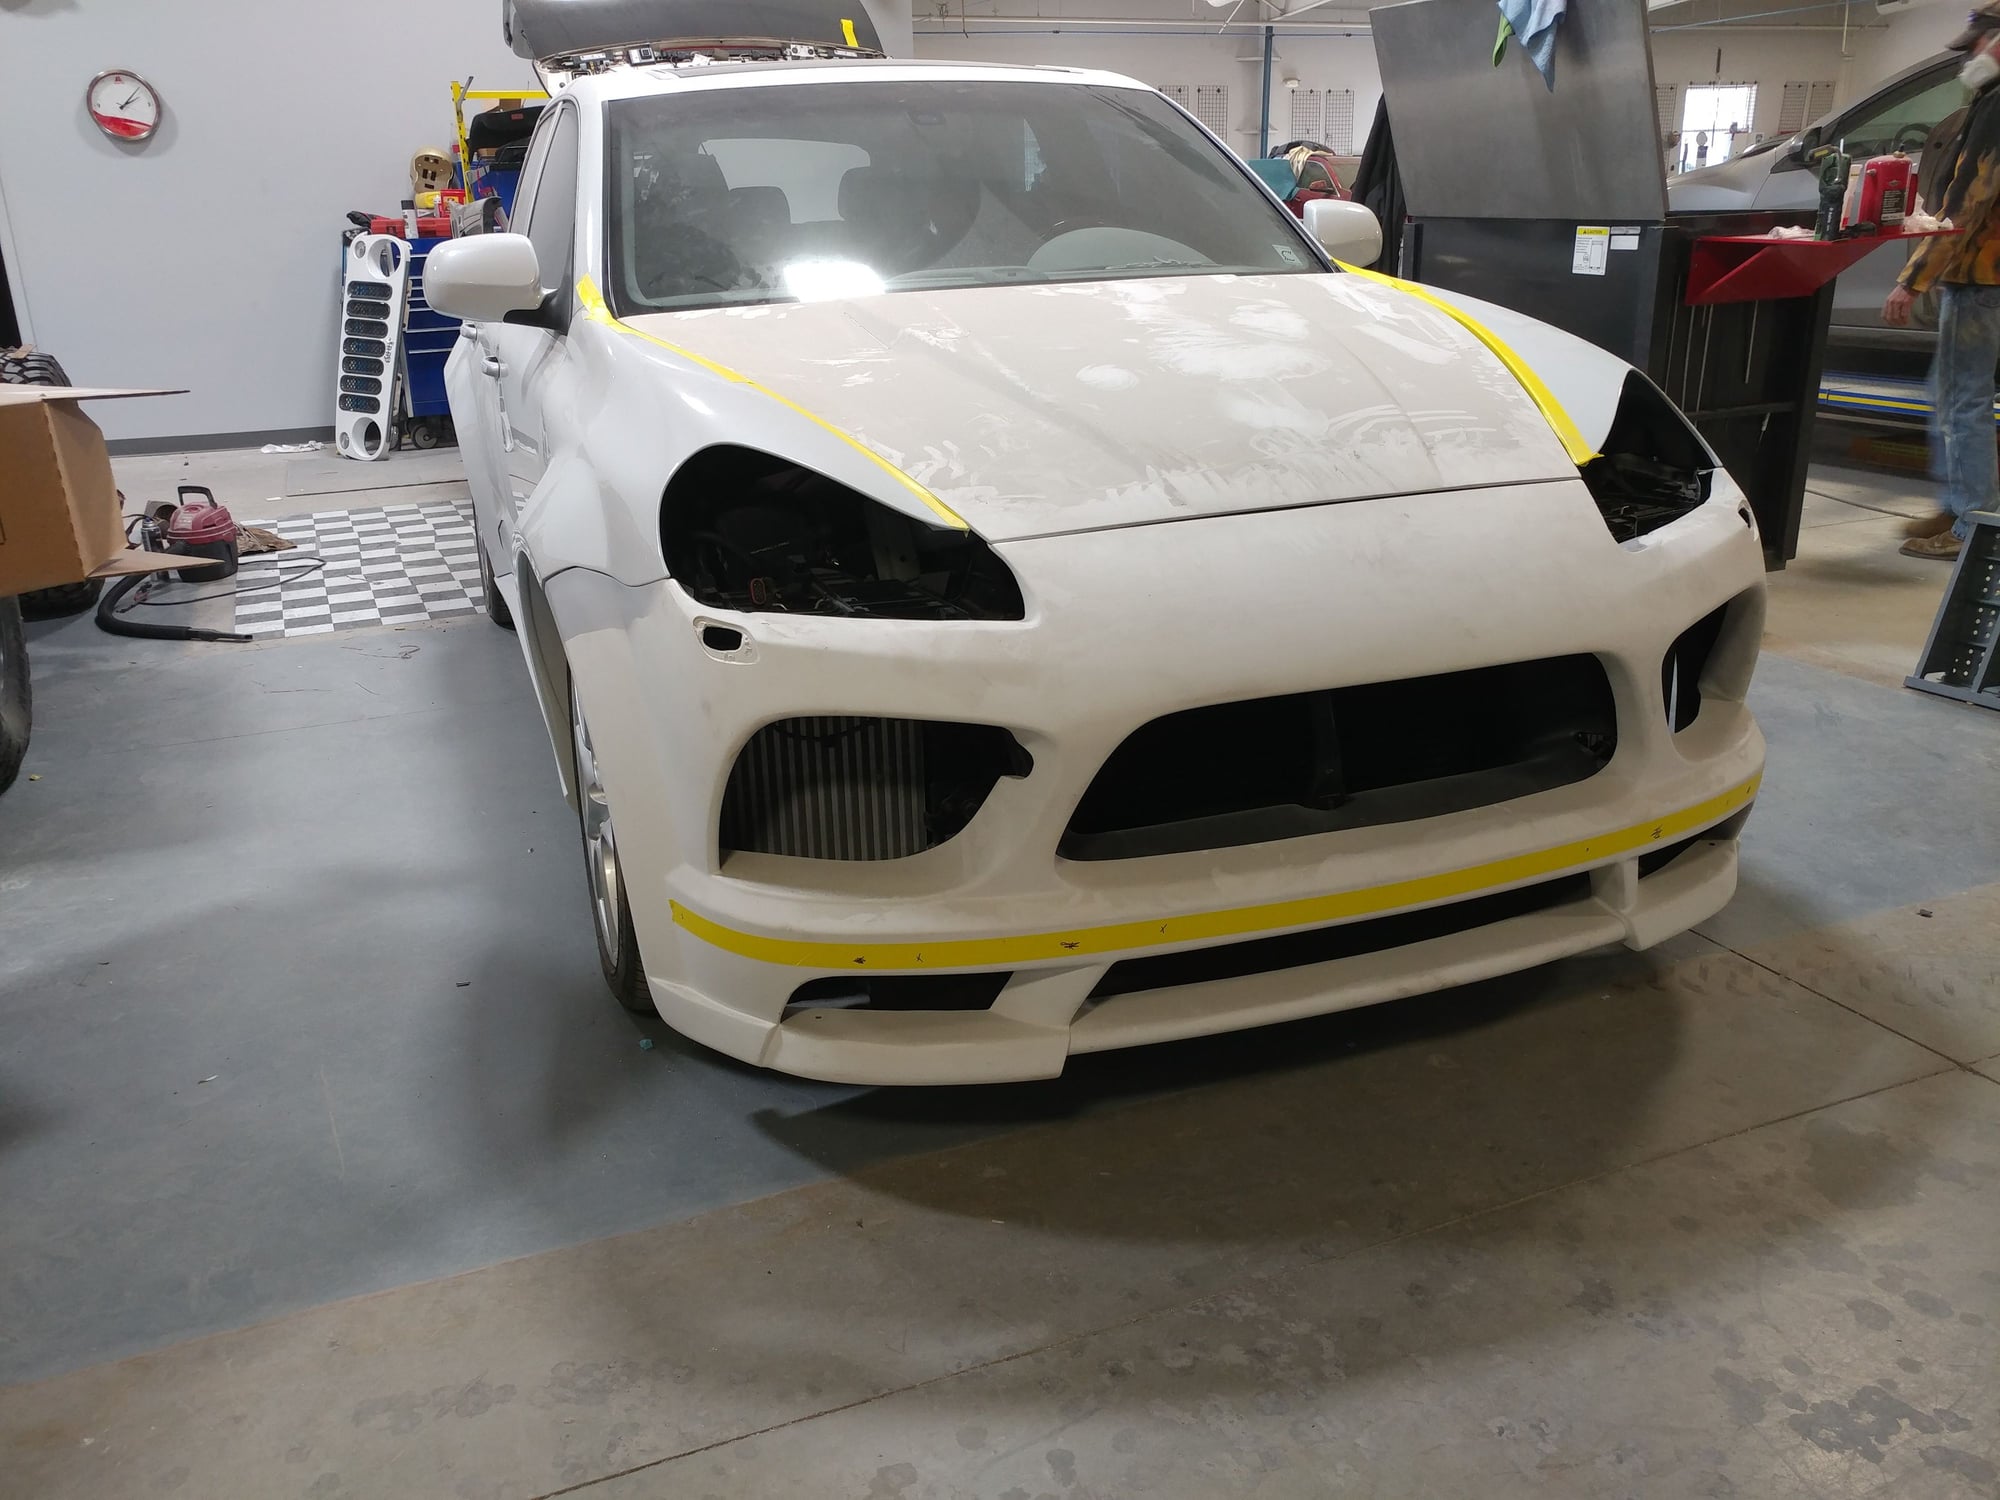
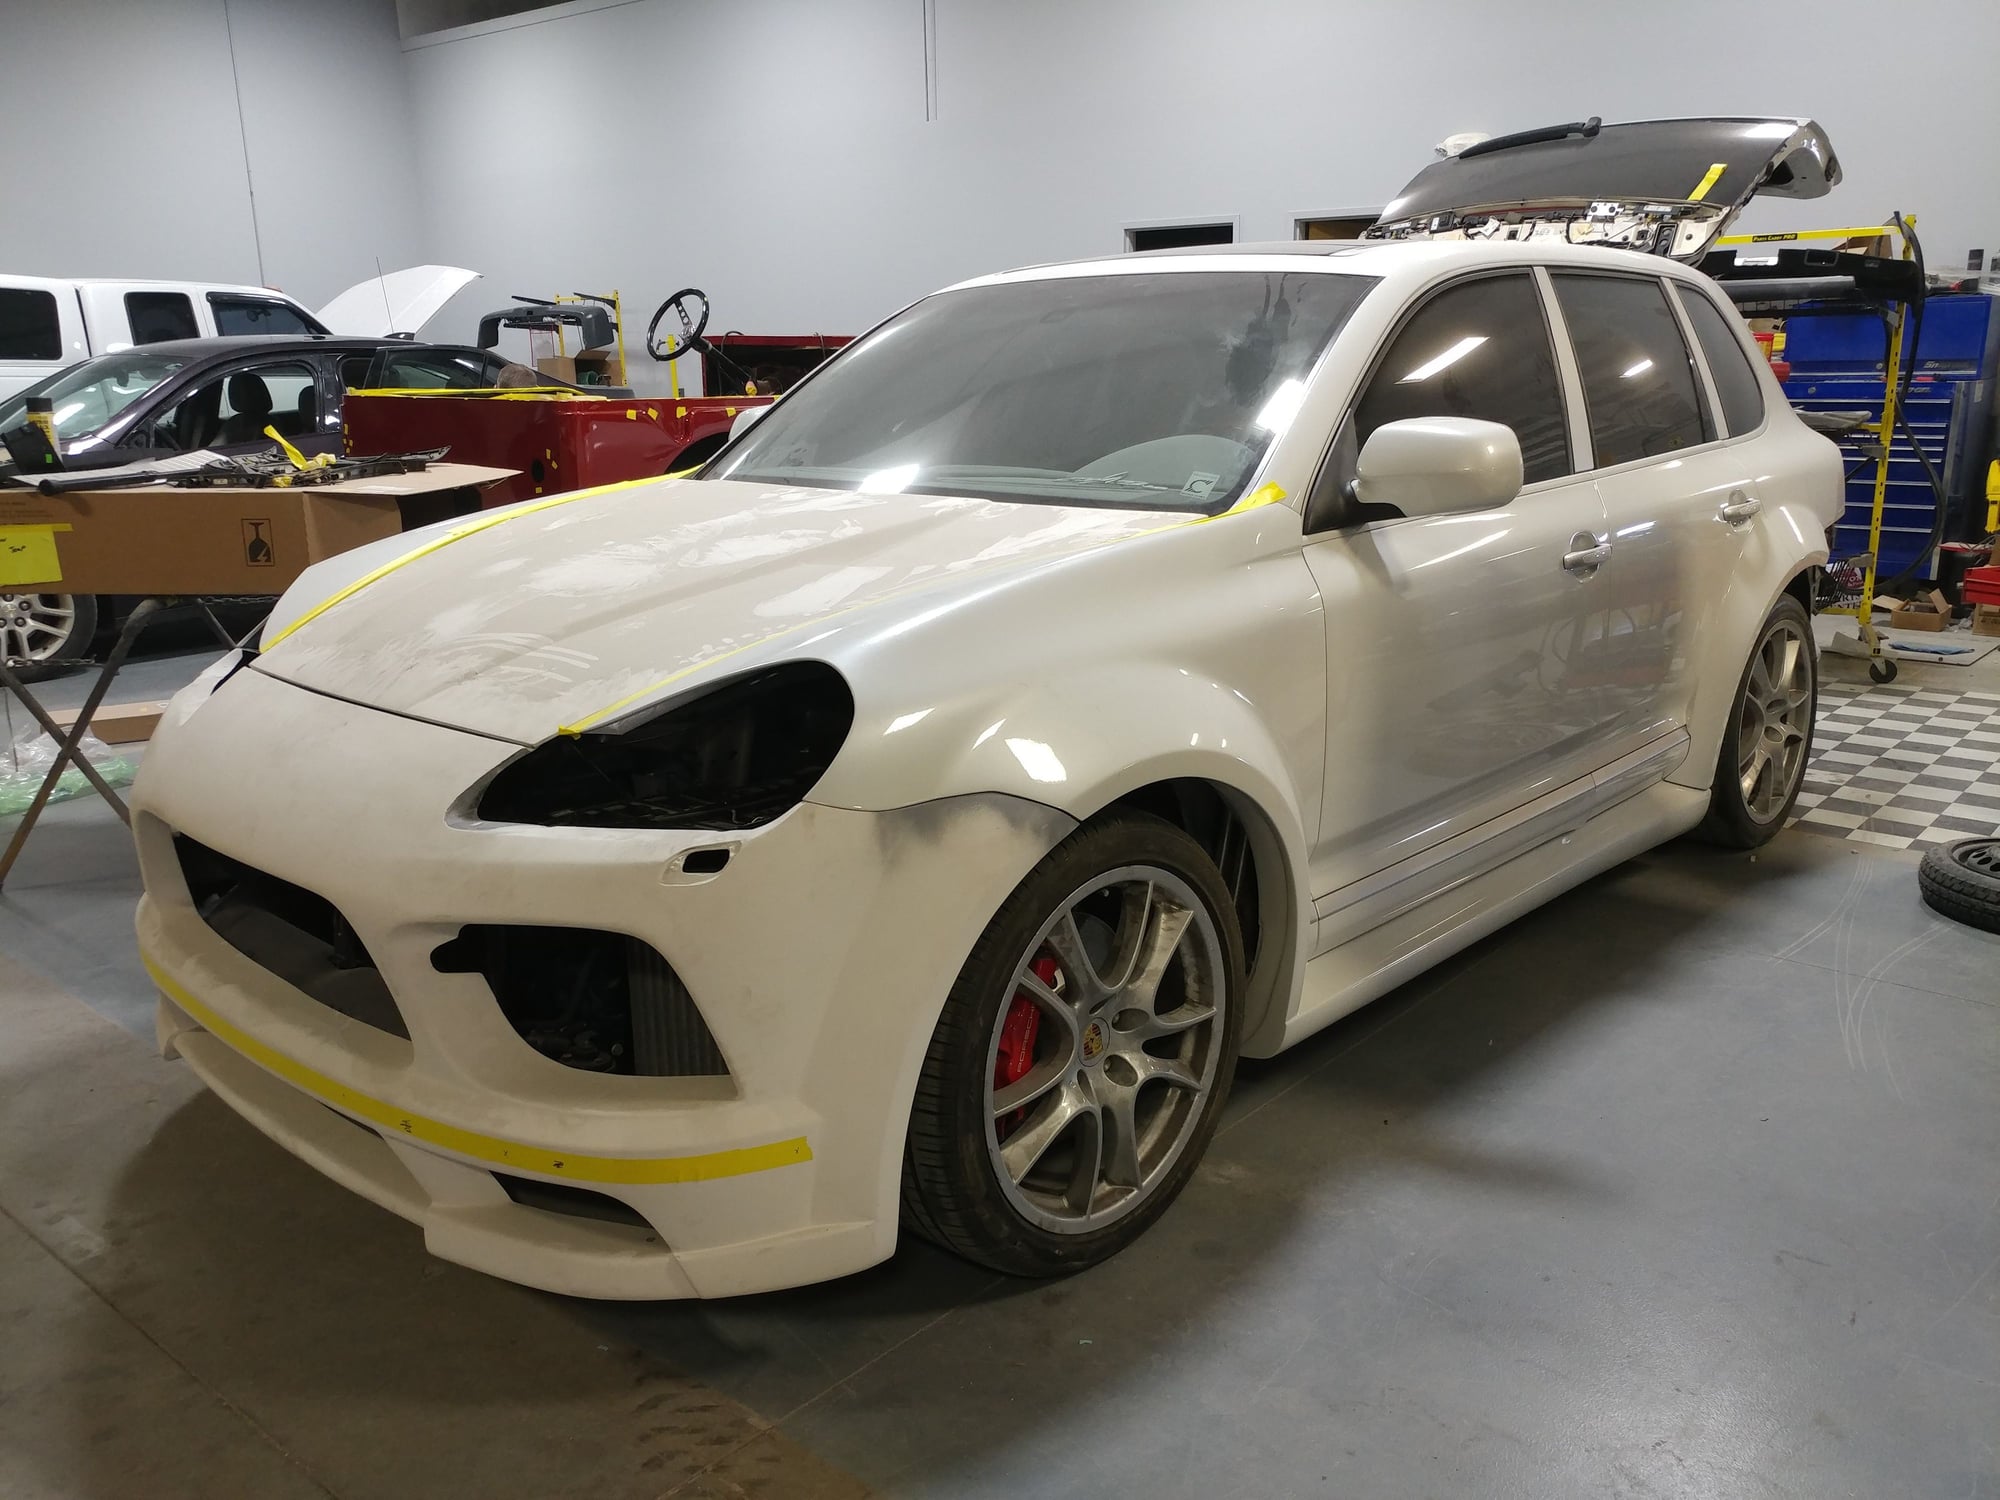
The rest is looking very nice now that it's one color. Will be really interested to see it completed.
I was sort of aghast at how the shop was treating the interior and other parts of your Cayenne. I could see layers of body-dust on the engine and interior. That stuff doesn't come out easily, and it so easily could have been avoided with some correct masking off of openings. Don't let them clean it by blowing it with an air-gun. Bring in a good high power vacuum with a tool for crevices and use that before an air-gun gets anywhere near the car. The air-gun is going to blow stuff into cracks and openings that you'll never get it out of.
The rest is looking very nice now that it's one color. Will be really interested to see it completed.
That's a good idea. Thanks Don. They'll detail it before giving it back to us, but I'm sure my wife and I will then go through it again our way before we put it back into service.
Even once we get it back, I still have quite a bit to do on it before it's completed. I have to:
play around with the spacer widths and the new wheels to figure out the right look and stance at the front and back
test fit the PCCB rotors and calipers then send off the measurements to have the radial to axial mounting adapters fabricated, before I can actually install them,
going to have to clearbra certain areas of the car, like the fronts of the rear flares, rocker panels, maybe the front bumper to prevent it from being blasted with road debris
have to put on the roof cross bars and then determine where to drill the mounting holes into the modified Yakima Skybox bottom so the new mounting system works where I can use the Pano roof even with it installed
it's been out of commission for so long, I'm probably going to renew all of the fluids following the "All the Pigs Fluids" thread using the Driven lubricants I've purchased
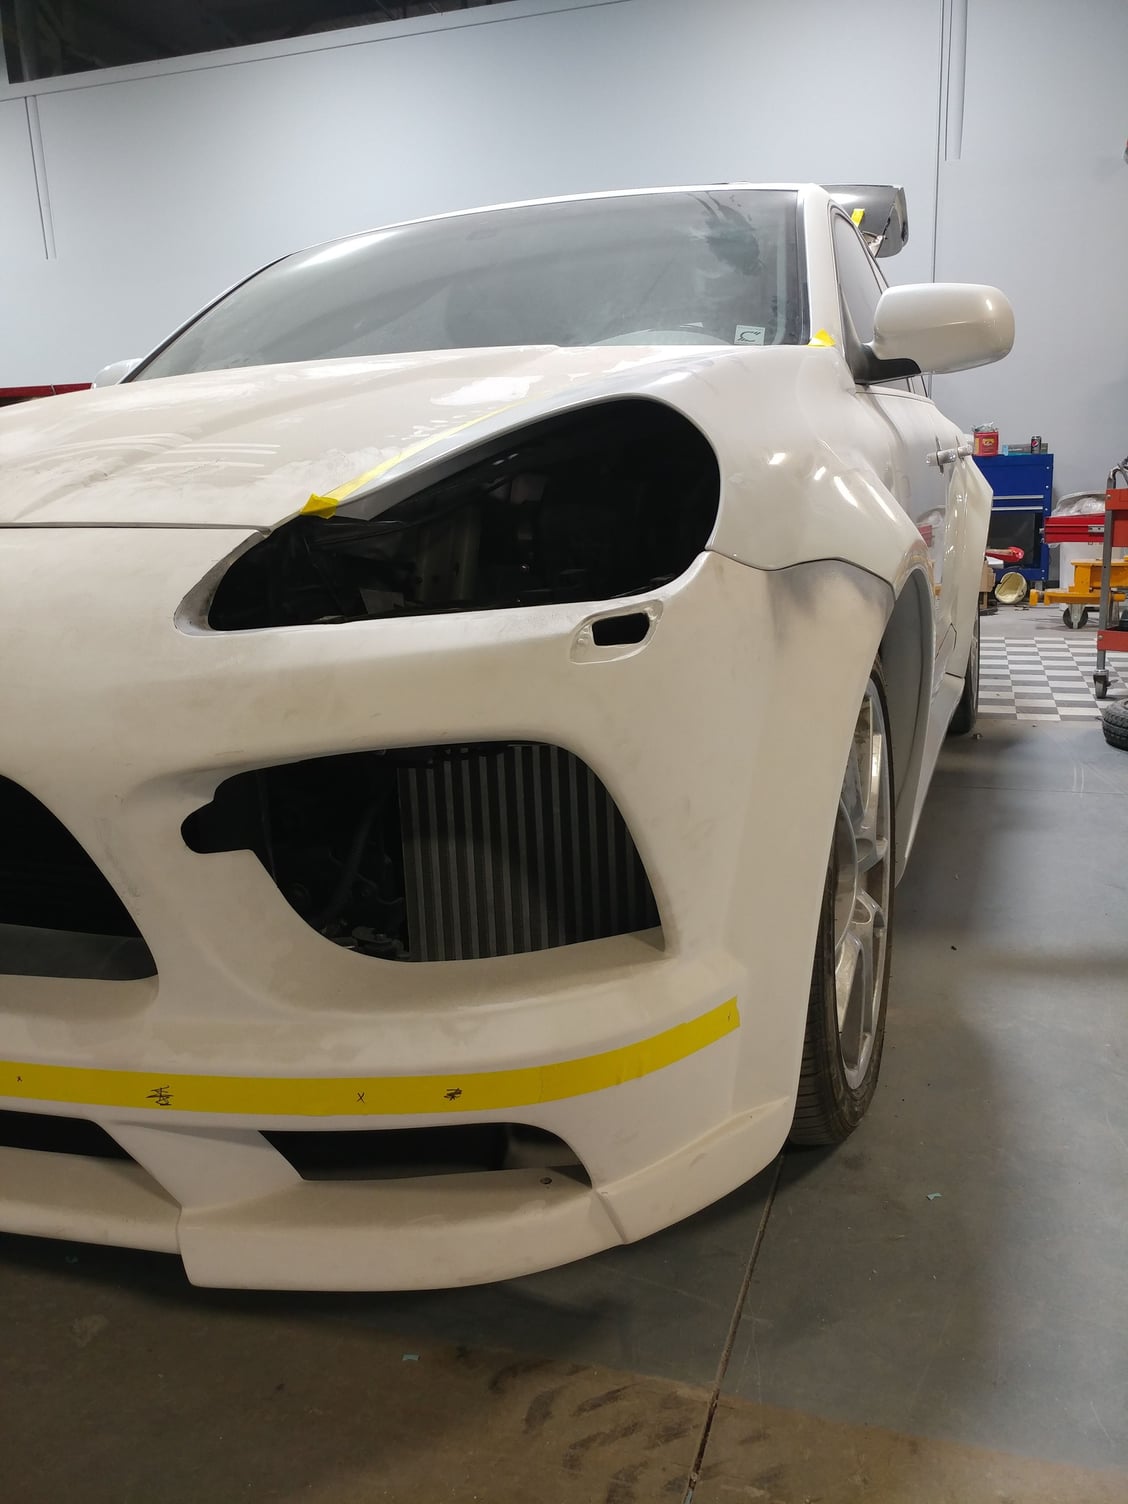
Those rims really do look lost in the wheelwells now. Spacers and new rims? I'm always a bit leary of spacers since they move the center of force out from the center of the bearings to an offset position, putting more stress on the bearings.
Those rims really do look lost in the wheelwells now. Spacers and new rims? I'm always a bit leary of spacers since they move the center of force out from the center of the bearings to an offset position, putting more stress on the bearings.
Yup, 22x12s with 315/30 tires and spacers. I bought the wheels with a conservative 50 offset (same as stock) so I could fine tune the front and rear stance. I have 4 pairs of Adaptec Speedware bolt on spacers (25, 30, 35, & 40mm) with the proper 71.6mm hub-centric flange and they're the type that bolt to the wheel carrier and then the wheels bolt to the spacers. For these widths, it's better to do it this way than with sandwich spacers that have really long bolts, as it spreads the load around 10 points of the hub instead of 5 and eliminates the need for really long lug bolts that could fracture. The spacers come with special conical seat small head bolts that fit into the pockets on the back side of the wheel mounting surface. The wheels will bolt to the spacers with World Motorsports conical seat Ti lug bolts since these wheels use tapered seats instead of the normal Porsche ball or radius seats. I have two different lengths of the lug bolts to maximize thread engagement with the spacers depending on which thicknesses of spacers end up being used. I think I can use the longer set with all of them except the 25mm pair.
With a 12" wide wheel that has the same offset as the stock 10", it will be 1" further in and 1" further out prior to being spaced, so the 25mm spacer is the minimum to create stock clearance to the inside and that will move the outside out 2" from where the OEM wheels are sitting in these photos. Since the fronts have to articulate, I'm not sure how far I'll be able to push them before I have an inner fender liner clearance issue, but will address that by molding or reshaping the fender liner if need be. The rears should be able to push further out than the fronts since they run straight, and suspension travel increases negative camber which will tuck them in at the top as the suspension compresses or lower ride heights occur (Sport, loading).
At some point down the road I may decide to have a set of custom forged wheels (probably Forgelines) made with the exact offsets I figure out, eliminating the wheel spacers, but we'll see how it goes.
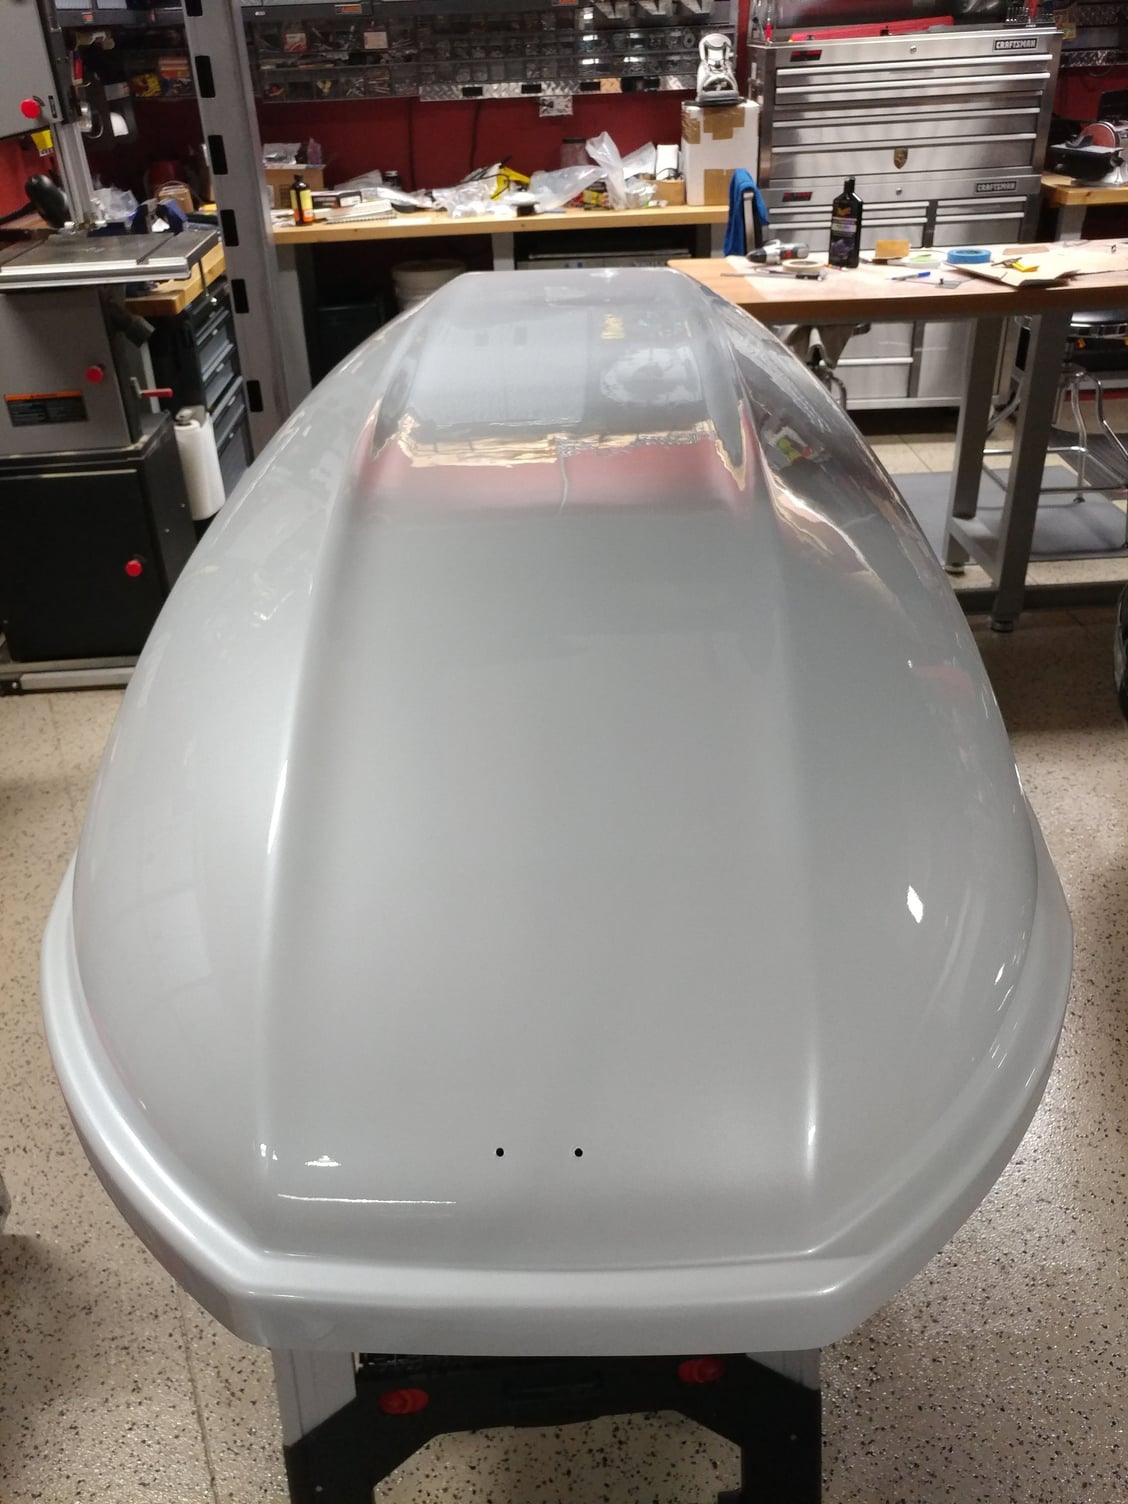
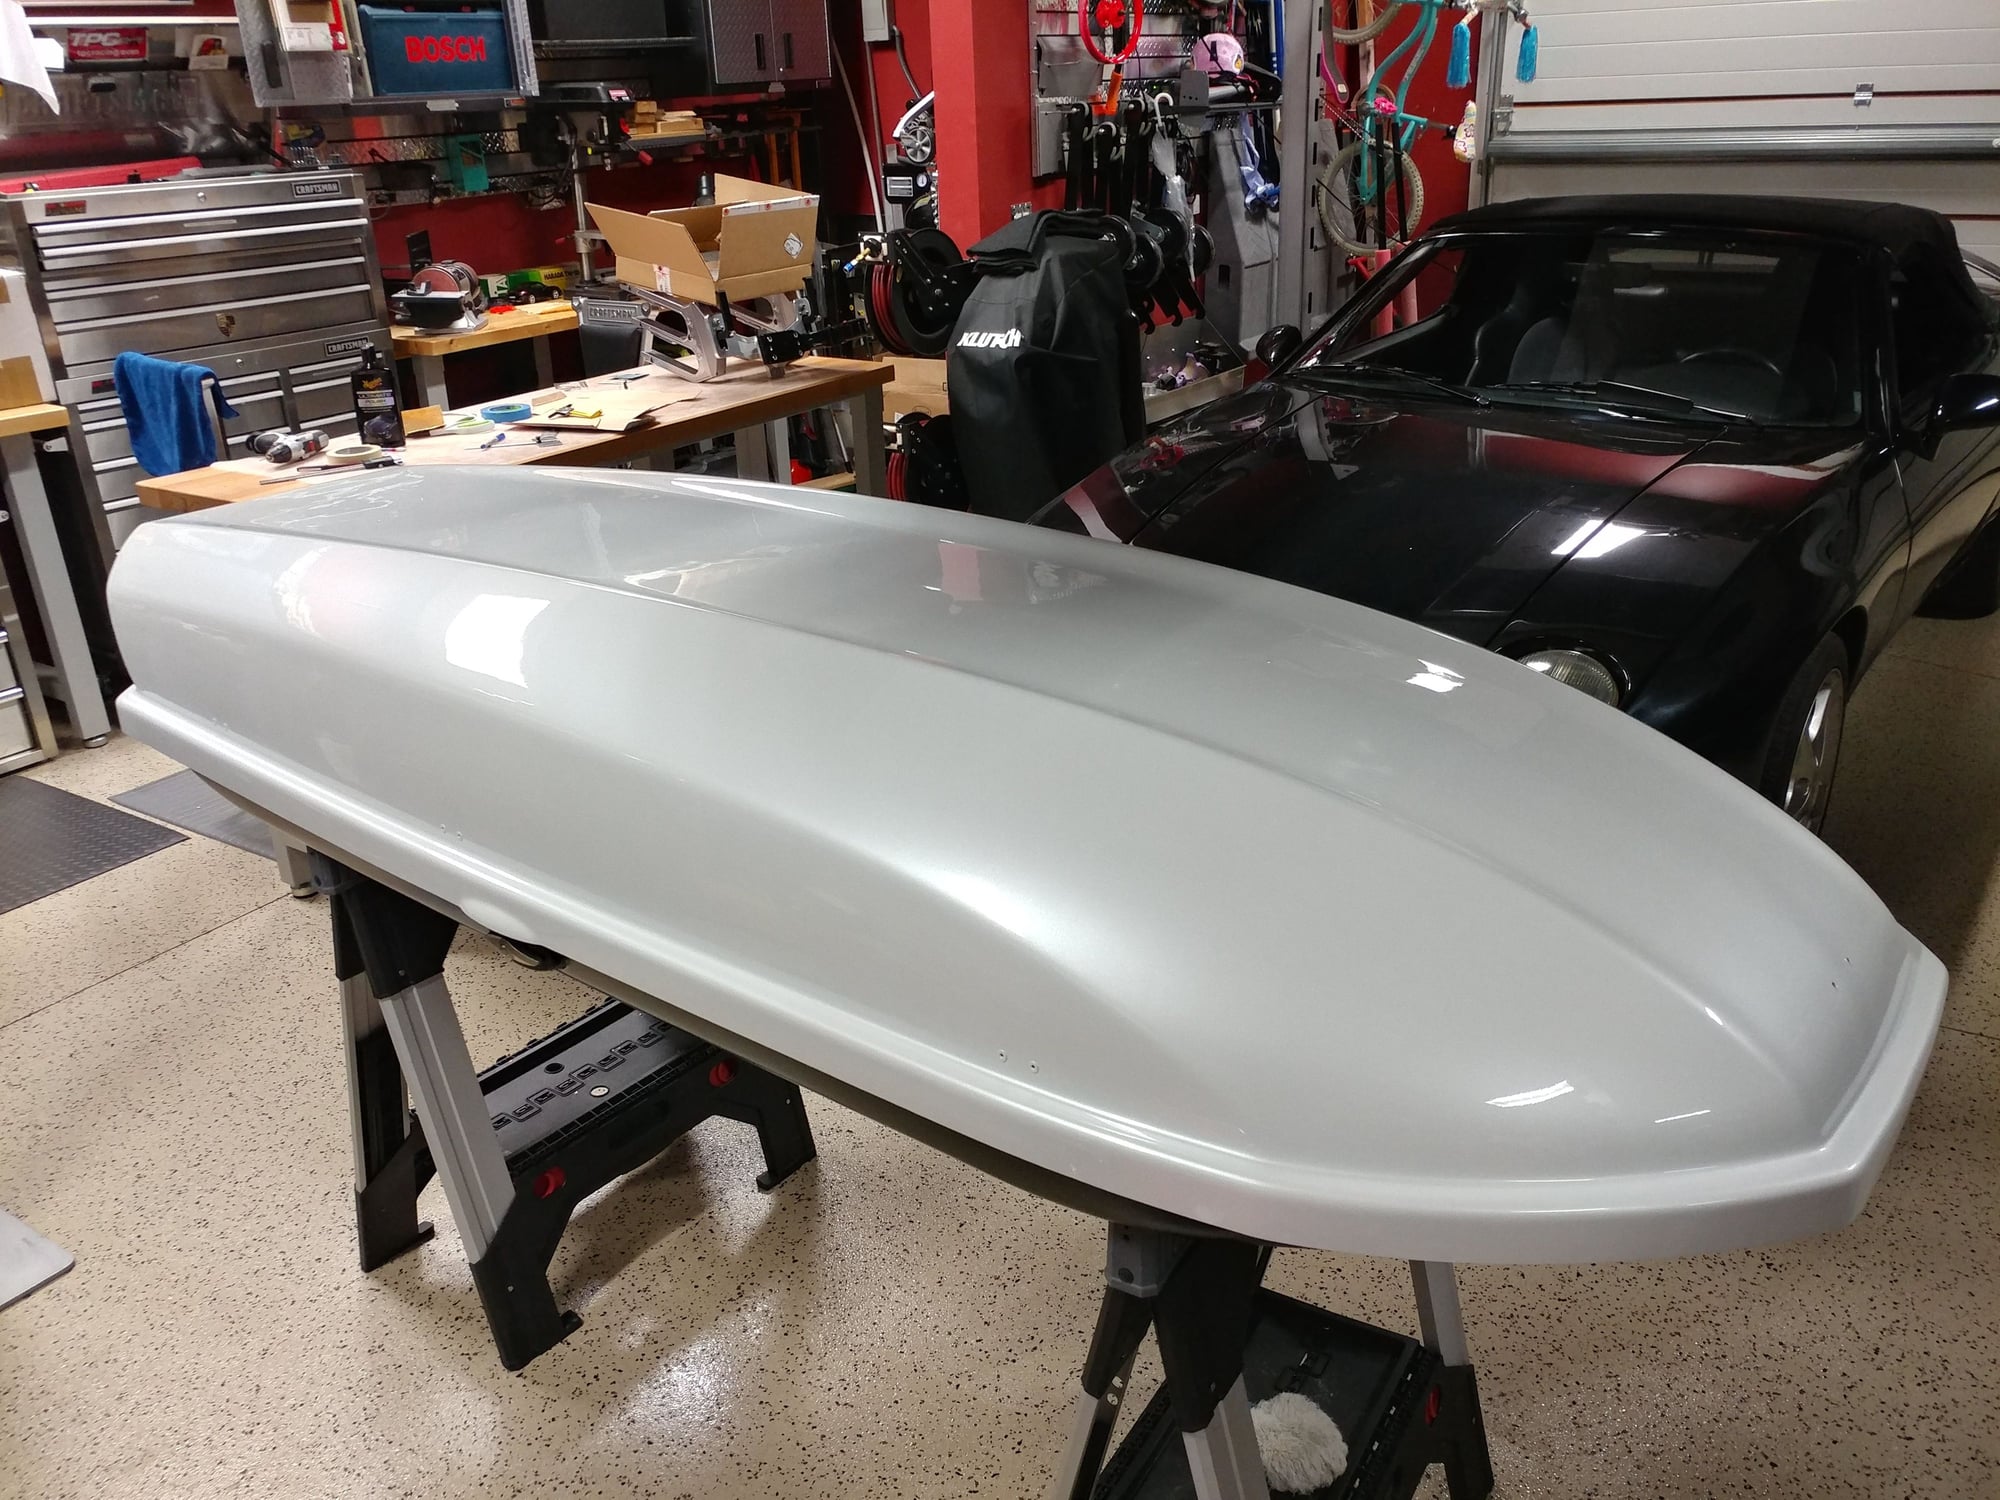
Picked up the top to the Yakima Skybox that I had the body shop paint to match the new color of the Cayenne. I decided not to remount the hinges to it just yet (that's why the holes are still open), as it will be easier to drill the new holes in the sealed runners I made to go with the T-Bolt fastening system I'll be using, the purpose of which is to have enough clearance under the crossbars to be able to use the Pano roof with the Skybox installed, should we want to (but I have a feeling it might become a windstorm in there - we'll see).
Now I just need a car back onto which to install it - LOL
How much weight was added to the front doors for this kit? Curious if this will cause your hinges to sag earlier than normal. Other than that, this is awesome.
How much weight was added to the front doors for this kit? Curious if this will cause your hinges to sag earlier than normal. Other than that, this is awesome.
The flare pieces are fiberglass and pretty lightweight, but then there's the panelbond and filler, so probably a little bit of weight, but doubt it's substantial. I didn't weigh the doors before and after.
Am I the only one who kinda wants a tour of Pete's Garage?
As someone whos planning a massive garage addition I would love to have better pics of what goodies you have hidden around.
Sorry for the thread jack.
nychase,
Thanks, and here's your virtual tour - I don't have just garage photos so tried to grab car pics where you can see more of the garage.
4 workbenches - one empty just to work on stuff (that's not in these pics) but more out in in open space, so you can work on big stuff and have it hang off. 2nd two are in an L-config in the corner and the left one has the bench vice mounted to it on the left side, which is over near the tool wall... that's also where the band saw is. The 4th work bench has a drill press, a bench grinder, and disc/belt combo sander mounted to it and further to the right from that behind the partial wall is the big floor-mounted compressor that has 2 hose reels mounted on the wall - one has an inline oiler and uses the blue quick connect fittings. the other has an air dryer and is for non-oil applications, like sandblasting, painting, inflating tires, blowing stuff off, etc
Have to have a utility sink in the garage. That's in the far corner near the pink 911.
I also have:
Ultrasonic Parts Washer
Welder
Plasma Cutter (if Santa comes through)
Lots of air tools and battery powered tools all organized on a section of stainless slat wall
I installed Office building grid ceiling lights that are actually installed up in ceiling so they are flush with it
Lift is a Custom Backyard Buddy that's a combo between the Boat Trailer Lift and 7,000 lb Extended height light and has an extra set of decks mounted to it, so it's narrower enough for the 914, but wide enough for the boat trailer. Has a rolling oil drain pan and a pair of pneumatic bridge jacks in it so I can do wheel and brake work on a car that's on a lift. Also has the caster kit so I can move it twice a year to accommodate storing the boat inside in the winter.
Floor is a 2-part epoxy that was professionally done with shark-grip clear coating on it (but it's still slick when wet).
Garage doors are on high-lift tracks with Liftmaster Jackshaft openers so they run up very close to the ceiling.
Hope that helps give you some ideas and if you have any questions, just send me an email to petza914@gmail.com or if you want better pictures of a specific area - though I can't guarantee it will be clean and organized in the pics
Extended Height Backyard Buddy Lift goes up high enough to walk under without bending down and to park the truck or Cayenne underneath
Gladiator Garage Storage Cabinets along the back will with wall cabinets stacked on-top of them
Workbench area - tool wall in the back right corner. Ramps, Jacks, and Jackstands to the right
4th workbench in the open that's kept clean unless there's something being worked on. Compressor is back behind that partial wall, anchored to the floor. Welder is under the cover near the air hose reel. There's a second air hose reel under that one.
Better view of Tool Wall to the left, and flush mounted ceiling lights (still need to paint the mouldings around them)

 11-21-2017, 12:37 AM