When you click on links to various merchants on this site and make a purchase, this can result in this site earning a commission. Affiliate programs and affiliations include, but are not limited to, the eBay Partner Network.
The upper control arm bushings on my 2005 TT are shot (79K mls). Looking at the job tonight it seems that the complete air strut needs to be removed? Has anyone performed this job? If so, I have a few questions:
1) Can you access the control arm bolts without completely removing the strut and high pressure line?
2) How did you vent the high pressure line?
3) If I do vent the line do I need to re calibrate the height system?
I'll probably do that project this summer. Finishing up the Coolant Tee's today. Actually awaiting a new Radiator drain plug. Porsche swapped to these plastic Radiator drain plugs back in the 944 days and after 5~10yrs they get brittle and break (sounds like plastic Coolant lines & Tee's). I just ordered 3 new ones, one for each of my 944T's and one for the Cayenne. Gotta admit the old 911 is really the most reliable one, but yes, not the one I would choose to drive every day.
I'll probably do that project this summer. Finishing up the Coolant Tee's today. Actually awaiting a new Radiator drain plug. Porsche swapped to these plastic Radiator drain plugs back in the 944 days and after 5~10yrs they get brittle and break (sounds like plastic Coolant lines & Tee's). I just ordered 3 new ones, one for each of my 944T's and one for the Cayenne. Gotta admit the old 911 is really the most reliable one, but yes, not the one I would choose to drive every day.
After the 996 TT cab I promised myself if Im gonna own porsche again I have to do some of the work. Didnt plan on this job as previous owner did the lower control arm bushings, but guess this will be my first big job
It is going to be easier to just remove the whole strut assembly and perform the swap. The air strut contains a residual press. valve. Just crack open the air line and when you hear escaping steadily, stop. Give it a few min to bleed off and remove. The residual press valve will maintain some air.press inside the strut.
It is going to be easier to just remove the whole strut assembly and perform the swap. The air strut contains a residual press. valve. Just crack open the air line and when you hear escaping steadily, stop. Give it a few min to bleed off and remove. The residual press valve will maintain some air.press inside the strut.
No worries and fairly straight forward.
thx Mr haney
yep removing the whole strut assembly looks like the way to go. Accessing bolts under the ECU on passenger side and the one under the brake resevoir
looks like a pain in the ***.. I dont wannna break anything in the process. Any suggestions?
If you go the way of removing the strut entirely, be aware that you CANNOT get to the 3rd upper bolt by removing the brake reservoir or fuse panel. You need to remove the secondary firewall panel between the engine and brake reservoir.
There are 3 bolts holding it in place, and the bottom of the panel is and upside 'U' shape with a rubber molding. Two of these bolts are simple to get to, one on the right and one on the left (behind the engine). The 3rd bolt is hiding underneath the cowling, so to get to it you need to remove the passenger side wiper arm.
So yes, one of the steps for R&R of the front-left strut is to remove the wiper arm assembly. !@$%.. discovery time eats into beer time.
Good luck. It isn't actually too bad of a job to do.
Thanks RubberDuck
Yes i was trying to figure out how to get to the 3rd bolt for the struts . If im understanding you correctly i need to remove the 2nd firewall 1st . by removing 3 bolts one of which requires the removal of wiper. Do i need to remove anything else such as the ECU on passenger side or resevoir on driver side?
With fire wall removed is it easy to remove and fit strut bolts?
brooklynkid
I haven't done the passenger side yet, so I couldn't tell you. But yes, you are correct. Remove the secondary firewall panel first and you have relatively easy access to the bolts (with a good size socket wrench extension.) No need to remove the reservoir; it isn't in the way at all.
Finished the job last night right before just in time to shower up and toast in the new year.
Job took longer than expected about 8 hrs longest and most frustrating part was putting the wheel well liners back in.
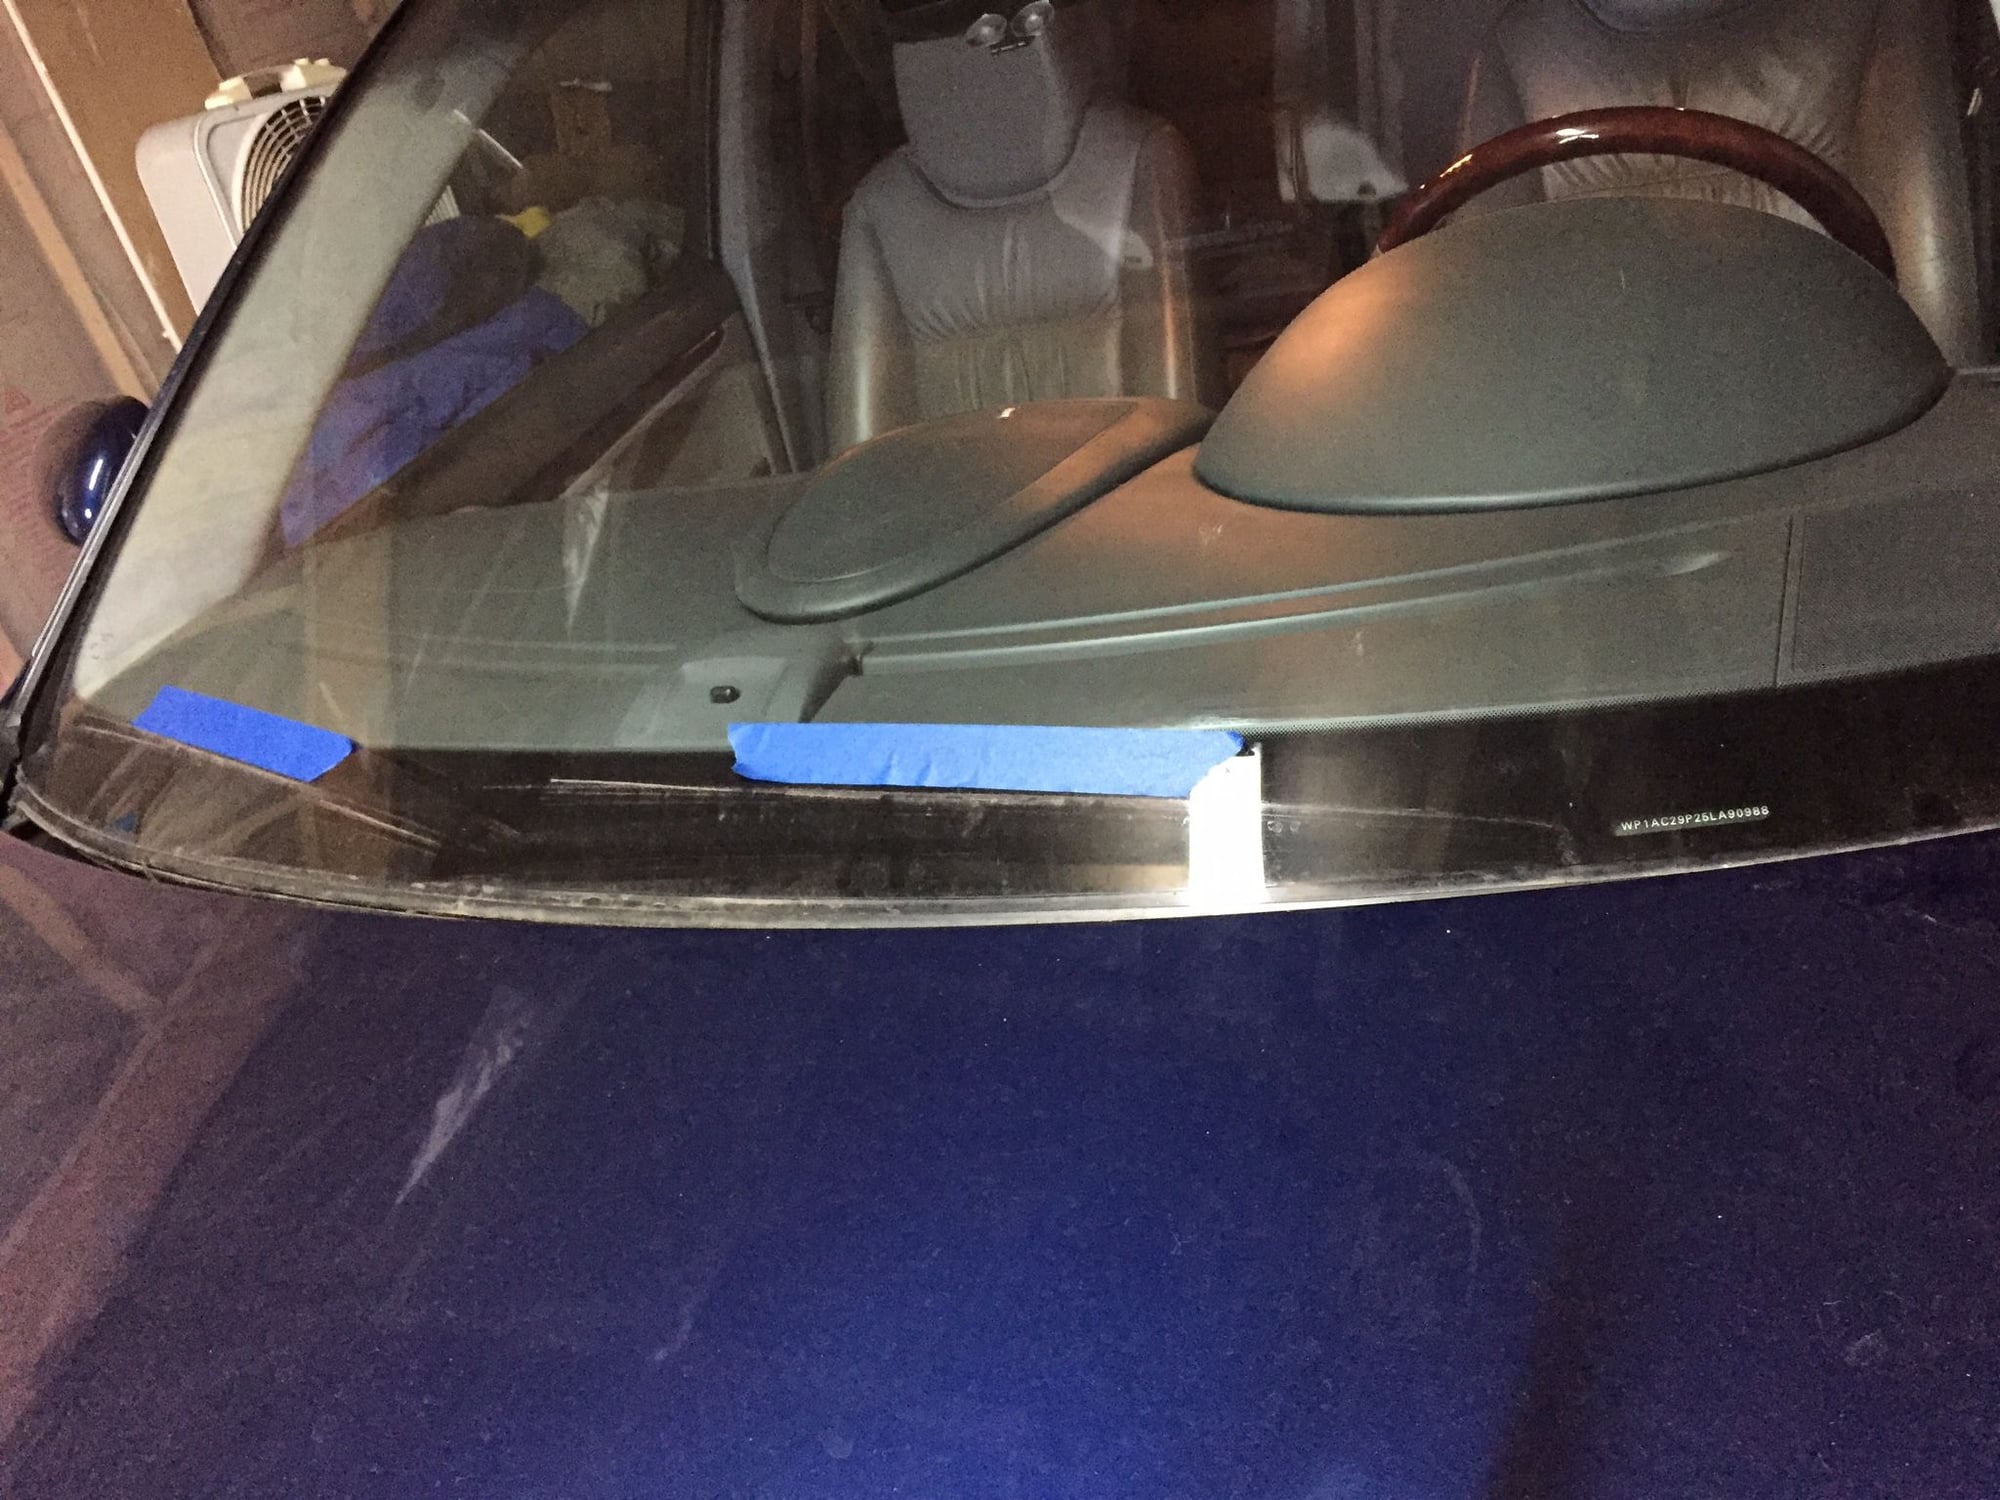
part 1 remove windshield cowl and wiper arms, I marked the wiper position with tape on windshield to make sure I knew the position when i reinstalled
Removal of wiper arms took some finessing but came off eventually and I was able to pop the windshield cowl out
Before i started any work i set the suspension to low setting then put it in jack mode. I then measured the approx height from the center of the wheel to the bottom edge of fender. That will was my start position and what i wanted to get close to when i reinstalled strut assembly. interestingly the driver side was about 1/2 inch higher than passenger
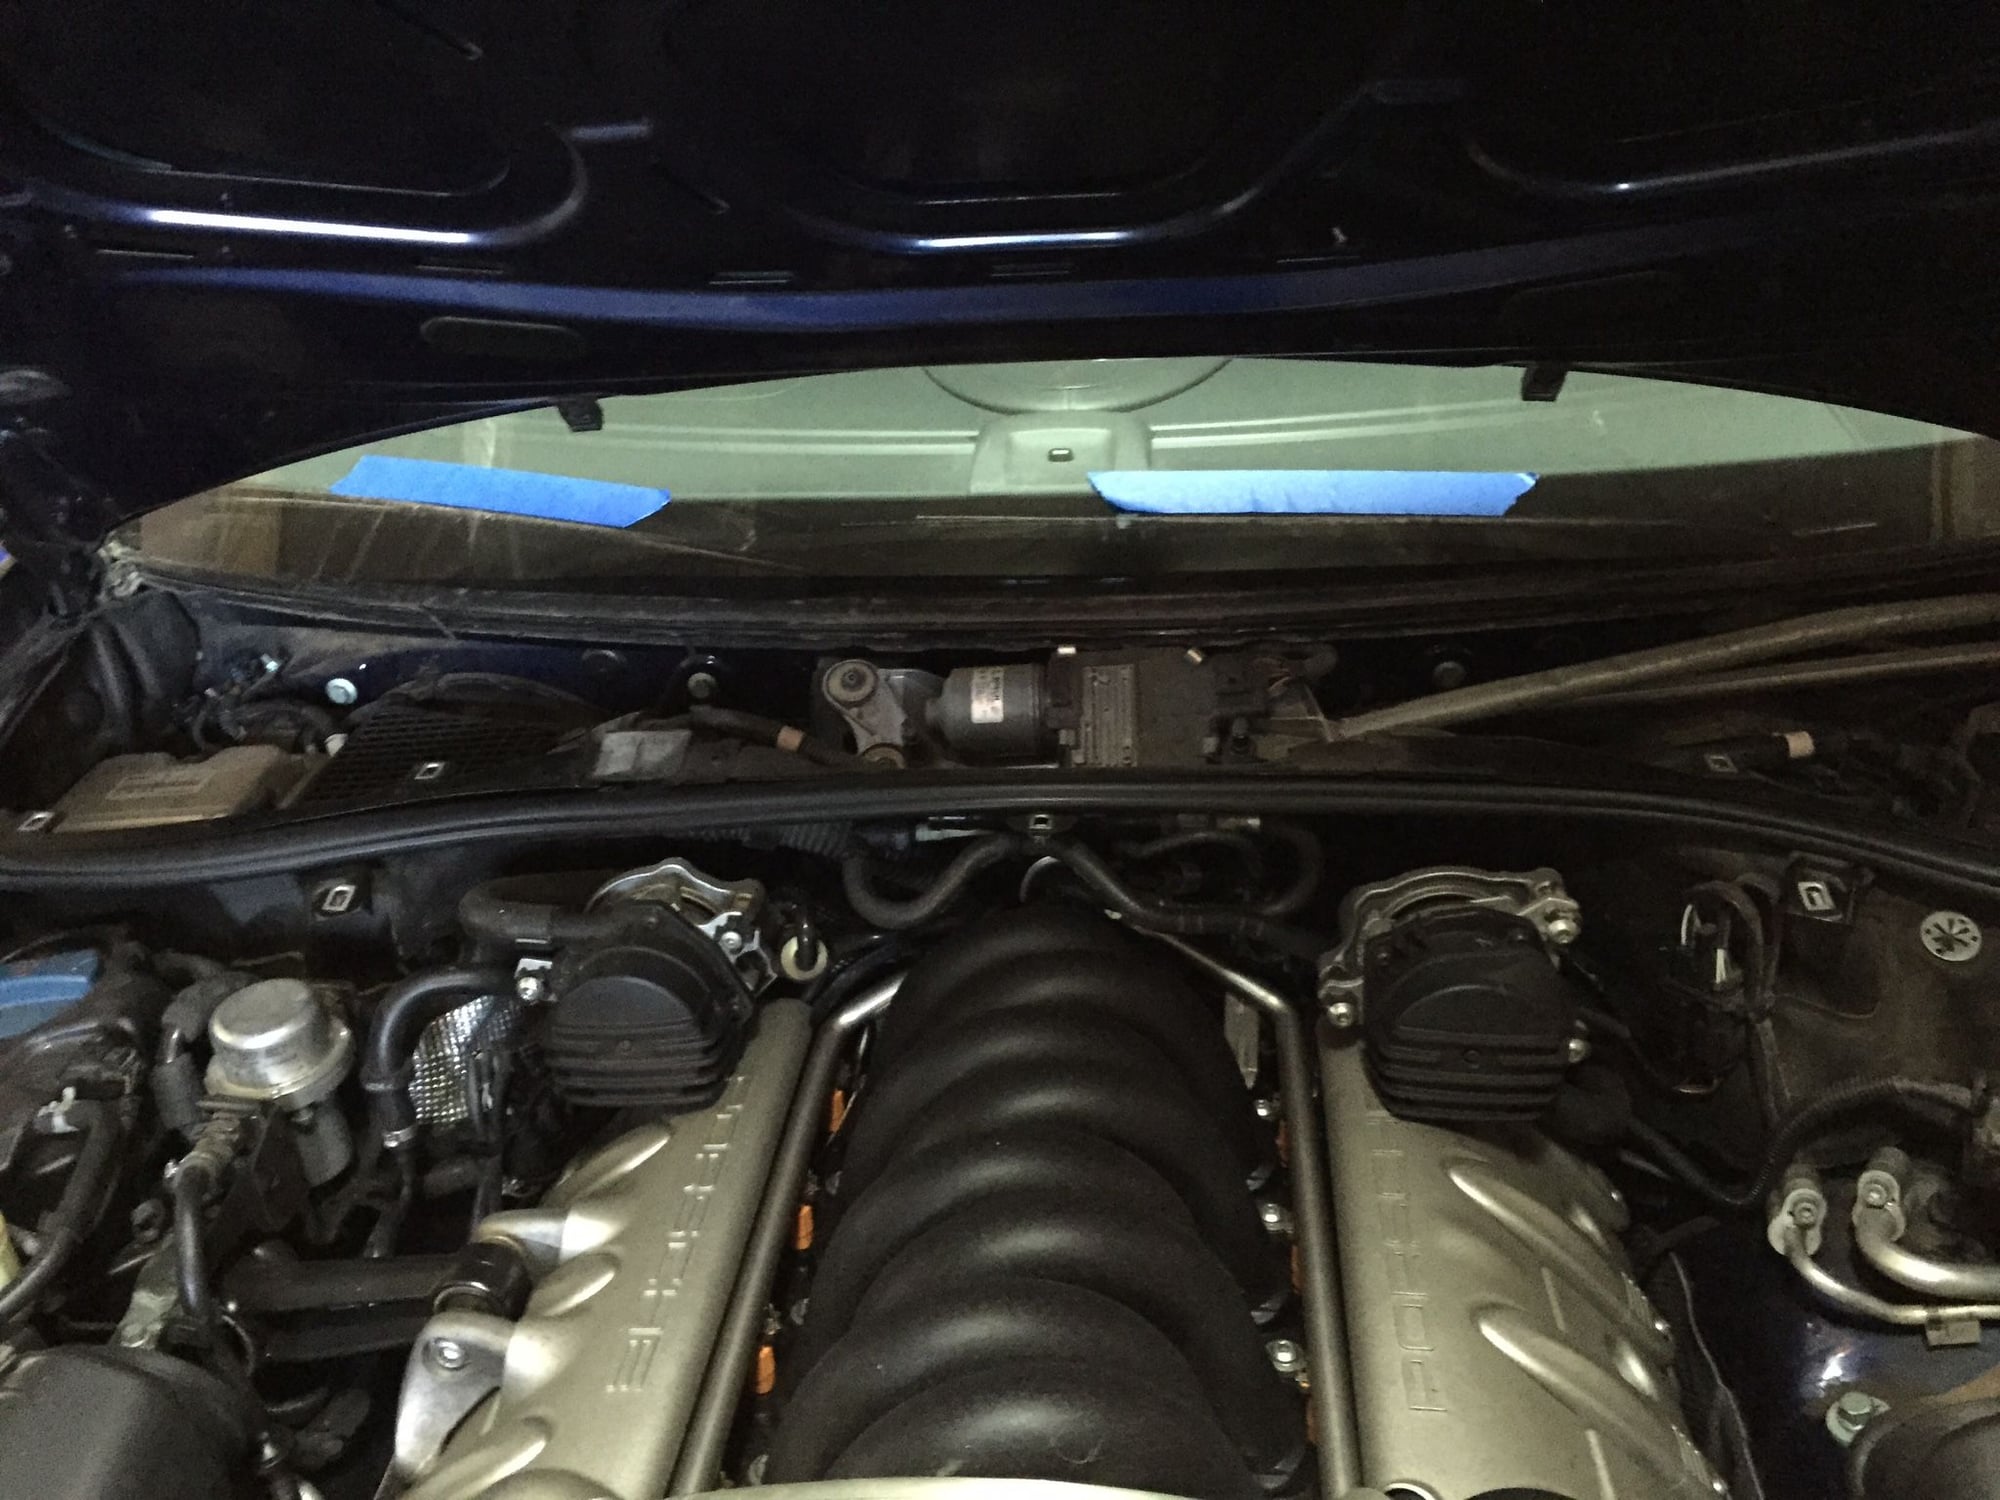
I jacked up vehicle and put on jack stands just high enough get wheels off ground but low enough to get to the the 6 bolts hold the upper struts.
Note with the windshield cowl removed I could see all the bolts and was able to unbolt the upper strut. I did drop two 16 mm sockets behind the brake resevoir but was able to retrieve them with simple magnet tool
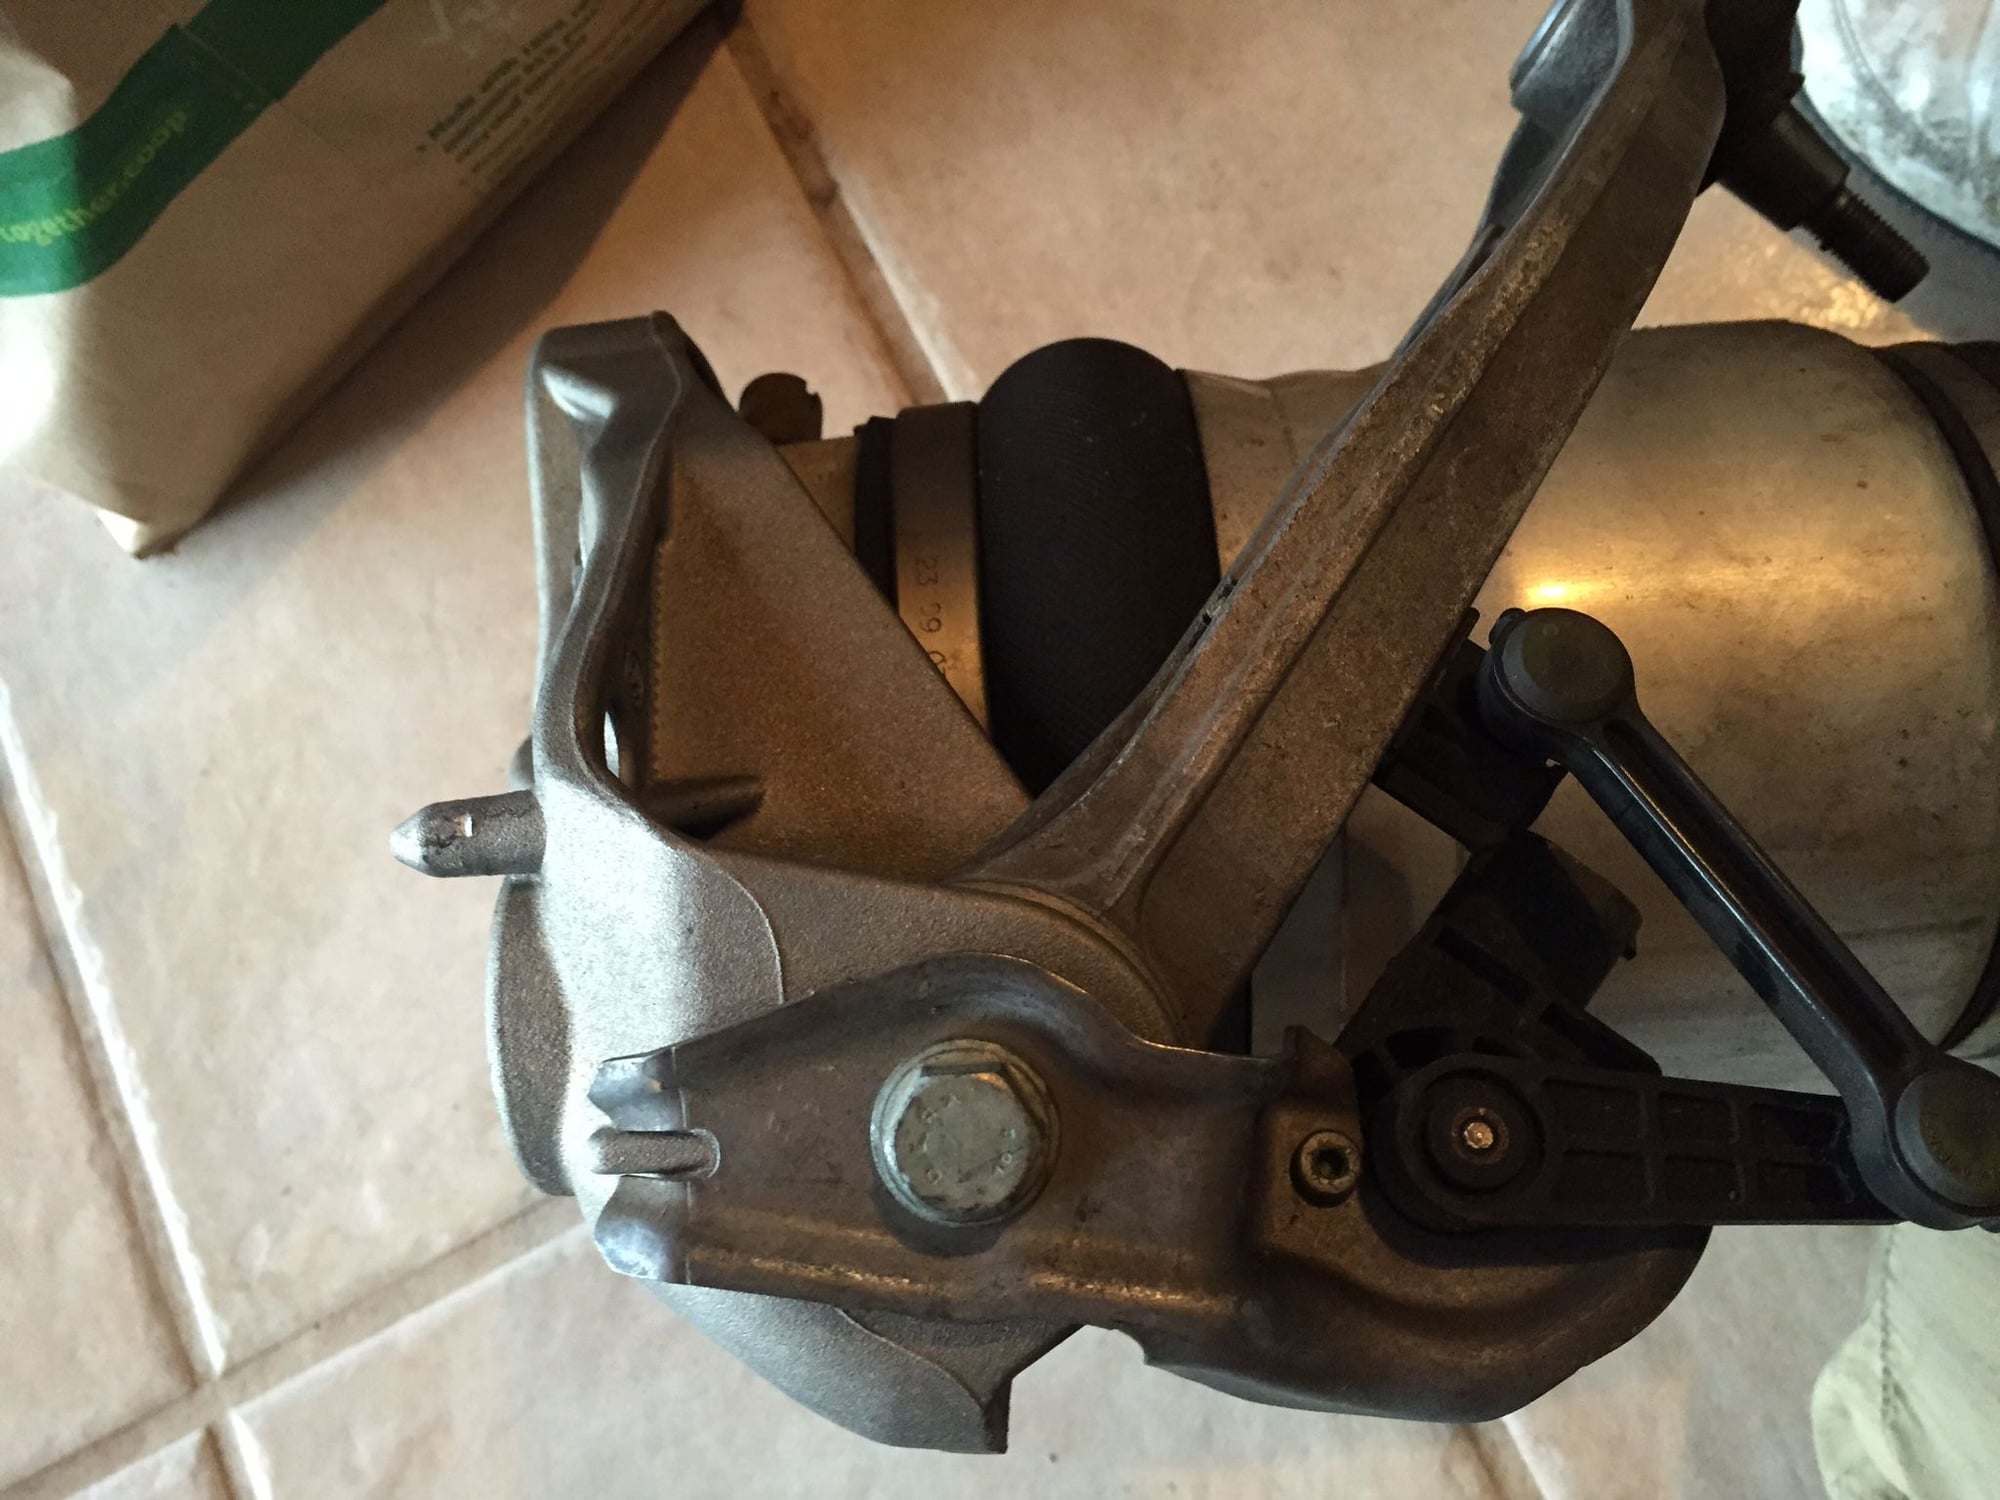
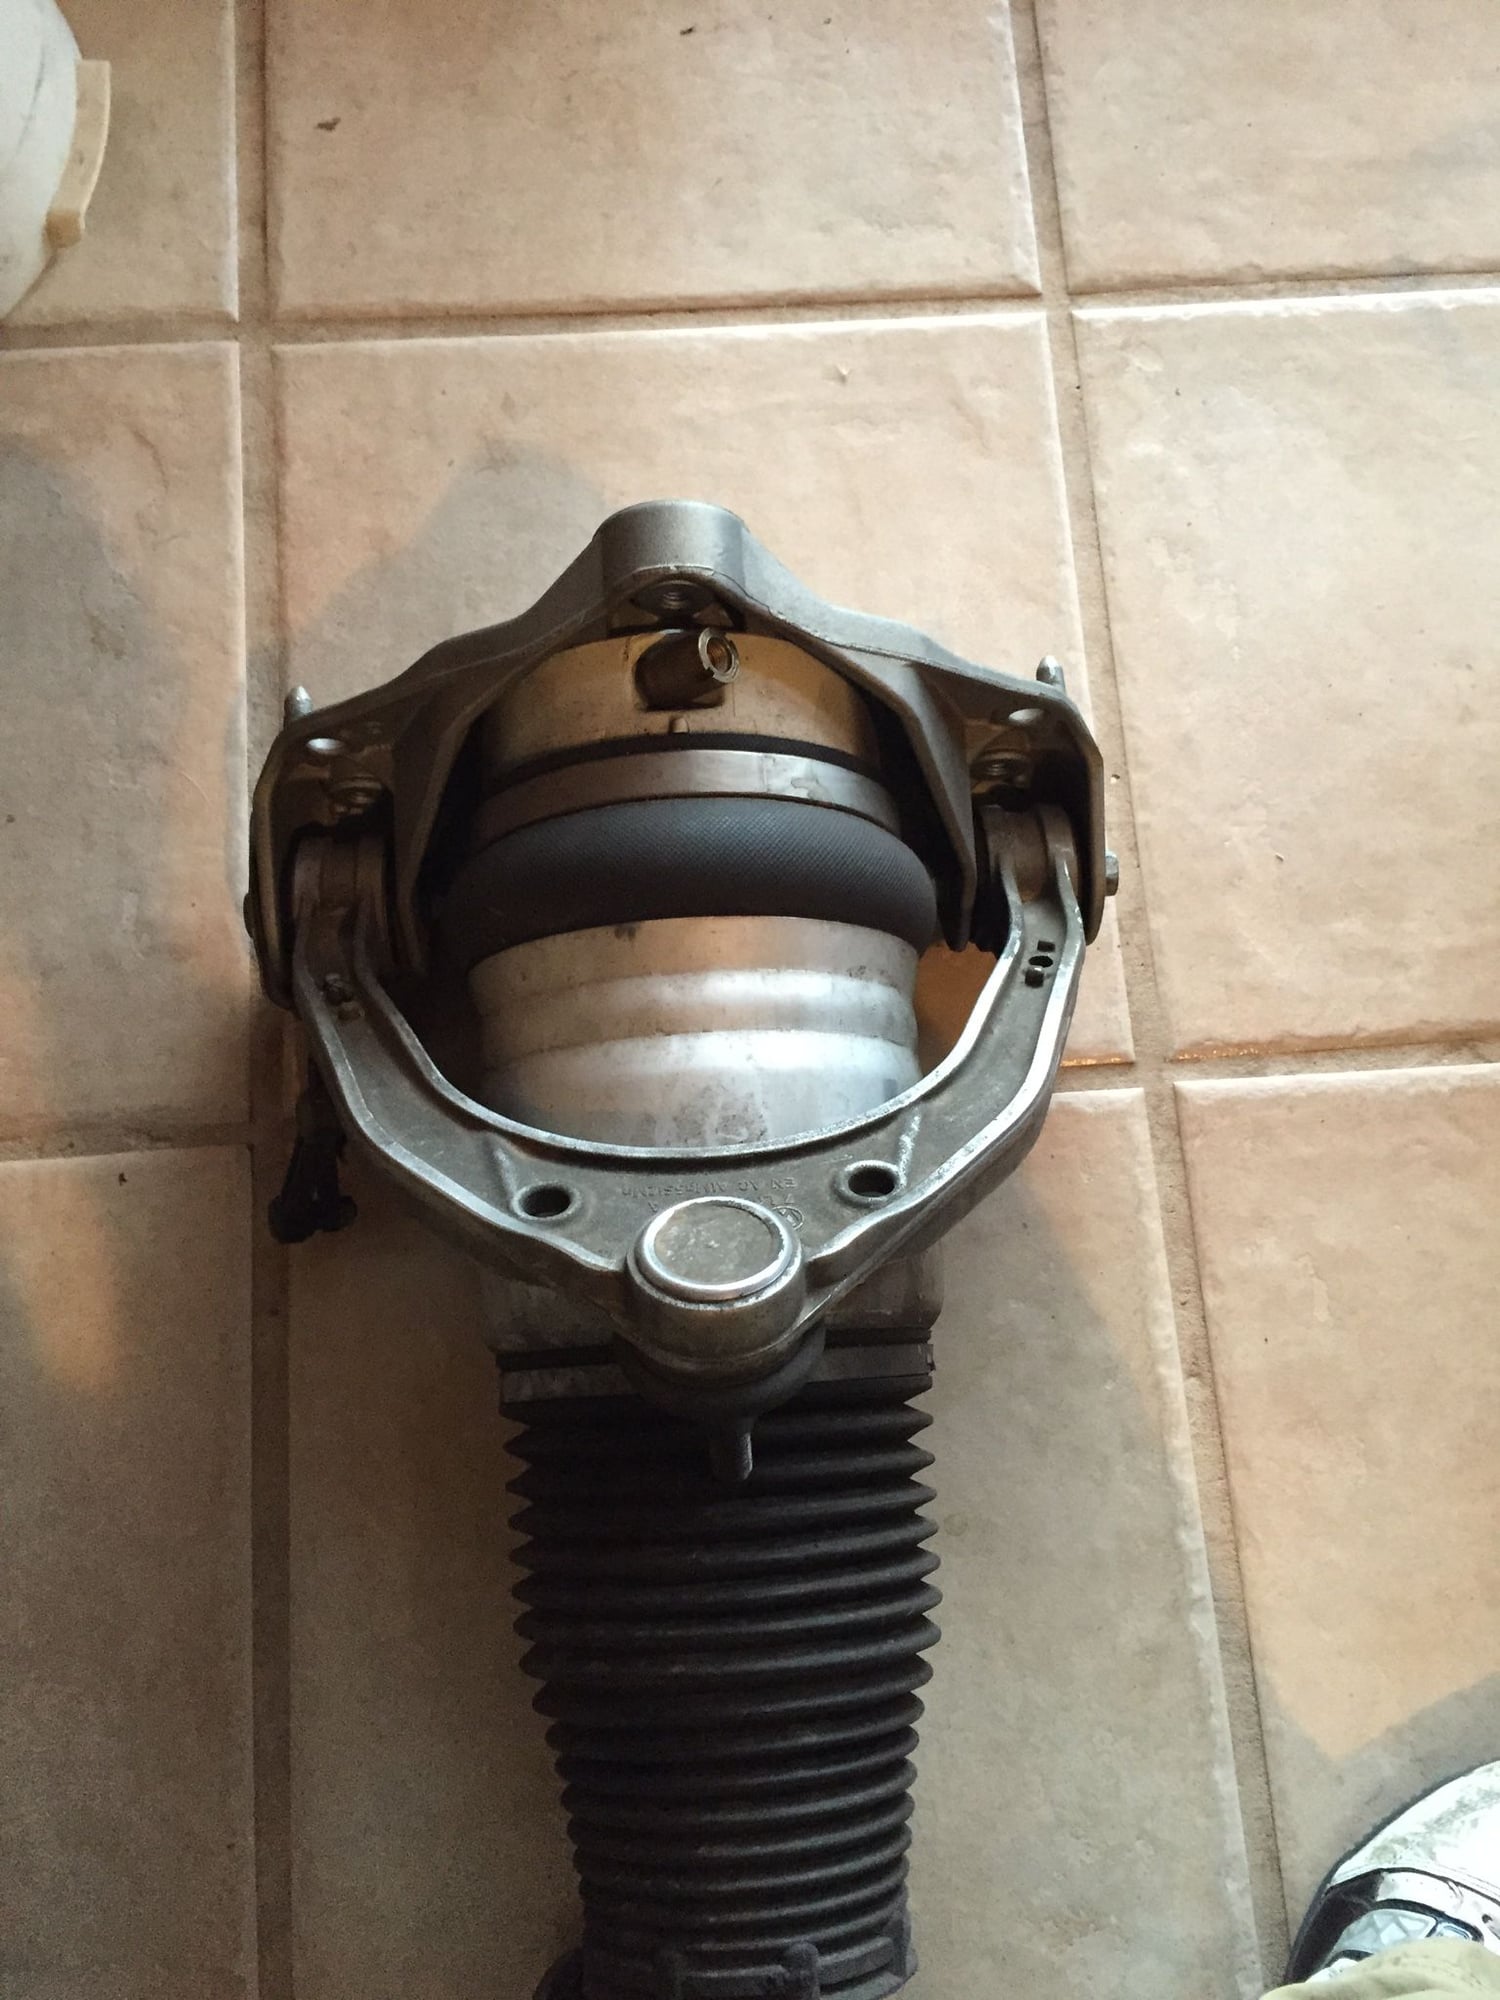
I then basically followed the instructions from Arnott industries to remove the air struts and upper mount. The upper control arms are attached to the mount and although i was able to fit wrenches and tighten and loosen the bolts and nuts to the control arm there isnt enough room to pull the bolt out .
Disconnect the level sensors and the other sensors attached to the air strut before removing. becareful as the level sensor is attached to the control arm via a simple push pin. Also note postion off the bolt mount to the control arm there is important as the level sensor will not calibrate correctly if its off .
My upper control arm bushings were shot! complete rubber break down tons of movement and likely the cause of all that clunking when I corner hard. New Control arms were from TRW and the weight and quality looked/felt very good they came with new bolts to reinstall and torque down. I also replaced the drop links as I was already there, used the Delphi brand.
Once most bolts were lightly fasten I put a jack under lower control arm and proceeded to jack it up until distance between center of hub and fender was equal to my start measurement. Once I achieved this I torqued all bolts down to spec. This ensured my alignment was as close as possible to normal
I reinstalled the wheel well liners and that took a ridiculous amount of time and patience as the holes just wouldnt line up!
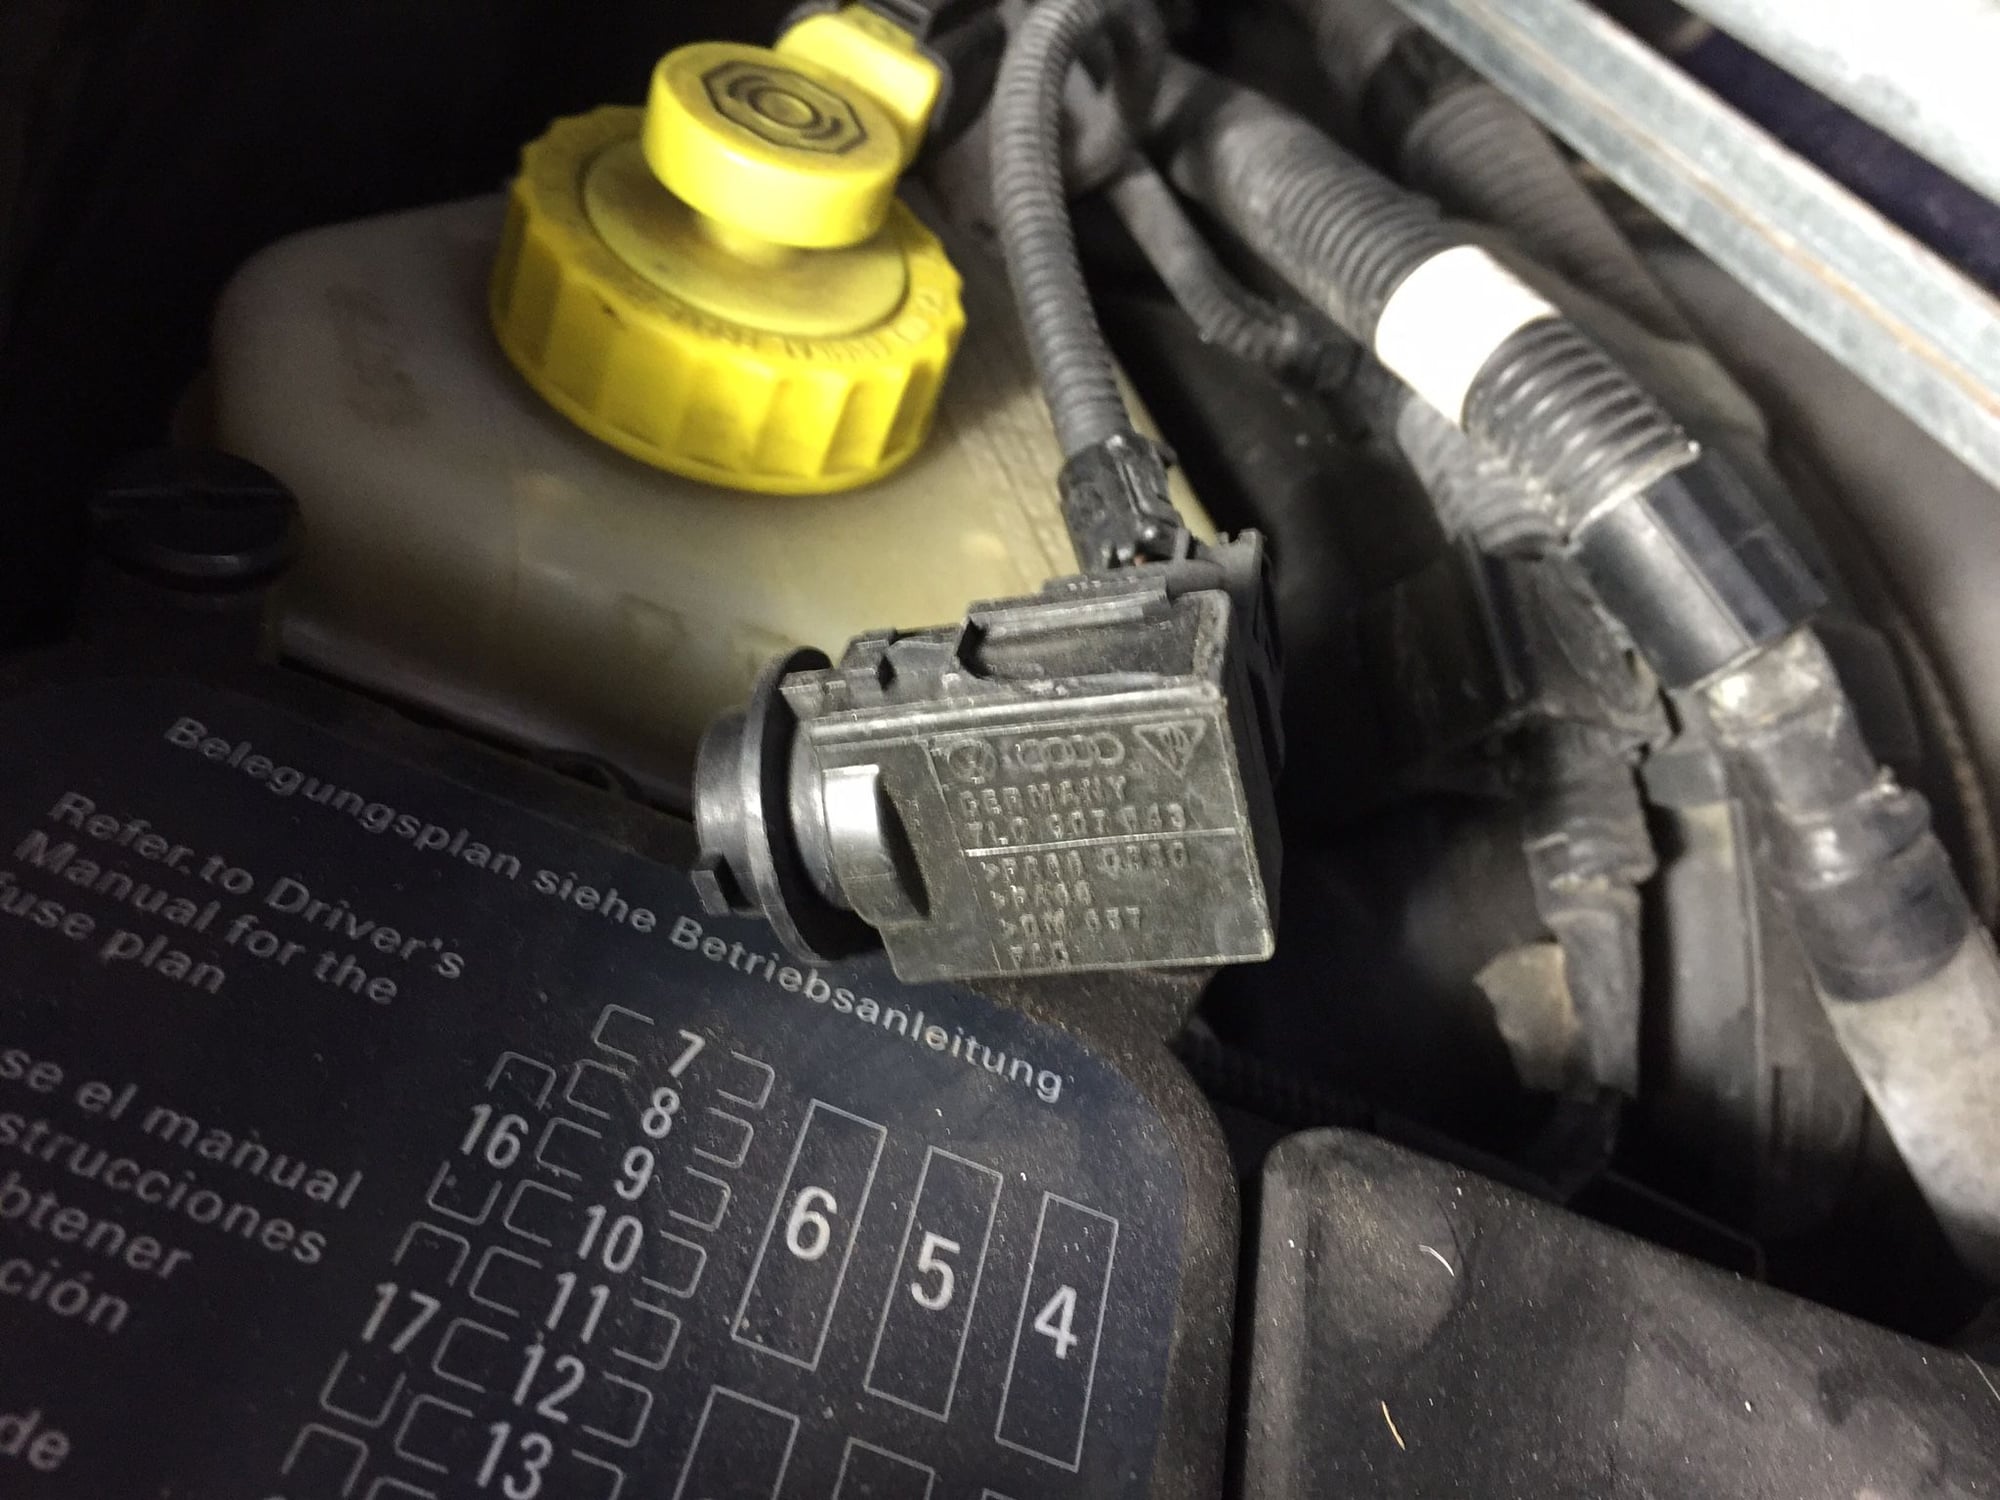
Finally I bolted on the wheels and re-installed the cowl and wiper arms in the pre-marked positions. I did discover this plug near the brake resevoir and it didnt seem to have a place to plug in.. Does anyone know what its for? No fault codes upon restart
Took the Cayenne out this morning. no air leaks and it felt very tight, no more clunks going up my drive ramp or when cornering hard. Im gonna get a durametric and see if i can level the car better and perhaps lower it a little before I get the vehicle alignment .
hope this helps anyone that feels like DIY project.
I did discover this plug near the brake resevoir and it didnt seem to have a place to plug in.. Does anyone know what its for? No fault codes upon restart
I think that is your air quality sensor. If it is, it mounts to the underside of the windshield cowl - there should be a wire connector for it as well.
I had an error (no code just a red error icon) in the Air Conditioner Section of Durametric and found the wire wasn't connected to mine. I just attached it last weekend and haven't had a chance to see if the error is back.
I plan to tackle the upper control arms this weekend and your write-up is very helpful.
I am also replacing:
Lower control arms
Upper strut mounts
Tie rods
End links
Sway bar bushings
Be glad when the job is done and looking forward to no more clunks and a tight like new front end.


 11-04-2012, 09:26 PM