When you click on links to various merchants on this site and make a purchase, this can result in this site earning a commission. Affiliate programs and affiliations include, but are not limited to, the eBay Partner Network.
Couldn’t seem to find these anywhere, so logging them here. 2009 Cayenne Turbo S CTTS 975 front brake torque specs.
- caliper bolts 270 nm
- rotor hat retaining bolt 20 nm (once the wheel is mounted, the wheel lug nuts do the work and also force the hub to center)
- retaining pin bolt 30nm
(source: phone call to Porsche dealer)
not a bad DIY. I got flummoxed on three recommendations before starting:
1) use ceramic paste or something anti seize between the rotor and hub, like
shows. This seemed like a messy pain, is not called for by Porsche nor alldata diy, and the random comment that then the lug bolts get more shear force b/c there is less friction at the mating surface put me over the edge to just skip that.
2) use a carbide cutter bit as a scraper to get a perfectly flat hub mating surface. Like from a helical woodworking blade, little 1/2 square things, mounted on a stick. Again, just seemed too elaborate. I used a stainless steel brush to scrub everything especially the center hub part, shot with brake kleen and moved along.
3) release the brake fluid bolts from the caliper prior to starting, or at least loosen the bleeder bolts as you spread the caliper pistons.Should make spreading the pistons easier, and reduce bad brake fluid backwash into the lines. I skipped it, but plan to consider doing this next time, see below. Also, Porsche and alldata call for it as part of the normal process.
on all three I said screw it and plunged ahead.
BUT I found:
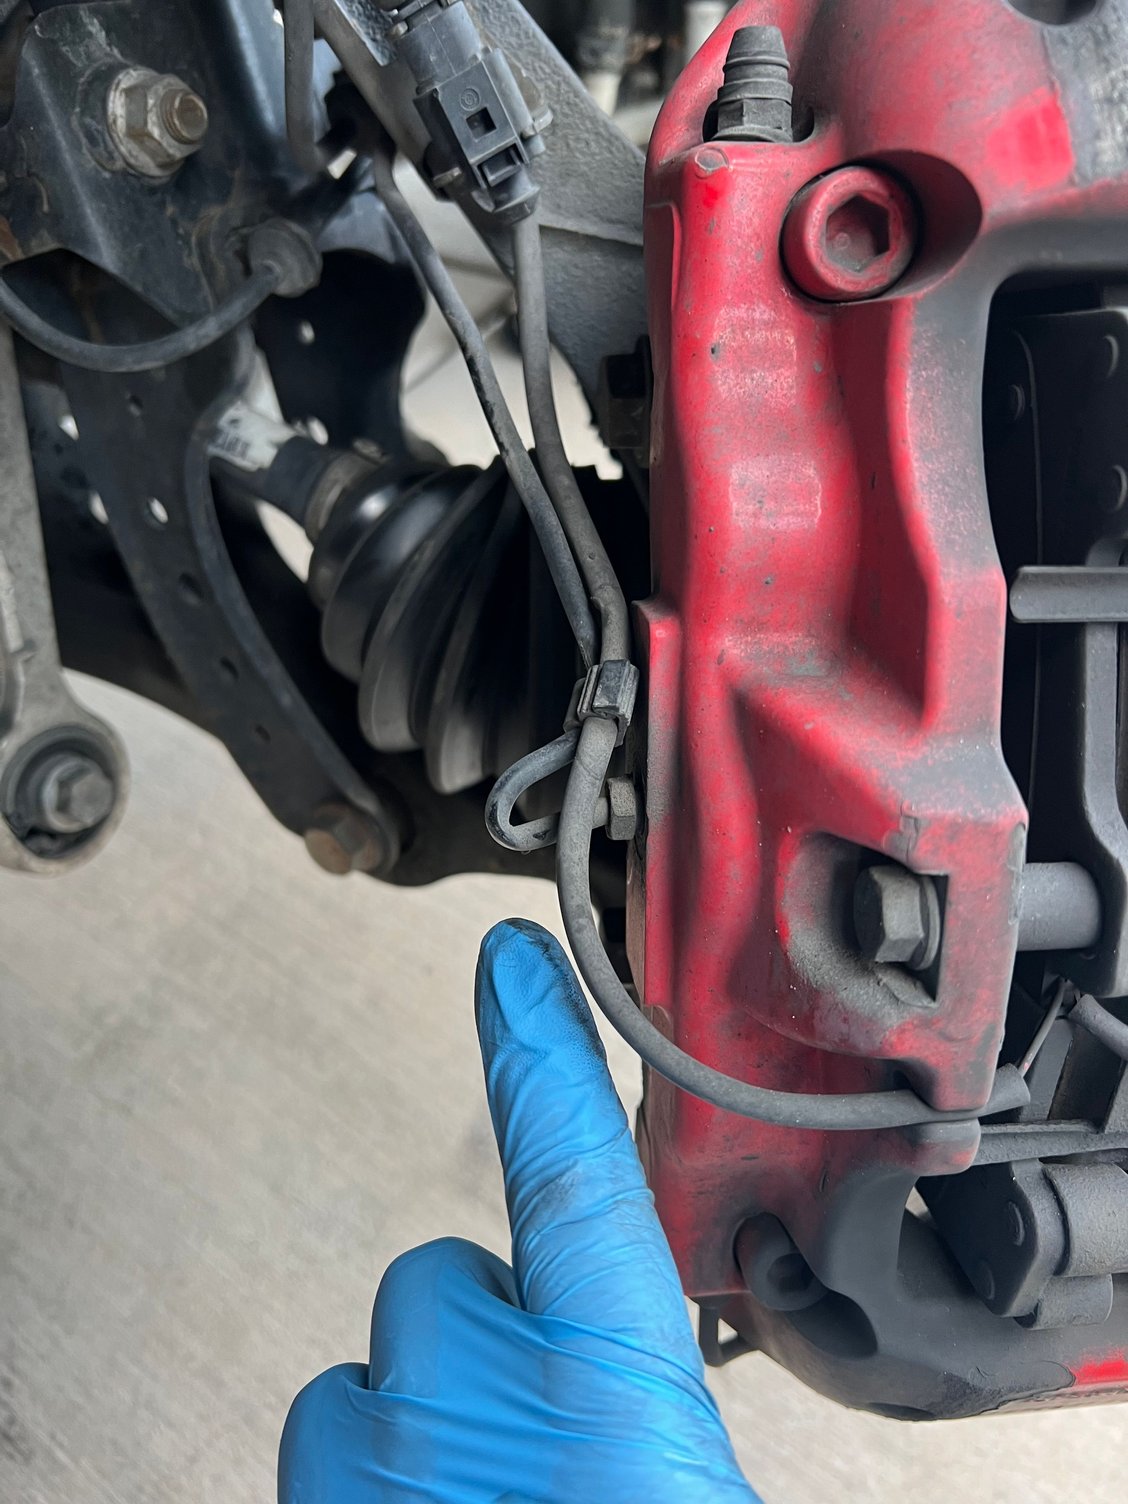
- unlike any videos I found, the hose to the caliper is rigid, and the pliable hose parts are locked in tight with brackets. So remove the brackets was an extra step and I still felt like I was twisting the hard metal part of the lines inadvertently. Next time try to disconnect. Gonna flush anyways.
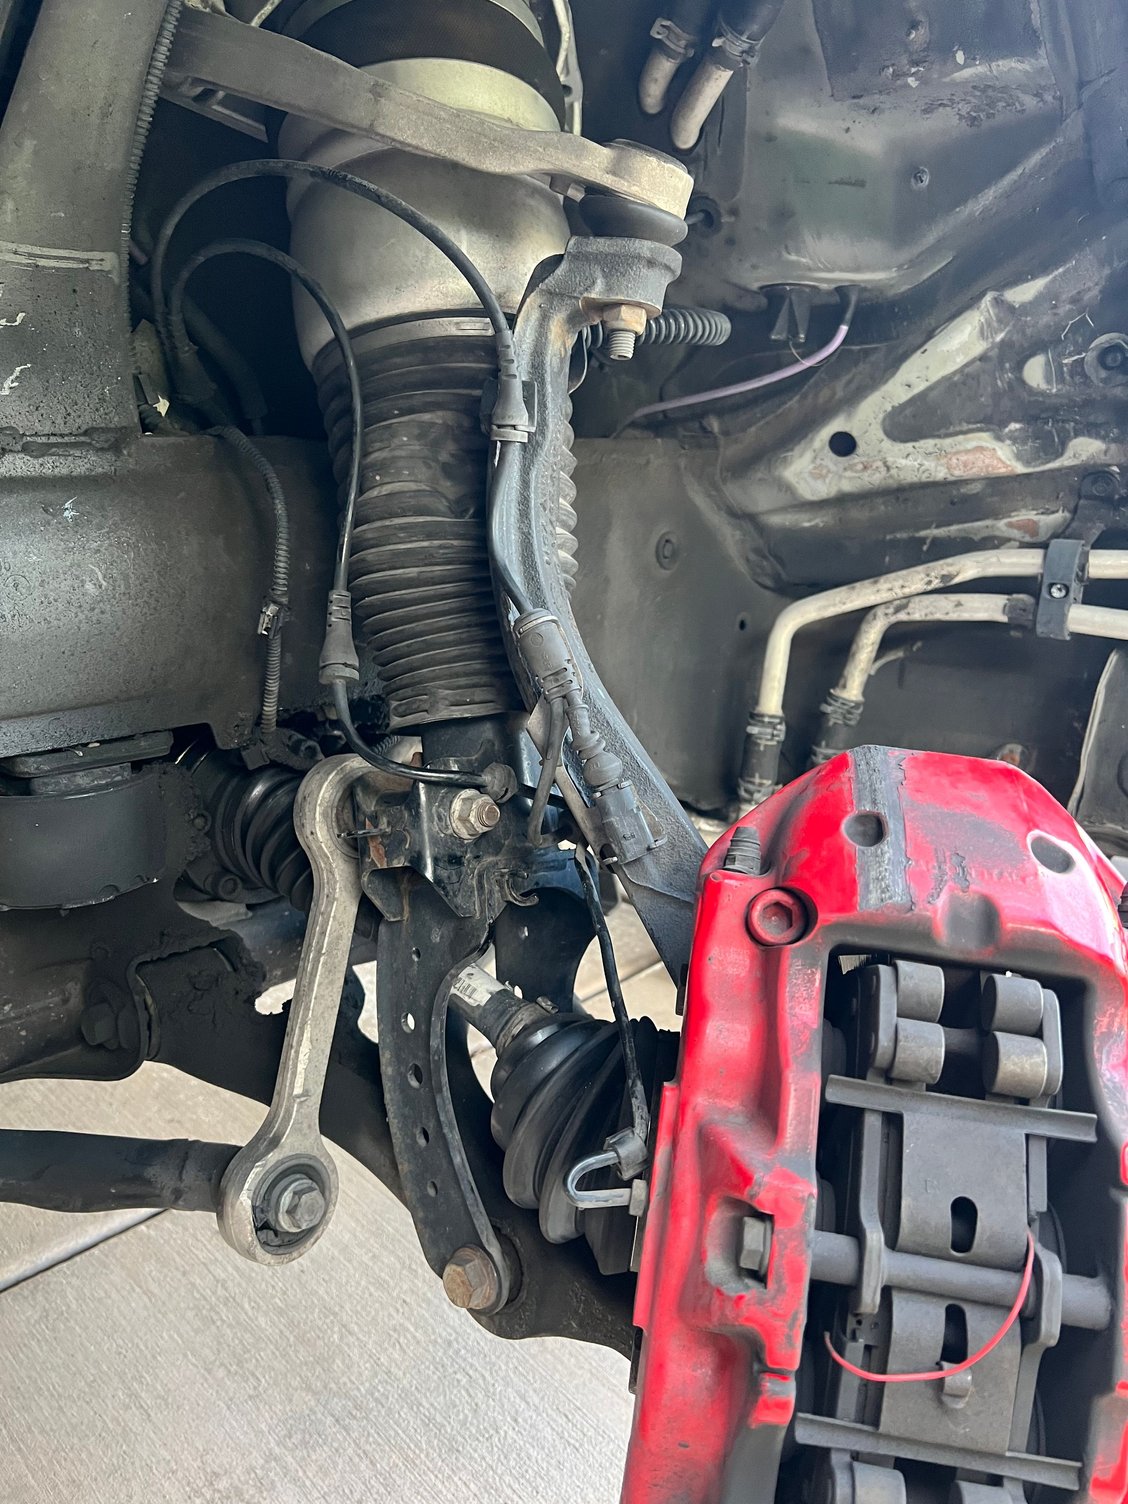
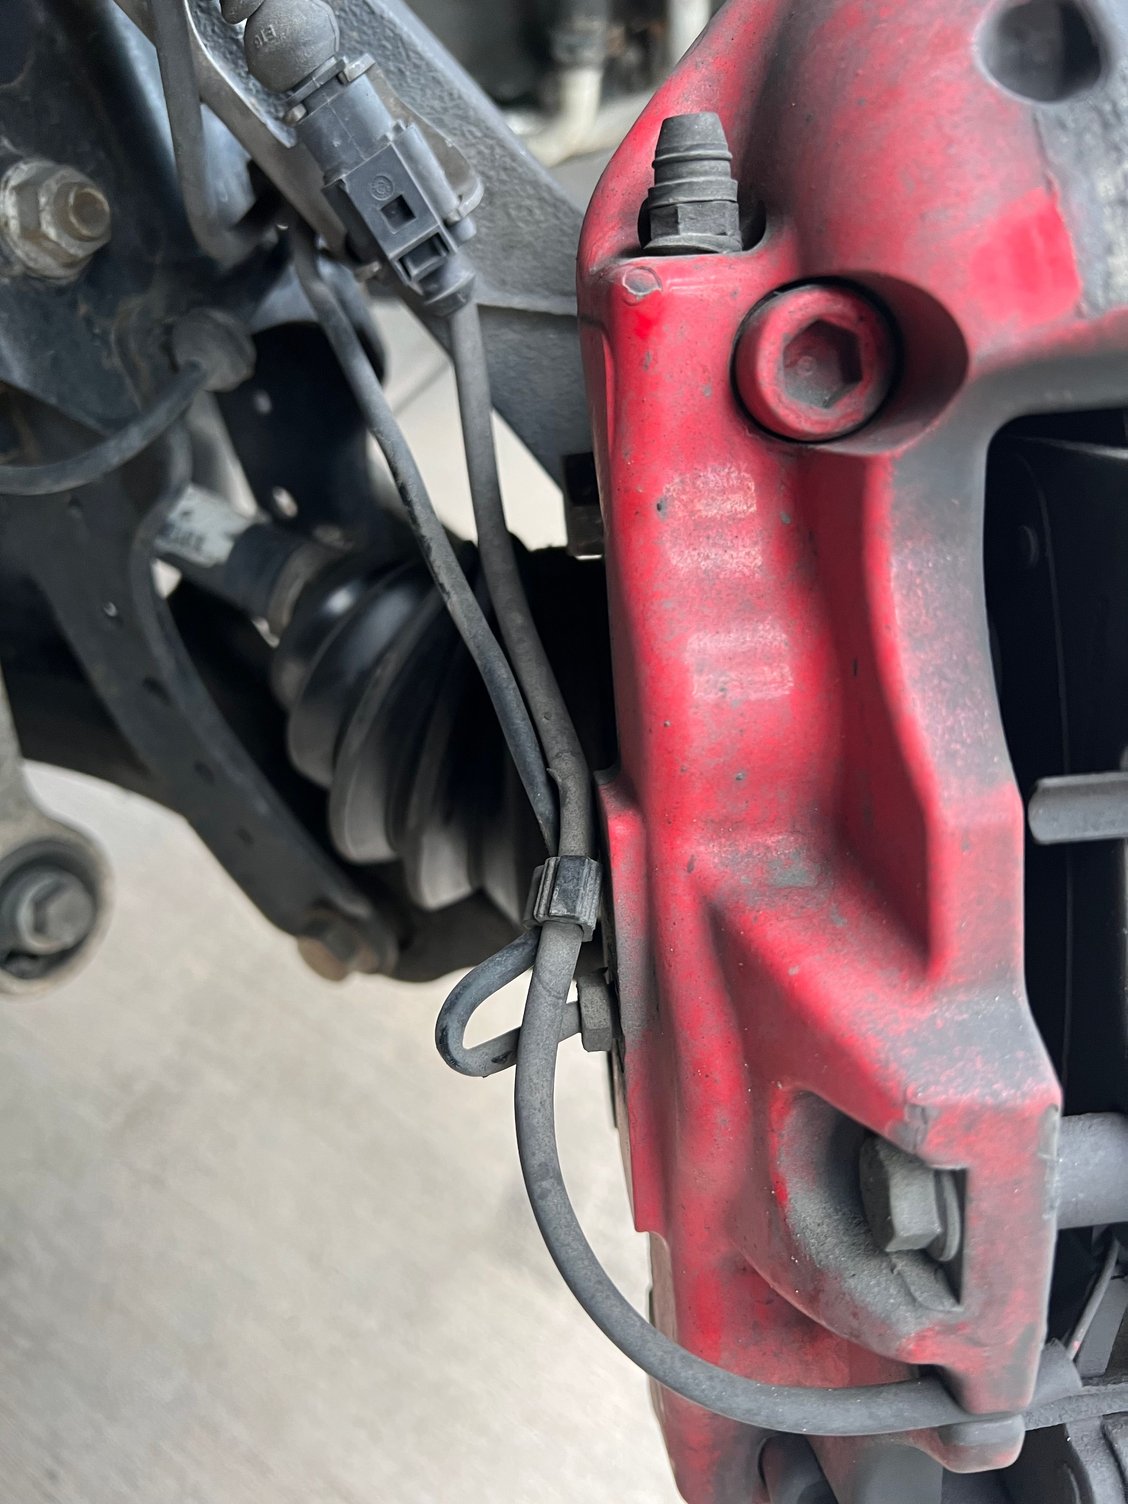
- driver side is clearly the side of a previous major impact. Wheel well is badly scarred and fasteners are bent. The caliper is badly scarred presumably from collapsed wheel during impact. It looks like the upper arm of the pivot bearing assembly is bent so it is too close to the air strut. The sway bar link is smashed. The brake line is surely partially pinched and I was worried it would get worse. The boot of the air strut is ripped by the upper brake line bracket that I can’t remove because the strut is likely bent. So; eeew.
But I did it and then bed them in with about 4 moderate skies from 45 to 5 ish, then a few minutes then some near full 60 to 15 stops about 6, tires chirp on occasion but not full panic.
All good! Rears next!
here is the pre-existing damage… Wheel well is scarred, bent fasteners
Bent upper arm of pivot bearing (runs parallel to air strut, should be further away?)? Ripped air spring boot. Caliper scarred presumably from collapsed wheel from wreck. Oh, and smashed sway bar link I knew about already…
Partially pinched brake hard line driver side caliper
anybody have an opinion on if I can drive it a bit short on transfer case fluid?
Well dang! The torque specs for transfer case drain and fill bolts are rubbish. After torquing properly, they are way more embedded in the case than the ones that came out. Apparently some people have cracked their case trying to screw in these tapered plugs. They do not have a positive stop to bump against.
AND the bottle I got had 850 ml, to replace about 750-800 that drained out, meaning the motiv pump started spitting foam before the case was full.
I tried to use a turkey baster to tease the last drops in but I ended up short.
botched job. 😢
oh well; I planned to do it twice anyways with the free replacements from FCP Euro. Too far in if torqued to spec. Risk of cracking the case? Just hand tighten until you know the included gasket material has set, and/or take pics before you remove and just go in about that far. These are too far in.
re-did the transfer case fluid and plugs, didn't torque them fully and left some threads hanging out per my "before" pics... So far no leaks and thankfully I didn't crack the case using the prescribed torque specs last time.
Interestingly, the "new" transfer case fluid that might not have even gotten up to temp yet (I drove it around the block a few times and did a few low speed circles at idle and full steering lock)... came out pretty gnarly black. I plan to do a third at some point, hoping to get to what appears to be mostly newish looking fluid... Thanks FCP for the lifetime replacement fluids. shipping and 30 minutes, and I can do a fluid refresh until I get clean fluid out. I hope that is good for the car and that I'm building karma points in the maintenance ledger...
also, the passenger wiper arm stopped working. It appears to me there is a washer under the metal arm that rests in the plastic cap under the arm, and seats on the drive shaft so that the compression ring can push against something. However, mine does not have it. My best guess is my indy lost it when he removed the cowl recently (and either noticed it and didn't think it mattered, or didn't notice it).
It doesn't appear in the parts diagram for the wiper arm, so I think it is considered integral to the wiper arm. I'm trying on eBay... I might be able to fabricate the right ID and OD washer... Else I'm out $200 for a new one.
Intermittent brake light warning signal, and TPMS too. Hopefully the TPMS works itself out with the new wheels/tires/tpms when mounted. Need to start troubleshooting the brake light intermittent warning. Hopefully "just" a bulb swap. (fingers-crossed)...
Most of the suspension parts have arrived or are in transit. I'm pumped to start getting that all sorted in the next few weeks.
Maybe hit up an HPDE coming to Utah Motorsports park September 10 and 11th. I'll probably leave most of these blizzaks on the track. That should be fun!
Dang, are these aftermarket adjustable ride height links, or is that OEM
2009 CTTS…
oh! And in case I don’t figure it out sooner, can I just pop these off (with some real force), or do we undo those nuts on the shaft they are attached to? Thanks!
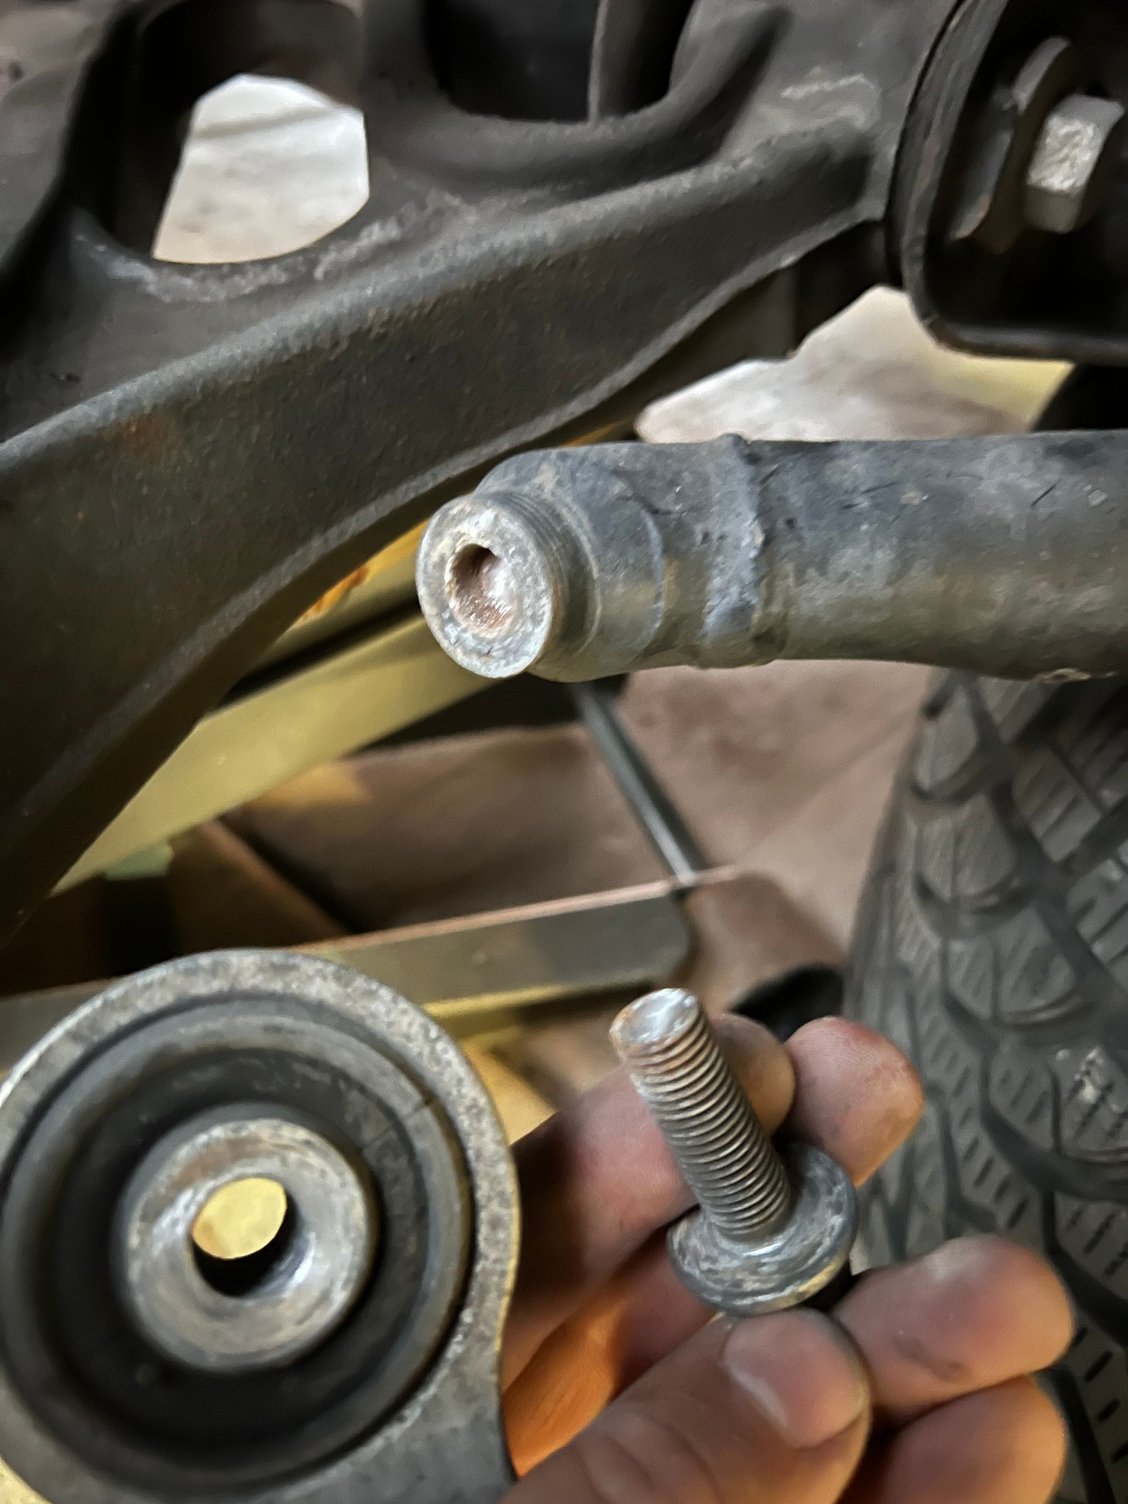
Looking for extraction advice. That bolt above sheared off while I was using a breaker bar and considerable force. It looks like the threads might be siezed (maybe even galvanically?) inside the pdcc sway bar end.
im anticipating that drill and extract will not be sufficient. Torch (on what)? Penetrating Lube? Tap extractor with hammer?
is the worst case that we over drill a bigger hole and tap and use a bigger bolt (or a sleeve?)
Removing parts for suspension refresh… is that hub nut really this bad? An 800 lbs impact wrench didn’t budge it. I’ll try the jack-with-breaker-bar trick next…
really? Should I just go ape on it?
pretty sure I checked; but are these reverse thread on the driver side?
Hub nuts are all standard right-hand thread.
I don't like using impacts on any rolling element bearings if the bearing is to be reused. It's easy to brinell the races and now you need a bearing replacement.
I use a 3/4" drive socket with a 3/4" drive sliding T handle and a suitable length of pipe. Get someone to hold the foot brake if needed.


 08-02-2022, 06:59 PM