When you click on links to various merchants on this site and make a purchase, this can result in this site earning a commission. Affiliate programs and affiliations include, but are not limited to, the eBay Partner Network.
Burnt out tail light. Easy fix right? I started loosening the bolts and spraying them and then crack. Both clips holding the bolts in broke. Any ideas on how to get the bolts out and the the lens off? Drill the bolts? The lens is still in but loose.
When you say the clips broke - from memory - these are flat-U shaped clips where the rear part has threads? If so - somehow you've got to make the rear part stop spinning. Probably impossible to do with the light still installed - so perhaps drilling the heads off is where you may want to start, and then remove the light.
I can't remember what or how those things thread into the tail light, but it shouldn't be hard to fix with some epoxy once you get them out.
You may want to try one of the following techniques:
1. An electric impact driver. Sometimes they can spin a bolt quickly enough that the inertia of whatever is threaded to them allows the bolt to still unscrew from it.
2. Use hot glue to attach to the bolt head. You may be able to pull on it while unscrewing with the right pressure to apply enough friction on whatever they are screwed into that it will stop spinning. Isopropyl alcohol will instantly remove all hot glue.
The bolts thread into what's called a 'speed nut'. Which is a fancy word for 'cheap *** piece of sheet metal'. Once the speed nut breaks & starts spinning, you are screwed.
The only way to get the bolt out is to drill or cut off the head.
I used a cut off wheel and a couple different steel cutting tools on a Dremel.
Once I get the bolts out, is it an easy fix to repair the cracked mounts?
Absolutely. Google "Speed Nut" and you will see what they look like. U-shaped clip with a hole through it, and 'sorta threads' on one side.
What has happened is the bottom of the "U" has broken. And the 'sorta threaded' part is likely rusted to the bolt.
Once you get the bolt out you will see it. Put a new speed nut on and you are good to go. You will likely want a new bolt too.
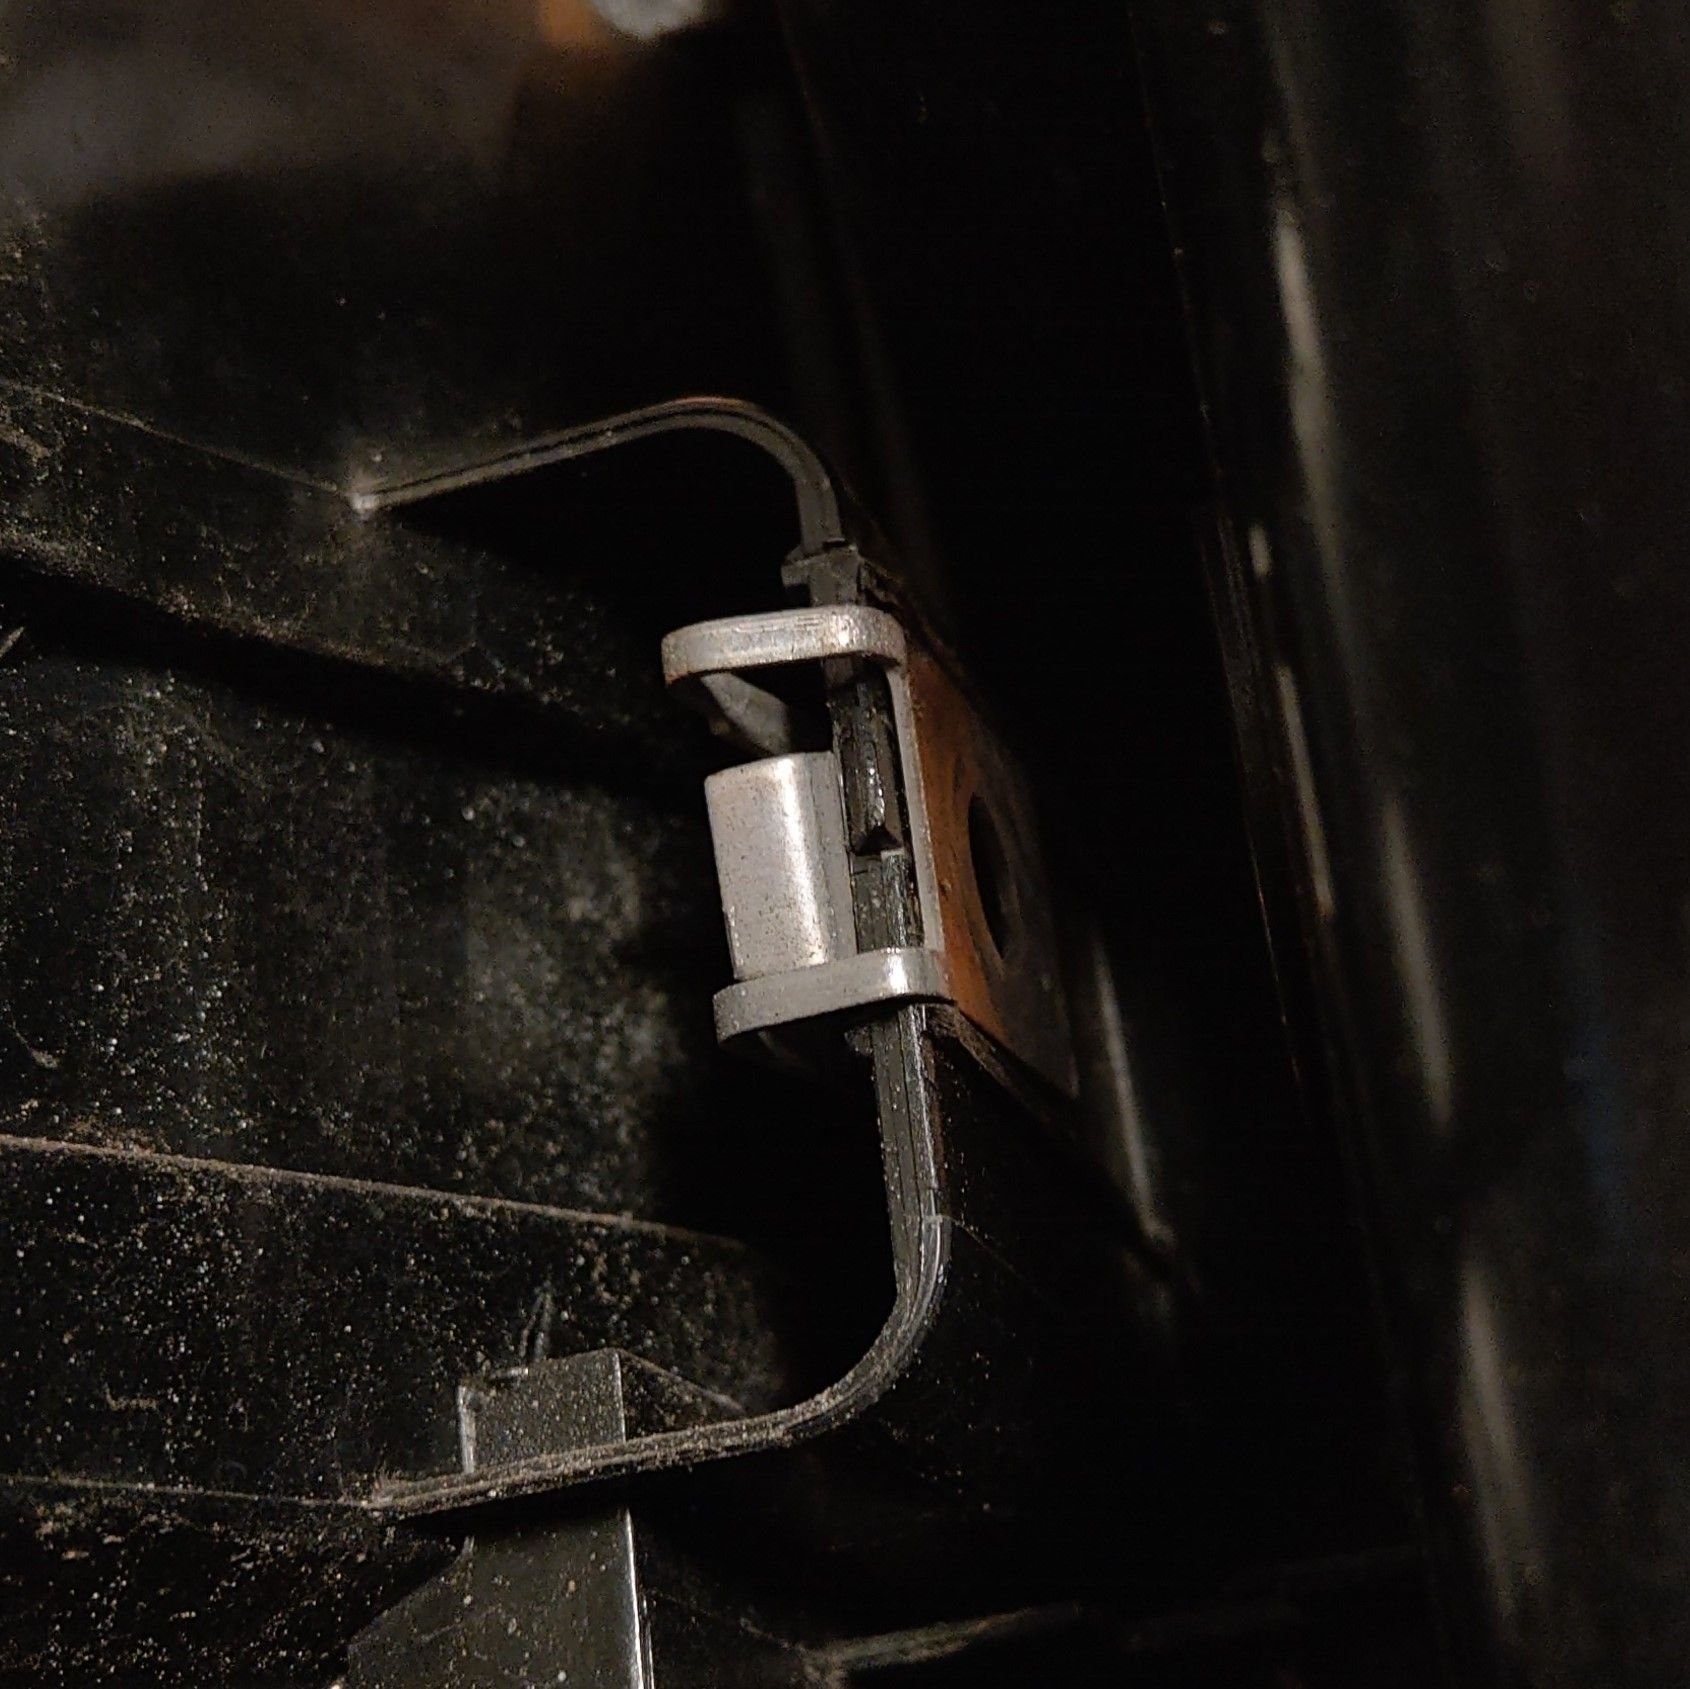
Don't know if you worked through this on the weekend, but this is a picture of what you are dealing with.
If the speed nut "jumped" the tabs keeping it from turning in place, you might be able to get something behind the bolt head and pull on it while you turn, assuming the penetrating spray has done it's job.
If the plastic u-shaped brackets completely broke (hope not!) I would think you can just pull the light out and the speed-nut & bolt will stay in place.
Otherwise, as others have said, it is time to grind the head off...
I fought with it for a while and gave up. I'll have to drill it or dremel it. I hope the plastic didn't break either. I should have some time tomorrow night. Thanks for the picture. I know now what I am up against.
I would bet heavily that the plastic didn't break. If it did, the light housing would come out.
Look at the 'speed nut'. It has two little tabs between the top and bottom (back and front if you prefer). It won't take much rust to make the bolt stick, and stick stronger than what ever is left of those two little tabs (go back to post 8 & my definition of 'speed nut')
That's what happened to me. I'll bet it's what happened to you. Getting the head of the bolt cut down is not a fun thing, there's only a little room to work with. I ended up scratching the plastic around the bolt some. The little round 'cover' piece hides most of it.
Take your time and take it 'one bite' at a time. I ended up switching back and forth between the cutoff wheels and the cutting heads. Sometimes I got a better shot with one, other times with the other.
Drilling may have been a better option, but then again, once the drill bit 'bit' the bolt head, would it have just spun it? I don't know.
It is probably a fix beyond what you can do but if you can TIG weld by some luck, you can weld an Allen wrench right to the bolt. the heat of welding usually breaks it free and even if it doesn't you can pull against the Allen wrench as you turn to get tension on the uncaptive nut and let you unscrew it. Great trick for any broken bolt really.
Otherwise just drill it, Rivnut it and you are good to go.


 10-04-2018, 01:10 AM