When you click on links to various merchants on this site and make a purchase, this can result in this site earning a commission. Affiliate programs and affiliations include, but are not limited to, the eBay Partner Network.
Sweet. I've got a job for the weekend if I can get the parts here, then.
Originally Posted by Ben Tan
Thought I share my version of the special too I made. Difficult to get the Audi tool from where I am. Cut the U Shape bit from an old door hinge. The thickness matched the valve�s groove perfectly. The side of the U is about 4mm and the middle clearance is 15mm. Place it into a 19mm socket perfectly snug and now I have a special tool for this valve replacement job.
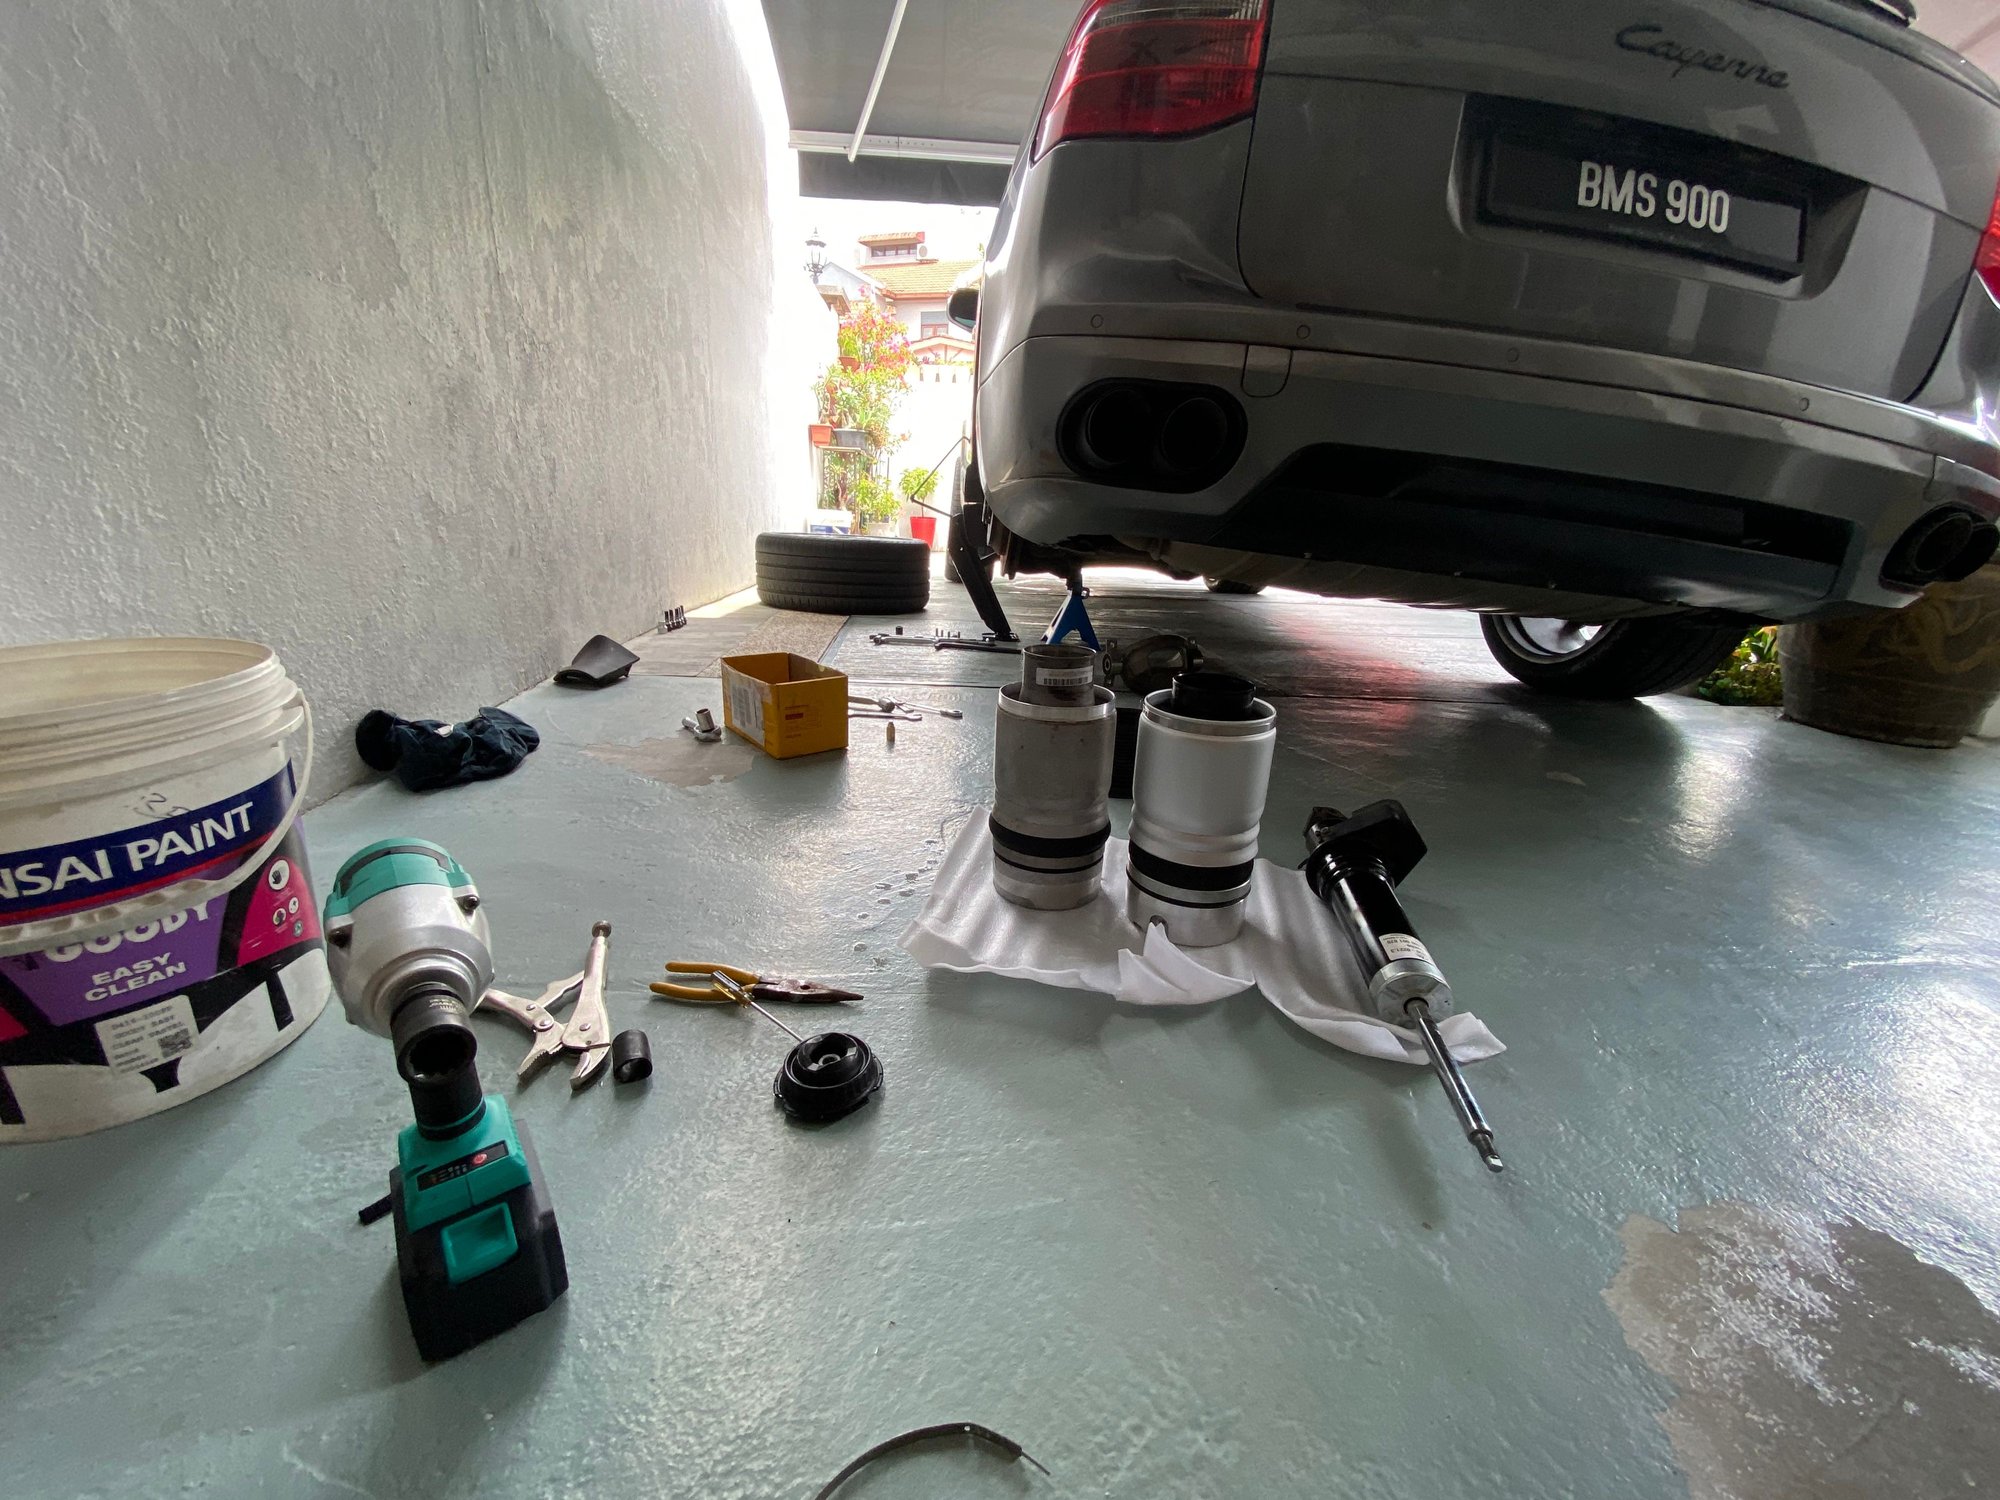
I completed the front valve replacements this morning. All of the advice here is appropriate, especially at least supporting both wheels of the side you're working on with rated jack stands. Let the valve bleed a bit before removing it from the shock, as was noted - it will launch if you spin it off quickly.
I replaced my compression fittings too, as they weren't hard to remove. A quicky pull with pliers from the side and the ferrule will snap in two and off. When replacing the compression nut and ferrule, it's important to get them as far up the hose as possible for proper seating. I had play on my first attempt.
I'm not looking forward to the rears. Does anyone have photos of the location?
Last edited by user 8298308; 03-10-2022 at 12:11 PM.
I completed the front valve replacements this morning. All of the advice here is appropriate, especially at least supporting both wheels of the side you're working on with rated jack stands. Let the valve bleed a bit before removing it from the shock, as was noted - it will launch if you spin it off quickly.
I replaced my compression fittings too, as they weren't hard to remove. A quicky pull with pliers from the side and the ferrule will snap in two and off. When replacing the compression nut and ferrule, it's important to get them as far up the hose as possible for proper seating. I had play on my first attempt.
I'm not looking forward to the rears. Does anyone have photos of the location?
rears face inward, you have to go by feel. Might be just easier to take off the strut assembly instead (4 bolts at top, one at the bottom)
Sorry, I have to laugh... the rears are nearly impossible to see. Myself and others have replaced them by feel but it requires infinite patience and results in severly scraped hands and arms. The first one is the most difficult and the second much easier after you get the feel of it. I could probably do each side in 20 minutes now.
Remember to be VERY careful if you put your arms up in there. Ensure that the P!G is properly supported. You could break or even lose an arm if you aren't careful as the pressure is released.
On the scale of the worst jobs on my 957 CTTS, this ranks as a 9+, with 10 being the worst, and is almost as bad as the HPFP replacement, which I would rate a 10.
Just an update to my problem. Turns out that both bags on the rear has a leak. A very tiny one that can�t be seen with the naked eye.
my height can�t go above normal when I had the problem. Firstly replaced the rear right bag and it could go one level up and throw an error when attempting special terrain height. Left it at normal height overnight and saw the rear left dropped half an inch and the right compensated a little.
Following that changed the read left bag and all is well. Cycles through all the heights without any problem.
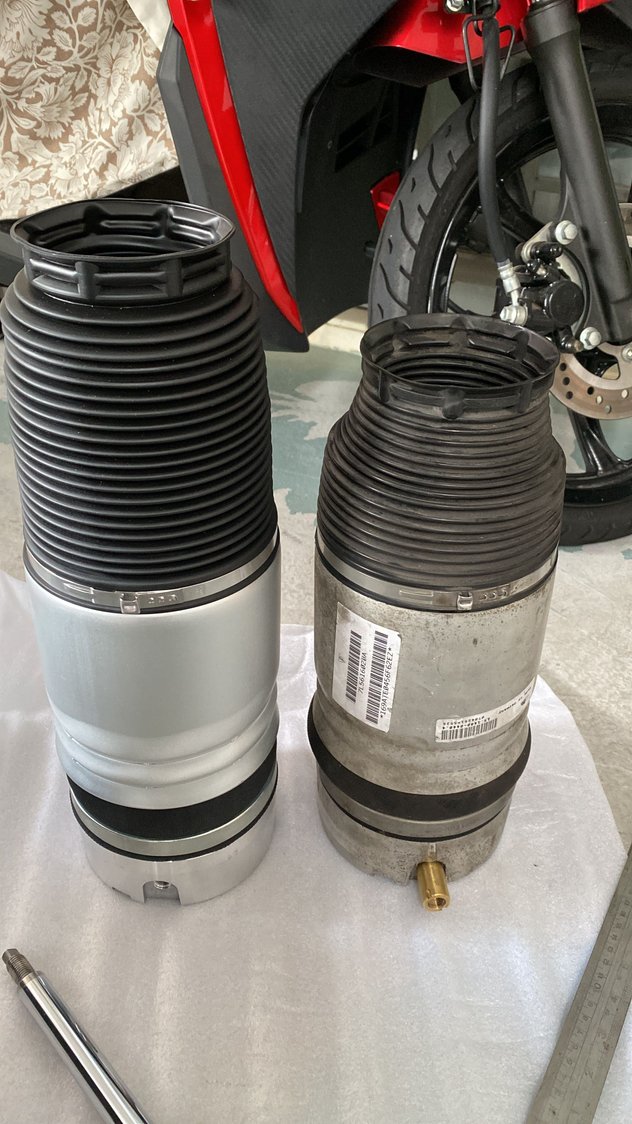
Things I noticed, the o rings at the valve or Voss connectors are unlikely to leak. At least in my case - tropical climate no winter. You have to unscrew to a certain point past the grip of the o ring to even hear the air hissing. Aged bags can leak although I couldn�t see the actual tear once removed. Could be a small pinhole sized that is made worse with higher pressure. The struts is really hardy. Mine is 15 years and still kicking with no leaks.
btw both rear bags with top mounts, upper lower o rings and valve with connector from AliExpress for usd$400 shipped. No quality issues from my observation. Only problem was the dust cover was longer so I reused mine. No biggie.
Oh, man - I really appreciate the well wishes on this. I can't wait.
I might ask a friend if his lift is available for this. I'll probably do it at the same time I switch to the summer wheels in a few weeks.
Edit: Oh, man - I slid under to get a look at the location. This will be hilarious.
I certainly wish you success! Definitely use a lift if you can. I would love to have a lift but I am stuck because installing a lift in my garage means a very expensive code variance and a complete rebuild of the garage to accomodate the height. Take your time (and a lot of deep breaths) and you will get the hang of it.
Any issues with the ride quality of the new air springs?
I'd say keep the used air springs- it might have been just a top O-ring and a dirty surface on the top hat and upper part of the spring.
rides the same as the original is not better. It�s not the o ring and or mated surface. I already have them cleaned (surface) and o rings replaced prior to concluding that it was indeed the bags. Also replaced valves before.
I just had the same Chassis Warning and valve failure as the OP. For reference, I went with an German supplier that was recommended on the Audi forum. The OEM units are $200+ and $130 (discounted) and the units from this supplier with a two-year guarantee are $79 each or $99 for a pair shipped from Germany. It is a no-brainer to replace both rears at the same time for and extra 20 bucks.
There appear to be a ton of cheap knockoffs of the valves out there and I for one am not willing to take a chance on them as there are no references that I can find.
I hope this saves someone a bunch of time!
Cheers,
Tom
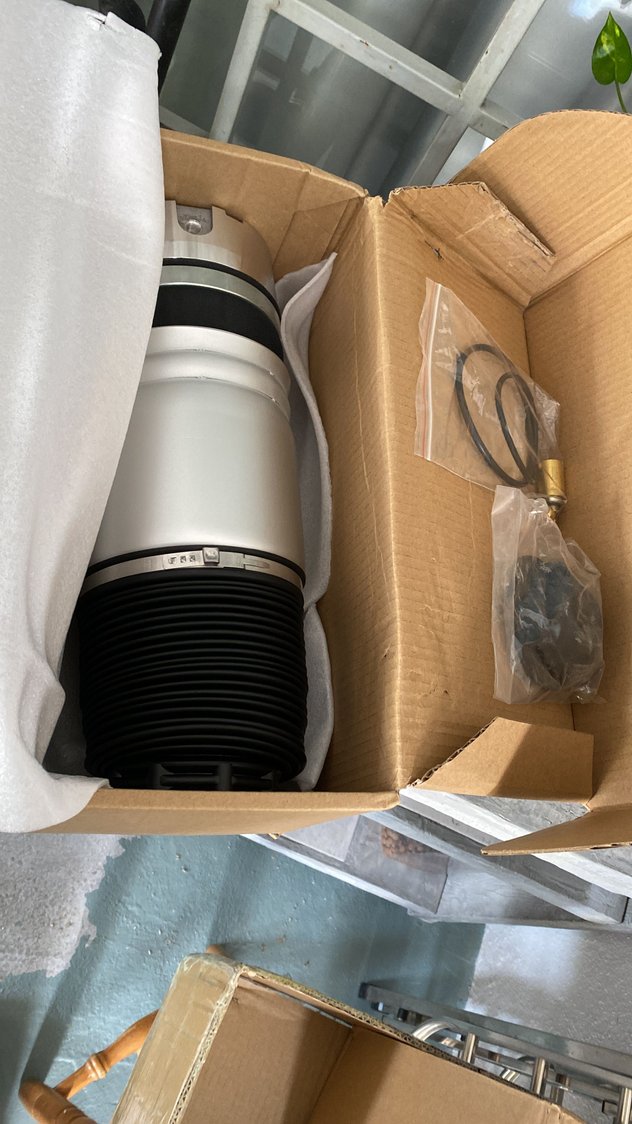
I was happy to buy replacement valves from the above eBay link, at $80 each�compared to $110 ish OEM, it felt like a bargain. I referenced that eBay seller on a Cayenne Facebook post, for a user experiencing the same suspension issue. A direct link to the manufacturer was provided by another, same valve for $40 each. While shipping isn�t included�there�s an awful lot of daylight between $80 & $40.
I was happy to buy replacement valves from the above eBay link, at $80 each�compared to $110 ish OEM, it felt like a bargain. I referenced that eBay seller on a Cayenne Facebook post, for a user experiencing the same suspension issue. A direct link to the manufacturer was provided by another, same valve for $40 each. While shipping isn�t included�there�s an awful lot of daylight between $80 & $40.
This thread immediately addressed the air suspension issue that I had, and that others experience. Needed this bump�
Thanks for the link! They also have valve blocks and connectors if anyone needs them. I need to do my front valves at some point, but the site only lists rears for sale..IIRC they are the same, front and rear or am I mistaken?
Sorry, I have to laugh... the rears are nearly impossible to see. Myself and others have replaced them by feel but it requires infinite patience and results in severly scraped hands and arms. The first one is the most difficult and the second much easier after you get the feel of it. I could probably do each side in 20 minutes now.
Remember to be VERY careful if you put your arms up in there. Ensure that the P!G is properly supported. You could break or even lose an arm if you aren't careful as the pressure is released.
On the scale of the worst jobs on my 957 CTTS, this ranks as a 9+, with 10 being the worst, and is almost as bad as the HPFP replacement, which I would rate a 10.
Tom, you can lay comfortably while changing your HPFP and not have the fear of loosing an arm😆 I think changing the vacuum pump is worse as the space is tighter.
Tom, you can lay comfortably while changing your HPFP and not have the fear of loosing an arm😆 I think changing the vacuum pump is worse as the space is tighter.
Thanks for the link! They also have valve blocks and connectors if anyone needs them. I need to do my front valves at some point, but the site only lists rears for sale..IIRC they are the same, front and rear or am I mistaken?
front and rear have different part numbers�both as OEM, and from the aftermarket manufacturer listed above. They looked identical to me�but labeled the bags they came in F&R specific.


 02-23-2022, 09:44 AM


 Sorry, I have to laugh... the rears are nearly impossible to see. Myself and others have replaced them by feel but it requires infinite patience and results in severly scraped hands and arms. The first one is the most difficult and the second much easier after you get the feel of it. I could probably do each side in 20 minutes now.


 I certainly wish you success! Definitely use a lift if you can. I would love to have a lift but I am stuck because installing a lift in my garage means a very expensive code variance and a complete rebuild of the garage to accomodate the height. Take your time (and a lot of deep breaths) and you will get the hang of it.

