When you click on links to various merchants on this site and make a purchase, this can result in this site earning a commission. Affiliate programs and affiliations include, but are not limited to, the eBay Partner Network.
I put lifters in my A4 not too long ago and did everything you're supposed to do to make sure they are primed yet had a similar experience with a couple that took forever to pump up. Tense moments for sure but glad it worked out for you.
...now when do we get dyno results from the cam swap!!!!
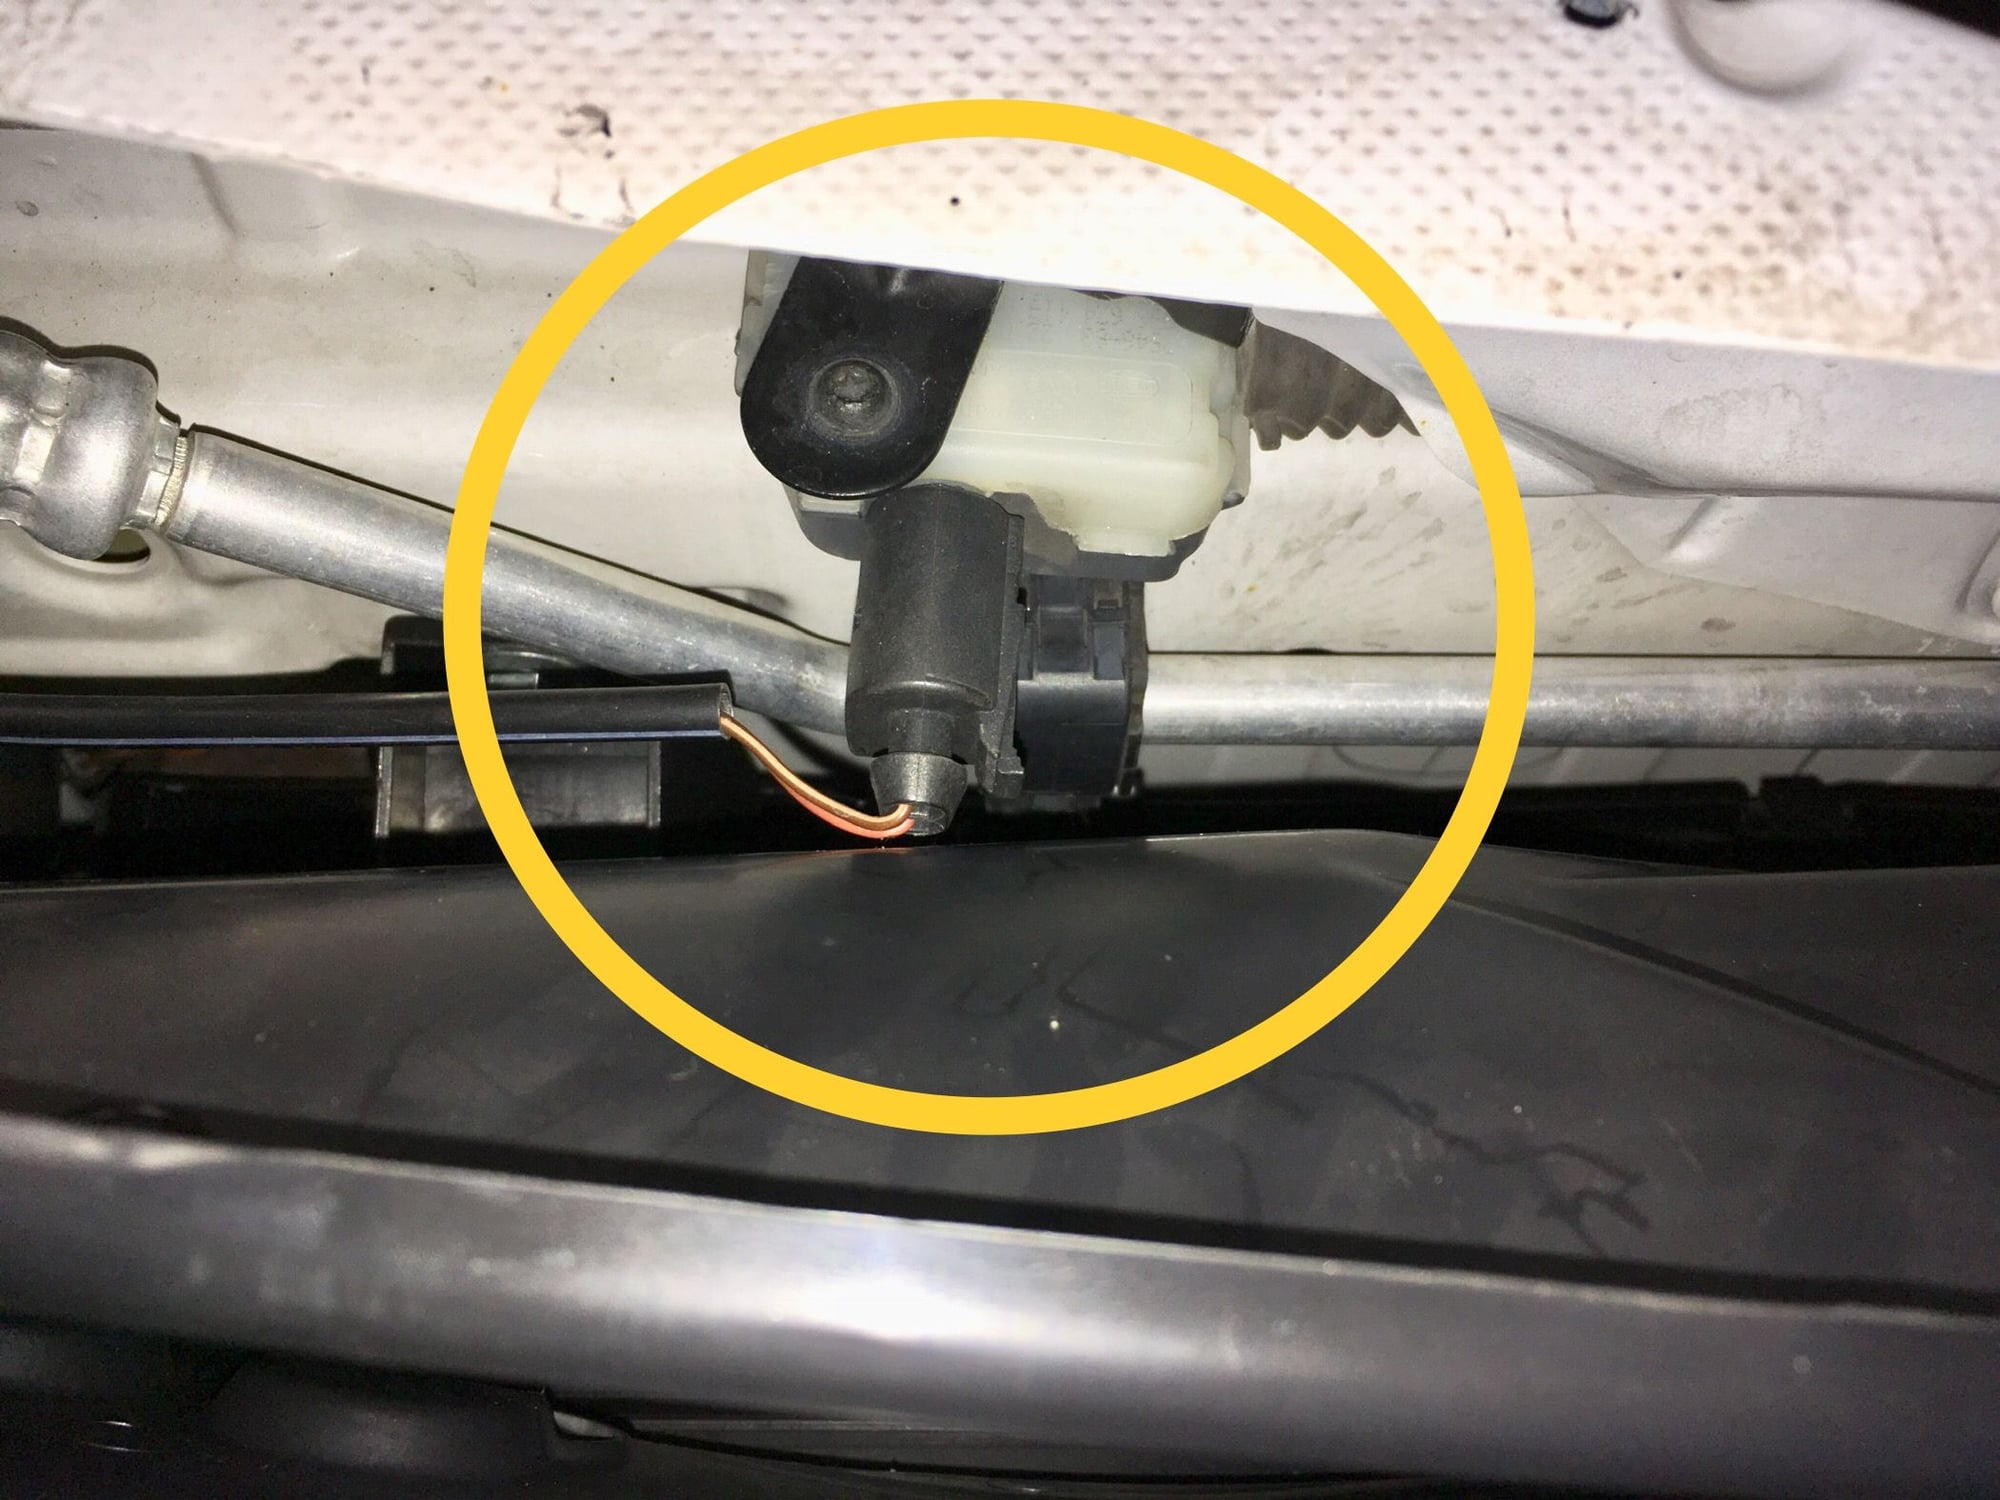
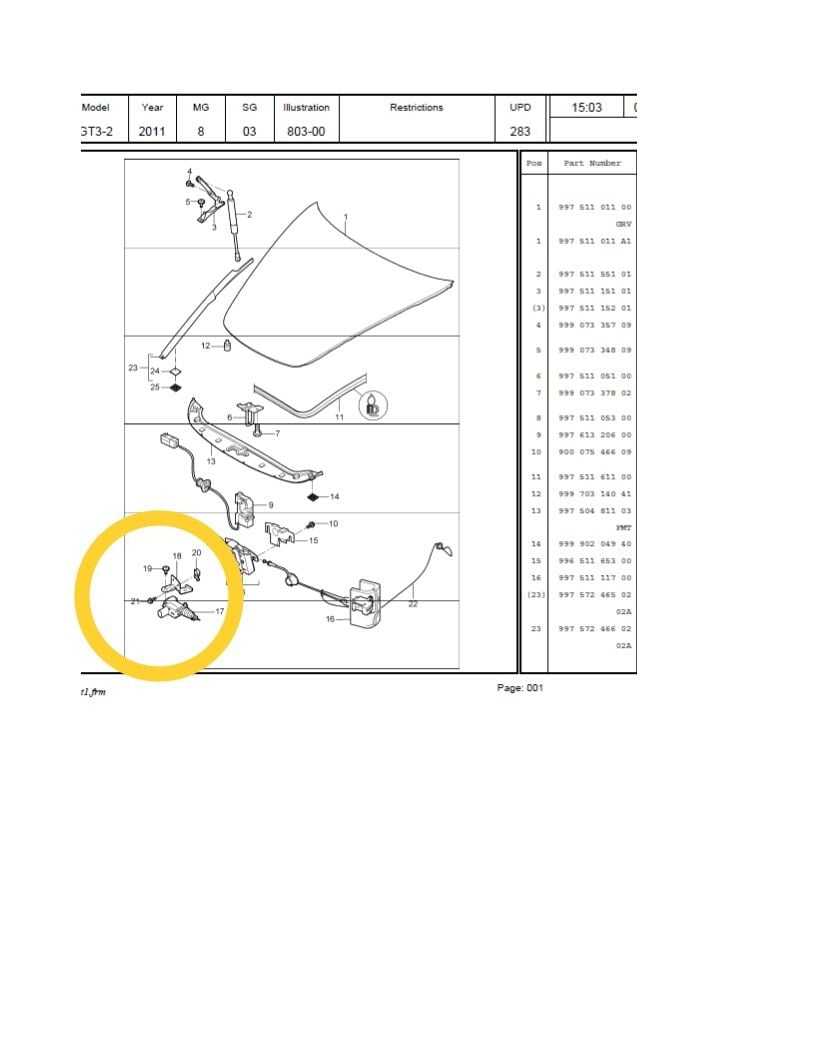
Do you or does anyone happen the know the part # for the .2 /RS electronic latch release? The .1 latch lease gets in the way of the .2 duct. I looked briefly on PET but unable to find the part numbers for item #17 and #18 in the image below.
Thank you, Steve W.
Unfortunate that's the same part # as what's on the car now so its some other part that makes up for the clearance for the .2 upper duct.
Thanks anyway.
Do you or does anyone happen the know the part # for the .2 /RS electronic latch release? The .1 latch lease gets in the way of the .2 duct. I looked briefly on PET but unable to find the part numbers for item #17 and #18 in the image below.
Ok, bare with me here and Im going to explain a bunch of things that need to be done to make this work
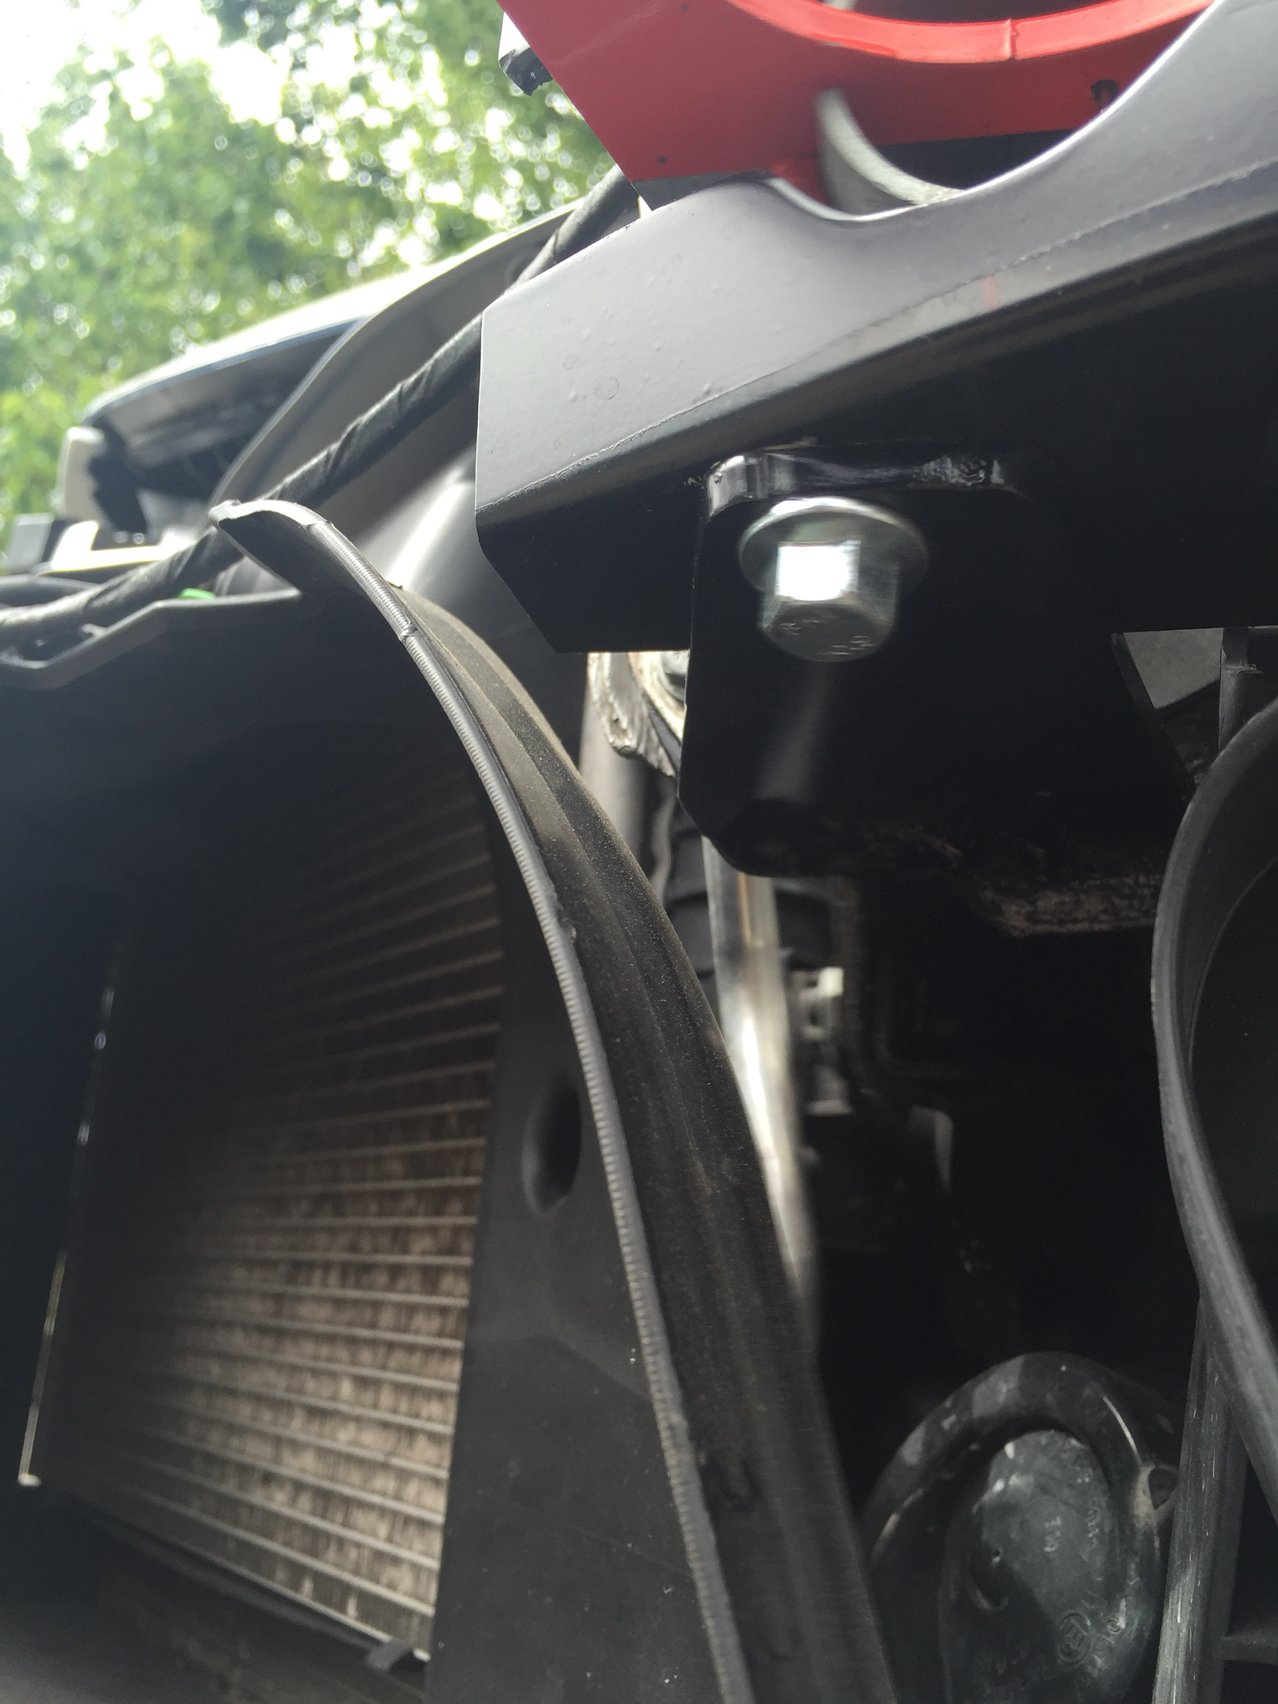
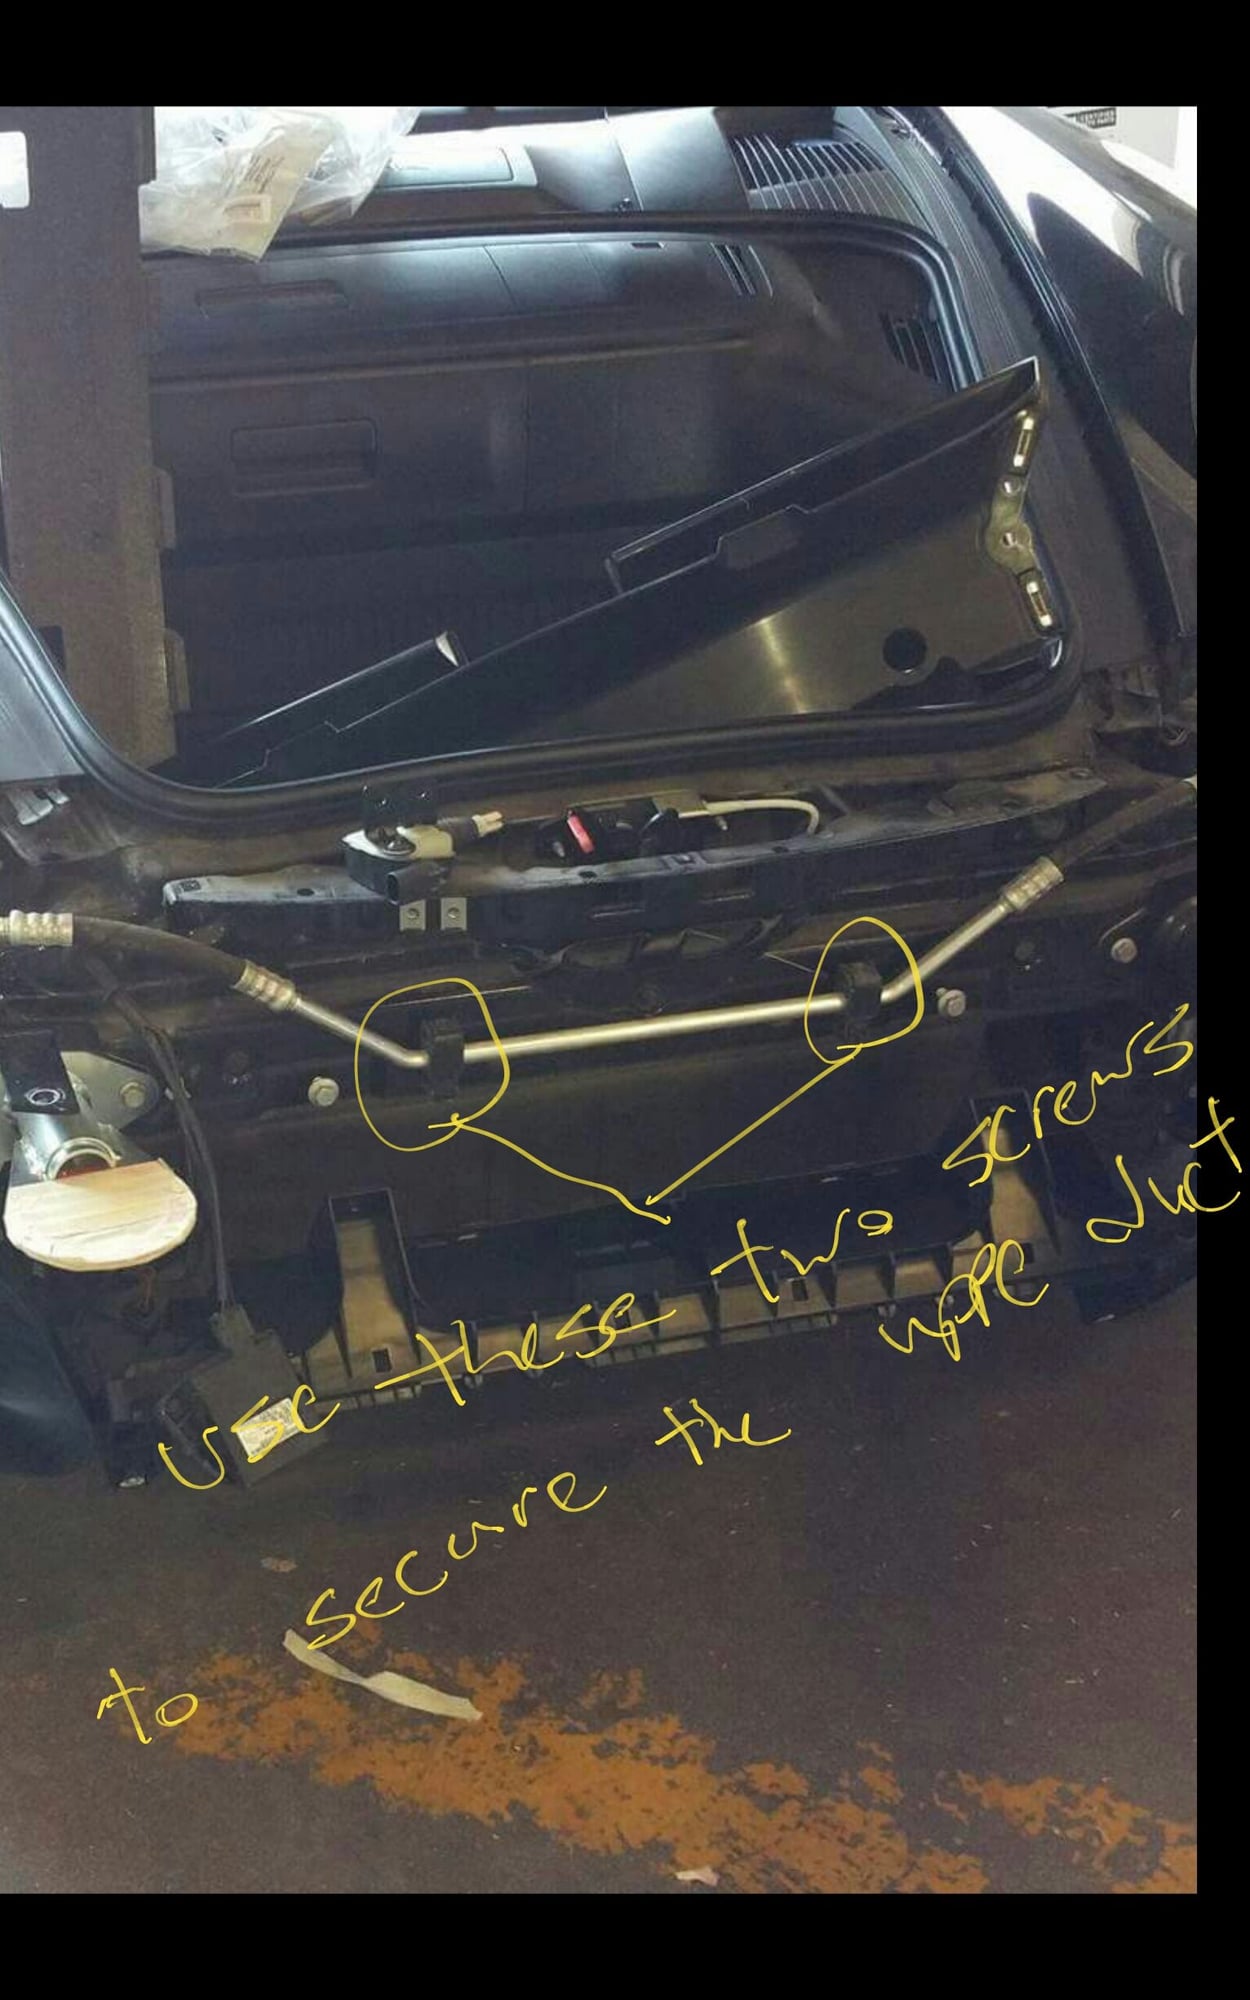
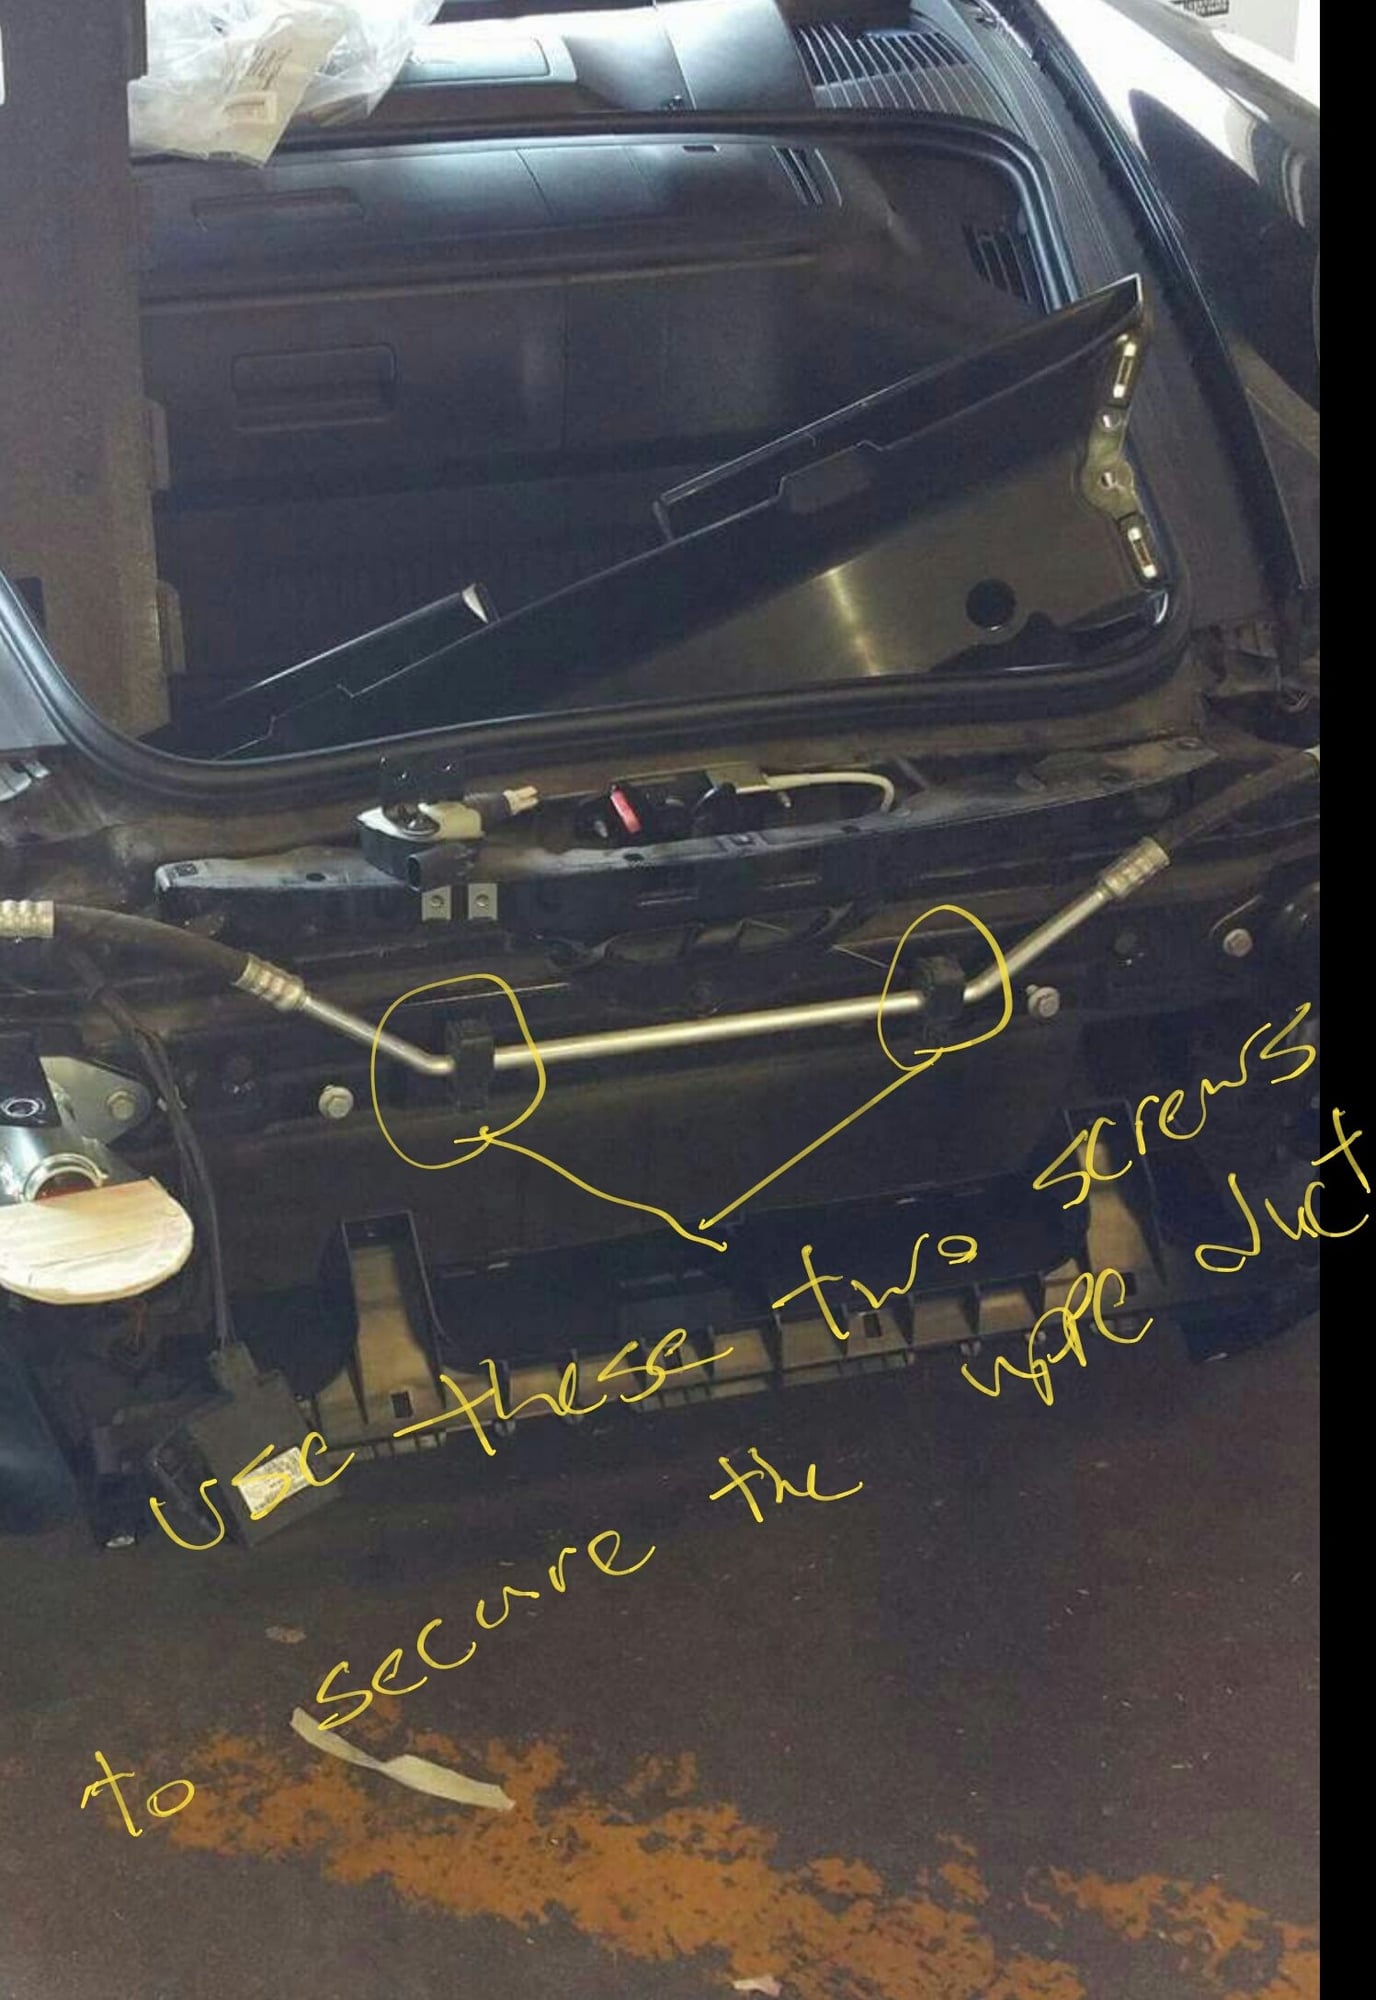
The .2 upper plastic air duct plugs into your existing center radiator plastic bracket, how ever I'm not sure if yours is the same as the 997.2 gt3 and gt3rs. There are two holes on each side that will secure the plastic duct to the two areas that are on the body of the 997.2 gt3/rs via two washer nuts (part number 99904902901, you need 2 of them) how ever many other than the .2 RS have them so yours probably won't have it either. I refused to drill holes or let it just sit loose, so what I did was after removing the center AC condensor hose I had two body mounted screws that held the brackets for the ac hose right behind where the air duct would go, I plugged the air duct to the center radiator and made sure it is in place and lightly pushed it back and got two indentations on the back of the plastic air duct where it sits against the body, then I took it back out and drilled those two holes and put plugged everything back in and used those two washer nuts mentioned earlier to secure the center upper air duct against the body. It basically became plug and play and no holes where drilled and nothing was cut.
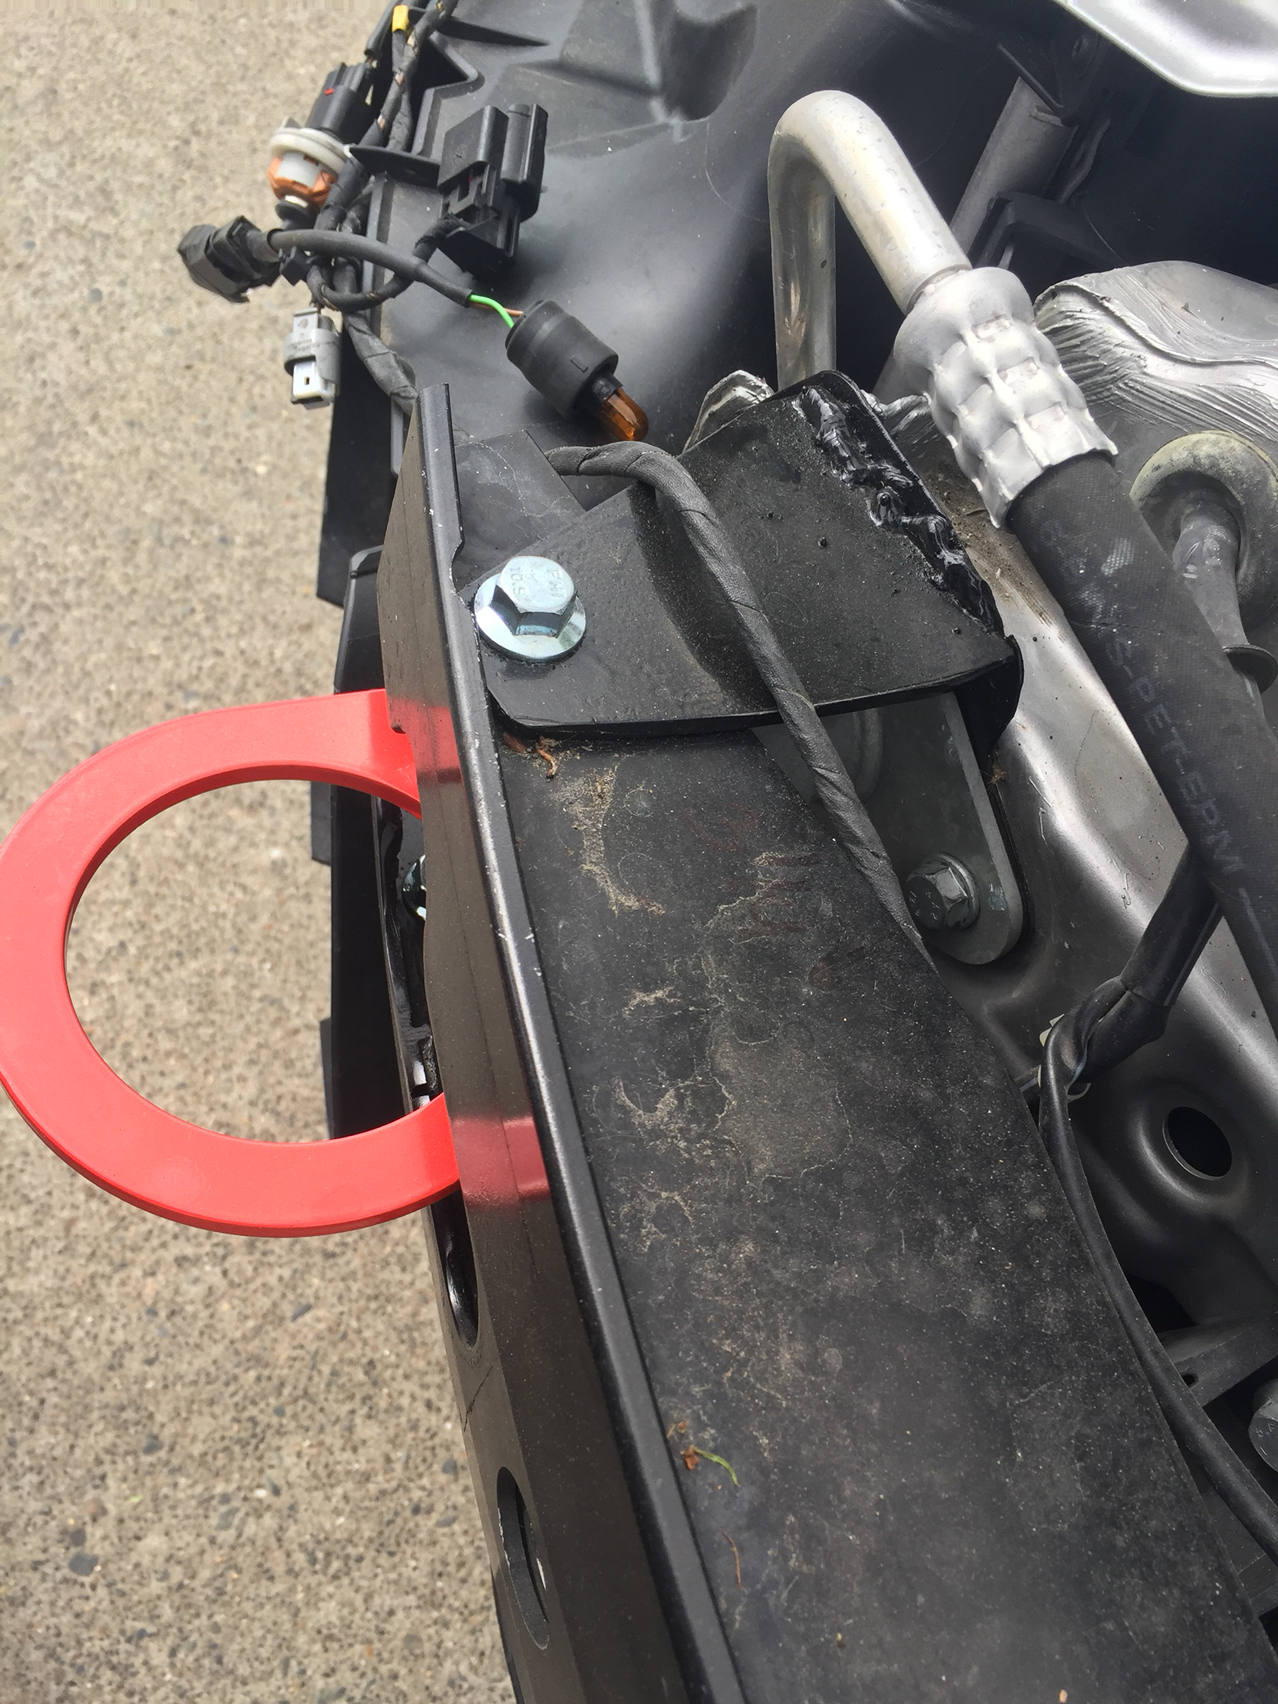
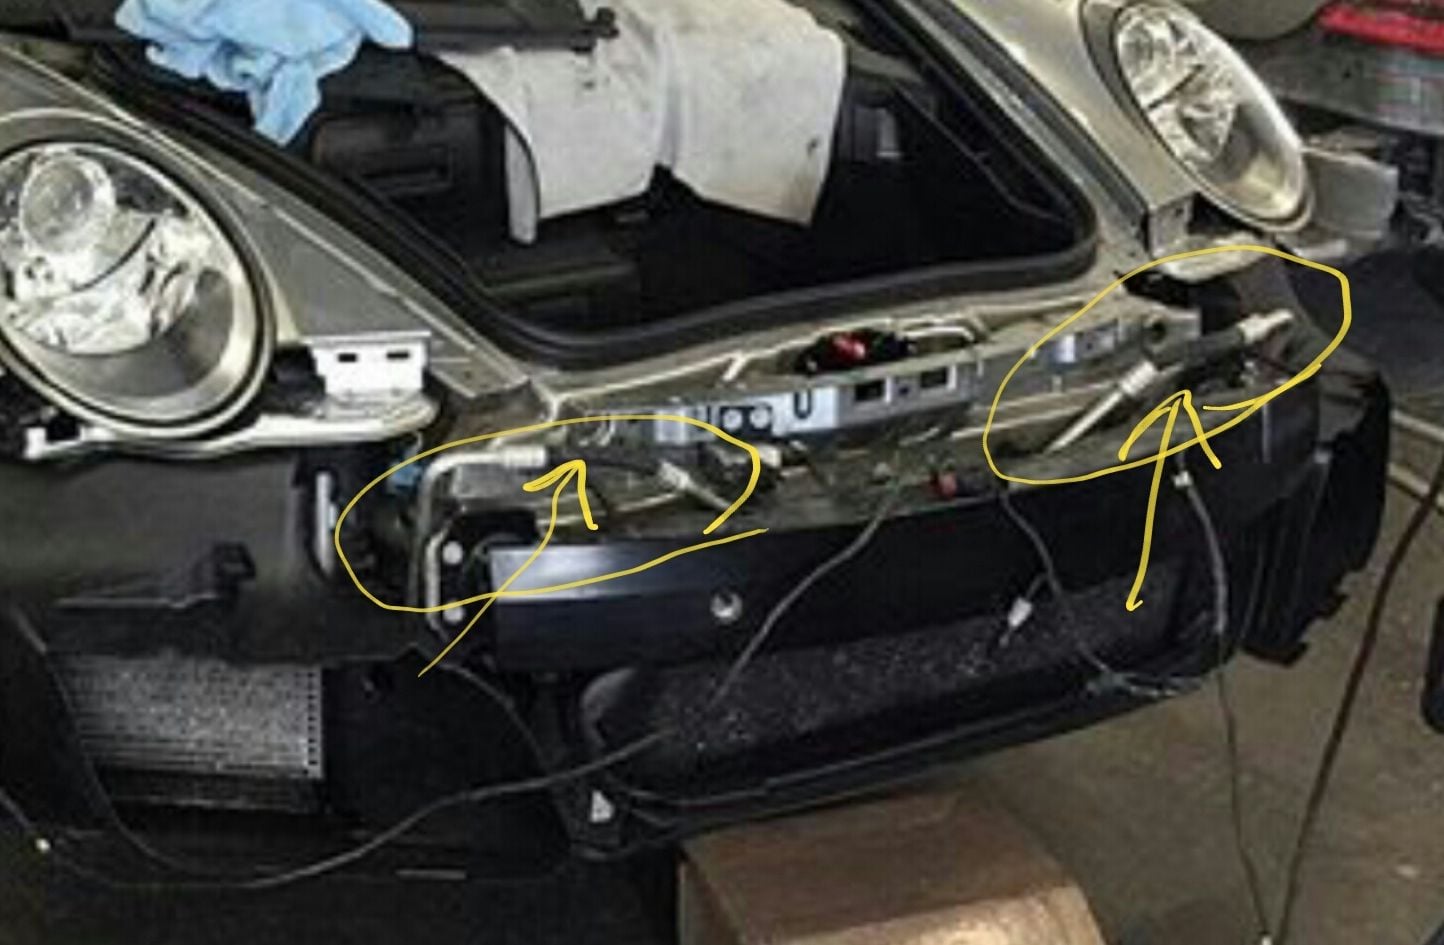
Now all 997.1s and 997.2s with the exception of the 997.2 gt3 and gt3rs use the same center AC condensor hose that connects the left and right condensers together, how ever this hose gets in the way of the center upper duct and won't let it sit right. So you have to replace this hose with the hose for the 997.2 GT3/GT3RS part number is 99757310390. It only comes from germany so about a 2 week delay. Once you replace this hose you have to refill the AC gas. This hose goes behind the center radiator plastic bracket and doesn't use any brackets to secure the body since it's a short and straight hose unlike the hose that's there right now. Refer to pics below. I circled how your hose is right now and where the new one travelers from.
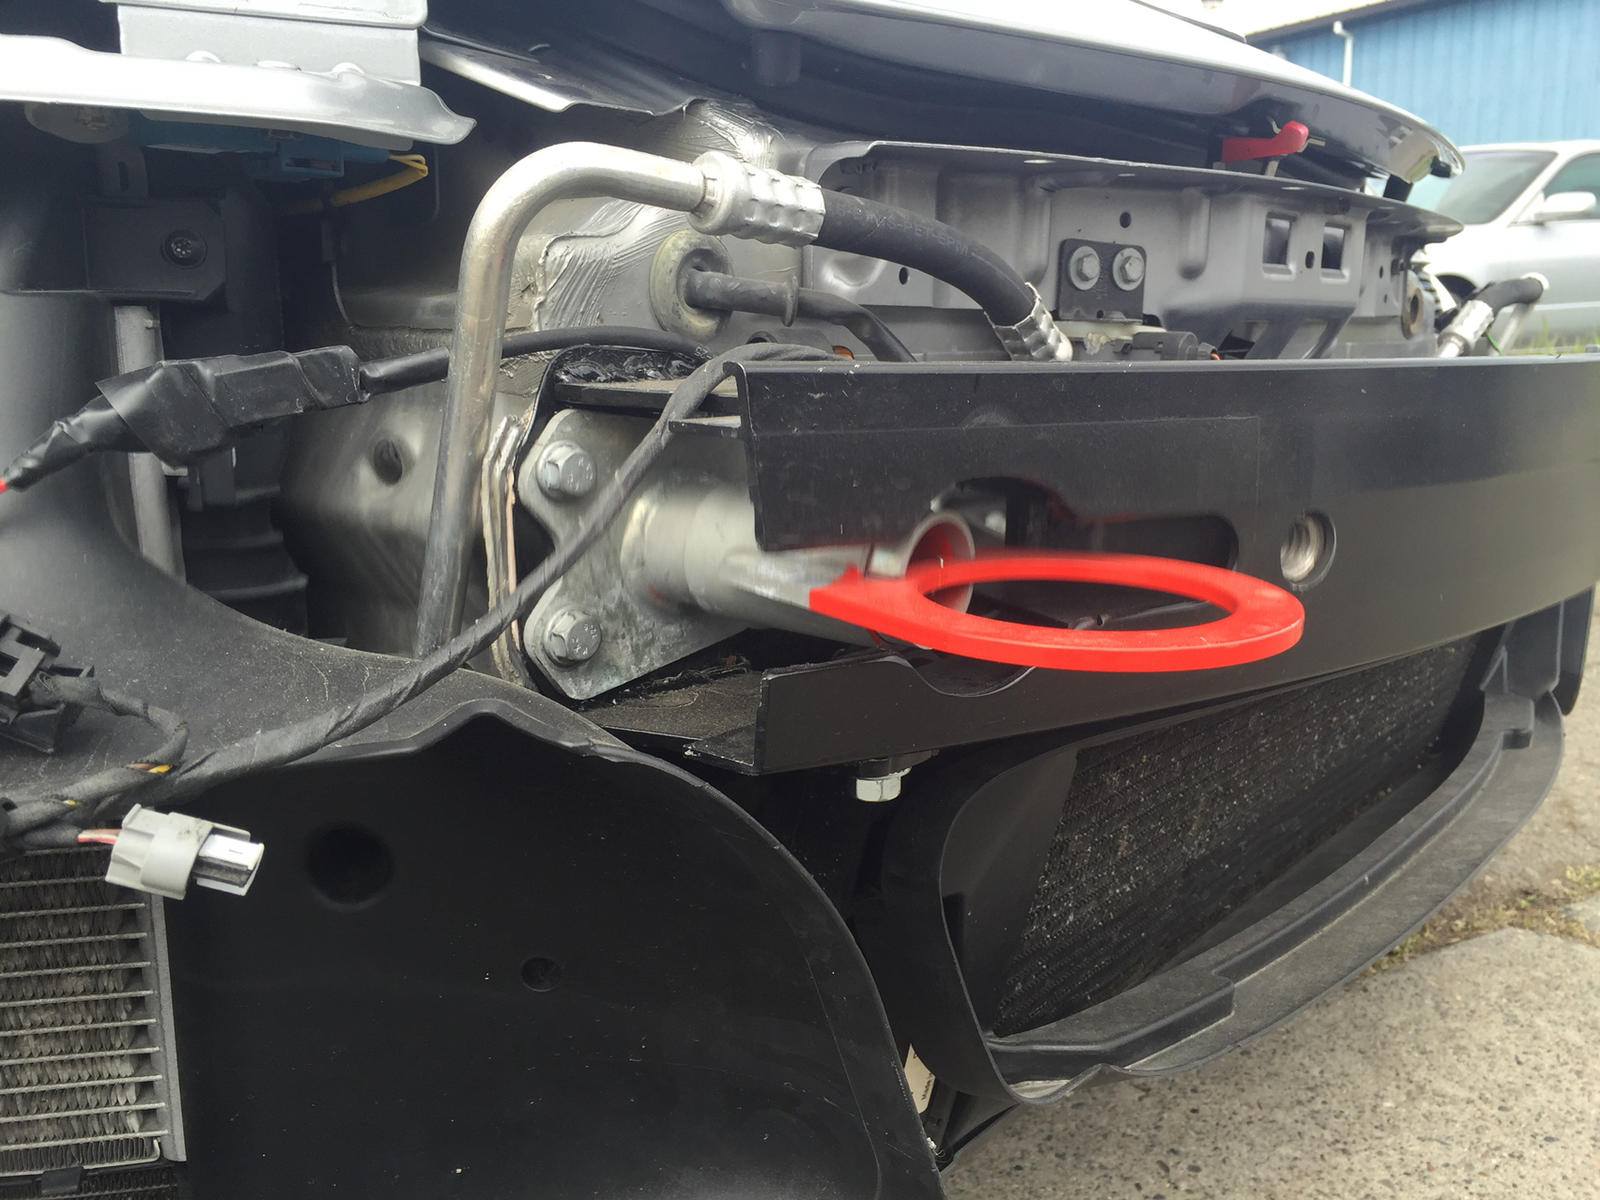
Now after the two above steps you still have issues. Right by the hood latch sits the emergency hood release actuator (this is the one that gets activated by the handle that's inside the hood, it's used in case some one gets stuck inside the hood/frunk they pull that handle and it opens the hood) You need to use the 997.2 gt3 and gt3rs parts and remount it like on those cars, or you can just remove the whole thing if you think you will never need it.
Finally the part number for the center upper air duct is 99750448981, and also attached you will see the the mounting points for the 9972 gt3/rs(the blue car) that yours and mine doesn't have and the pic of the mounting points that I used which was available and unused after moving the center AC condensor hose, they actually get in the way of the plastic duct mounting flushed so I did double duty on them, I used them to poke out of the plastic air duct so it can sit flushed and used the washer nuts to mount the air duct to them.
Ok, bare with me here and Im going to explain a bunch of things that need to be done to make this work
The .2 upper plastic air duct plugs into your existing center radiator plastic bracket, how ever I'm not sure if yours is the same as the 997.2 gt3 and gt3rs. There are two holes on each side that will secure the plastic duct to the two areas that are on the body of the 997.2 gt3/rs via two washer nuts (part number 99904902901, you need 2 of them) how ever many other than the .2 RS have them so yours probably won't have it either. I refused to drill holes or let it just sit loose, so what I did was after removing the center AC condensor hose I had two body mounted screws that held the brackets for the ac hose right behind where the air duct would go, I plugged the air duct to the center radiator and made sure it is in place and lightly pushed it back and got two indentations on the back of the plastic air duct where it sits against the body, then I took it back out and drilled those two holes and put plugged everything back in and used those two washer nuts mentioned earlier to secure the center upper air duct against the body. It basically became plug and play and no holes where drilled and nothing was cut.
Now all 997.1s and 997.2s with the exception of the 997.2 gt3 and gt3rs use the same center AC condensor hose that connects the left and right condensers together, how ever this hose gets in the way of the center upper duct and won't let it sit right. So you have to replace this hose with the hose for the 997.2 GT3/GT3RS part number is 99757310390. It only comes from germany so about a 2 week delay. Once you replace this hose you have to refill the AC gas. This hose goes behind the center radiator plastic bracket and doesn't use any brackets to secure the body since it's a short and straight hose unlike the hose that's there right now. Refer to pics below. I circled how your hose is right now and where the new one travelers from.
Now after the two above steps you still have issues. Right by the hood latch sits the emergency hood release actuator (this is the one that gets activated by the handle that's inside the hood, it's used in case some one gets stuck inside the hood/frunk they pull that handle and it opens the hood) You need to use the 997.2 gt3 and gt3rs parts and remount it like on those cars, or you can just remove the whole thing if you think you will never need it.
Finally the part number for the center upper air duct is 99750448981, and also attached you will see the the mounting points for the 9972 gt3/rs(the blue car) that yours and mine doesn't have and the pic of the mounting points that I used which was available and unused after moving the center AC condensor hose, they actually get in the way of the plastic duct mounting flushed so I did double duty on them, I used them to poke out of the plastic air duct so it can sit flushed and used the washer nuts to mount the air duct to them.
THANK YOU VERY MUCH FOR ALL THIS INFO!!!!!
This is extremely helpful! I haven't even thought about the AC line yet. Looking at the photo with the blue car, the .2/RS does have a different release actuator and bracket that I have yet to find in PET.
Front
Install front bumper upper clips, part # 999 591 629 01 (x4)
Secure front bumper corner pieces and install flaps
Replace light bulbs, Left corner turn signal, Right blue running light.
Remove emergency latch actuator (to clear center rad upper duct).
Replace center AC line (to clear center rad upper duct).
Make screens or covers for log light openings on front bumper.
Install front crash beam.
Test fan module with PIWIS or Durametric.
Install front windshield lower cowl corner pieces.
Delete or conceal sunroof switch wiring harness. Rear
Modify and refit Left and Right rear bumper frame to hold bumper cover better.
Modify or replace upper fixing strip.
Install upper clips on fixing strip, part # 999 507 489 01 (x4).
Replace rear cowl bolts, refit deck lid & wing, secure deck lid screen, install wing end plates.
Install rear crash beam and tow loop.
Install heat shield (for center muffler)
Install rear bumper grill and install plastic trim piece above exhaust tips. Under body
Get Left and Right side plastic cover panels from body shop and install them. Other
New tires, ride height, corner balance alignment.
Bleed brakes.
Reconfig Motec dash gear indicator (for ring & pinion ratio change).
Fix driver side window switch.
Wash & wax
Install car number stickers on windshield and rear bumper. ***List of items subjected to change(most likely add, not subtract)***
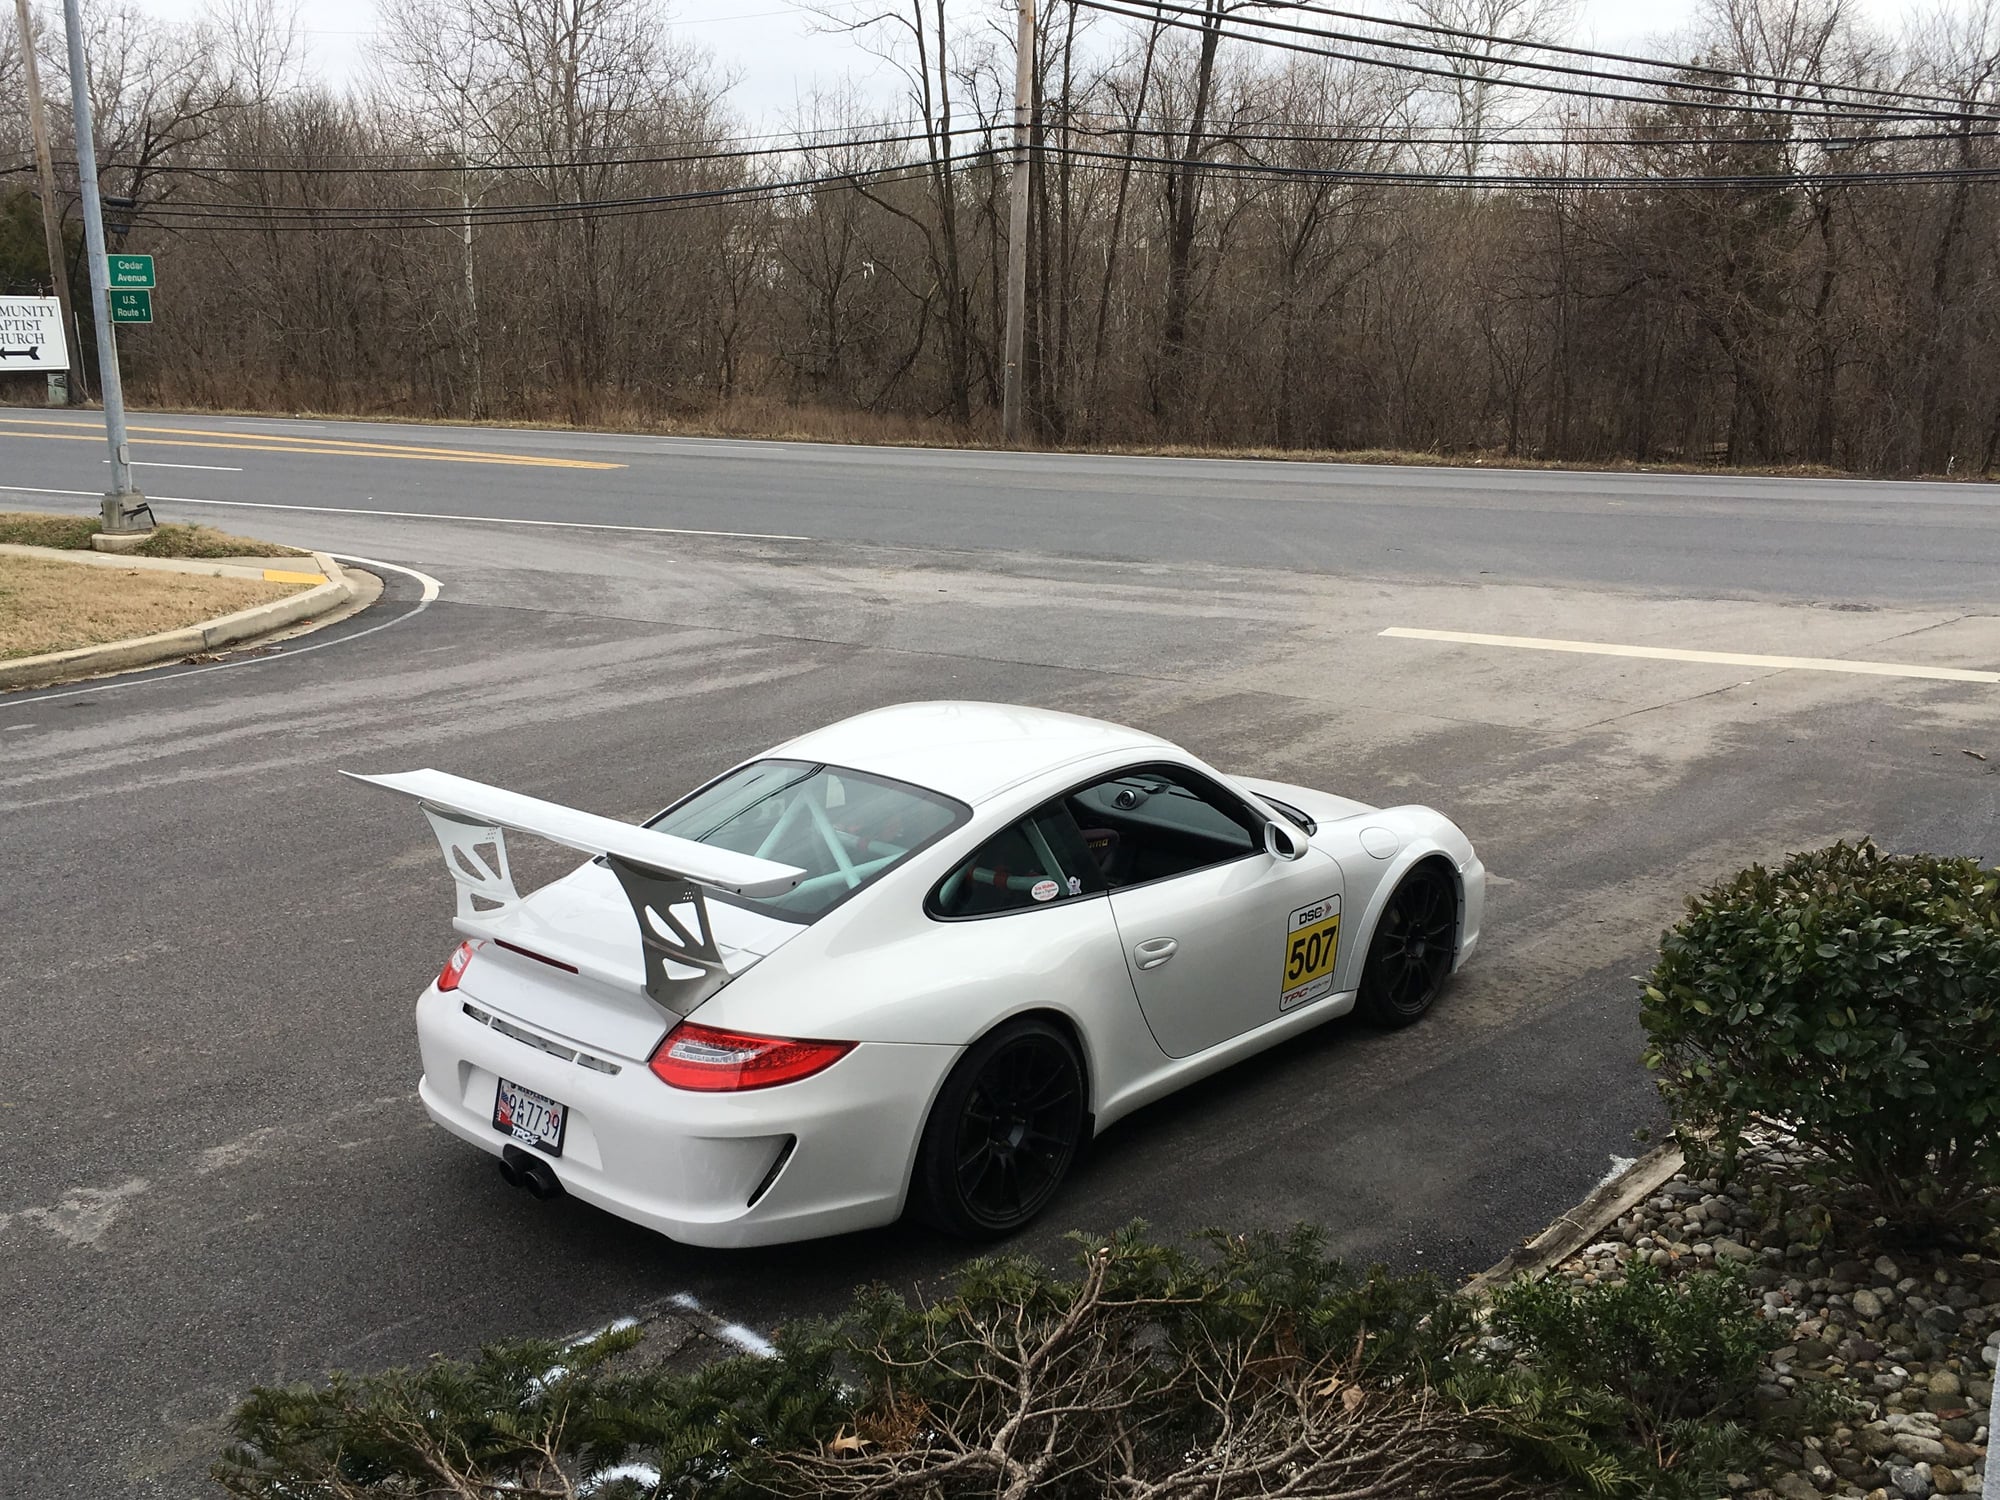
Here's a few pics from driving trip home. In time before the next snow fall!
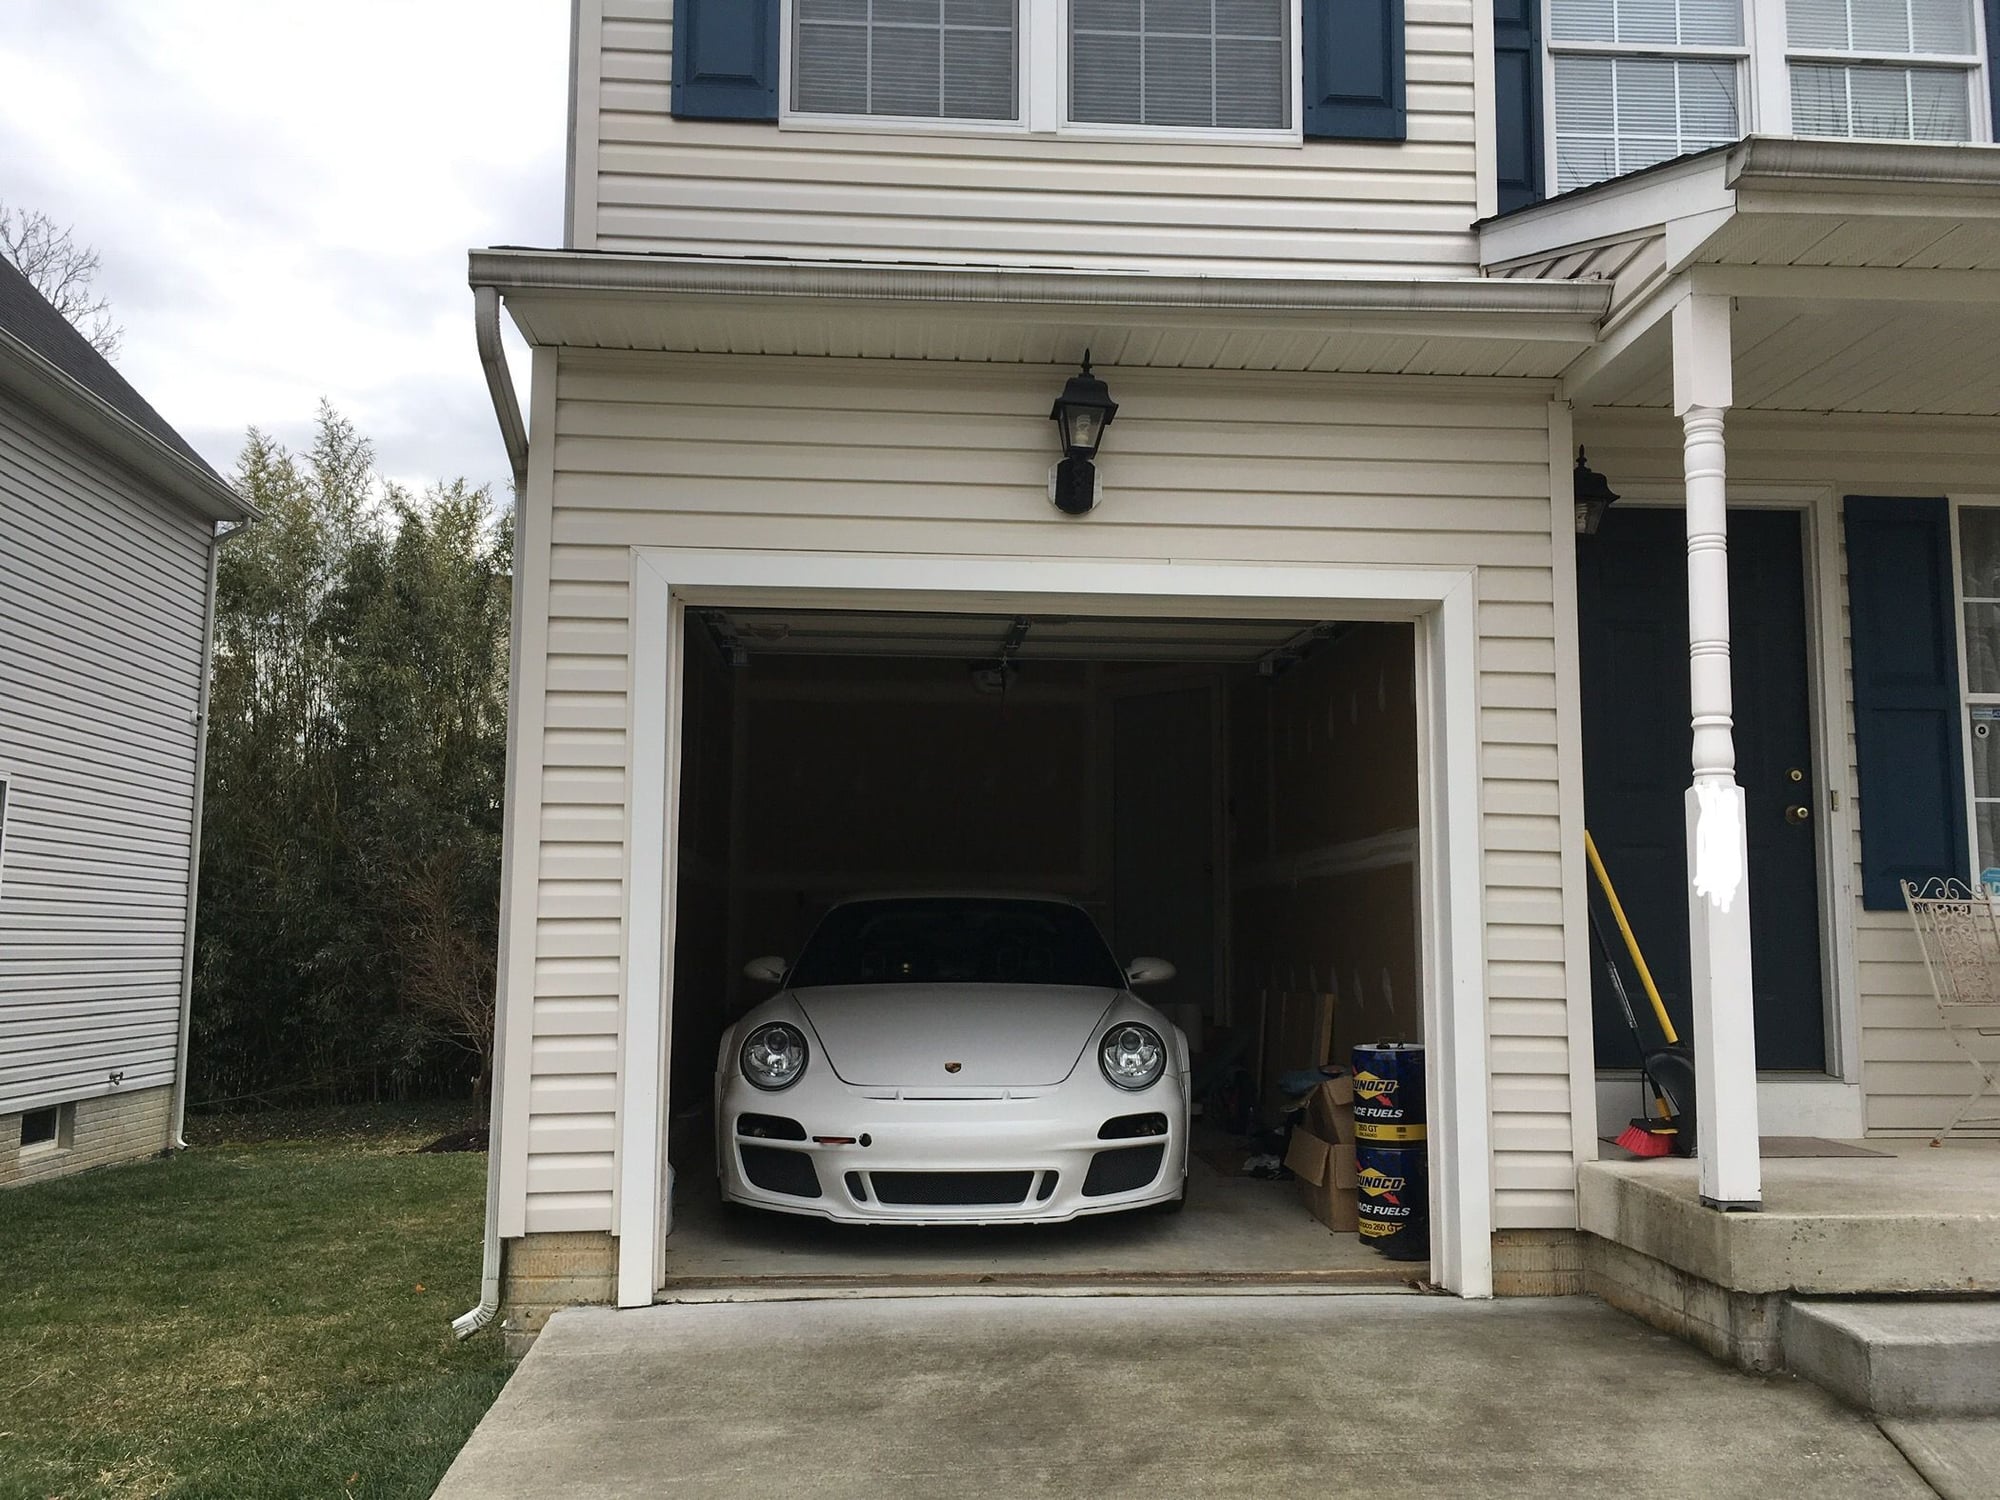
Its very limited what I can at my house because the garage size doesn't allow for floor jack handle.
What's going on with those fuel cans? What kind of fuel are you running?
After the 4.0L engine build last year, the dynamic cylinder pressure was too high(see post # 946 of this thread for further info). Even with a lot of ignition timing pulled out and the intake vario-cams adjusted all the way to reduce cylinder pressure the engine was sometimes getting -2.0 to -3.0 degrees of knock sum(via COBB Accessport) in a couple of cylinders. While this wasn't horrible, as some stock engines have same or higher knock sum, I rather have an extra margin of safety by using race fuel on track. That's what I did last year. The purpose of the exhaust camshaft swap that I did in December was to address this by increasing valve overlap to bleed off cylinder pressure. BTW, those are empty cans in my garage. I kept two of them because they look cool.
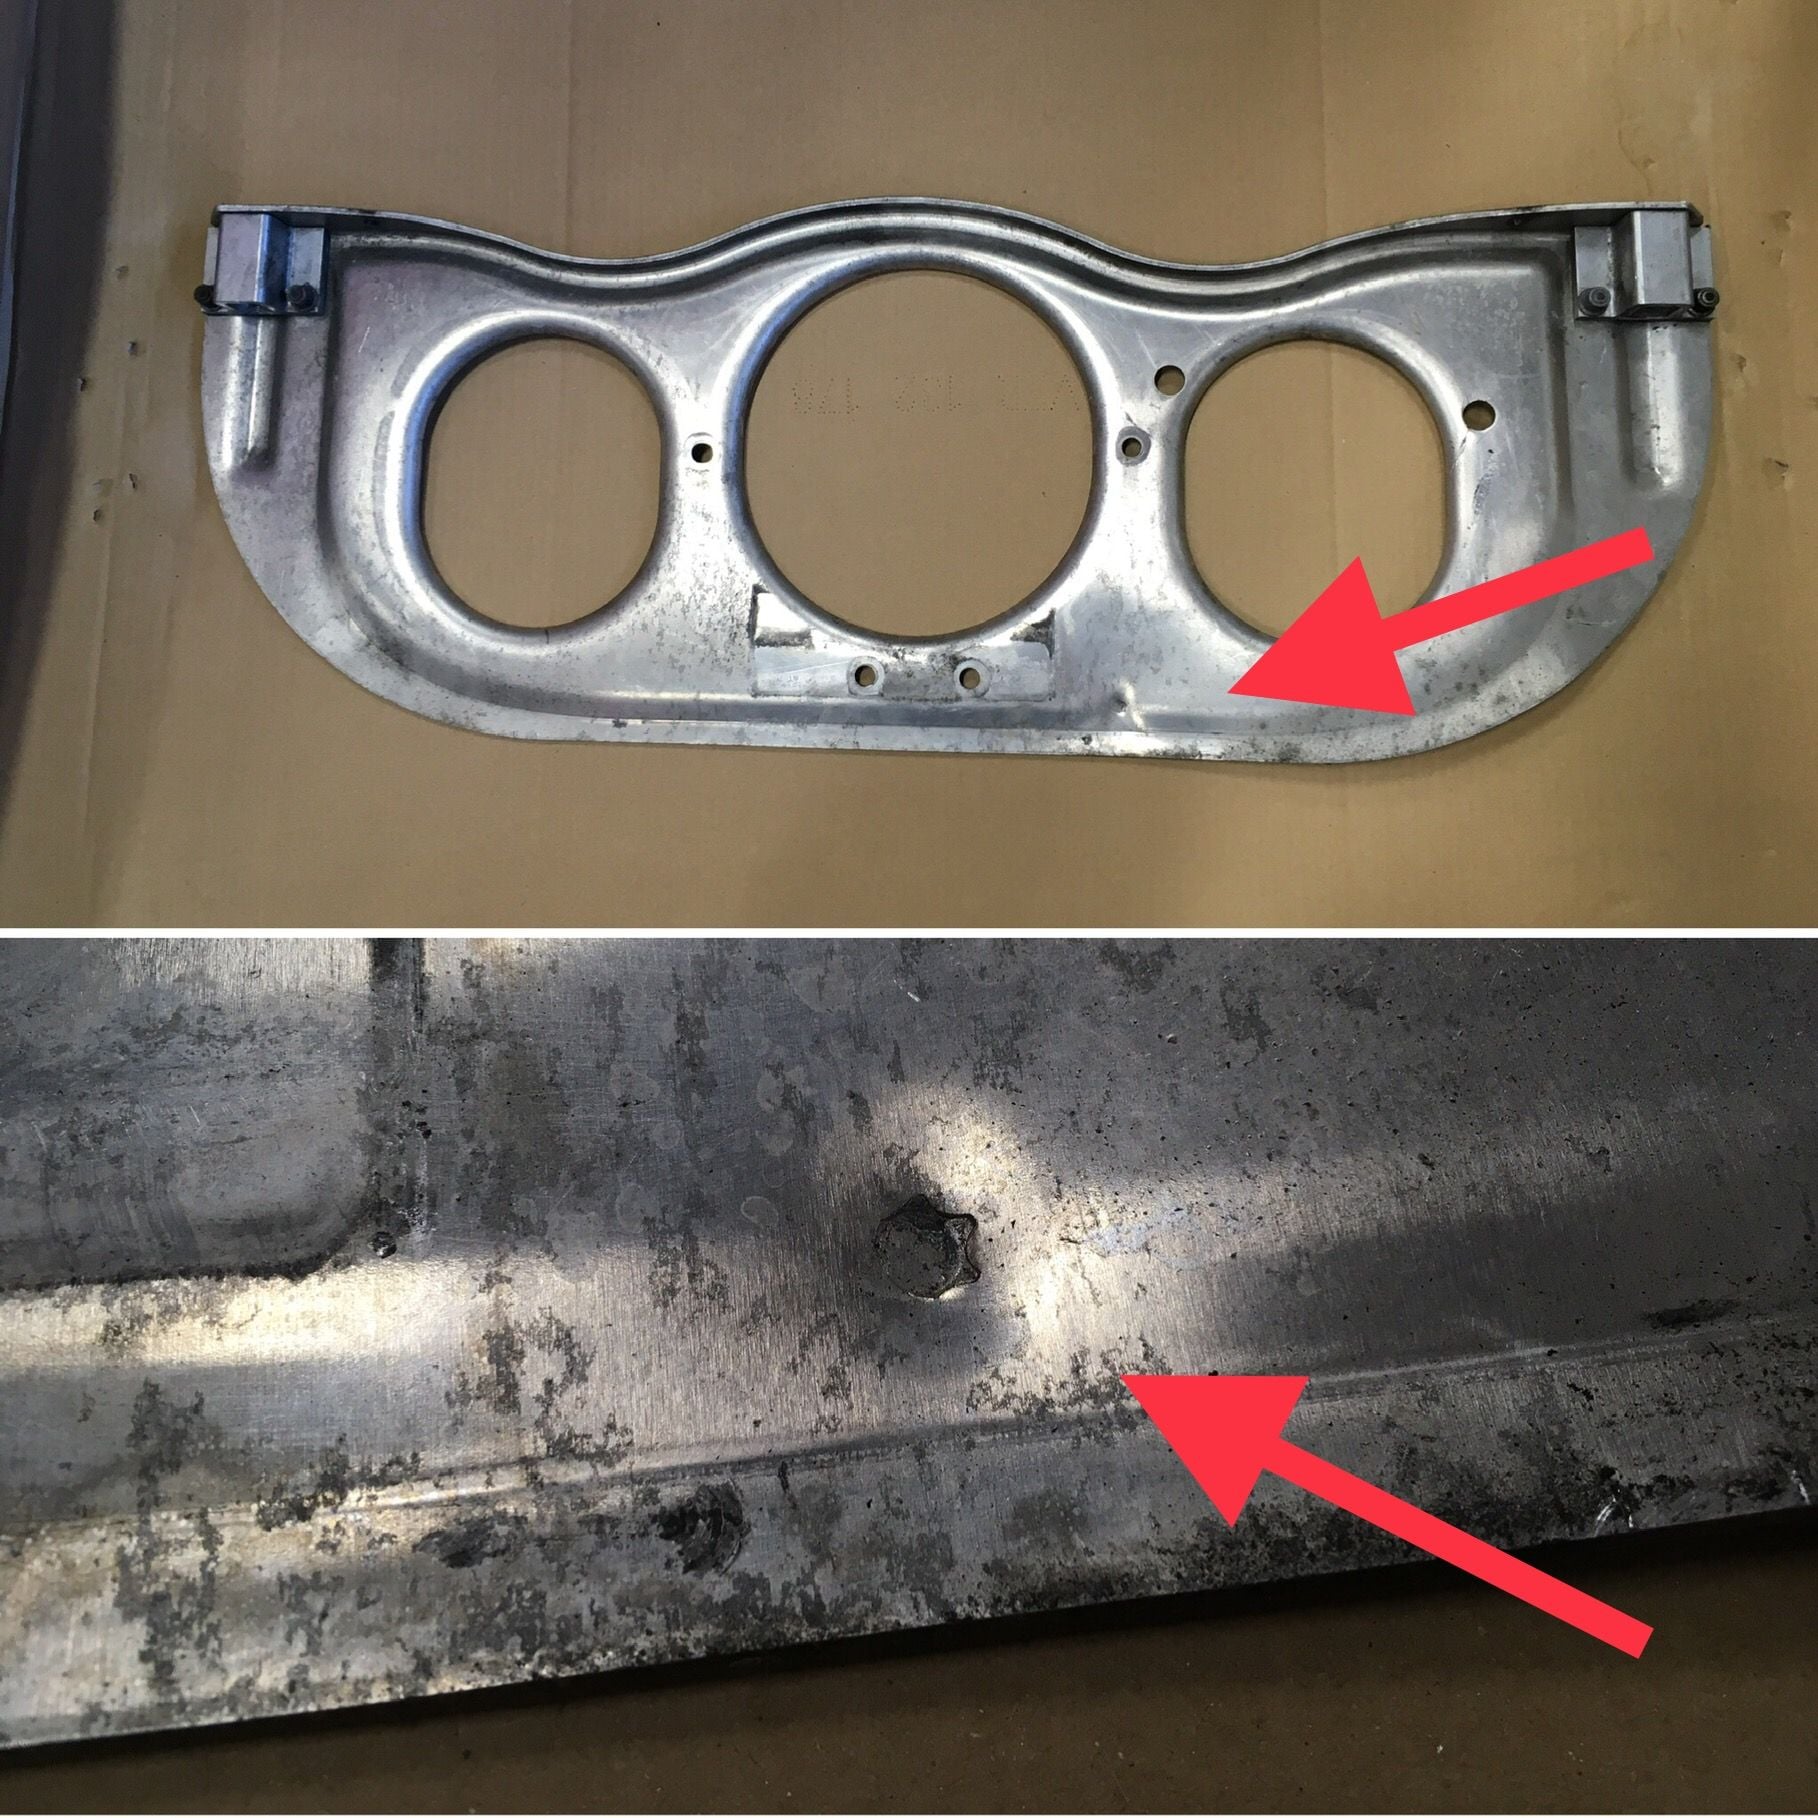
As I was throwing away the old parts from the repair I came across the engine carrier. Looking at it now, I was so fortunate that the impact didn't crack the engine block! That guy launched his car and kept on the gas pedal when he rear ended me The engine carrier has an indentation of the bolt head from the engine. Just had to reflect for a moment. After this I won't talk about this incident anymore.

 02-05-2019, 06:21 PM


 The engine carrier has an indentation of the bolt head from the engine. Just had to reflect for a moment. After this I won't talk about this incident anymore.