When you click on links to various merchants on this site and make a purchase, this can result in this site earning a commission. Affiliate programs and affiliations include, but are not limited to, the eBay Partner Network.
I replaced my AOS back in late September this year, and just haven't had a chance until now to compile the DIY.
The car was running great and consuming an average amount of oil according to Porsche guidelines, so this was purely a preventative step.
Although the car ran great before, it did actually feel a bit better/smoother after the AOS install (particularly at idle and in the lower rev range)
At the time the car had about 72k miles on the clock.
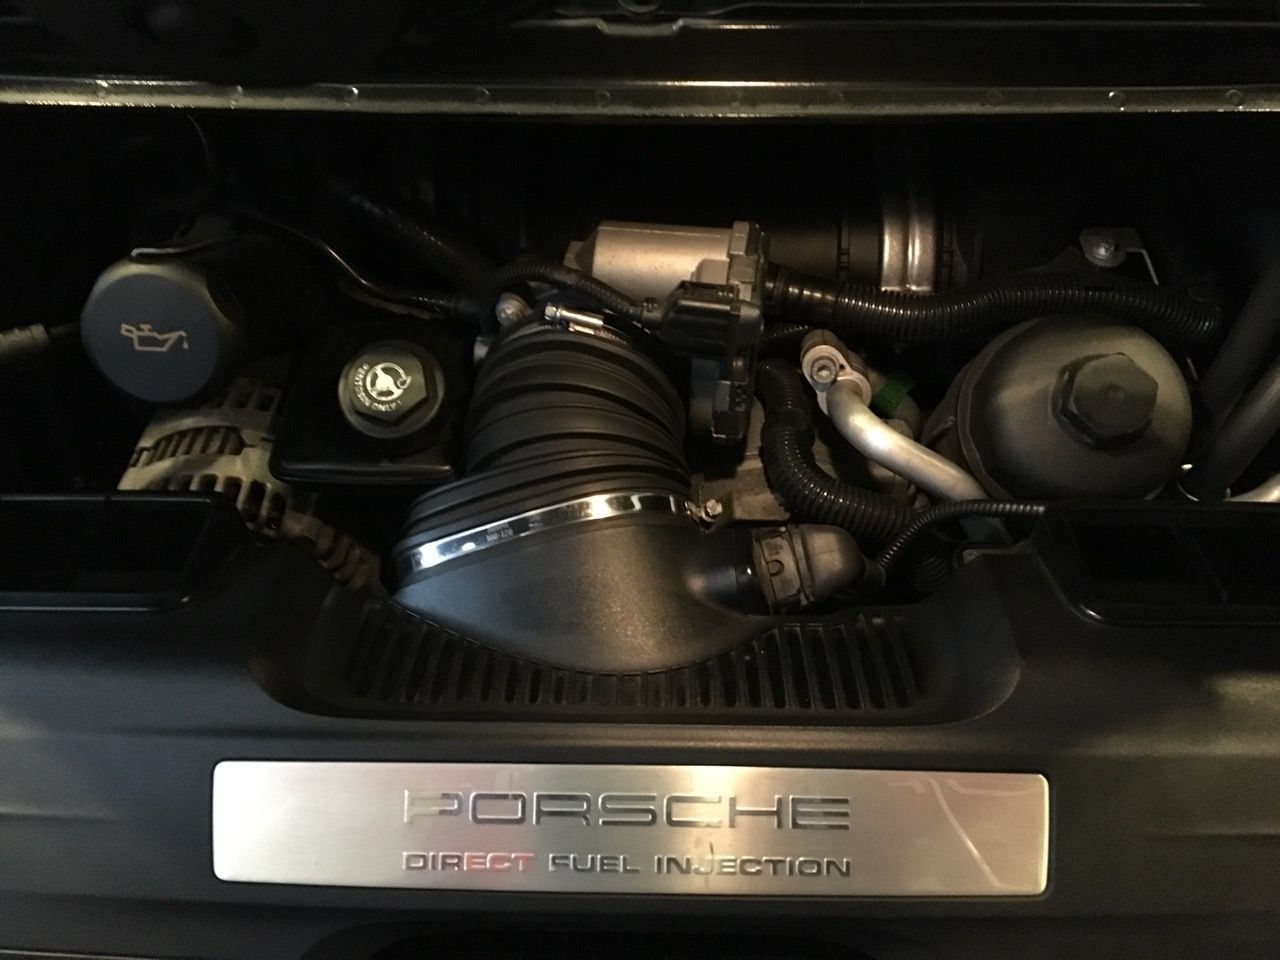
Please excuse all the pollen & dust in the part of the engine bay where the AOS is installed (I don't think it's avoidable
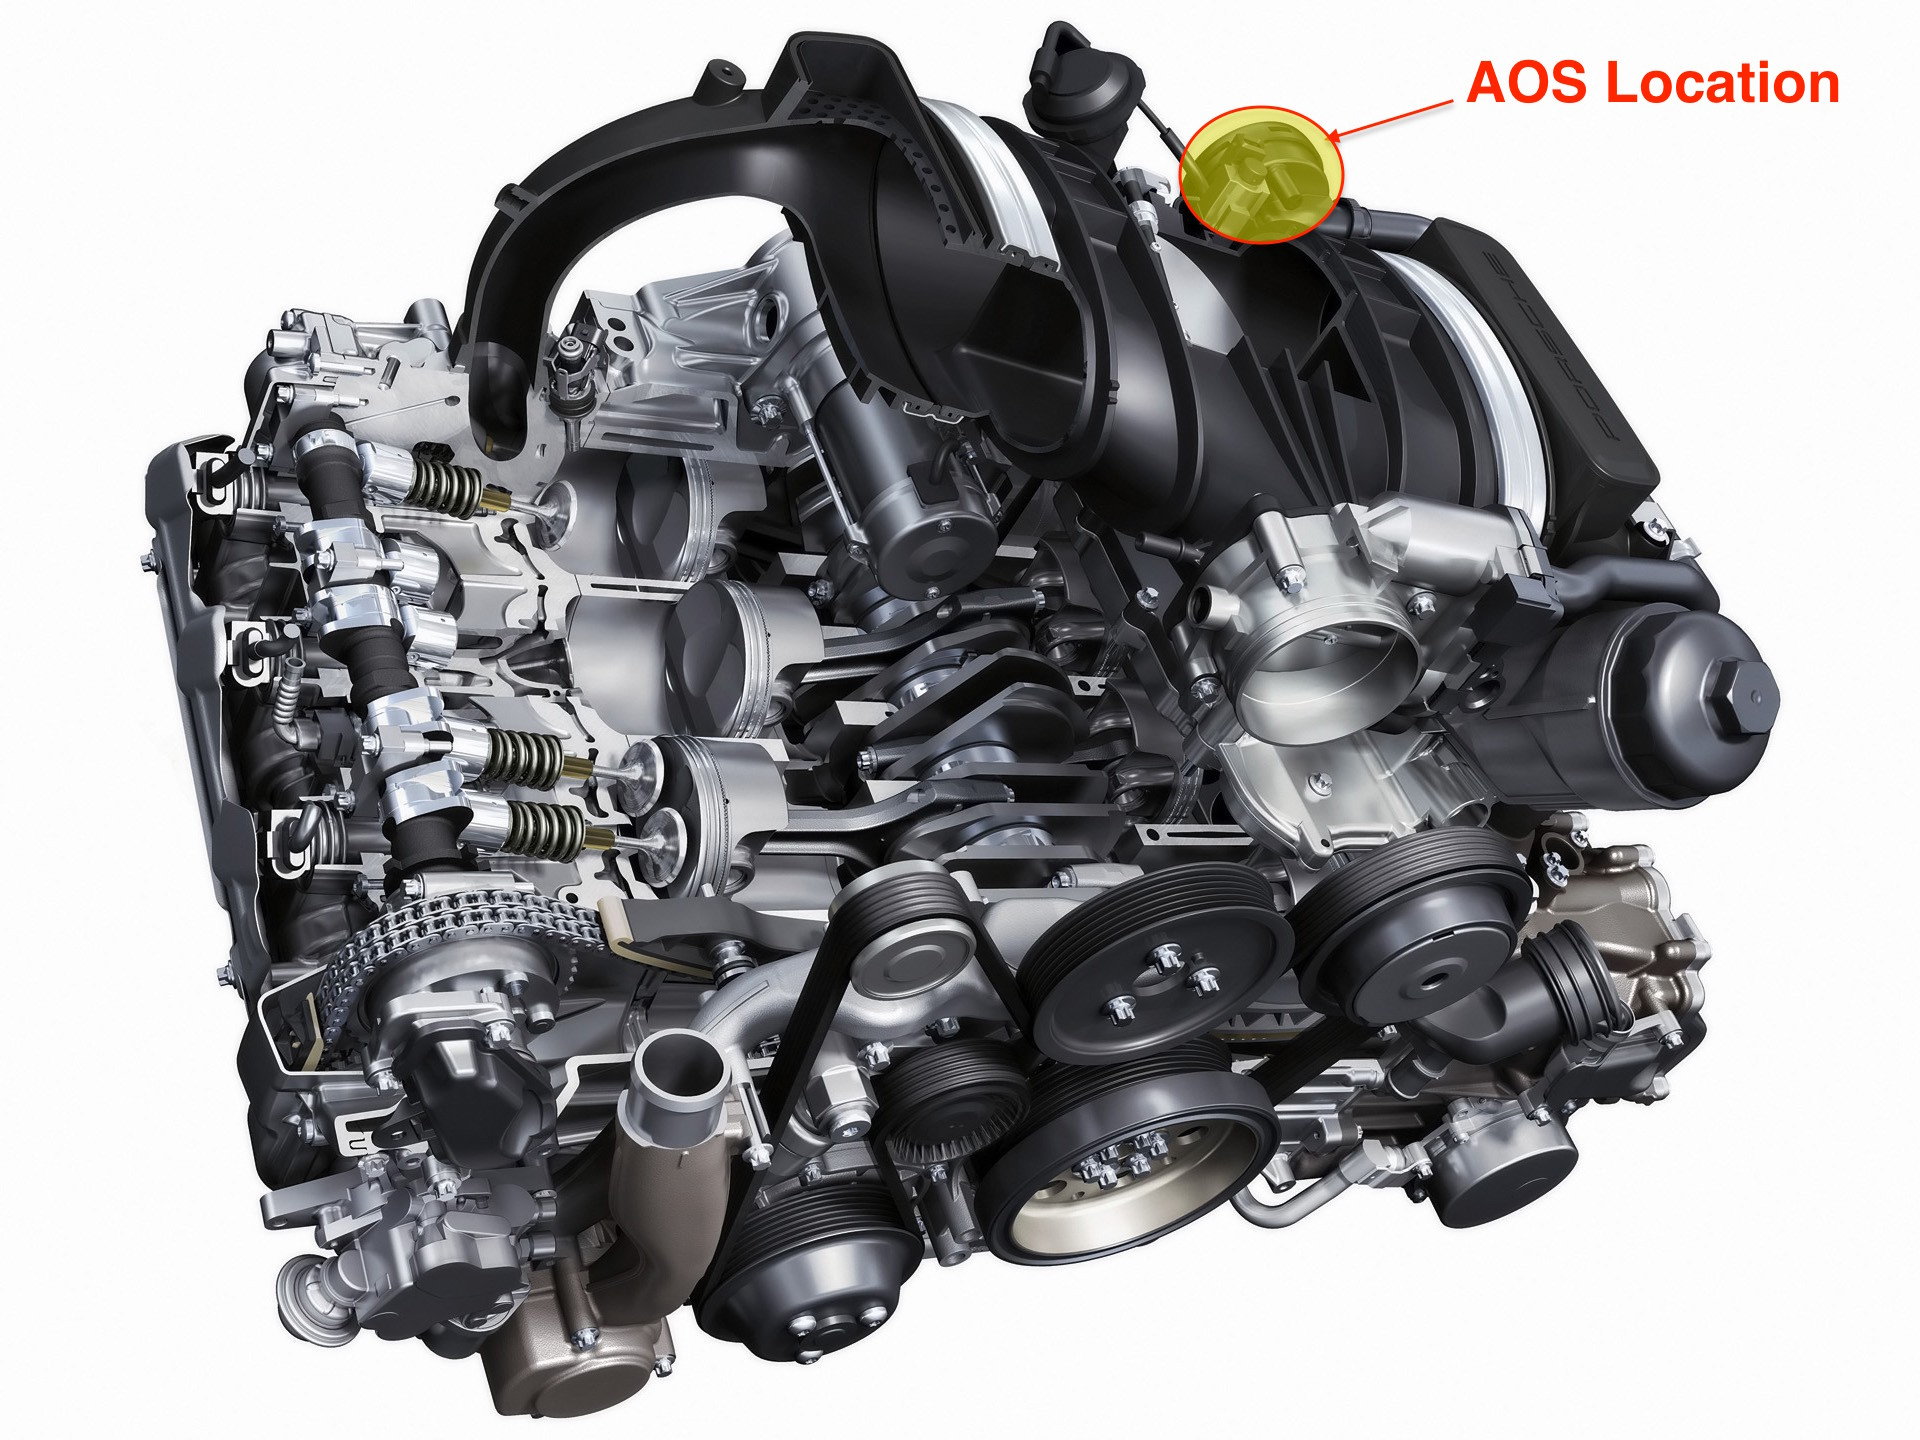
I installed the OEM AOS with p/n 9A1 107 040 02 (note this is revision 3 of the part. I do not know what (if anything) has changed since prior versions.
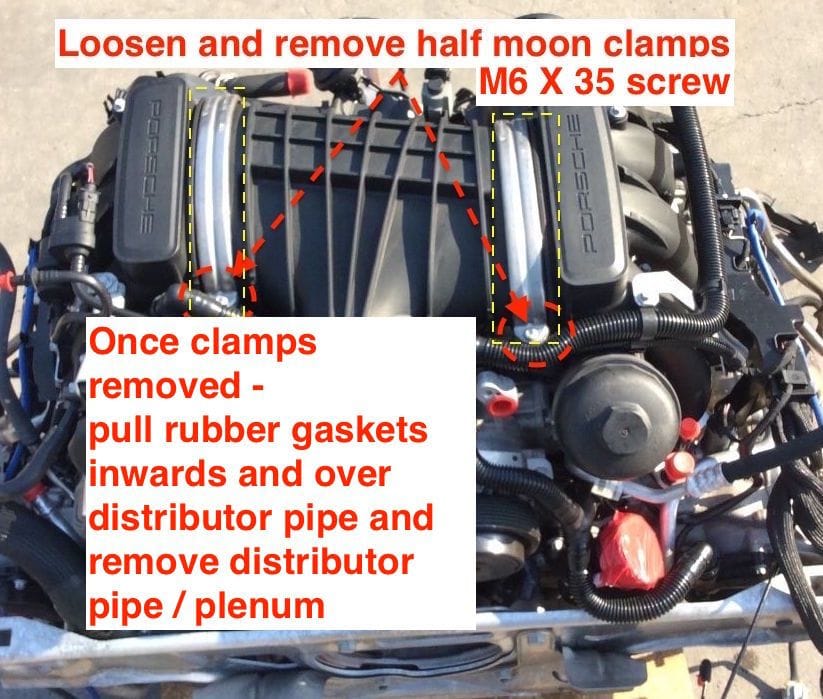
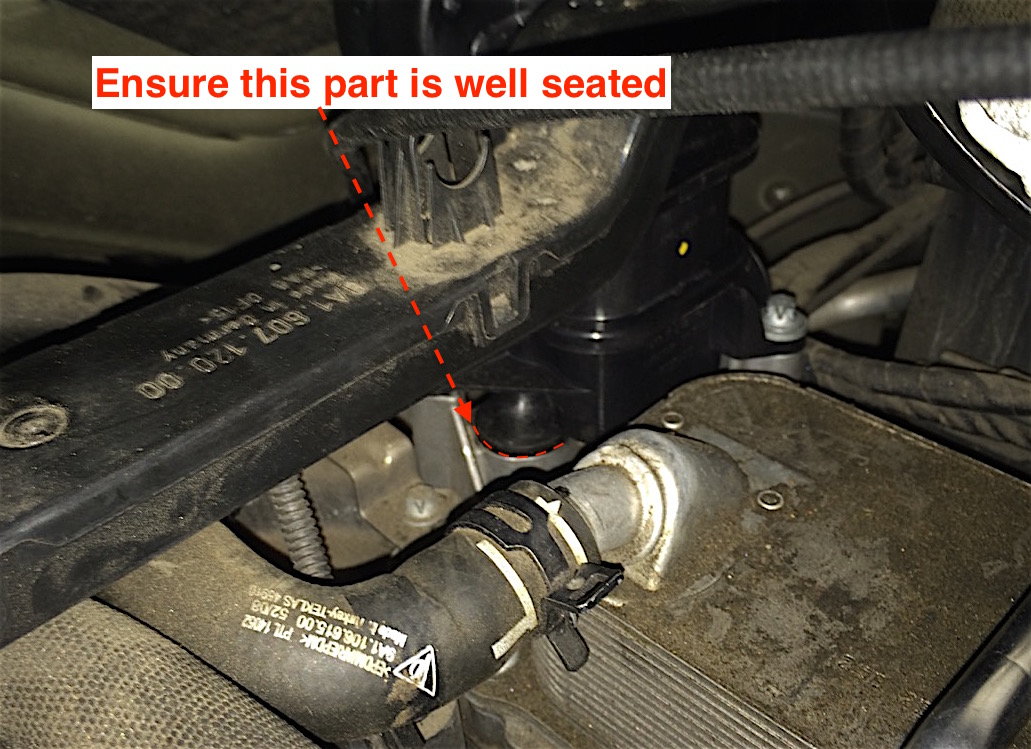
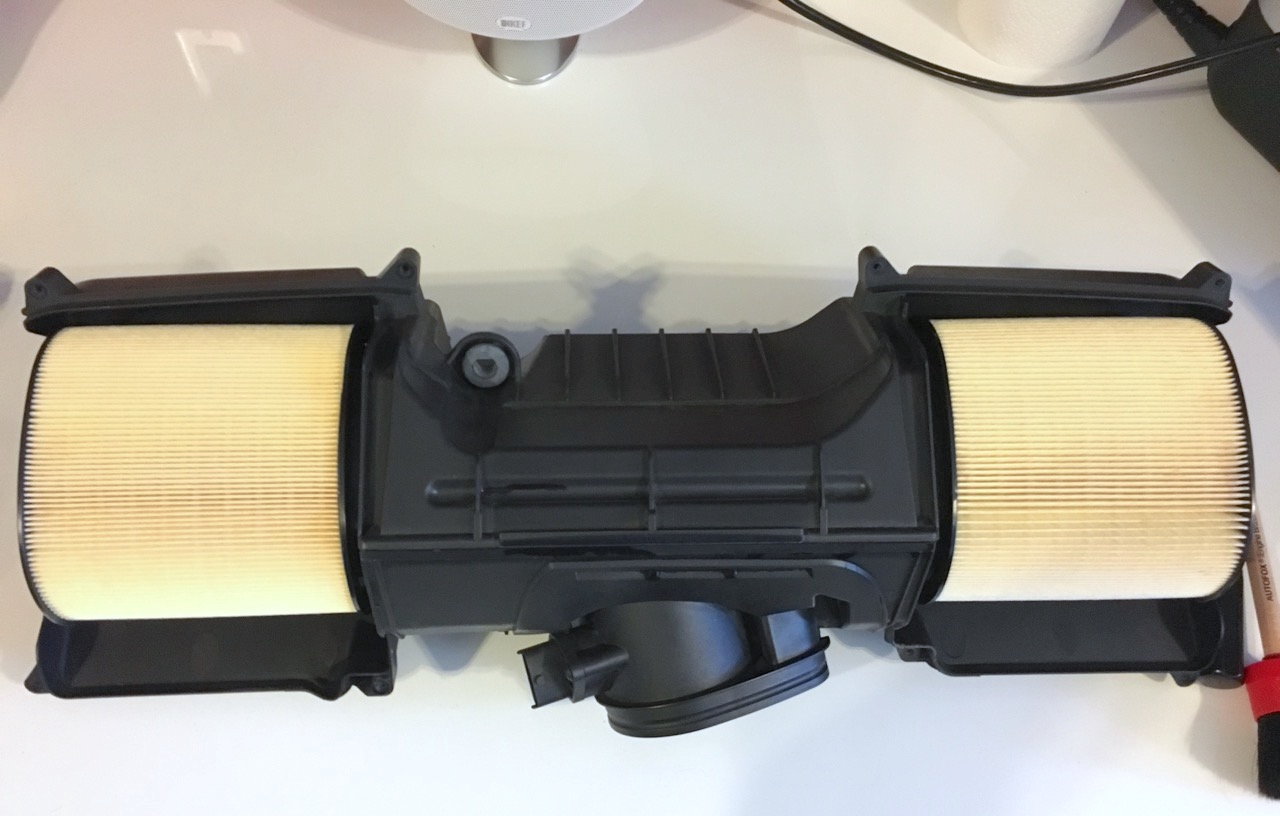
The trickiest part of the job was actually replacing the plenum (air distributor pipe). It's the kind of thing that will always be easier the 2nd time around. Just pay very close attention to how the rubber sleeves are fitted when you first remove the half moon clamps, and you should be fine. This is really key as you do not want this part incorrectly installed and allowing dirty and unmetered air into the system.
Hopefully the pictures below make the steps clear. I borrowed some pics from the web in order to superimpose/highlight key areas.
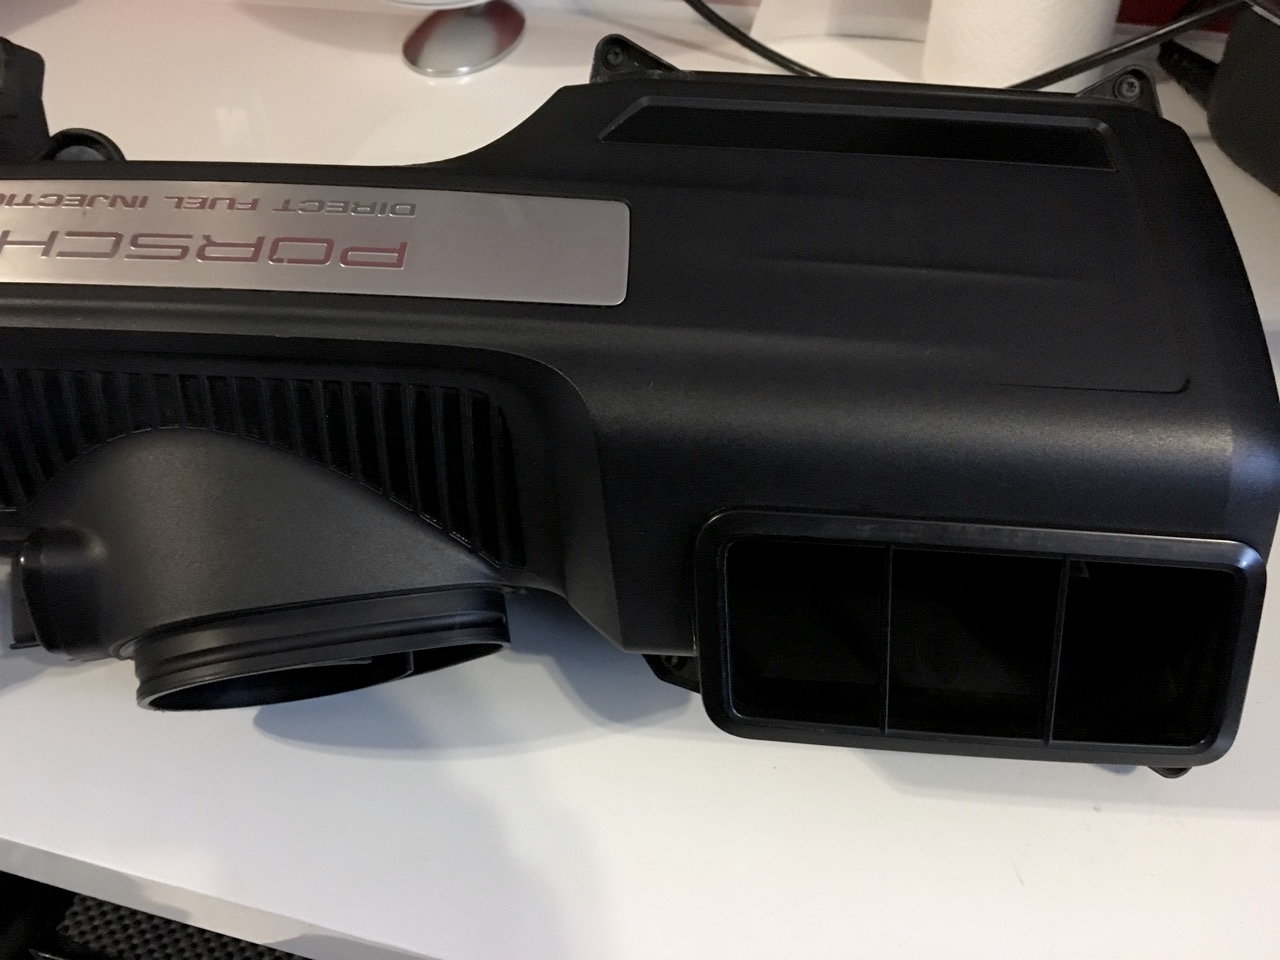
Step 1: Remove the airbox (there are many posts/DIY's on this step so I won't repeat it here)
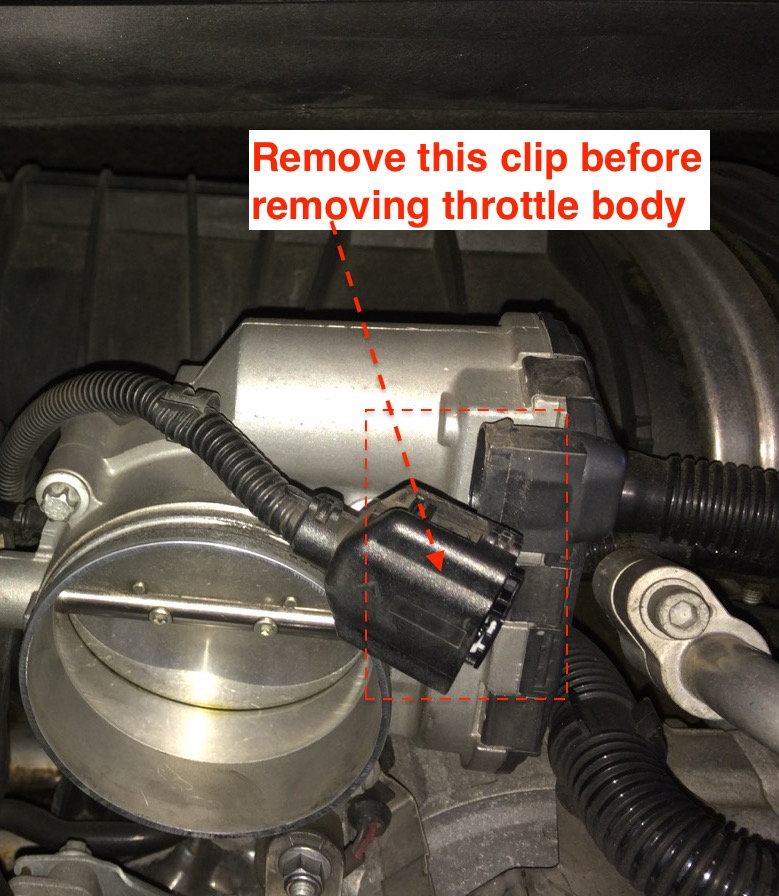
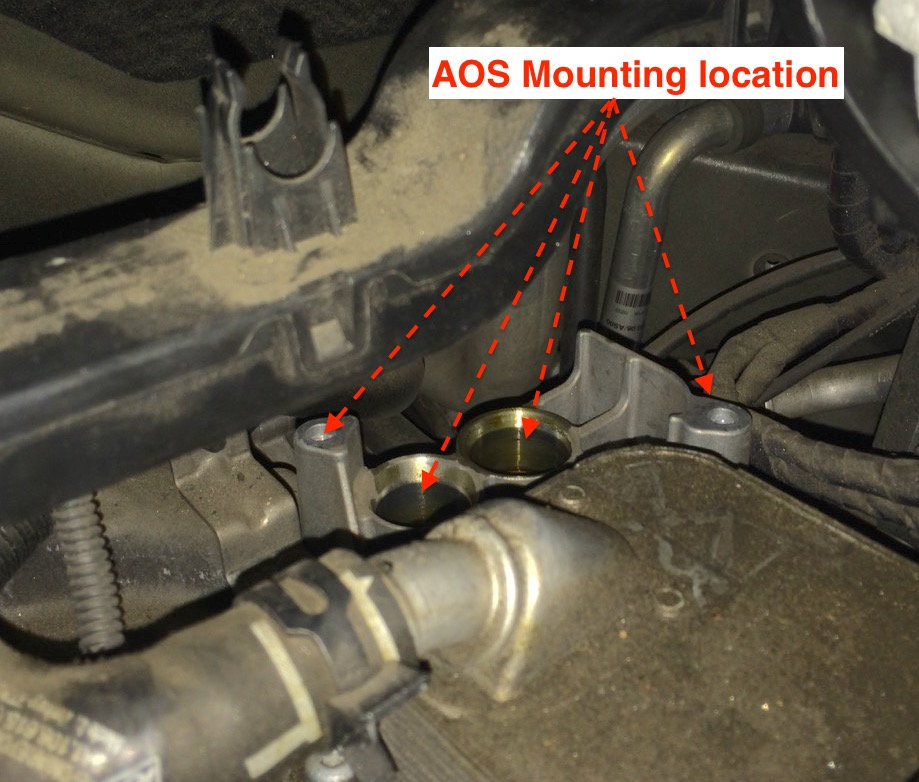
Step 2:
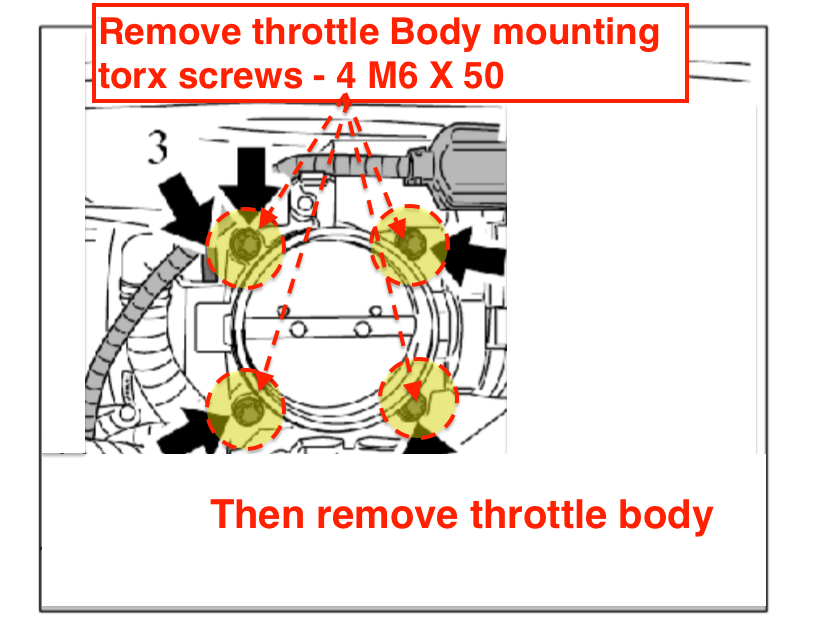
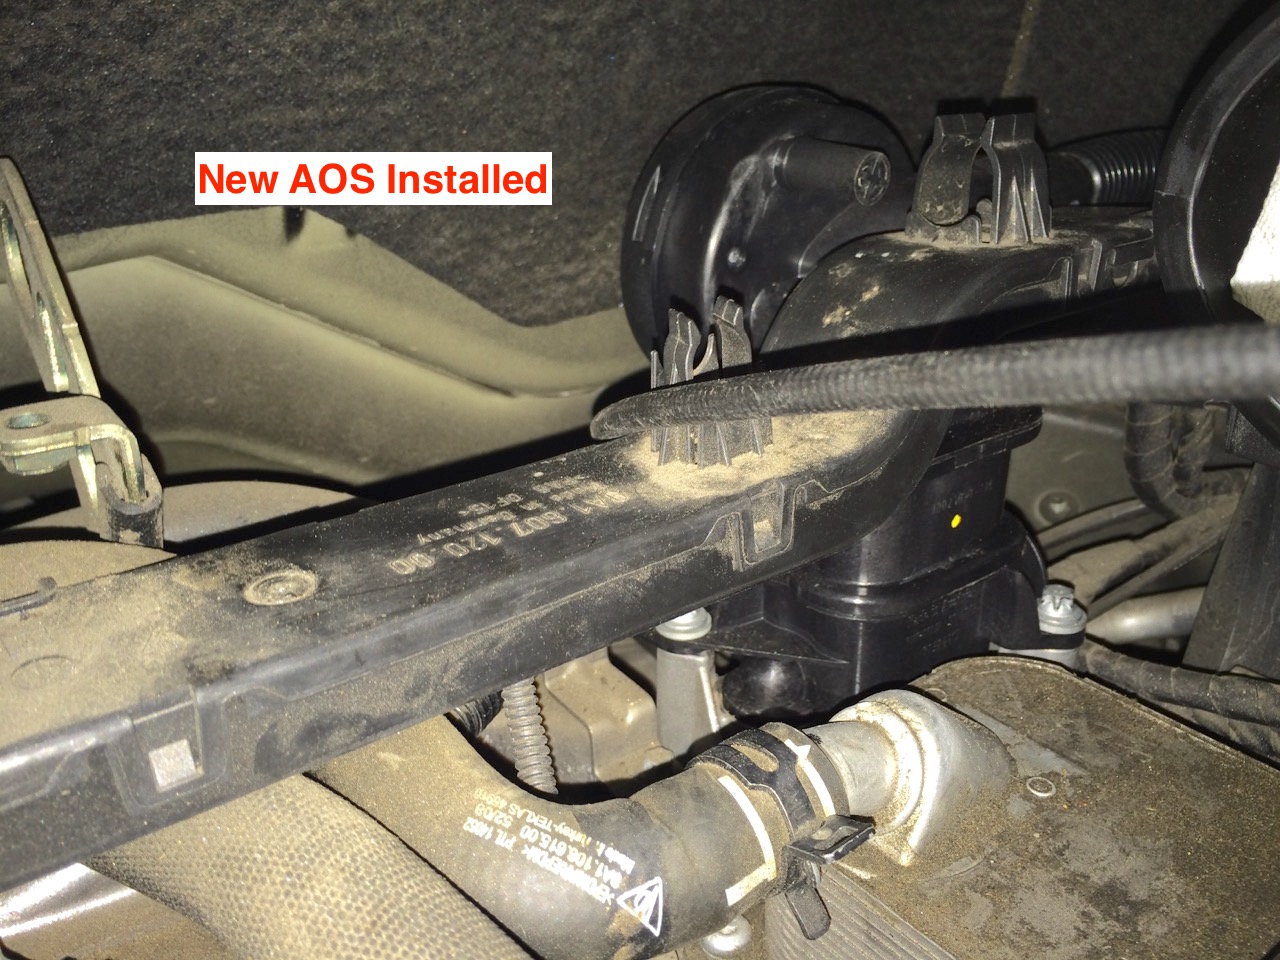
Step 3:
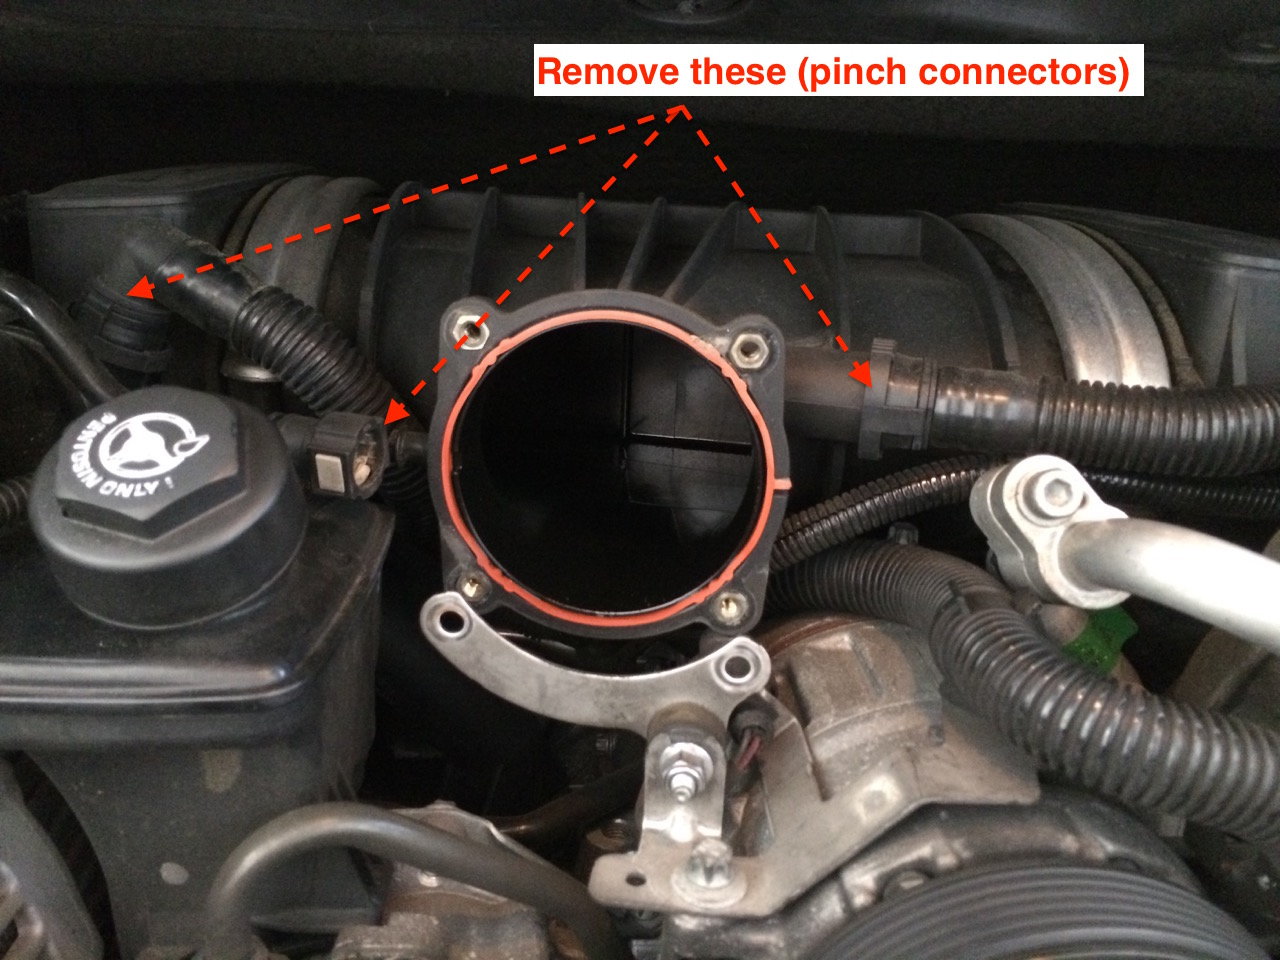
Step 4:
Step 5:
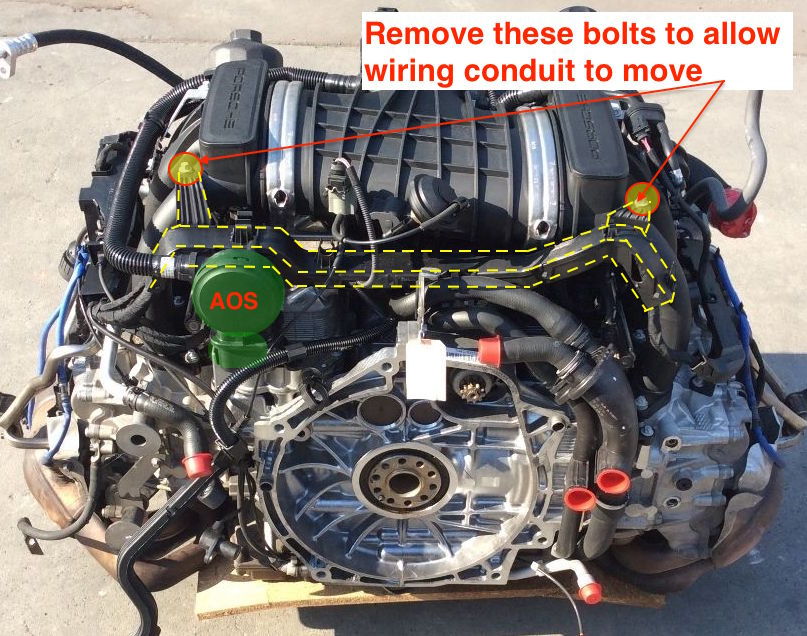
Loosening this harness will provide a lot more flexibility when installing the AOS and also when reinstalling the half moon clamps which connect and hinge from the rear.
Note the left side connector on the AOS is a real pain to get well seated. Also the design I think is flawed in that it will never sit 100% flush. This can also be seen when comparing the 2 ports on the old AOS. You can see that the left side port has some dust above the o-ring, whereas the right side port does not.
I think this really comes down to the design of the part and that the area where it seats has a conical opening.
For reassembly - mount the air distributor/plenum and secure the half moon clamps before replacing the wiring harness conduit mounting screws to ensure more wiggle room back there.
If anyone is doing this DIY or has an opportunity to add their data to the abovementioned mentioned thread on vacuum levels, that would be most appreciated.
It's been over 3 months since the new AOS install and the car still runs beautifully. It is too soon to determine if oil consumption has changed at all, but that was never a concern to start with.
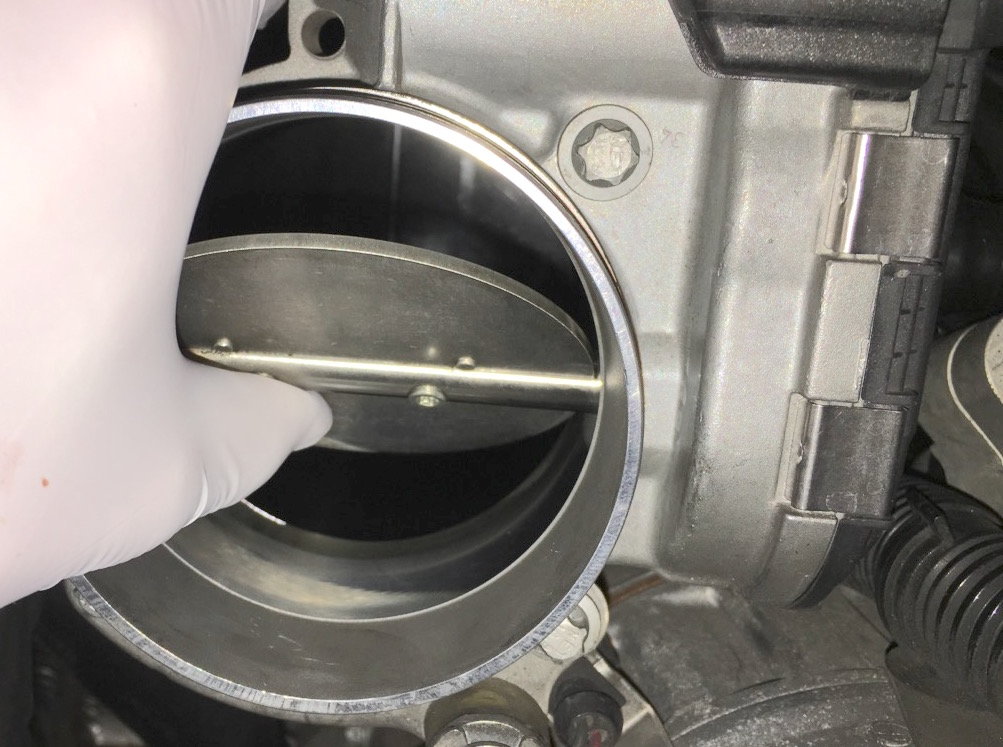
Today I changed out the air filters and took the opportunity to inspect the throttle body which I'm pleased to say was spotless inside.
I have a 2009 C2, PDK, Sports Chrono with 20K miles that I bought 2 years ago with ~14K miles.
I've read all the horror stories about AOS failures (specially 997.1's) and seek your advice as to the wisdom/need/propensity/peace-of-mind that my changing it would bring.
I have a 2009 C2, PDK, Sports Chrono with 20K miles that I bought 2 years ago with ~14K miles.
I've read all the horror stories about AOS failures (specially 997.1's) and seek your advice as to the wisdom/need/propensity/peace-of-mind that my changing it would bring.
Your car and you can change the AOS anytime you want.
My experience (2002 Boxster, 310K+ miles) is the AOS will last 80K to 120K miles. As long as one recognizes the signs of a failing AOS and then avoids running the engine any but instead just flat beds the car to a suitable shop to have the AOS replaced a bad AOS is not the end of the world.
'course, the problem is at least it is my experience the signs of a bad AOS can vary. While at the end the billowing cloud of oil smoke from the exhaust is a clear sign of a failed AOS the warning signs can be mixed.
The 1st AOS started with a slightly varying idle and some slight hesitation off idle. Investigation by me found an oily throttle body. How oily? A drop of oil was hanging from the butterfly valve. There was considerable oil at the hose connection just downstream of the throttle body. At the time I didn't realize the signficance of this. (The hose connection was where the hose from the AOS connected to the intake.)
Towards the end with the engine idling I unscrewed the oil filler tube cap but was unable to remove it against the pressure difference. Called the SM at the local dealer and after I related the behavior/symptoms to him he said "AOS" and don't attempt to drive the car in but have it flat bedded.
The early warning signs of the 2nd AOS failure was a CEL that occured at the end of a long day's drive. I was on a road trip driving 2K miles east to see my folks. I'd take the freeway exit and with the engine idling waiting for the light the CEL would come on with just a hint of some stumble from teh engine. I don't recall the error code/codes but based on them my "diagnosis" was MAF and I pressed on.
2 days and nights and part of a 3rd day I made to my destination. Next morning when I started the engine oll smoke just billowed from the exhaust and I knew what the CEL and error codes really meant. Again I had the car flat bedded to the nearest dealer for an AOS.
The most recent (3rd) failure there were no early warning signs. The engine was running just fine. Driving through town I stopped at a light. When the light changed and I pulled away I happened to glance in the rear view mirror and spotted a big cloud of what I first thought was coolant vapor. But it proved to be oil smoke. After a few hundred feet the smoking stopped and I turned the car around and headed 10 miles to the nearest dealer. But I got caught at another light and while watiing for it and with the engine idling it started to smoke again and when the lght changed the smoking didn't abate and in fact the engine started to run rough. I quickly pulled into a large parking lot and positioned the car so the flat bed tow truck would have no problem loading the car.
In a few minutes the car was on the back of the truck and its way to the dealer.
Let me add the forwardmost intake bolt is a motherscratcher to both get out and replace. I did everything up to bolt down the plenum and voila! Sent it on a free flatbed for the pros to do. I flat out couldn't deal with those bolts, and nothing scares me. You simply can't reach them without luck and a fight. Your hands will not like it either. I opted for spending money.

 12-31-2016, 07:16 PM