When you click on links to various merchants on this site and make a purchase, this can result in this site earning a commission. Affiliate programs and affiliations include, but are not limited to, the eBay Partner Network.
I just bought a pair of secondhand 997.2 primary bypass pipes that do not have the original instructions. Does anyone have the instructions that came with the pipes when they were new from Sharkwerks? Are they even needed? From what I have read it seems pretty simple except for the top bolt on the cat flange if you don't remove the back bumper.
It's absurdly easy, I'd recommend just getting under there and going to town, just make sure to use break free and let it soak in on the bolts for a night before trying just to make sure you don't break anything.
The only fairly tricky thing in the installation is removing and reinstalling the upper bolt that attaches the Sharkwerks pipe to the catalytic converter on the passenger side. Some guys use a special "S" shaped wrench, but I was able to do it with two 13mm crescent wrenches. I posted photos in a prior thread in this post: https://rennlist.com/forums/997-foru...oval-2.html#27.
Hopefully the sale included the two straps that hold the crossovers to the mounting plate. I also use new copper-plated exhaust nuts on the three bolts used for each of the two catalyst flanges, available from the dealer or several places online (including eBay). These are corrosion resistant and won't seize as much as normal stainless bolts under the high heat conditions of an exhaust. Fabspeed actually includes them in their exhaust products. The last time I needed them the dealer was out but I found them at the local BMW dealership... they are used on their high performance cars as well.
Thanks guys. I am planning on just going ahead and pulling the rear bumper. I already have it up on ramps and am going to tackle it in the morning. The car only has 15k miles and has been in the south for most of its life so I am hoping the bolts won't be too bad. Not seeing any straps. Don't see the straps in any pictures either come to think of it so I have no idea what you are talking about.
FYI, it doesn't really help to remove the bumper IMHO. The Sharkwerks instructions don't mention this either. I tried various combos of center deletes and mufflers and I did this a few times without removing the bumper. The technique I referenced in the prior thread (linked a couple of posts back) takes care of the upper bolt just fine with just two ordinary 13mm crescent wrenches. Maybe it helps that I have thinner hands than some and can reach in there without a lot of trouble though.
I guess you can do the installation without the straps but I think you'll get a lot of noise when the crossovers vibrate against the center mounting plate, the same one the factory muffler attaches to. I think you'll have to get the straps sooner than later. They are two slightly different lengths by the way (I see this is mentioned in the instructions). The Sharkwerks ones and very nice and durable so I'd recommend trying to get those. If not those, you'll probably need something strong and able to withstand high heat.
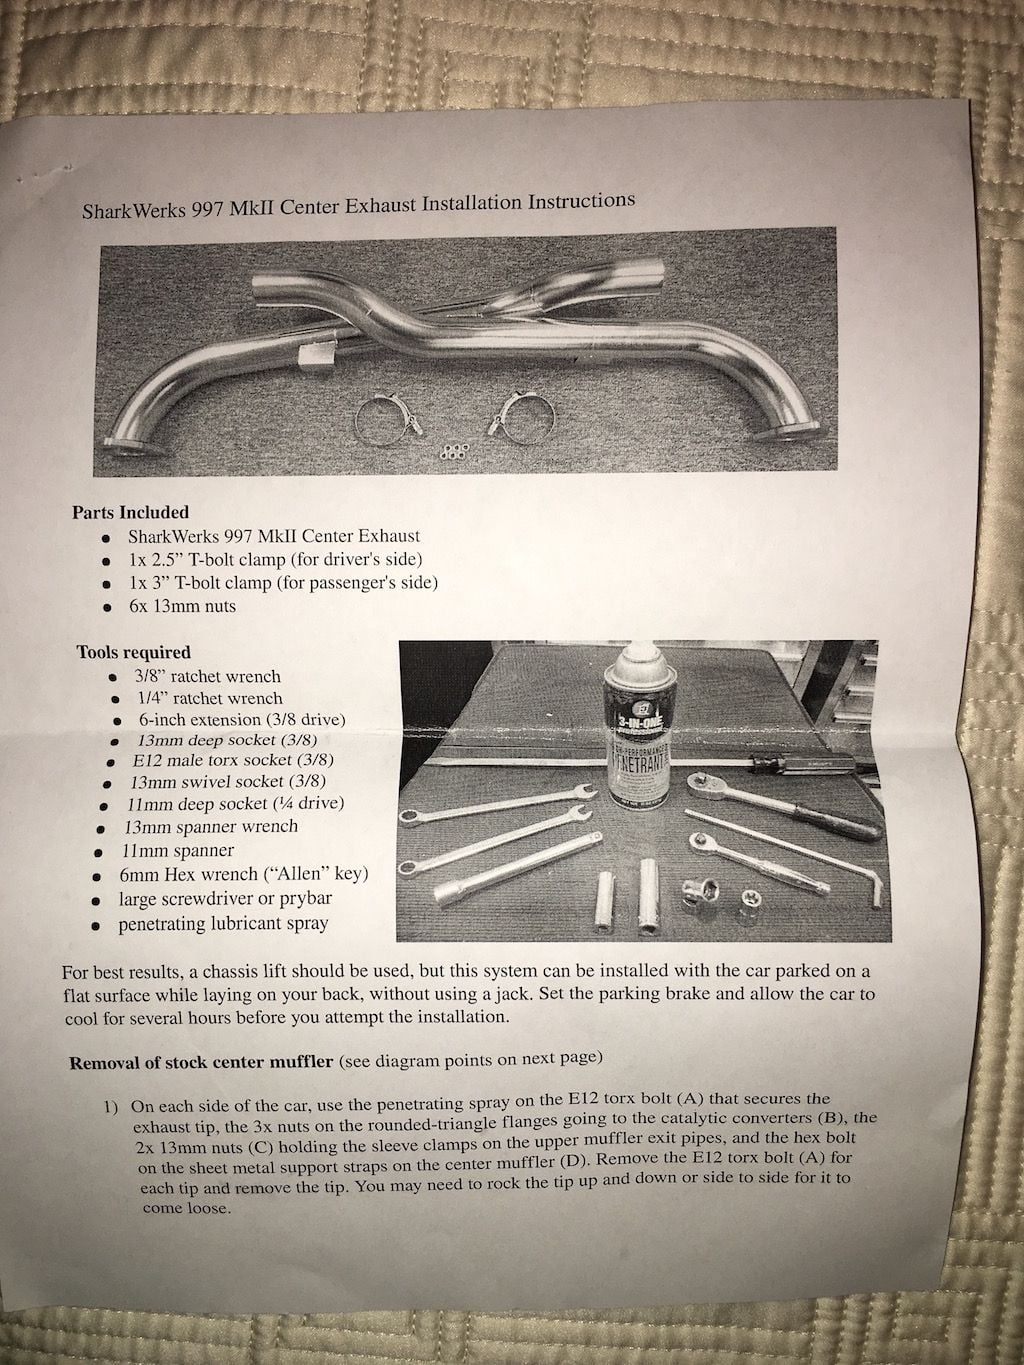
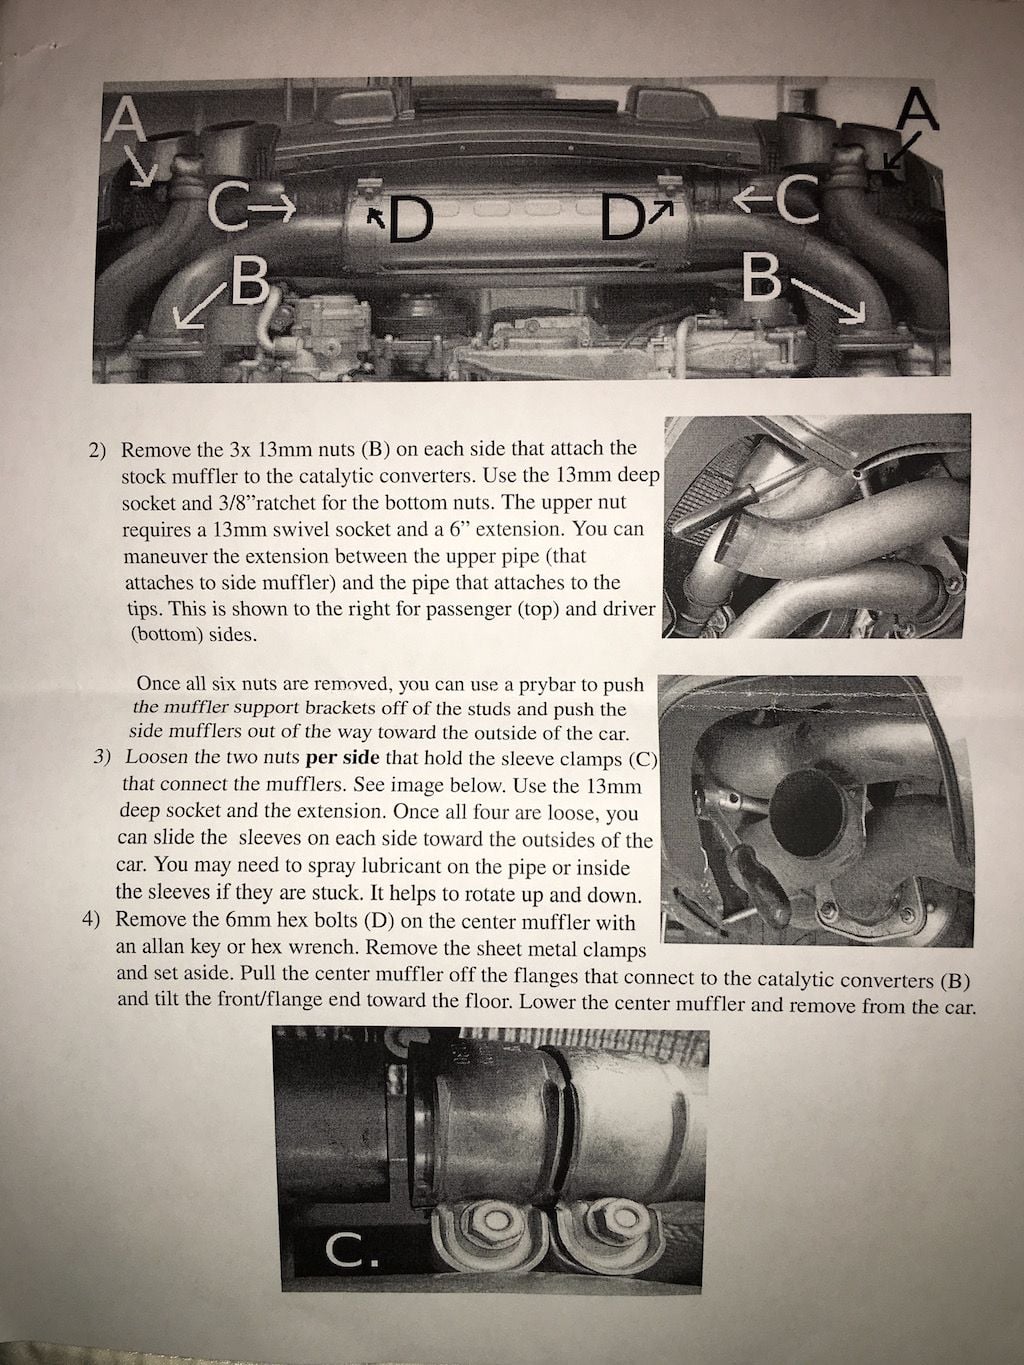
It occurred to me that the guy that sold me the Sharkwerks crossover also included the instructions and so I dug them up and took photos for you. Here you go:
With the bumper removed, the task then becomes ridiculously easy. Everything is right in front of your face. Bumper removal is just as easy, pop out the tail lights, a few screws and there you go. Can it be done with the bumper on?, of course, but if you do twist off the upper cat stud, hammering the broken one out is super simple with the bumper off. Also if you are a neat freak, it gives you a chance to tidy things up under there, removal of leaves, road debris, etc.
Thank you guys so much. Thanks to Storm for the pictures and additional guidance. Same to Wolf.
I am about to go out and attempt.
Wolf: on an unrelated note, can you post a picture of the back of your car with the bumper on and everything? I am also about the put the Porsche lettering on, same as yours, and am working on placement. Yours seems lower than most people's when they install the lettering on a 997 and I think I like that better.

 12-11-2015, 04:01 PM