When you click on links to various merchants on this site and make a purchase, this can result in this site earning a commission. Affiliate programs and affiliations include, but are not limited to, the eBay Partner Network.
Got an early start on my DIY weekend today. Planning to replace the following:
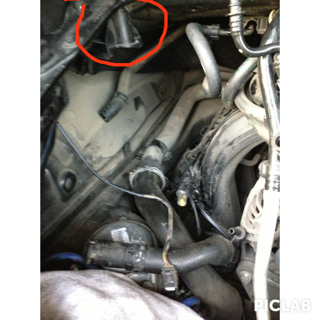
1. Coolant Tank
2. AOS
3. Water Pump & Thermastat
4. S Belt
2007 997.1 Tip 60K miles
I am we'll into #1 but am stuck trying to remove my coolant tank. I am using DIY from Pelican and I'm at the point where I've lowered the engine, disconnected/relocate hoses and cables out of the way per instructions but unable to wiggle free the coolant tank from engine compartment. The tank is not attached to anything.
If only I can remove the plastic mounting bracket that attaches to the top of the tank. Removing this bracket may give me more room to wiggle free the tank. Not sure how to remove this without breaking it off.
Any suggestions to overcome my problem is greatly appreciated.
I used a sharp knife to cut off the hose nipple that interferes with the engine. It came right out after that. You're throwing the tank away anyway, right?
Also, you really dropped the engine right? So that the engine mount nuts are all the way at the end of the engine mount?
That's a big weekend to hit all that stuff. You should check your starter cable to make sure it's not burnt while you're in there.
Will cut the nipple as you have suggested and check the starter cable as well. Engine lowered to its lowest point, possibly? Don't know how much the engine can be lowered.
Recently I can't seem to post pix here. But able to post pix on RennTech for this problem.
I started sawing off the nipple but the got a reply from other Forum suggesting that the engine could be lowered further. Didn't know how else to lower it any further. Had idea to put front tires on the ground while JP the two rear tires. While both rear tires were on JP, I decided to slightly jack up the passenger rear side. Rear passenger side hovers about an inch above the JP plate. This must have given me enough clearance to pull out the coolant tank. Got the new tank in without issues, but getting dark....will change out water pump in morning and see if I can pull AOS as well.
Thank you Rich for suggestions...will check out the cable.
good luck. I've lowered the engine to the bottoms of the mounts (meaning support the engine, run the engine mounts bolts all the way to the bottom of the studs but making sure all threads are engaged, then release engine to drop down).
Just to update, got the new tank connected and replaced both the water pump and thermostat using USMC's DIY... very good info...thank you. Did not take off driver side manifold. Will fill the coolant tomorrow morning and hoping for no leaks. Will also replace S belt in the morning. Will hold off on AOS for next time.
Congrats on R&R of the coolant tank, WP, and t-stat. Great list of DIY's to tackle together. Keep us posted on how the coolant replacement goes... FWIW, Airlift makes this task easy. GL
I was really worried this morning about leaking coolant but after Airlift held at 25 PSI vacuum, my worries were lifted. Airlift is such a time saver. All is good after a hundred miles test drive!
i tried to follow the pelican parts instructions but it was very 996 biased. Ive just started my removal and have already run into some issues. Someone should really redo those instructions.
I thought I found a suggestion on this site, but possibly on the interweb:
1. Dislodge the coolant tank from the black bracket from top side.
2. Push the tank towards the front of the car.
3. Remove the black bracket from the car engine bay that holds the coolant tank.
4. With the bracket removed, this gives you more room to pull out the coolant tank.
Wish I had found this suggestion when struggling with this DIY.
Hope this helps.
NOTE: I did not take these steps, so if someone can confirm these steps?
They already did. Check out the list of DIY's at the top of the forum. There's a really good DIY done by user USMC. Extremely helpful.
Ive checked the DIY section a number of times and cant locate one specific to the coolant tank. There are three on the water pump - but none about the tank. Am i missing it? The pelican one is specific to the 996 and our cars are different.
B. Use steps 1 - 4. NOTE: I did not take these steps, so if someone can confirm these steps?
Originally Posted by mlv_250
1. Dislodge the coolant tank from the black bracket from top side.
2. Push the tank towards the front of the car.
3. Remove the black bracket from the car engine bay that holds the coolant tank.
4. With the bracket removed, this gives you more room to pull out the coolant tank.
C. Pick up Pelican step 12.
D. Reinstall the coolant tank into engine bay. Push the tank towards the front of the car.


 08-22-2014, 06:10 PM