
997 Speedster Look (Delavilla Humps)
 04-29-2014, 11:47 PM
#1
Instructor
Thread Starter
Join Date: Jul 2011
Location: Cape Cod, MA
Posts: 135
Likes: 0
Received 0 Likes
on
0 Posts
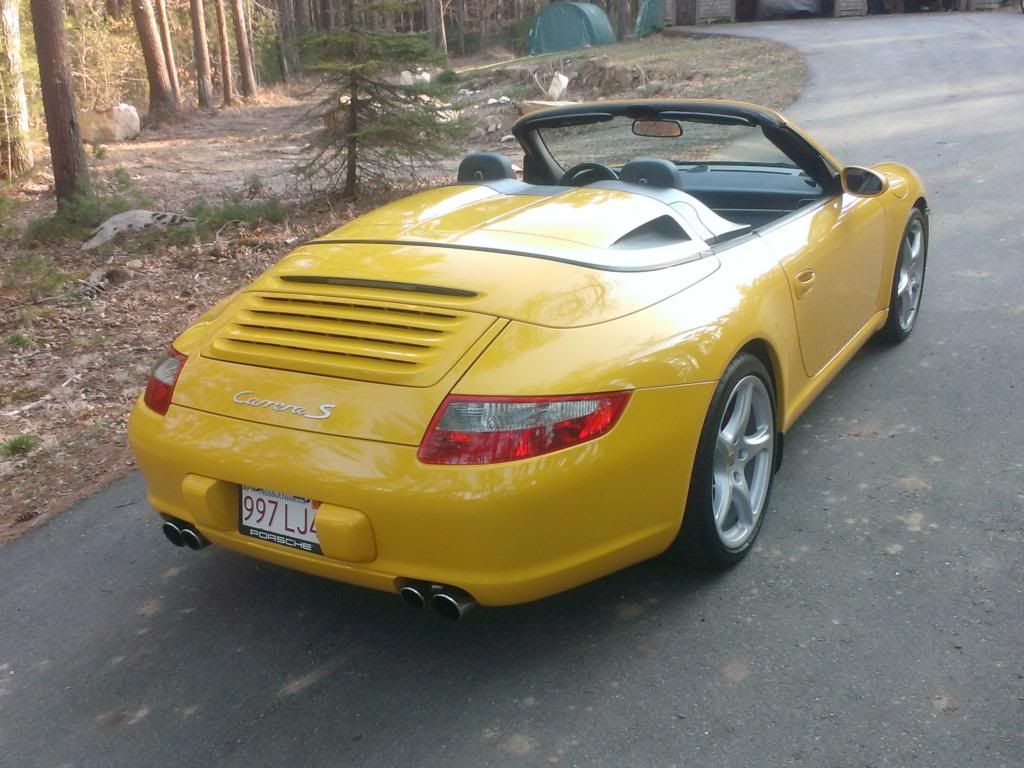
I purchased the Delavilla Hardback Kit from Suncoast in late winter and since had them painted up and mounted on the car. (see Avatar)
I'll admit.... I like the look a lot. It may be the novelty right now but regardless it changes the look of the car I think for the better.
I did see a display at Suncoast before I bought, so I knew what I was getting into. They reduced the price from the original $3k to $2200 so I took the plunge. It cost me another $550 to paint the panels to match so I managed to keep it under $3k.
I'm terrible at posting pictures, however I'm willing to answer any questions on my experience with this kit. I'd add that the biggest selling point for me was that the install doesn't require any alteration to the car, and removing it takes about a minute... putting back to the original CAB.
Fire away with questions, and opinions of the look....good or bad!
Ken
 04-30-2014, 12:05 AM
#2

Pics from various angles would be awesome.
04-30-2014, 12:28 AM
#4
Didn't seem to post, what's the issue you run into? Are you uploading directly to the forum?
Alternatively, post to flickr and share the album link.
Alternatively, post to flickr and share the album link.
04-30-2014, 12:42 AM
#5
Instructor
Thread Starter
Join Date: Jul 2011
Location: Cape Cod, MA
Posts: 135
Likes: 0
Received 0 Likes
on
0 Posts
SToronto,
I'm using Photobucket. I've got a few decent pics from different angles, but putting it frankly "I suck at this"! I'll keep working on posting the pics, but don't hold your breath!
Ken
I'm using Photobucket. I've got a few decent pics from different angles, but putting it frankly "I suck at this"! I'll keep working on posting the pics, but don't hold your breath!
Ken
04-30-2014, 01:28 AM
#6
Photobucket does most of the work for you. To the right of your image are several "links to share this photo" boxes. Usually when I click in one of the boxes the text is automatically copied. Pasting the "direct" text will give us a link to your picture like this...
http://i1332.photobucket.com/albums/...ps9331ded1.jpg
Pasting the "IMG" text will display it in your post like this...
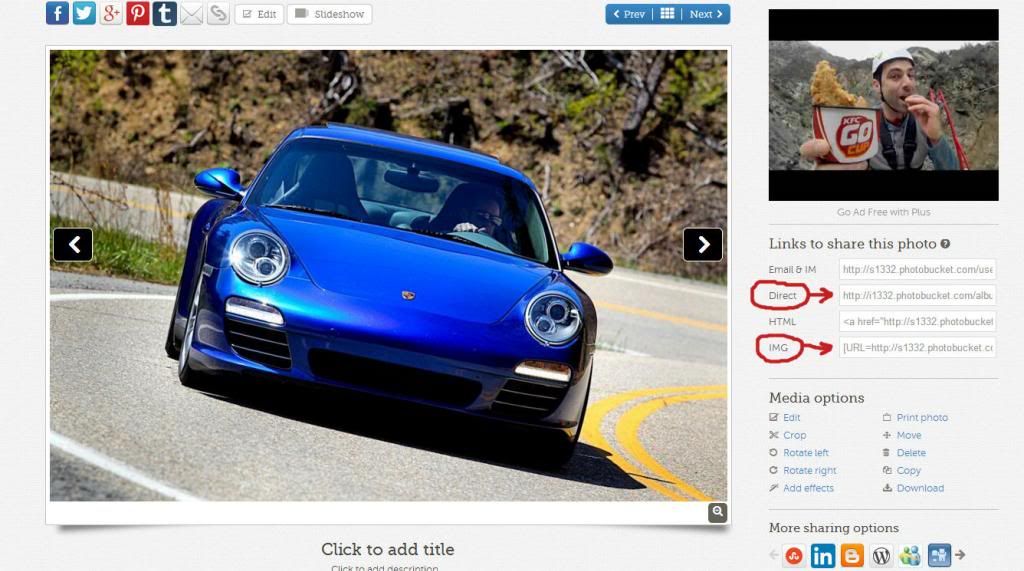
I've circled the two relevant boxes for you. Good luck.
http://i1332.photobucket.com/albums/...ps9331ded1.jpg
Pasting the "IMG" text will display it in your post like this...

I've circled the two relevant boxes for you. Good luck.
04-30-2014, 02:32 AM
#7
Instructor
Thread Starter
Join Date: Jul 2011
Location: Cape Cod, MA
Posts: 135
Likes: 0
Received 0 Likes
on
0 Posts
[IMG]http://i1308.photobucket.com/albums/s602/smokestack20/186_zps36c5b568.jpg
[IMG]http://i1308.photobucket.com/albums/s602/smokestack20/081_zps7ca315fa.jpg
Hope these pics go thru!
EDIT..... Apparently I'm doing something wrong! Next step... the computer goes as far as I can throw it out the window!
[IMG]http://i1308.photobucket.com/albums/s602/smokestack20/081_zps7ca315fa.jpg
Hope these pics go thru!
EDIT..... Apparently I'm doing something wrong! Next step... the computer goes as far as I can throw it out the window!
Trending Topics
04-30-2014, 02:41 AM
#8
 you just needed to close the img tags. links should end in .jpg[/img]
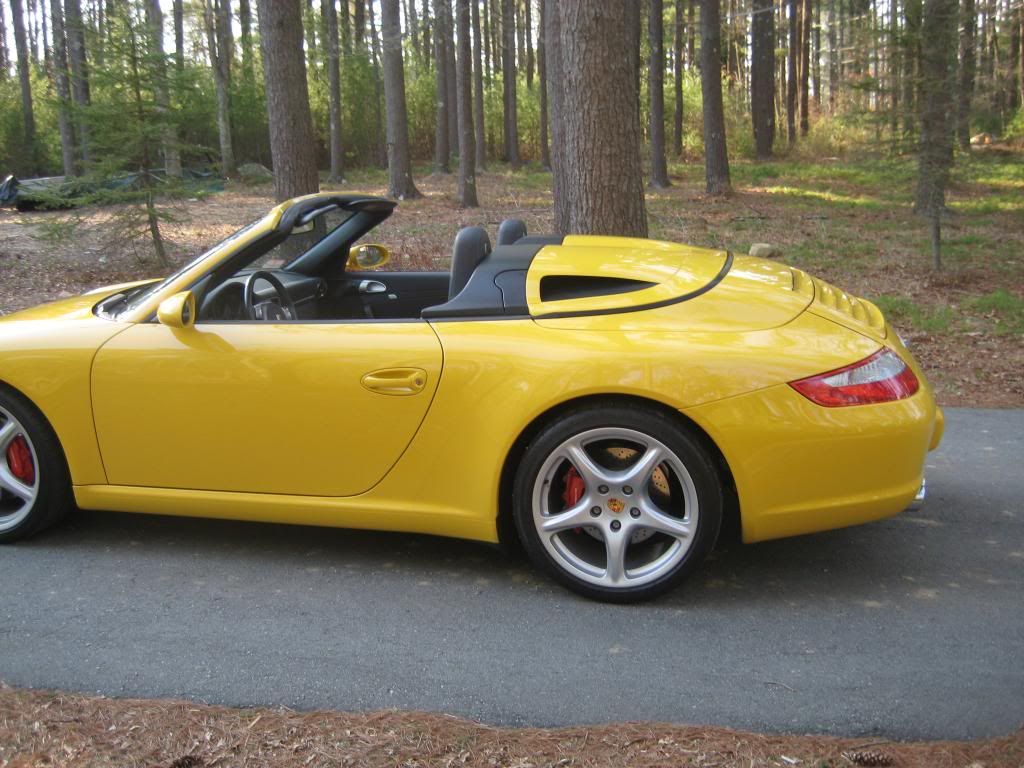
 04-30-2014, 03:03 AM
#9
Nordschleife Master
What happens when out and about and out of the blue a rain shower comes suddenly? Can it be stowed away somehow?
04-30-2014, 12:09 PM
#11
Instructor
Thread Starter
Join Date: Jul 2011
Location: Cape Cod, MA
Posts: 135
Likes: 0
Received 0 Likes
on
0 Posts
Breaking Bad, Thanks for posting the pics!
ADias,
You should plan to use it only on sunny days.
However:
It's a 3 piece unit, 2 painted body panels and the black main beam. It takes only a minute to dismantle. The "clam shell" secures the back of the painted panels.
Raising the clam shell ( raising the top ) releases the panels for removal and you can then continue to put the top up. The black "main beam" stays in place.
The panels will fit in the passenger seat area but it wouldn't be a comfortable ride home.
Ken
04-30-2014, 01:47 PM
#13
Nordschleife Master
Breaking Bad, Thanks for posting the pics!
ADias,
You should plan to use it only on sunny days.
However:
It's a 3 piece unit, 2 painted body panels and the black main beam. It takes only a minute to dismantle. The "clam shell" secures the back of the painted panels.
Raising the clam shell ( raising the top ) releases the panels for removal and you can then continue to put the top up. The black "main beam" stays in place.
The panels will fit in the passenger seat area but it wouldn't be a comfortable ride home.
Ken
ADias,
You should plan to use it only on sunny days.
However:
It's a 3 piece unit, 2 painted body panels and the black main beam. It takes only a minute to dismantle. The "clam shell" secures the back of the painted panels.
Raising the clam shell ( raising the top ) releases the panels for removal and you can then continue to put the top up. The black "main beam" stays in place.
The panels will fit in the passenger seat area but it wouldn't be a comfortable ride home.
Ken