When you click on links to various merchants on this site and make a purchase, this can result in this site earning a commission. Affiliate programs and affiliations include, but are not limited to, the eBay Partner Network.
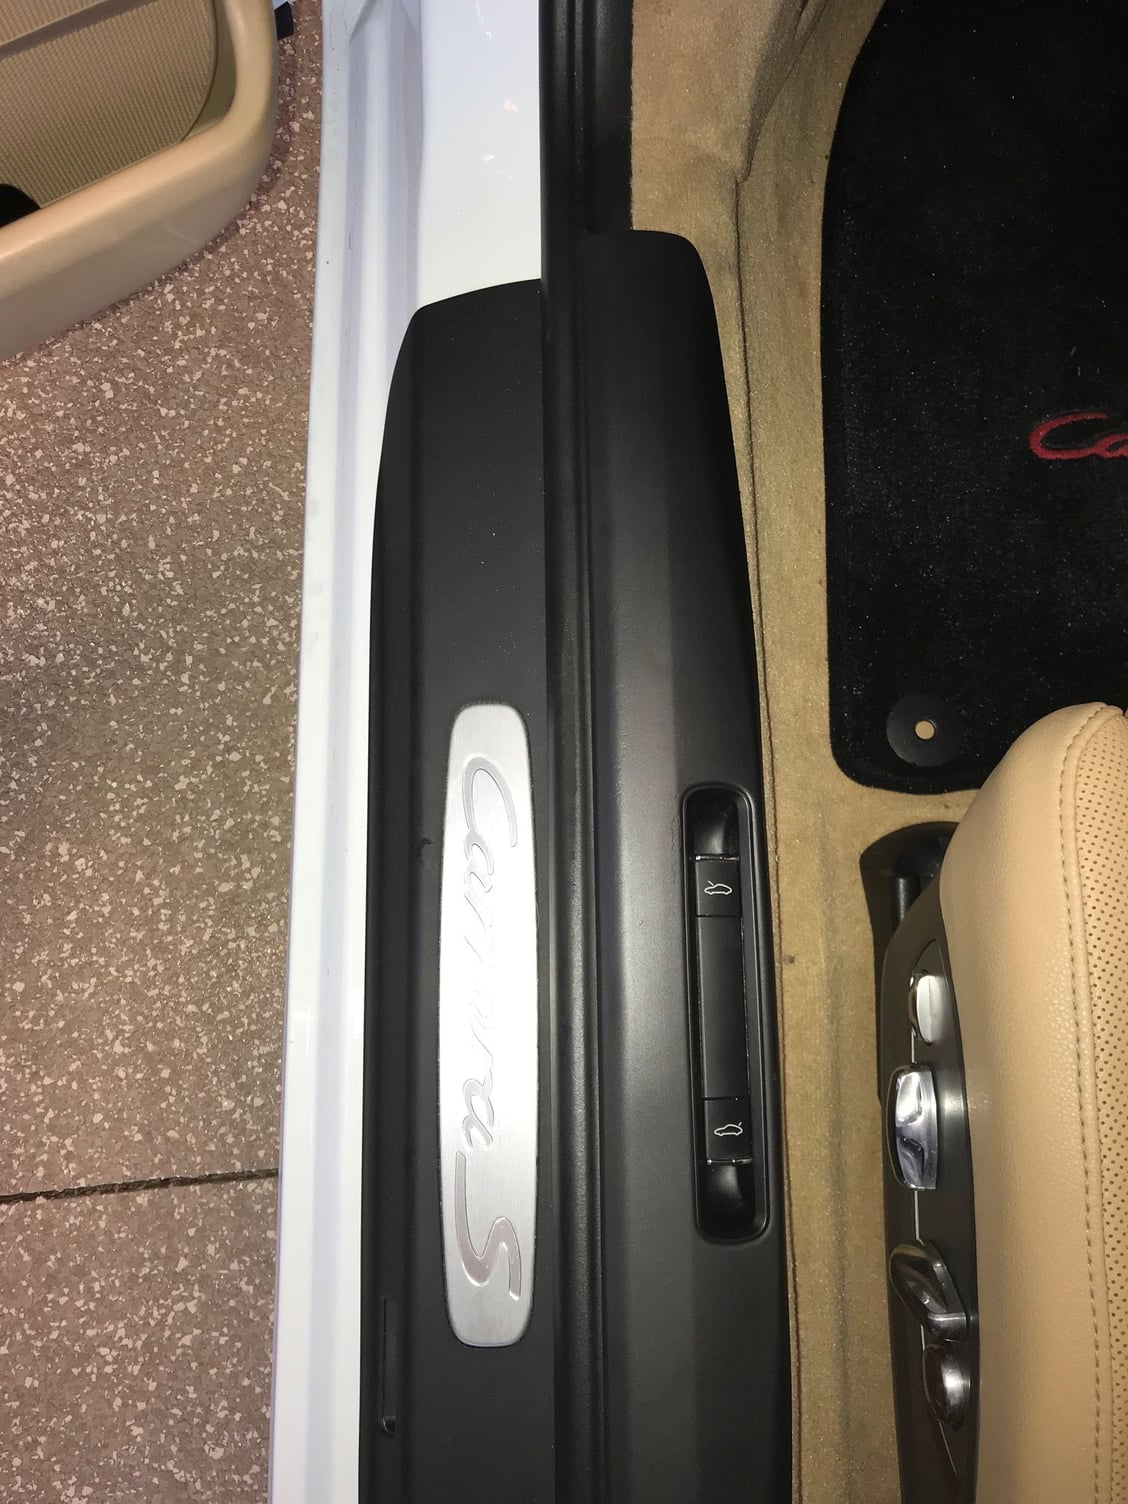
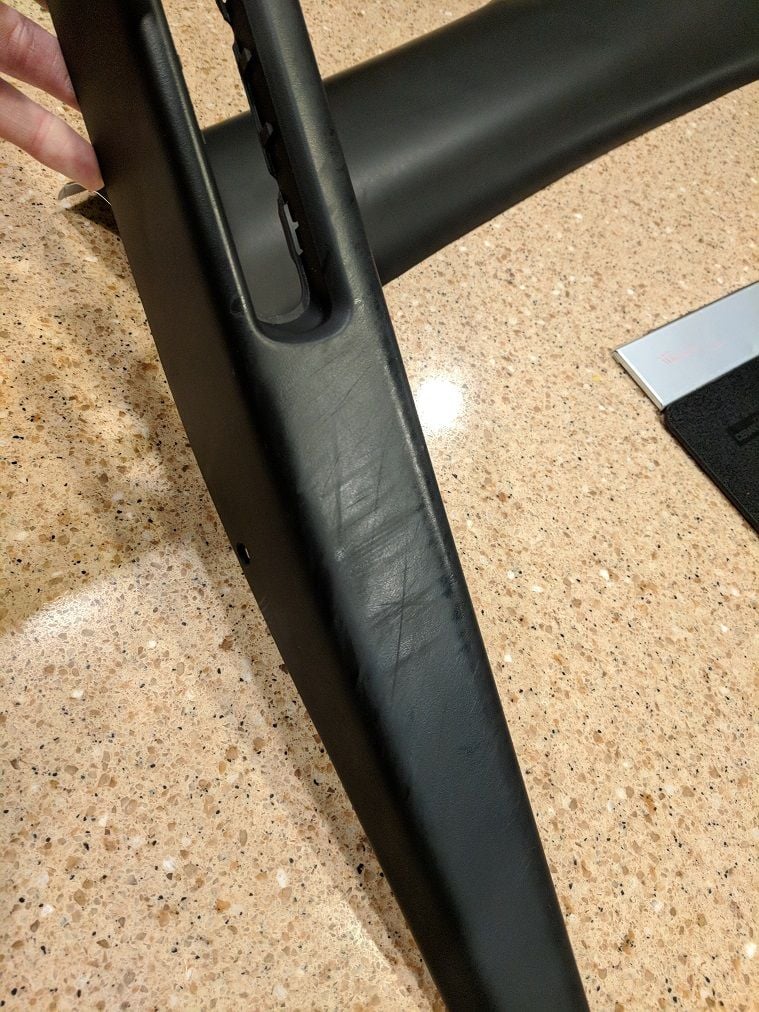
I just did this repair. It is only "satisfactory"
as the OE covering is difficult to feather-edge. Also, the ACE flat black laquer is more reflective than the OE finish. But, it will do for now. (See attached.)
BTW, a friend who is a Concours pro covers his sill pieces with Gaffer's tape. And, removes it when he shows the car. The advantage to Gaffer's tape is that it doesn't leave residue as Duct tape would. Although it is more expensive than Duct tape.
BTW, a friend who is a Concours pro covers his sill pieces with Gaffer's tape. And, removes it when he shows the car. The advantage to Gaffer's tape is that it doesn't leave residue as Duct tape would. Although it is more expensive than Duct tape.
Bro N: Looks good, but I would wait at least a week after painting before putting Gaffer's Tape on the fresh paint. Just have your navigator take off his/her shoes and place that footwear on the floor mat before swinging his/her feet into the Porsche. FYI, an unnamed Concours buff inadvertently left the Gaffer's Tape on the sill pieces for a recent regional concours, and the judges did not notice the nicely placed matt black Gaffer's Tape as it blended in so well when cut to size. Travel Safe in the Coming Days.
Last edited by Type 2; 07-03-2018 at 03:32 PM.
Reason: MSP
Another option over paint is a wrap. I used flat black 1080 from 3M. Is super easy since the entire trim piece comes off and the center buttons can be removed. Making the wrap an easy effort. Plus it is super easy to remove and replace for cheap as needed. Since I like the look I'll most likely pull this wrap off soon, sand the trim piece to flat (I did not do that this time, just put the wrap over the scratches which in turn allowed a couple small scrapes to be visible but still 99% better than before the wrap) and reapply.
I too have a friend that is a Porsche conours judge who travels the country to judge events and also shows his Porsches. We spoke about how he repaints his every couple events and then I showed him the wrap and he was impressed. He took some extra I had laying around and was going to try the wrap for the next event he was showing his car in. When done right you'll never know it was wrapped.
What's the trick to getting the buttons out of the sill once off the car. Looks simple enough with the clips but it's not coming out easily and don't want to break.
Or are you guys just tapping over the buttons when spraying?
EDIT: I got in 30 seconds after I posted. Doing both clips on each side at once did it.
Another option over paint is a wrap. I used flat black 1080 from 3M. Is super easy since the entire trim piece comes off and the center buttons can be removed. Making the wrap an easy effort. Plus it is super easy to remove and replace for cheap as needed. Since I like the look I'll most likely pull this wrap off soon, sand the trim piece to flat (I did not do that this time, just put the wrap over the scratches which in turn allowed a couple small scrapes to be visible but still 99% better than before the wrap) and reapply.
I too have a friend that is a Porsche conours judge who travels the country to judge events and also shows his Porsches. We spoke about how he repaints his every couple events and then I showed him the wrap and he was impressed. He took some extra I had laying around and was going to try the wrap for the next event he was showing his car in. When done right you'll never know it was wrapped.
Mine were scratched - close to that level - as an experiment i took a wet magic eraser to it and then 303 protectant work amazingly well.
Thanks Matt, was afraid I would have to remove the console. The wrap looks fantastic. As I have zero experience with it I'll likely go with some paint and if I don't like it just buy a new useless piece.
Mine were scratched - close to that level - as an experiment i took a wet magic eraser to it and then 303 protectant work amazingly well.
YMMV
Matt
I tried your recommendation Matt - using the wet Magic Eraser and then followed up with a vinyl / rubber conditioner (One Grand ERV). Photos below show the before and after shots of the driver's side door sills.
The door sills in the before shots were clean and had been treated with a vinyl conditioner. Problem was the embedded scuffing that I (previous to using the Magic Eraser) could not remove.
Your recommendation Matt really worked. Thanks.
Driver's side before... Driver's side - before... Driver's side - after... Driver's side - after...
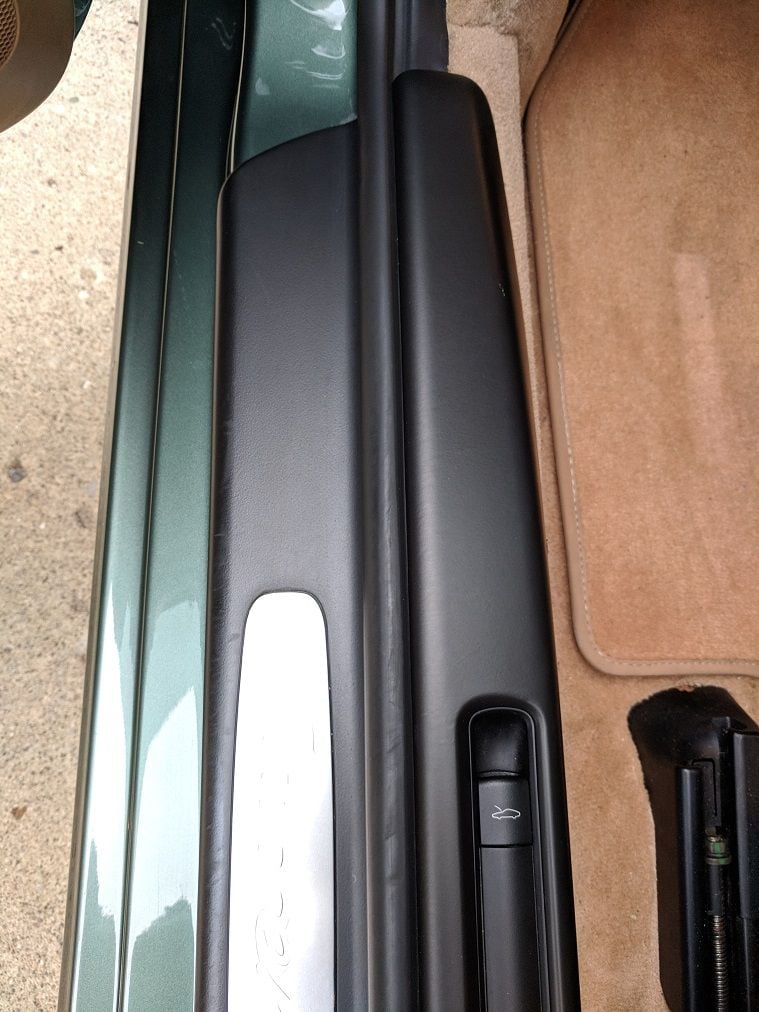
The center of the buttons painted but the buttons themselves are not. That's probably the best contrast to see the different shade. I think after installed and some armoral over all of it, will be about perfect.

 03-22-2018, 09:58 AM