When you click on links to various merchants on this site and make a purchase, this can result in this site earning a commission. Affiliate programs and affiliations include, but are not limited to, the eBay Partner Network.
Great write up. Many members will be happy to see this. Looks like maybe it could be done without dropping the box in Boxster�s not so sure about anterior clearance on 911�s Please update as to performance after the fix
Thank you! I will attach a link soon of the Porsche running
Thanks Damien for the great write-up, nice to have details on how to separate the case and some feedback on the replacement part itself.
I added info and a link to the T-design part in the PDK repair sticky with the caveat that the jury is still out (for now at least). Hopefully the reliability holds up, looking forward to future updates. I'll also incorporate Damien's instructions for splitting the case in the post.
Feels like we've turned a corner with the PDK and Porsche's ridiculous policy. We've now had successful DIYs for the clutch fluid pressure sensors, the valve body, and the distance sensor. Gotta love the folks who refused to take it and blazed a trail on this. Stubborn and frugal are a powerful combination!
Edit: The Porsche PN for the plastic end caps Damien shows is 9G1.321.360.00, and they are cheap at $5 each.
Thanks for attaching this into your first post Much appreciation on this !
I tried but failed. The potting ZF uses is rock hard and I could not get it to soften much even with very high heat. It does become somewhat brittle with heat but the internal components are fully encapsulated by the potting and chipping it out damaged them. I was able to figure out the design from what I found inside but as T-design notes it's nearly 15 year old technology. Apologies for not posting about this back then but numerous personal issues had me preoccupied.
Thanks for the temp info on the components T-design, we'll be watching closely and hope you have a winner on your hands. I'm thinking this part works for all PDK vehicles from 2009 though 2016 (all 7-speed PDKs) but please confirm.
Damien - What torque did you use for the case bolts when reassembling? Also, I assume you must have used RTV at the seam as there's no gasket?
.
If anyone else is doing this please try and get the part numbers off the two bearings in the end case after separation. They are replaceable and I'd like to add the info to the PDK sticky.
I torque them to about 15nm with small amount of medium strength locktite.
You are right, it should have a gasket in between, but I threw it away and used RTV sealant instead. Reason being is I have taken out the rear casing way too many times and caused the gasket to warp. I personally do not recommend doing this.
Six months or whatever, you're still ahead of Porsche and ZF on this. Unless there was miscommunication between me and the dealership, the failure of this sensor was what required full replacement of the PDK on my car fairly recently.
Yes, you are absolutely correct - the dealers answer to failed sensor is full PDK replacement. We invested in this project knowing that people out of warranty would want other option than full gearbox replacement at $20k
About me: Hello all, my name is Damien Law, you address me as Damien. As someone who fixes transmission(DSG MOSTLY) for a living, I always like to try new solutions.
THIS DIY: This post will be about replacing displacement sensor on Porsche 987 mated to a PDK gearbox, using new sensor made by T-Design (http://t-design9.com/porsche_PDK_dis...on_sensor.html).
The procedure is mostly the same for all variations of PDK on 997, 991, 987 and and 981 models. The sensor is not available from Porsche at all, but the new unit is manufactured by T-Design. This repair saves car owner from replacing the whole gearbox.
My PDK experience: I have driven many cars with different variant of double clutch designs including BMW's famous DKG, Audi & VW's famous DSG, Ferrari's DCT, McLarens' SSG, Ford's DPS trash & etc. Porsche's PDK is by far, no doubt that from all the dsg produced out there, nothing beats the experience of Porsche's PDK in the 997,991, 987, 981 & more (Macan & Panamera does not count). The response is just amazing, downshifts are just instant, it is almost that the PDK system has 100% synchronization with your brain at 0% latency. You must be thinking that I am overexaggerating, but I can assure your I'm not.
PDK Flaw Just like many other double clutch transmissions out there, Porsche's PDK has 1 major flaw and that is the distance sensor located inside the rear section of gearbox. You can find many useful info about this specific PDK in the following thread: Guide to Repairing a PDK Transmission In this thread, I will be showing you how I fix PDKs with this specific issue.
Fault Code Present: You might get faults like the following but not limited to: P1731: Shift rod 1 displacement sensor P1732: Shift rod 2 displacement sensor P1733: Shift rod 3 displacement sensor P1734: Shift rod 4 displacement sensor P17XX: 5V ... displacement sensor (don't quite remember this one) If you get any of these faults, it is very likely that your displacement sensor has failed or is failing. If you can't be certain, always refer to the data values, they are helpful.
Before replacing displacement sensor your must: First: Drain all oil & store them in a safe place where it wont be contaminated with debris or water.
Second: Pull the gearbox out of the car, have it come down & the job can be done easily.
Third: Once the gearbox is out & placed somewhere that is workable with. First, you will notice that the gearbox is only 2 piece of housing mated to each other. In this process you will only need to work on the rear section(opposite of input shaft) of the gearbox to replace the displacement sensor.
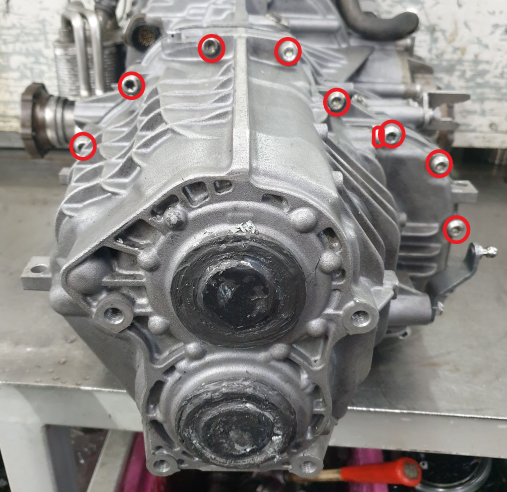
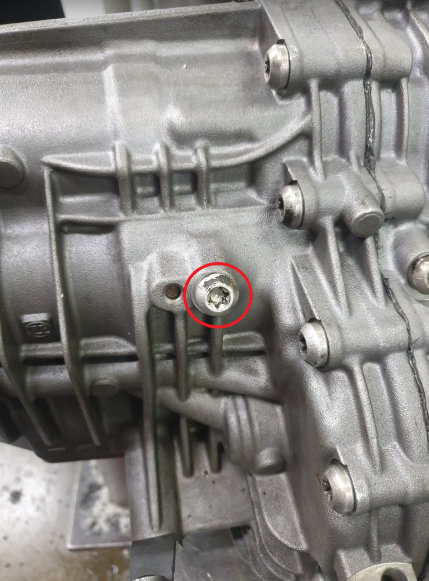
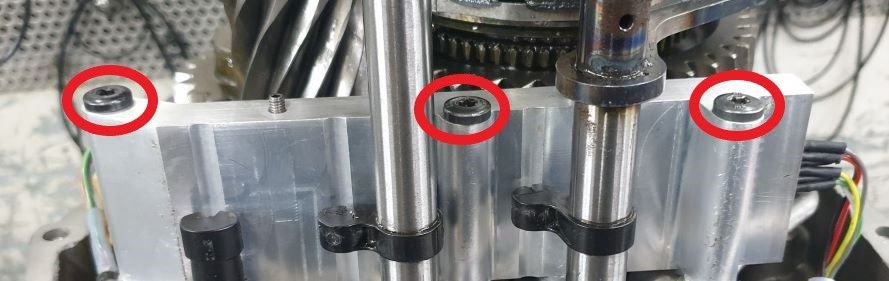
Fourth: Only in the rear section, undo all T45 sized bolts & I mean ALL. undo bolts circled in red, there's more below, you get the idea...
don't forget this bolt too
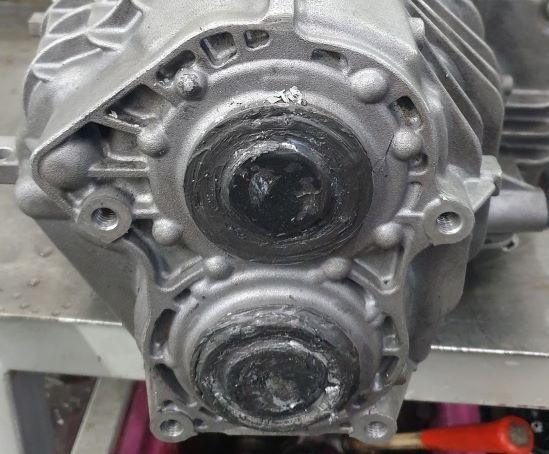
Fifth: In this step, you will need to remove the 2 sealing caps. I was able to pry it out slowly with great amount of patience without completely destroying it just so it can be reused. remove the 2 black sealing caps. Do it however you feel that is the safest way if you want to reuse these. Mine does not look too good because I pry-ed it out at least 5 times.
Sixth: Once the caps are out, you will need to undo the bolt from the top cap side and unclip the snap ring from the bottom cap side. Unfortunately, I did not snap pictures for this step, but it will be a pretty obvious procedure once the caps are out of the way.
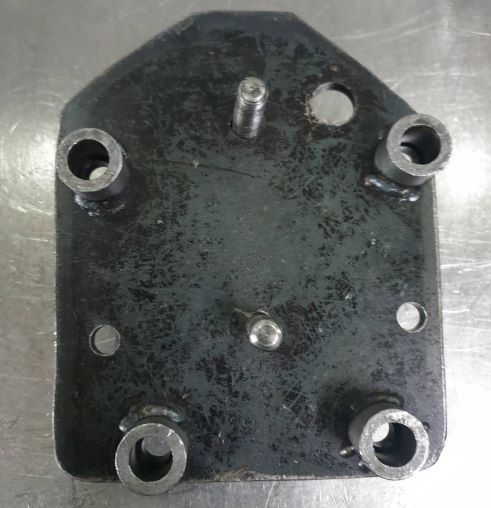
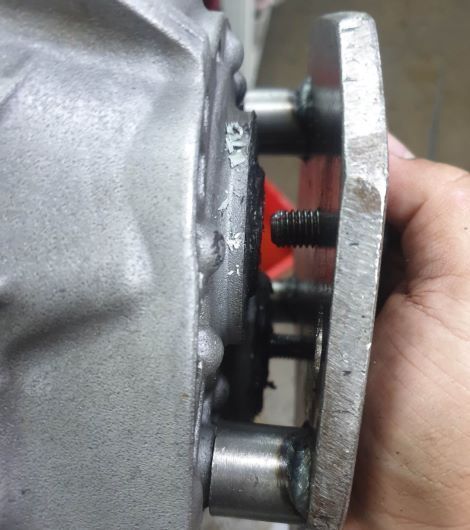
Seventh: In this step, a special tool will be required. I'm not too sure if this tool is buy-able but we managed to make one ourselves(pictures below). We start of by tightening the tool to the housing, then places 2 thick and correctly sized washers between the 2 shaft and the special tool's screw. Slowly tighten the 2 screws on the special tool and the housing will come right off. If the screws are very tight and the housing wont budge, it is likely that you have missed a bolt that was suppose to come off. I can't really describe how this process should feel so good luck we made this ourselves, not too elegant but it works
you see the two screws between the tool and the housing? the washers goes in between
this picture illustrates pushing out press-fit shafts out of the rear housing using my home made tool
Eighth: Once the rear section it out, you should be able to see the displacement sensor. And if you don't, you are probably not working on a PDK. that's the displacement sensor
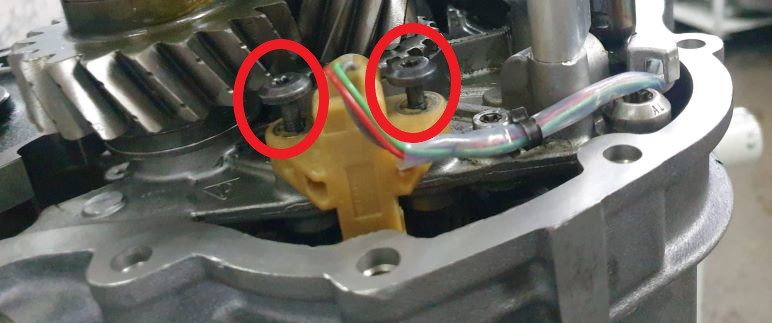
Ninth: Removing the displacement sensor is pretty easy. Just undo 3 bolts from the displacement sensor, undo 2 bolts for the speed sensor and lastly, remove the clip at the female connector of the sensor and push it out of the housing. As easy as ABC. undo bolts circled in red
unbolt them
The Last Step:
Out with the old, in with the new displacement sensor (only at T-Design). Once that is done, just reverse the process and perform calibration(with part replacement/overall procedure) with PIWIS II or III.
I was lucky enough to source once from T-Design and it works like a charm
This is their complete guide on how to prepare the sensor for installation >> Instruction for Displacement Sensor by T-Design
If you have any questions, just ask and I will reply as much as I can.
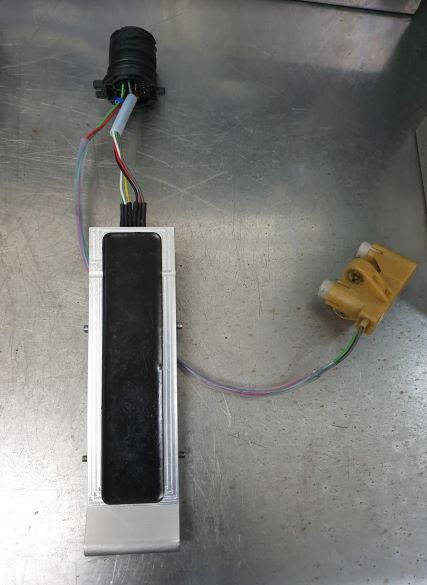
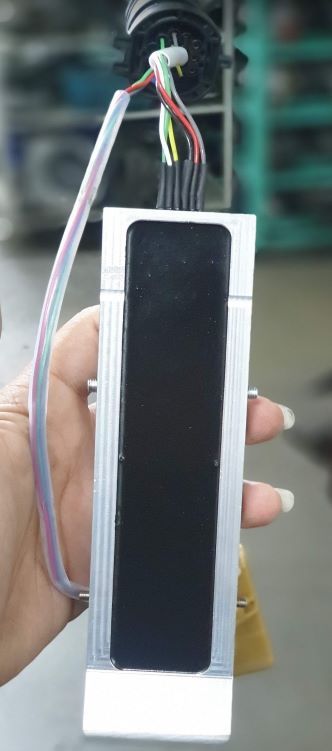
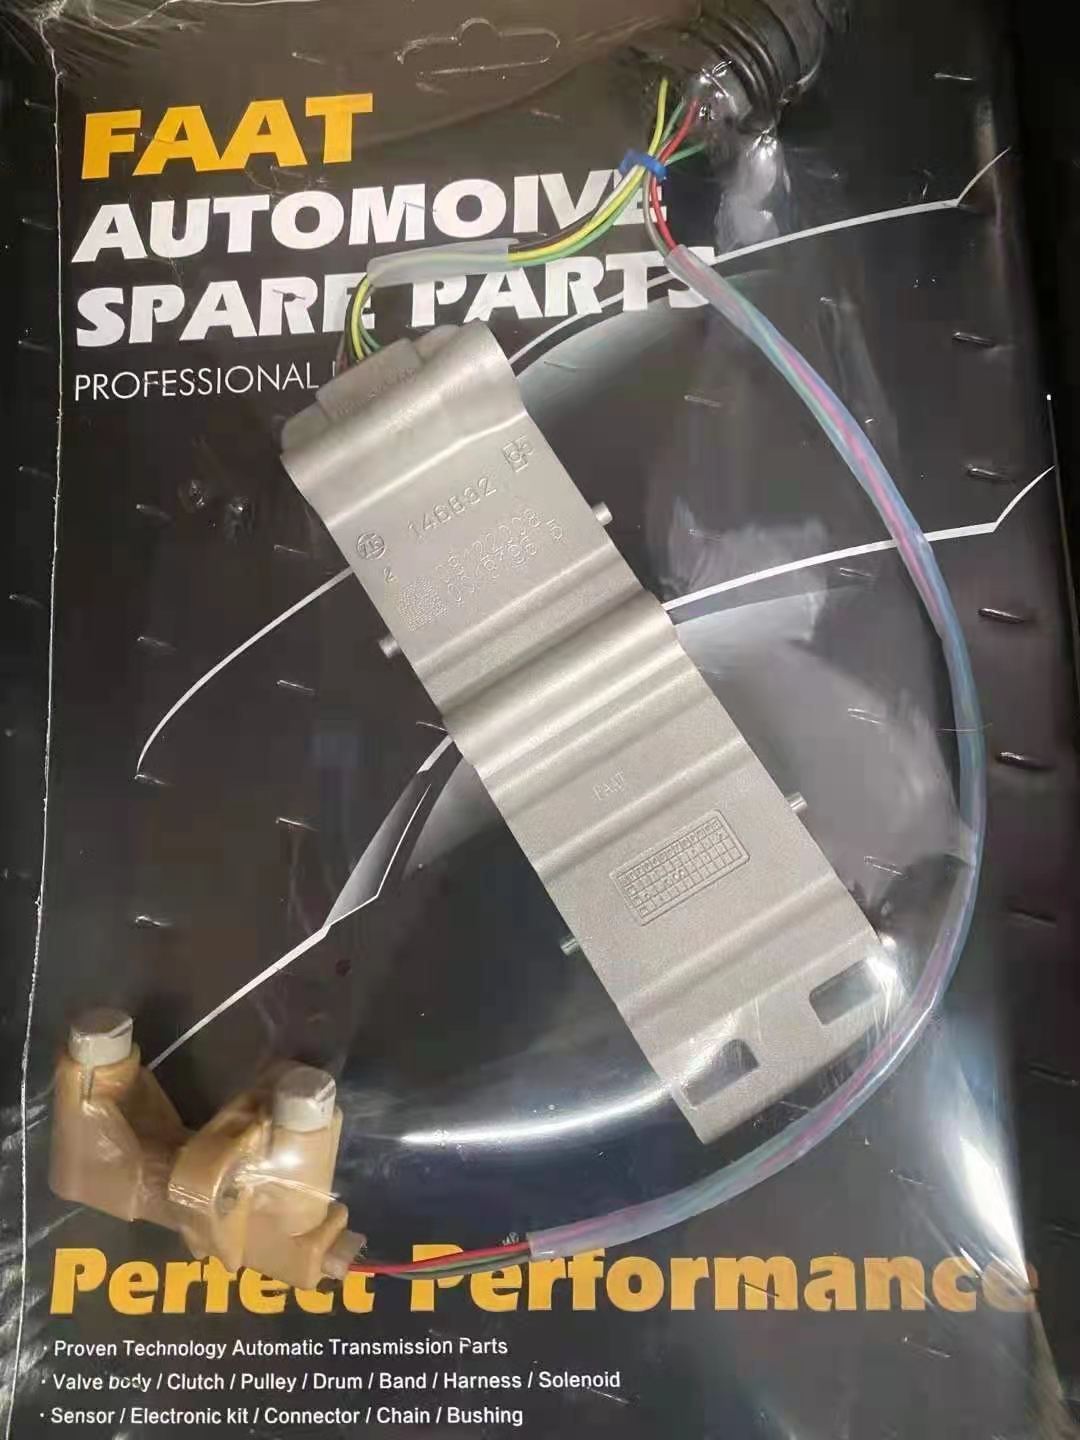
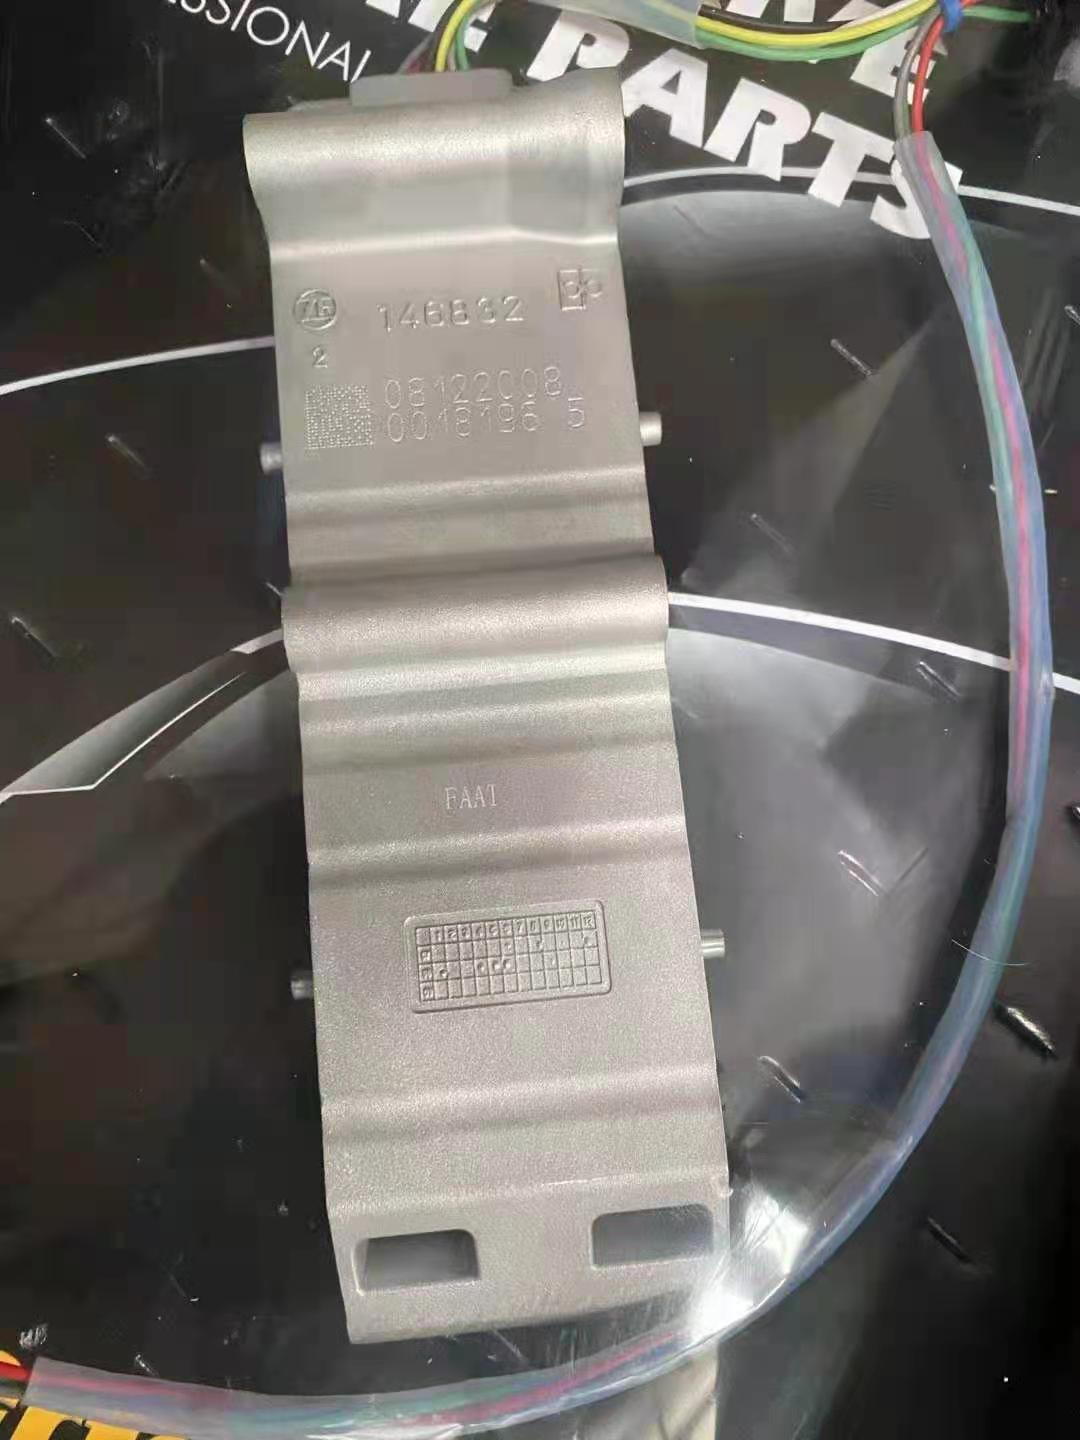
Some picture of the sensor that I sourced from T-Design
the aluminum part came and I soldered it to the harness
Fantastic post! Great information. Did you finally got the car running by using the T-Design part? I am living in China, which getting a used one pulled from a savage car was easy, I�m just wondering can I replace the sensor without taking off PDK from my 987.2 Cayman S?
Hi, regarding your question, yes I have got the T-Design part to run on my car. Second, it is possible on some model but I have never tried it myself, I prefer to have the whole box down and get the job done


 06-22-2021, 06:35 AM


 Much appreciation on this !