When you click on links to various merchants on this site and make a purchase, this can result in this site earning a commission. Affiliate programs and affiliations include, but are not limited to, the eBay Partner Network.
I have a 2002 996 but the engine was replaced in late 2005 with an updated big bearing motor which is why I'm posting here.
The car has done 167,000 miles with about 127,000 of those on this engine. It's all working exceptionally well except that I've developed an oil leak on bank 1 which looks to be coming from the #2 spark plug hole. My plan is to drop the engine and remove the cam cover and cams to get at the bottom three o-rings as well as the top three - of course I will reseal the cam cover as well.
It's going to look a whole lot like the job that idlook2 did here:
Unfortunately - idlook2 did not go into a lot of detail about how to re-time his cams so I'm left digging through dozens of internet posts about 5 chain motors while occasionally finding hints about the 3 chain motors. Near as I can tell it's a whole lot simpler for me, I think I have it figured out.
I also have what I think will be the two specialty tools I need, one to lock the cranks and the other to lock the cams (see photo).
My plan is to :
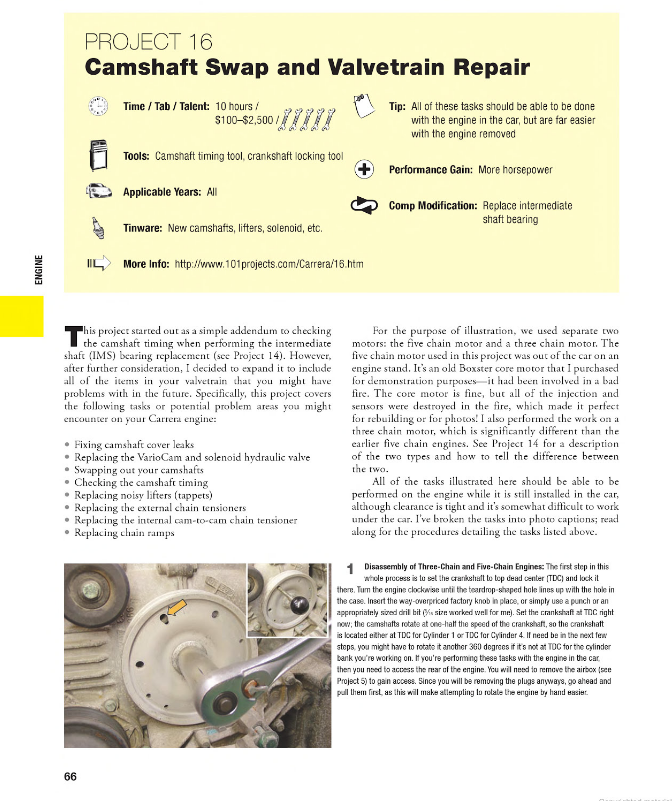
1) lock crank at TDC1
2) remove the two camshaft inspection covers.
3) mark the end of the camshafts and the cam cover using a centre punch (useful for orientation later)
4) lock the camshafts using the tool.
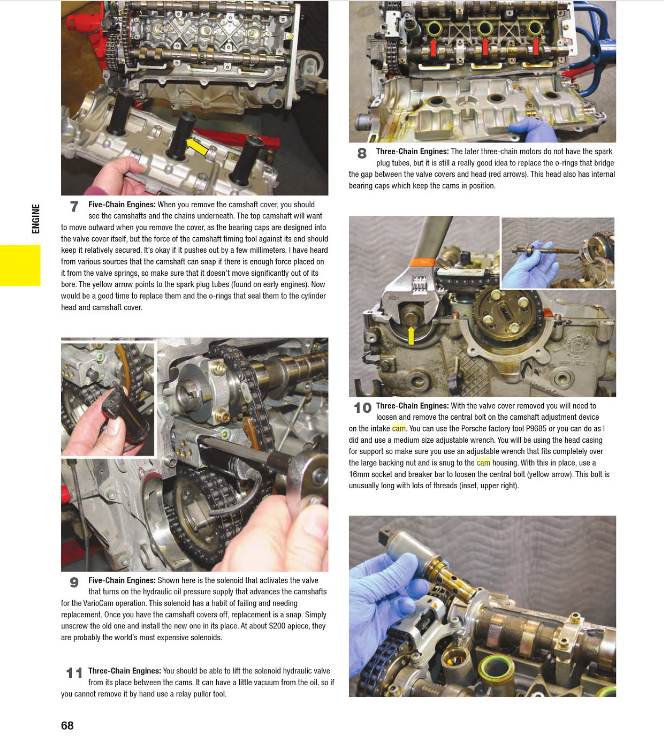
5) remove the cam cover
6) remove the tensioner and chain guides
7) remove sprockets - noting and marking the position of the chain on the sprockets - careful to not allow the chain to skip off the IMS
8) remove last cap holding cams and then remove cams.
9) remove the lifters and lifter housing - note position of lifters and number them so they go back together same way.
10) replace o-rings. under the lifter housing.
11) replace lifter housing and lifters
12) rotate cams into correct timing position, install one bearing cap, lock cams with tool.
13) install sprockets on end of cams in same position as before (do the three chain motors also have the odd-coloured link ?)
14) install chain guide and tensioner.
15) thin bead of black loctite 5970 on cam cover flange (would love some details here - I understand the placement and amount are critical).
16) Torgue down the cam cover bolts to 10 ft-lbs
17) remove cam locking tool. - rotate engine and check again.
Any input or suggestions is appreciated, especially on the cam timing procedure but also things to do while I'm in there. I've put 100,000 miles on this car and it's basically mine forever now since it's not worth anything on the used car market and it will be eligible for collector insurance where I live soon so will be cheap to run. I plan replace my PSS9 coilovers and get new shifter cables.
The motor isn't out yet - I'm dealing with a series of bolts that broke when I removed the header first. I hope to get this job done by spring buy I have othe trcars to drive so n oplan to hurry.
Hey someone found my write up useful! Quick question, do you have a factory service manual? There is a nice diagram showing where to place the sealant and the correct sequence to torque the bolts.
Regarding cam timing, it is pretty straight forward from what I can remember. If you don�t spin the engine, all of the marks that you make should line right back up.
I'm glad you found this thread. In fact yours is the only one that shows what's important for this particular style of m96. If a goes well this thread will add online resources for the next guy.
I don't have a service manual. I'm hoping someone can post the relevant info.
I bought a used copy of that book a couple of months ago and I leafed through it but didn't go through in enough detail to notice this procedure. Thank you so much for posting. I'm going to go ahead and study it in detail.
It is a five chain model that's described but I guess ours are the same but easier....
It took me a while to get back to this thread - I had to deal with a series of broken header bolts - see post here
Turns out that removing the header was not necessary for this job but lesson learned - all was sorted in the end.
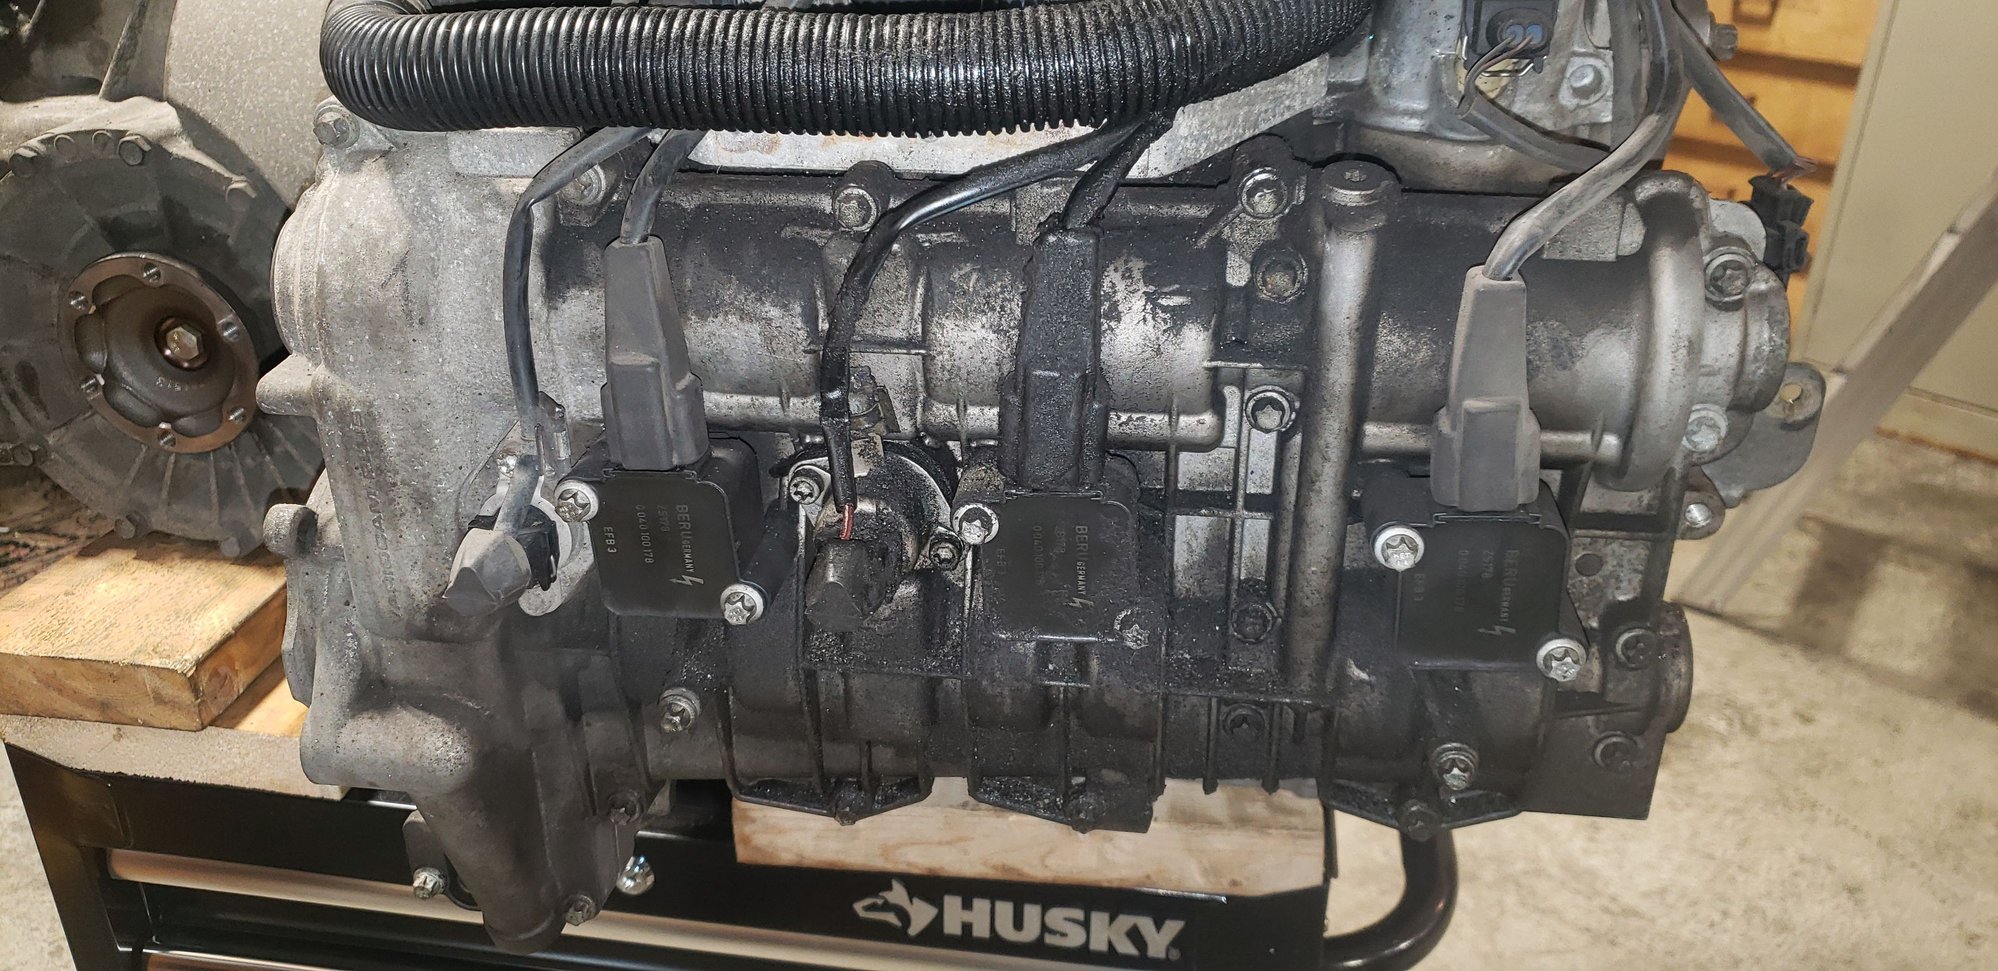
I got my motor and trans out Wednesday night - went ok. A little tricky getting the tail of the transmission to clear the cross beam on my hoist but we managed to tilt it enough to get it done.
Now I can see what is causing that oil leak, or more correctly what isn't causing it.
I removed the coil packs and the tubes are dry all the way down. That means I don't have to got through the whole cam removal procedure to replace the bottom o-rings like idlook did in his post.
I'm pretty sure actually that most of the leak is coming from the flexible plastic vent tube that catches vapour from the right side head and send them to the air-oil separator. In addition to a lot of oil showing up around that tube as it passes over the left side - I'm also seeing some residue showing up on that pipe only on the right side. See the photos.
I'm not sure that this is the whole story though - there seems to be a lot of oil on the bottom of the left side - which has me thinking the cam cover seal to the head has been compromised.
The new plan is to replace that pipe and reseal the cam cover. Of course I will clean everything and as a bonus I discovered my transmission bushing is badly torn up. This is good news since y gear selection has been a bit off lately and this explains why. I'm planning to install cup cables (or after market equivalent) so I'm going to have some damned crisp shifts when it all goes back together.
Some photos:
Motor out - I bought a new tool cabinet to use as a rolling bench. It has 1000 lbs capacity and seems stable enough.There's a lot of machinery here..
The left side oily mess I'm dealing with.
The vent pipe I think is the main culprit. This is where it passes over the left side of the motor.
This is the same pipe where it passes over the right side - starting to see some weepage. There's little to no oily residue on the cam cover.
Inside one of the three spark plug holes - they all look like this. Nothing to see here.
Torn up transmission mount - look at the outer rim from 9 o'clock to 12 o'clock, but there are tears all over it.
Nice work. Those plastic AOS hoses are all going to fail at some point - they suck. From the grime location on the motor and what the hose looks like, that may be all that's wrong.
That trans mount bushing is shot, like you say. If you catch it before it fails you can use Function First inserts to stiffen them back up and avoid having to press them out and replace them - you've passed that point though.


 12-26-2020, 06:50 PM