When you click on links to various merchants on this site and make a purchase, this can result in this site earning a commission. Affiliate programs and affiliations include, but are not limited to, the eBay Partner Network.
It is relatively easy to replace the cupholder assembly and go from broken, nearly-useless cupholders to non-broken, nearly-useless cupholders.
Tech Tip: Much of the assembly is made of ABS plastic. You can use Oatey ABS Pipe Cement to make very strong repairs. Available at home and hardware stores. I've repaired many old airplane interior parts with it and it works fantastic.
Tools needed:
1. 5/32" allen wrench. Ball-end type makes this a bit easier but not required.
2. Small plastic spudger such as for opening an iphone or the like. The interior pry tools might be a bit big for this job.
3. Helpful, a small inspection mirror to make it easier to locate the screwheads.
Materials:
1. Replacement cupholder assembly (hey, it's only money, right?)
Procedure:
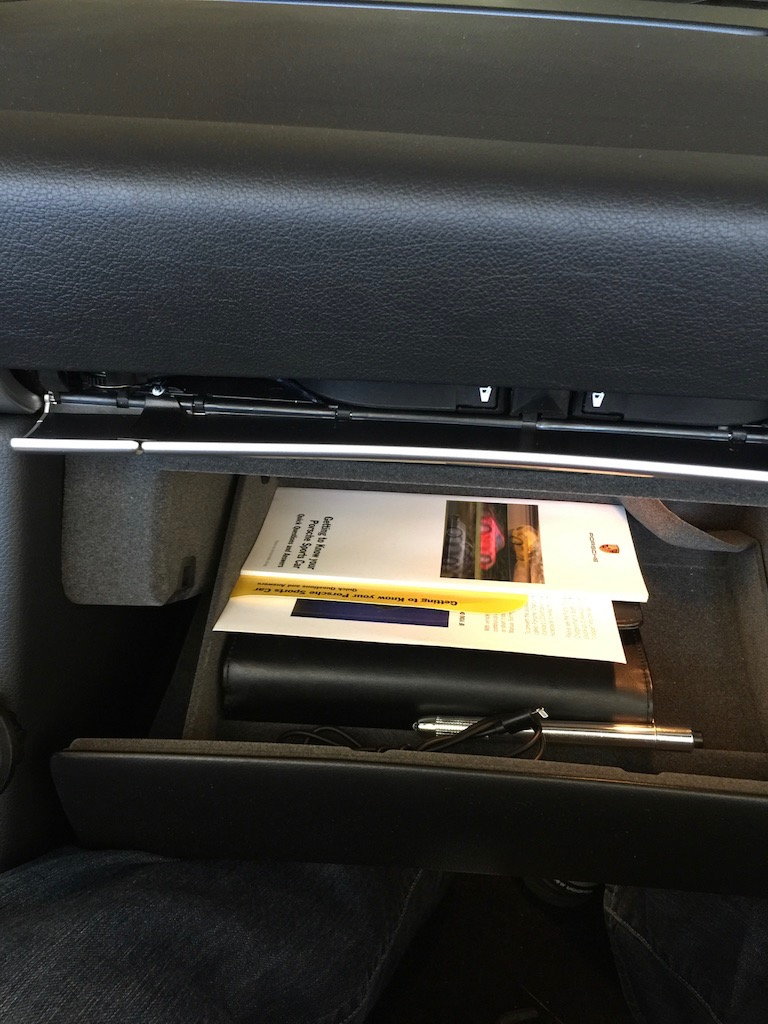
1. Open glove box.
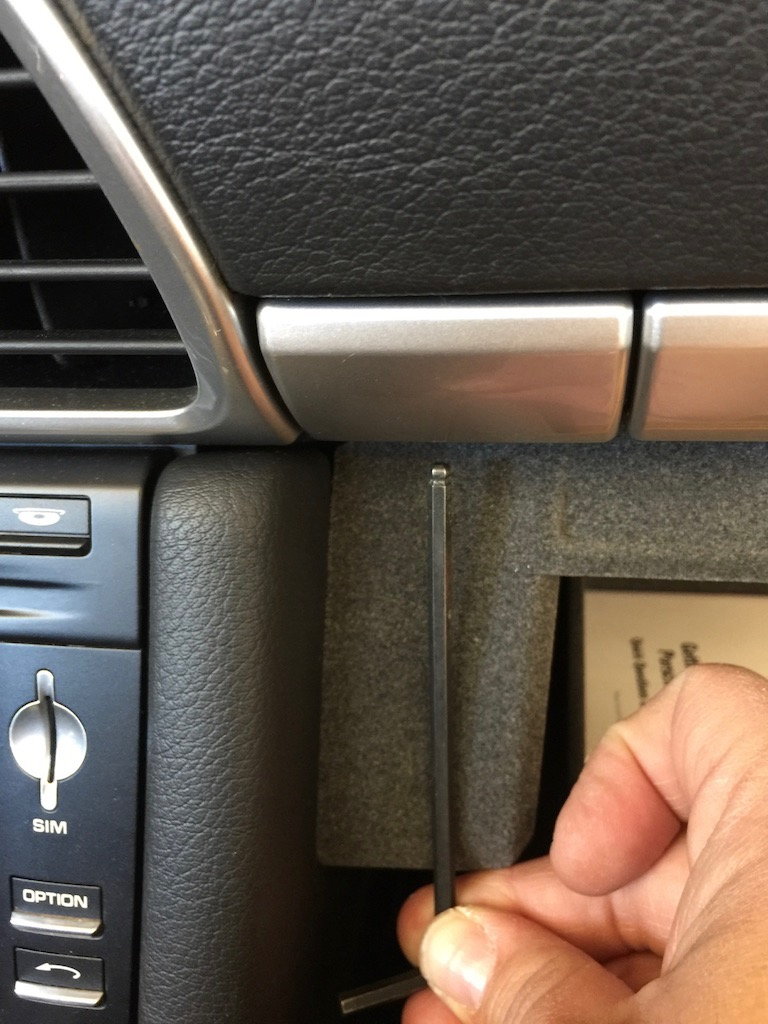
2. Locate the two allen head screws, which are directly behind the small flaps on either side of the cup holder assembly.
3. Loosen both allen head screws and pull them out. You might need needle nose pliers to grab them and withdraw them enough to clear the speed nut.
4. Once the screws are out or at least withdrawn enough, pull the entire cup holder cassette out of the dash.
5. Go to a padded work surface and carefully pry the three trim pieces off, by inserting the small plastic prying tool from the hinge side.
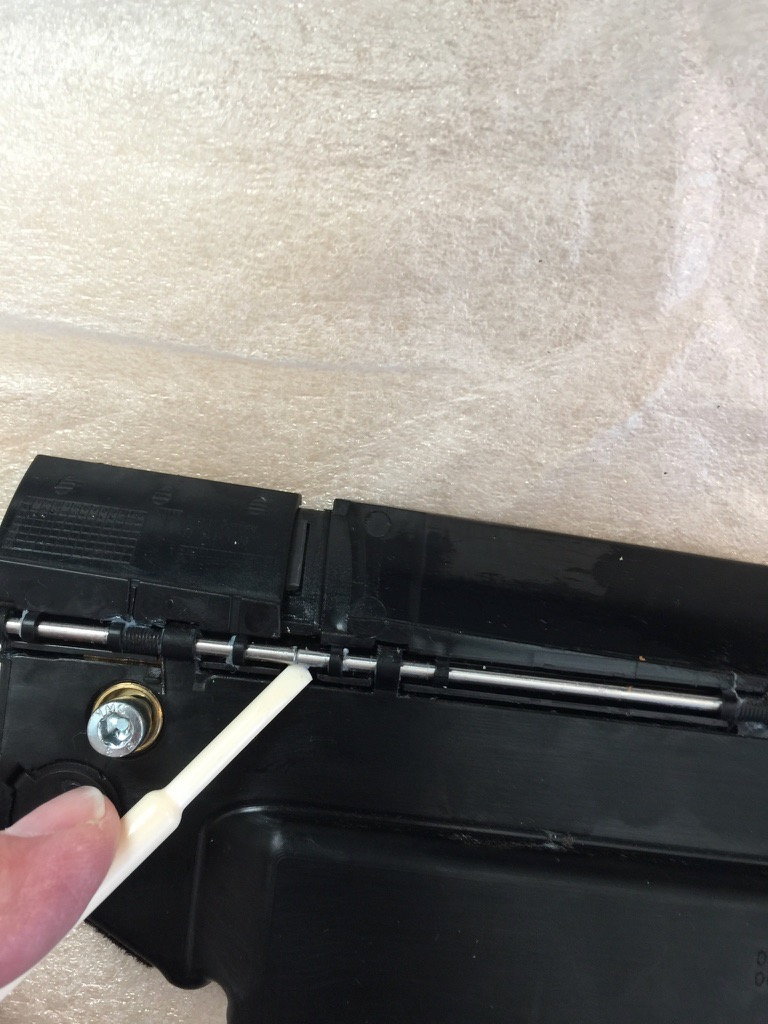
6. Check the new cupholder cassette hinge pins. Test-fit the trim pieces on and check that the metal hinge pin protrudes enough on each side of the three flaps so that the matching claw on the trim has something to snap onto. The pins can easily slide so line them up before snapping the trim pieces down.
7. Starting with the large middle trim piece, hook the top over the black plastic flap. Check alignment before snapping them down onto the hinge pin. Do the sides last, same procedure of hooking the trim over the edge of the black plastic flap.
8. Check operation.
9. Fit the new assembled cassette into the dash. Mine came with allen head screws already in it that are semi-retained. Start the screws, but do not fully tighten, stop just short of snugging them down.
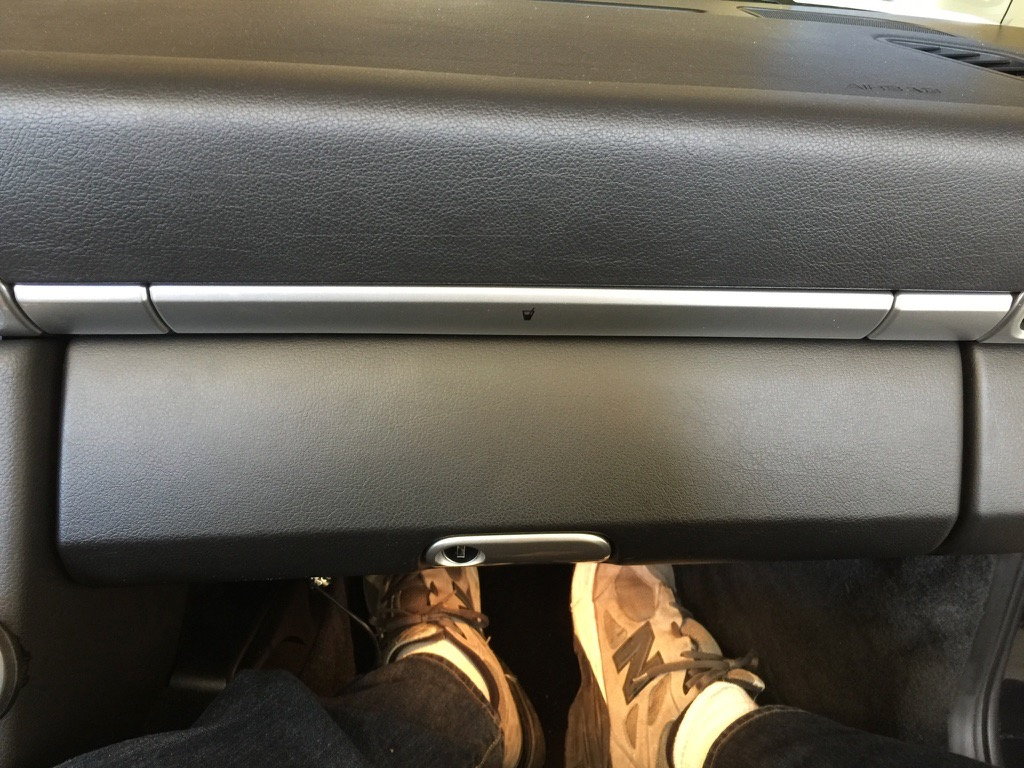
10. There's enough play in the speed nuts in the dash to give room to align the cassette in place. It should line up with the AC duct trim and have fairly even spacing.
11. Once aligned, tighten the allen head screws in place.
Enjoy your beverage supporting once again!
Unfortunately, there's very little that is repairable in this thing. If you get lucky, you might be able to fix it. Procedure is the same for R&I.
Prep for cupholder removal.
Allen screw on the left side
Allen head screw on the right side
Check the hinge pin alignment on the new cupholder and adjust as needed.
Check the middle flap hinge pins too.
Check and center all three so the claw on the trim can clip on.
Great post. Rule number one for passenger. Don't touch it. Rule number two. Touch it and you'll have to get out of car.
Did you do permanent fix and glue it shut for life?
Porsche offers a repair kit for the "tensioner" which is the little flap on the inside of the cup-holding ring. That's the only parts available other than the whole unit.
Mine had a broken tensioner, but it also had a broken shaft that is supposed to lift the drop-down arm as you close it. It also didn't want to stay latched. Just too much little broken stuff to fix. Had to replace.
I will say, it is highly over-engineered and poorly-designed all at the same time. It doesn't function very well, and it is very fragile and prone to breaking, despite its mechanical complexity.
Great write-up! Personally I have never used the cupholders so if the door ever stops staying shut I'm just going to fasten it with a couple pieces of 3M double-stick tape.
I like cupholders. My boat has 13 of them! In this car, with hot coffee, I hold my finger over the sipping hole on corners and bumps. Mine works perfectly.

 04-02-2018, 10:13 PM


")
