When you click on links to various merchants on this site and make a purchase, this can result in this site earning a commission. Affiliate programs and affiliations include, but are not limited to, the eBay Partner Network.
Lots of work there @napoleon, how many miles on the car?
50k mile car.
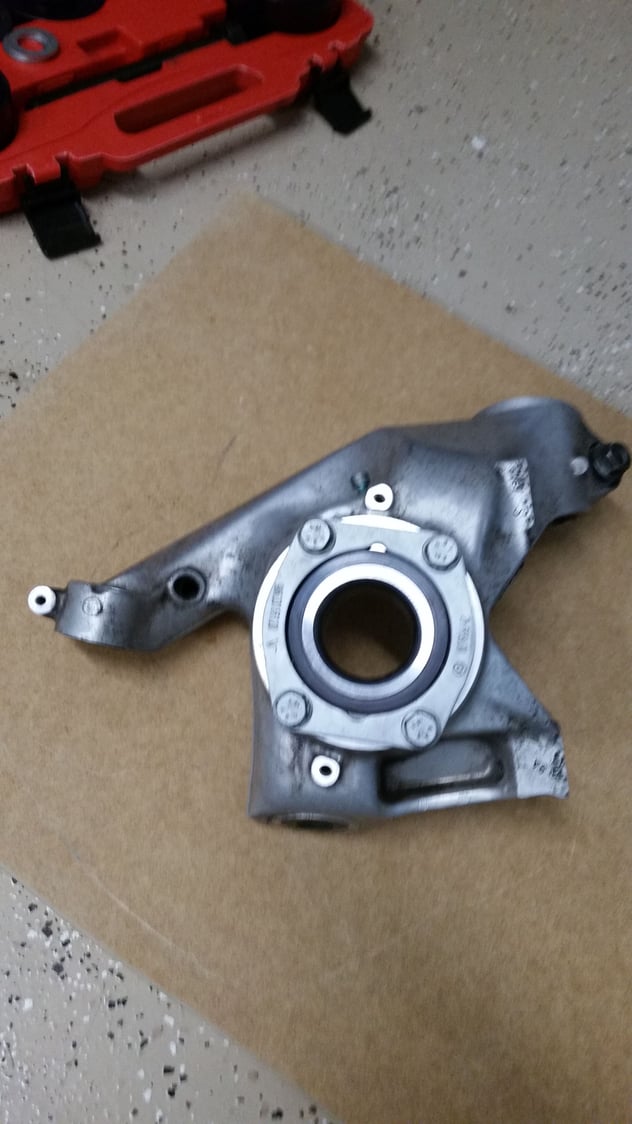
The car is actually in a fantastic overall shape, but I think the previous owner must have hit something at some point, bending the hub, and breaking the cage lose in the inner tie rod?
The coffin arms were just destroyed by a tow truck driver putting chains over the arms. A few years before I bought the car, it had a bad battery and was hauled to the shop and I think this is when it happened. All the bushings in the coffin arm are in excellent shape, no cracks and tight. Just the nicks on the most narrow part of the coffin arm make me a bit worried, plus I'm a perfectionist lol.
These aren't projects that I did "today," but a few projects that I did over the winter. These are all super easy 30 min to 1 hr DIY projects, but they go a long way:
1. Replaced ashtray with a new trim piece with "ashtray delete" purchased from Suncoast. The ashtray wasn't quite flush to the trim and I always thought it looked sloppy, and now I park my phone in this slot, it's perfect. This project involves removing a few screws, plugs, and trim pieces, but you do need to be careful when removing switches and tabs not to break the plastic! Super easy, 20 min. start to finish.
2. Removed CD storage tray and replaced it with open storage tray. 2-3 min job. Just pulled the old storage tray out, and popped the new one in.
3. Installed aux plug from Becker Audio. You can purchase this from Becker Audio's ebay store, it's a direct plug-in into the CD Changer outlet (if you have a disc changer, you loose that functionality I think). Then I drilled a small hole in the upper storage tray (visible in pic, but not when you're sitting in the car), and fed the aux plug through. Instructions for enabling the AUX feature/mode on the headunit come with the cable. This took me about an hour. The hardest part was removing the headunit which was stuck in there pretty good, getting the headunit back in, and also threading the aux cable through the hole is a bit fiddley. All in all an easy project with HUGE results, love having full access to Spotify.
4. Hardwired a quick hookup for a Deltran Battery Tender Plus, accessed through the frunk. The cord runs down the outside of the weather stripping and does not pinch on anything, the frunk closes fully. It gives easy access to the battery tender on the ground without having to go through the window. 10 minutes.
Some progress. I got the new bearing and hub in and it runs true. Now I have to wait for my new control arms to arrive Friday and I can get it all together.
If anyone wants to do wheel bearings here is a tip: Heat the spindle in the oven (when the wife is gone) to ~120 celcius and chill the bearing in the freezer. It will drop right in, no pressing required.
I had to press the hub in, but it was fairly easy.
How much shipped to,30030-need a set of track wheels...c
Well, looks like $75-$80 per wheel to ship UPS ground or USPS ground from here to there. I see prices vary widely for the actual wheels, from less than $200 to almost $500. Not sure why the price variation, but these are unmarred. I just don't like the flat black powder-coated look at all. So if I pick a price in the middle-market, like $350/wheel, then I come up with a total of $1400 + $300 shipping = $1700.
Maybe people will tell me that's too cheap and I should hold out for more $$$. I already boxed them in the BBS wheel boxes and stowed them in the rafters in the garage, so there's no rush to sell them.
4. Hardwired a quick hookup for a Deltran Battery Tender Plus, accessed through the frunk. The cord runs down the outside of the weather stripping and does not pinch on anything, the frunk closes fully. It gives easy access to the battery tender on the ground without having to go through the window. 10 minutes.
Looks good. I put the official Porsche tender on my Amazon wishlist, but this is less than half the price and doesn't use the cig lighter, which in my car has a tendency to push out plugged-in items.
 03-05-2017, 08:16 PM