When you click on links to various merchants on this site and make a purchase, this can result in this site earning a commission. Affiliate programs and affiliations include, but are not limited to, the eBay Partner Network.
Figured this hadn't ever been done to my recently purchased 996tt, so after 15 years and ~30k miles thought it was due. Let's remove the front bumper cover and clean the road debris out from the radiators.
Tools needed:
T25 torx
Phillips head screwdriver
Vacuum
3/8" rachet and extensions
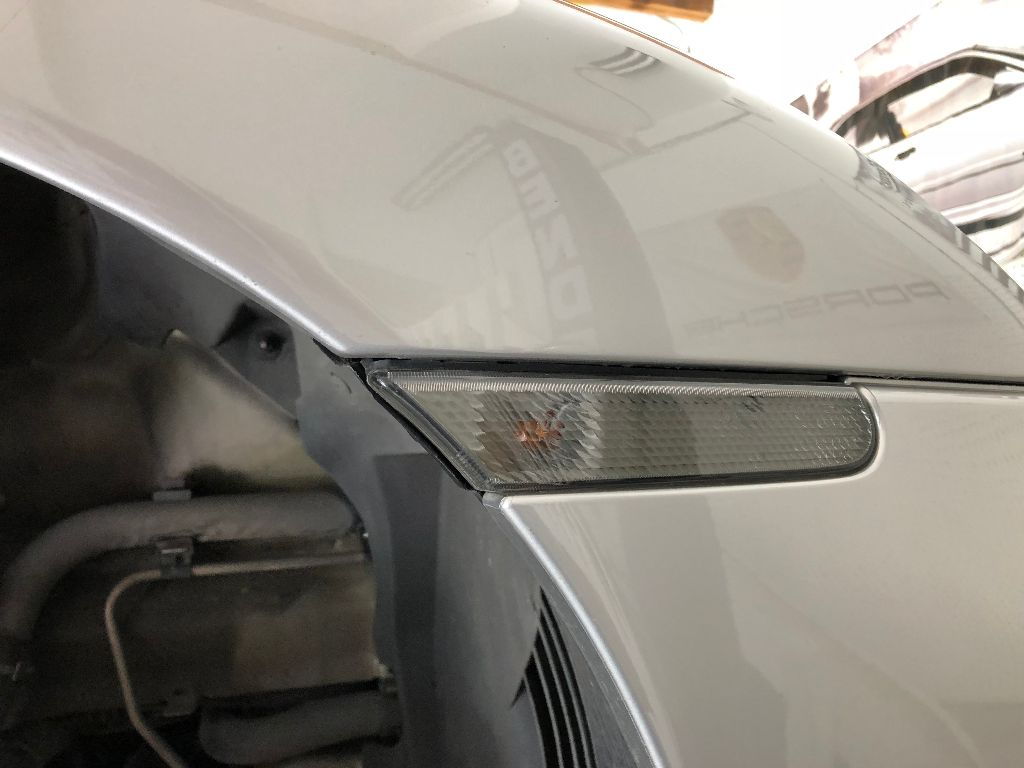
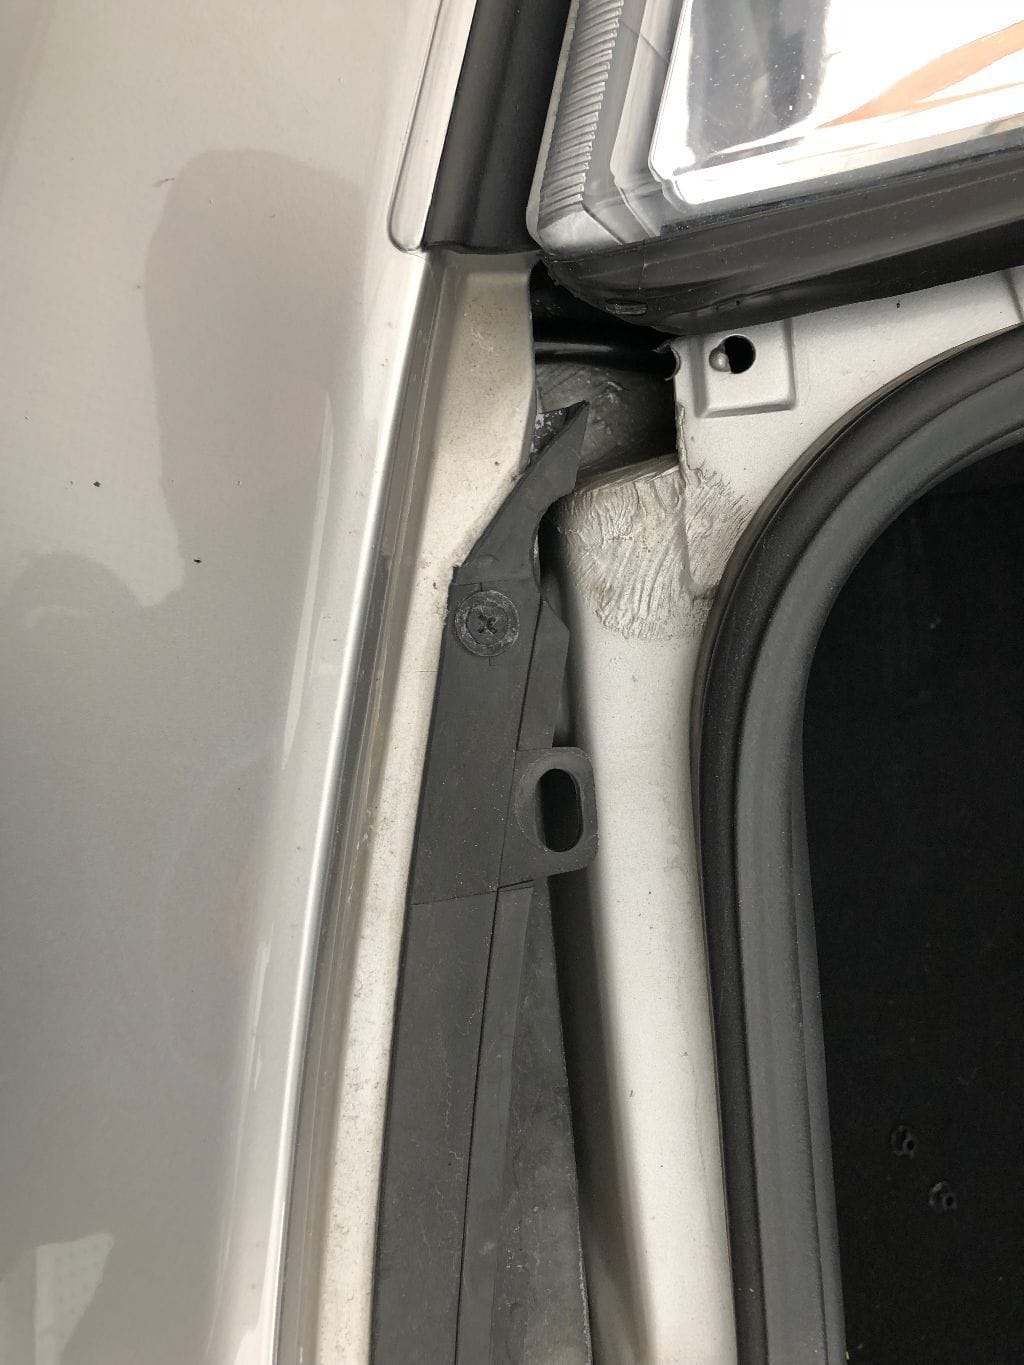
OK, start by popping out the front side marker light. Just push it forward and it'll pop out. Don't worry, you didn't break it!
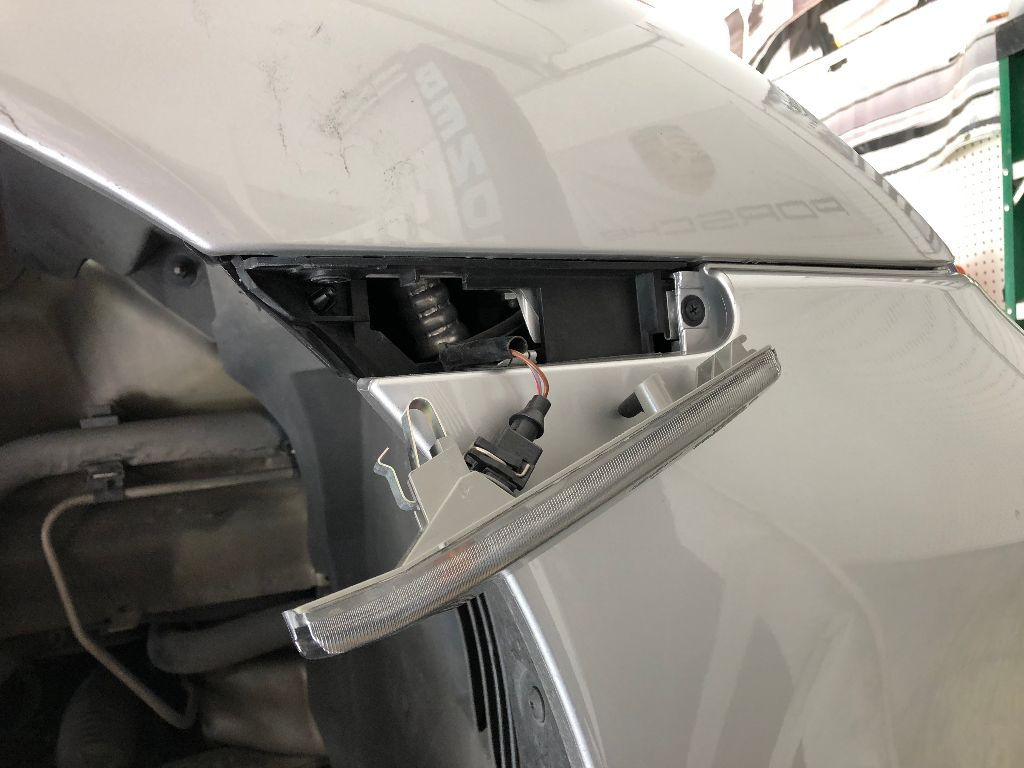
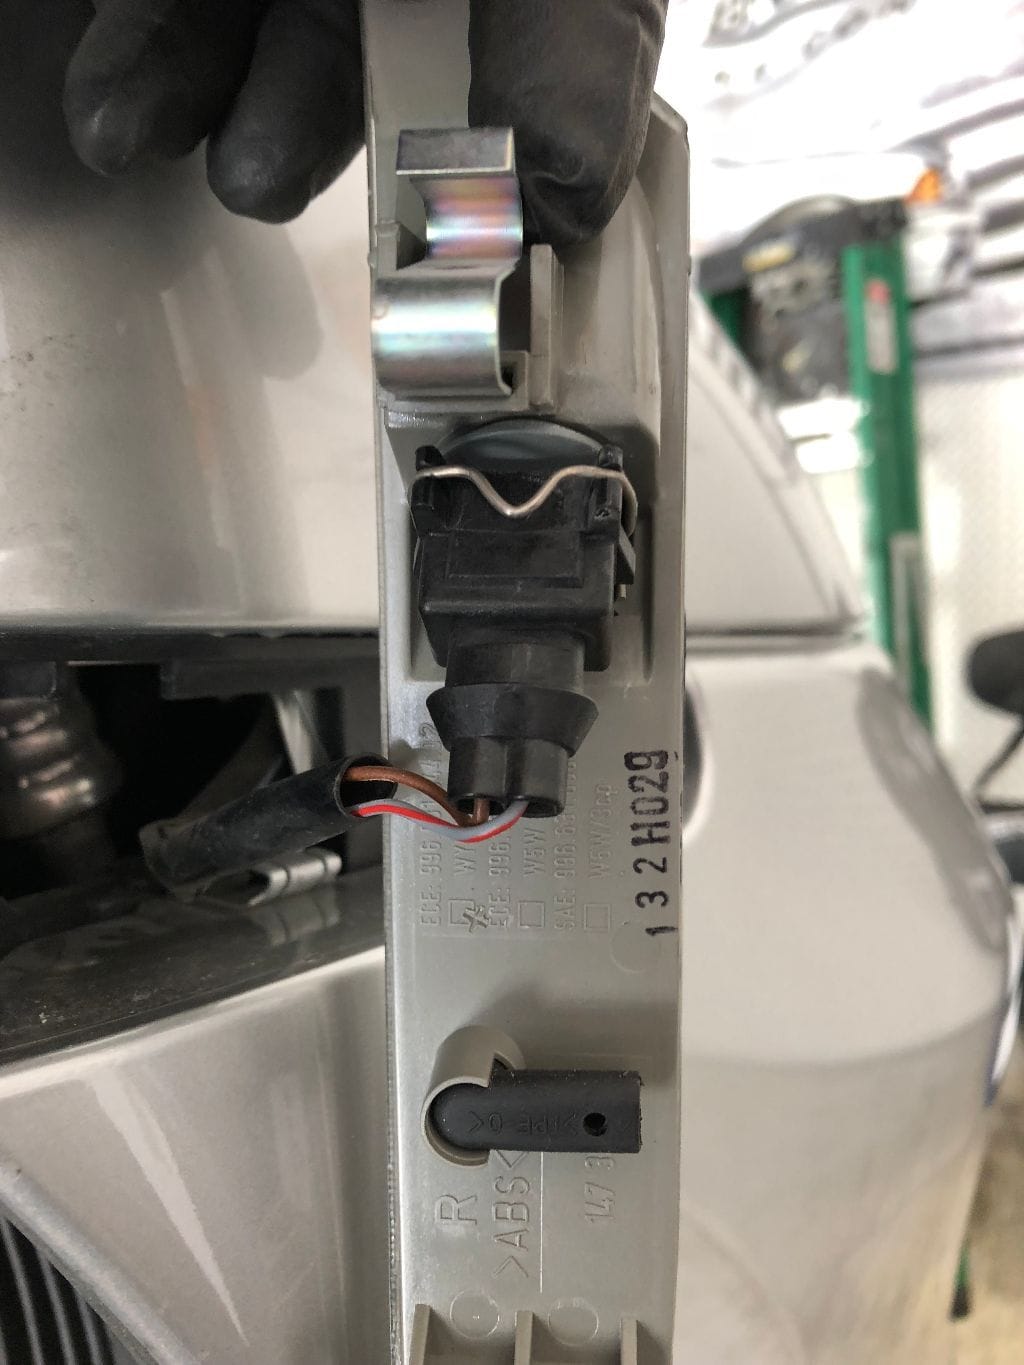
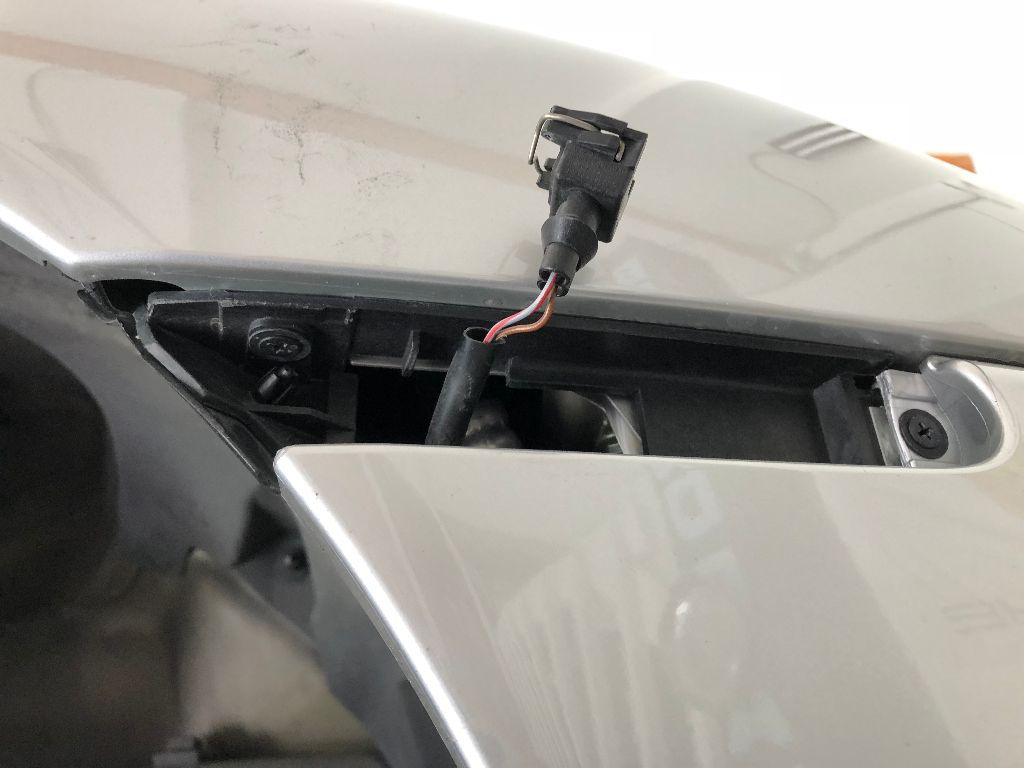
Ok, now pinch the silver bracket to release the harness and remove the side marker light completely
Now remove the two screws you find behind the side marker light. Be aware there's a *third* screw you'll need to remove here too! You'll need to take the T25 screws out of the front inner fender liner, peel it back to see and remove it.
There's also a plastic dowel pin on the fender liner attaching to the side marker part that you'll have to remove. These are a total bitch, I usually end up destroying them on removal and just replacing them with new ones.
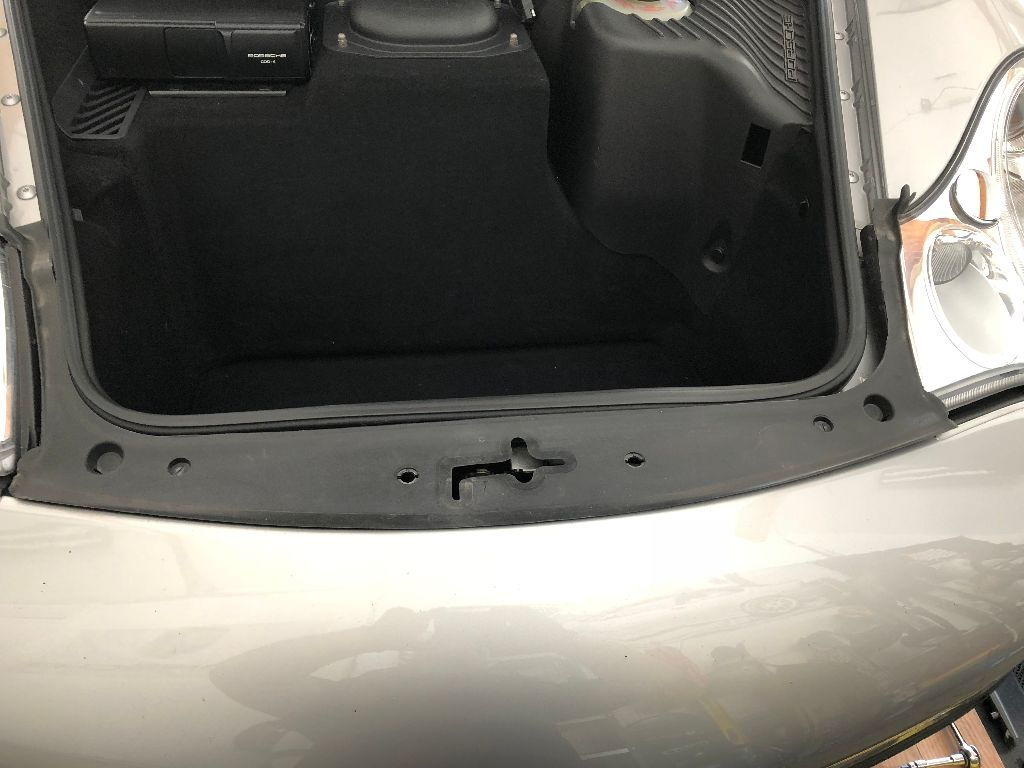
Ok, let's open the frunk, you need to turn those pins 90 degrees, then you can pull out the front trim piece to access the screws underneath.
Ok, now go underneath the car and remove the 4 T25 torx screws on either side of the bumper as well as the 3 torx screws in the center. Also remove the 1 phillips head screw in the inner fender liner holding onto the back of the front lower lip spoiler.
That should be all of the screws, pull the bumper away from either side, then pull the entire thing forward and off.
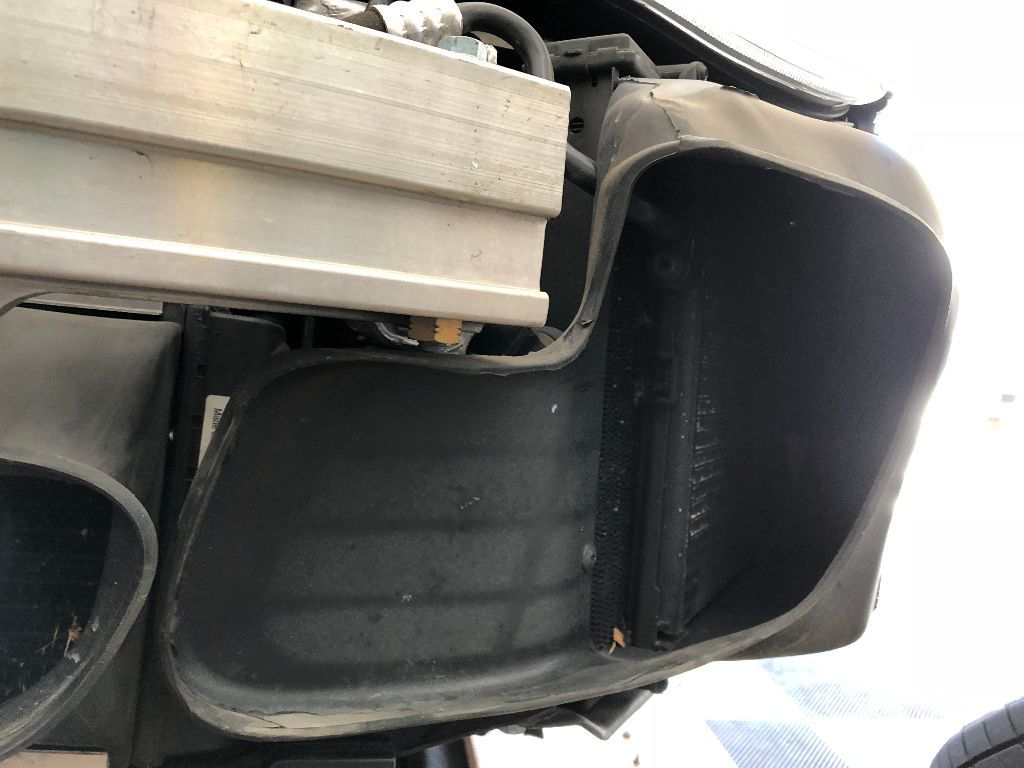
Let's take a look at the radiators...
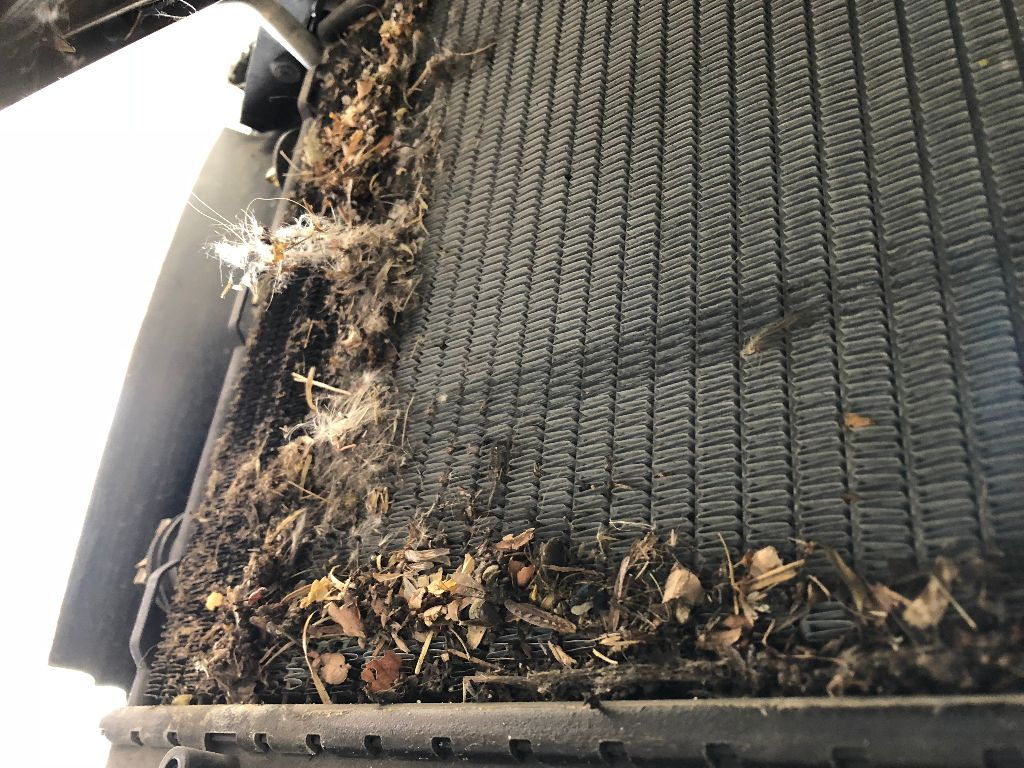
Doesn't look bad, but don't let that fool you. Remove the shrouds from the side radiators, there are 2 T25 torx screws. Pull the shrouds towards the center line of the car to remove them. Then you'll get to see all the garbage vacuumed up by your car
That's just what fell out when I removed the shroud!
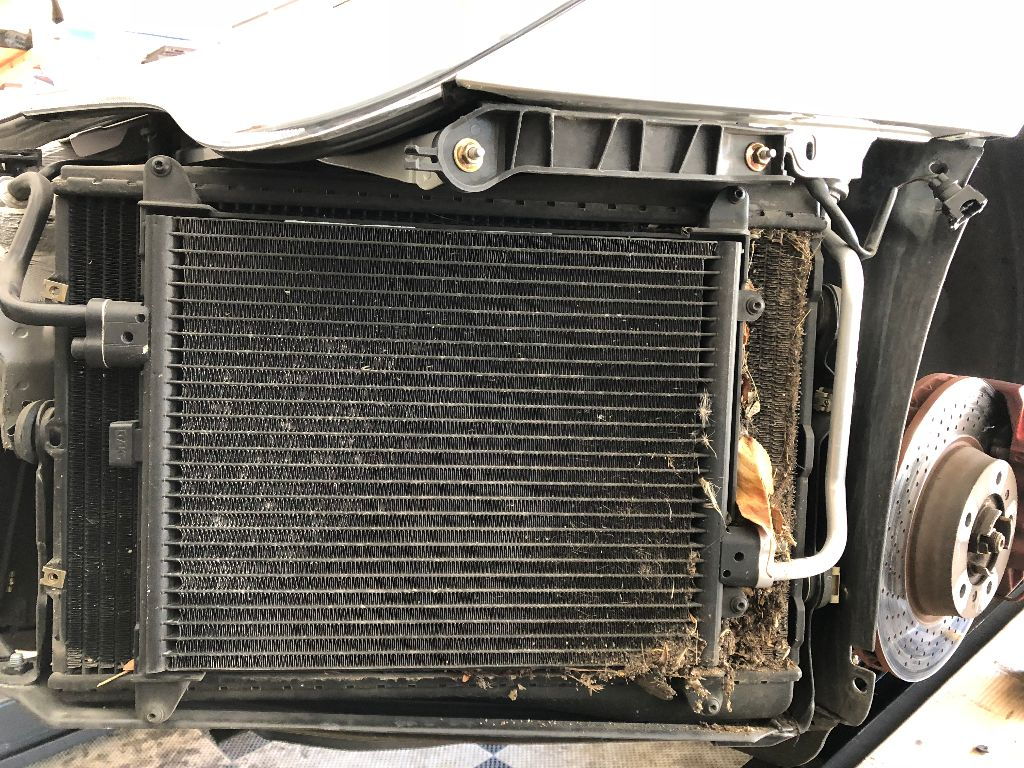
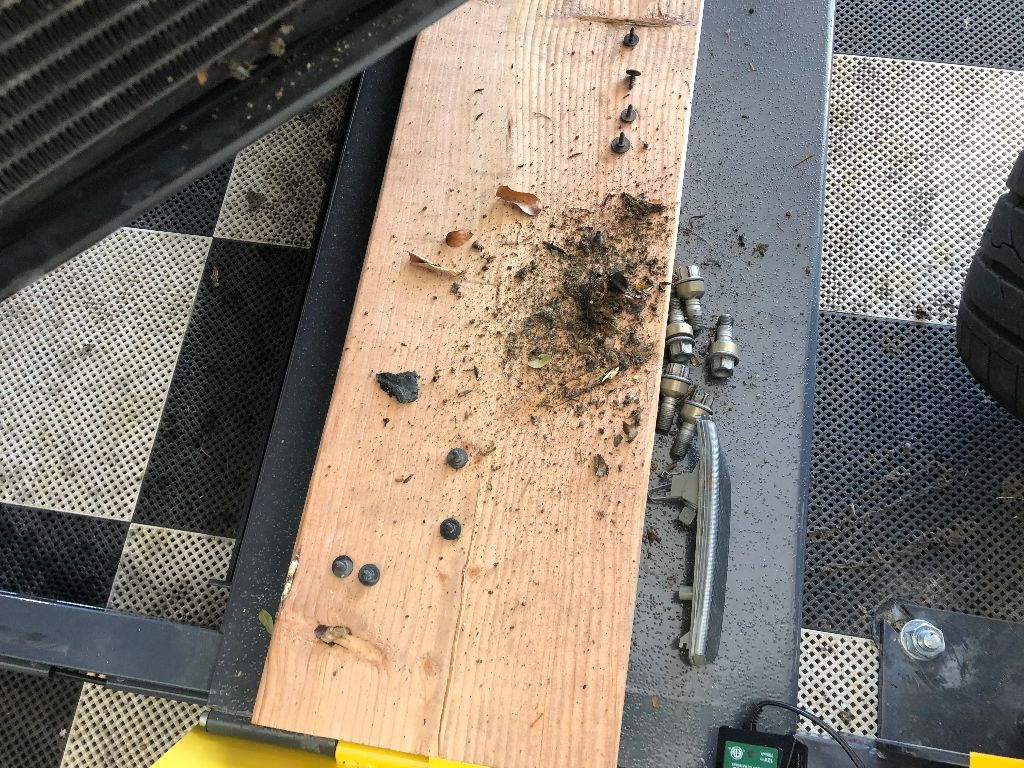
Vacuum up what you can, then remove the 4 T25 screws holding the AC condenser onto the front of the radiator. Gently pull the AC condenser a little bit away from the radiator. This is what you'll find, more debris!
Vacuum all of that out, then as they say, reassembly is the reverse of removal!
Nice! How did the lugnuts get in there?
It is pretty remarkable how much junk gets in there. Mine had a packs worth of cigarette butts plus feathers, fur, part of a plastic fork and a thousand little round pebbles in the bottom of the center radiator duct.
Looks all too familiar. Both my outboard radiators ended up failing at the lower rear corners where most of the gunk collects. They both lasted about 13 years with no one cleaning them, not too bad I guess.
Cleaning the radiator ducts out is sort of a rite of passage for new 996TT owners. It was one of the first things I did when I bought mine, and it was very obvious there had been no prior cleaning. You'll feel better knowing the car's cooling capacity is no longer compromised with all the crap that collects in there.
Nice write-up docwyte! I think fpb was pulling your leg on the lug nuts. Your garage floor looks exactly like mine - black & white checkerboard drain tiles. I like them, but they are almost impossible to keep clean, especially when you have a lift sitting on top of them like both you and I have.
After looking at bansasn's pic of his center radiator, I remember that I have a front end camera as well as some radar detector/laser jammer hardware in my car. Hopefully, they are not mounted to the bumper cover, but for other people with that type of equipment, it is another step to check before pulling the bumper cover away completely.
Yup, impossible to keep those tiles clean. It's a double edged sword, since the tiles are perforated they're not slippery when wet. However they let all the dirt, etc, fall through them and there's really no way to clean them without completely removing them from the floor.
I've tried pressure washing them, which helps some but since I don't have a drain in my garage for the water I end up having to vacuum it all up. Way too much work for the limited results. Knowing what I know now, I'd rather have a solid plastic tile that I could pressure wash, then just squeegee off....
Agree completely. Once we start remodeling our house in a couple of years, getting rid of those tiles and replacing with a quality epoxy coating is very high on my list. But, I've had them for over 10 years, so I guess I can live with them for a couple of more winters.
...Once we start remodeling our house in a couple of years, getting rid of those tiles and replacing with a quality epoxy coating ...
Yup, those plastic tile floors seem great for a "show" garage, but a complete pain in the *** for a working garage. Can't imagine the hassle of cleaning up an oil spill. Older epoxy coat on my floor, highly functional if not quite as pretty.
Issue with doing an epoxy coating is that *everything* needs to be out of the garage while they're doing it. That's just not gonna happen, I have way too much stuff in the garage with nowhere else to put it.
Issue with doing an epoxy coating is that *everything* needs to be out of the garage while they're doing it. That's just not gonna happen, I have way too much stuff in the garage with nowhere else to put it.
I hear ya... and if it's an older garage, you likely need to do a crap-ton of cleaning and grinding to get good adhesion. But the "everything out" is reason enough that I have an OLD epoxy coat floor and will likely never have a NEW epoxy coat floor unless I move ;-)
 10-19-2018, 03:09 PM


 Your garage floor looks exactly like mine - black & white checkerboard drain tiles. I like them, but they are almost impossible to keep clean, especially when you have a lift sitting on top of them like both you and I have.