When you click on links to various merchants on this site and make a purchase, this can result in this site earning a commission. Affiliate programs and affiliations include, but are not limited to, the eBay Partner Network.
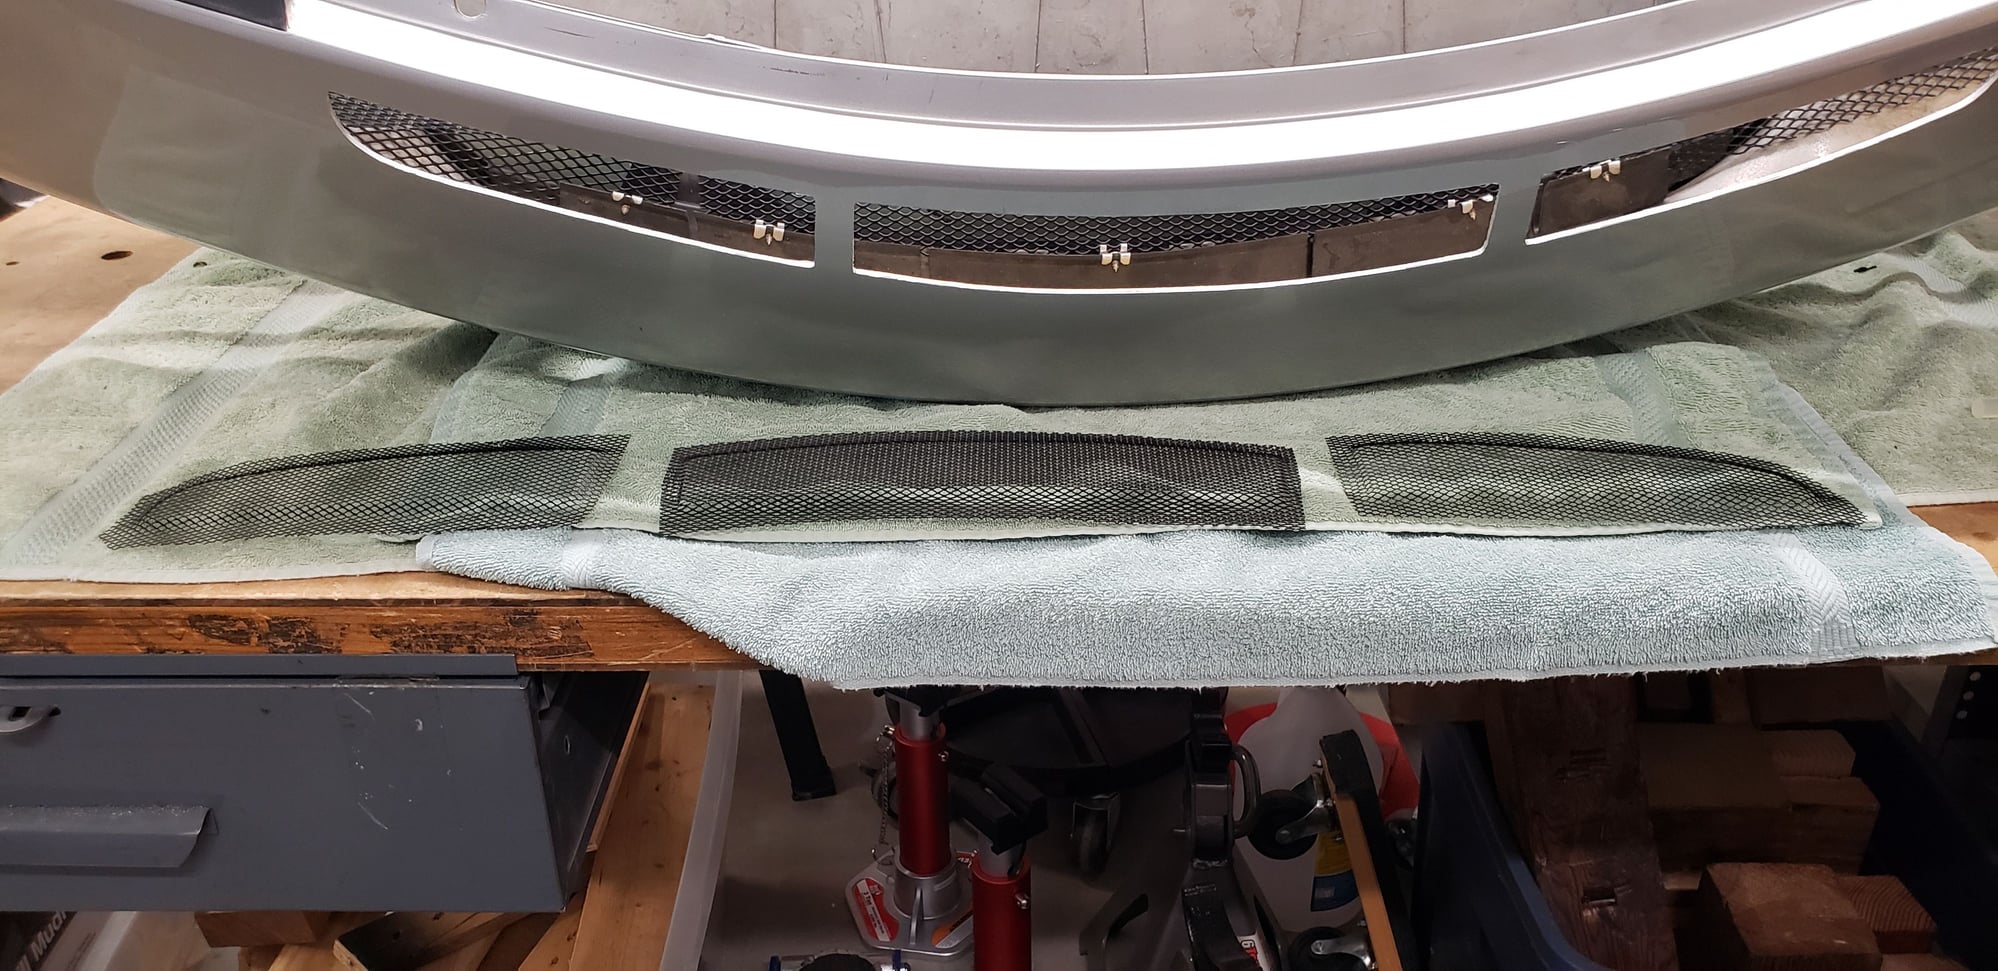
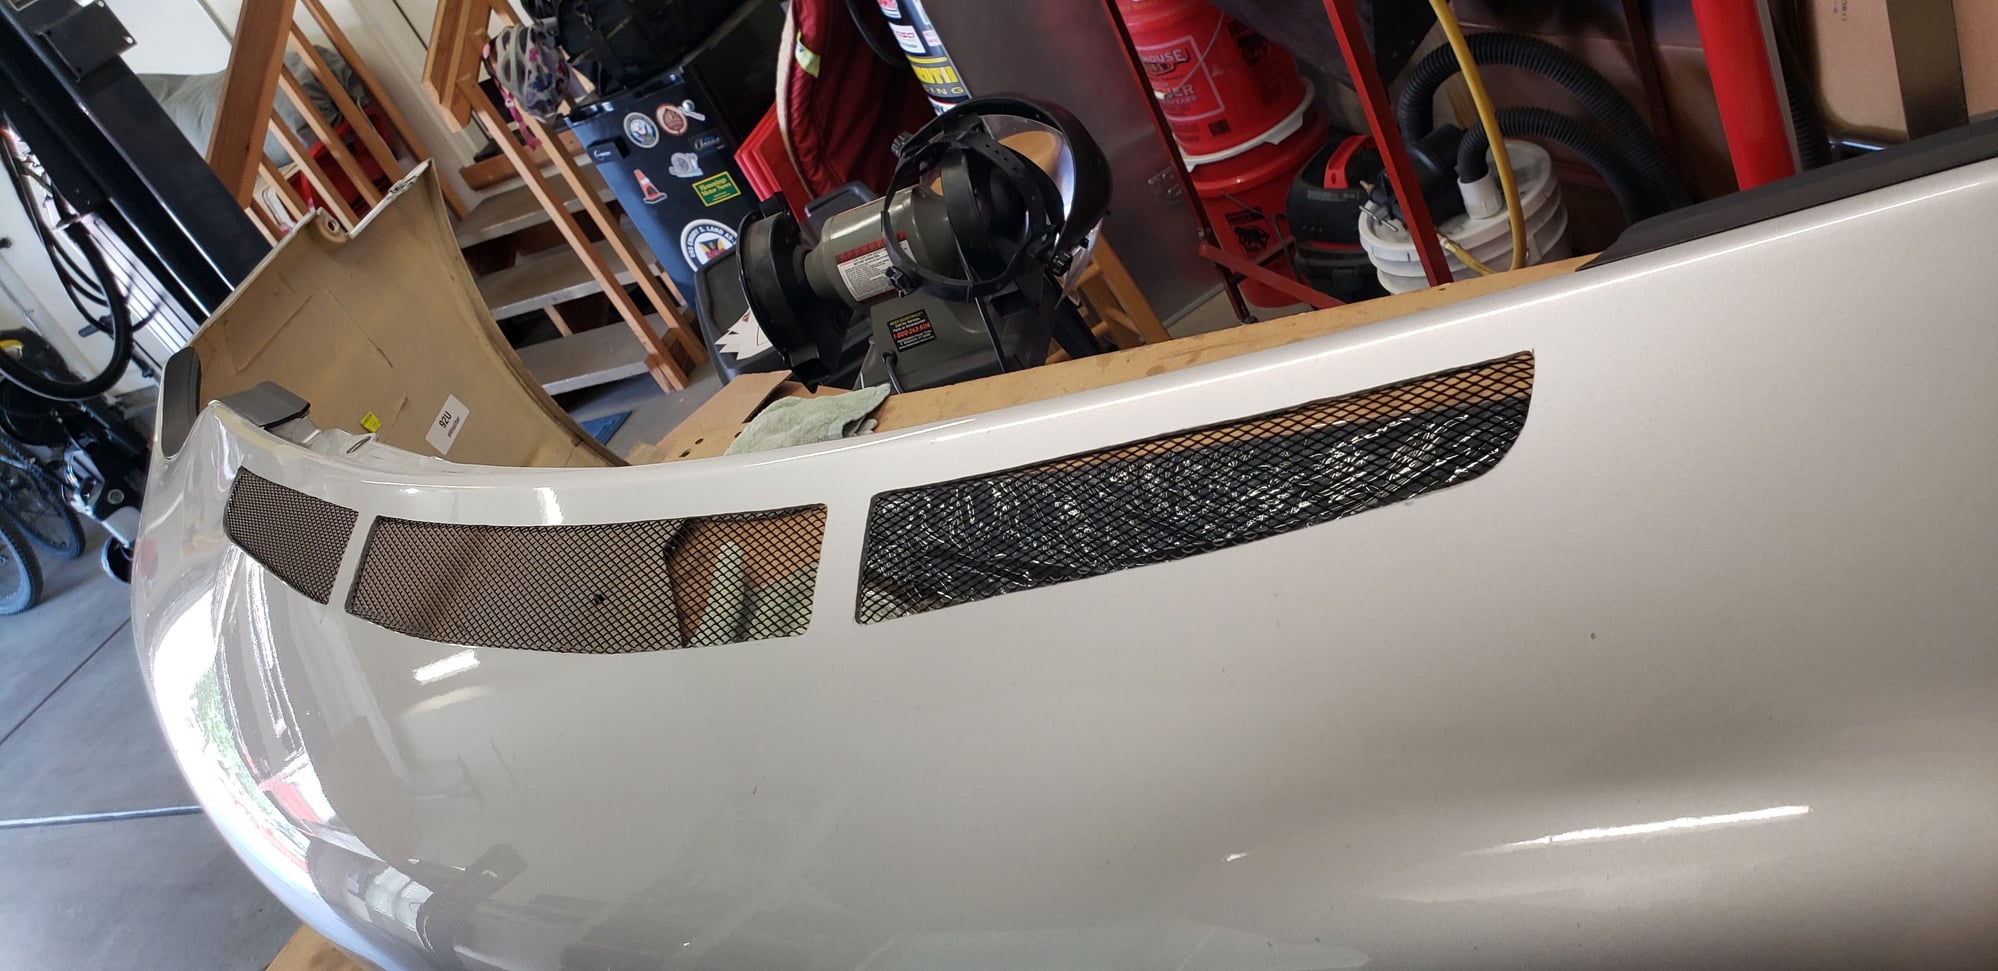
The part number you posted closely matches the curvature of the RS vents. Attached is a pic of the duct placed upside on top of the bumper to give you an idea.
The part number you posted closely matches the curvature of the RS vents. Attached is a pic of the duct placed upside on top of the bumper to give you an idea.
The part number you posted closely matches the curvature of the RS vents. Attached is a pic of the duct placed upside on top of the bumper to give you an idea.
Is rennlist a great site or what? I post a part number for a somewhat obscure part (GT2 chimney) from a rare Porsche (996 GT2) and ask if it will fit on another somewhat uncommon car (996 GT3) with an even rarer design mod (996 RS vents), and within minutes somebody posts a picture of that part fitted up to the target car! The people of rennlist are what make it such a great site.
Mine was a bit of a hack job, and is by no means air tight. There are a couple tabs and corners that need to be cut away from the GT2 duct so that it fits. I also removed all the plumbing for the headlight washers so it would fit better.
I did the centre rad tilt at the same time as installing the duct, and I also needed to cut away most of the inside sections of the side AC/rad ducts as the centre rad stuck out too far to get everything to fit correctly. It can be done, just requires a bunch of trimming.
Benefits included the aforementioned better front grip, as well as better overall water temps.
Thanks for the additional feedback and pics. I'll be giving my GT2 duct to my shop as soon as it arrives from Suncoast with instructions to trim it as needed for a good fit, or to come up with their own solution if they can find a better one. As you noted, a perfectly airtight fit isn't necessary, but I also want it to look good. My shop (Nolasport) does top notch work, so I'm confident they'll come up with a good solution. I'll post the results here.
I wonder if your need to trim the side vents is because you didn't reverse the mounting frame for the radiator, as explained OZ951's thread. If you don't reverse the frame such that the tabs are closest to the front of the car, the radiator tilts farther forward and contacts the side ducts.
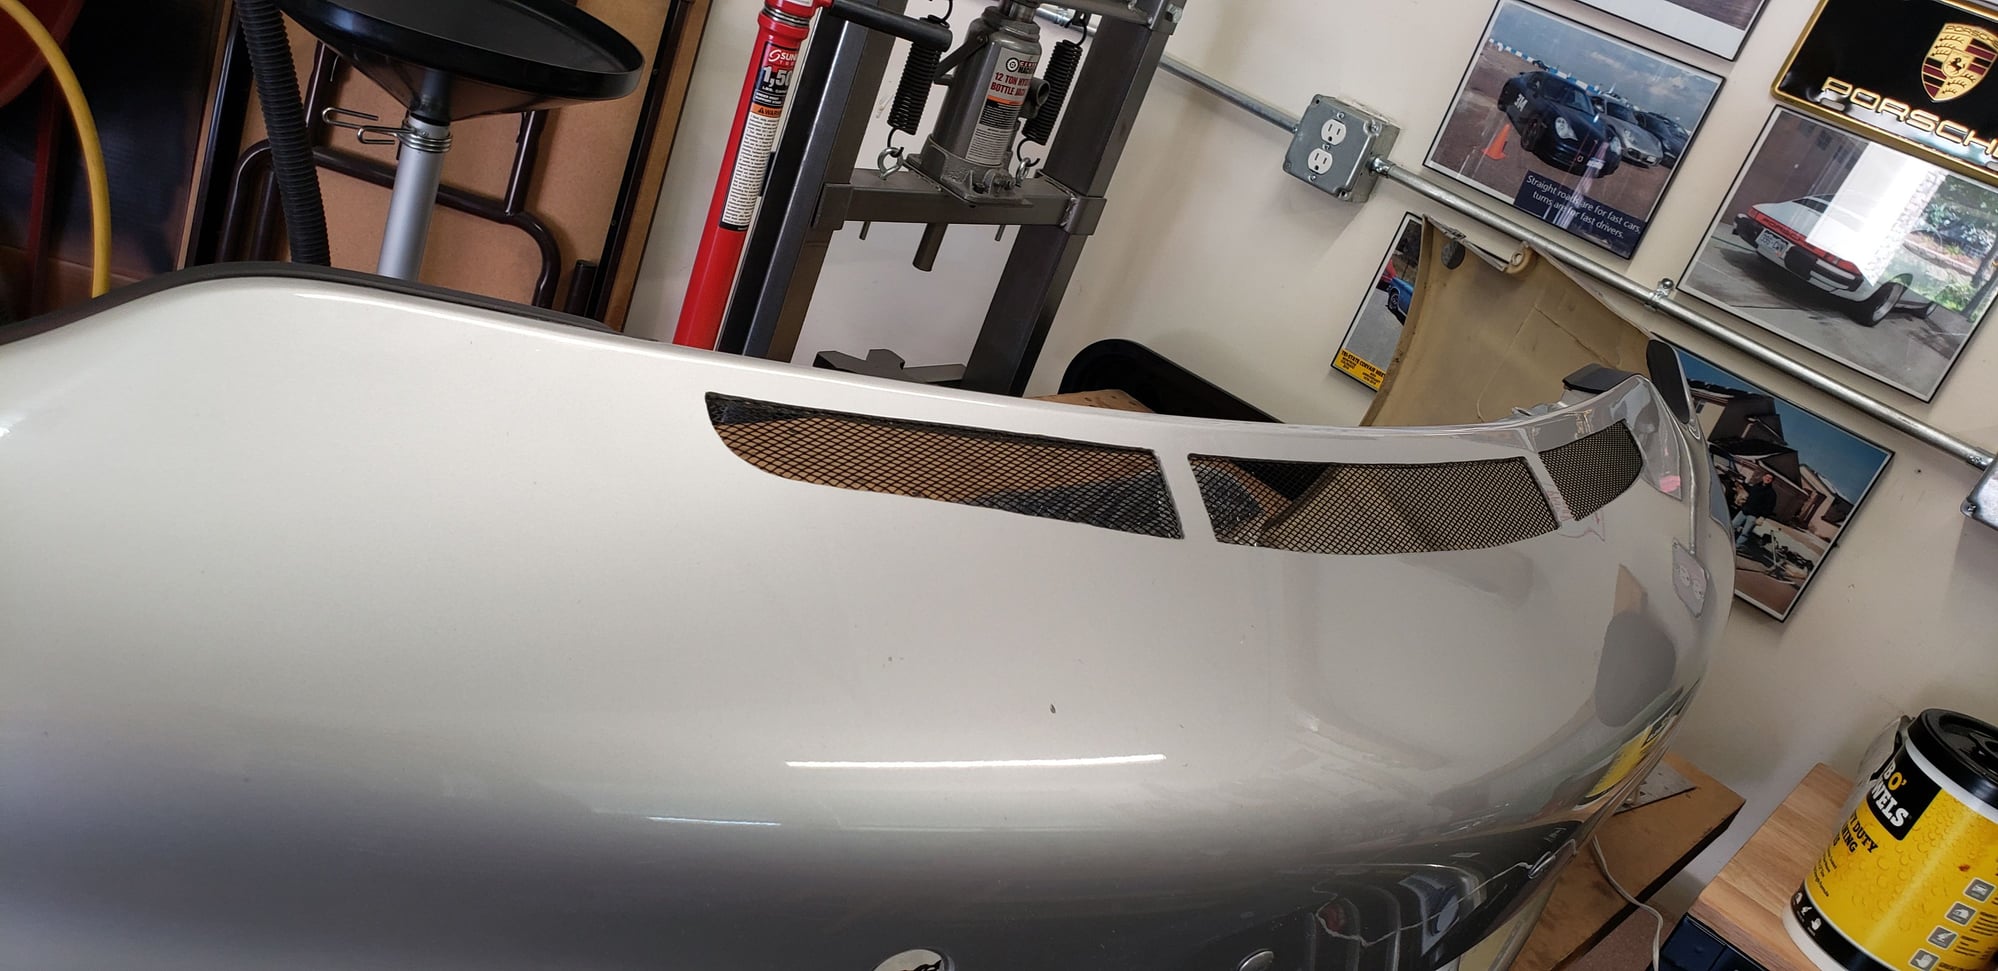
Finally got the RS vent project finished and I�m pleased with the outcome. I had the car at my shop (Nolasport) to have the radiators replaced and suspension refreshed (shocks, control arms, hubs and wheel bearings). All of that hardware was the original, 12-year old stuff, so I figured it was time. While they had the front end apart, I used OZ951�s templates to cut the slots in the bumper and Nolasport fabricated a custom duct to direct most of the air up to the vents. The GT2 duct didn�t fit as well as the Nolasport guys wanted so they made their own. You can see the start of the duct in the pic below. They added end plates to stop the air from flowing out the sides. Will post more pics of the duct when I get them. You can certainly feel the hot air rising up from the vents with the car at a standstill. I�ll let everyone know if I can feel a difference in front end grip next time I take it out on track.
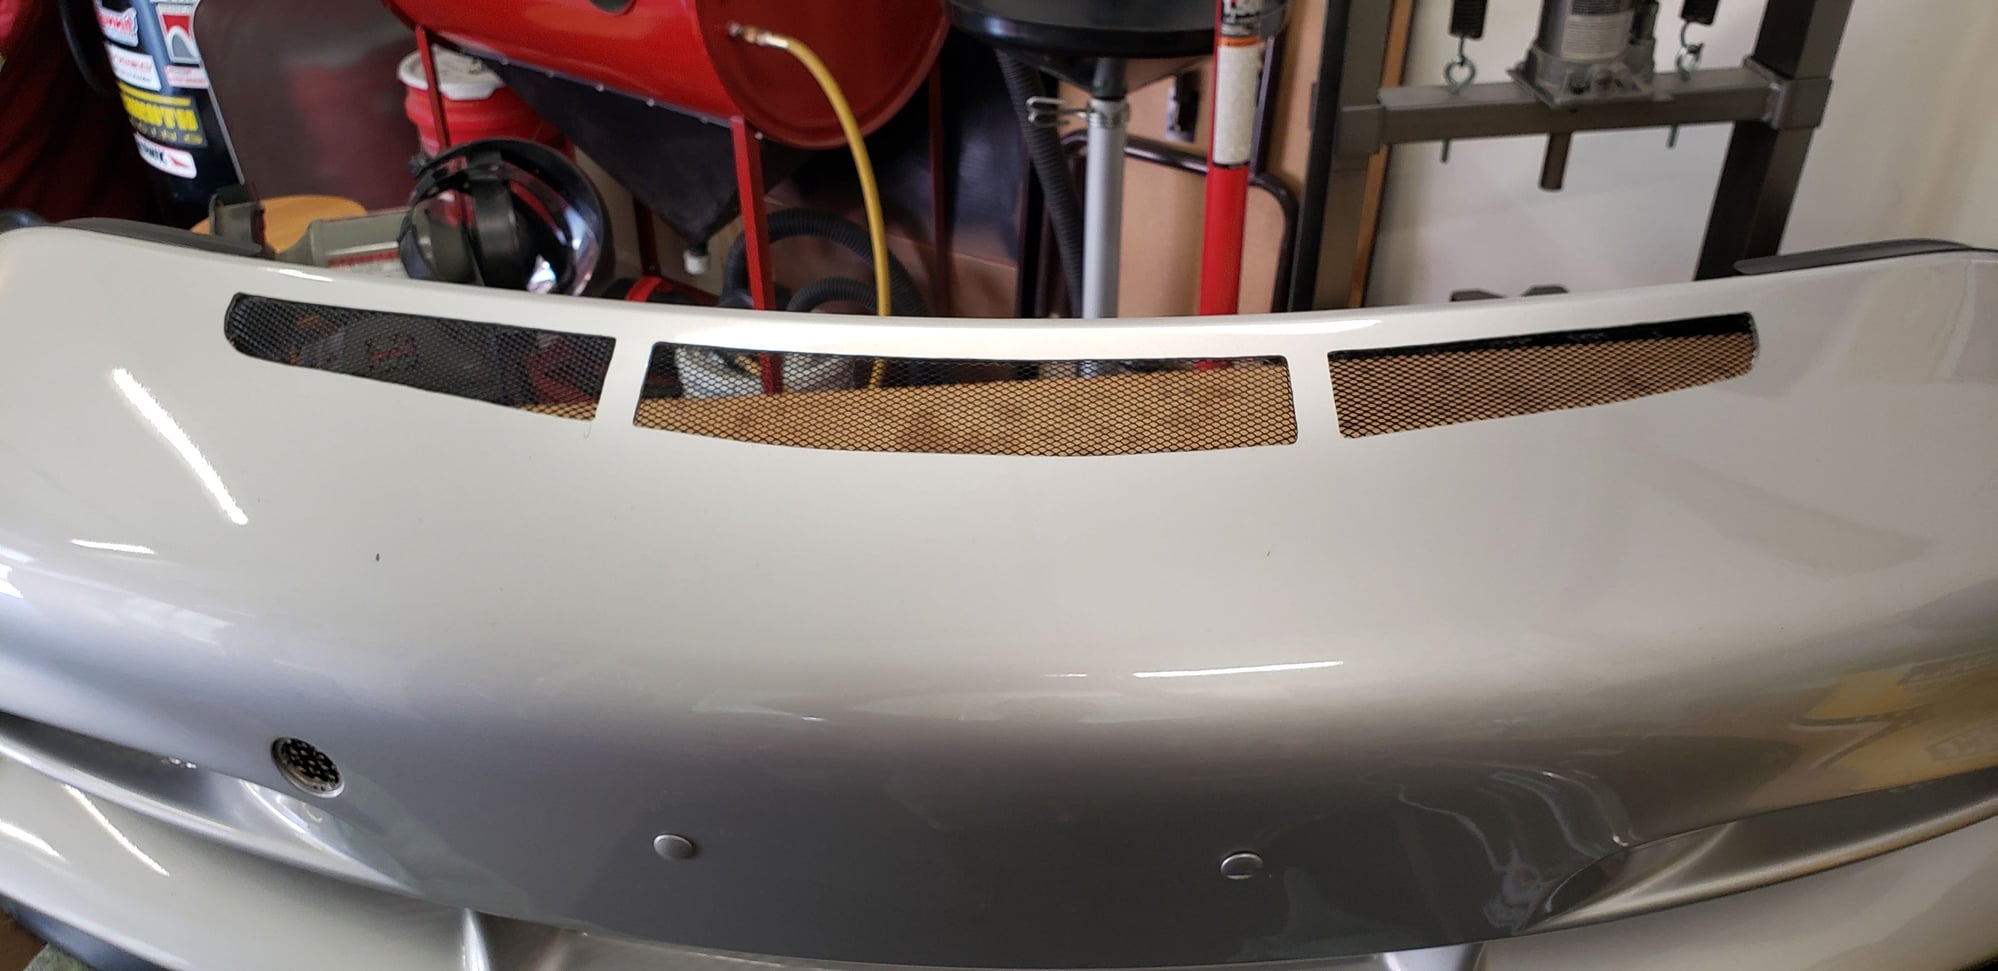
I finally got around to doing this conversion on my front bumper. After blowing a coolant hose at the track my car is at the shop getting a bunch of stuff done on it so I brought the bumper home to make the cutouts. Worth noting that I found the templates to be small compared to the actual measurements posted earlier here so I made my own templates. I cut the areas out with a Dremel tool using a plastic cut off wheel, did the end curves with a Roto-zip bit, then smoothed/finished the edges with a sandpaper wheel. I only had one little "oops" with the sandpaper wheel which you can see in the photos (darn). I used the cutout pieces from the bumper to "emboss" the aluminum mesh then tacked it in place with hot glue followed by Locktite plastic bonder epoxy. The mesh I used was from Amazon and is for motorcycle radiators. I painted the cut edges with a silver paintmarker before installing the mesh (worked/matched surprisingly well). I then used a piece of urethane type plastic I found around the house to block the lower holes and bonded it in place with 3M Window-weld urethane adhesive/sealer. I'm pretty happy with how it came out, especially for a freehand cut out. The shop is installing the GT2 radiator duct and flipping the radiator (going to all aluminum radiators x3, should be nice) before reinstalling the modified bumper. Can't wait!
Here's the mesh I used which I was very happy with:
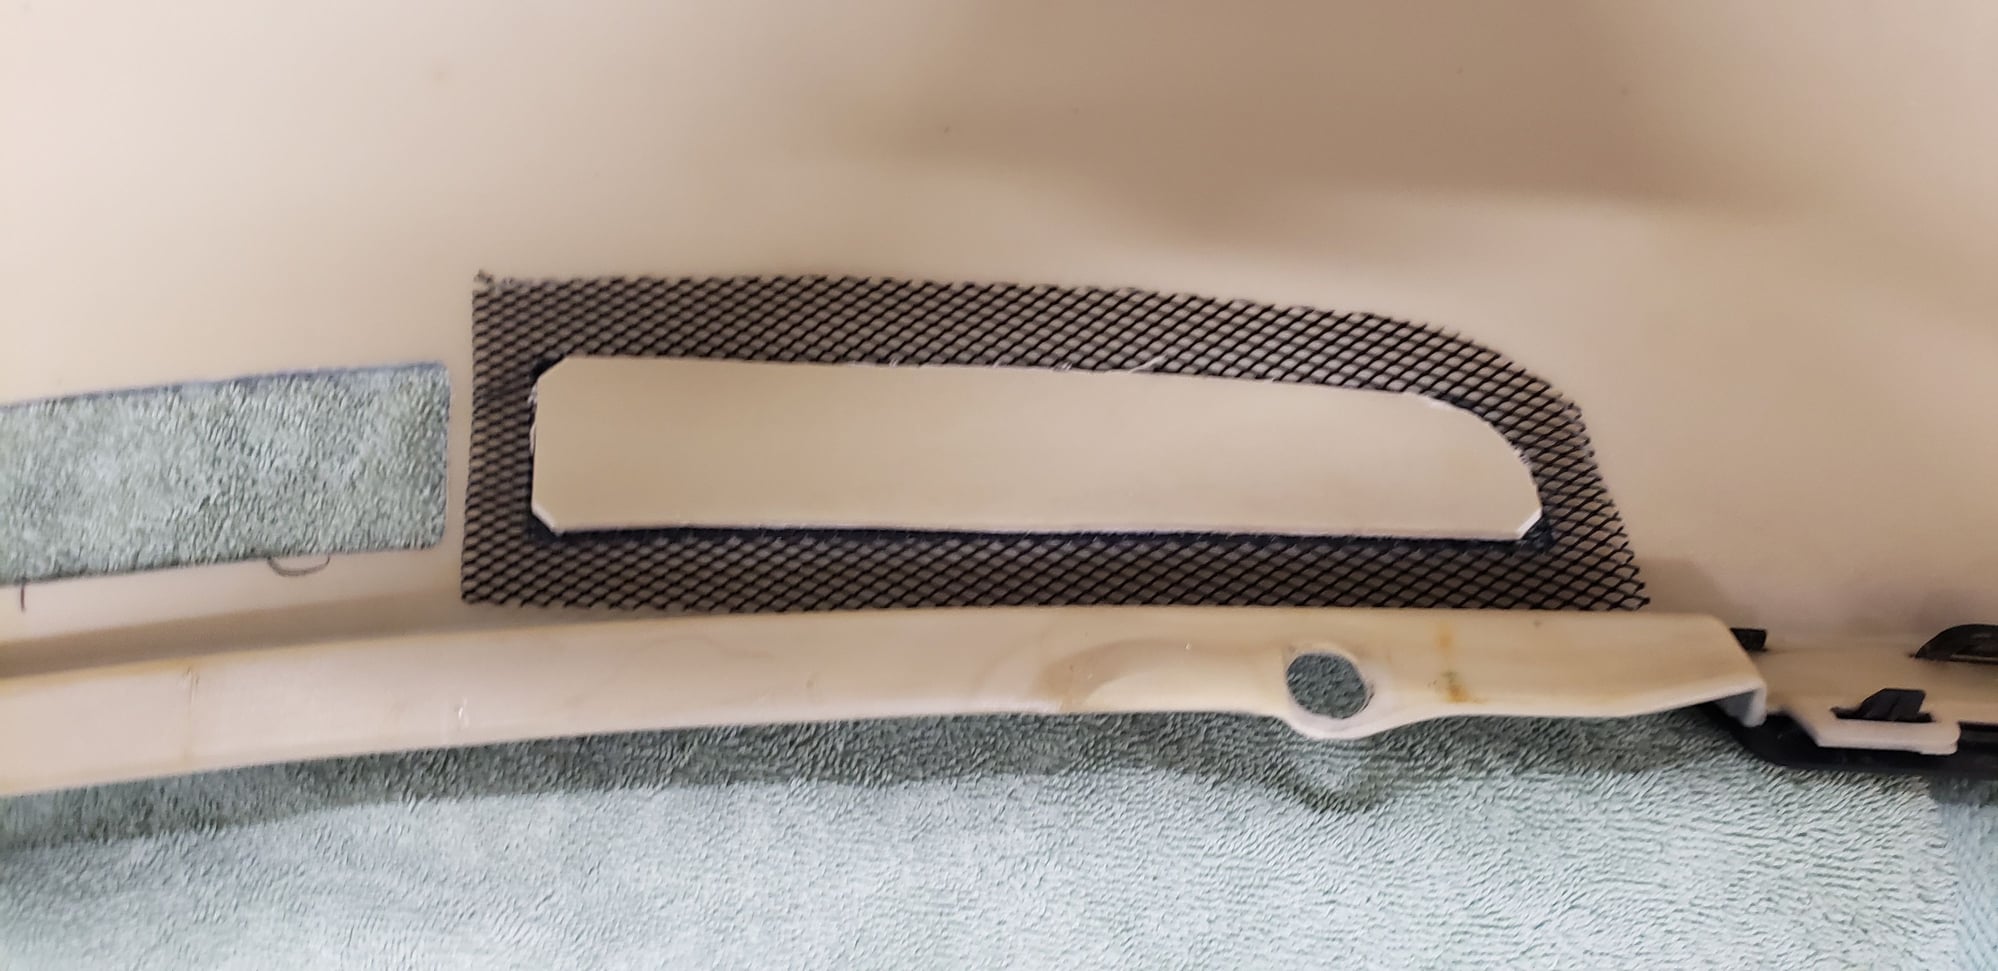
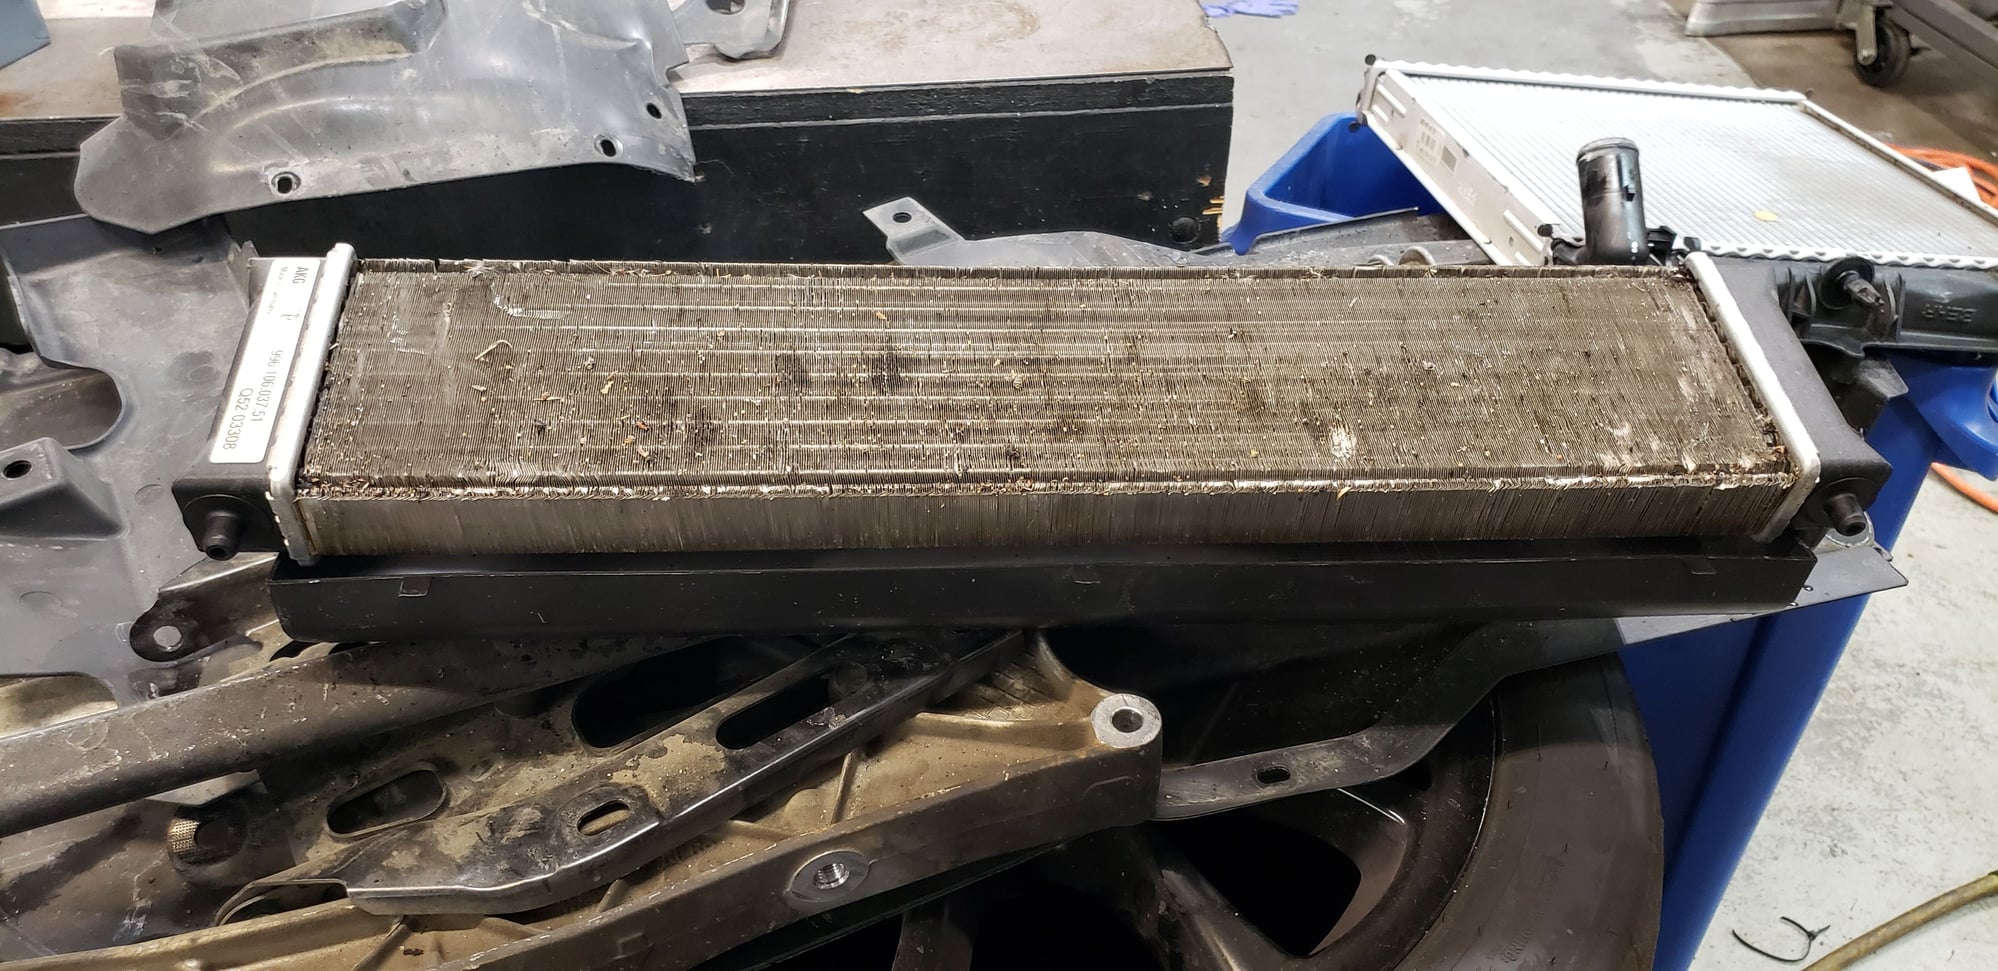
Here's an interesting data-point that does not appear to be described previously. The GT2 center air duct will NOT fit on the GT3 center radiator frame or radiator. It appears the GT2 radiator must be narrower and thicker than the GT3's radiator. (See photos). You can see that the GT3's radiator is wider than the GT2 air duct. Also you can see that the 3 retention tabs in the GT2 duct are spaced differently than the slots in the GT3's radiator frame.
I guess you could make it fit somehow by chopping it up but it would not be a true seal, will not fit in the GT3's center radiator frame, and the top would have to be cut off to clear the A/C and headlight washer lines as there is not clearance there for it. To me this seems like it would end up being a hack job no matter how you tried to do it. If you removed your A/C and headlight washers then it might fit at the top, but the radiator is still too wide and thin for the GT2 duct to fit as intended.
Bottom line for me is this winter I will pull the front bumper and center radiator back off and fabricate a sheet metal duct like someone did in the photos above to direct the air upwards. For now it probably mostly goes upwards and I am running with the radiator flipped but no upwards duct in place with the bottom bumper vents blocked off.
 07-25-2016, 11:49 PM