When you click on links to various merchants on this site and make a purchase, this can result in this site earning a commission. Affiliate programs and affiliations include, but are not limited to, the eBay Partner Network.
(OP, love the work on your interior. This post is not about your project but rather the wisdom of any after market work on airbags given folks are asking for kits to cover there's here.)
So this topic has bothered me for a while. I see lots of folks having cool steering wheels done in the aftermarket, and its been bothering me, knowing a little about how the airbags deploy from behind the factory interior finish. Do people not care about having a functional airbag, or indeed turning it into something deadly? The factory finish is engineered to yield and part in a predictable and as safe (as possible) way with the force of the air bag deployment. Covering that finish with (strong Alcantara or leather seems like a disaster waiting to happen. Here's a pic post deployment just to give folks and idea how this works: http://www.renntech.org/forums/topic...ag-deployment/
Thoughts?
Any decent auto interior upholsterer will put the seams over the breakaway seams in the airbag cover. Leather can also be skived and perforated from the rear so that it will rip very easily at the covers seams. If done right, you'll never see the skiving or perforations.
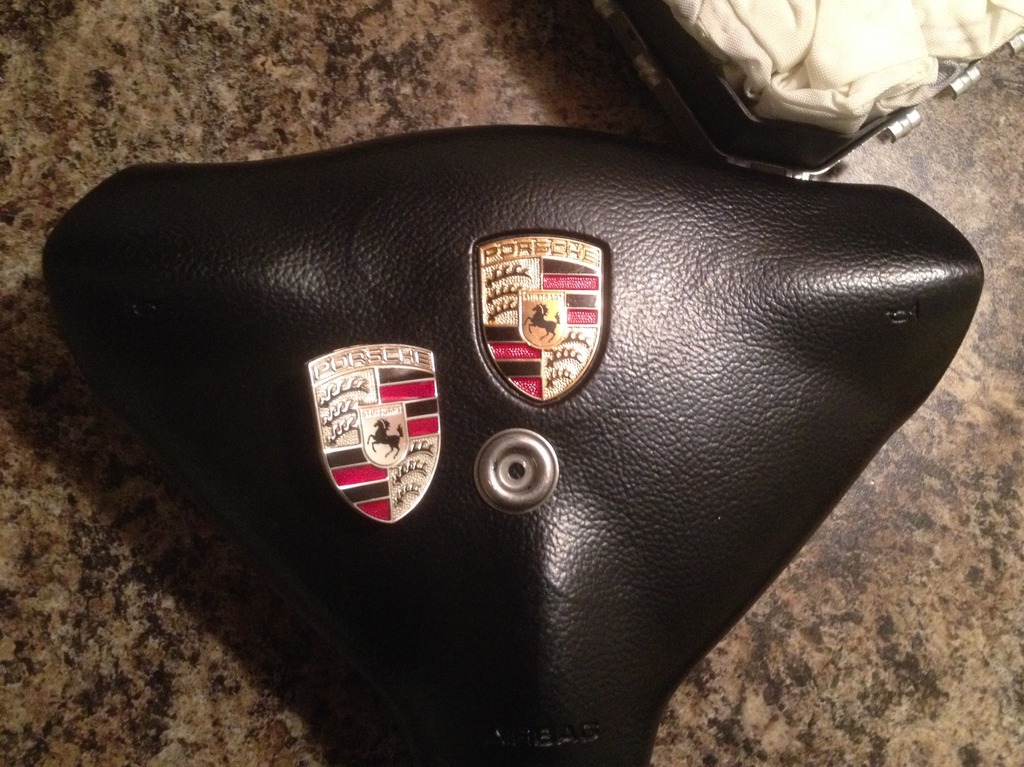
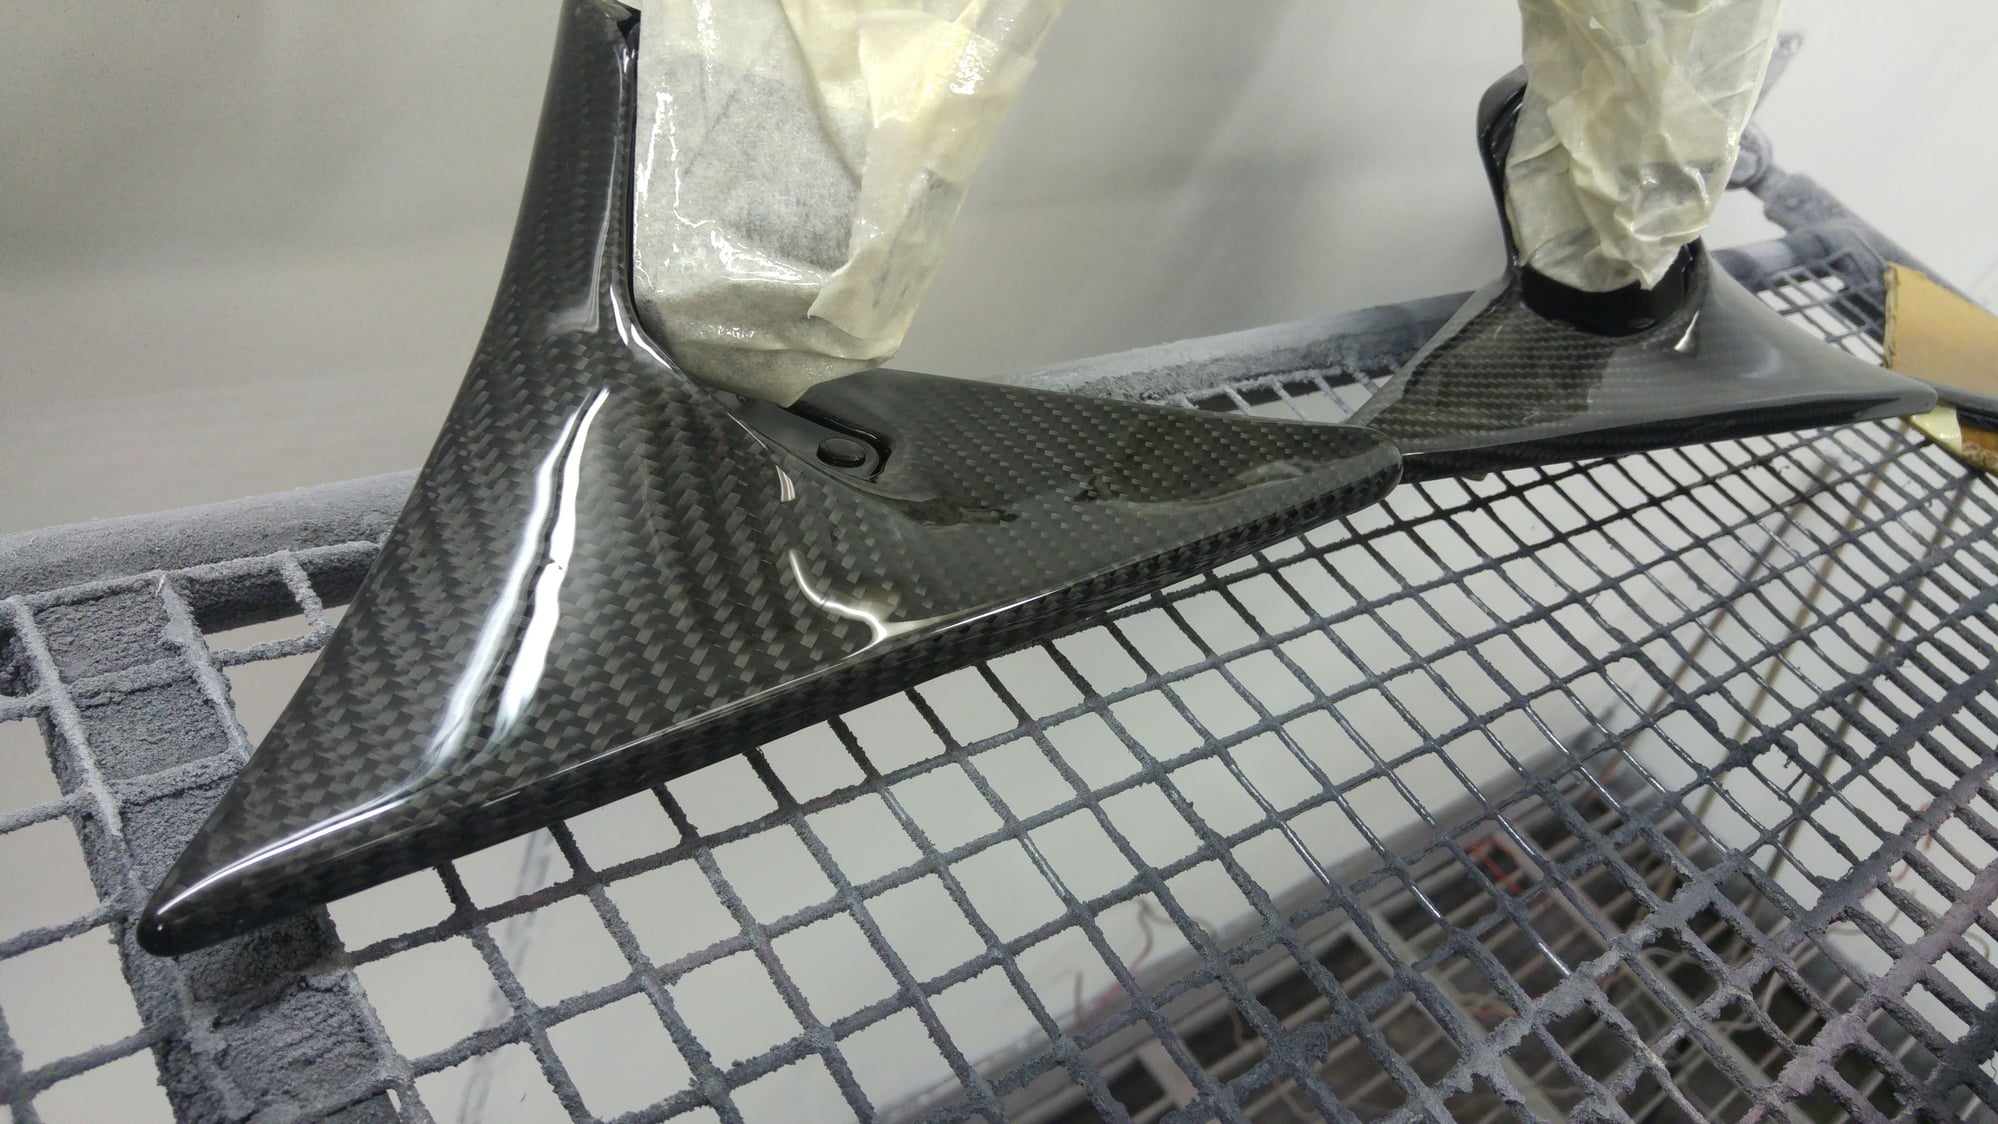
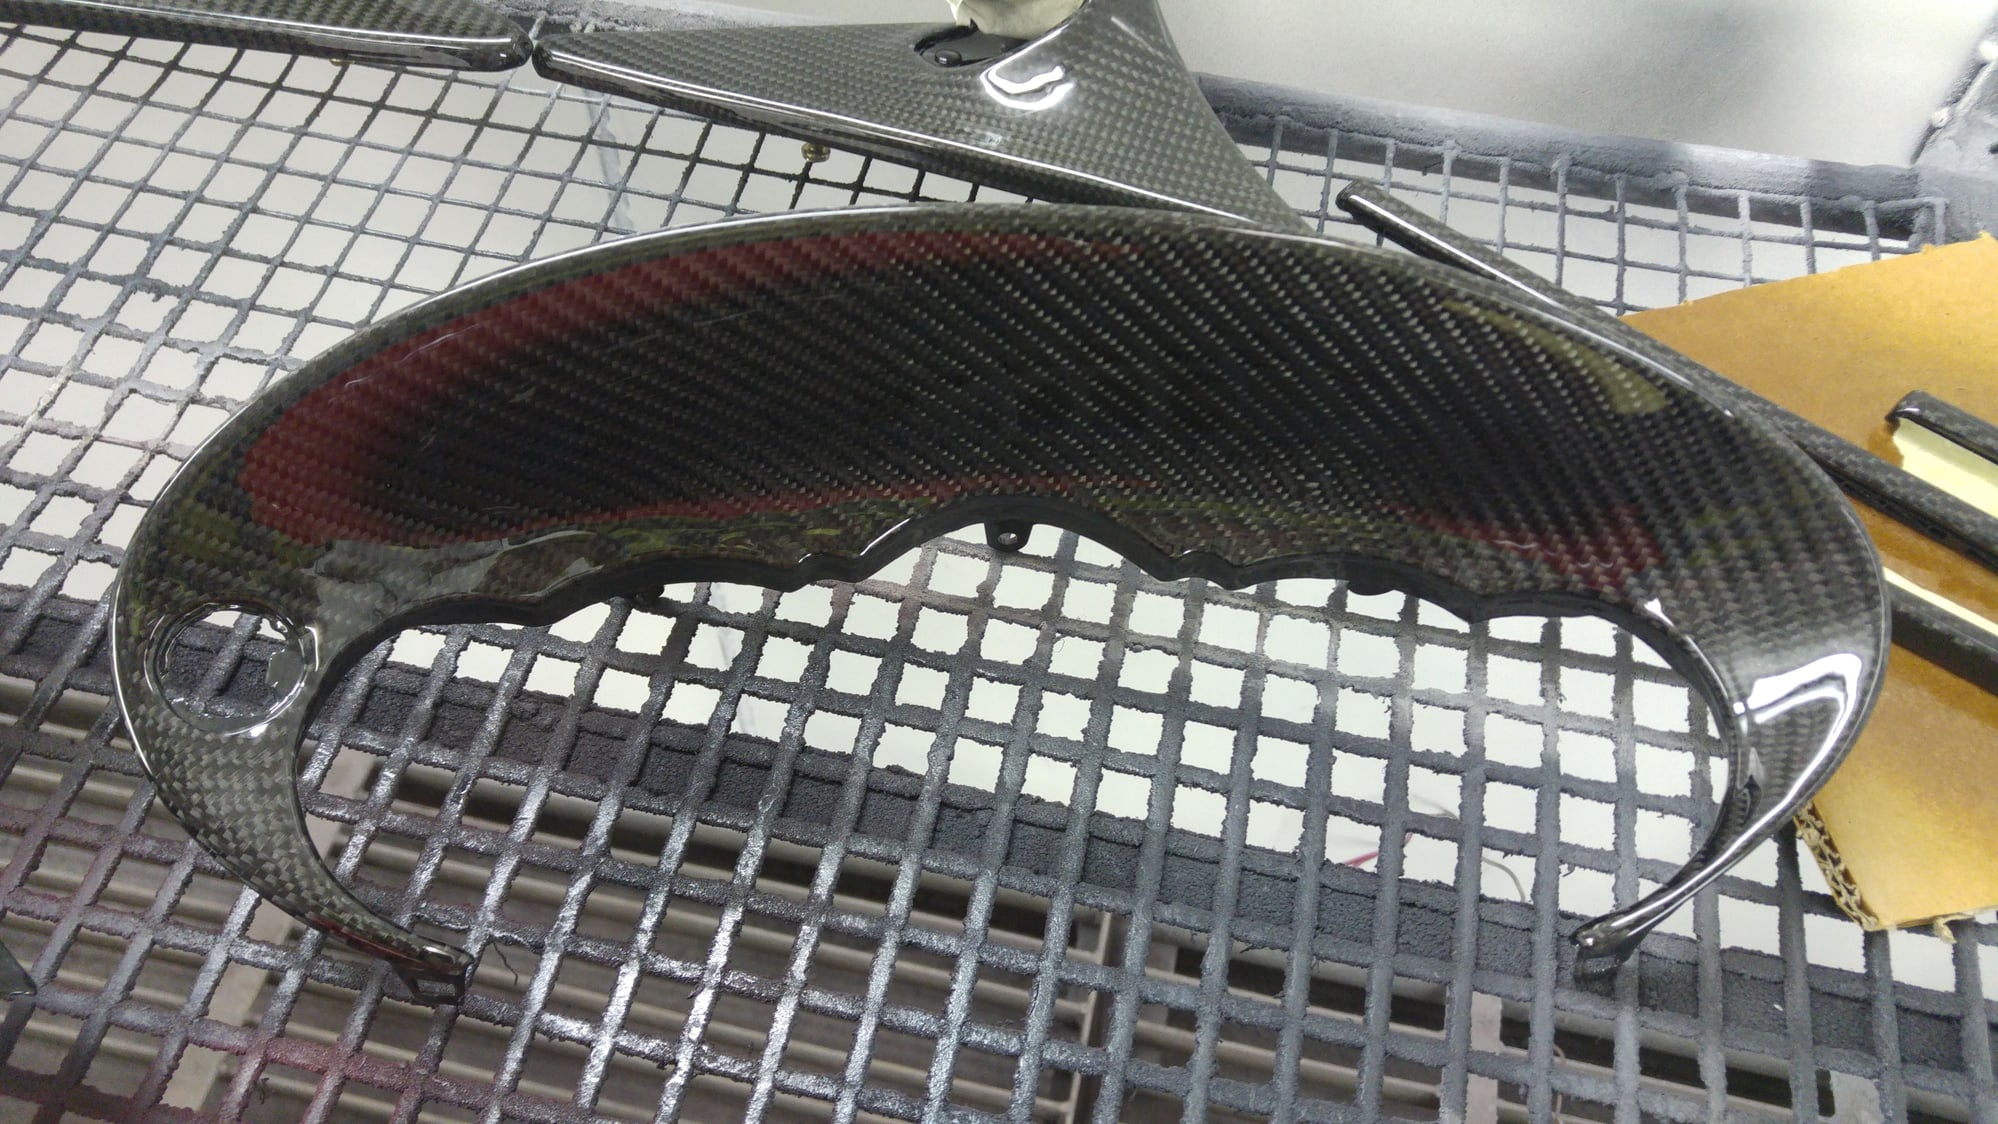
Coincidentally, I just put a new crest on my airbag today, so here are some reference pics. You can clearly see the OEM breakaway seams from both sides.
Coincidentally, I just put a new crest on my airbag today, so here are some reference pics. You can clearly see the OEM breakaway seams from both sides.
Where did you source the new airbag crest? I want to do this too, but I don't want to use a hood crest (and get hit in the face with it during a wreck)...
Where did you source the new airbag crest? I want to do this too, but I don't want to use a hood crest (and get hit in the face with it during a wreck)...
I guess I should have said "new used crest", but looks like new. I'm not even sure if they can be found new...didn't even look.
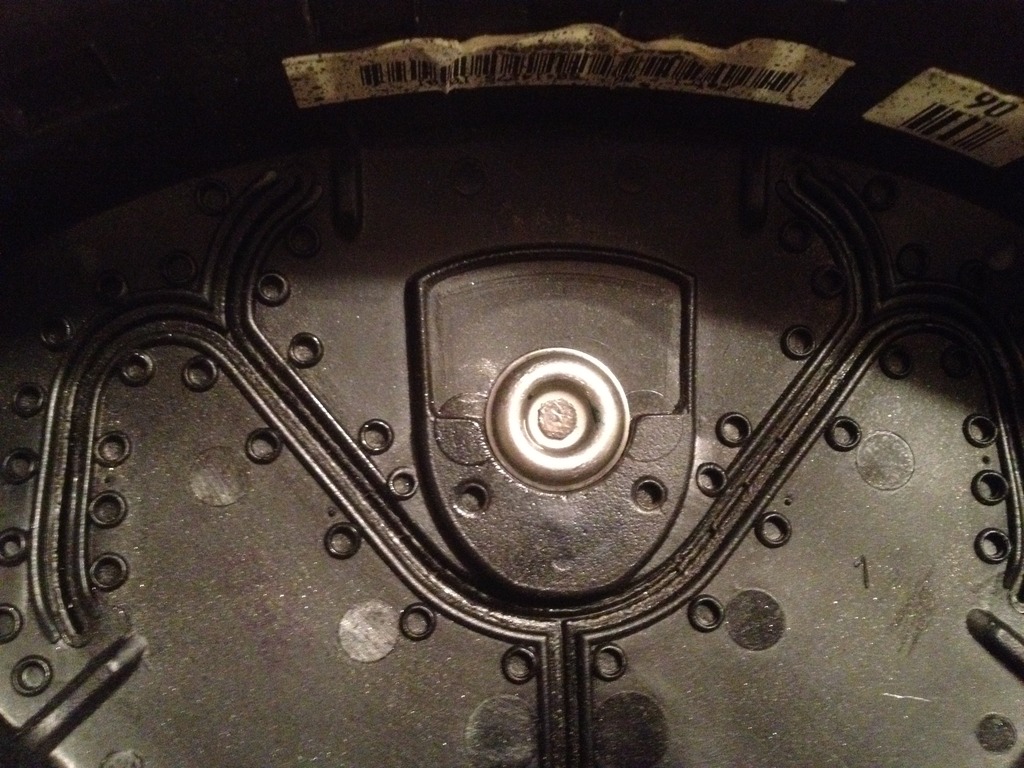
I got it from Woody. It came from a car that had been in an accident with airbags deployed, so he just cut off the flap with the crest on it and sent it to me. After removing the rest of the old flap, I was able to slide the retaining washer down the post to get better acces to the flattened tip in order to squeeze it back into round.
I did this by carefully heating up just the tip with a small butane torch and squeezing it little by little with a pair of pliers. Once round, I could then slide the washer off.
To remove the old crest, I just used a Dremel to cut off the flattened end. Put the replacement crest in, washer on, then re-flattened the exposed end of the post. To protect the new crest, I laid 2 thick pieces of leather down, placed the airbag cover on them face down and slowly flattened the post (rivet) down with many moderate taps with a small hammer.
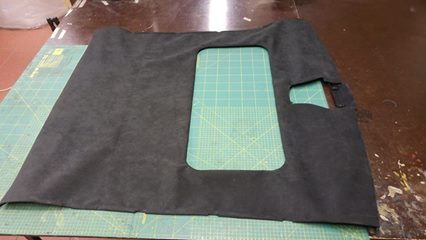
Getting the cover off the airbag requires removal of the airbag.
Disconnect the battery and wait a few minutes with the ignition in acc position to ensure all power is out of the system. Remove airbag (T30 Torx). Remove charge (4 x 10mm hex) and place in a safe location away from metal and other possible sources of static, then it's safe to remove the cover.
Woody parts out 986/996's (Woody's Parts, LLC 512-925-9171)
As has been said, the pieces you have done are absolutely beautiful.
I have an Alcantara steering wheel (and airbag) and shift boot, but the interior needs some additional pieces to help visually tie it all together. I'm trying to figure out what pieces would be economically feasible to do over the distance. The dash and or instrument pod would be ideal, I'm just not sure how difficult it would be find someone to install the kit. I think the center panel of the hardback sport seats and door panels would also be a nice touch. Those might be easier to find an installer.
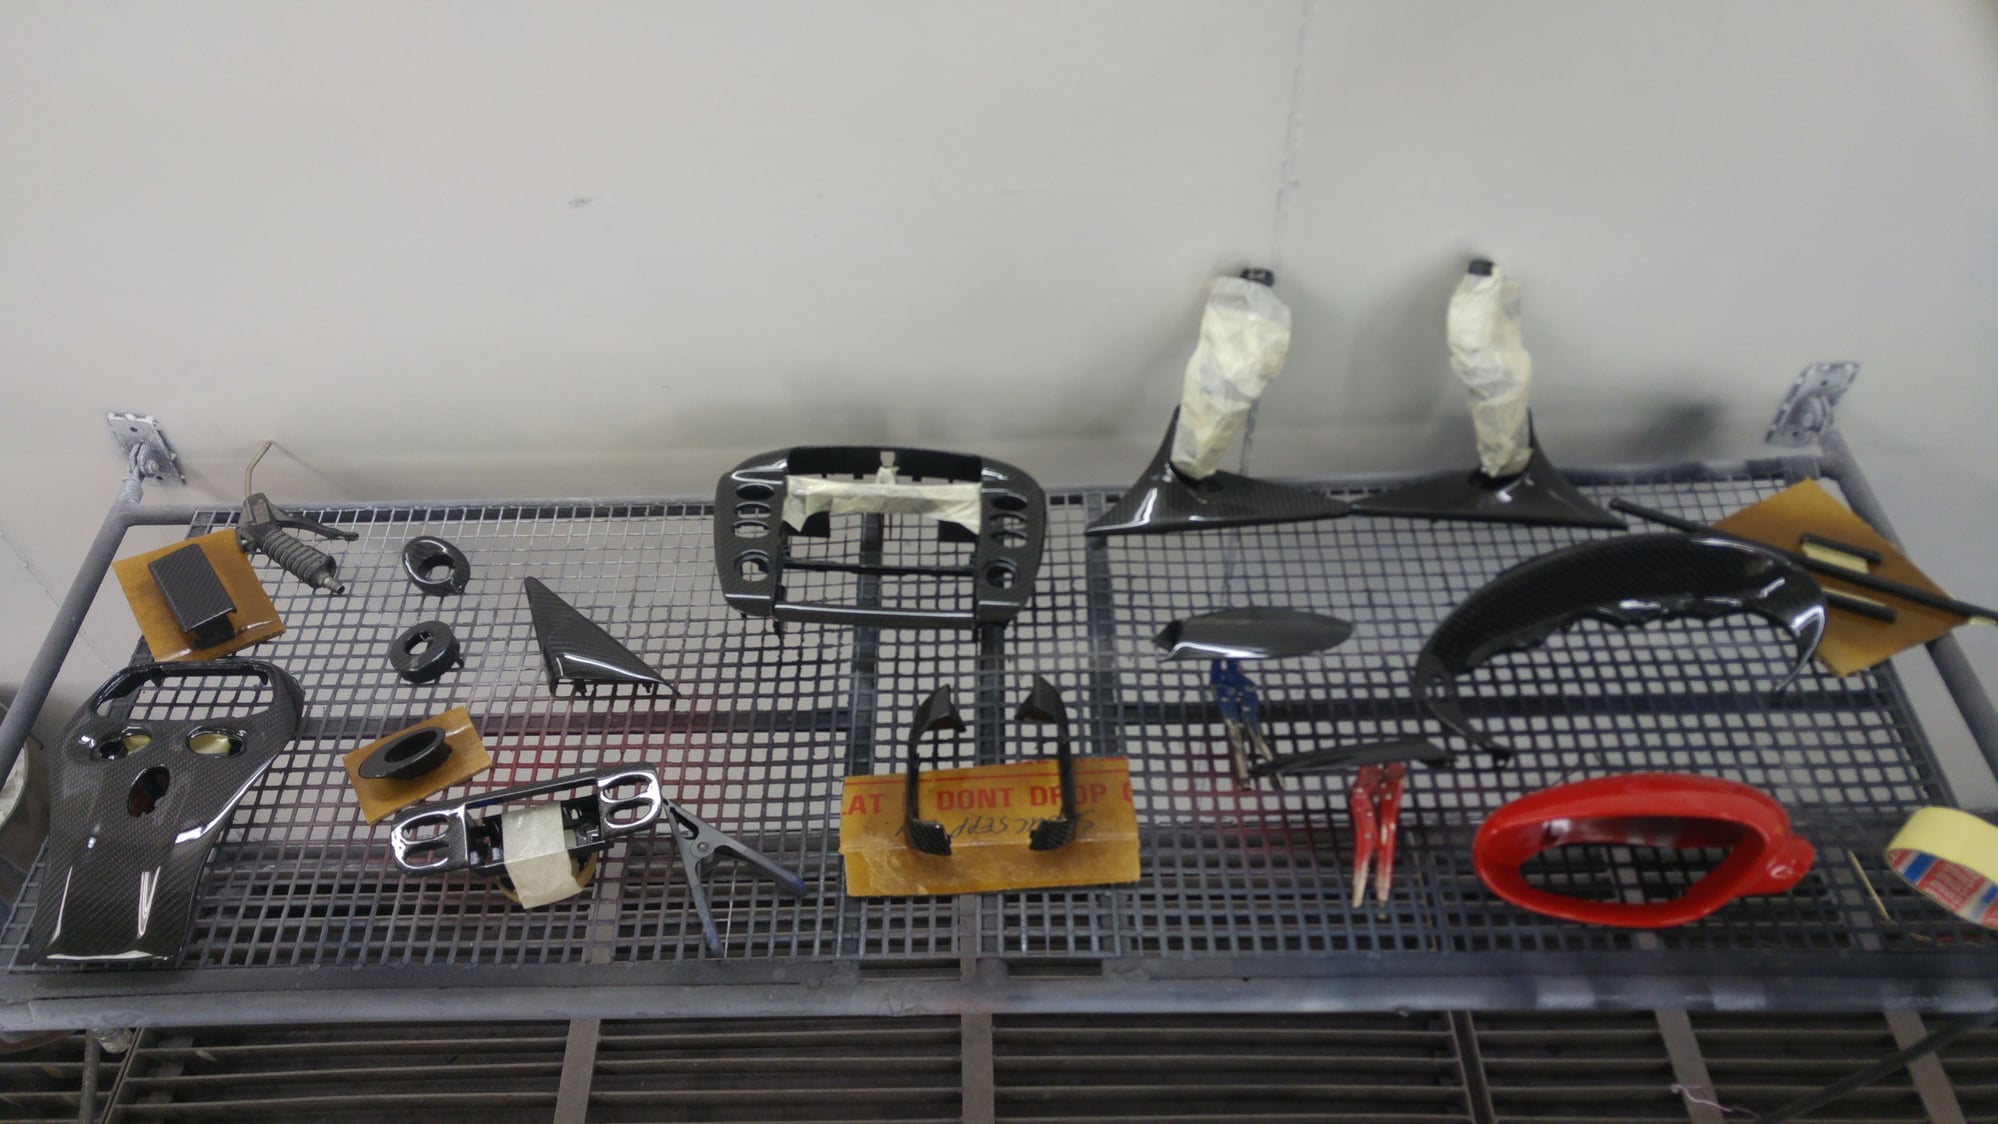
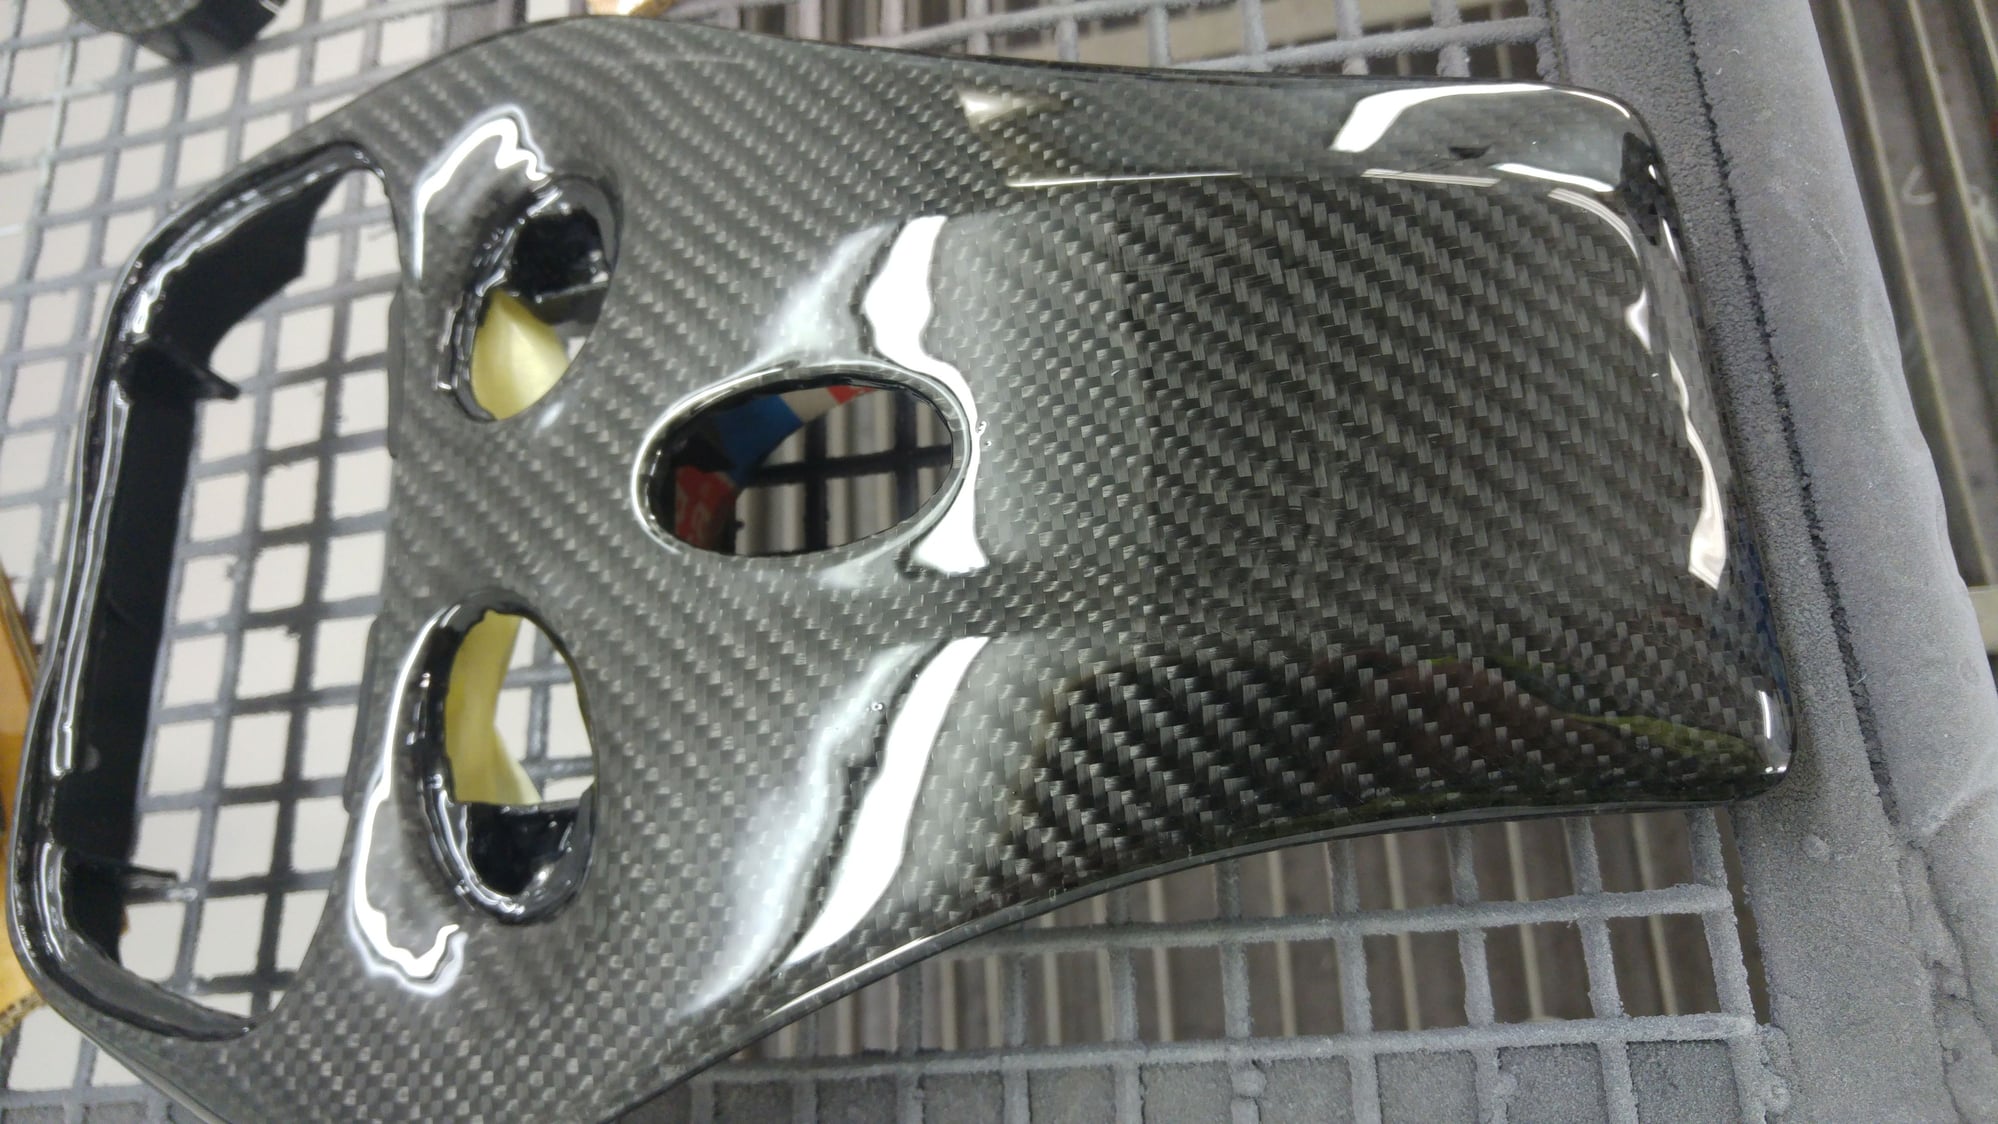
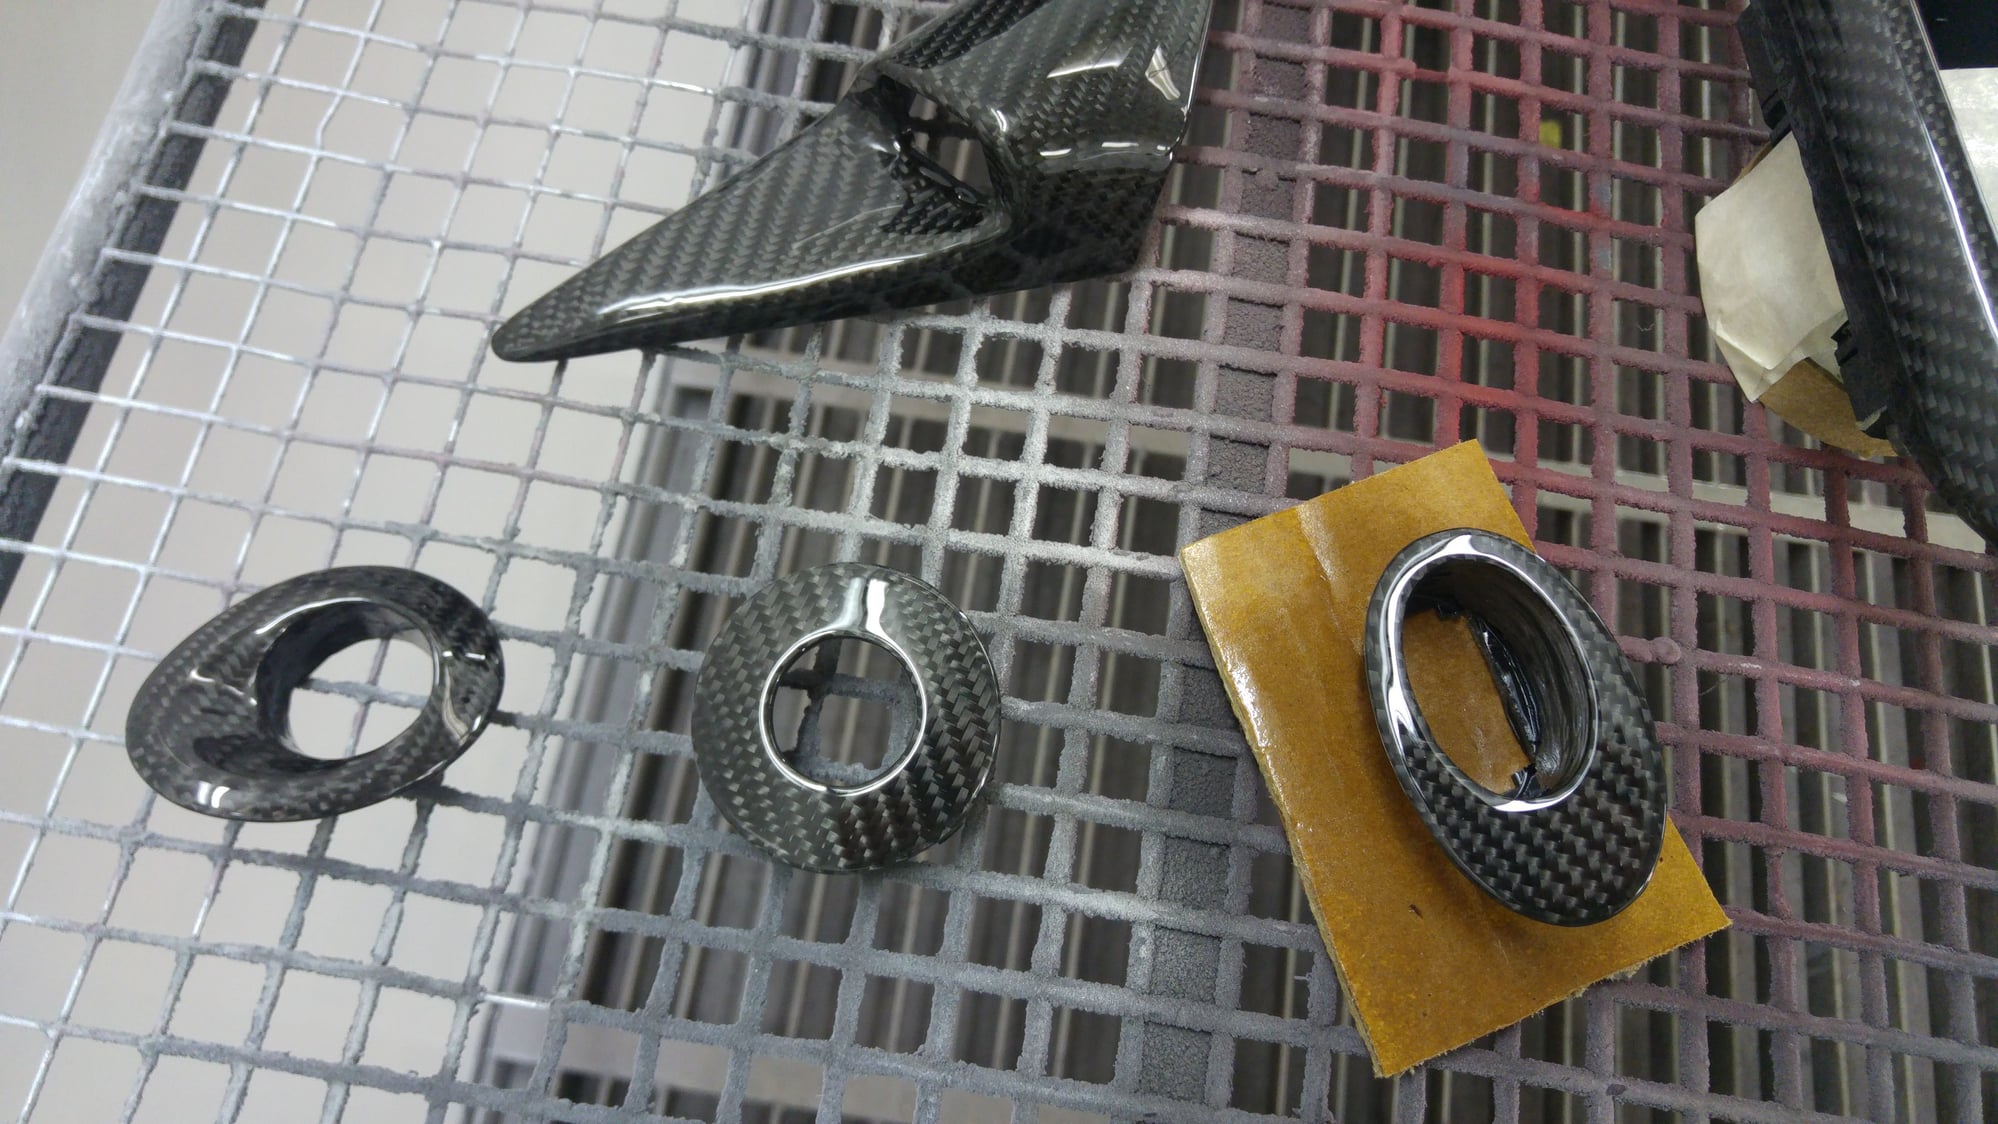
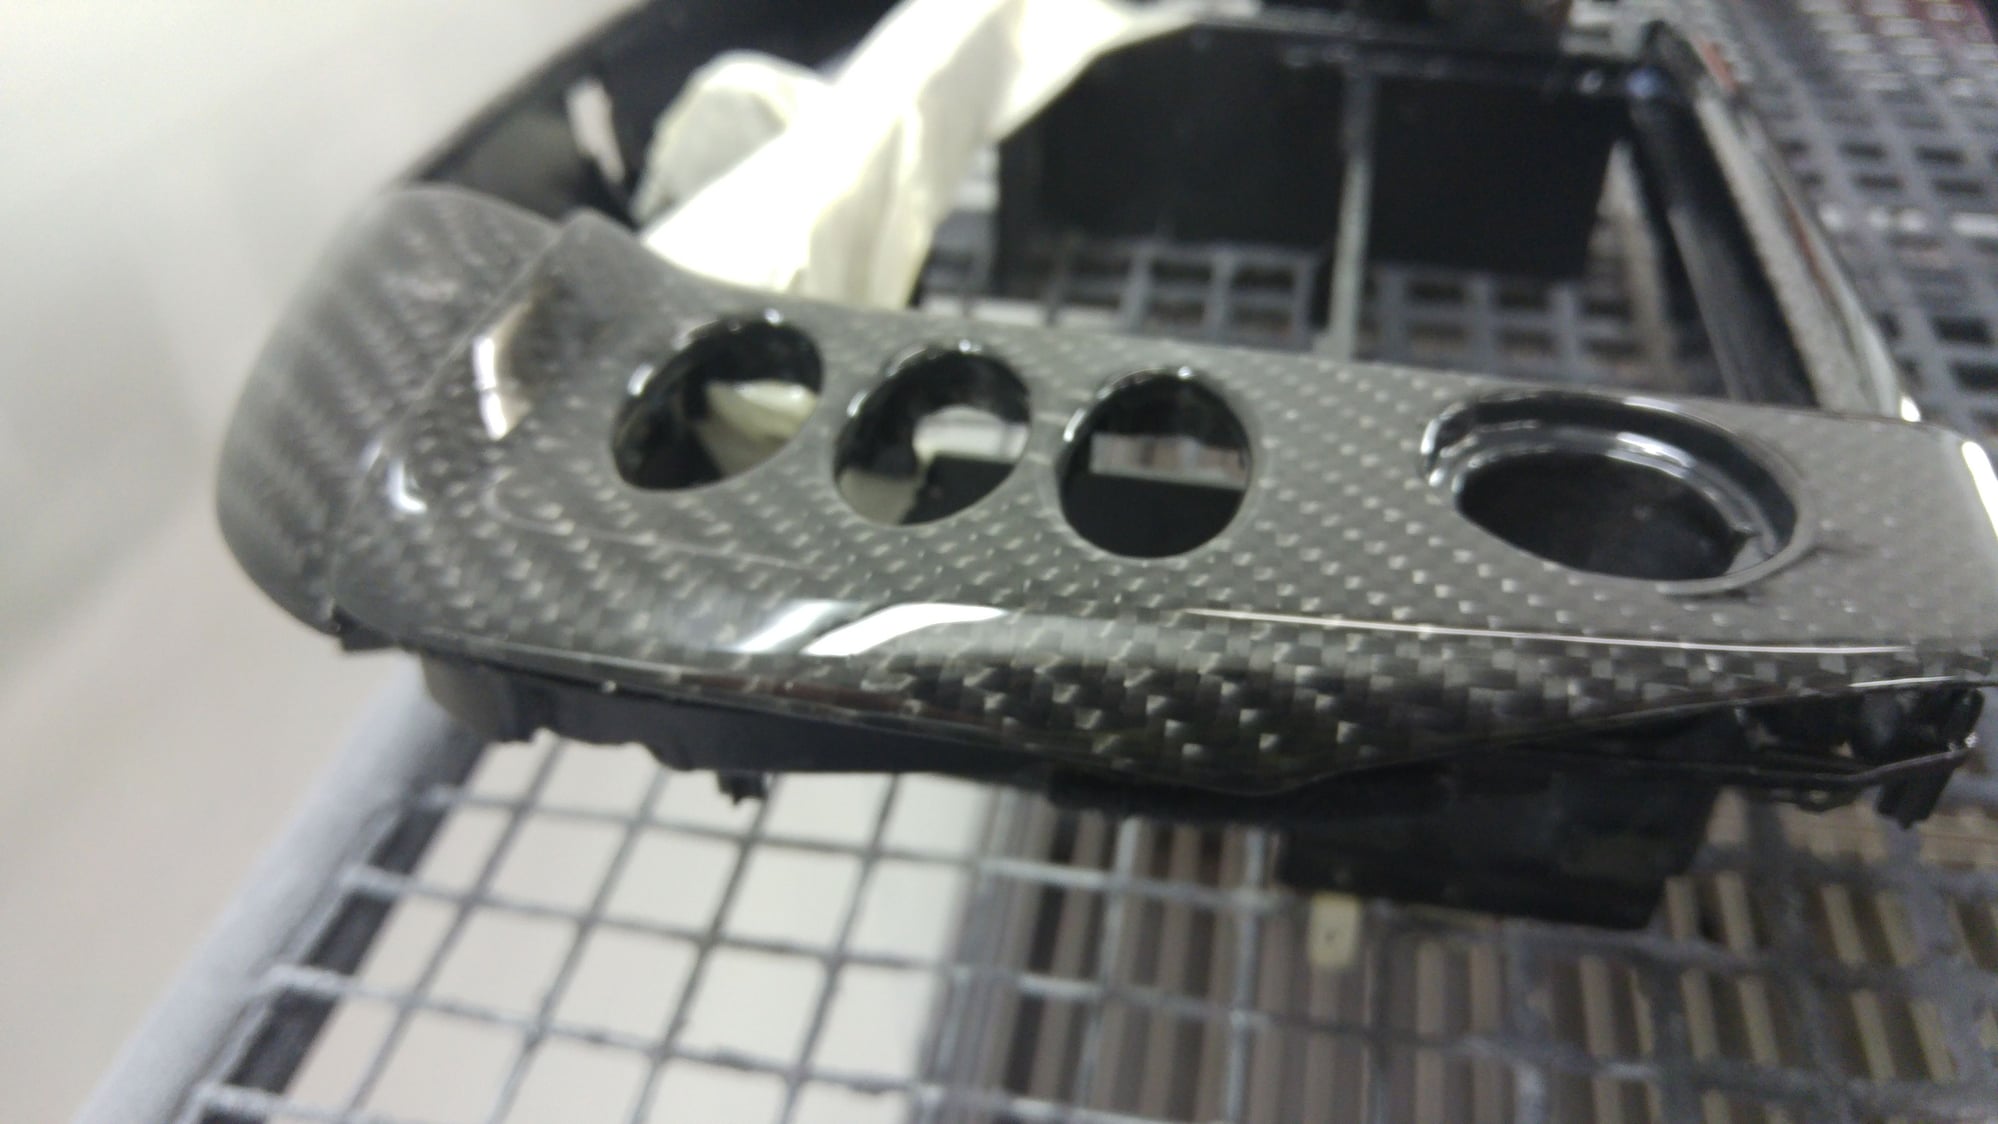
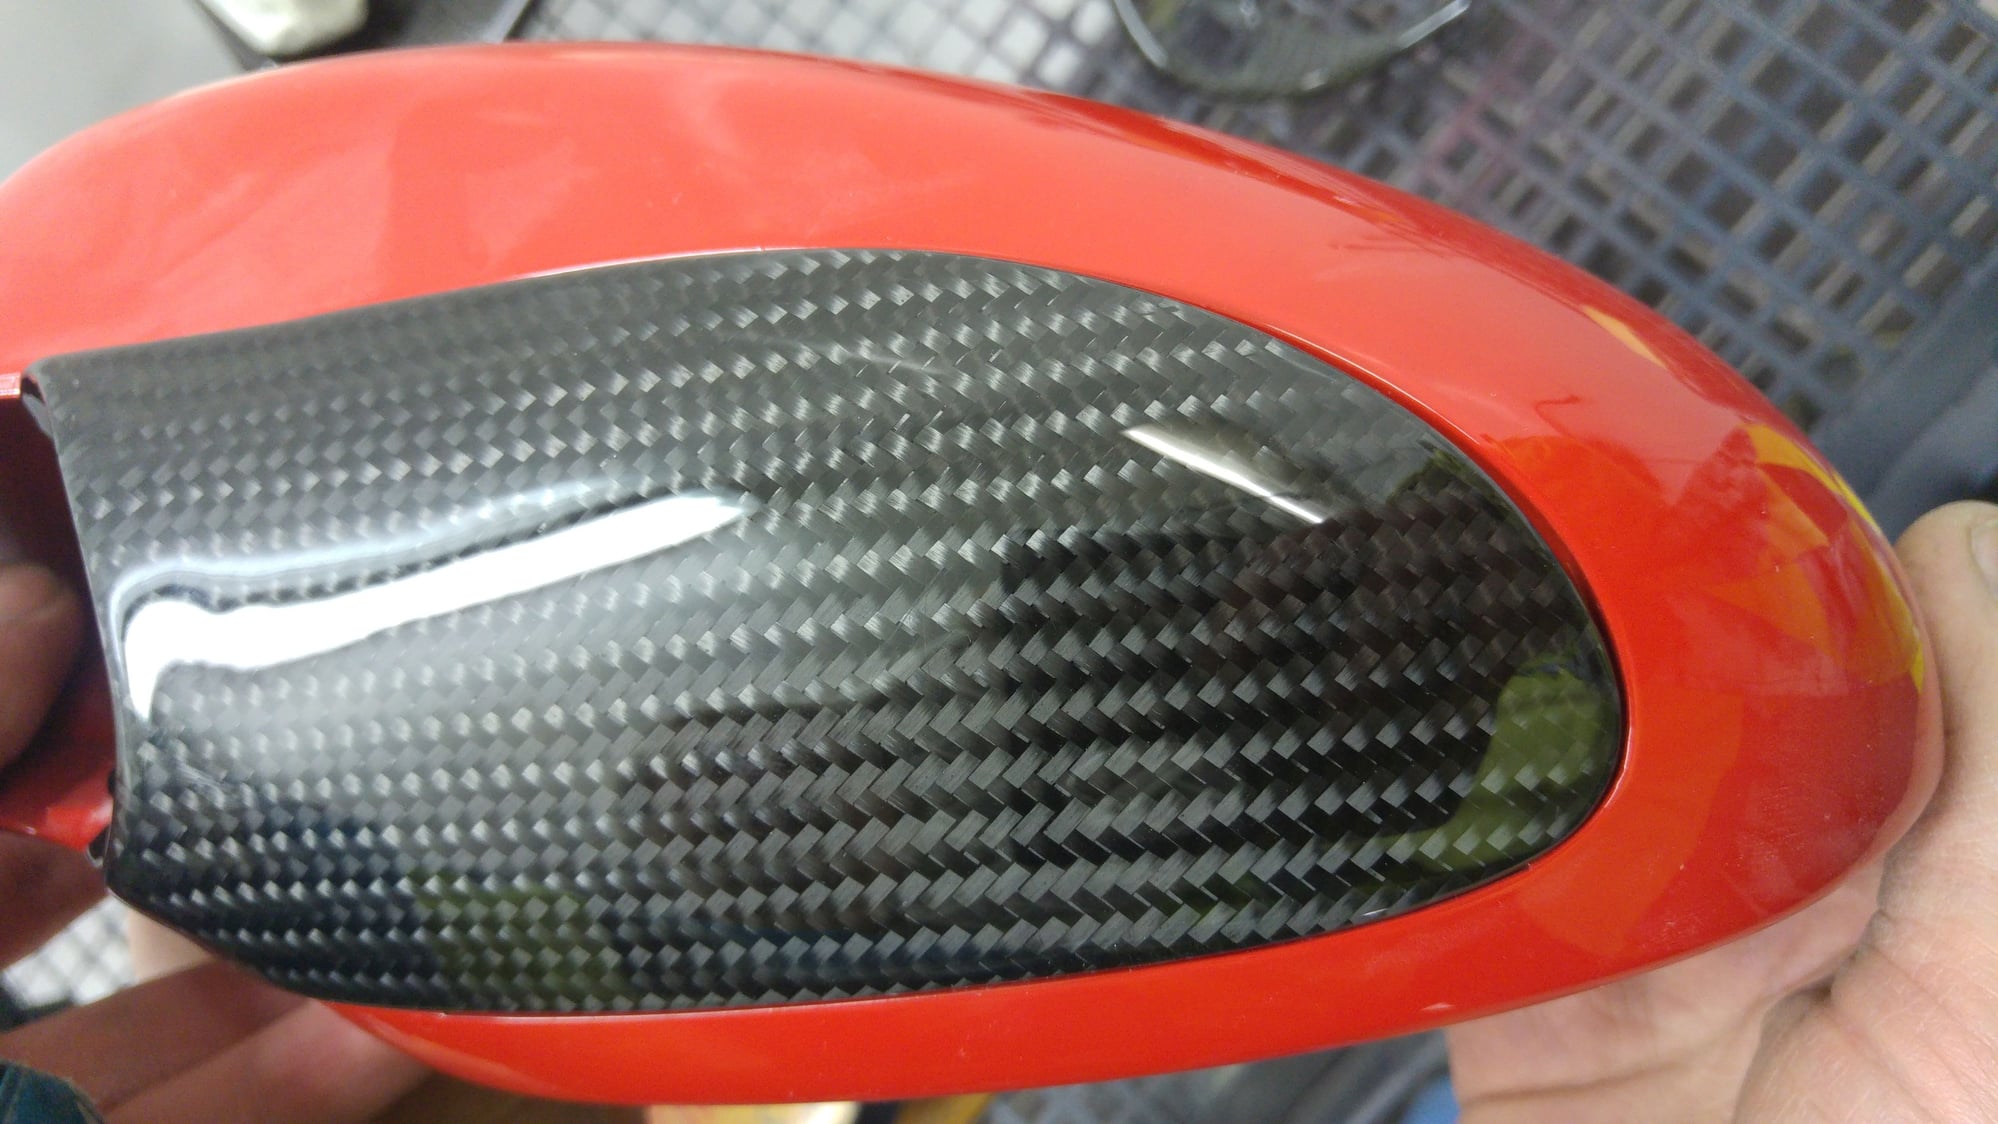
Most of the CF parts are now finished, though its perfectly fine to just sand the epoxy down and polish I decided its best to clear coat the bits. Leaves a much more clear and a glossier surface. Car itself got a Gt3 style bumper and side skirts. Inner parts of the headlights and door sills are still in progress, also started working on the seats, ended up with red perforated alcantara inserts, though black with black was the original idea...
That is really really nice work. One thing that lets my car down (other than the blown engine which is off topic) is the steering wheel, I would like something in Alcantara as I think it would be a huge improvement.
Can you source Alcantara in lots of colours? My interior is Savannah beige and I would like to keep it close to original??
Most of the CF parts are now finished, though its perfectly fine to just sand the epoxy down and polish I decided its best to clear coat the bits. Leaves a much more clear and a glossier surface. Car itself got a Gt3 style bumper and side skirts. Inner parts of the headlights and door sills are still in progress, also started working on the seats, ended up with red perforated alcantara inserts, though black with black was the original idea...
Guards red in comparison with CF
Who's front bumper (manufacturer) is that? FRP? (I would assume so from the filler...). Looks like the car is going to be a stunner!

 12-14-2016, 10:21 PM