When you click on links to various merchants on this site and make a purchase, this can result in this site earning a commission. Affiliate programs and affiliations include, but are not limited to, the eBay Partner Network.
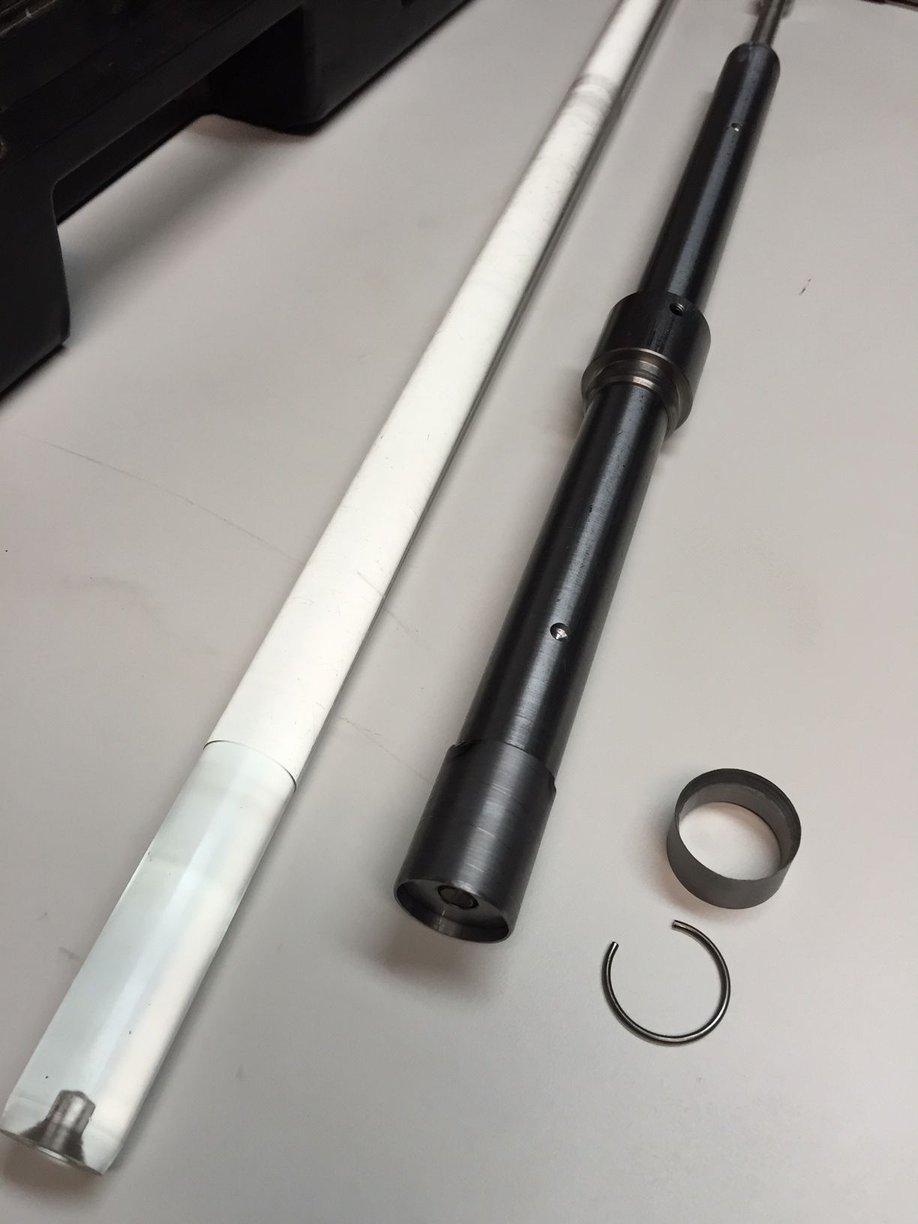
Even though I'm pretty confident the scavenge pump failure was a result of the accident, the timing chain and intermediate shaft and sprockets still had to bear the load of snapping the drive off the scavenge pump. One of Jake's documented failure modes shows the sprocket coming loose from the intermediate shaft. Is this a possibility with a failure like mine? Are all of the sprockets on the IMS pressed on? Is there any way of checking if they've moved or are coming loose without splitting the cases?
I have a feeling I will be splitting the cases...
Pull that pump apart and look for signs that it ingested something. Look for dents/ dings in the vane or the housing. You might even find the offending debris inside the pump.
The sprockets on the IMS are a light press fit only. All of them. Nonwaynto check them without disassembly of the engine.
Pull that pump apart and look for signs that it ingested something. Look for dents/ dings in the vane or the housing. You might even find the offending debris inside the pump.
The sprockets on the IMS are a light press fit only. All of them. Nonwaynto check them without disassembly of the engine.
How critical is rotational position from sprocket to sprocket? Is there a procedure to check if a sprocket has moved?
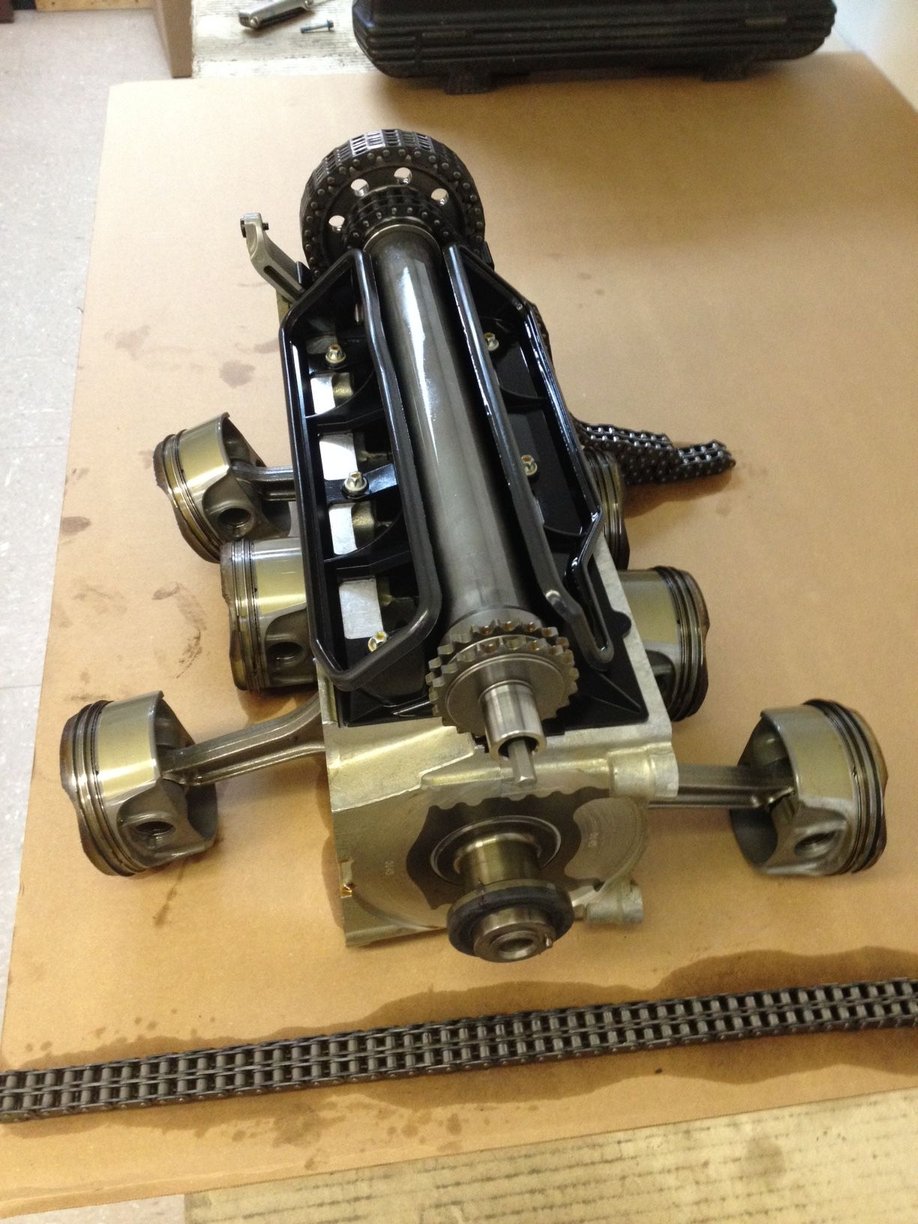
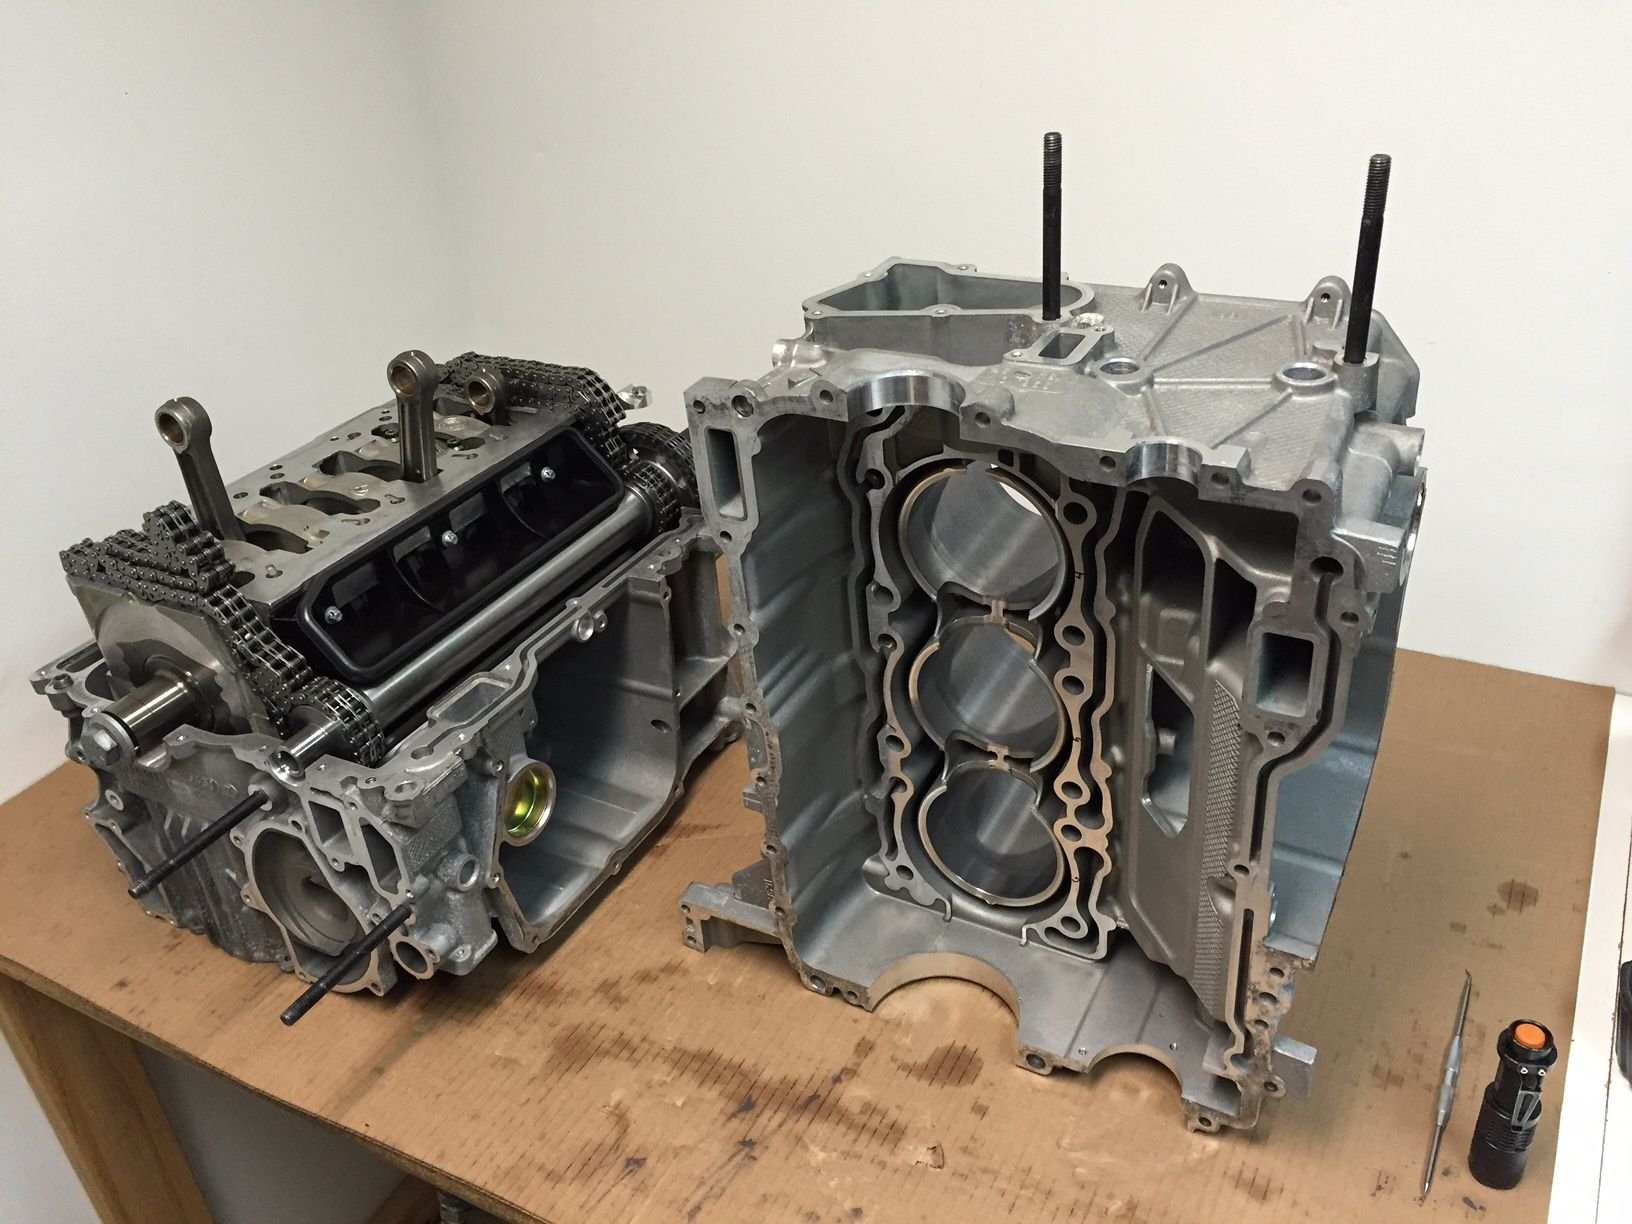
Its been a while since I posted about this project. Many parts have been ordered, reassembly has begun. Block has been cleaned, crank carrier has been reassembled, My ims came back from LN inspected and Ims Solution installed, rods have been reassembled with new bearings and ARP bolts, 1,2,3 pistons/rods are in the block as well as the crank carrier.
This weekend I had some time and I made my own wrist pin clip installation tool out of some scraps I had lying around. I tested a few times on each of the 4,5,6 cylinders and it seems to work very well. The tool threads into the block the same way the access plug does. It has a set screw that locks the tool into three different positions for each piston. The tool cant slip out and cant miss. I also made a mini tapered ring compressor to get the ring into the tool. They are a real bugger.
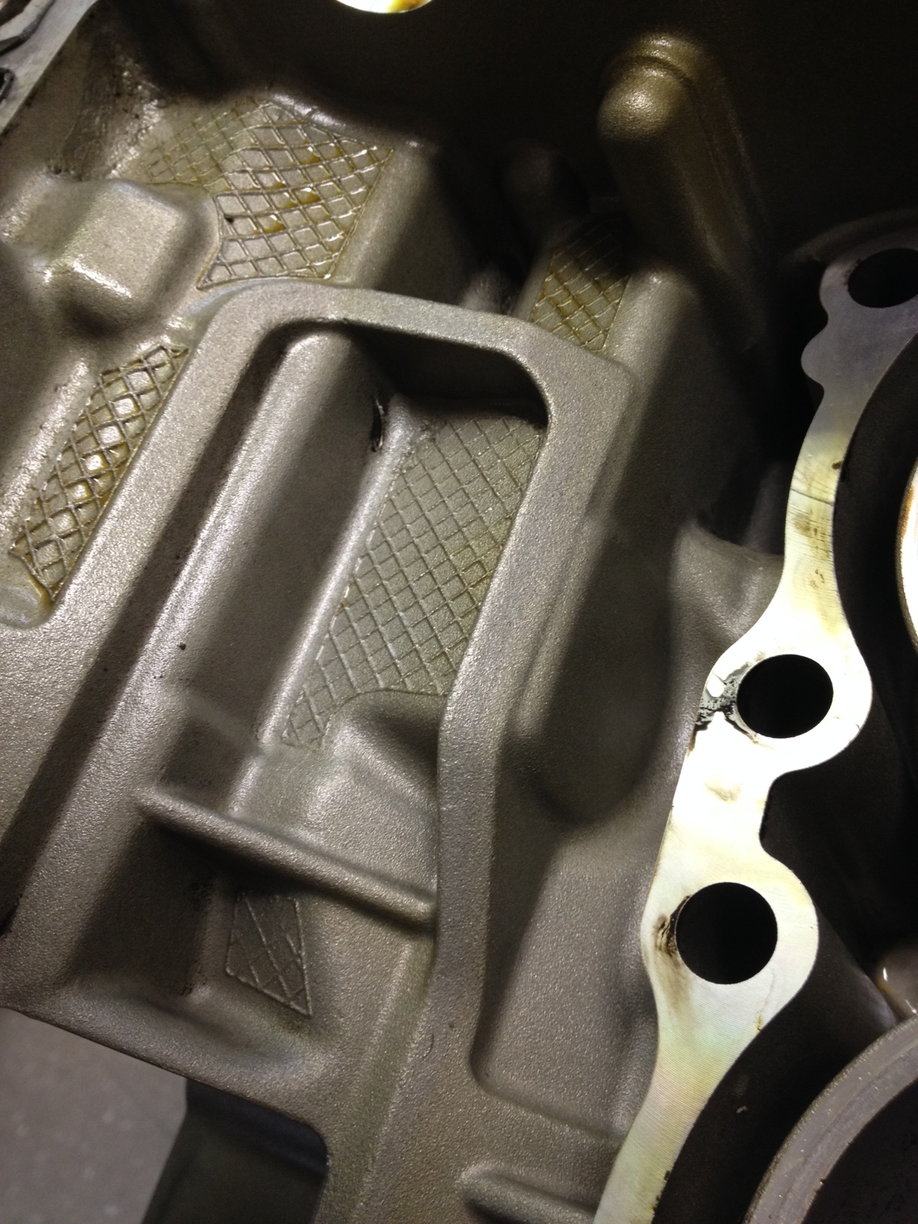
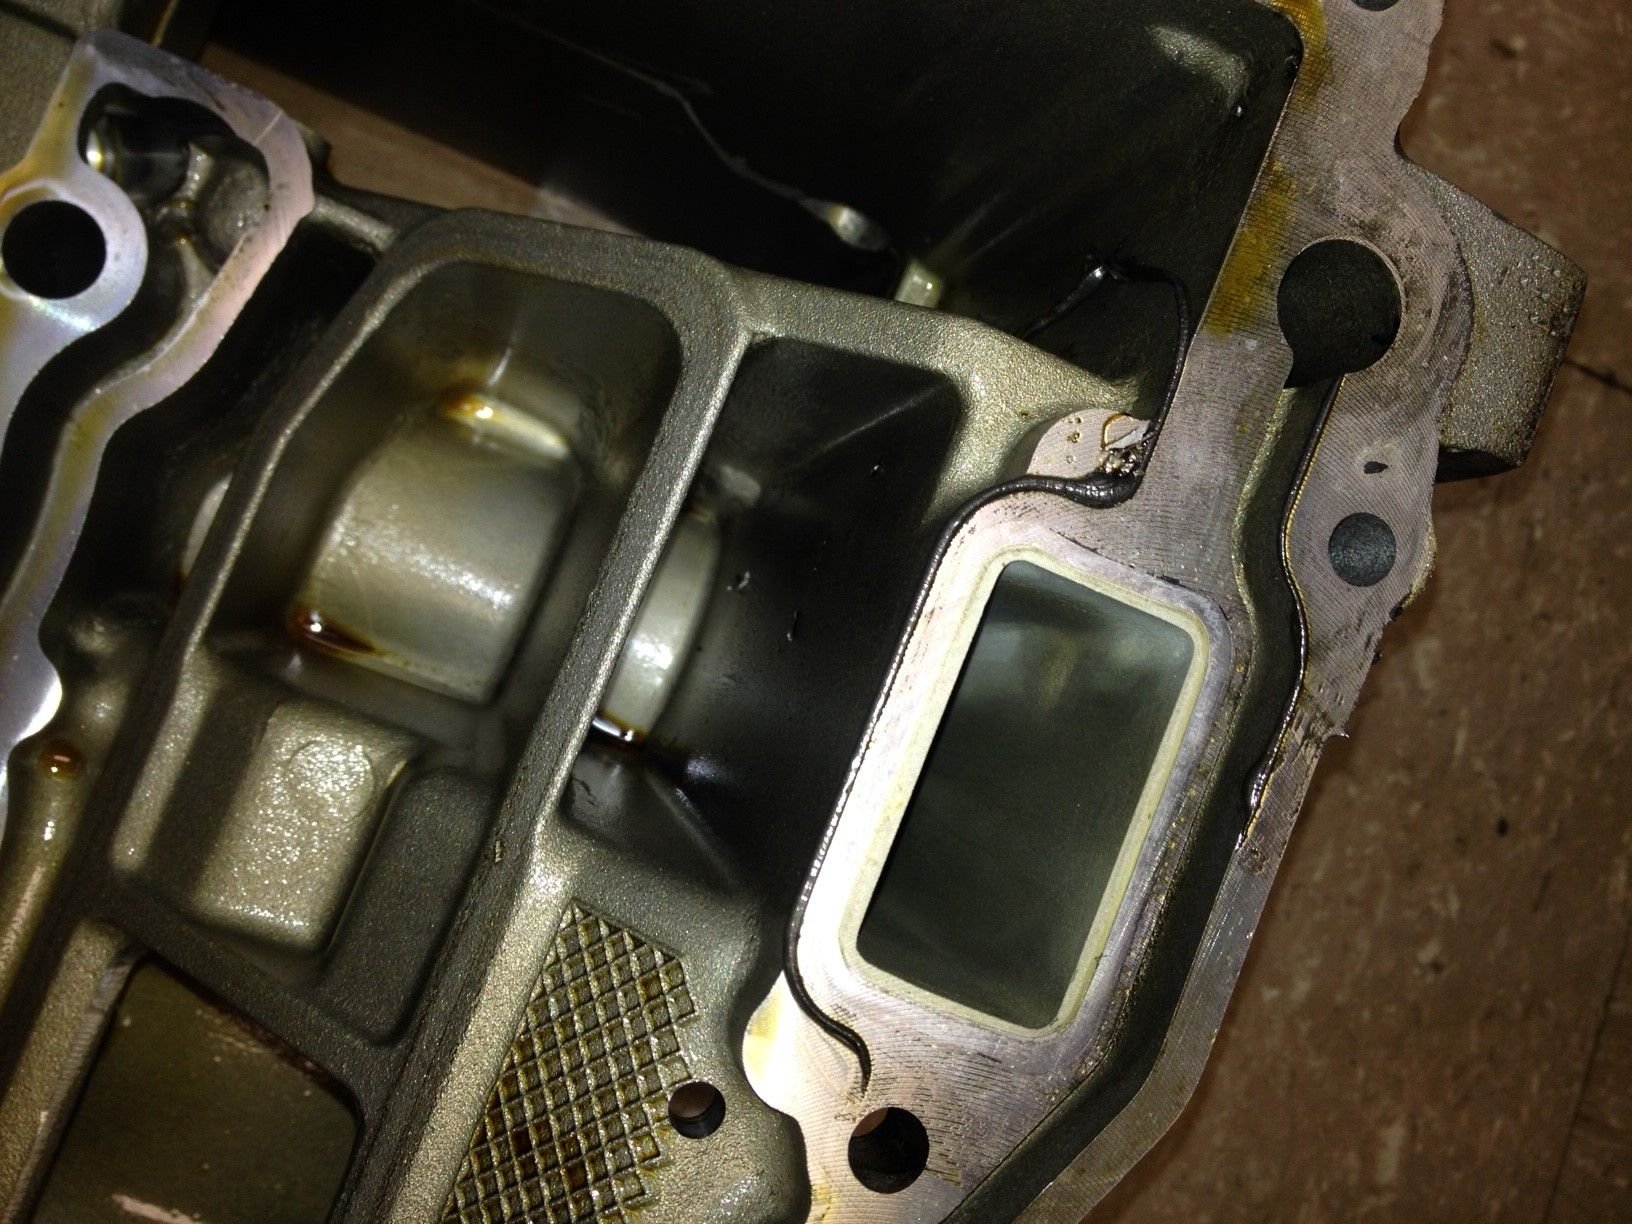
I'm feeling confident about clip installation and I think I'm ready to seal the block halves together, but I can't find much info about sealant application. What little info I've found I'm not sure I can trust. Logray's build shows a 1.32 mm bead of dreibond. I have a good idea where the sealant goes, but looking for more definitive info so I don't have to do this twice.
Update: Assembly is going well. Rotating assembly is in the block. Heads are on with new valve seals. Ims solution is in. Good, used oil pump is on.
Im getting ready to install cams, but i'm unsure about the lifters. Some will compress, and some won't. Some of the ones that compress will bottom out, others don't. Ive tried pumping them submerged in oil, no difference. What am i missing? Is there an inspection procedure for lifters? I havent found anything.
The design was upgraded by INA. Some of us replaced all 24 when they were still $40 each !Be glad that companies like Warehouse 33 have at last sourced cheaper INA lifters. When I bought mine, it was "cheaper"to buy them in Europe and ship here than to buy from any USA source !
If they don't work on the bench ,how do you imagine they will work in the engine?
Have you dismantled any of the jammed ones ? Much written about this in Search.
Particularly the pre-lubrication process when rebuilding the head.
These exhaust lifters are not special at all. Even Hyundai use the exact same lifters.
The intake ones you can use your thumb to press hard to push the plunger up and see if it's smooth and if there's any abnormal wear. Do not wear glove...it may get caught when the plunger retracts.
Originally Posted by george_west
I'm all for preventative measures, but is it really such a poor design that they should all be replaced after 30k miles?
What about intake side? Any way to inspect other that visual wear on the outside?
The design was upgraded by INA. Some of us replaced all 24 when they were still $40 each !Be glad that companies like Warehouse 33 have at last sourced cheaper INA lifters. When I bought mine, it was "cheaper"to buy them in Europe and ship here than to buy from any USA source !
If they don't work on the bench ,how do you imagine they will work in the engine?
Have you dismantled any of the jammed ones ? Much written about this in Search.
Particularly the pre-lubrication process when rebuilding the head.
Originally Posted by Ahsai
These exhaust lifters are not special at all. Even Hyundai use the exact same lifters.
The intake ones you can use your thumb to press hard to push the plunger up and see if it's smooth and if there's any abnormal wear. Do not wear glove...it may get caught when the plunger retracts.

 01-23-2016, 10:54 AM