
centre console delete
 09-28-2009, 10:00 AM
#31
Parts Specialist
Rennlist Member
Rennlist Member

I work at a Laser company and we have some really cool labels if you would like some small warning style I can grab one or two for you - I would love to see that done !
 09-28-2009, 12:36 PM
#32
Race Car
Join Date: Feb 2007
Location: Vancouver, B.C. Canada
Posts: 3,980
Received 0 Likes
on
0 Posts
 09-28-2009, 11:13 PM
#33
Instructor
ide like a laser to put in my front airdam. can i get one big enough to incinerate a-hole drivers?
gnr996- who is the hottie on your hood?
gnr996- who is the hottie on your hood?
09-28-2009, 11:16 PM
#34
Three Wheelin'
Thread Starter
09-29-2009, 12:19 AM
#35
Race Car
Join Date: Feb 2007
Location: Vancouver, B.C. Canada
Posts: 3,980
Received 0 Likes
on
0 Posts
yes a front and rear mounted laser is the ticket, just powerfull enough to blow out a tire..
 09-29-2009, 04:43 AM
#36
Jasper, if you haven't done the delete installation yet, here are some instructions to follow.
http://gallery.rennlist.com/gallery/albuq44
You'll need a 10mm wrench (preferably a ratcheting box-end) and a torx driver (can't recall the size, but it's common).
The toughest part is finding all of the screws (don't forget the one under the little finned plastic coin holder in the rear console compartment) and removing the metal bracket from the old lower console. In addition to the console delete you'll probably need the Upper AC Surround Trim, part # 9965526770001C
10-07-2009, 01:03 AM
#38
Three Wheelin'
Thread Starter
Right
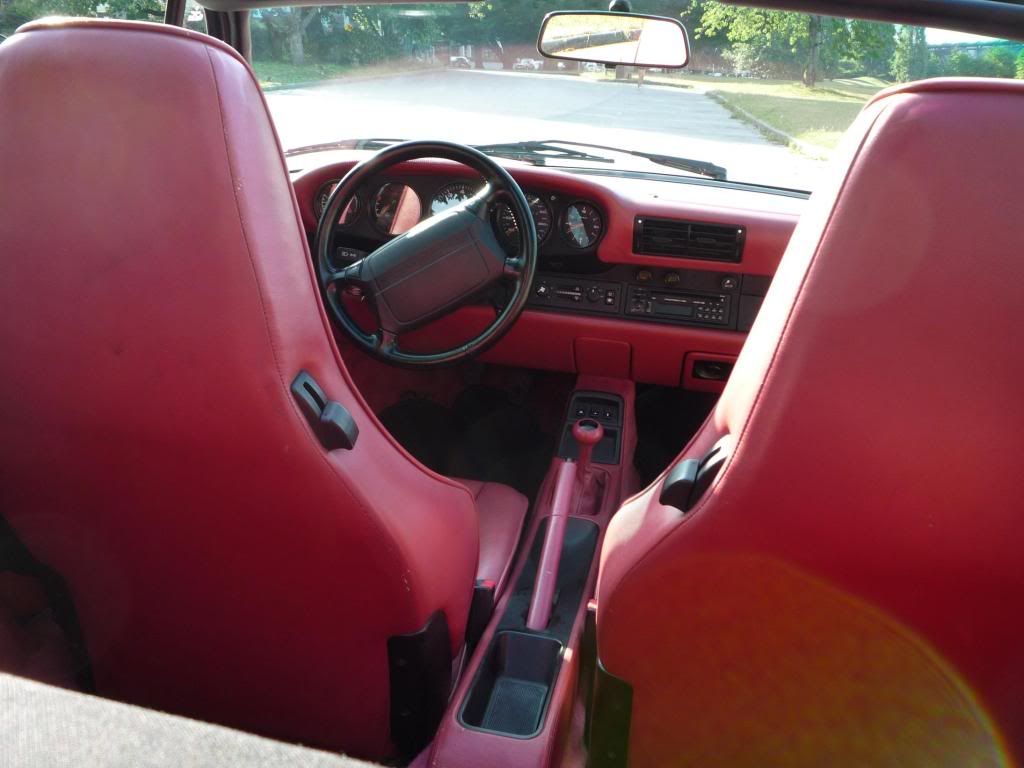
Jobs a good'un. Too dark for pics, but it looks just like the pics already posted of course. A few notes for the guys doing this mod in the future:
*note the rear console is the one between the seats, the centre console is the one under the radio.
1) There are three screws in the storage compartment under the arm rest. One screw holds in a bottom plate, one in the right front corner, and one screw under the coin holder. This one is different than *all* the rest. It has a flatter head to allow the coin holder to fit into it's little slot. Remember this when you put it all back together.
2) My car has the ashtray delete option. The two torx screws in the bottom of this little cubby are plastic expanding plug thingies, not screws. Once these are removed, you can snap the cubby out, there's a single torx screw under it.
3) Remove the shifter boot by just yanking up carefully. There's one last screw at the leading edge of the rear console. I have one of those big fat GT3 carbon fibre *****, and it is fixed in place with an allen head set screw. I removed this ****, but my understanding is that the stock ***** are pressed on and are difficult to remove.
4) Removing the whole rear console makes it a whole lot easier to remove the centre console. If you can get your **** off then it's worth removing the rear console. If you can't get your **** off it makes it a bit more difficult. I was looking at how my shift linkage could be adjusted so I needed to remove my console anyway. If you're removing the rear console you will have to snap off the side panel by the parking brake.
5) You have to remove the side panels of the centre (not rear) console next. These snap off with a fair bit of force required. There's two screws on each side of the centre console. Remove these screws and it's easy to remove the centre console after that. If you have heated seats you will need to remove the small panel which holds the switches. This just pops off too, no fasteners involved.
6) There's a steel bracket bolted to the floor just in front of the shifter to which the centre console was screwed. You'll need to remove that. It's held down by four locking nuts which are a bear to unscrew.
7) By far the trickiest bit is to relocate the heated seat switches. The wires are only *just* long enough, and you have to remove the A/C vents and radio/HVAC controls in order to fed the wires through. Even then I had to splice in a length of wire...there might be an easier way, but it sure wasn't obvious to me if there is.
8) To disassemble the dash, first remove the horseshoe shaped bezel. Once again it's clipped in place, not screwed, so you *just* have to pull it off. I started at the bottom right, wedged a credit card under it and worked my way around.. Once the horseshoe is off, then you use a small screwdriver to spring down two small tabs between the top of the A/C vents and the dash. The vents slide straight out ez after that. The radio and HVAC controls are set in a frame, which is fastened to the dash by four torx screws. Undo those screws and the frame holding these two components also slides out. I left the wires plugged into the back of the electronic gear...
9) To feed the wires through, undo as much of the tape holding the heated switch wire loom together as you can, the two bundles leading to each switch are all taped together. You have to make two separate bundles, one for each side and tape each of those together to keep it tidy and to protect the wire from chaffing on the sharp edges behind the radio. There is one blue wire which runs between the two switches, I don't know it's function, but it wasn't long enough for me to have a switch on either side of the horseshoe so I had to splice about 8 inches of new wire into it. Once you have the two bundles made up, crawl up under your dash with a flashlight and find the snake hole. It is only *just* big enough for the plugs at the end of each wire bundle. This was the least pleasant part of the job. It didn't help that it was getting on 11 pm and I was working in my carport.
After all that, the reassembly was pretty easy, the reverse of the above of course.
Well worth it lads. More leg room, cool retro looking dash.All that for $162, and about three hours of my time.
10-07-2009, 08:25 PM
#39
Three Wheelin'
Join Date: Jul 2009
Location: on the waterfront, Kobe, Japan
Posts: 1,434
Likes: 0
Received 1 Like
on
1 Post
sorry, am a lurker here-as considering with cobra sold 996 as dd.
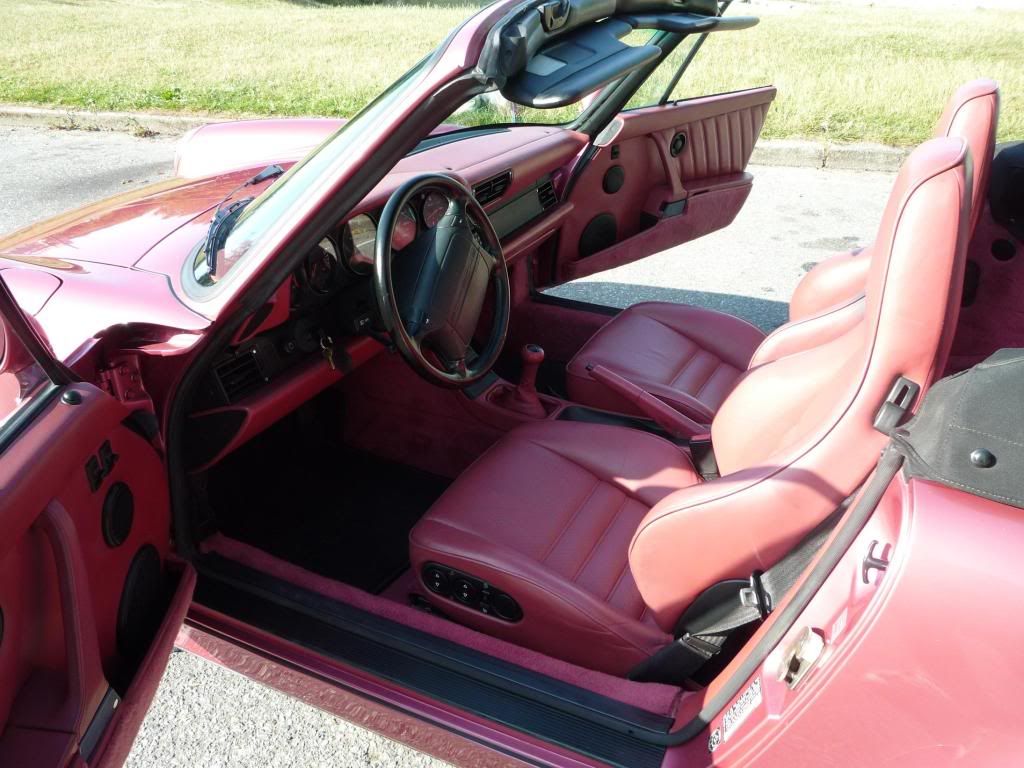
interesting posting (console delete)....takes you very close to 964 or 993 series style (964's had more leather).....mine
present 92 turbo look C2 (America Roadster)-garage queen
gone but not forgotten:
04 Cobra modified(575rwHP)
03Alfa GTA
02 Alfa 147
other American Muscle (all modified)
gone & forgotten
2 BMW's (overpriced, underpowered) & so-so build quality
10-07-2009, 10:54 PM
#41
Three Wheelin'
Thread Starter
yup - definitely part of the attraction although I must stress the console was absolutely killing my leg, so this mod was 90% about comfort. I love my 996, but I have never been al that happy about the position of the steering wheel in particular. It sits too low in my lap. A rake adjustment *up* would be dandy.