When you click on links to various merchants on this site and make a purchase, this can result in this site earning a commission. Affiliate programs and affiliations include, but are not limited to, the eBay Partner Network.
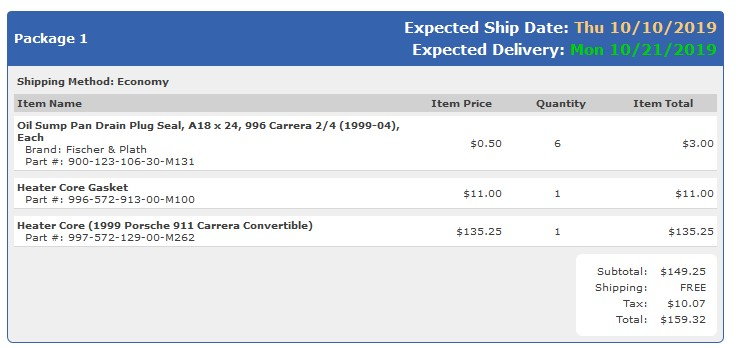
Have not posted in a while....this 996 has been great to me. Yesterday the fog coming from the vents and smell was evident.....the heater core is leaking coolant....already ordered a new heater core...coolant flush and refill is part of the project.....winter is coming
Will do....based on the write-ups here and Renntech...it should be a relatively easy thing to do....I will start draining and removing the front covers this weekend....by the time the heater core gets home...should be ready to drop in, button-up and refill...
Will do....based on the write-ups here and Renntech...it should be a relatively easy thing to do....I will start draining and removing the front covers this weekend....by the time the heater core gets home...should be ready to drop in, button-up and refill...
I don't even drain the coolant when doing a heater core unless changing out the coolant for new stuff.
The heater core hoses are pretty much at the highest point of the cooling system, I just clamp off the two hoses and change the heater core,fill the heater core almost full and install. very little air will enter the system.
It has been 5 years since it was last done....me thinks is a good time to flush/refill.....at least I do not have to "drain" the heater core....
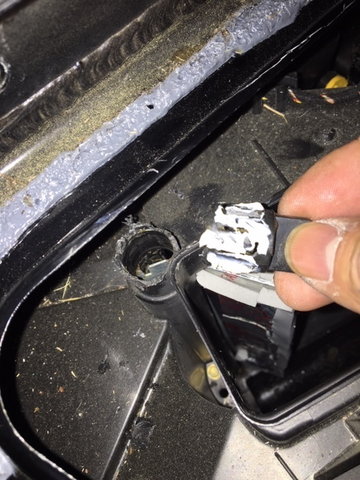
So far so good...believe it or not...my biggest struggle so far was unplugging the little electrical connectors for the washer nozzles
It seems from this point on is straight forward (just like the previous steps)....remove a few bolts...push stuff aside.....unplug hoses...remove foam cover...pull out old heater core..drop in new heater core...reverse process...
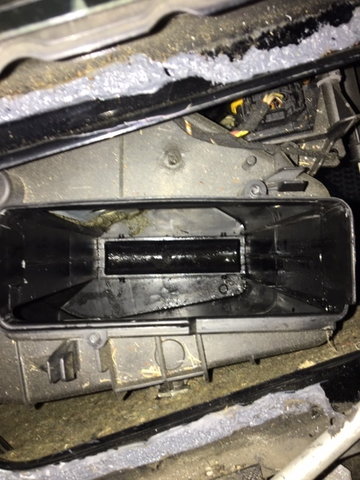
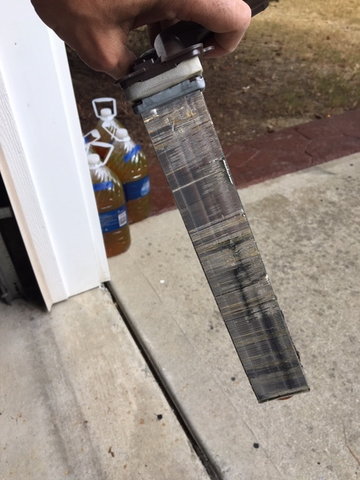
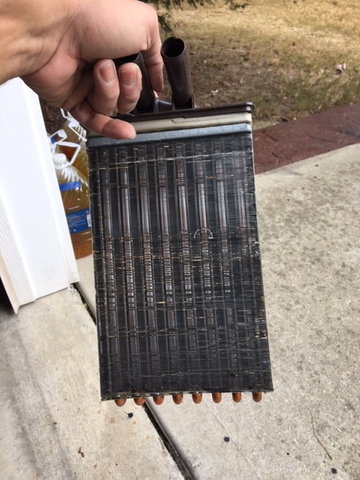
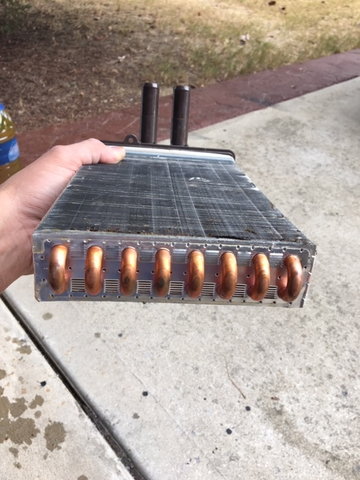
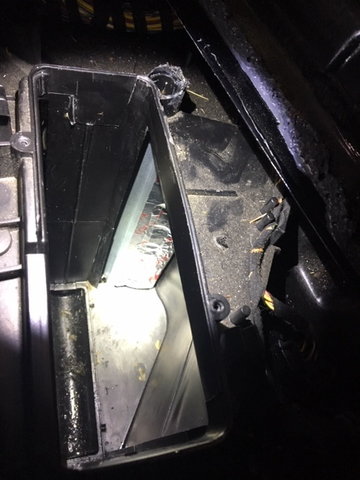
Just a few pics of the work: First look after removing the cover..be careful peeling it back Looking into the pit....lots foam and a little pool of coolant Vacuumed and "cleaned" the best I could Leaking heater core
Thanks for the pics. Will definitely help me when I tackle this project in the future.
Are our heater cores smaller than other cars? I�ve never had really great heat from my heater. And looking from the size of the core I can now see why.
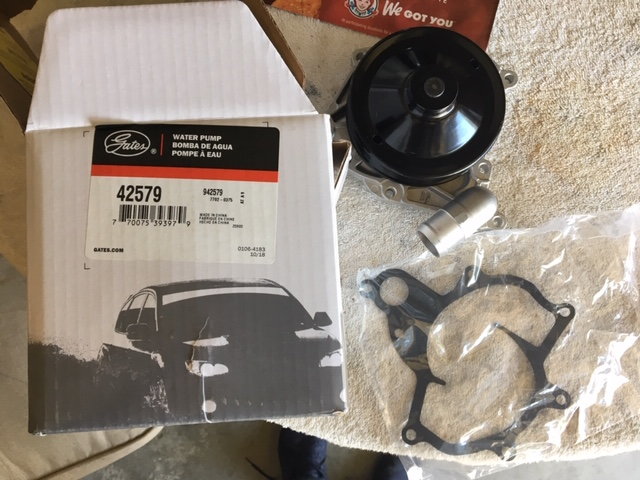
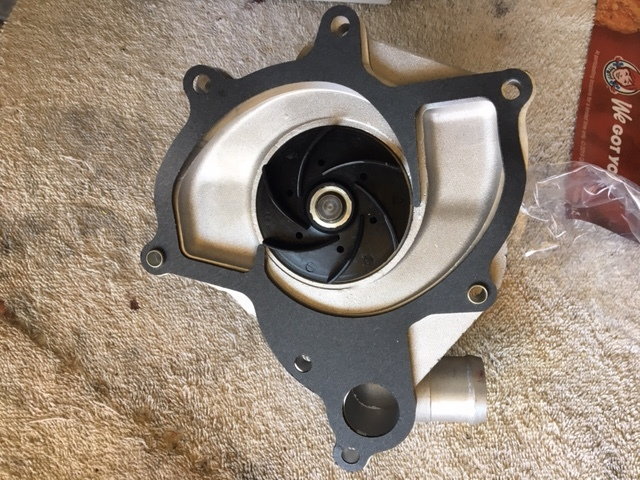
Water pump arrived today......now need to find the time to install...had very good experience with Gates products before UPDATE: Pump was out of spec....during a "dry run" installation, the impeller was making contact with the block...with screws finger tight I attempted to rotate the pulley...a lot of resistance compared to when the pump was outside the car...I could even feel the plastic impeller grinding/rubbing against the block...this pump was returned for a refund...a new pump (Pierburg) was ordered from Pelican Parts
Composite impeller... Hard/thick "cardboard/fiber" gasket....need to snip off a bit from the internal gasket tabs...looks like it may interfere with the impeller...
More updates....I am finished with the vent door....all that is left is to wipe down the bottom....waiting for heater core to wrap up the front....in the meantime. I may install the water pump (Update: Gates water pump was out of spec..DO NOT USE..impellers touching back wall of cavity...returned WP and purchased a Pierburg from Pelican)
This was not the final product...but you get the idea Grease that sucker well....silicone or lithium (what I used) grease Door installed Top "plugged"....I exercised the door back and forth by changing the temperature settings....beautiful....
Tips:
- When starting to dremmel the top...make a 1/4 inch hole with drill bit (or a bit bigger, may be 3/8...and just go in about 1/4 inch)...just enough to get the dremmel grinder into that hole and work your way out
- when close to the edges...use long needle nose pliers to "peel" the remainder of the plastic "outwards"...this way the bushing may slide out without being damaged
- make a note of which way the blade comes out.....take pictures
- remove the 7mm screw from the bottom bushing (search the internet...plenty of pictures of that area)...
- work from inside the frunk....no need to be reaching out over the fenders
- when it is time to put the vent blade back in..start by snapping in the top bushing...then go inside the car and make the A/C go low temperature....that will allow you to see the bottom bushing hole, and will help you align the blade with the bushing...2 people at this point is of great help...one holds the blade while the other pushes the bushing "up" from the bottom....
- before closing up....move the temp up and down in the a/c control unit and watch that beautiful updated door open and close the way it is supposed to.....with a new skin on it...lol
 10-08-2019, 10:00 AM