When you click on links to various merchants on this site and make a purchase, this can result in this site earning a commission. Affiliate programs and affiliations include, but are not limited to, the eBay Partner Network.
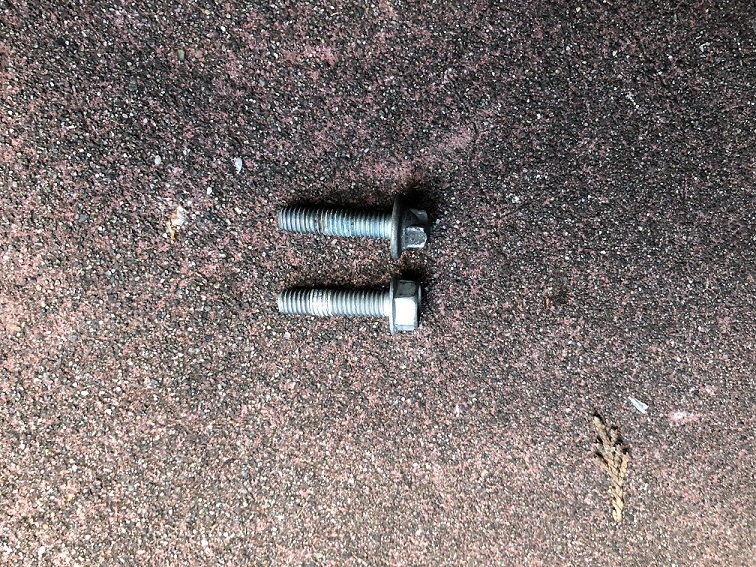
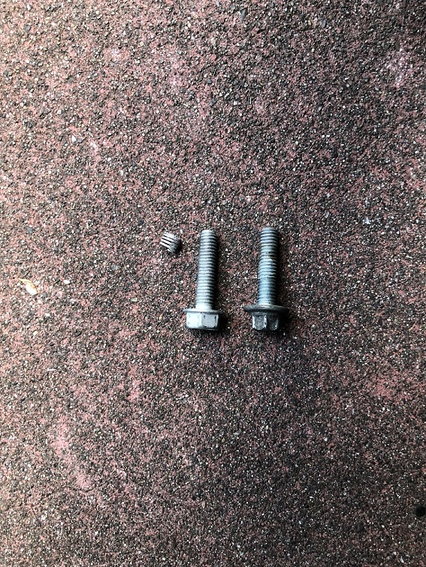
I've been finding little gifts from the previous owners of my 1999 C4 as I do little projects. Today when replacing my water pump I had placed all the bolts by hand and then began torquing them as recommended. The bolt at about 8 o'clock would not tighten...ugh. pic below of what I found. Question is, how shafted am I? old bolt on top - replacement on bottom after I backed it out of the hole at first I didn't know what was "on" the new bolt but then I tried to wire brush it and found I was able to "unscrew" it.
This seems like the remnants of a past fix...maybe not a great one. I have not yet researched options I may have. Would appreciate input.
OK now I know what a heli-coil is...is this an OK idea on the water pump, or do I need to drill and for a new bolt....is there enough material around this bolt?
It might be some of the casting. I'd chase the threads and see if there are enough left to get the bolt to bite enough to torque. If so, you are done. If not, look into helicoil.
I agree with the above post. If it is a piece of the original casting, I would helicoil it. If not, then it is already drilled oversize for the helicoil and I would install a new helicoil. I would NOT drill for the next oversize bolt.
It might be some of the casting. I'd chase the threads and see if there are enough left to get the bolt to bite enough to torque. If so, you are done. If not, look into helicoil.
I ran the bolt back in just with my hand after I had wound that coil off and never got to the point where I couldn't turn it..I'll double check that approach, if that's what chasing the threads means.
I agree with the above post. If it is a piece of the original casting, I would helicoil it. If not, then it is already drilled oversize for the helicoil and I would install a new helicoil. I would NOT drill for the next oversize bolt.
I wasn't too comfortable with the drilling approach myself!
You may know this, but there are several different length bolts on the water pump. If you put one that is longer in a hole that should only have a short bolt, it bottoms out and you keep on cranking, it could strip out the aluminum threads on the casting.
Hi CDS - Yes, I am aware of the bolt lengths. I don't think I stripped this one as I just backed it out and noticed what I now believe to be casing metal on the bolt. I got an insert kit and compared the bits on the bolt...it's not a helical insert. It's definitely softer material. I'm taking off the catalytic converter for more working room. I think I am headed toward drilling and tapping for a helical insert. This was supposed to be a weekend project?
Thanks for the heads up on chasing threads - I now own a tap.
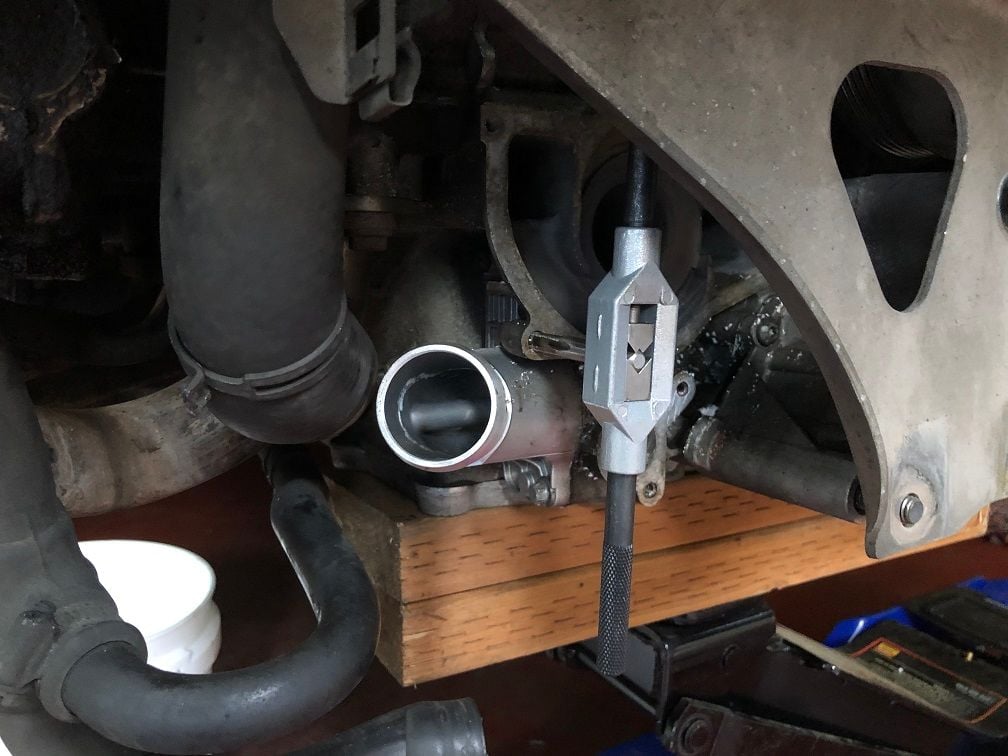
Got after my "weekend project" again last night. After breaking a few of the rusted exhaust bolts and cutting the others, I got the mufflers and cats off so I could have access to the stripped out hole. Here are a couple shots of the work. In the end I got her all put back together and will re-fill with coolant this weekend. Thanks to 4Driver4, rockhouse66 and cds72911...if you guys hadn't chimed in I would have felt a lot less certain of my next steps! This is a shot after I drilled out the hole with a 1/4" bit tapping threads for the helicoil - my turner tool was too big for the space requiring me to disengage and re-attach to the tap every 1/4 turn. I was very concerned with starting this tap correctly. Thanks to the softness of the case, it went in well.
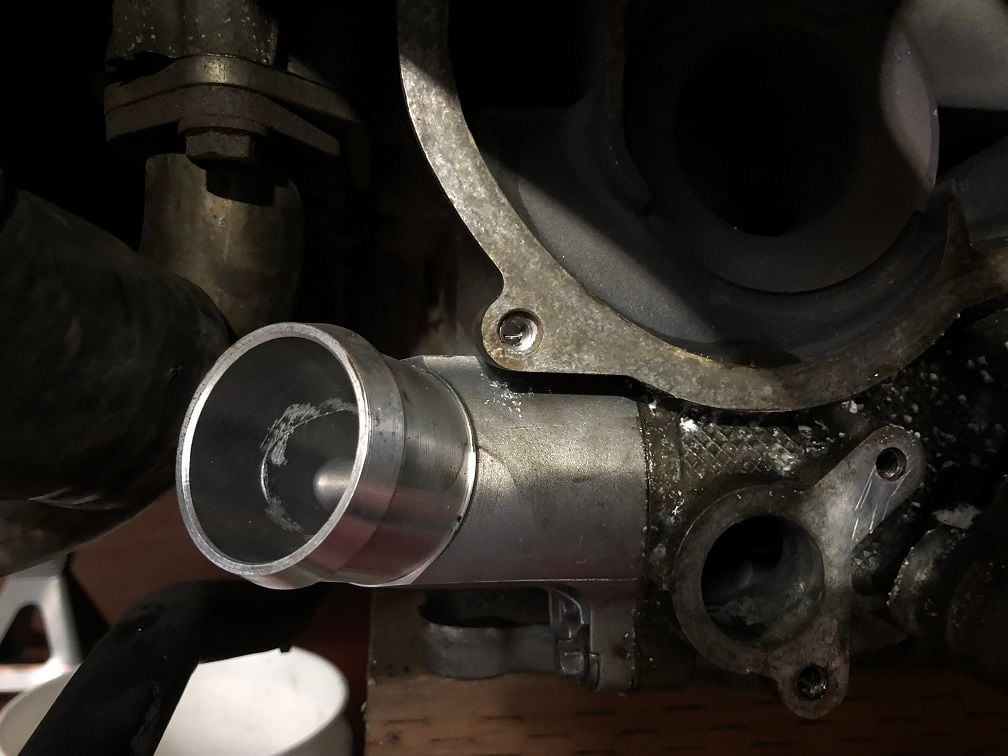
The helicoil is placed inside the newly tapped hole. You can see the tang of the helicoil in the back of the hole.
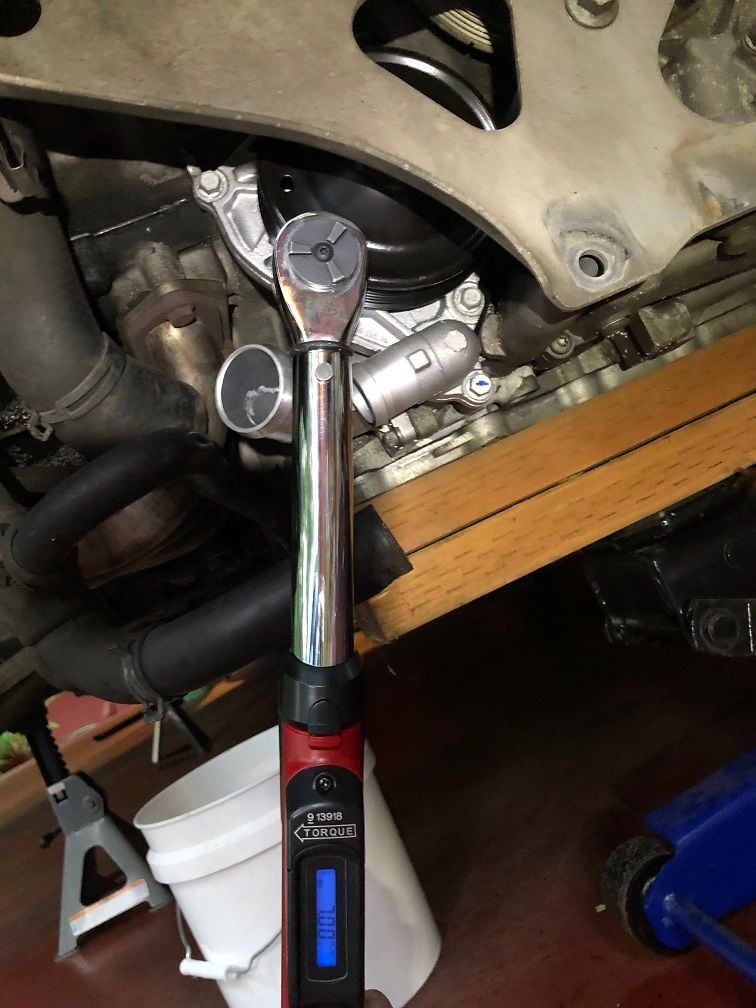
Torquing the bolt....and it held! The completed installation.
Well done.
Unless you have a trusted tech, you have to feel good you got that done correctly. I can imagine what kind of hack fixes someone would do in this case.
Well done.
Unless you have a trusted tech, you have to feel good you got that done correctly. I can imagine what kind of hack fixes someone would do in this case.
Tap it to the next size bolt, drill through and use a nut, epoxy the hole and drill/tap a new stock size one, use a small wisegrip to squeeze together the pump and the block (leaving the pliers permanently in place), JB Weld the pump to the block or use RTV to seal the pump to the block AND leave the vent valve permanently open on the overflow tank. That's about all I can think of right now.
Tap it to the next size bolt, drill through and use a nut, epoxy the hole and drill/tap a new stock size one, use a small wisegrip to squeeze together the pump and the block (leaving the pliers permanently in place), JB Weld the pump to the block or use RTV to seal the pump to the block AND leave the vent valve permanently open on the overflow tank. That's about all I can think of right now.
^^ You wouldn't happen to know those bodges from personal experience would you?
Tap it to the next size bolt, drill through and use a nut, epoxy the hole and drill/tap a new stock size one, use a small wisegrip to squeeze together the pump and the block (leaving the pliers permanently in place), JB Weld the pump to the block or use RTV to seal the pump to the block AND leave the vent valve permanently open on the overflow tank. That's about all I can think of right now.
 07-07-2019, 12:28 AM