Why does my car not blow warm air? No Heat. AC works.
#62
Three Wheelin'
Is that entire plate suppose to be covered with foam?
#63
Instructor
I think there is more than one door inside the air box but the one accessible from up top is the one that controls the heat/cold mix. And yes that metal door is supposed to be covered in foam.
#64
Just a car guy
Rennlist Member
Rennlist Member
Join Date: Jan 2002
Location: South Lyon, Michigan, Ewe Ess Eh
Posts: 9,927
Received 836 Likes
on
525 Posts
The OP was 99% of the way there with a much more elegant and minimally invasive solution when he went in from the top. Bagging that, slicing the enclosure apart and plugging the gaping hole with duct tape is a huge messy hack. It is destructive and inelegant, and devalues the vehicle. I’d be pissed if I found a PO had done this to a car I purchased.
I do agree (with others) that this could have been done more cleanly and resealed in a better manner. Every owner has different constraints/ resources / skills. If it were me, I would not be averse to doing something similar had I exhausted, or become frustrated by other options. I would not allow exposed adhesive within the housing, but foil tape and a plate/ plug for the cutout, would likely be my direction. That's because I would not be willing to pay anyone to correct this issue. Resources / constraints include funds to pay for repairs. Red used his skills and resources (creativity) to tackle a problem from a different direction. That to me, is impressive.
I can't speak for Red - but my car is not likely to ever be sold. I have never considered resale with any of my cars, ever. Any of my hacks are not going to be seen or discovered by anyone (unless it's my wife or one of my kids). Every owner is different.
#65
Drifting
Installed it is 90 degrees rotated, so the long axis is vertical. It is a blend door, allowing the right mix of heated and cooled air to enter the hvac for distribution into the cabin.
This flap is not the item to the left of Red’s picture (that looks like a household electrical outlet), it is the item to the right of that, which he already covered with black gorilla tape. You may need to expand the picture to see it.
This flap is not the item to the left of Red’s picture (that looks like a household electrical outlet), it is the item to the right of that, which he already covered with black gorilla tape. You may need to expand the picture to see it.
#66
Just a car guy
Rennlist Member
Rennlist Member
Join Date: Jan 2002
Location: South Lyon, Michigan, Ewe Ess Eh
Posts: 9,927
Received 836 Likes
on
525 Posts
Installed it is 90 degrees rotated, so the long axis is vertical. It is a blend door, allowing the right mix of heated and cooled air to enter the hvac for distribution into the cabin.
This flap is not the item to the left of Red’s picture (that looks like a household electrical outlet), it is the item to the right of that, which he already covered with black gorilla tape. You may need to expand the picture to see it.
This flap is not the item to the left of Red’s picture (that looks like a household electrical outlet), it is the item to the right of that, which he already covered with black gorilla tape. You may need to expand the picture to see it.
Last edited by Scott at Team Harco; 03-01-2019 at 08:42 AM.
#69
Yup, cut the top of the pivot off with a dremel, remove the plug underneath, unclip the arm on the bottom from inside the car, extract the plate through the hole in the top where the heater core was removed, and recover it with an appropriate material.
Any job worth doing is worth doing correctly.
Any job worth doing is worth doing correctly.
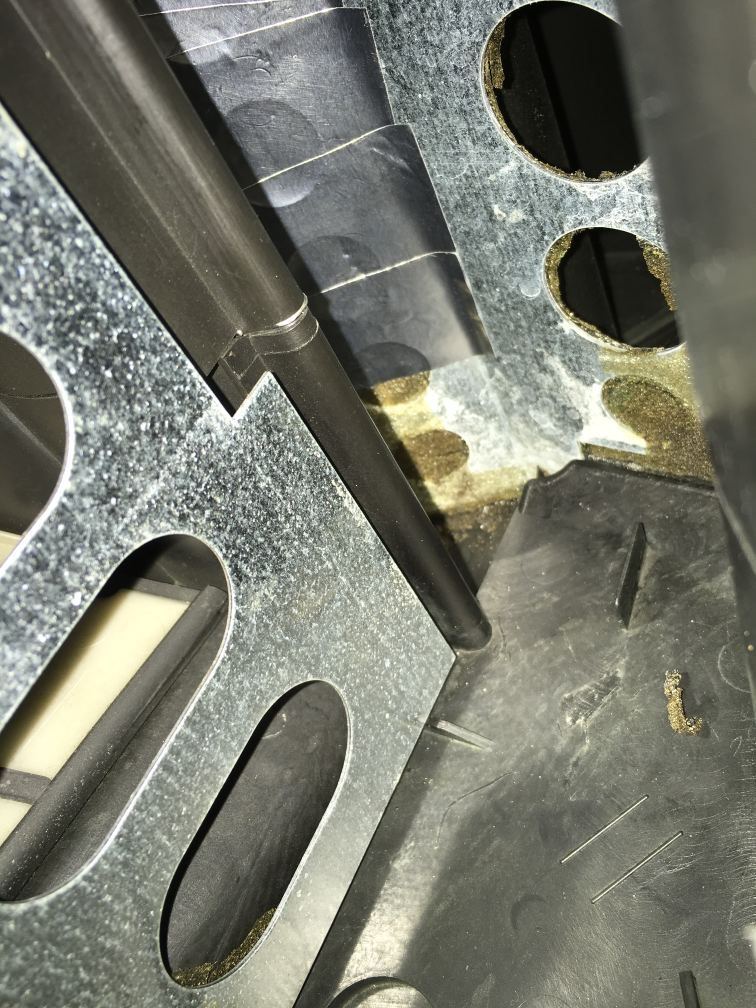
I just did this repair a couple of weeks ago because the heat in my car was non-existent. Here you can see the cut I made. I used an oscillating tool and a Dremel as the cut got closer to the wiring harness (the picture already shows one hole covered up).

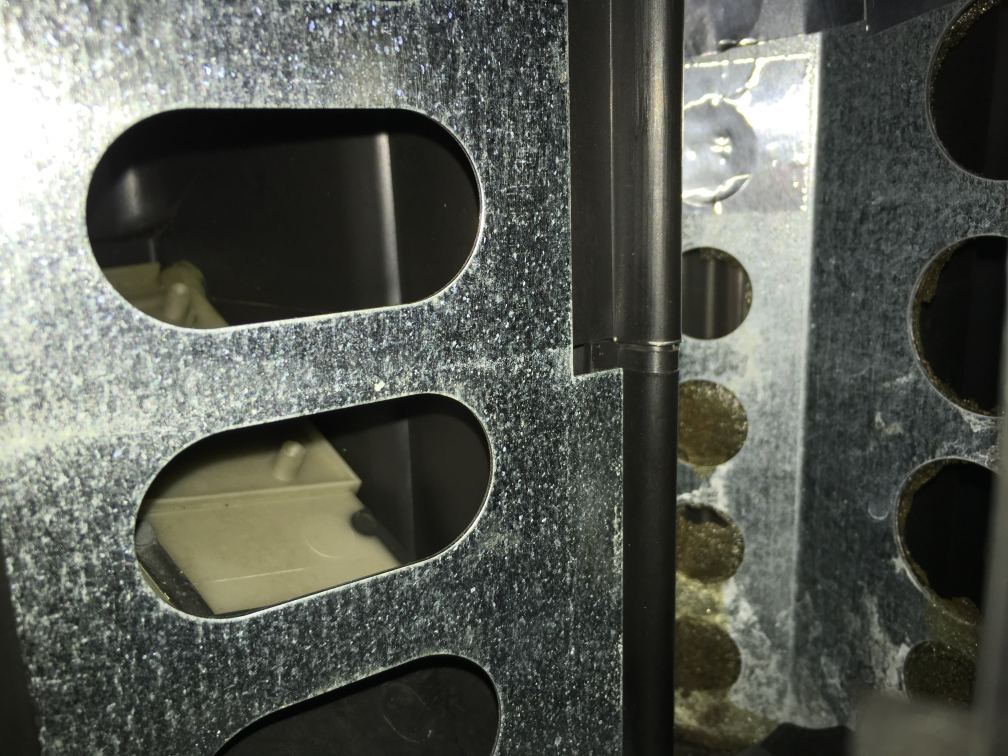
This picture shows both flaps. The near flap has four oval holes. The farther flap has 12 round holes! Seven holes to the left of the bend and two columns of five holes to the right of the bend.

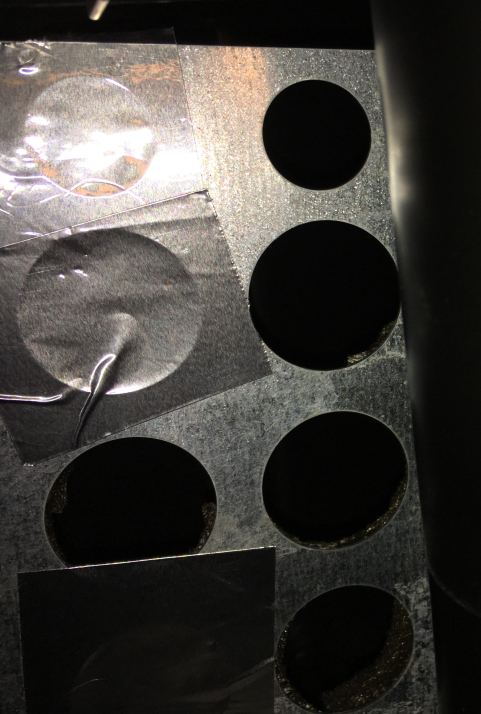
View of the seven holes on the left, partially covered.

Partial view of the two columns of holes.

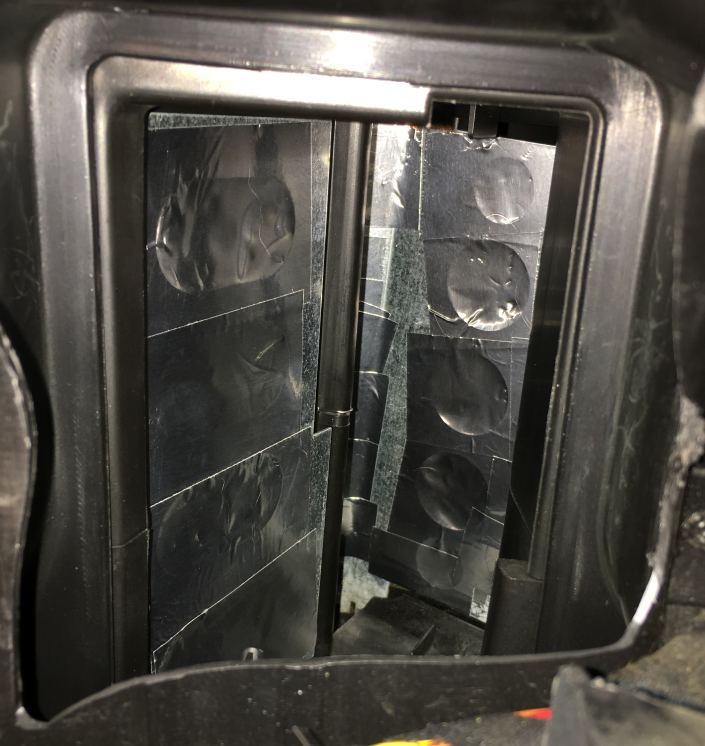
Here is an after shot. You can also see the bottom of the cut in the plastic housing. Actually the plastic piece broke itself off. My plan was to just bend the plastic flap down while I worked but it decided to remove itself as I was bending it.

I used the same metallic tape to secure the plastic piece back in place. I taped the entire perimeter on the outside and several inches (as much as I could reach) on the inside. The reattached piece was very solidly attached. Sorry, no pic of that.
For me, this solution offered the best results. Going in from the heater core only allows access to one of the flaps. Plus it required cutting parts, possibly damaging the hinge beyond what could easily be repaired. It also requires removing the heater core which could be damaged. I suppose if you were going to replace the core anyway it would be a good partial solution. YMMV.
Probably the most "correct" solution is removing the dashboard as documented by Meir on the thread that Ahsia posted. But I'm not eager to remove so many parts and evacuate (and then refill) the A/C refrigerant.
The thread that Ahsia posted (http://986forum.com/forums/performan...-debris-2.html) was a tremendous help to me, especially post #38 by 78F350.
Perhaps going in through the front isn't the most "pure" solution. But I don't have a low-mile garage queen, I have a driver. I also figured that the metallic tape would stay in place and that the repair would vastly improve the ability to heat the cabin. And it is vastly improved!
#70
Rennlist Member
Not to hijack the thread, but I always wondered why the Porsche engineers put that stupid foam in to begin with.
Maybe because they want "some" blending of air through the foam?
What do you guys think?
Maybe because they want "some" blending of air through the foam?
What do you guys think?
#72
Three Wheelin'
There are two plates in there. One to blend hot/cold, one to change level (defrost, dash vents, floor).
I just did this repair a couple of weeks ago because the heat in my car was non-existent. Here you can see the cut I made. I used an oscillating tool and a Dremel as the cut got closer to the wiring harness (the picture already shows one hole covered up).
This picture shows both flaps. The near flap has four oval holes. The farther flap has 12 round holes! Seven holes to the left of the bend and two columns of five holes to the right of the bend.
View of the seven holes on the left, partially covered.
Partial view of the two columns of holes.
Here is an after shot. You can also see the bottom of the cut in the plastic housing. Actually the plastic piece broke itself off. My plan was to just bend the plastic flap down while I worked but it decided to remove itself as I was bending it.
I used the same metallic tape to secure the plastic piece back in place. I taped the entire perimeter on the outside and several inches (as much as I could reach) on the inside. The reattached piece was very solidly attached. Sorry, no pic of that.
For me, this solution offered the best results. Going in from the heater core only allows access to one of the flaps. Plus it required cutting parts, possibly damaging the hinge beyond what could easily be repaired. It also requires removing the heater core which could be damaged. I suppose if you were going to replace the core anyway it would be a good partial solution. YMMV.
Probably the most "correct" solution is removing the dashboard as documented by Meir on the thread that Ahsia posted. But I'm not eager to remove so many parts and evacuate (and then refill) the A/C refrigerant.
The thread that Ahsia posted (http://986forum.com/forums/performan...-debris-2.html) was a tremendous help to me, especially post #38 by 78F350.
Perhaps going in through the front isn't the most "pure" solution. But I don't have a low-mile garage queen, I have a driver. I also figured that the metallic tape would stay in place and that the repair would vastly improve the ability to heat the cabin. And it is vastly improved!
#73
I love the ruined thing, that's for sure.
 There's some freedom in having a "ruined" car!
Hope my post helps someone. I kinda wished I'd been able to post sooner.
#74
Three Wheelin'
Ha! I am just poking fun. I get both sides of the equation for sure. 99% of the time I am about doing a job the correct way but I've owned so many cars and have done so much work sometimes I just want an easy way lol.
#75
Rennlist Member
All manufacturers use it. I had the same issue in other cars/trucks.


