When you click on links to various merchants on this site and make a purchase, this can result in this site earning a commission. Affiliate programs and affiliations include, but are not limited to, the eBay Partner Network.
Yes, I took a transfer to Asheville, a calculated pre-retirement move, paid for by the company.
Now: job...I don’t need no stinkin’ Job!
Retired 13 months ago.
Yes, I took a transfer to Asheville, a calculated pre-retirement move, paid for by the company.
Now: job...I don�t need no stinkin� Job!
Retired 13 months ago.
Nice. I'm about 17 months away from it myself. Almost to the day. You probably can't tell I'm keeping track...
OK - enough of the re-acquaintance sideshow. Actually quite cool on its own.
I don't think I did much yesterday. Did order a magnetic drain plug. Want to have that available when I do drain the oil.
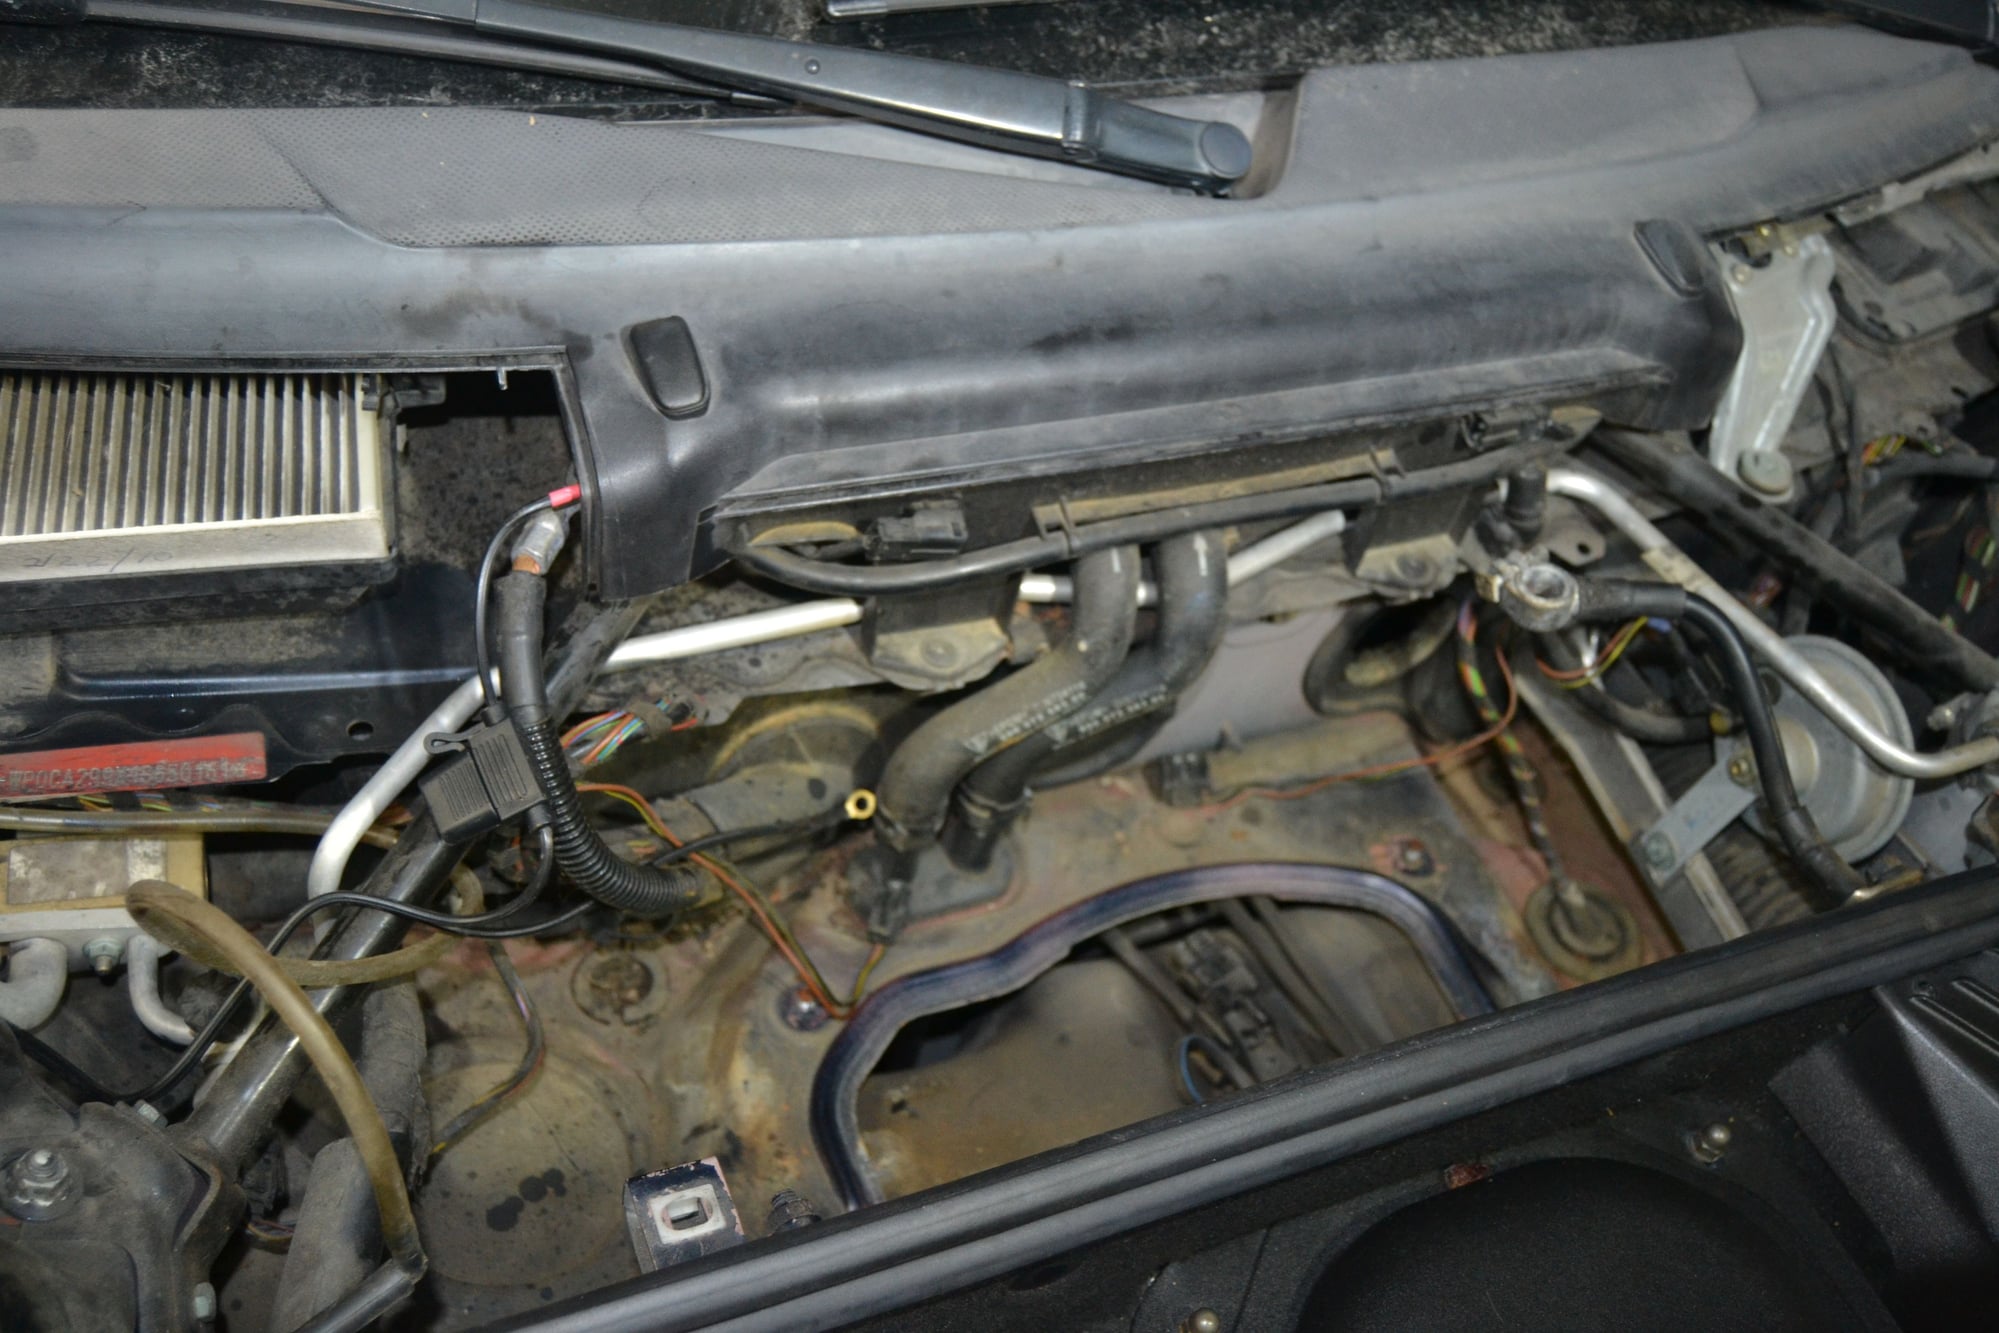
Today I set out to work my way toward removing the front bumper cover. Want to clean out all the leaves and debris around the radiators. Also want to test the right side fan. I know the driver's side works. Figured I'd start removing everything I can from the cowl and boot area. The more I see of this car, the dirtier it looks. The area under the taillights were a prime example. Let's not get started on the engine. I sure hope it's clean on the inside.
Removed the panels near the cowl. One of the M5? nuts (r/s) may need to be replaced or, at the very least, re-tapped. The battery tray is a mess. It needs a good cleaning and a coat of paint. The threads for the clamp (missing) bolt holes should get chased. I'll need a clamp, the battery was just placed on the tray and wasn't even captured by the beads. Not a big deal - but I want the battery properly mounted. Noticed a couple of open connectors up closer to the base of the windshield. Then I uncovered their mates (left side hanging on battery tray). Figure they must be the headlight washers. Also found an unplugged hole in the firewall (top, just right of center). Haven't located a part in my diagrams yet. Should be able to come up with a generic plug. I did find a plug that I can't place. It's also on the battery tray in this photo, but was found between the battery and the firewall.
Here's a view of the mystery plug and its part number.
After removing the battery tray, I set out after the drains. I've seen where these are known to clog and promote swamp conditions. Mine were well on their way. I vacuumed in the cowl area and then pulled two out without working too hard with the vacuum. Bet you can't tell which ones.
Need to get in with hot water and wet rags. Need to go through this entire car to clean and check just about everything. Needs a cabin filter. Not as bad as some I have seen here. Finding a lot of little covers and plugs missing. Will have to judge their true value.
I'm seeing a lot of red under the blue. I assume this is a primer coat. Blue seems to be the original color. Might have been partially, or fully resprayed, but not over a red car. Haven't found the tags for paint and options yet. Might want to investigate that, at some point.
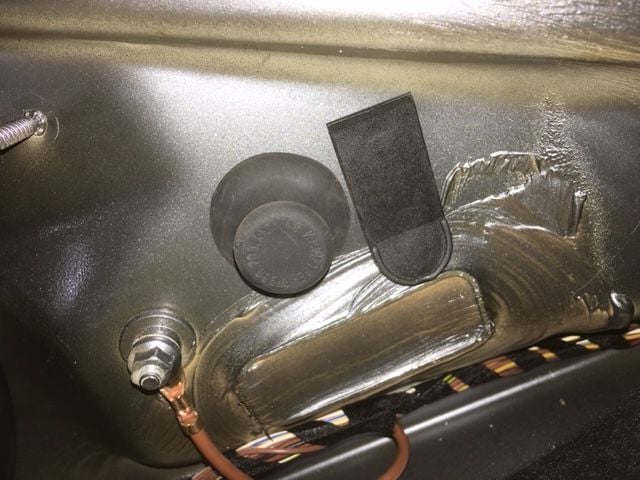
The plug on the battery tray is supposed to be on the side carpet covering the hole for the headlight removal tool to be inserted.
I'll have to check that. I figure the headlights need to come out anyway. Maybe I'll find the hole for the plug. Don't recall seeing an opening that would match it, in that carpeting. It's going to come out too. Thanks for the lead.
Ah - the photo helps. I haven't pulled that carpeting out yet.
Last edited by Scott at Team Harco; 02-26-2019 at 09:30 PM.
I'll have to check that. I figure the headlights need to come out anyway. Maybe I'll find the hole for the plug. Don't recall seeing an opening that would match it, in that carpeting. It's going to come out to. Thanks for the lead.
Yeah, I typed on, but I meant behind.
Check my picture above, in my previous post.
I went through the same issues when pulling the batterg tray.
ended up buying a replacement tray (ebay) and new hardware (dealer)
front bumper removal and radiator cleaning is easy. I had to order new hardware for bumper but my local dealer is very helpful. Helps that parts guys are all regulars at our local Cars and Coffee and have older porsches of their own... they understand the struggle lol
Now I'm no expert, and I normally don't use the underhood VIN when recording VINs when I work on other people's 911s and Boxsters, but I think your car has definitely been painted.
On my 2002 the metal the VIN is stamped into is painted the same color as the rest of the car.
I think it is covered by a clear label, so that might be why your VIN plate area was not painted with the rest of the car.
Man someone went to a lot of trouble to completely change the color of your car though.
From seeing factory assembly videos it appears that the entire body (except for perhaps doors hood and fenders are painted at one time in the same color.
Here’s a video showing the plug and headlight removal
Great stuff. I love two-minute tutorials. He does a good job of explaining the tabs, alignment and the crank lever. Those shorts were a little distracting though...
Now I'm no expert, and I normally don't use the underhood VIN when recording VINs when I work on other people's 911s and Boxsters, but I think your car has definitely been painted.
On my 2002 the metal the VIN is stamped into is painted the same color as the rest of the car.
I think it is covered by a clear label, so that might be why your VIN plate area was not painted with the rest of the car.
Man someone went to a lot of trouble to completely change the color of your car though.
From seeing factory assembly videos it appears that the entire body (except for perhaps doors hood and fenders are painted at one time in the same color.
That's interesting. When I first noticed the red, it was under the driver's seat. Unless the car was fully stripped, that's not a place that could get painted. You may be right, but the records I have from registration by previous owners, list the car's color as blue. Will be interesting to see if the tags are still on the car or if they were removed. Such as prior to a respray. I'm not sure if I would prefer it in red. I do like red cars, though.
Just so you know, you don�t need to remove the carpet, just peel it back (as if you were going to remove the headlight). It�s one of the things I always check when I am serious about a 996.
 02-25-2019, 01:38 PM