When you click on links to various merchants on this site and make a purchase, this can result in this site earning a commission. Affiliate programs and affiliations include, but are not limited to, the eBay Partner Network.
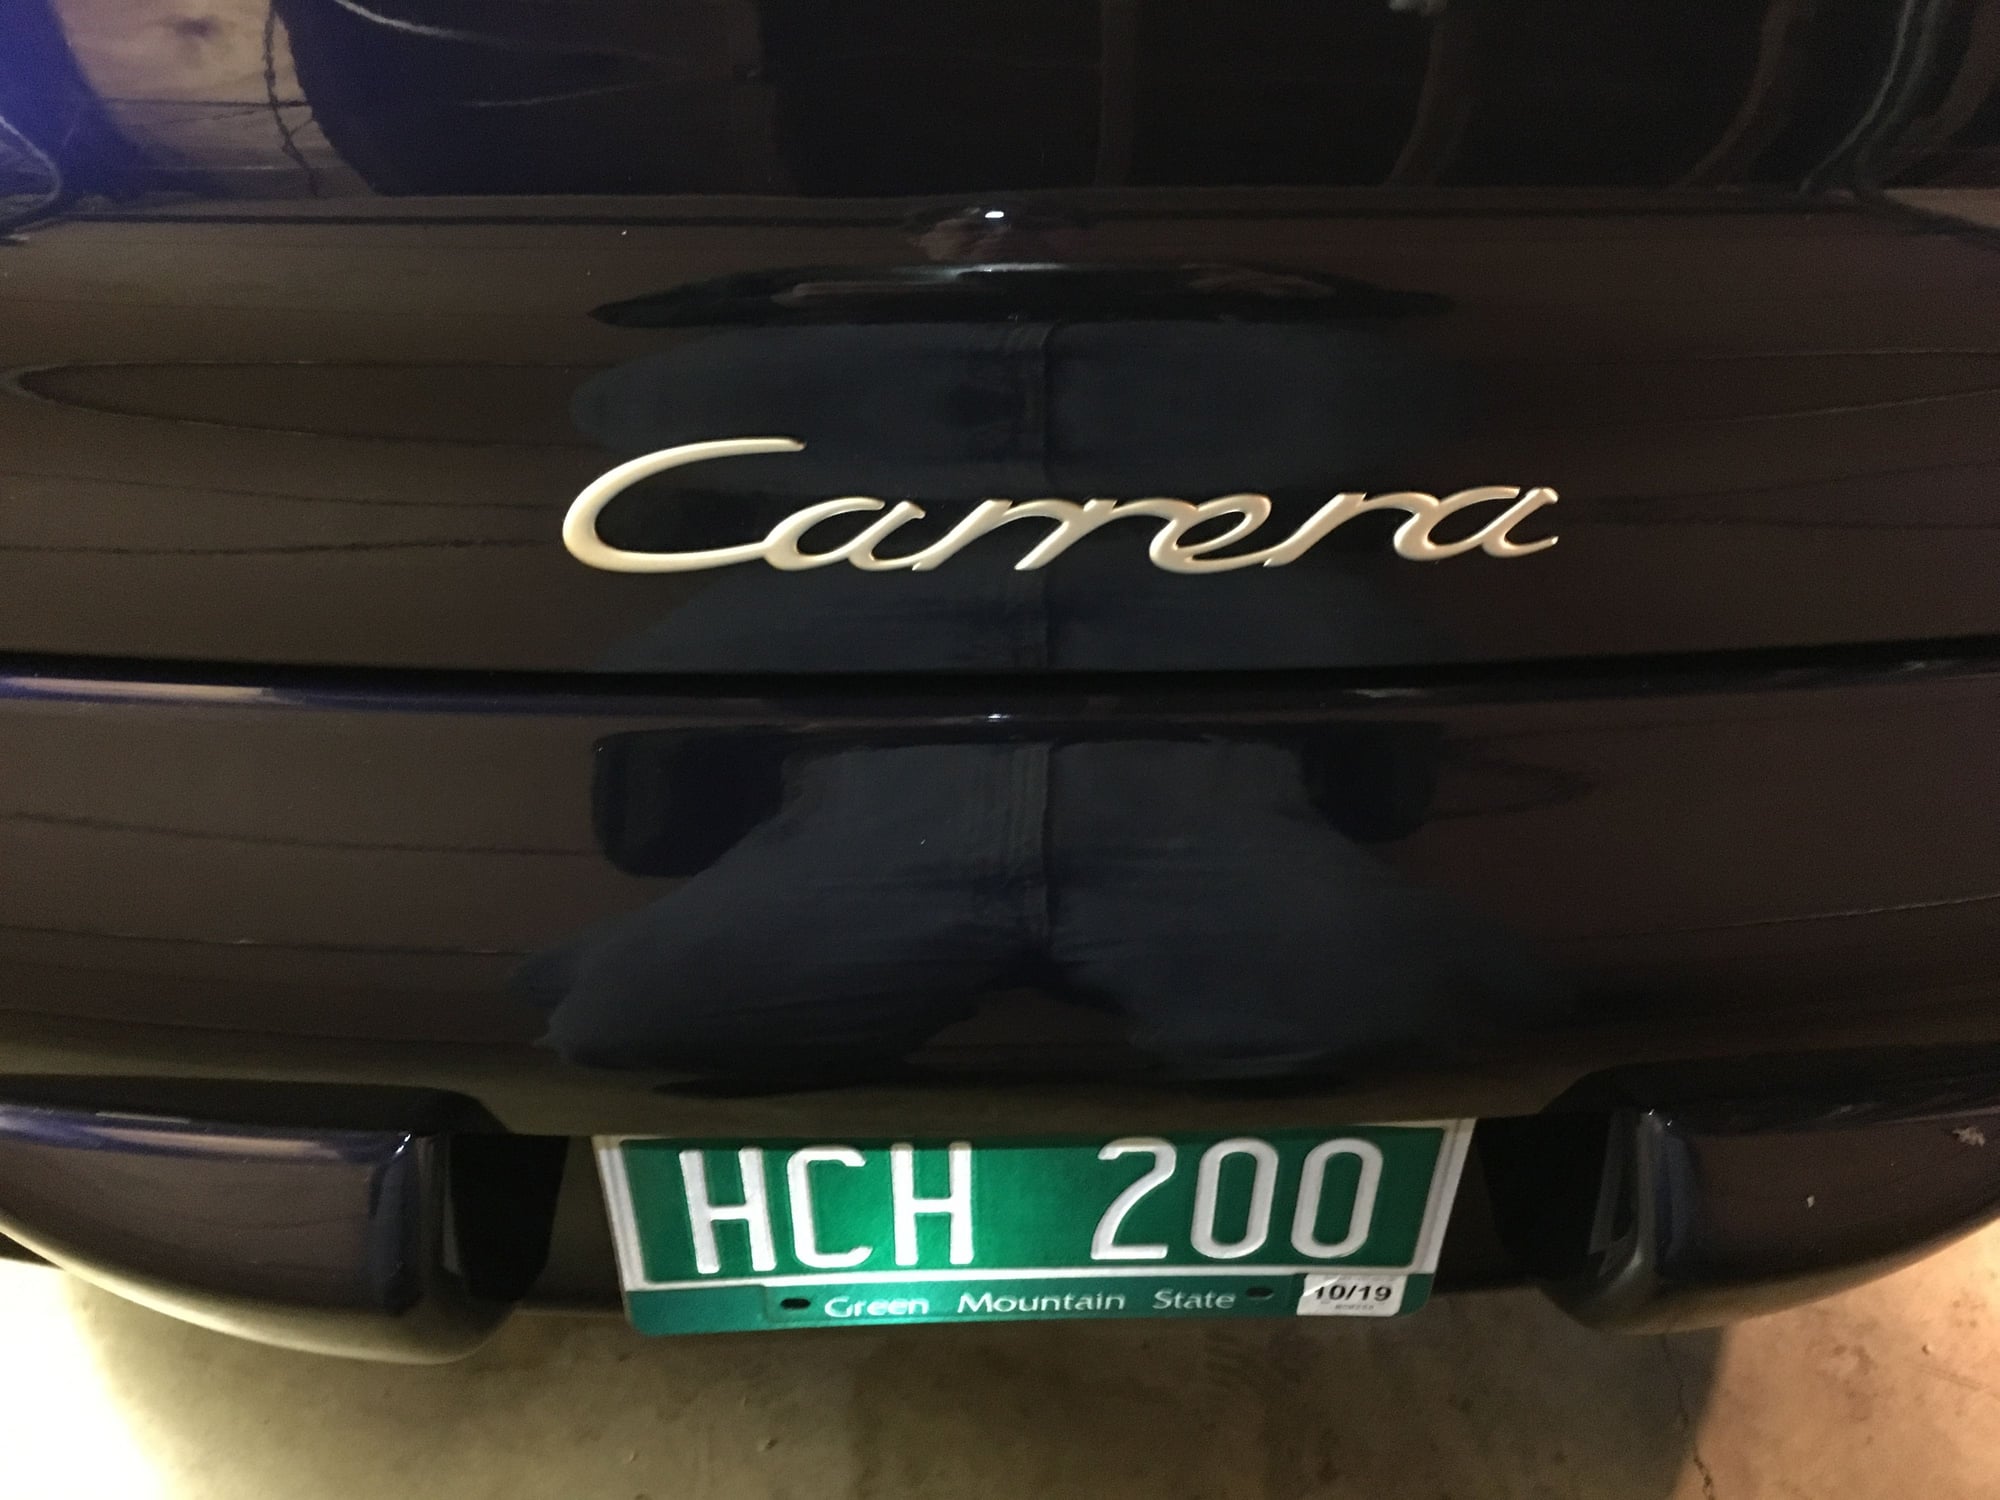
Two easy fixes today: removed the black Carrera badge and replaced it with silver and relocated the engine lid manual release to under the bumper cover behind the rear wheel - just three screws provide access.
Two easy fixes today: removed the black Carrera badge and replaced it with silver and relocated the engine lid manual release to under the bumper cover behind the rear wheel - just three screws provide access.
Any pictures from a distance? I debadged mine that had the black emblem and you can still see the old badge in certain lights. this may be something to make it pop a little more.
Any pictures from a distance? I debadged mine that had the black emblem and you can still see the old badge in certain lights. this may be something to make it pop a little more.
Not until spring, Gregcoleman81. The car is in my basement and won't see the light of day until April (too much snow). No ghost of the old badge as the new one fit perfectly on top of the old. I did see a YouTube video where the old badge ghost was polished out with an orbital polisher. If you don't want to replace your old badge, that may be a solution for you.
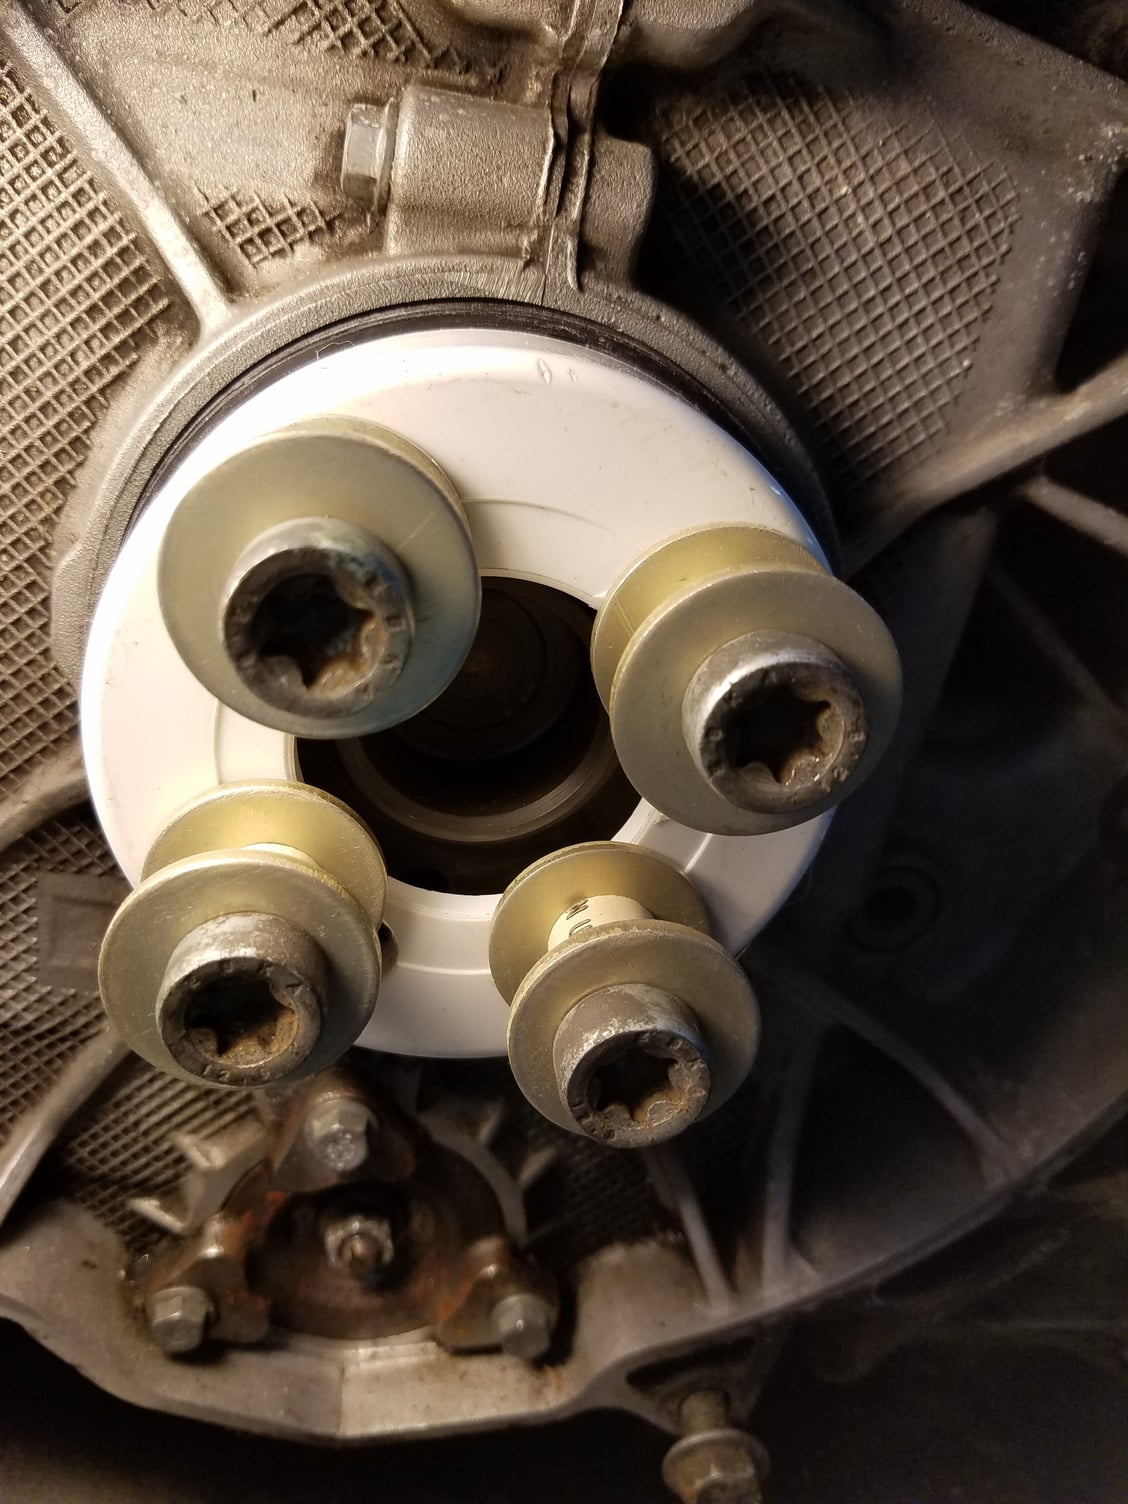
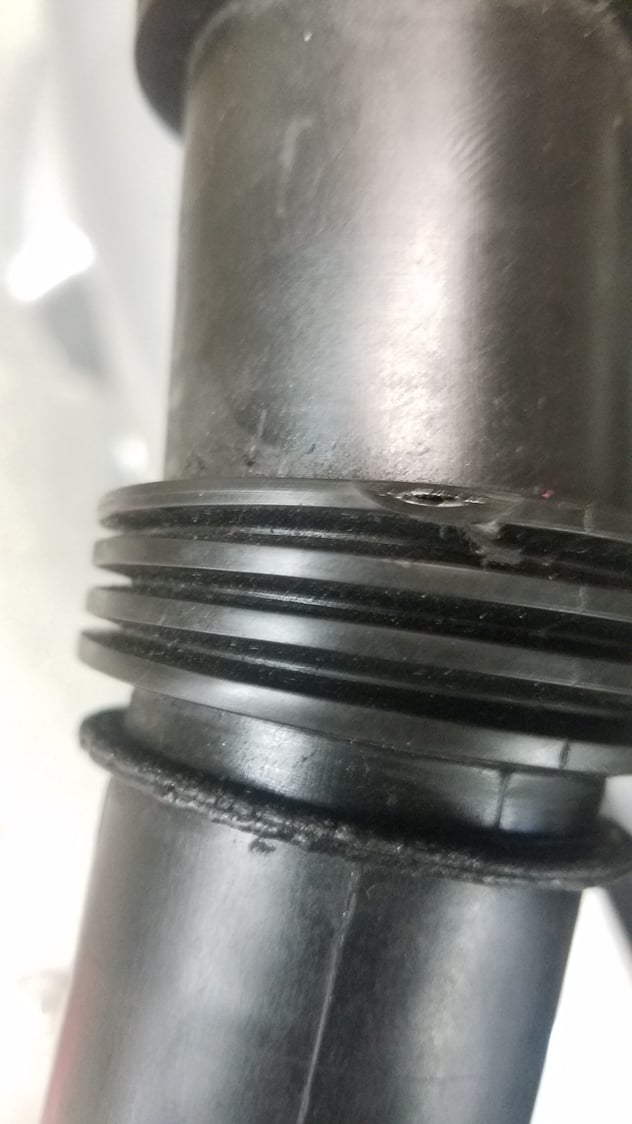
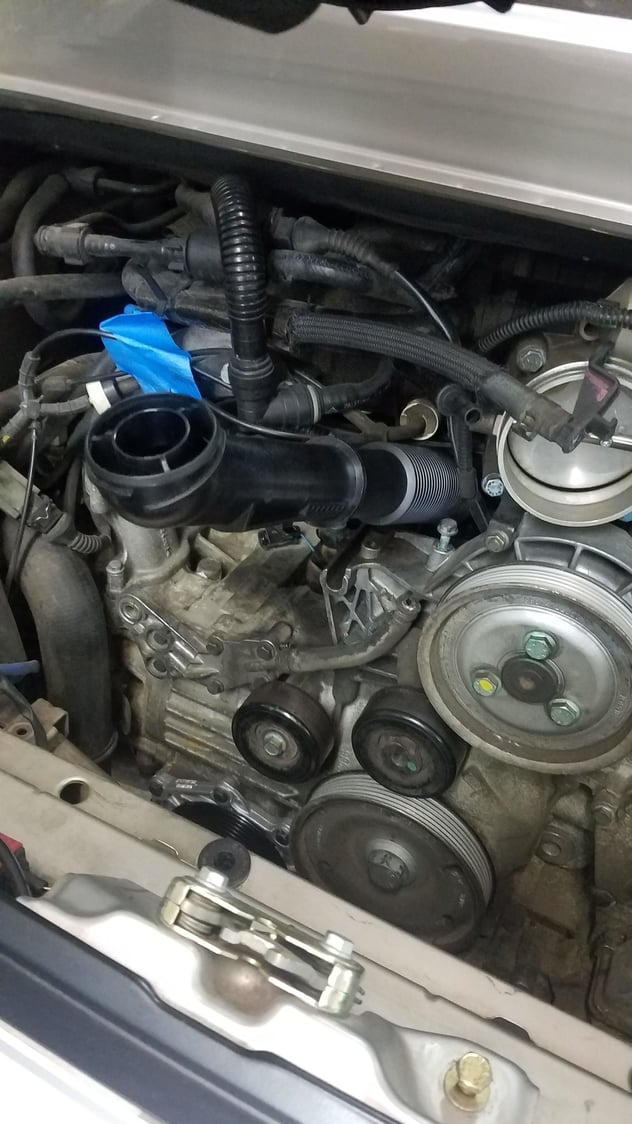
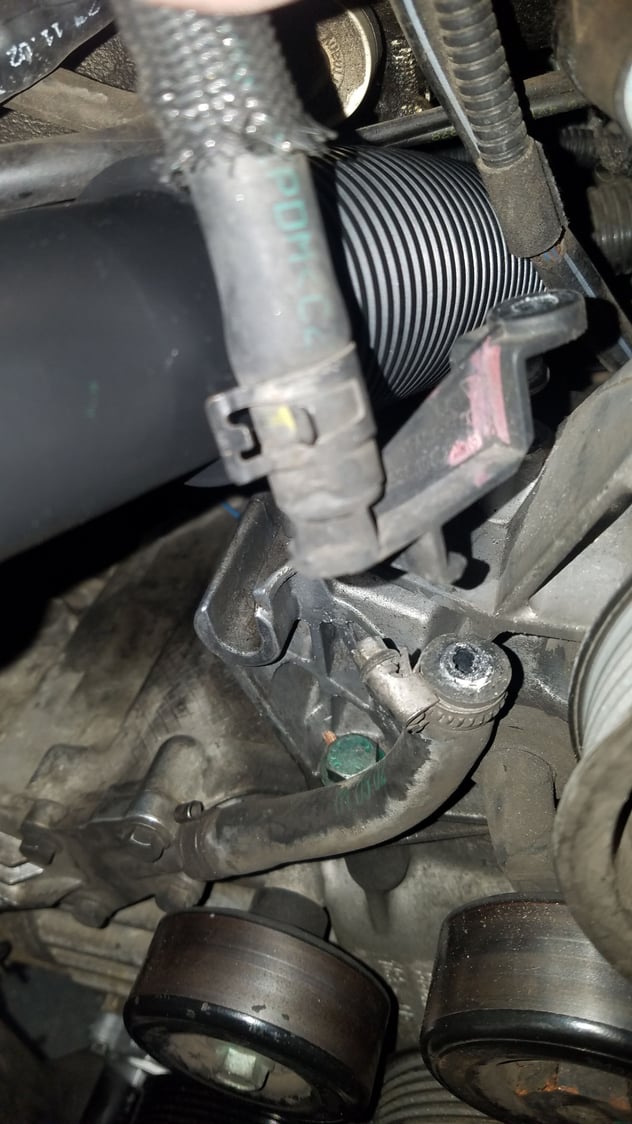
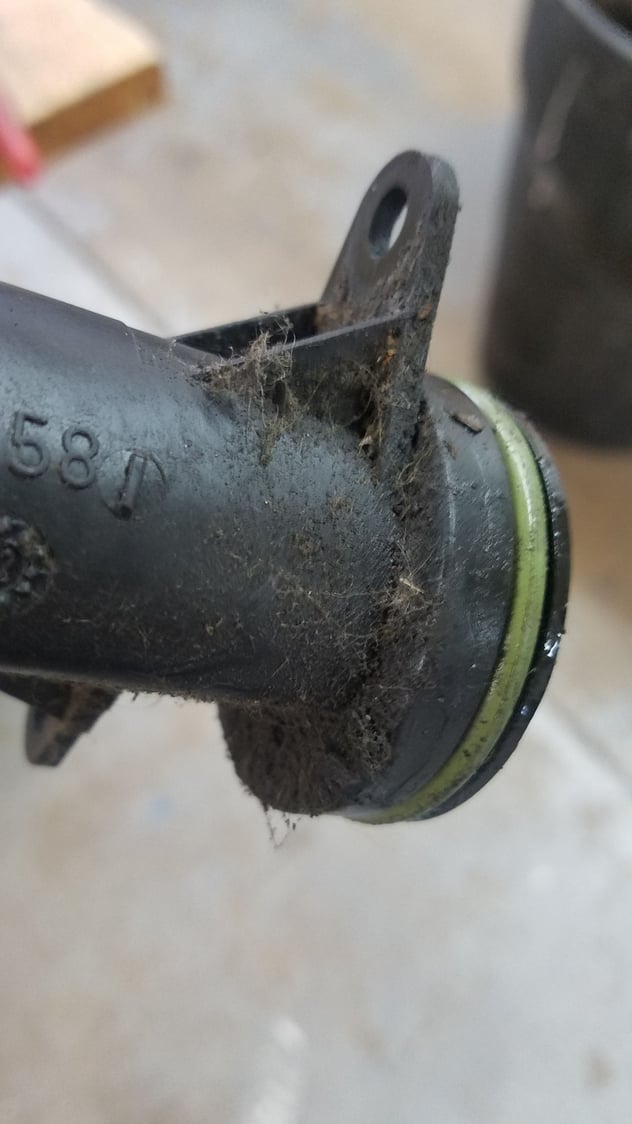
Replaced oil filler tube. Must have been rubbing on something. I'll take a look when I put all back together. New one has 997 model # on it. I managed to do it without removing throttle body. Paitence, feel and dexterity.
new one with fresh o ring went in snug, unlike one removed that almost fell out.
You need to replace your serpentine belt too.
It is so thin I can almost see through it.
I have the H&R Sport springs for the cabrio. I actually ordered the wrong ones (well, I was sent the wrong ones... but I digress) and was going to return them, but I wanted the front a bit lower than the rear like the GT3. These seem to have accomplished that aesthetic goal and I doubt it�ll upset the handling balance in any way. But even if it does, I think it�d actually help the front end bite a little more. I did not measure the fender heights because I don�t see the point of doing that with non-height-adjustable springs, especially when the surface on which I was installing them was not level. Also, the springs are a temporary solution to the 4x4 stock ride height as I will be installing the �hlins R/T coilovers eventually. It�s hard for me to spend a couple grand to replace perfectly good parts, though. My stock suspension only has 24k miles on it and works great. I�ll be taking more pictures with better light later today.
Any issues with the front hitting things like speed bumps or driveways?
maybe just getting too old. I like the vibration/the feel when I�m in the �mood of driving spirited runs� but it gets annoying if you are not in the mood and just driving around town. Also removing my lowering springs and removed the rear fixed tech art wing. Overall, I just want the car back in its classic oem/911 look and feel.
there is a lot to be said about the "quirky" feel it has from the factory. It's like non other in my opinion.
If you (or anyone else) wants that lip, I have one. I yanked it off as it would scrape on speed bumps and driveways. Cover the shipping and it�s yours. Maybe I should post in that pay it forward thread I saw.
I want to send thanks to Bash Hat for his generosity in recognizing that one man's trash is another man's treasure as they say. Cheers
I learned more about its engine from The Knowledge Gruppe�s Porsche M96/M97 Engine Rebuild 101 class.
If you haven�t attended one, you need to!
Now I�m hoping to make it to the 102 class in February.
 01-09-2019, 11:11 AM


 there is a lot to be said about the "quirky" feel it has from the factory. It's like non other in my opinion.