When you click on links to various merchants on this site and make a purchase, this can result in this site earning a commission. Affiliate programs and affiliations include, but are not limited to, the eBay Partner Network.
I wanted to start a new thread on this issue since I brought it up under a different thread called "Repaired hood emblem" and thought many of you may not see it.
I am looking to remove my XPEL clear bra that is 10+ years old. So as to not go through all the details, you can read more on Posts #8 on in the following thread - https://rennlist.com/forums/996-foru...od-emblem.html
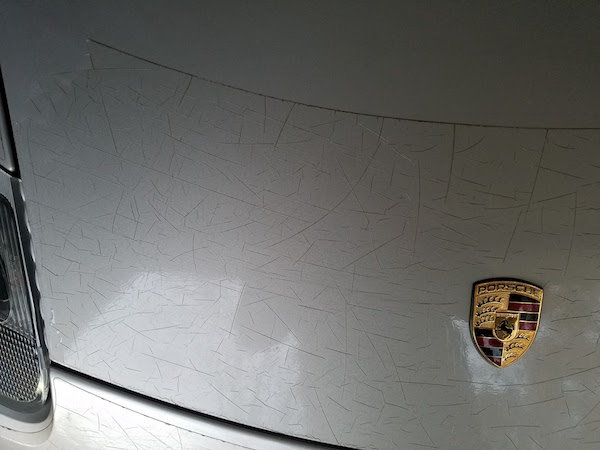
Attached area few pics of the condition of my clear bra and any and all comments are greatly appreciated.
I had my clearbra redone earlier this year. It took the guys at the shop a full week to get it off (Bumper, hood, fenders, rockers, behind the rear wheels, A-pillars, and front of roof). They did it with a heat gun and fingernails, one bit a a time. Newer clearmask should just lift up and peel off, but not this old sunbaked stuff. Fortunately I do quite a bit of business with them so they did not charge me for all the labor to get it off. So glad I did not tackle that job by myself.
Makes me wonder if I should do this myself? Anyone know of a reputable company in the Sacramento, CA area? Otherwise its just pick one from the yellow pages and live with the outcome, not my choice.
Do it yourself. I did mine with my wife's hairdryer. Just warm it up carefully and peel slowly, peeling the clear coating back on itself not 90 degrees to the painted surface.
You'll then have to clean any glue residue, which is easy
Do it yourself. I did mine with my wife's hairdryer. Just warm it up carefully and peel slowly, peeling the clear coating back on itself not 90 degrees to the painted surface.
You'll then have to clean any glue residue, which is easy
Thanks for the response. How long had yours been on the car and was it XPEL? Did you use a particular adhesive remover?
I bet yours will come off a lot easier than mine by the looks of it. Mine was cracked so it came off in tiny pieces. A heatgun worked but steam did work better. My neighbor loaned me his wife's clothes steamer but unfortunately I wasn't able to borrow it long enough to get all that far with the steamer. Goof off worked removing the adhesive but 3m adhesive remover worked better along with microfiber towels. Just don't plan on trying to wash and reuse the towels-throw them out.
I bet yours will come off a lot easier than mine by the looks of it. Mine was cracked so it came off in tiny pieces. A heatgun worked but steam did work better. My neighbor loaned me his wife's clothes steamer but unfortunately I wasn't able to borrow it long enough to get all that far with the steamer. Goof off worked removing the adhesive but 3m adhesive remover worked better along with microfiber towels. Just don't plan on trying to wash and reuse the towels-throw them out.
The picture you posted is the very reason I have thought about for removing mine. My clear bra material looks to be in good shape, just that its now 10 years old. I do have a tile and grout steamer, just worried about overheating the front plastic bumper.
I put on one of those rubber coated knit gloves and kept it close to the heat source. When the heat started to make my hand uncomfortable I backed off. Figured if it isn't burning my hand it isn't damaging the car.
Oh yeah I forgot the shop that did mine used a steamer, not a heat gun.
I'll second the steam method. I removed 20 year old stone guards from my 993 - very similar to the typical clear bra.
This can be a major job. My experience is that this material and adhesive can be very, very stubborn once it gets to be a decade or two old. Even with heat and steam, the material will come off in very small pieces...also the adhesive can remain behind. Be mentally prepared for a long, labor intensive process either by you or your shop.
If you are slow and take your time, be smart and careful, you can remove this stuff safely - but you'll have to be prepared for long tedious work. I would also be prepared for some minor paint correction once you get this stuff removed - removing adhesive from clear coat can be brutal.
mentally prepared for a long, labor intensive process either by you or your shop.
I'll second that. I managed to get mine off without paint issues but the frunk alone took probably 3 hours and my hands hurt afterwords. The car looks good afterwords however and it was worth the effort.
Oh yeah I forgot the shop that did mine used a steamer, not a heat gun.
A steamer is always the way to go. That's not to say that a heat gun wouldn't work, but we have seen heat guns get the film hot enough to make it even harder to remove. It's almost as if it bakes the adhesive into the paint. The worst thing that can happen from steaming the film is pruny fingers.
Basic urethane films will typically crack like the pictures that koobs996 posted because they have no hard clear coat to protect the underlying film from UV. Are you planning on getting new PPF put on afterwards?
I wanted to start a new thread on this issue since I brought it up under a different thread called "Repaired hood emblem" and thought many of you may not see it.
I am looking to remove my XPEL clear bra that is 10+ years old. So as to not go through all the details, you can read more on Posts #8 on in the following thread - https://rennlist.com/forums/996-foru...od-emblem.html
Attached area few pics of the condition of my clear bra and any and all comments are greatly appreciated.
Professional removal of the film is recommended. However, when professional removal is not possible, the film may be removed as follows:
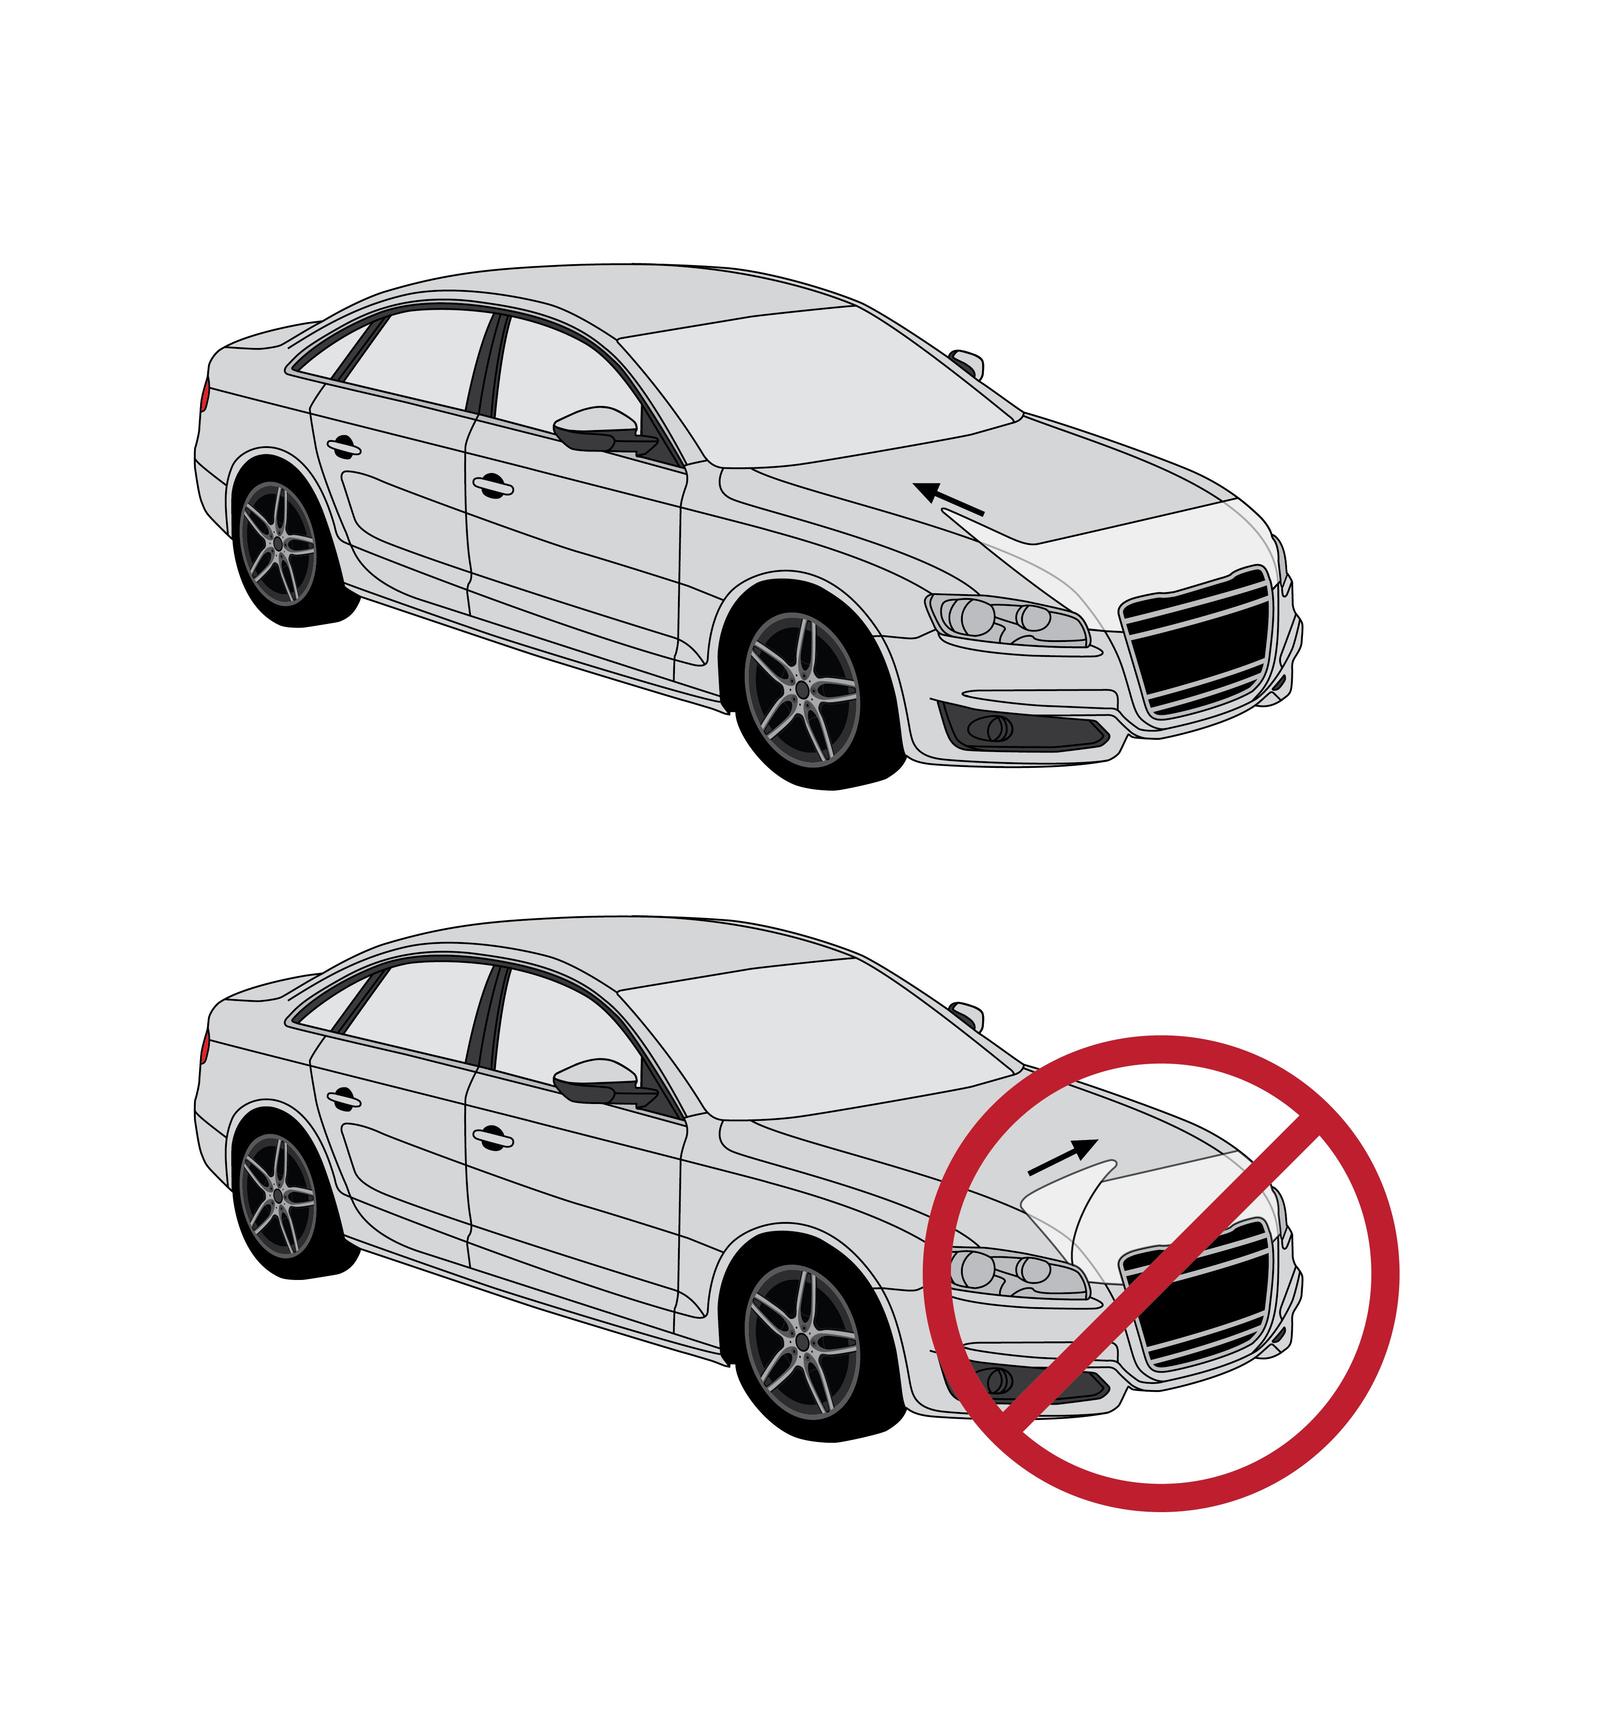
Warm the film with a heat gun or hair dryer to loosen the adhesive. 170� is the recommended temperature for this process. Keep the heat source moving to avoid melting the film or damaging the paint. Peel one corner of the film up with your fingernail. Pull the film towards you at a shallow angle less than 45 degrees (see figure attached). This angle is important to ensure sure that the adhesive comes off with the film rather than staying on the paint. The film should �stretch� off the car.
If any adhesive is left on the car, use a general adhesive remover to help loosen it.
See our Paint Protection Film Frequently Asked Questions page for more info. Click here.
We also hope that once the film is removed you will consider having brand new XPEL Paint Protection Film installed. Please let us know if we can answer any questions or help you locate an installer nearest you.
Professional removal of the film is recommended. However, when professional removal is not possible, the film may be removed as follows:
Warm the film with a heat gun or hair dryer to loosen the adhesive. 170� is the recommended temperature for this process. Keep the heat source moving to avoid melting the film or damaging the paint. Peel one corner of the film up with your fingernail. Pull the film towards you at a shallow angle less than 45 degrees (see figure attached). This angle is important to ensure sure that the adhesive comes off with the film rather than staying on the paint. The film should �stretch� off the car. Attachment 1270949
If any adhesive is left on the car, use a general adhesive remover to help loosen it.
See our Paint Protection Film Frequently Asked Questions page for more info. Click here.
We also hope that once the film is removed you will consider having brand new XPEL Paint Protection Film installed. Please let us know if we can answer any questions or help you locate an installer nearest you.
Who would you recommend in the Sacramento, CA area for removal? Depending on cost, I may need to wait for new install but if paint finish is still in great condition I do plan on new.
 11-15-2017, 06:18 PM