When you click on links to various merchants on this site and make a purchase, this can result in this site earning a commission. Affiliate programs and affiliations include, but are not limited to, the eBay Partner Network.
One note. I believe that the shock top nut should be torqued to spec with the weight on the wheel, either the car down off the jacks or the wheel jacked up to normal location. Since the shock top mount is a rubber part, you would use this technique as you do on any rubber suspension bushing.
I could be wrong, so let me know if I'm misunderstanding something.
The workshop manual is pretty clear on when the car should be on the ground before final torque. This is not one of those cases as far as I can tell.
It lists all the control arm bushings I assume (front and rear). Anything else?
Just understand that the OEM rubber bushings are press fit, not "floating". So you don't want to tighten it up, w/o car suspension weighted, since they will have deflection induced (pre-load), when you do lower it. Will destroy new OEM bushings fast. Sphericals (monoballs), and the Walrods don't have this issue, since they can move within the A arm. Top mounts (F/R) don't really do much more than isolates vibration/shock from body. Lifting suspension before tightening top nut, would probably be a benefit, by lessening stress on threads of nut and shock top. Maybe?????
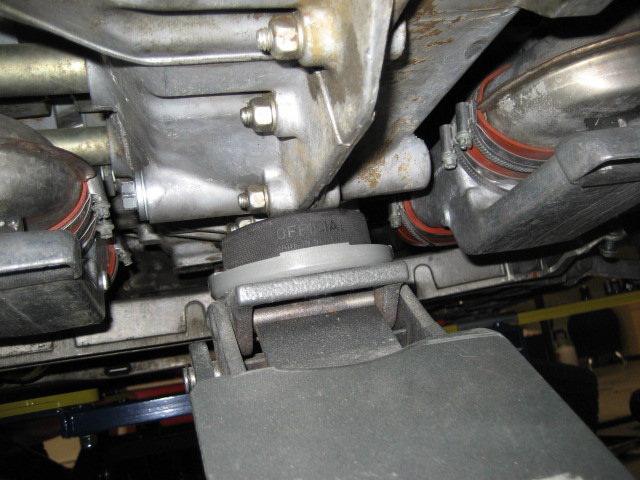
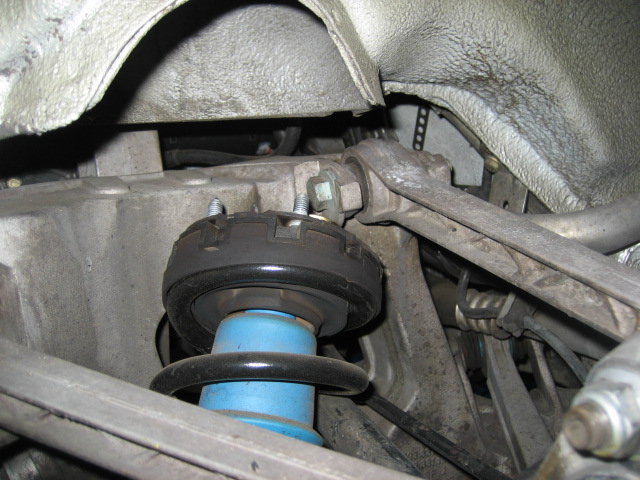
Over lunch, I started removal of the right rear strut assembly.
I got the big plastic gearbox cover out of the way.
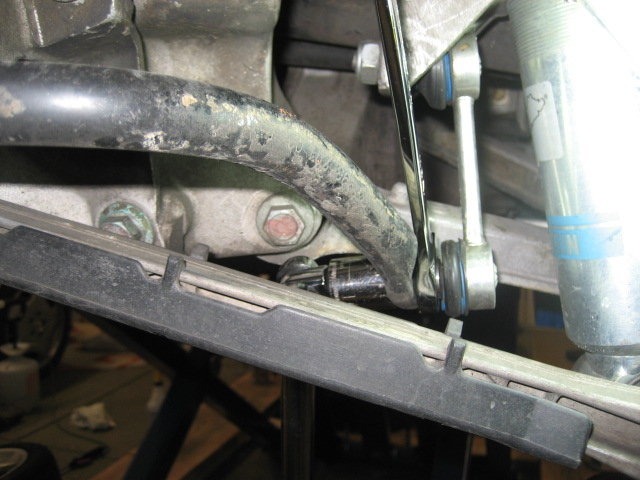
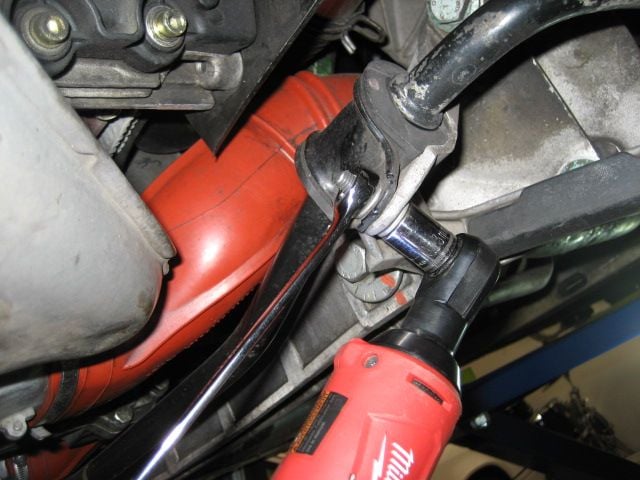
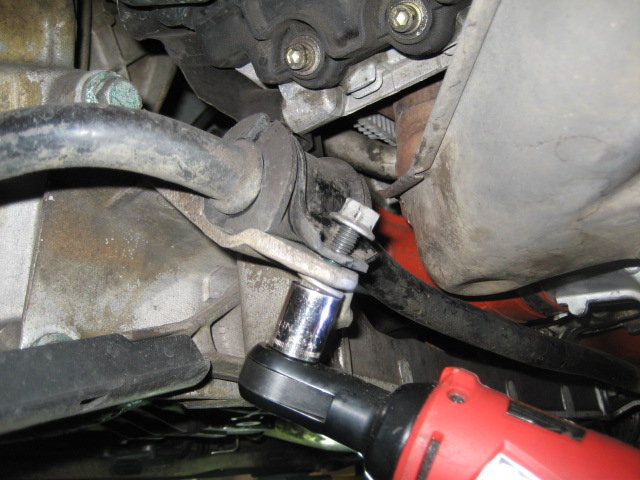
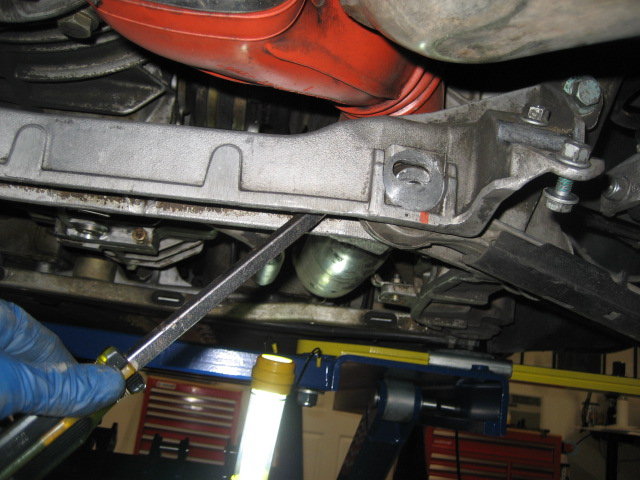
The drop links had to be separated from the anti-roll bar (ARB) using an open wrench to hold the joint and a breaker bar on the nut. Once I removed the nut, I pulled the stud out of the ARB, and reattached the nut to keep from losing it.
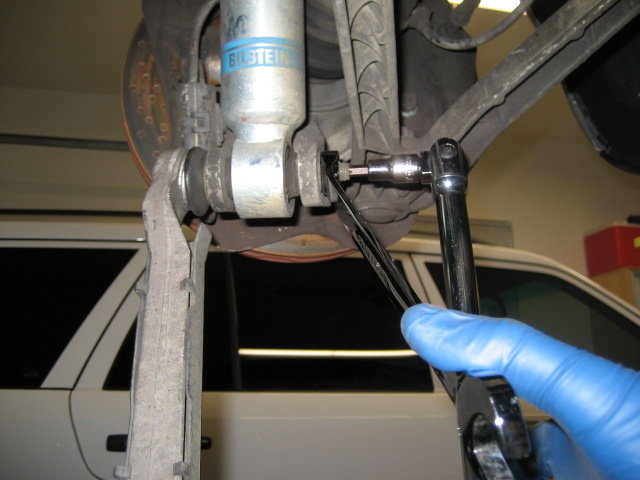
Next up was the car side of the toe link. I was able to fit an open end wrench on the nut, while counter holding the eccentric side with another wrench. This kept me from removing the heater pipe.
Then I learned why some of the other DIYs mention removing the ARB first. It prevents the removal of toe eccentric bolt. Bummer.
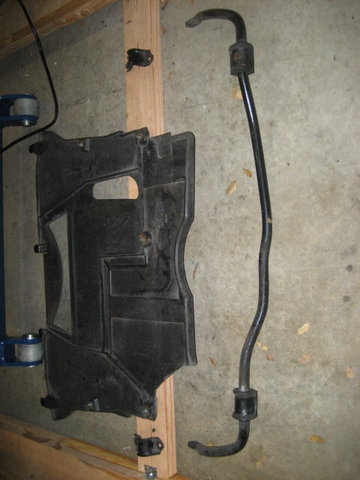
The ARB had to come off. First I disconnected the right bracket, then the left bracket, then the left rear drop link.
I took the ARB off and do not plan on replacing it. There's an adjustable RS bar that will go in its place on reassembly.
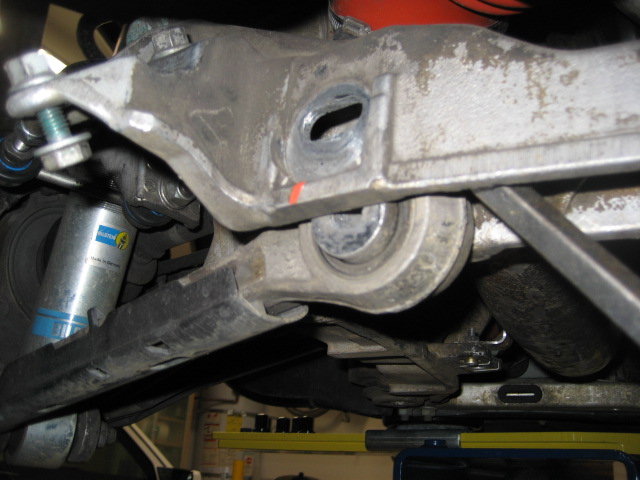
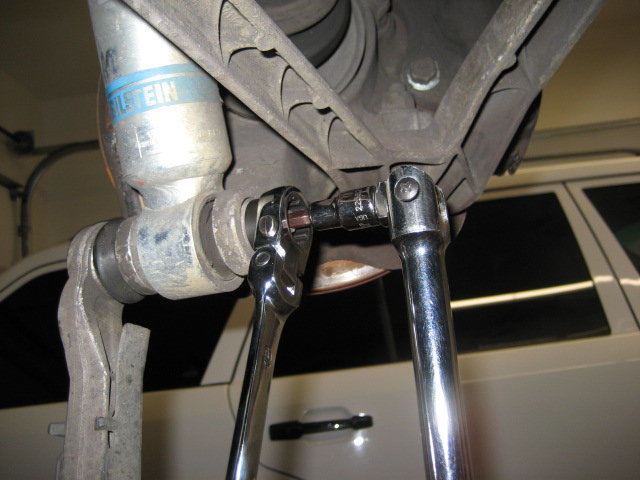
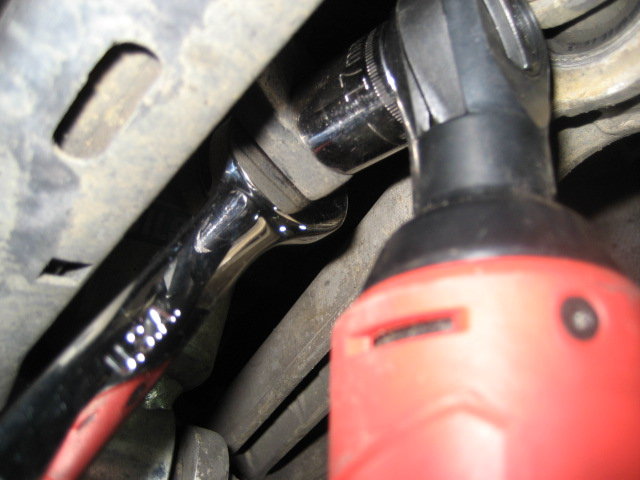
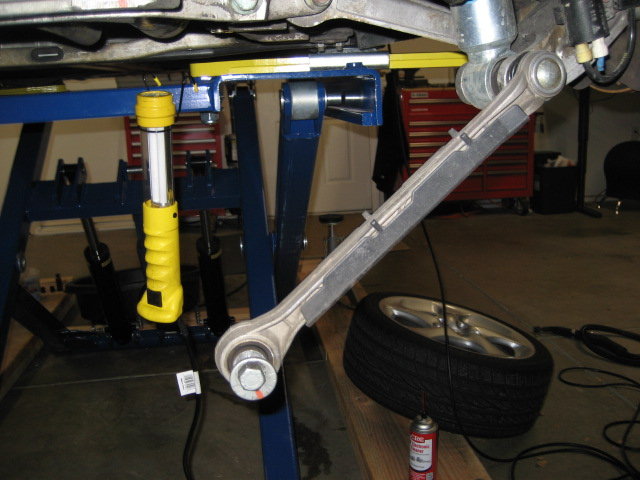
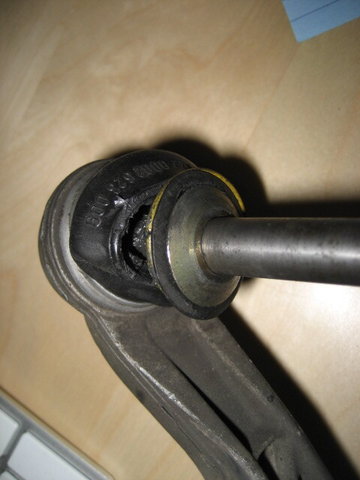
I was finally able to remove the toe eccentric bolt and pry the link out of the subframe with a large screwdriver.
With the car side of that link removed, I moved to the wheel carrier side and removed the nut counter holding the shaft with a torx bit and breaker bar.
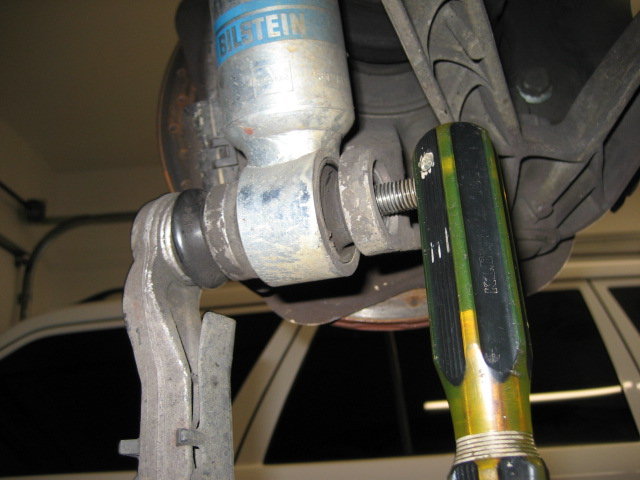
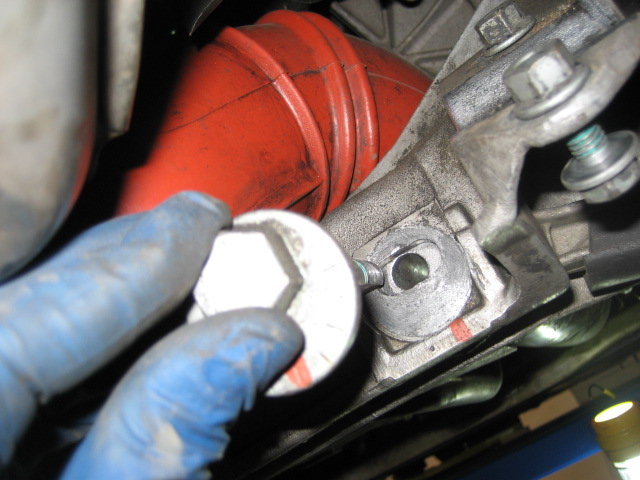
My electric ratchet worked well for removing the 4 nuts that hold the top of the strut assembly to the car.
While supporting the strut assembly with one hand, I wiggled out the toe link then removed the assembly from the car.
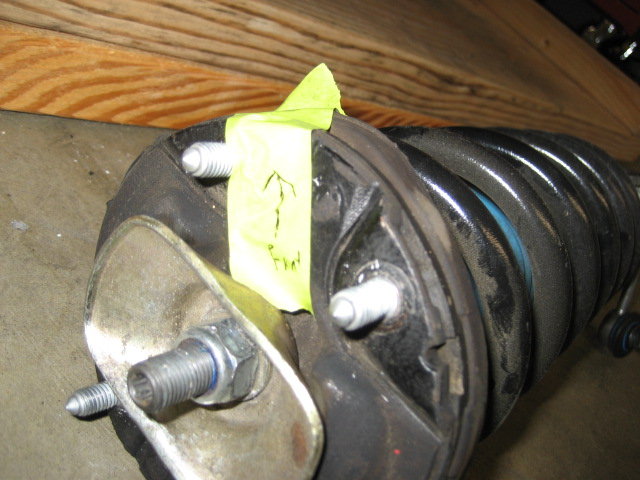
Unfortunately, I then hit my first snag with this little project. The toe link's boot was trashed. This is not uncommon, and I opted to order a couple new toe links. I'll have to be patient and wait for them to arrive before I can finish this project completely.
Excellent so far and timing is everything!! I am waiting for parts on my PSS10 install; specifically top hats front and rear as my car has 156,000 miles. Hopefully I can save others some time by suggesting that you simply need to loosen the rear ARB brackets to have room to remove the rear toe link bolts, and a good idea to sharpie mark their positions.
This is a great thread. I'm on the edge of my seat waiting for each installment .
As an FYI, I ordered stock toe links from Elephant and then had them install sport bushings before shipping to me. The cost of the sport bushing install was pretty reasonable and I'm excited to have a bit more stability in that link than stock. Just mentioning it in case others like the idea and want to do the same.
Two other points. 1. It is my understanding that the bottom perch on the rear(s) needs to be adjusted to approximately the same height as the original perches so that the bottom(s) line up. (Head's out of the gutter fellas...) Then 2. Another locking collar is desired "under" the perch to prevent it from moving around while driving in a spirited manner. No pic of this...although I did put one on each of the rear(s). This requires a bit of patience as you must "unwind" everything in order to get that bottom collar on...then of course put it all back together.
Some body please PM me and "school" me on proper pic posting technique..
I am traveling now and am not sure when I will be able to get back to my job..awaiting parts.
Do you know if a collar from an older HD shock would fit the PSS10 to secure the drop link perch? I've got a few spares that I could re-use for this purpose.
Do you know if a collar from an older HD shock would fit the PSS10 to secure the drop link perch? I've got a few spares that I could re-use for this purpose.
No...I consulted a local friend prior to beginning my job, who owns his own shop, and he supplied the correct size to me.
Glad to hear so many folks are doing the same project!
Great points, Dave.
Top hats - I'm at 140k, and have chosen not to replace the top hats. Based on my research, there isn't a lot of evidence of failure on these yet and the bearings (on the front at least) are still quiet and smooth. I totally get the "while you're in there" rationale though, since an alignment would be required should they fail and they are a critical rubber component of the suspension.
Drop link location - I plan to experiment a bit with this once I set the ride height and install the new RS ARB. I hope to fine tune the location to reduce preload on the ARB. Truthfully, I'm not sure how to position them to deal with the RS drop links, and like your technique for choosing a starting point.
Extra collar - I've done a ton of research on this and understand why folks do it. In my direct experience, it's just not necessary for street and and light DE use (at least on street tires). On my B6s, I used a hammer and screw driver to really snug up that locking ring against the perch, and it hasn't budged in over 3 years, 19k miles, and numerous DE days. I plan to do the same here. If the perch does ever come loose, I'll be sure to report back.
After talking with Steve Weiner, if I planned to run R compounds or slicks on a 993, then I'd want to change the suspension (much inline with Bill V.'s many posts) to account for the significant increase in forces applied to the suspension. Although we didn't talk about an additional collar directly, I'd think that one would be just the start down a very slippery slope.
Overall, I want my tires to be the weakest link. Street tires help enforce some discipline in the "because racecar" mod department, help keep my budget well under control, and help ensure that the car stays true to the quiet and comfortable street car it was back in 1996.
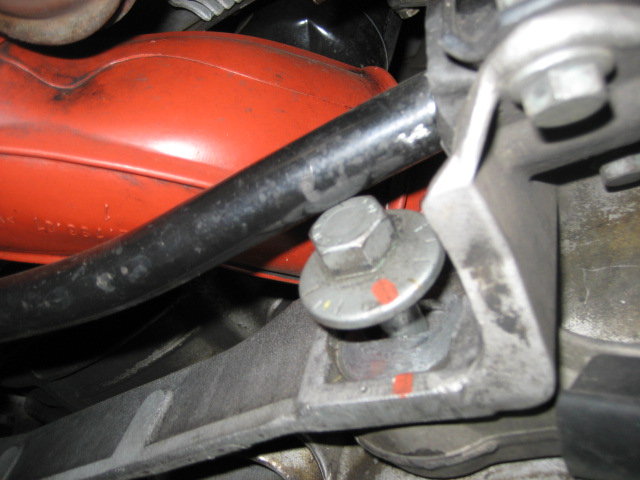
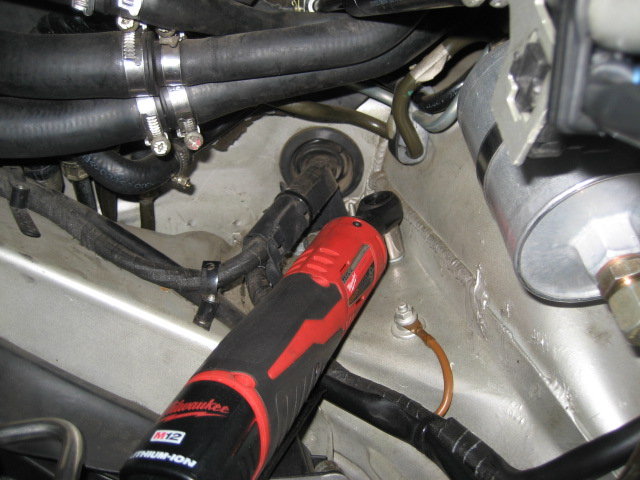
I went ahead and removed the left rear strut assembly. I used some slightly different techniques this time, so decided to document it despite it being nearly identical to the right side.
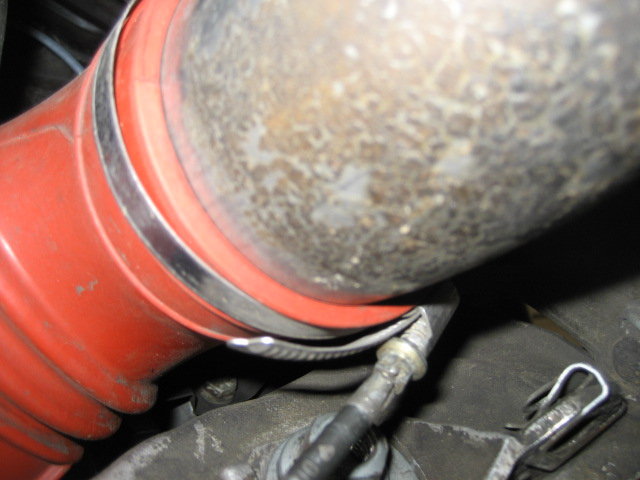
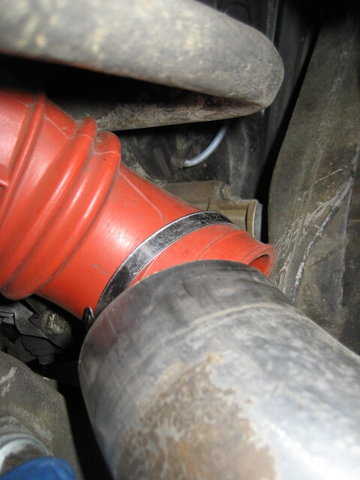
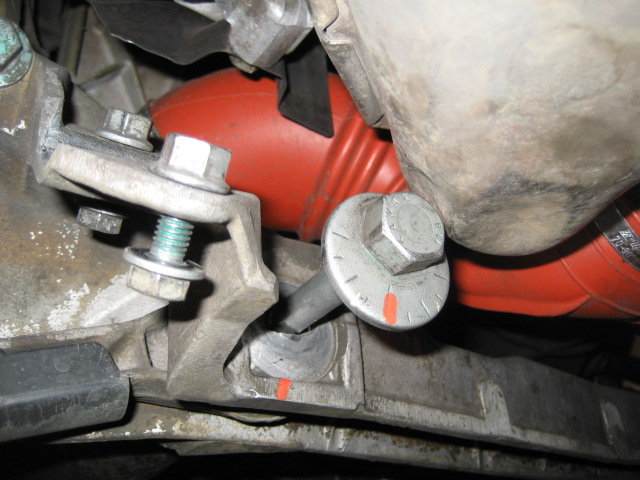
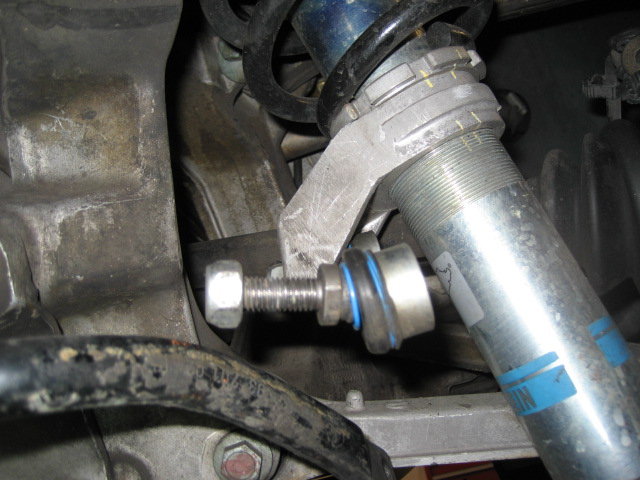
This time, I decided to improve clearance a bit by removing one end of the orange heater tube near the toe eccentric bolt.
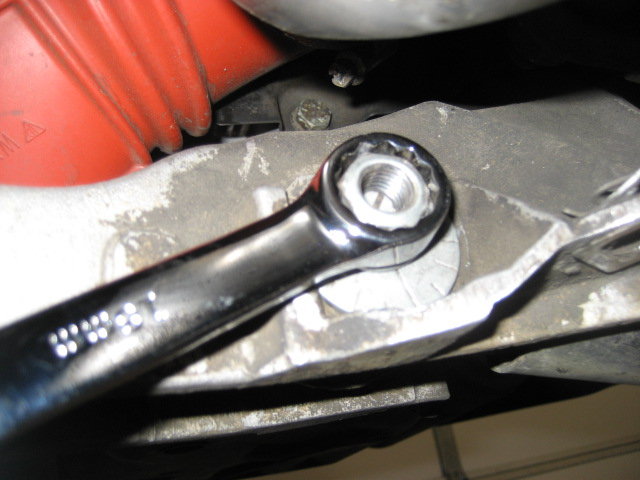
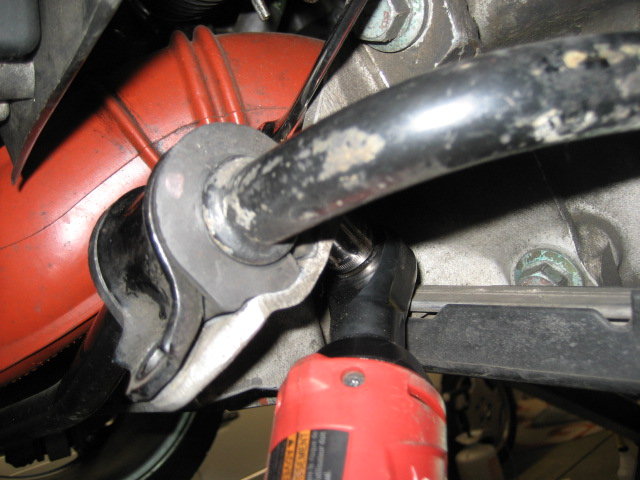
This allowed me to fit the box end of a wrench on this nut.
After breaking it free, I switched to a ratcheting box end wrench to save a few seconds of time.
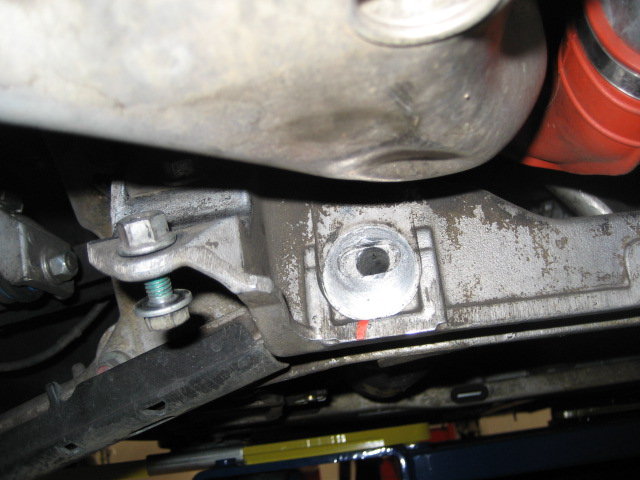
As expected, the bolt was obstructed despite some mechanic-installed dimples in the heat exchanger. Note the orange marks so I can reinstall it in a similar position.
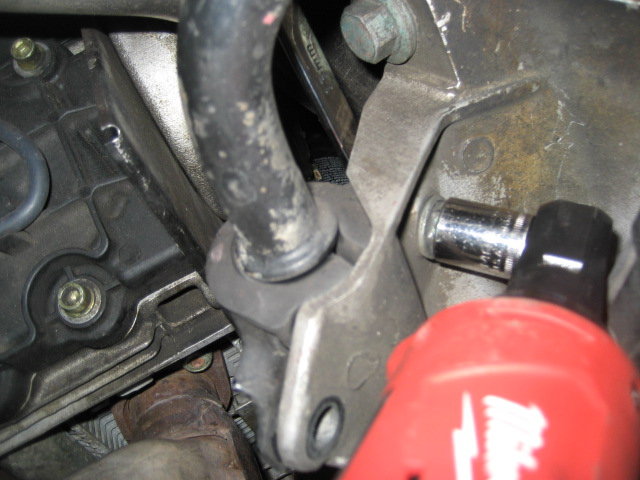
Out came the floor jack to raise the engine just enough to free the bolt.
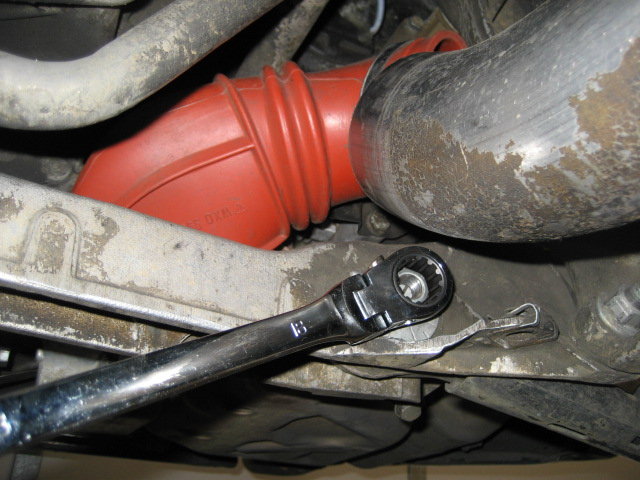
Just like last time, I used a large screwdriver to pry the link out of the subframe, then loosened the other end with a box end wrench counter held with a torx socket.
I did switch to the ratcheting wrench for speed again, then gently tapped the stud nearly completely out with the plastic handle of the screwdriver. I did not remove the stud completely yet. The stud kept the strut assembly secure while I moved on to the next step.
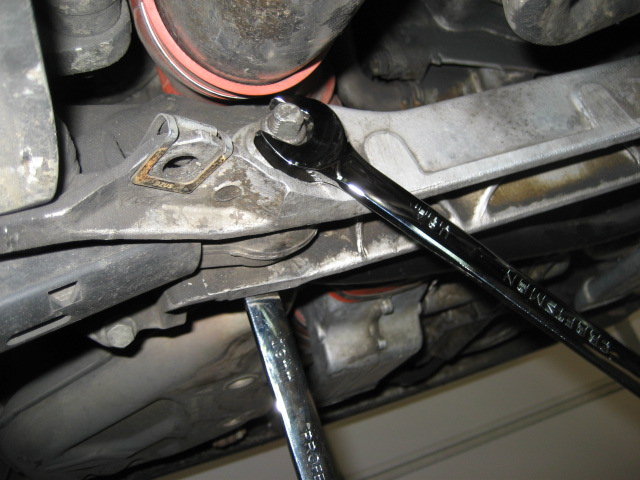
To break the nuts free on top of the strut, I used a 1/4" drive ratchet this time. There was just not enough room to break the nuts free with my electric ratchet. Once broken free, I switched to the electric ratchet. There is very little room back there. I'm not looking forward to getting my torque wrench back there on reassembly. I may have to disconnect some items from the tree.
After removing the toe link completely (forgot to photograph it), I carefully lowered the strut assembly from the car, remembering to make note of the front of the mount this time.
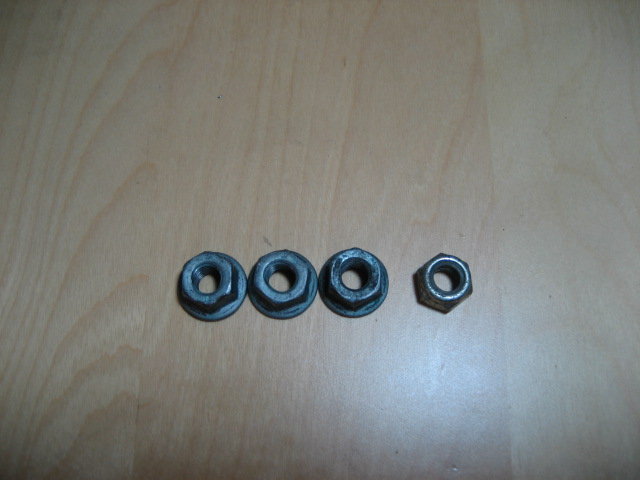
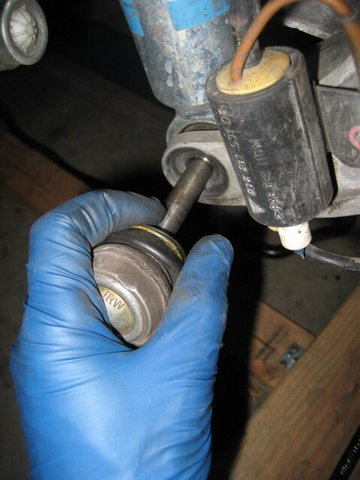
Then I noticed something interesting about the nuts used on top of this shock. One appears to be a nyloc nut. I'll order some new ones of these today and swap them all out as mentioned in the service manual.
 12-15-2016, 12:59 PM


 .
.